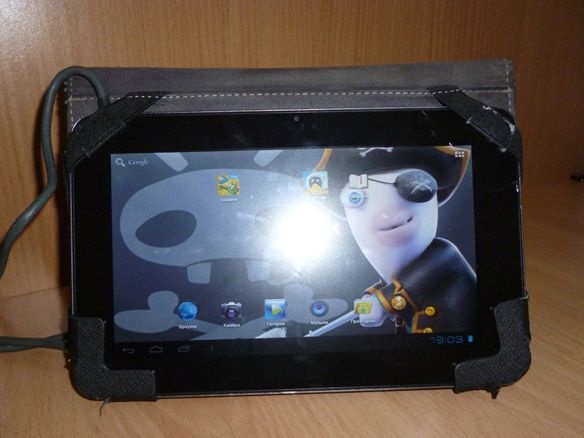
Good afternoon, today I want to share instructions on how to modify an old tablet. The world of modern technology is developing very quickly and the tablet, bought several years ago, no longer meets modern requirements. And the battery life is not very long. As a result, many now have an old tablet, whose battery is weak, modern applications no longer pull, and it's a pity to throw it away. So I have such a mess. On the example of my Texet TM-7029 I will show what it can be turned into.
We will need:
- an old tablet (in my case, Texet TM-7029, but it can be almost any)
- charging to him
- thin wires
- screwdriver
- soldering iron
- solder, rosin
- multimeter
- resistors (may not be needed, depending on your tablet, the rating also depends on the tablet)
- Convert DC-DC voltages (it may not be necessary, depending on your tablet, the rating also depends on the tablet)
- drill
- 6mm metal drill
Step 1 Power.
This is the most difficult and crucial step. Older tablets have a lot of problems. One of them is an old battery that does not hold a charge. There are several ways to solve this. The easiest way is to leave the battery inside connected and power through normal charging. But there are pitfalls here. Firstly, for a long service life, the connection socket is broken and does not provide a reliable connection. Secondly, aesthetically I personally do not like the look of the charging wire sticking out from the side. Thirdly, a complete battery failure is possible and then the tablet simply will not start. As you already understood, an individual approach is needed here.
I will tell in detail only about my Texet TM-7029, and for the rest I will give you options for what can be done. So, in my case, the connection connector is broken and the wire does not hold in the socket, the battery is weak, but still alive. We disassemble the tablet.
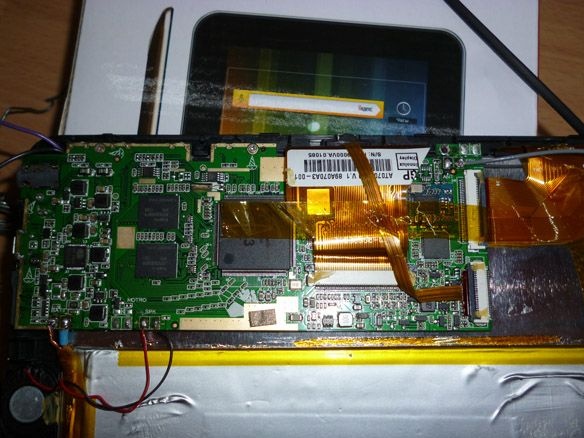
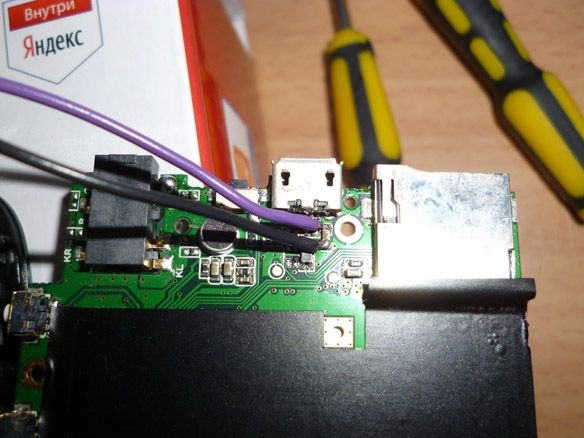
I tried to solder the battery and apply power through its connection marks. The tablet started, but it threw an error and turned off. Therefore, I decided to leave the battery, and connect the power through the micro USB jack, as charging should be done. The micro USB socket is soldered on the back of the board. We solder off the battery and speaker wires. We unscrew all the screws holding the board. Disabling the screen and touchscreen loops is optional. We turn the board over and see that the socket contacts are very small.You can solder the socket and solder the wires to the contacts then it will be much easier, but I wanted to leave the ability to connect to a computer, and so I found a capacitor standing for smoothing the power on this line with a multimeter and soldered the wires to it:
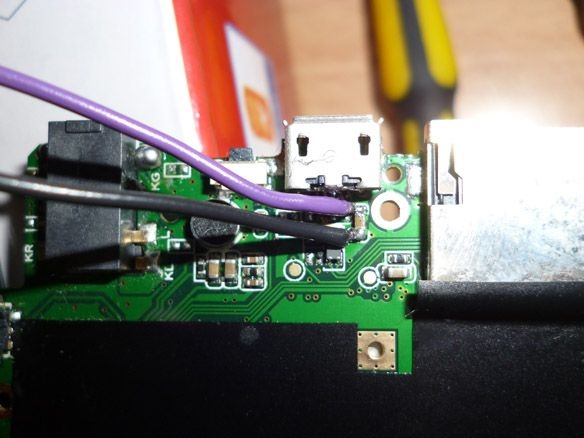
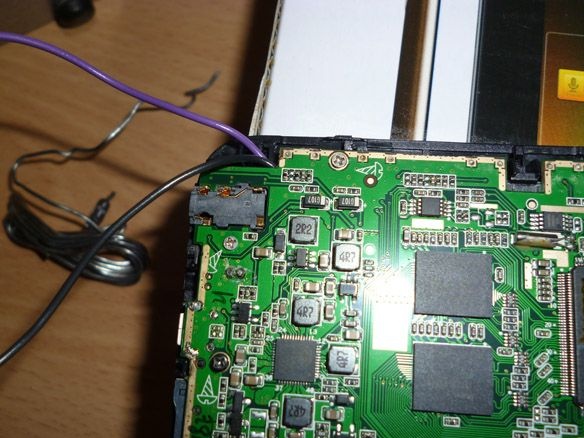
Next, carefully lay the wires near the headphone jack and turn the board over.
I will give tips for owners of other tablets. You can also try:
Disconnect the battery, connect the native memory, it turned on - excellent, we test stability in different load modes. If it is cut off under load, you can try to take the adapter more powerfully, or replace the wire with a shorter \ solid one, since the material, length and cross section of the power cable are of great importance and can easily create conditions in which the device can not take more than a certain current.
Most modern USB-charged devices understand the computer in front of them, or the native / non-native memory. And this understanding, comes to them on the data bus D + D-. In this regard, the device will take a certain current, namely up to 500mA from non-native memory and USB, and up to the nominal value of the adapter from the native one. Accordingly, using the device via USB without a battery becomes impossible. Regarding the inclusion of the "native" memory mode, there is information that:
most android devices need to short circuit D + D-
some Samsung filed for D + and D- for 2.5v
Iphone on both D + and D- for 2v. iPad D + = 2.5v and D- = 2v
So, some people think (or just do) that the external power adapter can be put “plus or minus” on the corresponding contacts instead of the battery and there is nothing wrong with that. This is not entirely true. In most cases, the power from the battery goes first to the power controller, as it does from the external power supply. Not too lazy to find and open the datasheet on the chip of this controller, for example AXP209, it says in English on white that the power from the battery side should not exceed uh ... 6.3v, but it will burn at 11v. maximum. And on the controller of another tablet it is written no more than 4.5V ... you will not guess here, in addition, sometimes the power from the battery can go directly to other nodes. And it is not known how in those nodes they will treat your 5v, instead of the ones set no higher than 4.3v. In general, you need to look here.
In addition, it is possible that, from your charger, the voltage reaching the battery pads sags on the wires, or just under load, then, in general, everything is in order) The main thing is to take measurements.
As for the choice of the maximum current of the power adapter, for good you need to put the ammeter in the gap of the battery plus and see how much the device actually eats in different modes. In general, honest two or three amperes with a margin of power should come up.
If the backlight is blinking and the sound is cracking, try soldering between the plus and minus of the battery pads on the device itself a capacitor (the larger the better, the better), you can two. One, for example, 3000 microfarads - the second 0.1 microfarads.
As another option, you can connect power to the battery pads through a DC-DC converter, adjusting the converter to a voltage of 4.2 V.
In general, everything can be beaten even easier: put on a plus from the adapter a silicon diode with a current margin, the voltage drop on a silicon diode with direct connection is 0.6-0.7v, it turns out just the "battery" voltage.
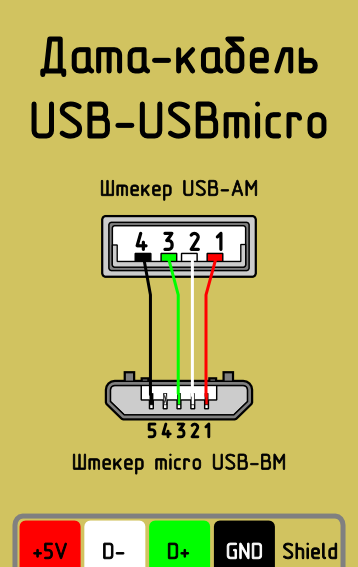
Soldered wires are connected to the wire at the end of which is a UBS connector.
The main thing is not to reverse the polarity. You can take the wire from the old phone and cut off the plug for connecting to the phone. Most often, the wires differ in color. Red is a plus, black is a minus, the remaining cut off shorter and insulated.
Step 2 Cover
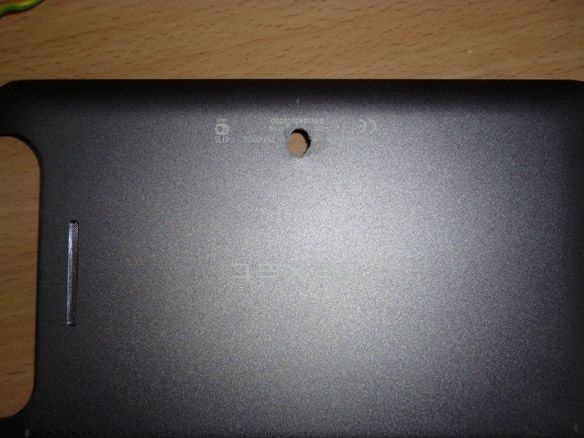
It is necessary to provide methods for attaching or mounting our tablet. To wall mount our tablet, you need to drill a hole in the back cover. We use a 6 mm metal drill for this. First you need to measure the middle and only then drill. And do not forget to cut a recess for the power cord. If the lid is metal, like mine, we cut it with scissors for metal, if the plastic is just a knife.
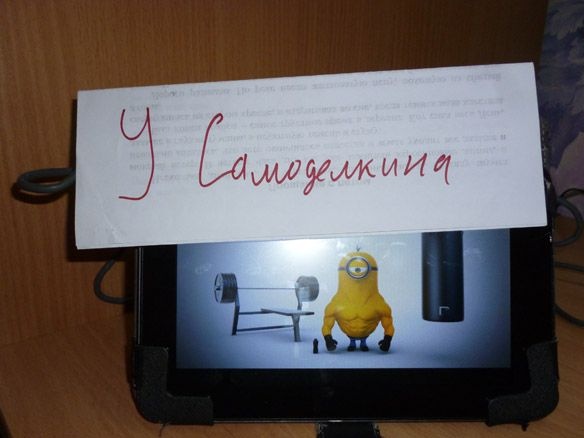
If there is a flipper case for him, you can just put it on. For example, like this:
Step 3 Programs
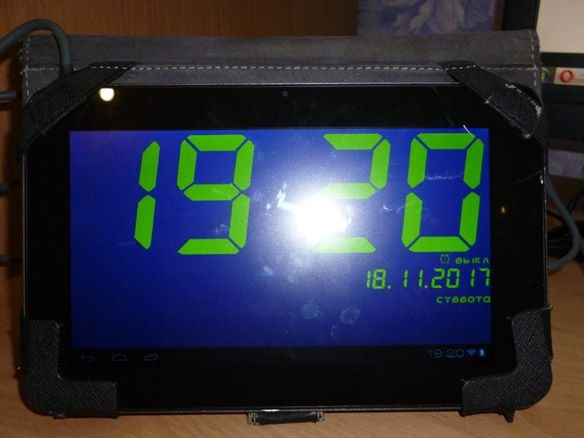
The functions of our tablet are completely dependent on the installed programs. One option is a desktop clock with weather. I use the free program Tablet Clock for this. You can download it through Google play at the link:
At the first start, select the city for which to display the weather.
If your tablet has a navigation bar, it will be hidden when the application starts. In this state, clicking anywhere on the screen will return this line without affecting the application.
Clicking on the alarm icon displays the system window for setting the alarm.
Pressing on time displays the application menu (the same as on the device menu button, if it is not).
Clicking on the weather switches to two different types of forecast - for a day and for a week.
If your device does not have a light sensor, but there is a camera, preferably a front camera, turn on the brightness adjustment in the settings using the camera - the light will be measured by the camera every 30 seconds. If you run the application without a connected charger with this mode, the battery life will be reduced.
The time and date format is taken from the system.
If you want to reduce the brightness even less than what your device allows, change the R, G, B values in the text color settings to lower ones. For example, if for green (# 00FF00) put 80 instead of FF, the brightness will be 2 times lower.
You can select the screen rotation in the settings.
Another option is a digital photo frame. The application is called Digital Photo Frame. She is also free. It also has musical accompaniment. You can download it from Google play at the link:

With this application it is possible:
- view images from the selected folder on the memory card as a slide show
- enable / disable sound
- search for files in subfolders
- autostart when a charger is connected or when you click on a widget
- display of time, date, battery charge, the ability to configure and disable them
- lock screen off
- random alternation of images and sounds
- extensive settings for screen and image display