The author of this workshop acquired a new home and ran into a maintenance problem. the garage, which was located on the territory. Firstly, the garage door was small in height. Secondly, the race was too narrow, and it was not possible to deploy the car at the right angle.
A different solution was required since leaving diesel auto on the street in the rain, snow and frost would be sacrilege.
The author carried out the preparation of the project and came to the conclusion that the garage should be wooden, frame construction. In addition, a certain amount went to purchase a place, the official execution of documents, as it was planned to carry out all construction work in accordance with the law. The advantage of this design is that the structure is frame, that is, temporary, so it does not require special documentation.
In addition, the design is relatively lightweight, there is a comparison with other possible options. But this is a big plus for the construction of the foundation.
Immediately determine the lumber that you plan to use, as this is a real chance to save. You can use second-hand materials, disassemble the old barn, more or less even poles with a flat surface selected on the machine will go here. Such poles can be used as rafters and vertical wall posts. The purchase of new lumber transforms the design from economical to very expensive. Keep this in mind.
Materials:
- a beam of suitable section;
- boards for wall cladding;
- sheet material for hemming the ceiling;
- wooden slats;
- insulation for walls and ceilings;
- metal roofing;
- floor boards;
- concrete for pouring the foundation and screed;
- corrugated board and hinges for gates;
- corners, channel, metal pipe;
- consumables: nails, bolts, screws;
- mining and paint;
- film waterproofing;
- roofing material.
Instruments:
- grinder;
- circular;
- jigsaw;
- concrete mixer;
- screwdriver;
- painting supplies.
Step One: Building the Foundation
The screed under the garage was performed by two people. You can handle one, but it will take much longer. As for the costs of preparing the site and the delivery of materials, about $ 250 was spent on this in total. This includes garbage collection, as well as the purchase and delivery of cement, gravel, sand and the purchase of reinforcing mesh to strengthen the screed section along which the car drives into the garage.In addition, the author acquired a place and a metal garage, which cost him another $ 750.
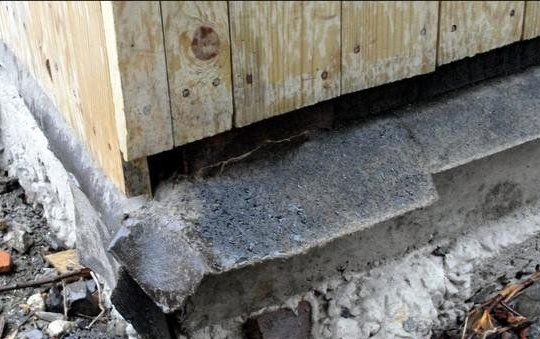
To support the lower bars along the perimeter of the screed, the author placed the fittings, to which he welded a metal corner 70 mm and the channel in front. If you live in an area where the level of rainfall does not make you scared in the autumn-winter period, screeds to the floor level will be enough. In another case, the perimeter of the foundation can be slightly increased and used to install the main frame. If desired, the concrete foundation can be primed with a special composition, which to some extent protects it from getting wet. However, in most cases, when building a garage, such expenses will only be superfluous.
During pouring, make sure that the sides of the rectangular foundation remain equal. Check the diagonals and the length of the sides until you are sure that everything is smooth. You can score landmarks and pull the cord to facilitate the task.
Step Two: Installing the Garage Frame
As a waterproofing, a roofing material is laid on the base under the beam. This is usually enough if we are talking about workshops, garages and utility rooms. But for fidelity, all the lower bars are processed by mining. In this case, mining is the most affordable and cheapest composition for protecting wood from decay.
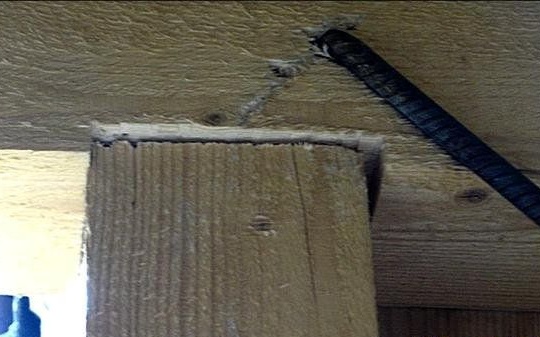
The lower supporting beam has a section of 120 x 120 mm. 100 mm is the limit below which you should not fall. However, in this case, the garage was planned to be of impressive size - 5.7 by 3.9 m. For such an area, the dimensions of the beam turned out to be optimal. To strengthen the structure and more securely fix the frame, the lower harness is bolted to the foundation with large bolts that go into concrete 10 cm.
Vertical racks of frame construction were mounted by the author in half a tree. For this, a groove was selected in the lower harness. The racks themselves were mounted on dowels, which the author cut from a beech rod 25 mm in diameter, specially purchased for this purpose. The length of the dowels in this case is 20 - 25 mm. The author drilled holes for dowels using a pen drill and a conventional household drill. For ease of connection and their protection, oil was poured into the holes.
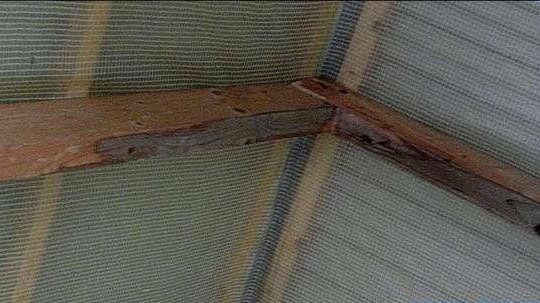
For the manufacture of corner and central pillars, the author used a bar with a section of 100 x 100 mm. To save money, all other racks were thinner - within 50 x 100 mm. In the diagram, key racks are marked in red and auxiliary ones in blue. In the horizontal elements of the frame, grooves 15 mm deep are cut through the bottom and top using a jigsaw. These are grooves for vertical supports fixed with dowels (see photo).
After the base of the frame is ready, it should be strengthened with braces, and also install jumpers and boxes under the windows, if any are planned. Carefully measure the verticals for installing the entrance garage door.

Step Three: Installing the Roof
Before you start wall cladding, you should equip the roof. In this case, you can carry out all subsequent construction work without looking back at the weather conditions.
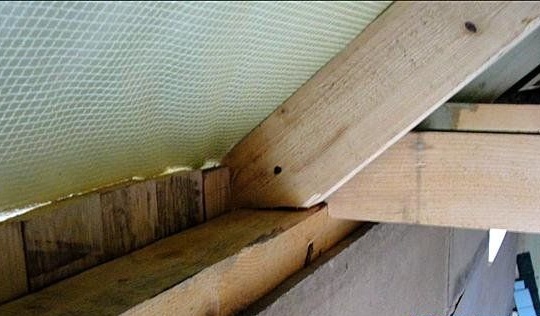
For the manufacture of rafters and floor beams, the author used a bar with a section of 60 x 120 mm. The length of the beam was 6 meters, so the roof slope was 3 m each. If possible, then farms can be assembled on the ground, measure all angles, diagonals and then install on the roof. However, the author did not master this task physically, so I had to do everything right on the roof. But in this case, you will need an assistant. Moreover, if you have no previous experience in building roofs.
Top crate under the roof. The author used metal sheets for roofing. This is one of the most affordable, practical and optimal materials in terms of price and quality. Moreover, it is convenient to work with him, and roofing work can be carried out alone, if you adapt, as it should.Sheets are fastened with metal screws. Use rubber pads to prevent water from entering the mounting holes.
The author laid film waterproofing on the crate. It certainly will not be superfluous. At this, the arrangement of the roof can be completed. Later, you can insulate it and knock it out with boards or any available sheet materials such as OSB or even fiberboard.
Step Four: Wall Cladding, Floor and Ceiling
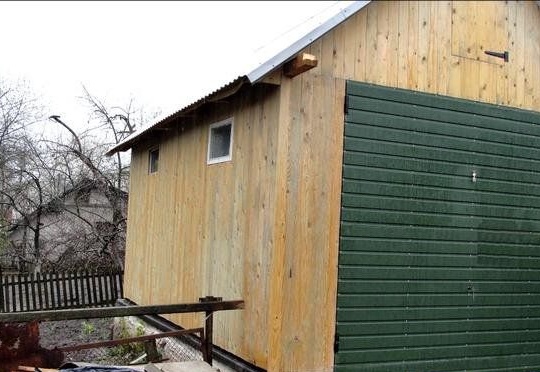
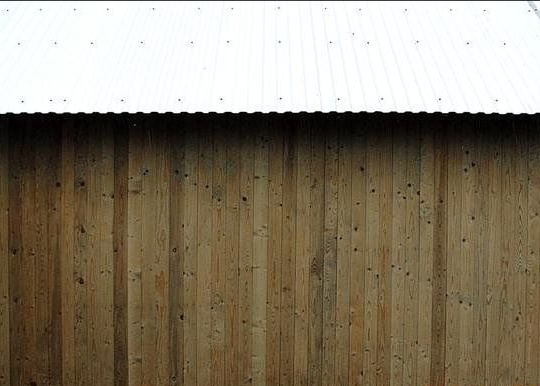
For cladding the walls of the garage, the author used a trim board. He didn’t take the quarters on his own, because without a machine, with the help of household tools alone, it would take too much time. Instead, he gave the boards to the carpentry workshop. Prepared in this way by a shale-board, the author revetted the exterior walls of the garage. For fastening, he used nails of 70 mm. However, it is advised to take galvanized nails or self-tapping screws for this.
The author chose 30 mm thick boards as a floor covering. Under the condition of high-quality screed, waterproofing under a wooden coating may not be used, especially since this is a garage.
The author also arranged and insulated the ceiling. Use glass wool slabs or glass wool rolls. Expanded polystyrene is perfect for insulating the ceiling. It is durable and practical; it is one of the best insulators available.
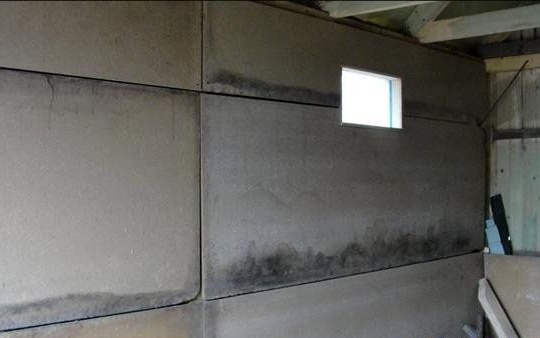
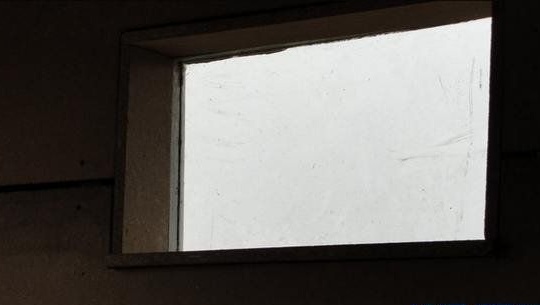
The author used old chipboards to insulate the walls of the garage from the inside. Of these, he made the inner window frames.
Step Five: manufacturing and installation of garage doors
Since the task was set to save as much money as possible, it was decided to make a garage door on their own, and even from what was at hand. And this is a corrugated board, which was less than what was required. Initially, it was planned to spend 7 m2 of sheet material on the gate. Decking was only 6 m2. After the calculations, the author decided to set the sheets horizontally. Not so practical, but without additional costs for materials.
For the gate frame and the manufacture of jumpers, the author purchased a 40 x 20 and 20 x 20 pipe, and carried out welding work on his own. Diagonals of the frame were measured, and only after that he welded the jumpers. All welds should be cleaned and the frame prepared for painting.
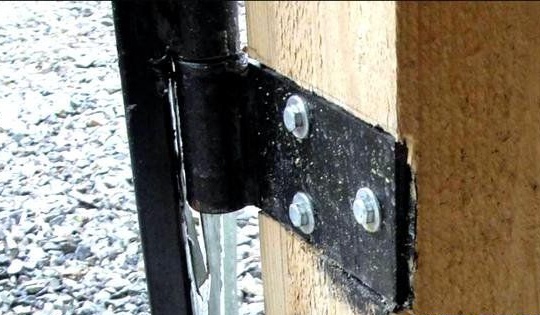
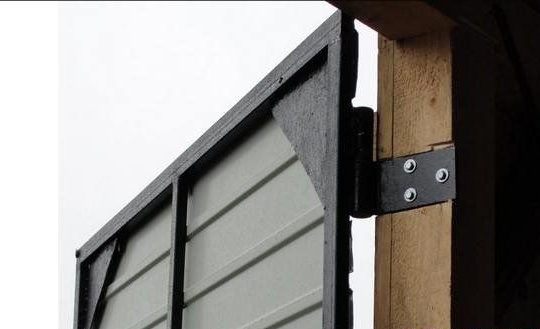
The author used simple loops. He installed a loop on a square and welded a plate to it in order to maintain an even angle. The method paid off. To make the hinge plate flush, the author cut out grooves on the uprights. After that, it remains to strengthen the design with scarves and install locks.


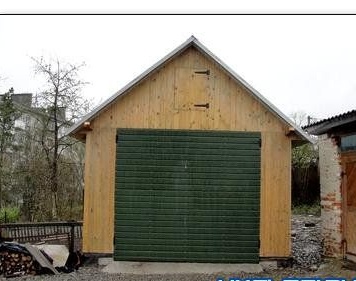
As a result, the garage of 5.7 x 3.9 m with a wall height of 2.5 m cost the author $ 1,200 in saving mode, taking into account the purchase of a place and the purchase of a metal garage.