

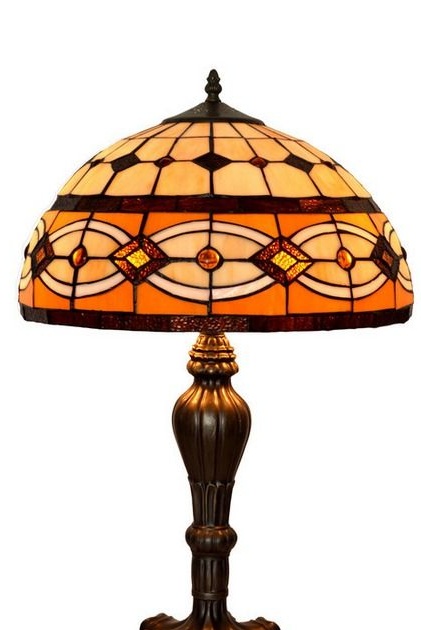
There are such things in the world - stained glass. And here are their varieties, well, not so much - more than a few. Vary in design. Among them is the so-called “tiffany”. Stained glass window or technique, whatever. A fairly simple way to combine colored curly glasses into a kind of picture. Briefly, pieces of glass are cut out relatively roughly by a glass cutter, and they are adjusted and ground on a special machine. The edges are wrapped in a strip of copper foil and the prepared glass is folded into a pattern. Then the seams are soldered. In this way, in addition to large stained-glass windows, you can make small cute little things - caskets, Christmas decorations, glasses, vases. Miracle is good, stained glass shades look like. For instance.
Now, to make a stained glass window of this shape, you need an appropriate base that sets the shape. It is very good if it will be possible to hammer small cloves into it to fix the edges of the glasses, not bad if it does not melt at soldering temperatures. I would like to out of the trash. But as always.
To make a wooden mold, we need a minimal set of carpentry tools and a wood lathe. It is very good if there is a circular saw.
For blanks, we need trimmed dry coniferous (less weight) planks, of which during carpentry or wooden construction, usually a mass is formed.
The form was drawn in layers in AutoCAD, blanks were selected from the wooden rubbish in the workshop. They were calibrated in width and thickness on a circular saw.
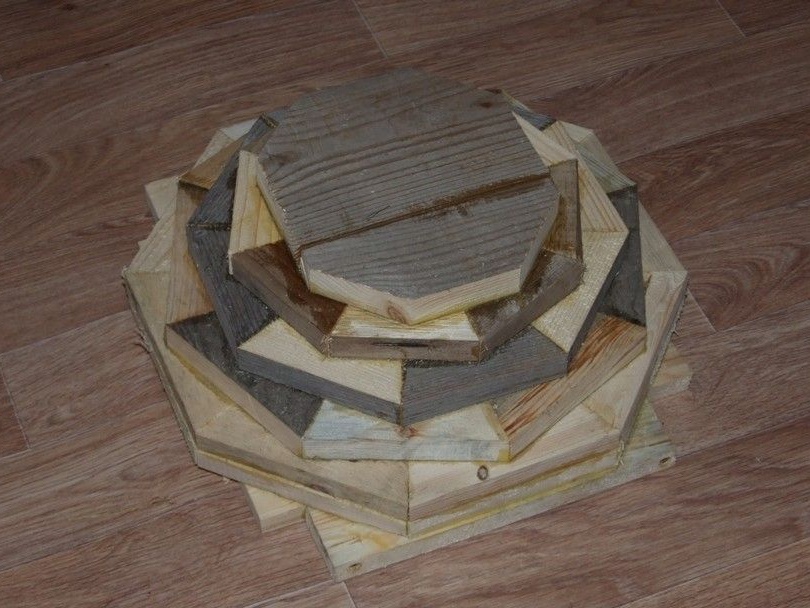
We calibrate the calibrated planks to the ends at the required angles and assemble them, glue them into “rings”. Before drying, it would be nice to load the rings with something heavy through polyethylene (so that the dried glue does not peel off the table and cargo).
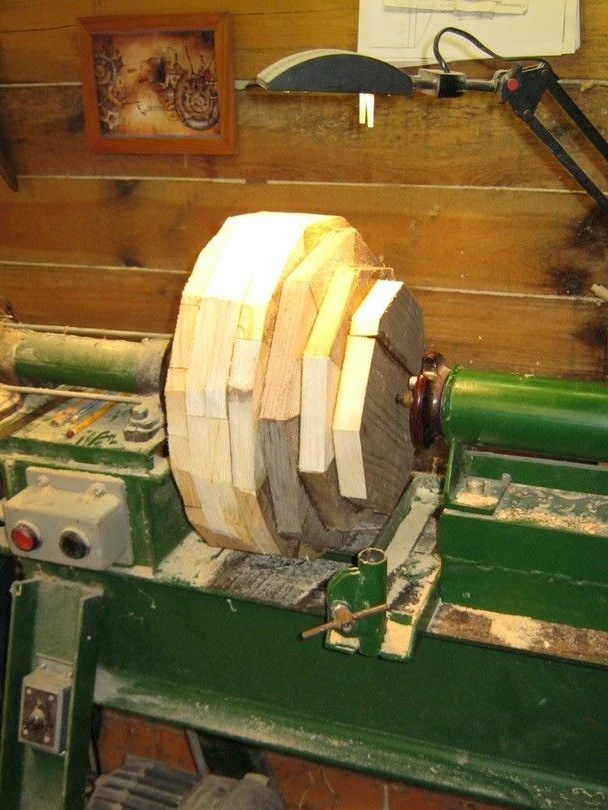
After gluing the layers we collect the pyramid. We form a solid bottom and ceiling at this stage.

Pay attention to the overlap of the seams.
All who hid inside, it's not my fault.
After the glue dries, we “gnaw” the workpiece - we remove everything that protrudes strongly, it’s convenient to use a chain electric or benzo (on the street!) Saw.
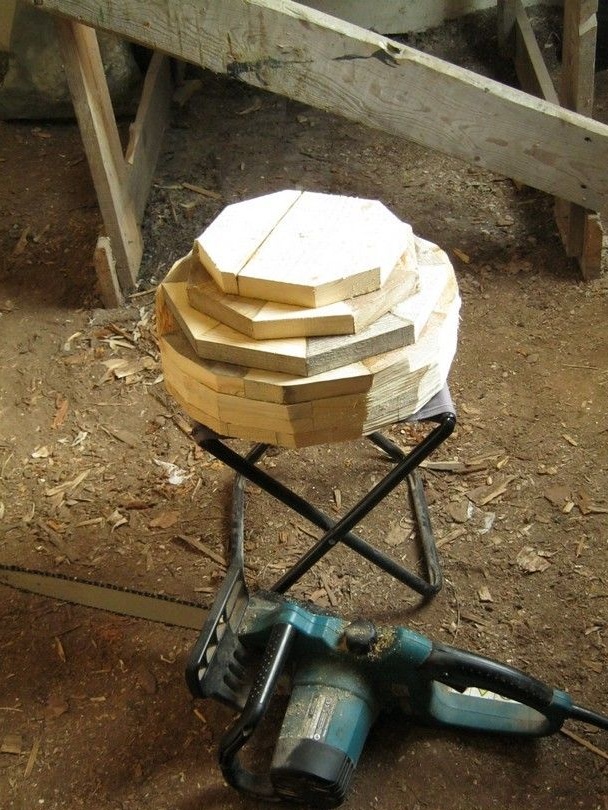
We install the prepared workpiece in a lathe and sharpen it at low speeds.
Gradually, the desired silhouette looms, if it is important to exactly match the drawing, it is worth using a template. It can be made of cardboard or fiberboard. Curves on fiberboard are easily cut by a "school" jigsaw.
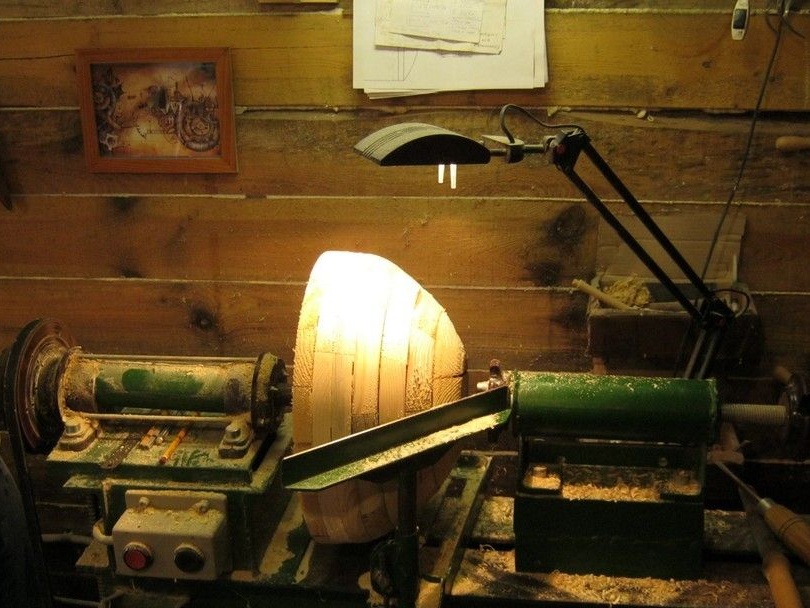
Well, the mold is turned, a respirator on the face (patsaki, why without muzzles?) In the hands of the skin and into battle. Slices of wood are end-face, they do not sand well, changing the direction of rotation helps a lot. The grinding scheme is as follows: a large skin - the direction of rotation toward itself, a large skin - a direction of rotation from itself, a skin with a smaller grain - a direction of rotation from itself (so as not to switch again), a skin with a smaller grain - a direction of rotation toward itself, and so Further.
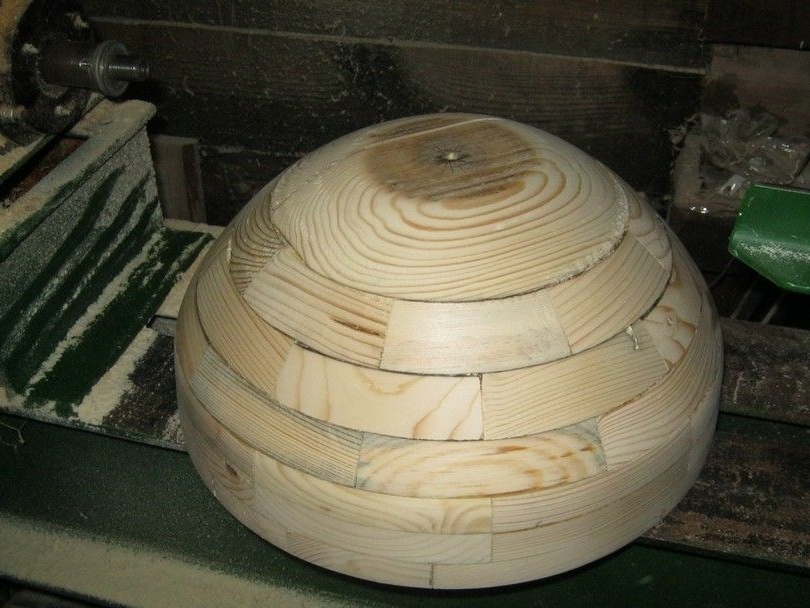
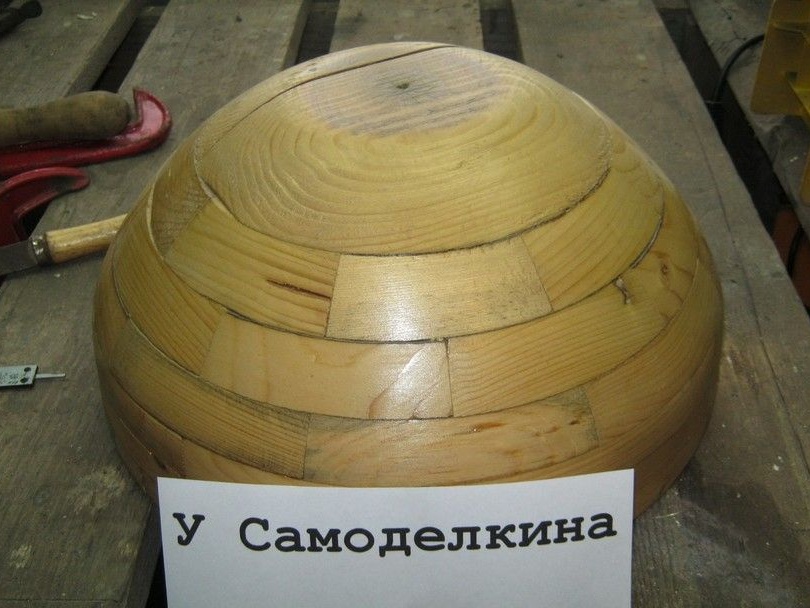
ABOUT! Smooth, beautiful, nice to see. Small flaws at the joints of pieces of wood are quite acceptable, because our product is nothing more than a snap and careful fitting of parts before gluing unnecessarily complicates the manufacture. Moreover, the smallest of the glass pieces of the potential lampshade, as a rule, are significantly larger than the largest cavity in the mold.
All that remains is a couple of layers with a swatch, so that, as my grandfather says, "it was all cultural." It’s probably better, like mine, with water-based varnish - it will smell less when the copper-coated edges of the glasses are directly on it, on the form to solder.
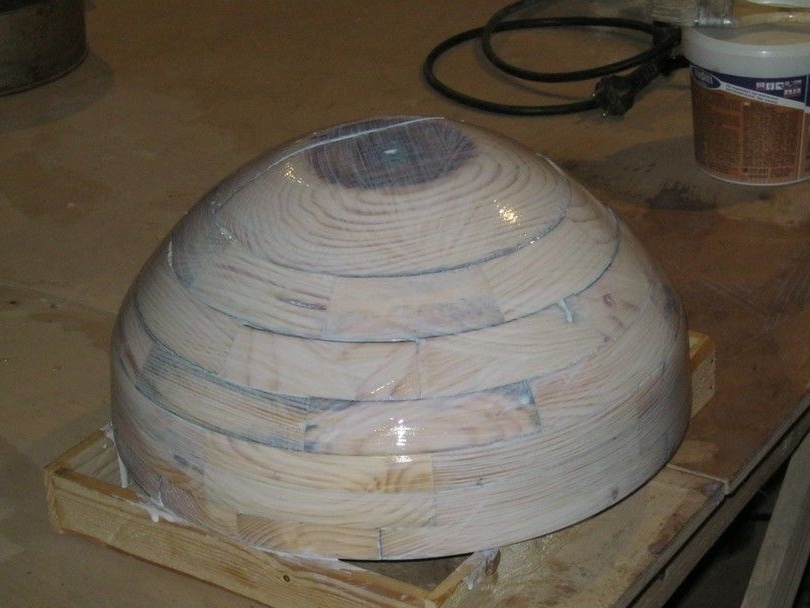
Well, that’s the finished form.
Summarize. We, moving our brains and putting our hands together, made the necessary equipment. The material used was wooden trash, waste that usually goes to the stove. Unlike the purchased foam mold, our reusable one, it can be easily soldered on it (an obligatory process for assembling a tiffany stained glass window), it is much more massive and will fiddle less on the table during operation, finally, we spent only a fraction of the time and electricity on its manufacture, apart from the little things like varnish and glue. The only negative is that for technological fasteners you will have to use thin, long studs, unlike dense polystyrene foam, it is convenient to do this with pins just stuck with your fingers.
Foreign craftsmen make forms that allow both soldering and pins from balsa, but such material does not roll around under your feet, however, whoever has access to such pieces of wood is better to make of them.