Hello. In my last post, I talked about how I made it convenient campfire tripod.. The tripod turned out to be good - it fully meets the qualities that I expected from it. And, as is often the case with "successful homemade", I wanted to add something else!))))
The first refinement that I decided to implement is to equip the tripod with some kind of device for placing skewers, or grills.
Of course, no one will cook kebabs on it - for this I’m riding in the trunk compactly packed barbecue.. But often there is a need to quickly warm up something on a skewer, or fry sausages, or lard, and you should not melt a brazier for this if the fire is burning. Previously, I used two folding U-shaped racks for this, which I stuck in the ground near the fire. But this is not convenient if the fire is not "one-time". (And we go with tents, it happens, for a week, and the bonfire burns all this time). Firstly, a bonfire burning for several days can already be “high” from accumulated ash, secondly, it is “full of heat” and it is difficult to stick racks at a distance from each other that does not exceed the length of the skewer.
That is why I decided to make a hanging frame that can be easily hung on a hook, adjusted in height, and just as easily removed when it is not needed. Well, of course, it should be folding, and fit in a tripod case. Of course, this design has a significant drawback - it will tilt with an uneven distribution of weight. But, as I already said, I’m not going to cook kebabs on it, and for the rest, all its advantages will overshadow this minor flaw.
And, secondly - some kind of case, or case! After all, from my own experience I know that a tripod after its intended use is covered in soot and becomes very dirty. Each time it doesn’t make sense, of course. It is easier to pack and store in this condition until the next installation over the fire. My old tripod "lived" in a canvas bag, which was not very convenient - firstly, it "strummed"! Secondly, it was not very convenient to remove and insert it - she strove to cling to the fabric with everything she could! )))). And thirdly, after a warm rain suddenly fell and drops fell on this cover, strong spots appeared on its surface - soaked soot appeared.The view has become very unaesthetic ...
Based on this, I decided that my new tripod will have a hard cover.
So, what I needed to make these "lotions")))):
For a hanging frame under a skewer:
1. Profile pipe, section 15 by 15 mm.
2. Trimming pipe profile, with one wall not less than 30 mm.
3. Hairpin M8. (1.m.)
4. M8 nuts (4 pcs)
5. M8 wing nuts (4 pcs.)
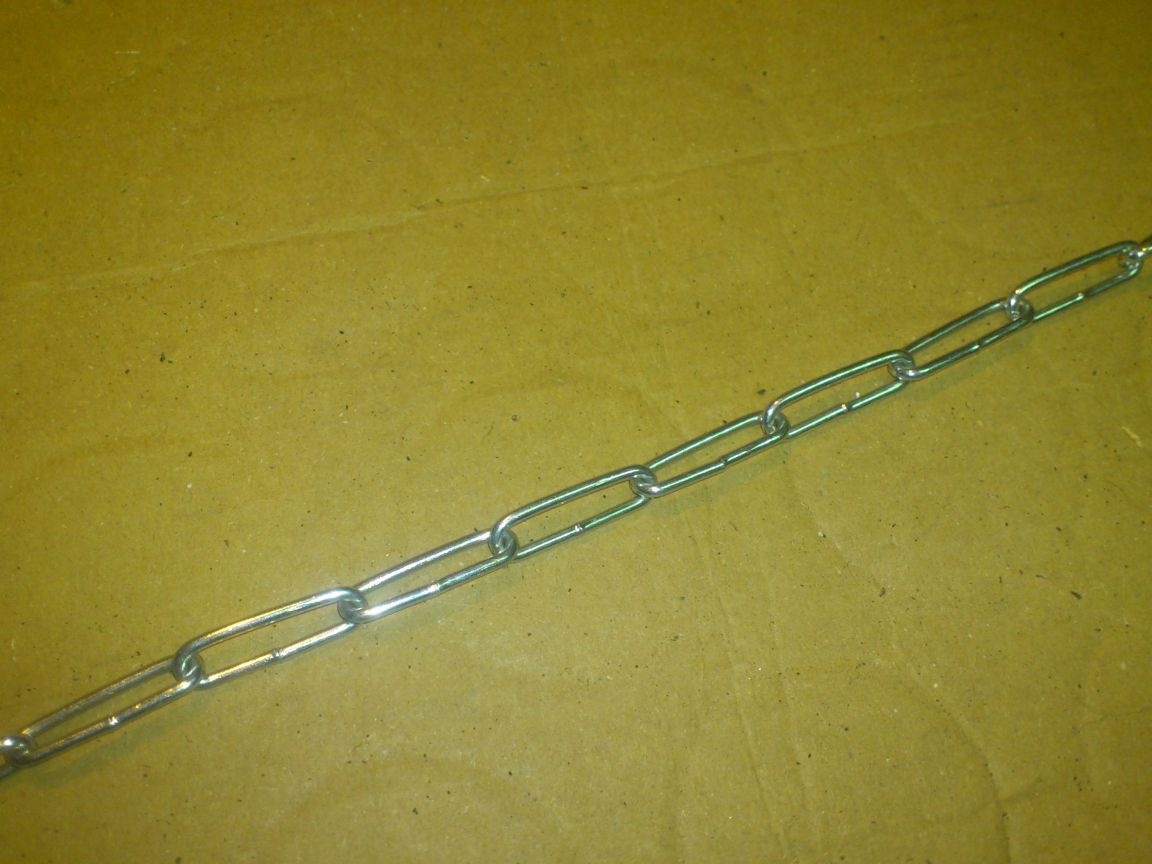
6. Chain with small links.
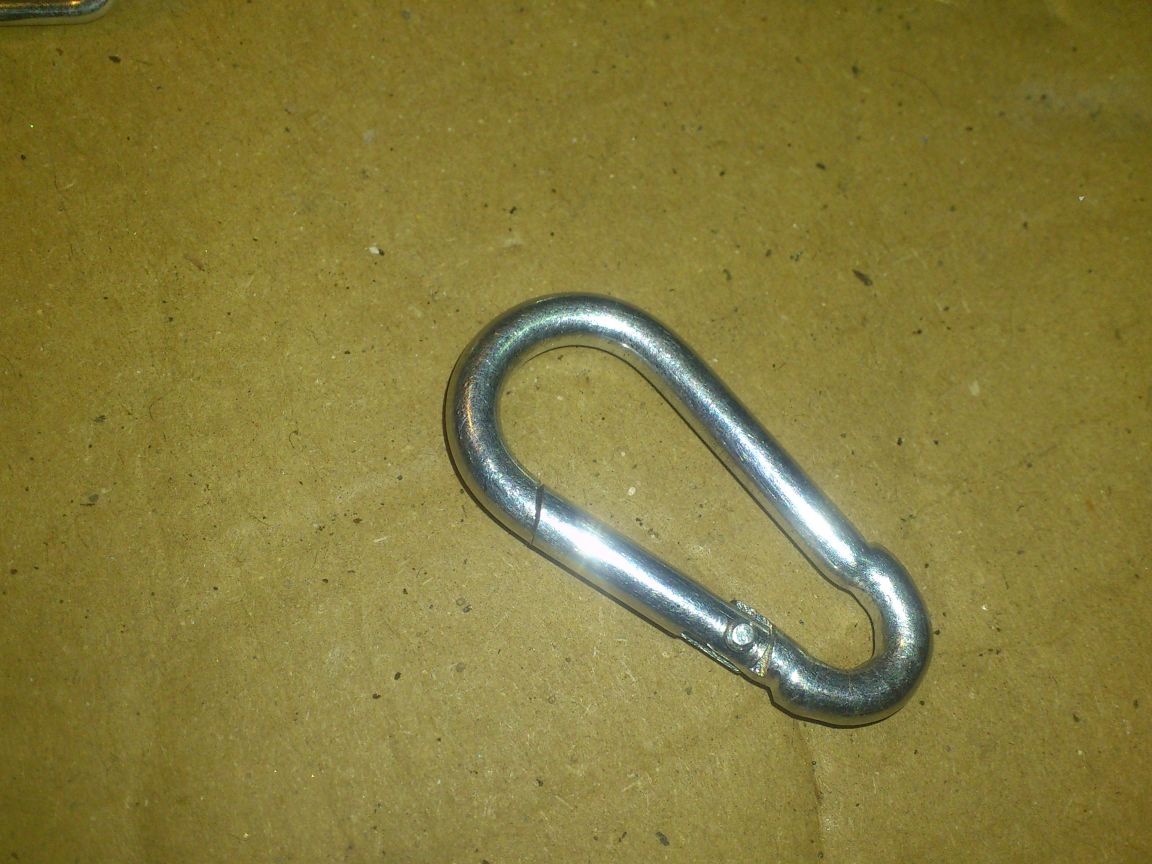
7. Carabiners for a chain of suitable size. (4 things)
To make a case:
1. Fiberboard.
2. Cutting tin.
3. Extraction rivets.
4. "Household" adhesive tape.
5. Trimming dry wide boards, 25 mm thick.
6. Locks (In my case - “ties for sliding tables”, as I called them in the furniture hardware store)
7. Washers M5 enlarged.
8. Carry strap.
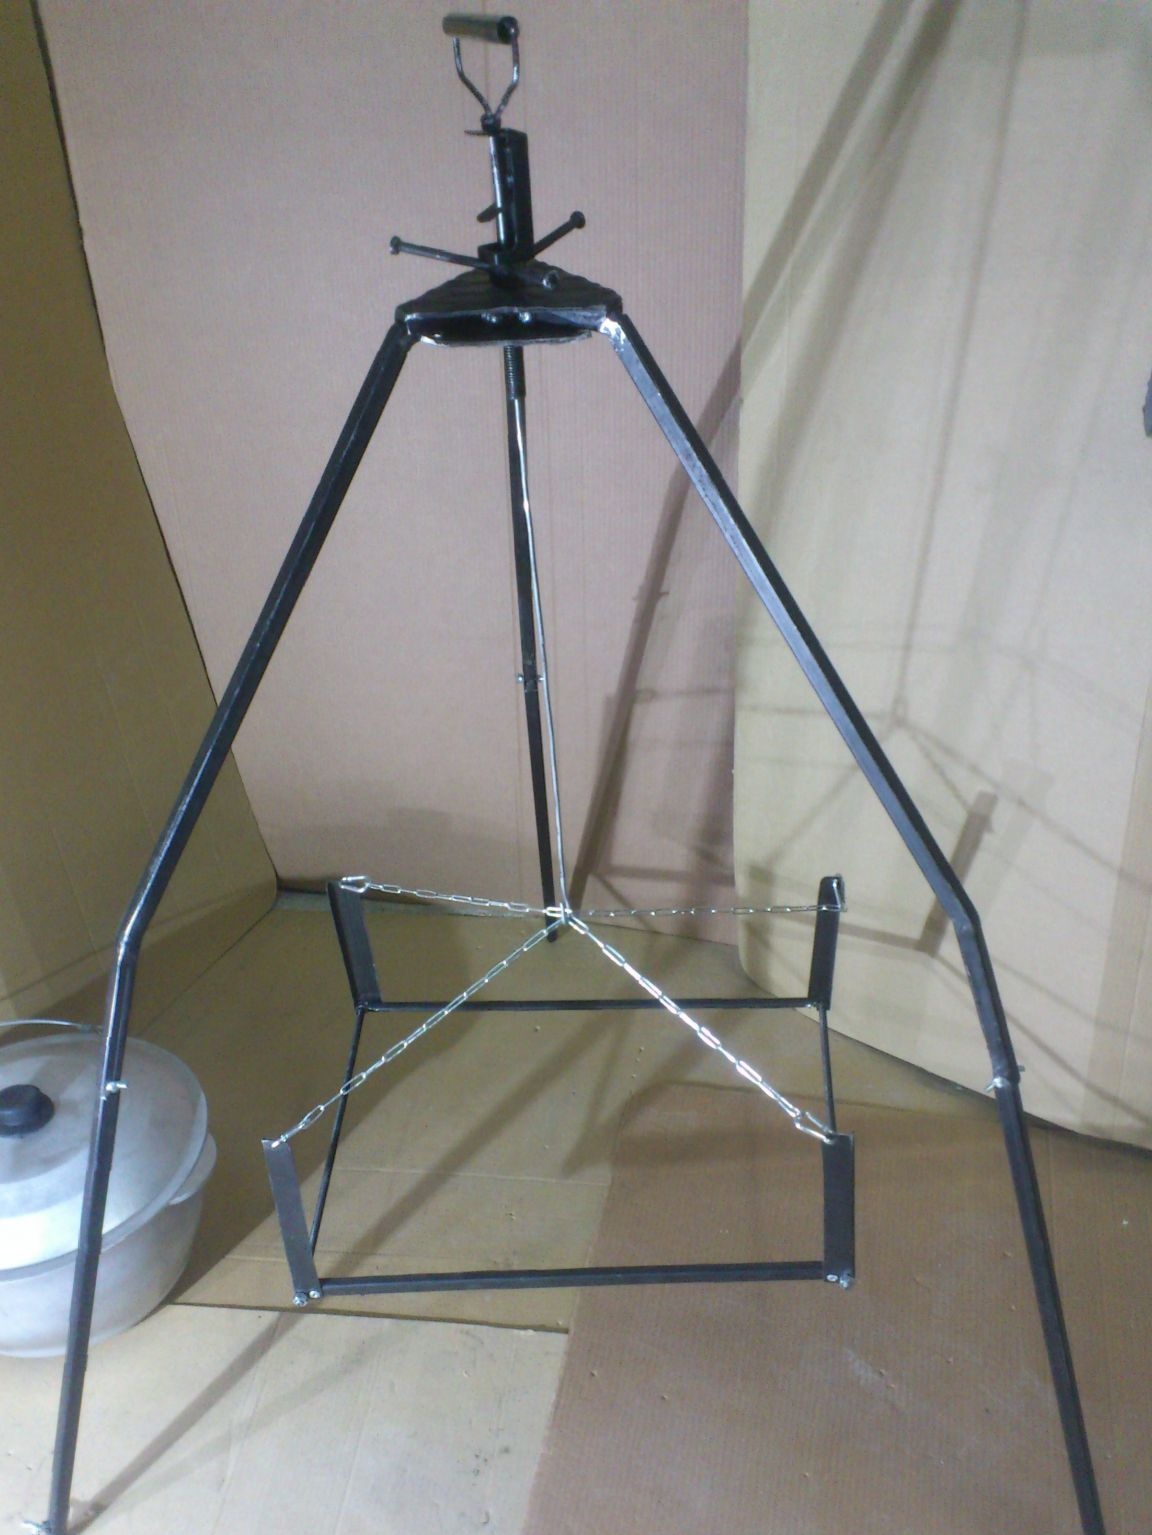
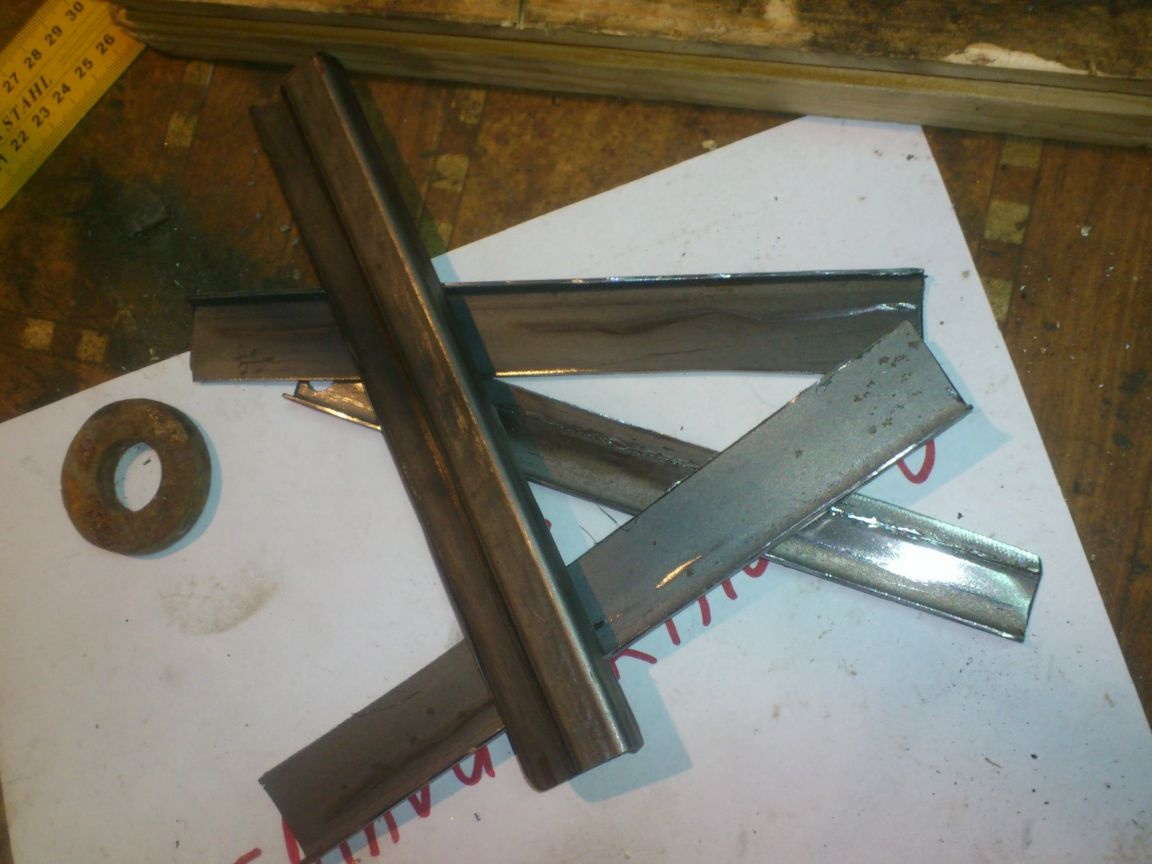
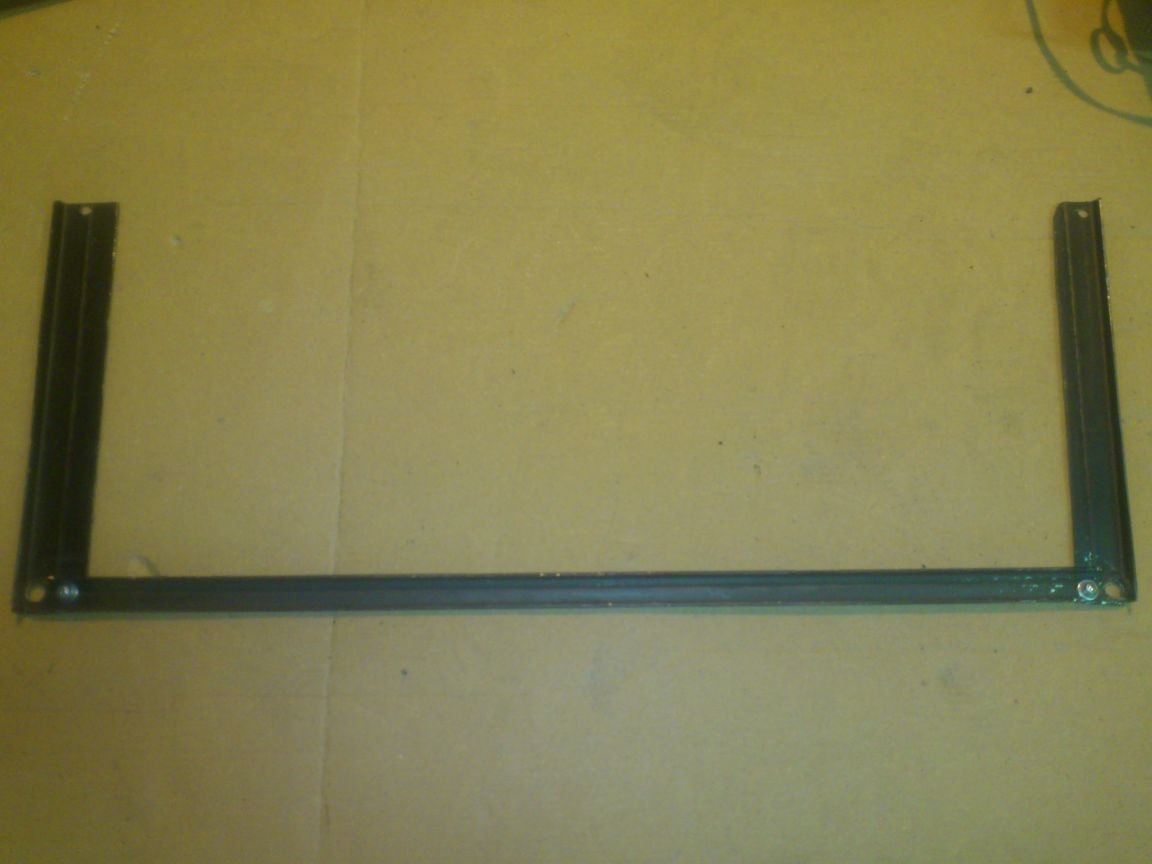
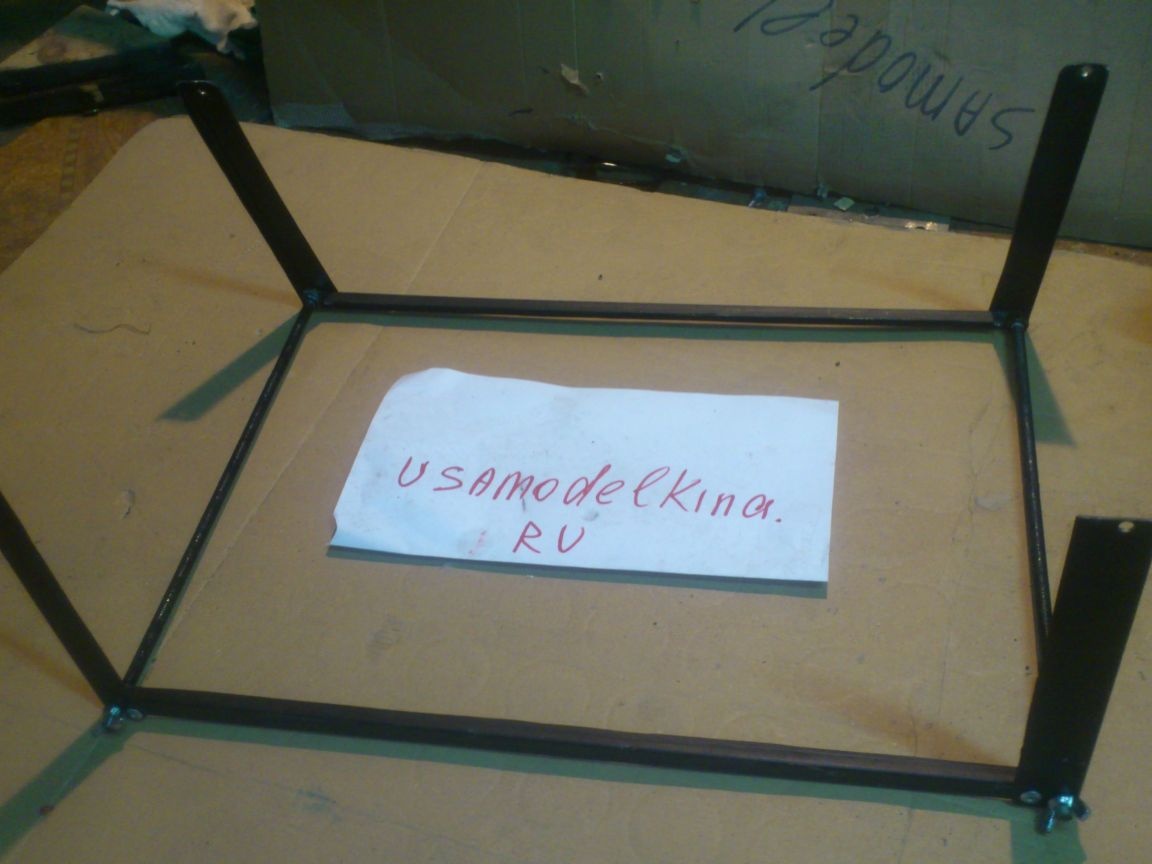
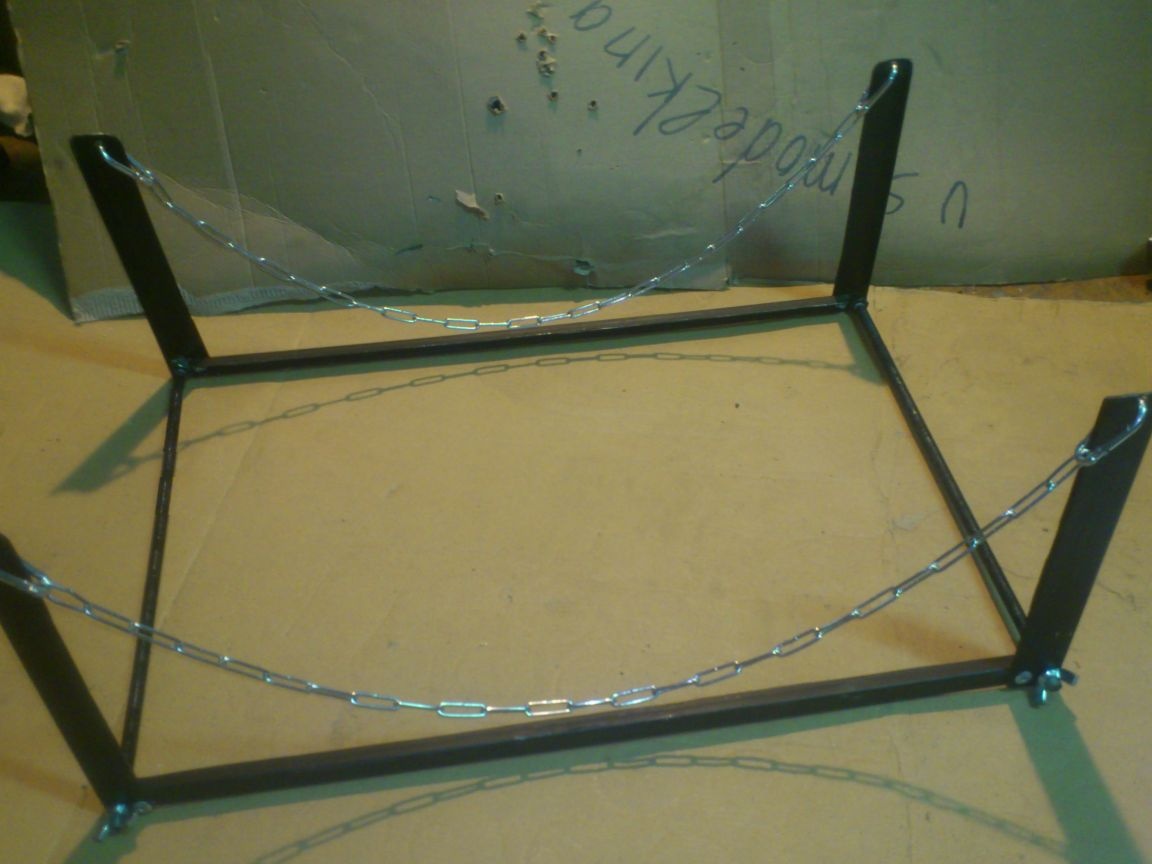
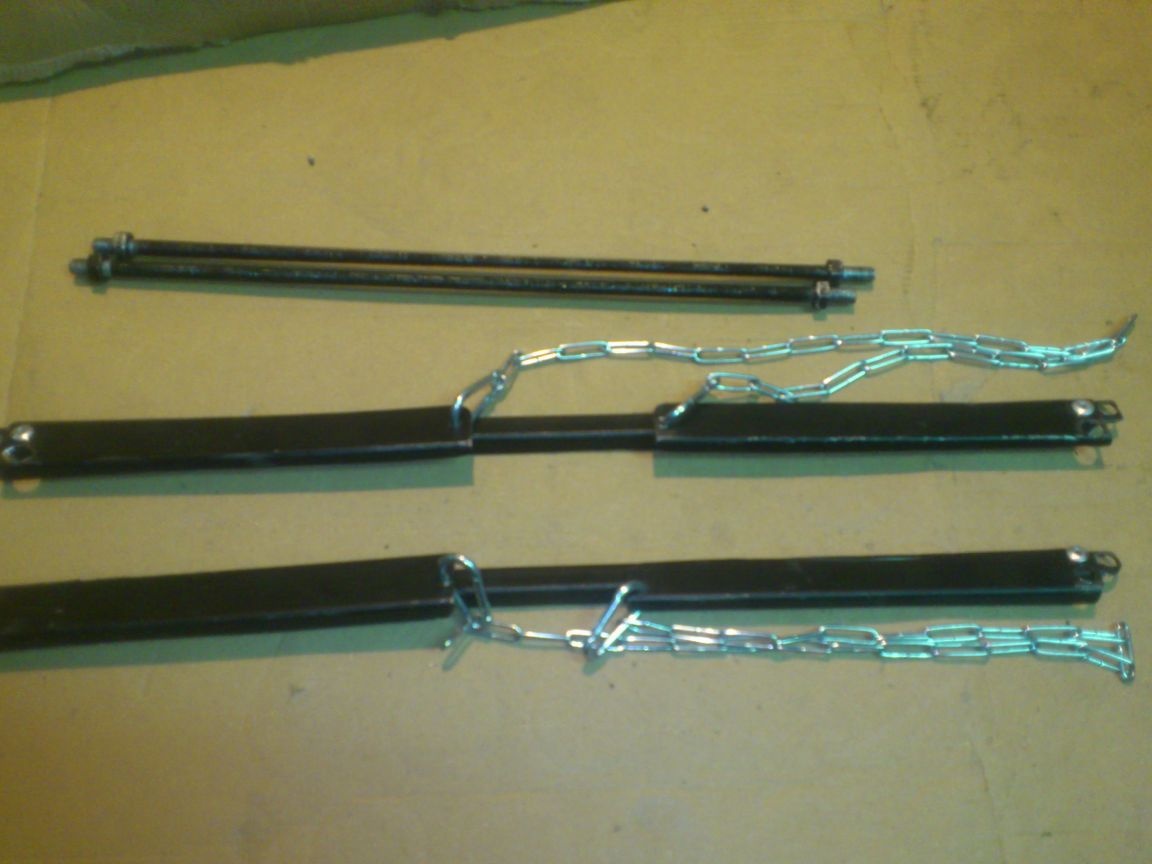
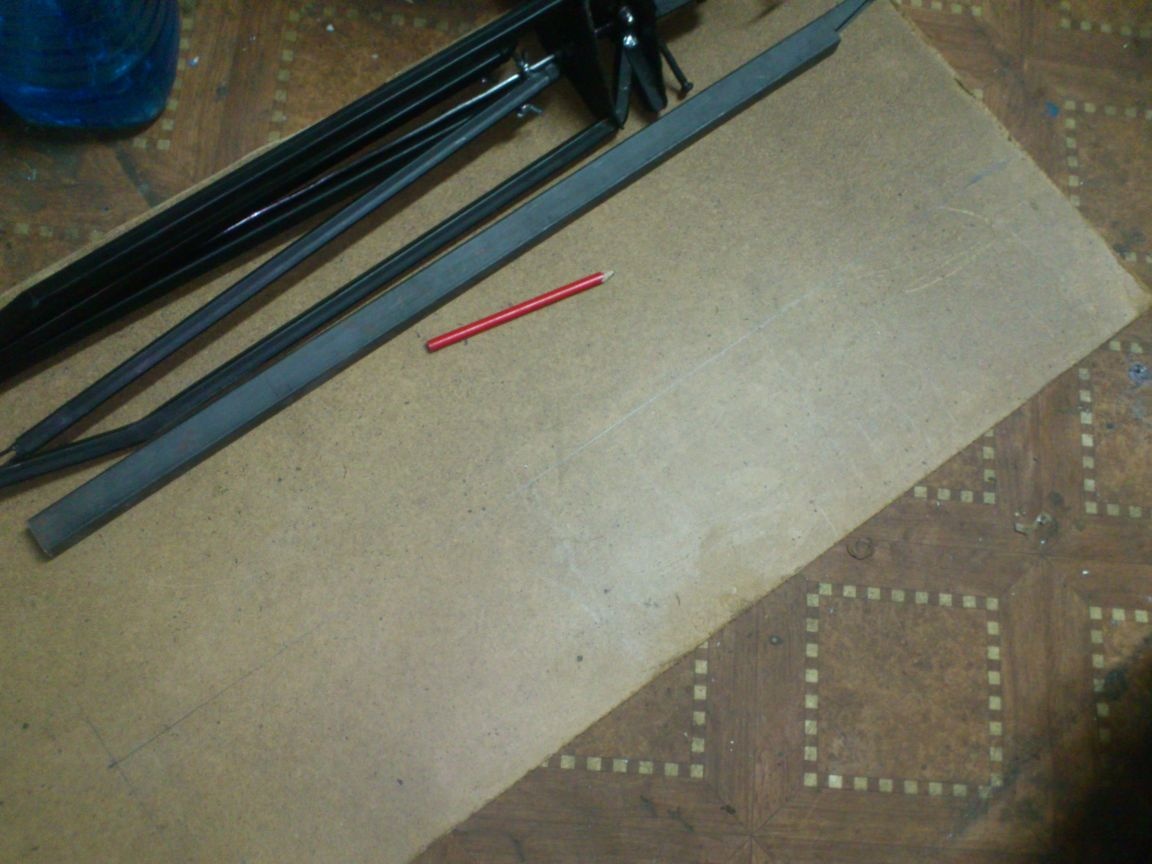
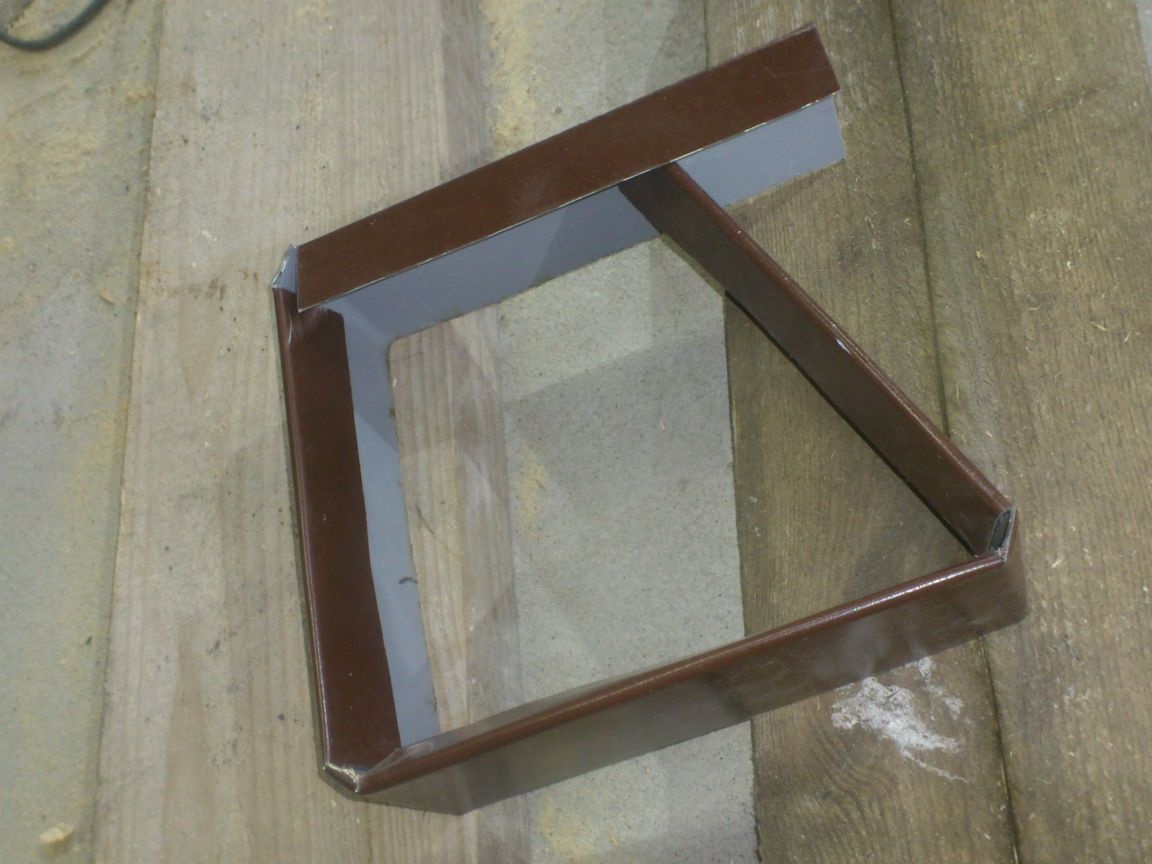
At first I took up the frame. According to my idea, it will consist of two crossbars (on which skewers will be directly put), which will be connected into a rectangle using two M8 hairpins.
I decided to hang the frame on a hook on chains. But, if you let the chains straight from the corners of the frame, you will need to either make them long enough (which will “steal” the height adjustment amplitude), or to lose part of the usable area - chains leaving at an acute angle will not allow putting the skewer at the very edge.
Therefore, I decided to make a rack frame, 15 cm high, in the corners of the frame, and already hang their ends on chains.
I started with the crossbeams.
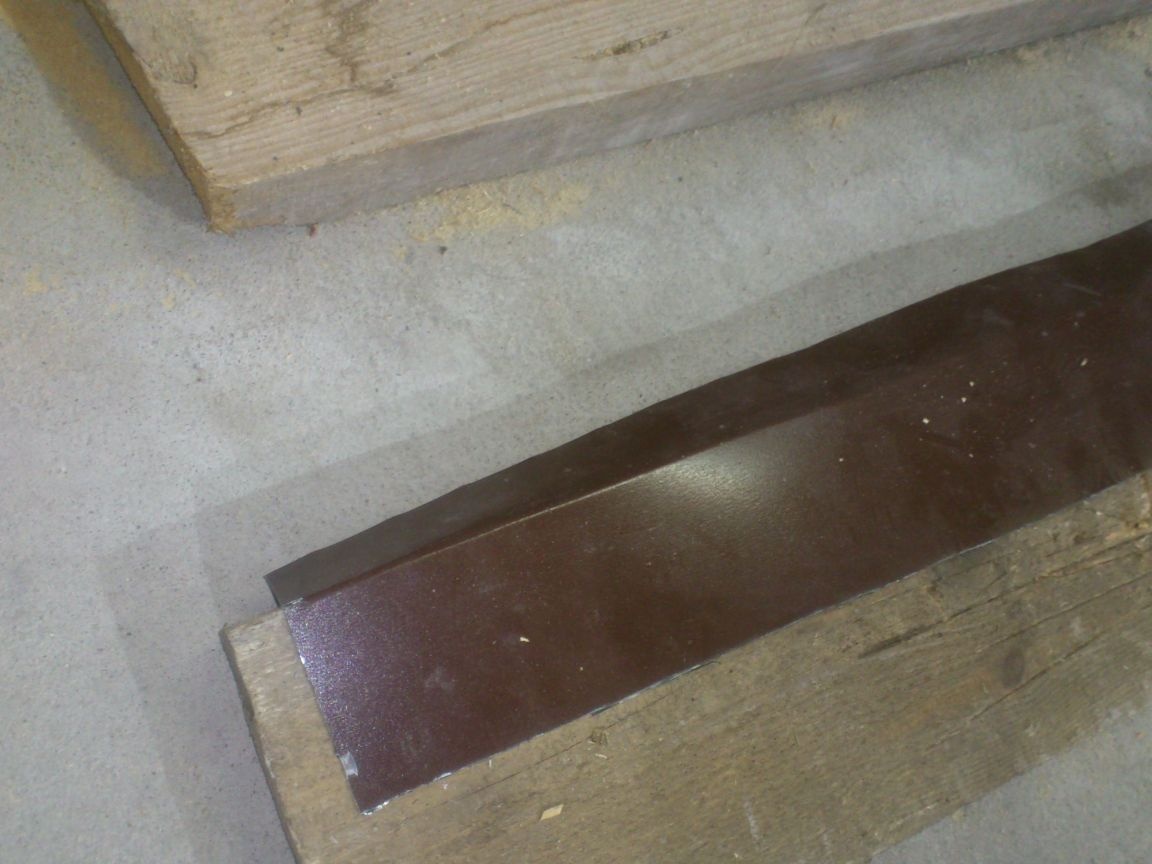
The crossbars do not have to be particularly strong, therefore, in order to facilitate the design, I decided to cut along a thin profile pipe with a cross section of 15 by 15 mm so that two light corners turn out:
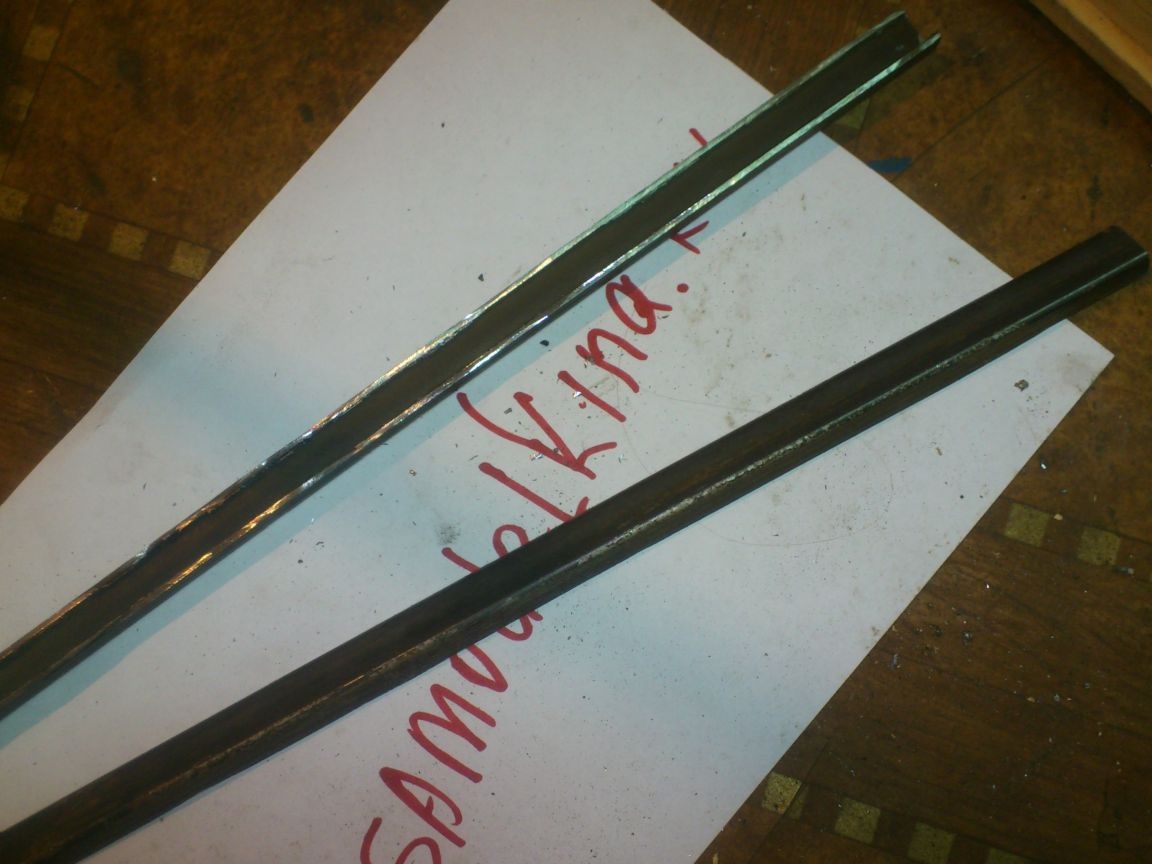
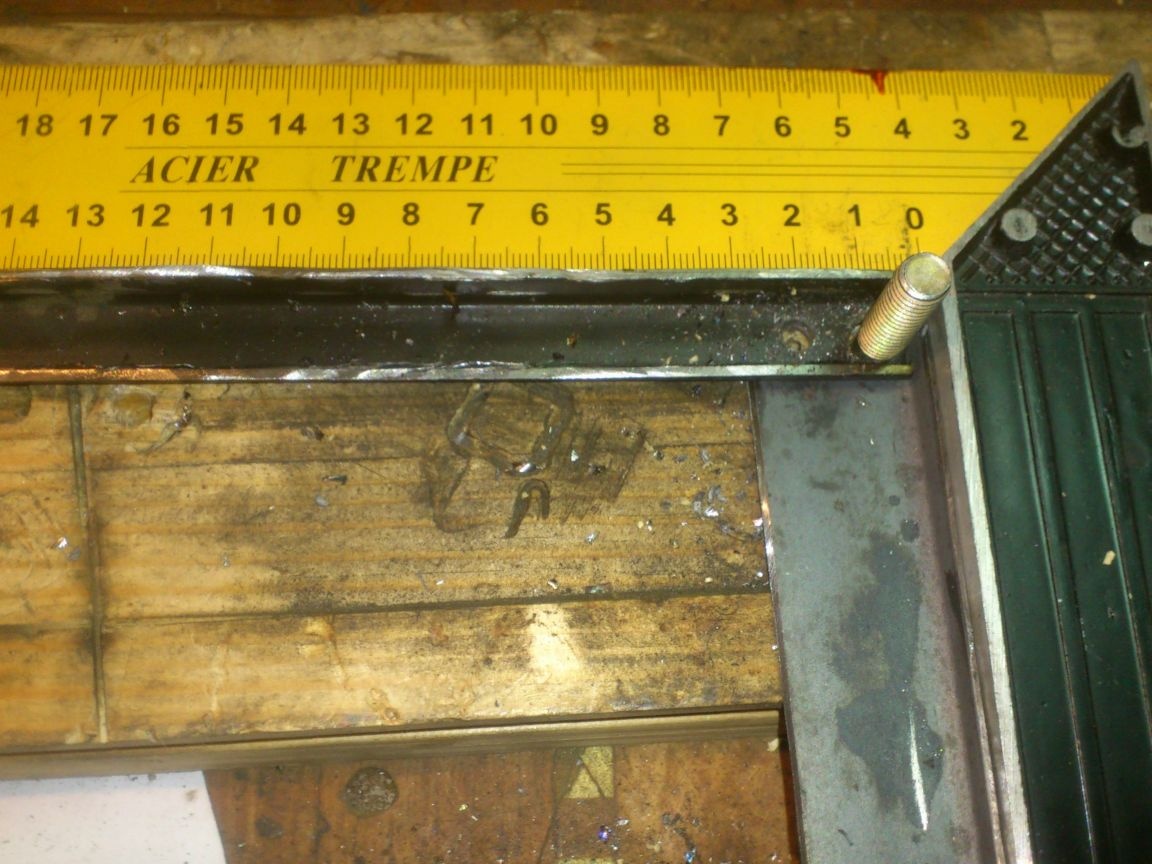
I made racks from scraps of profile pipes with a wall width of 30 mm. I cut four corners of different heights - one of its regiments was 30 mm wide, and the second a few millimeters. This is rather a stiffener:
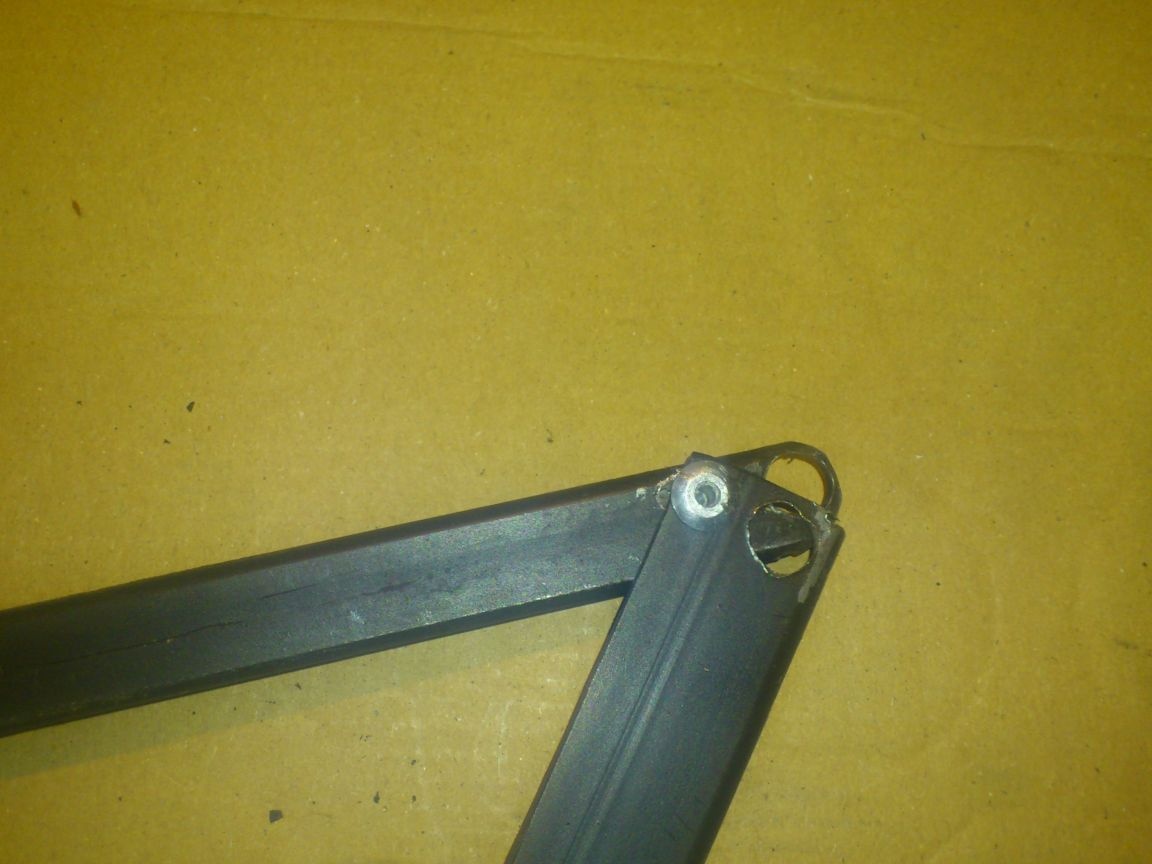
The design will have to be connected with an M8 pin. Therefore, having folded planks with uprights at right angles, I drilled holes in them with an 8 mm drill:
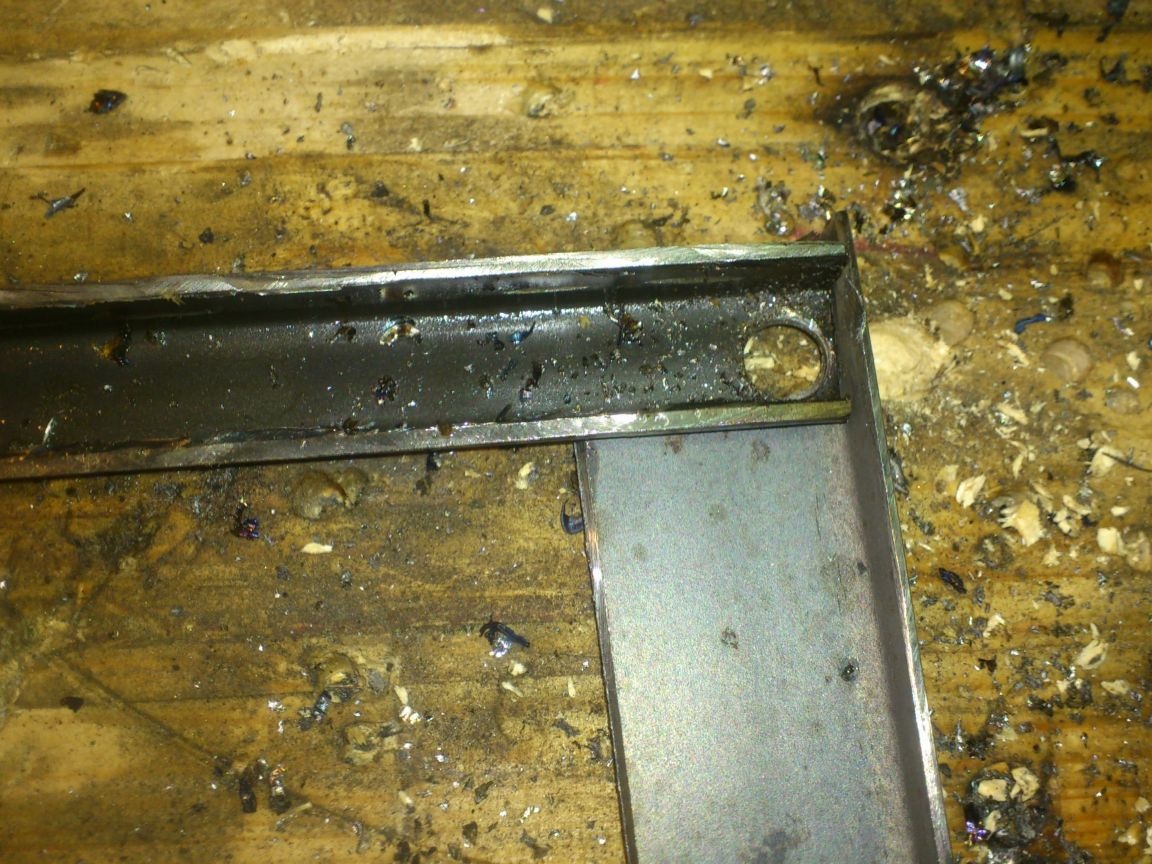
A pin will enter these holes and fix the crossbars with frames in the desired position when the structure is unfolded. To connect, and it will fold on the other axis, as which I decided to use a conventional exhaust rivet. If you use a screw connection, it will unwind when folding, unfolding, and the strength after the studs are removed, is no longer needed. If only the design did not fall apart))).
The holes for the “axes” should be drilled so that the posts create right angles with the crossbars. For this, I decided to make a template.
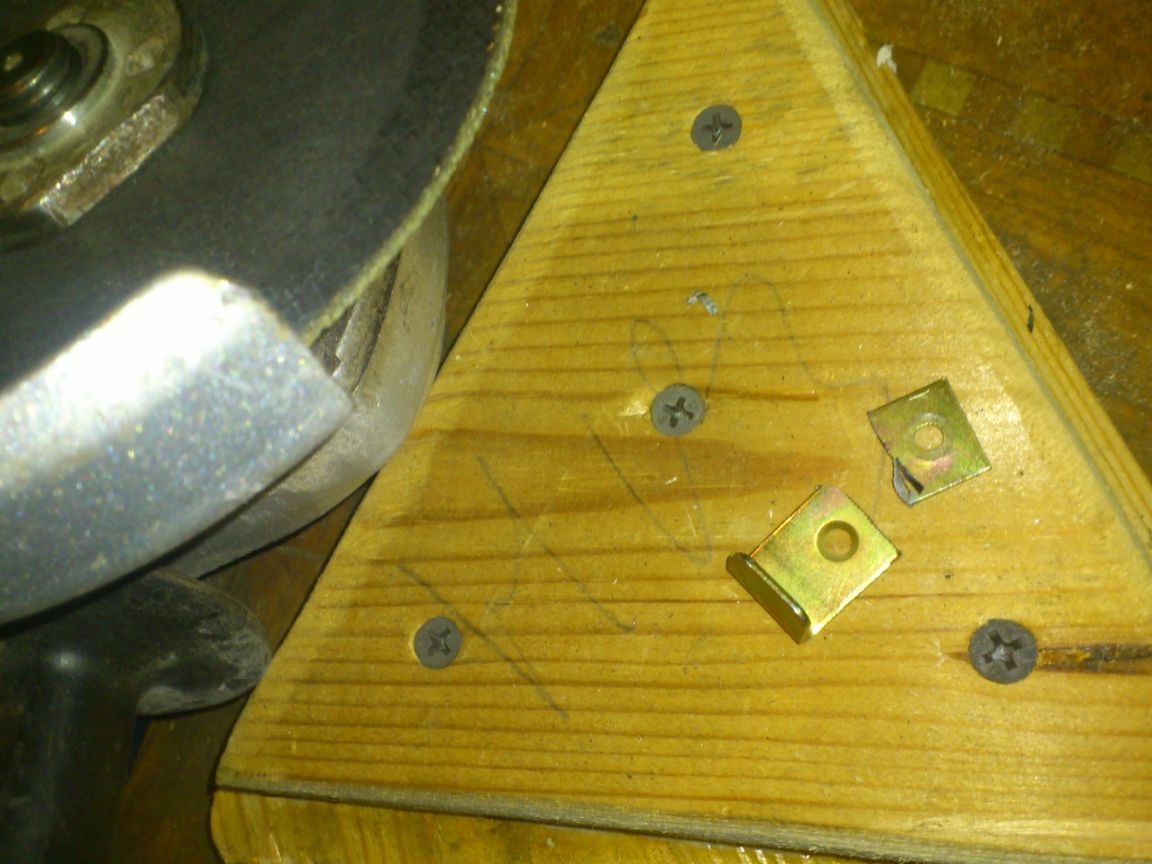
I drilled a dull shallow hole in a wide wooden board:
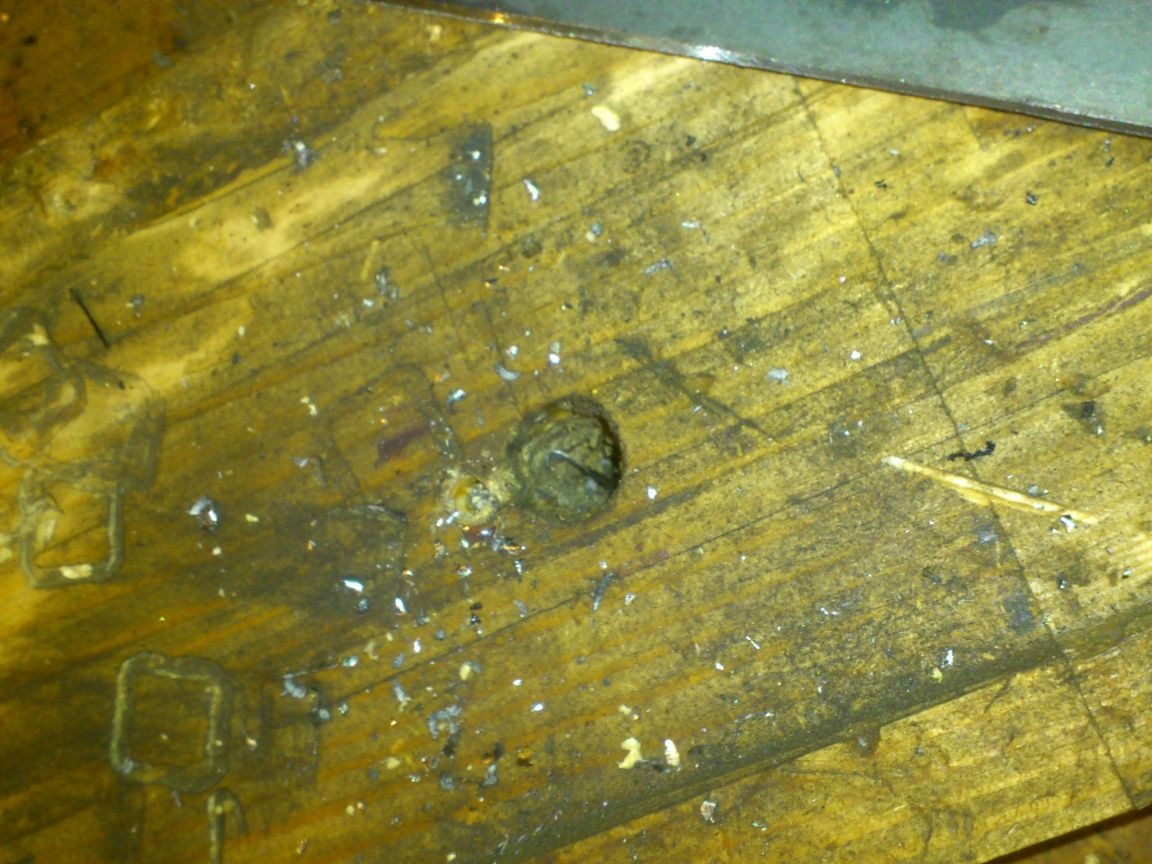
He scored a hat with a M8 bolt:
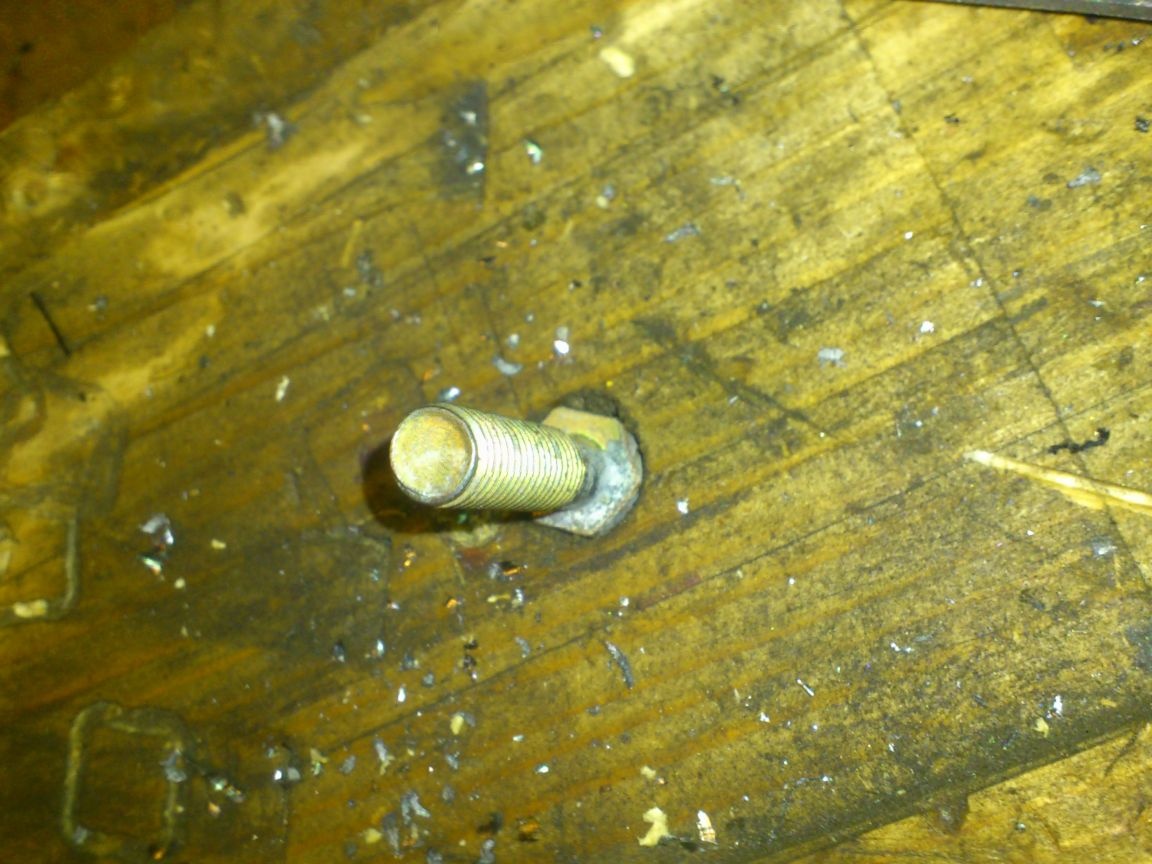
Now I put on this bolt in pairs the ends of the crossbar with the uprights, verified the angle using a square, and drilled a 5 mm diameter hole for the rivet through both workpieces, placing it as far as possible from the first hole:
Then he riveted, and “developed” the fasteners, several times with effort folding and unfolding the resulting hinges.
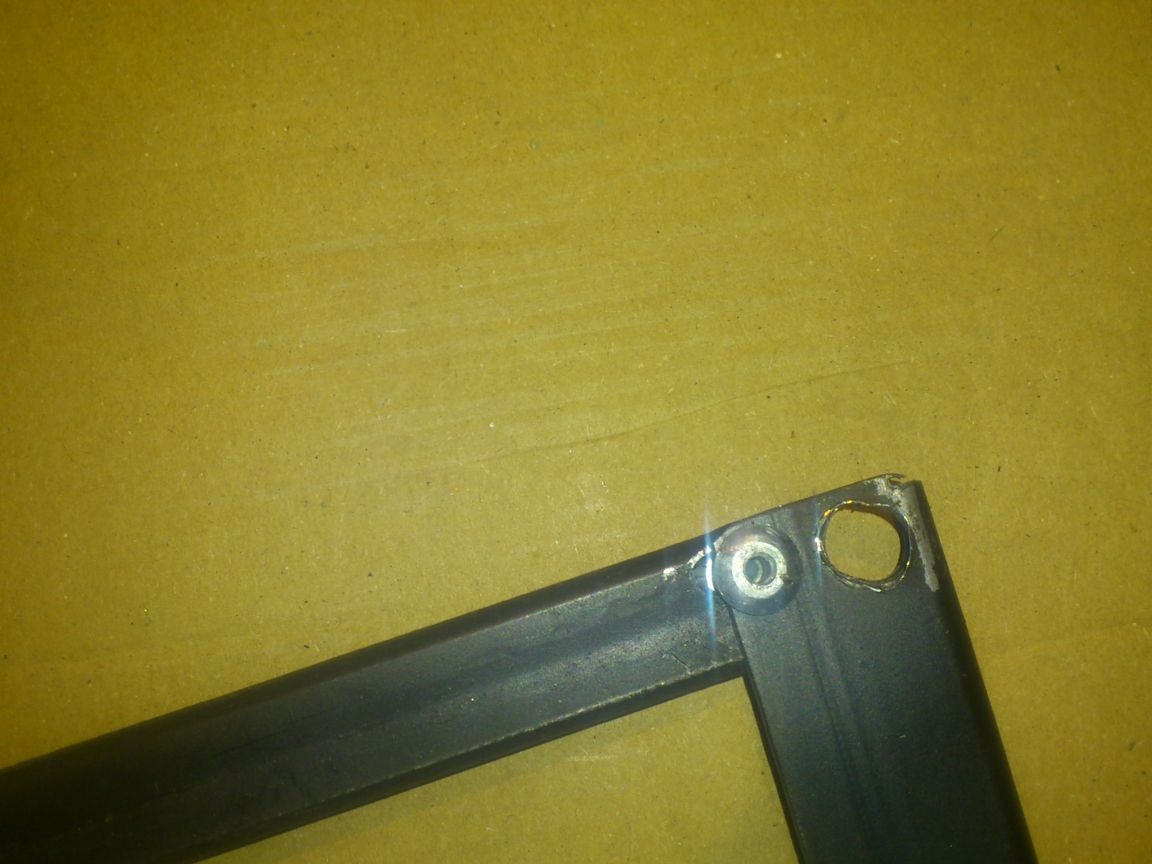
Two of these details I got:
Next, I cut two pieces of an M8 hairpin:
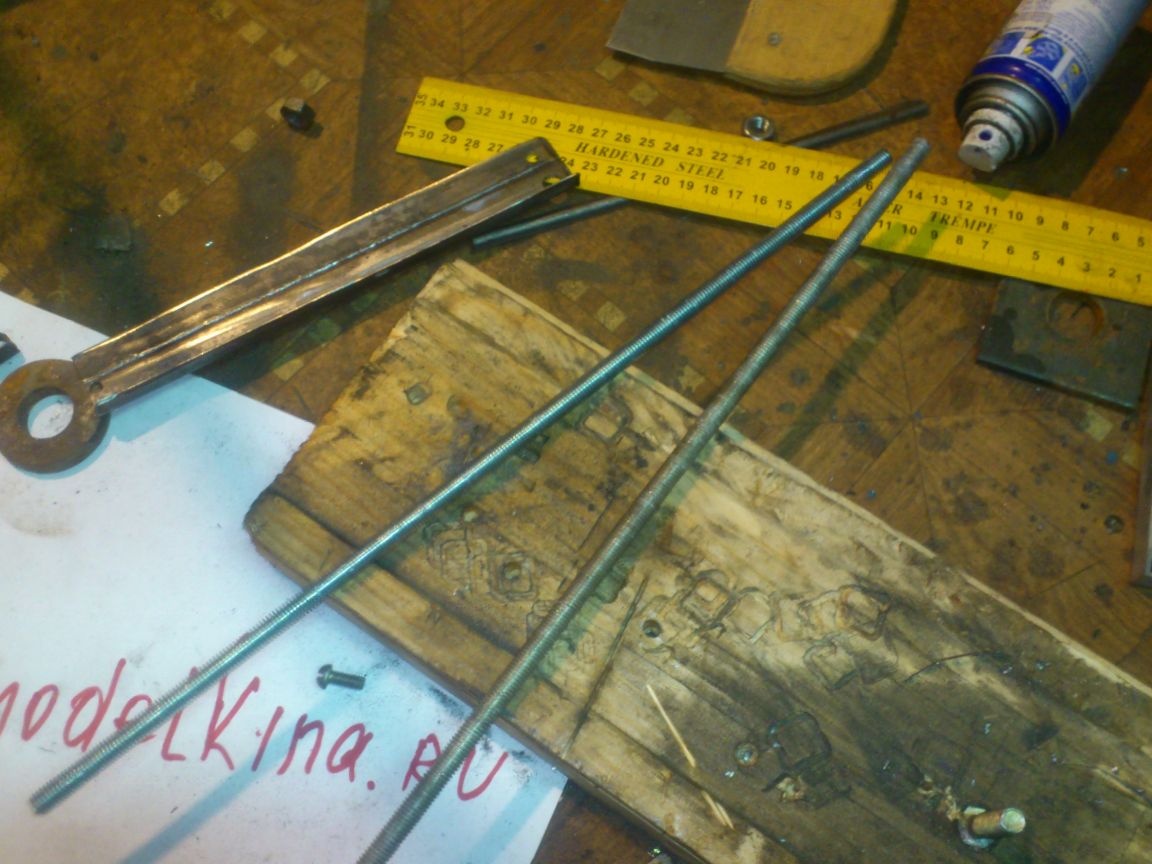
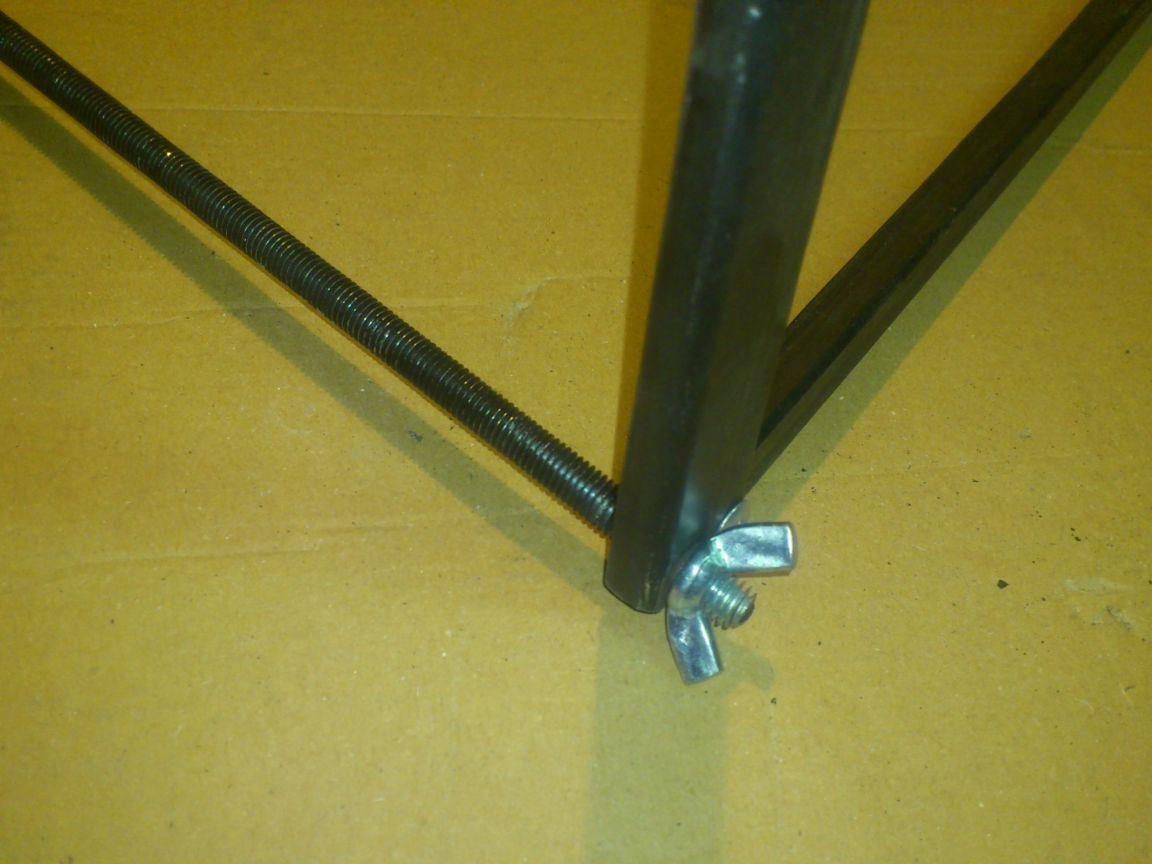
And he connected the two parts by them, screwing ordinary nuts as limiters on the ends, and holding them with wing nuts:
For the suspension, I used a chain, which I attached with carbines to the ends of the racks, having previously drilled holes there:
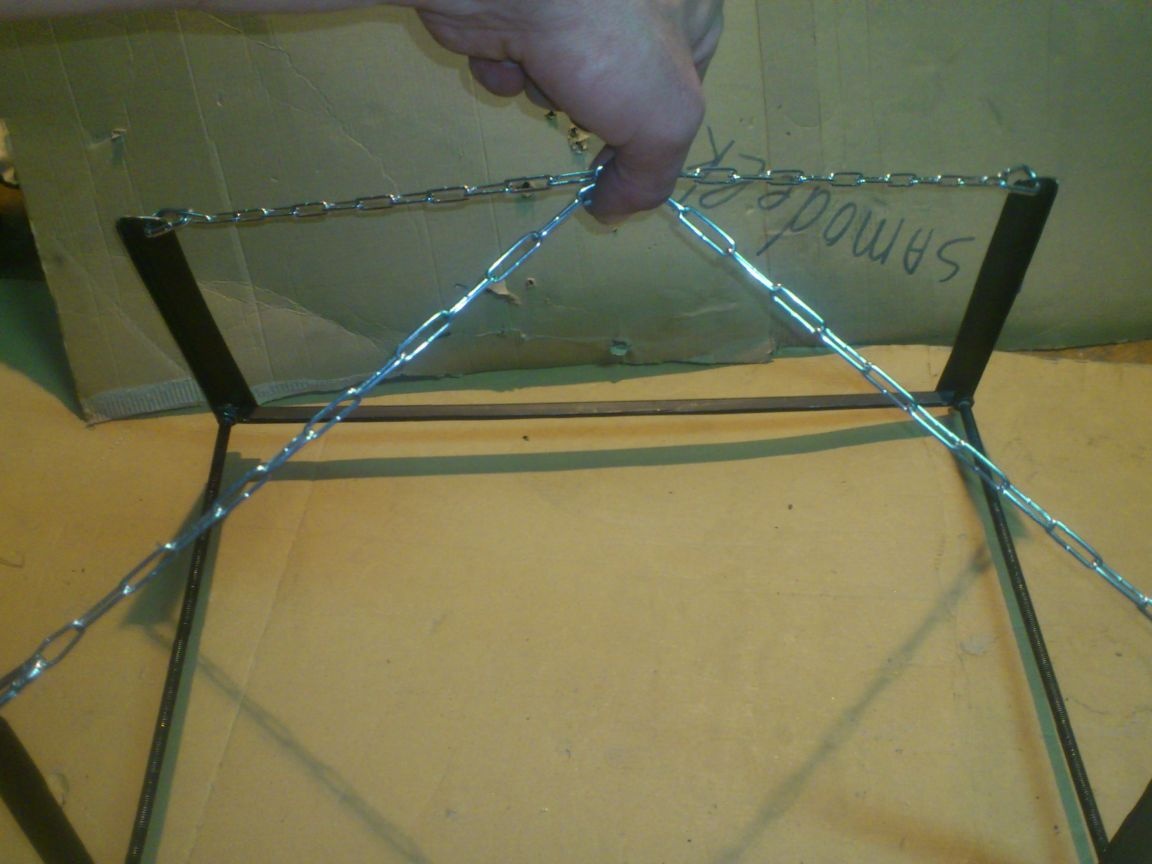
The structure is disassembled very easily - just unscrew the wing nuts and fold the structure.
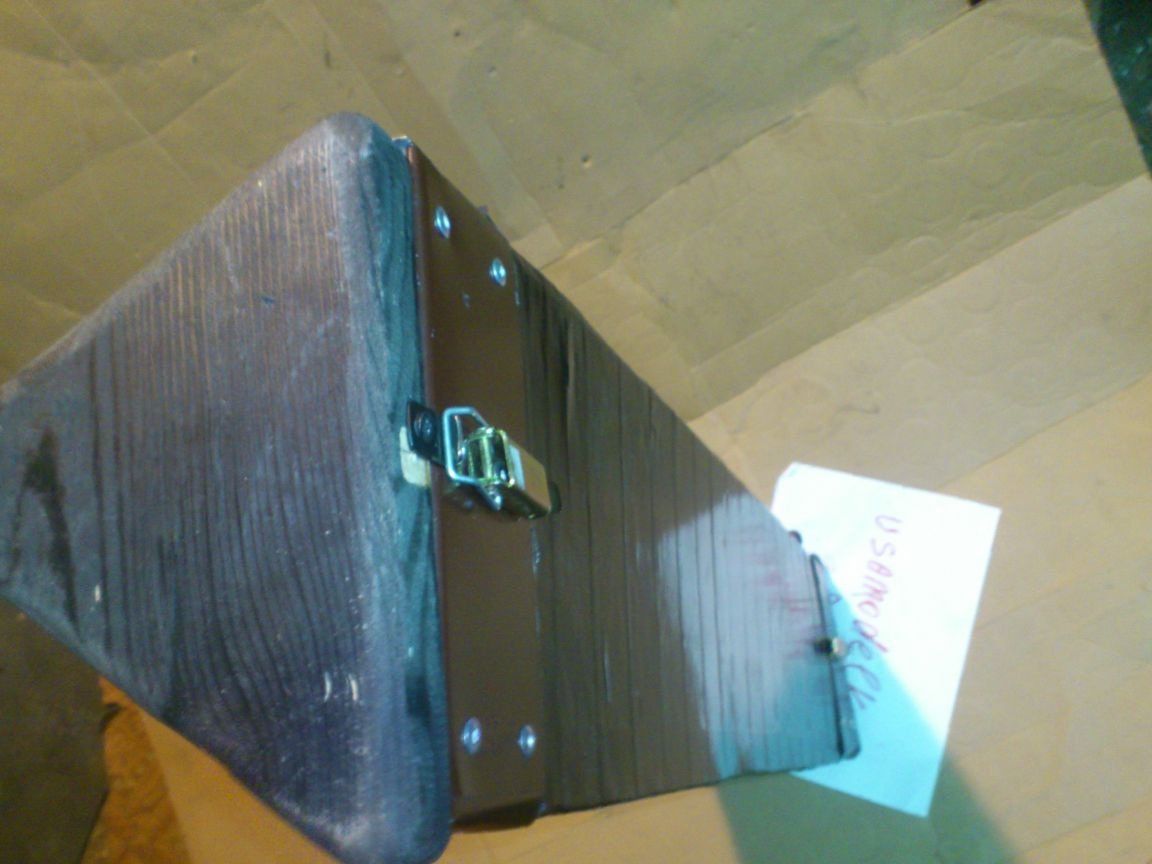
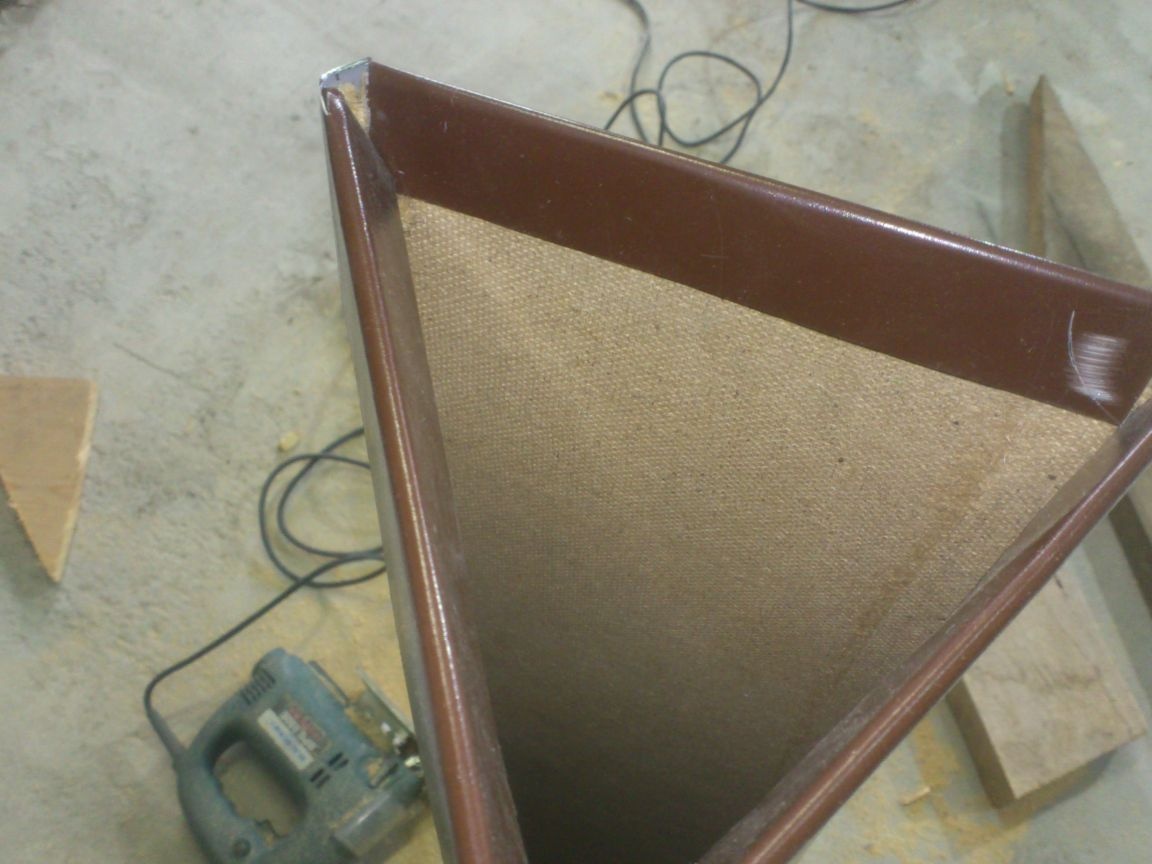
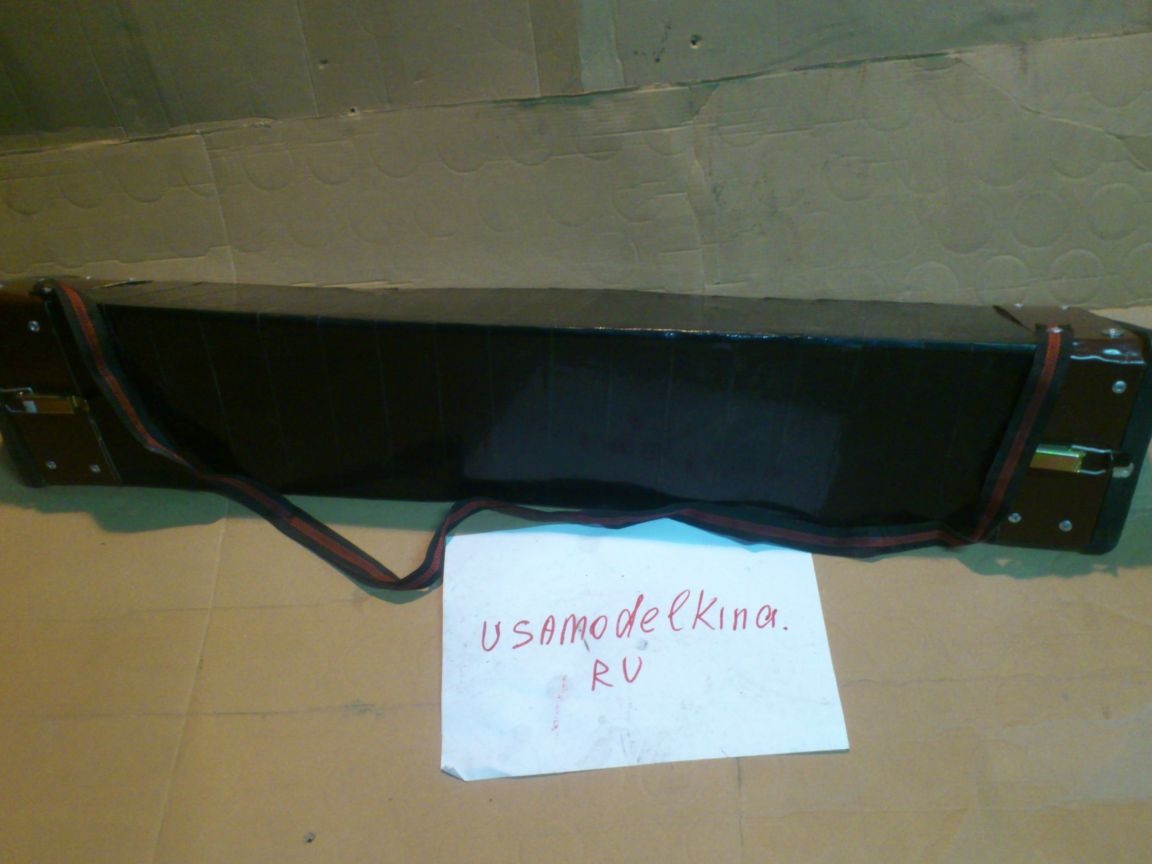
Now let's get into the case. Since the tripod in my section has a triangular shape, I decided that it is best to make a triangular "tube" with opening covers on both sides. Then the tripod will be easy to remove - by placing the case vertically, and unfastening the bottom cover, you can simply pull the case off the tripod.
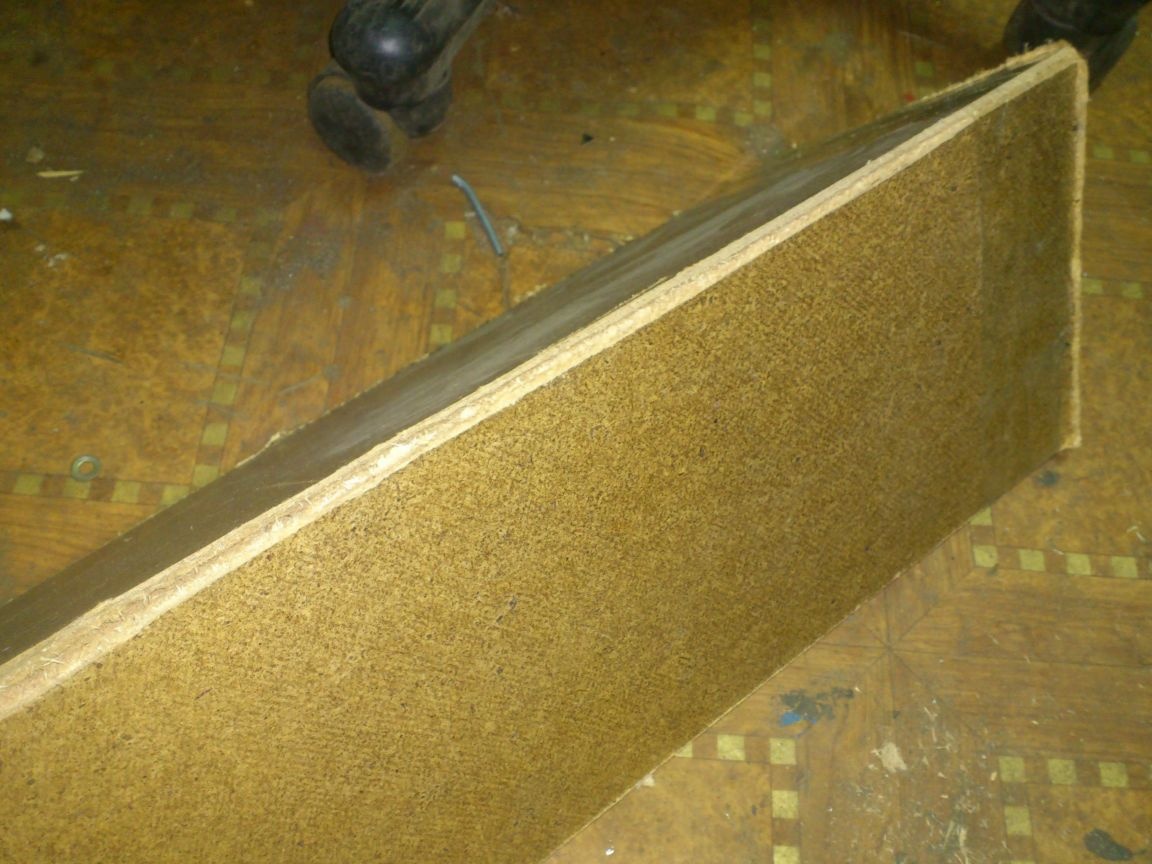
I decided to make it out of fiberboard. I took a piece of fiberboard (the back wall from the old cabinet) and drew on it three adjacent rectangles of the desired size:
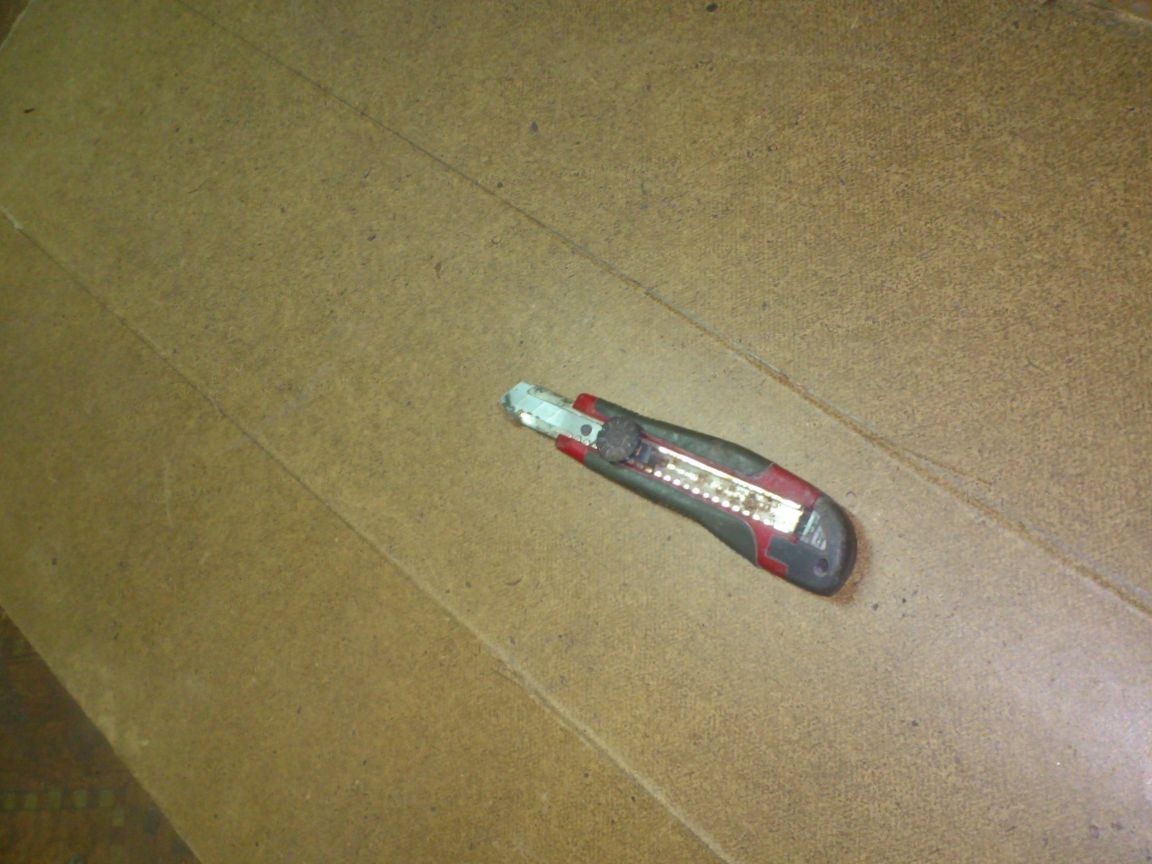
I cut off the extra length, and along the lines dividing the walls made cuts with a knife, without cutting it to the end:
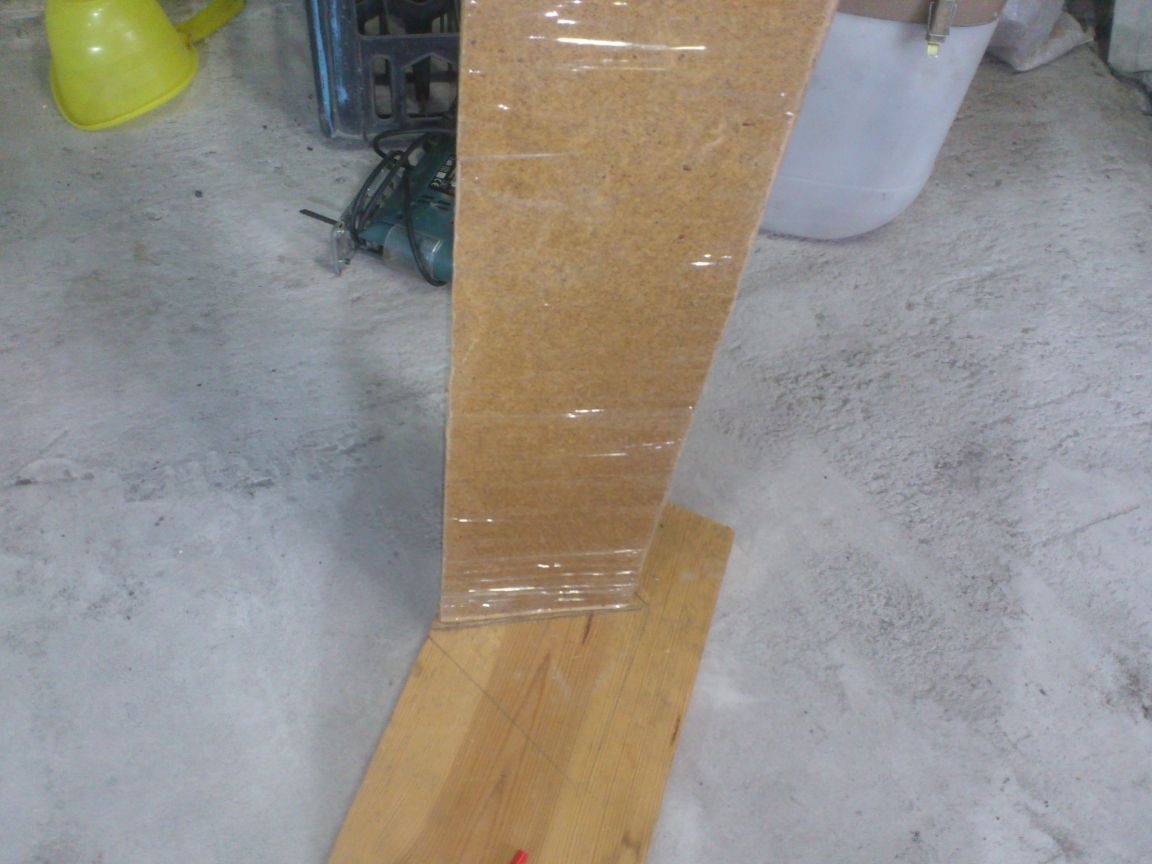
And then he folded it over these notches, and wound it with tape:
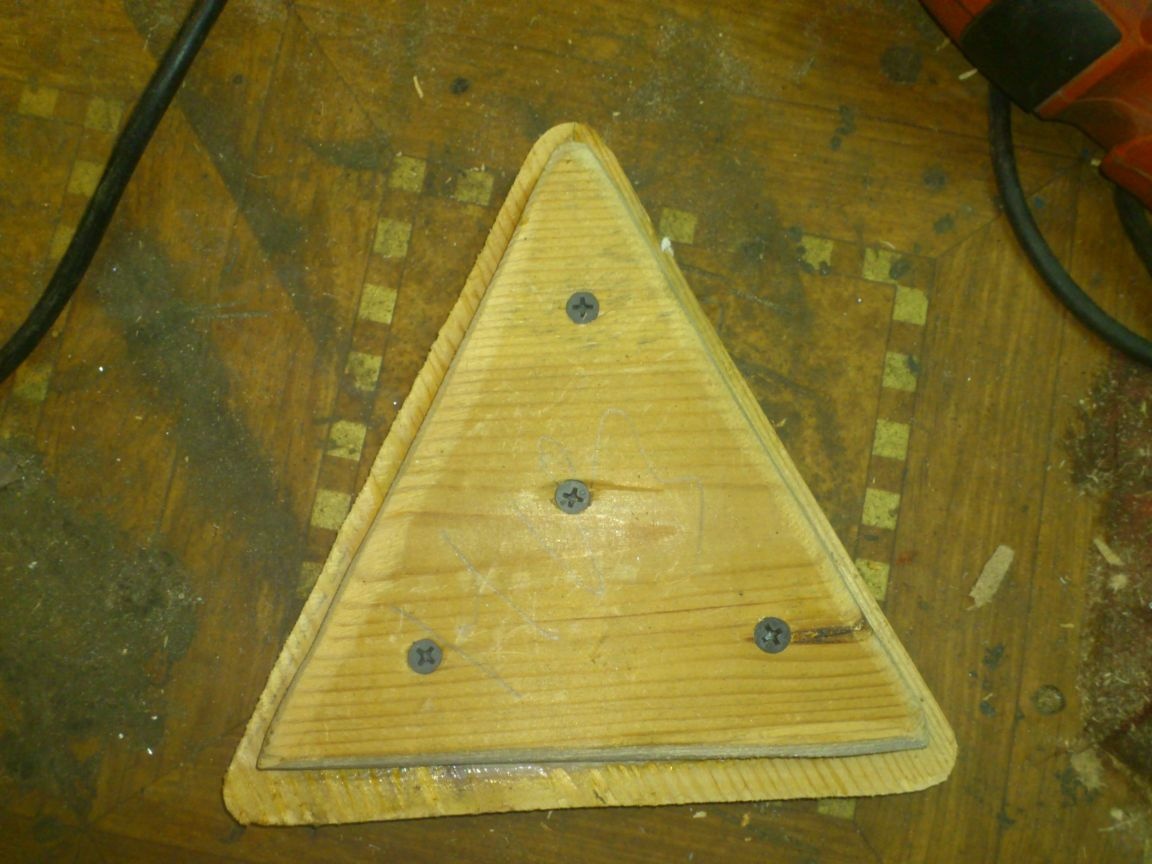
Lids made of a wide board, 25 mm thick:
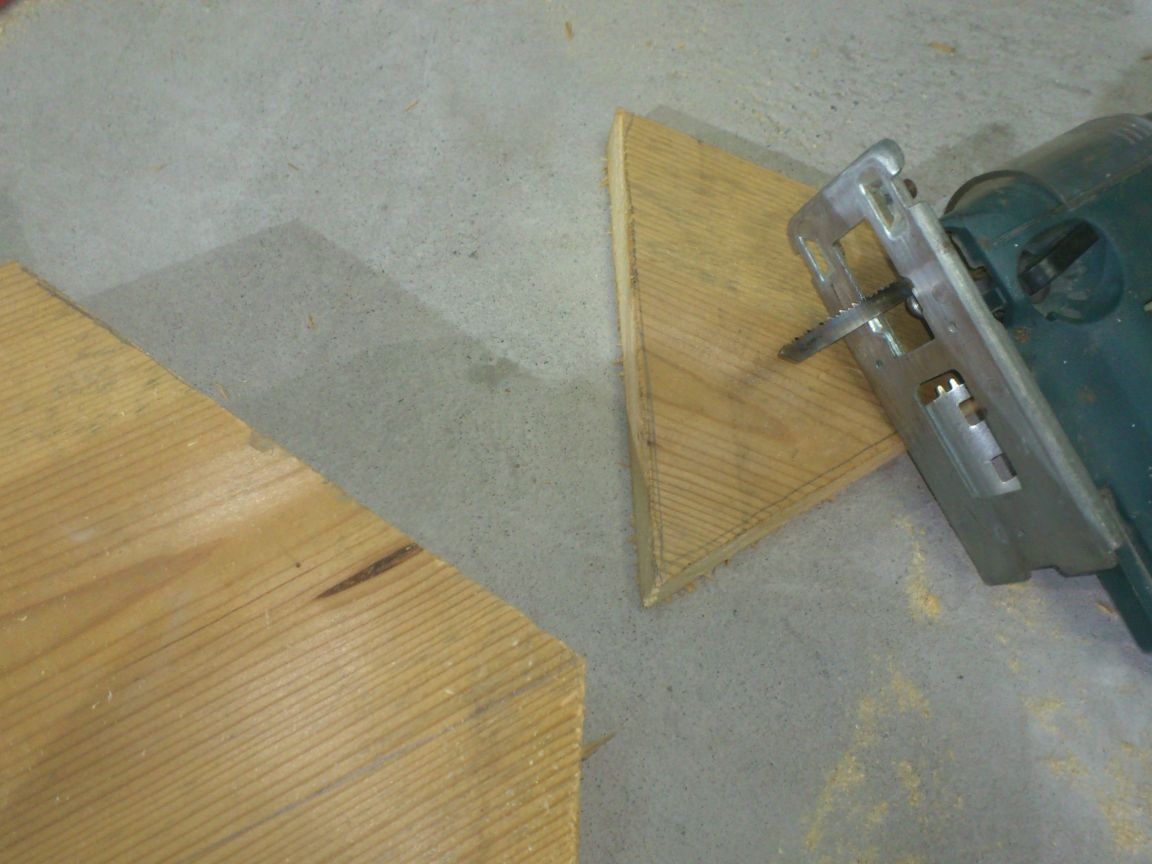
made two triangles - one smaller (will go inside), the other more:
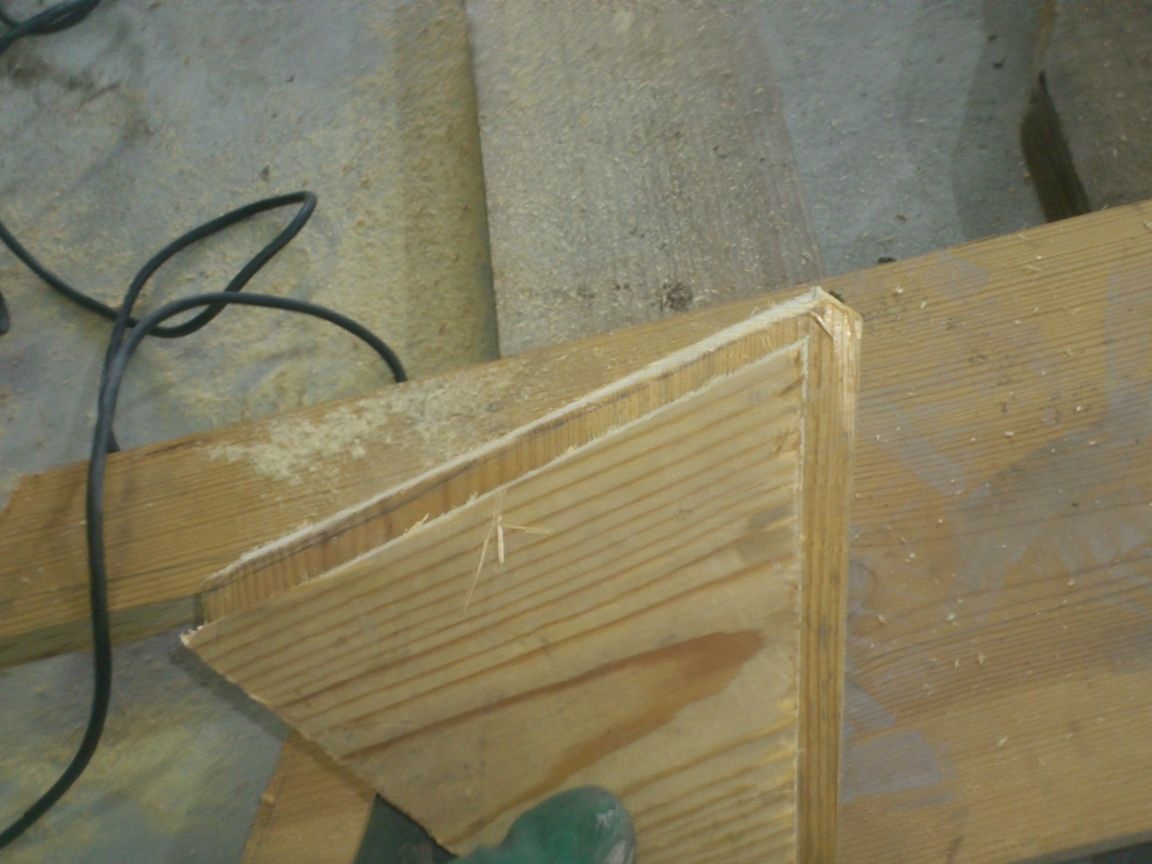
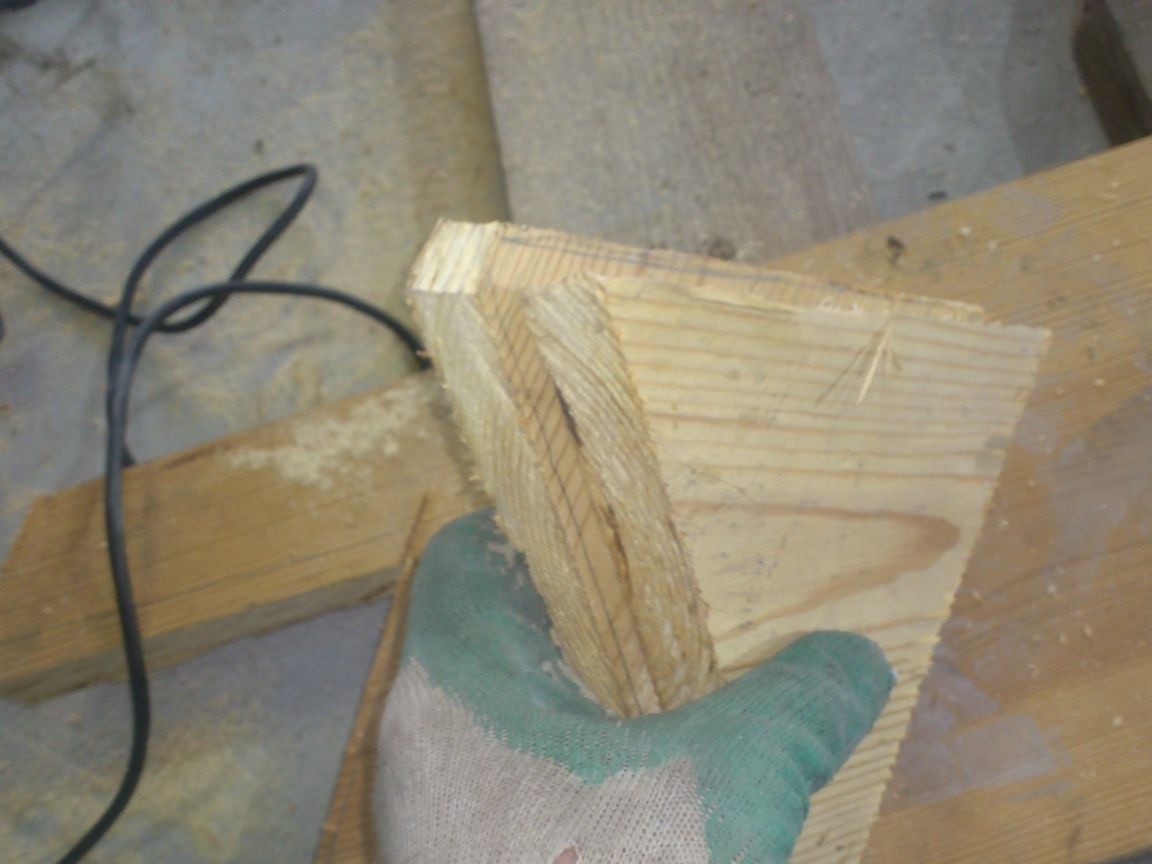
Processed all the details with an emery-petal wheel:
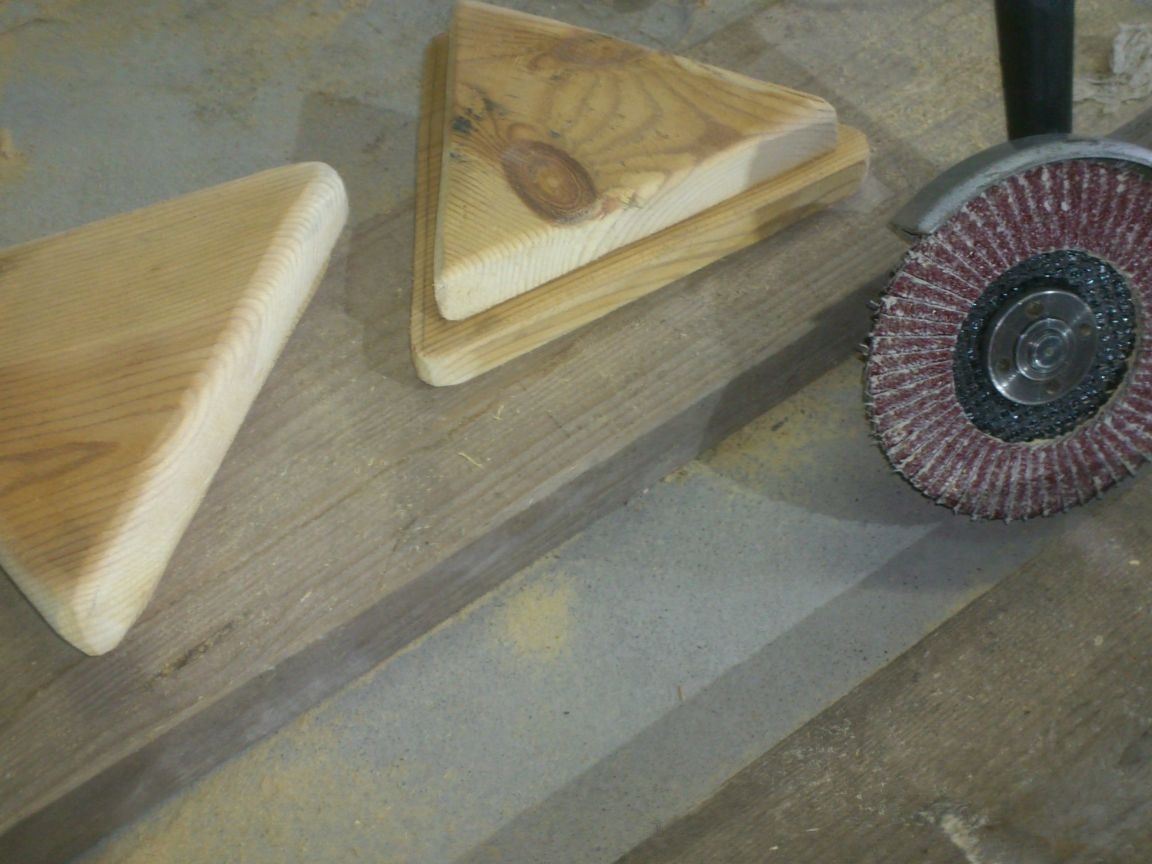
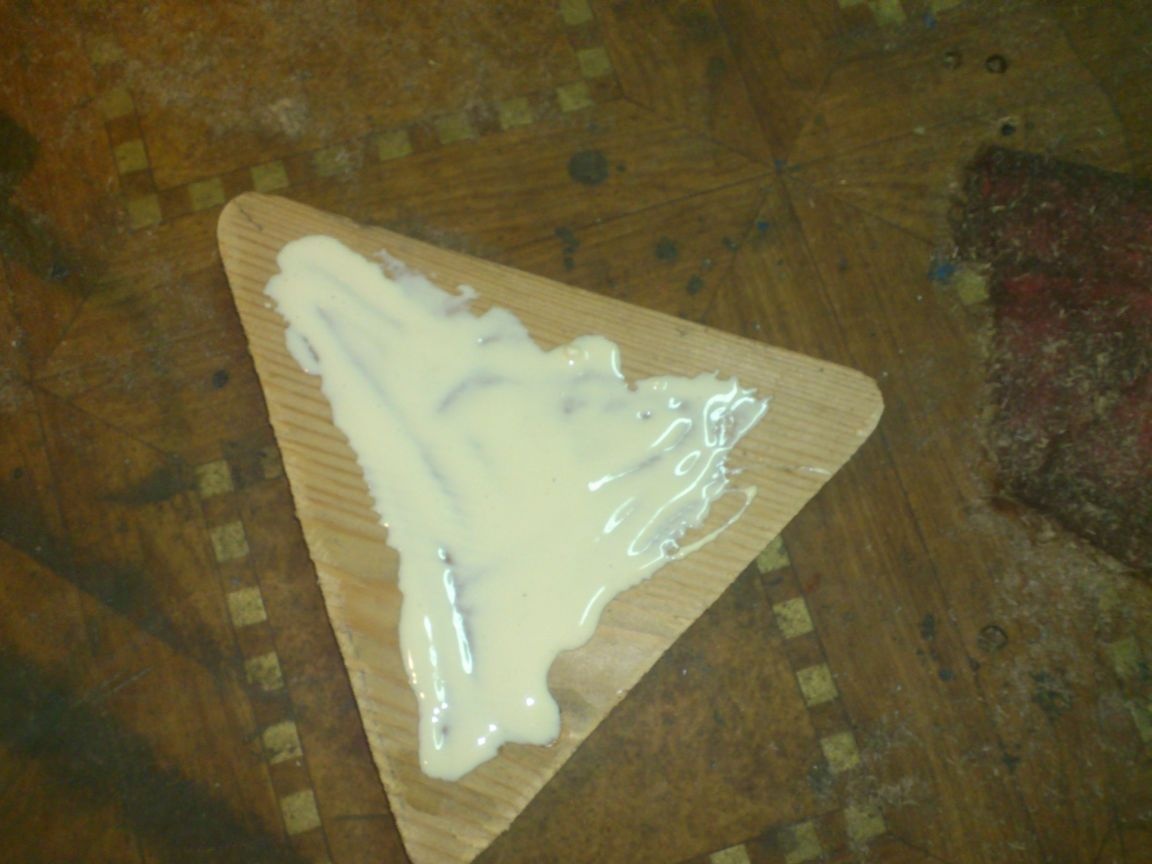
Connected in pairs. I smeared with PVAD and pulled it with screws:
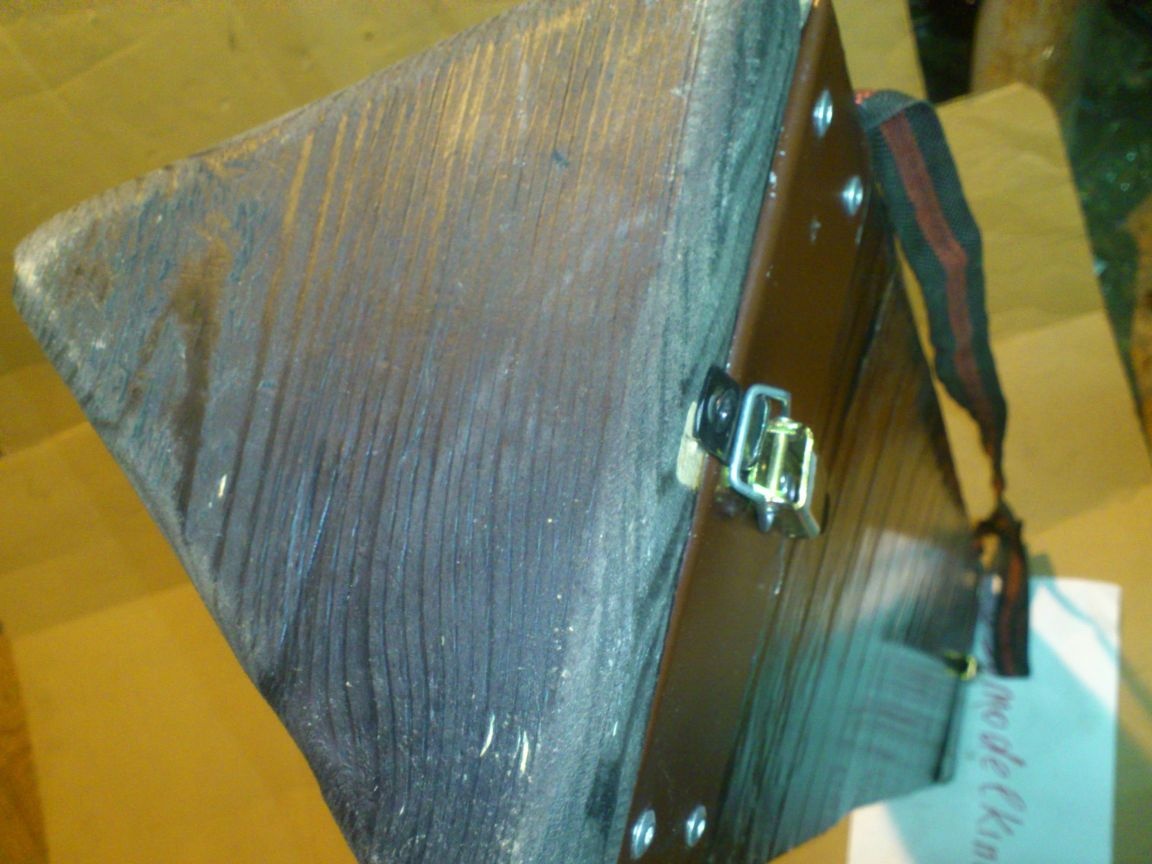
The lids are ready. Now I took up the "tube" itself. I decided to strengthen the edges with metal plates. I remained at the construction site with scraps of the frontal board of sheet metal with a polymer coating. I decided to use it.
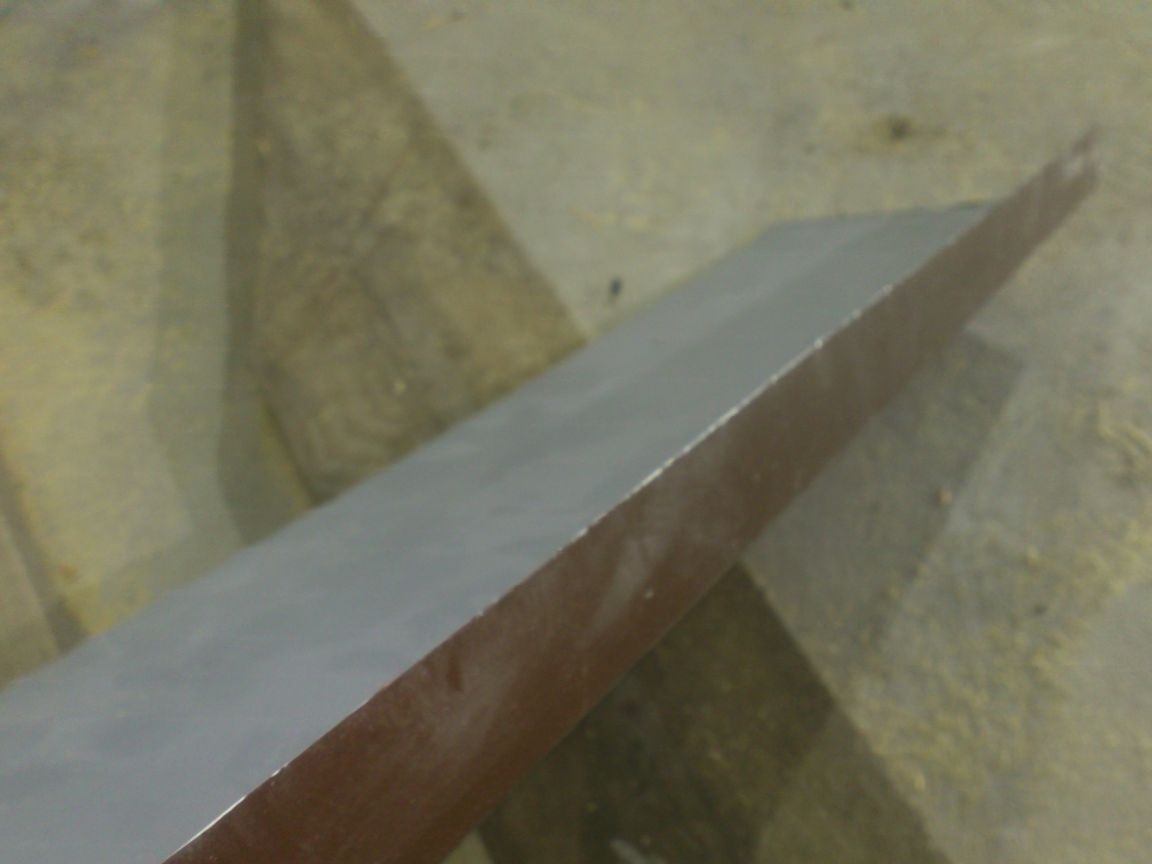
Marked and cut along:
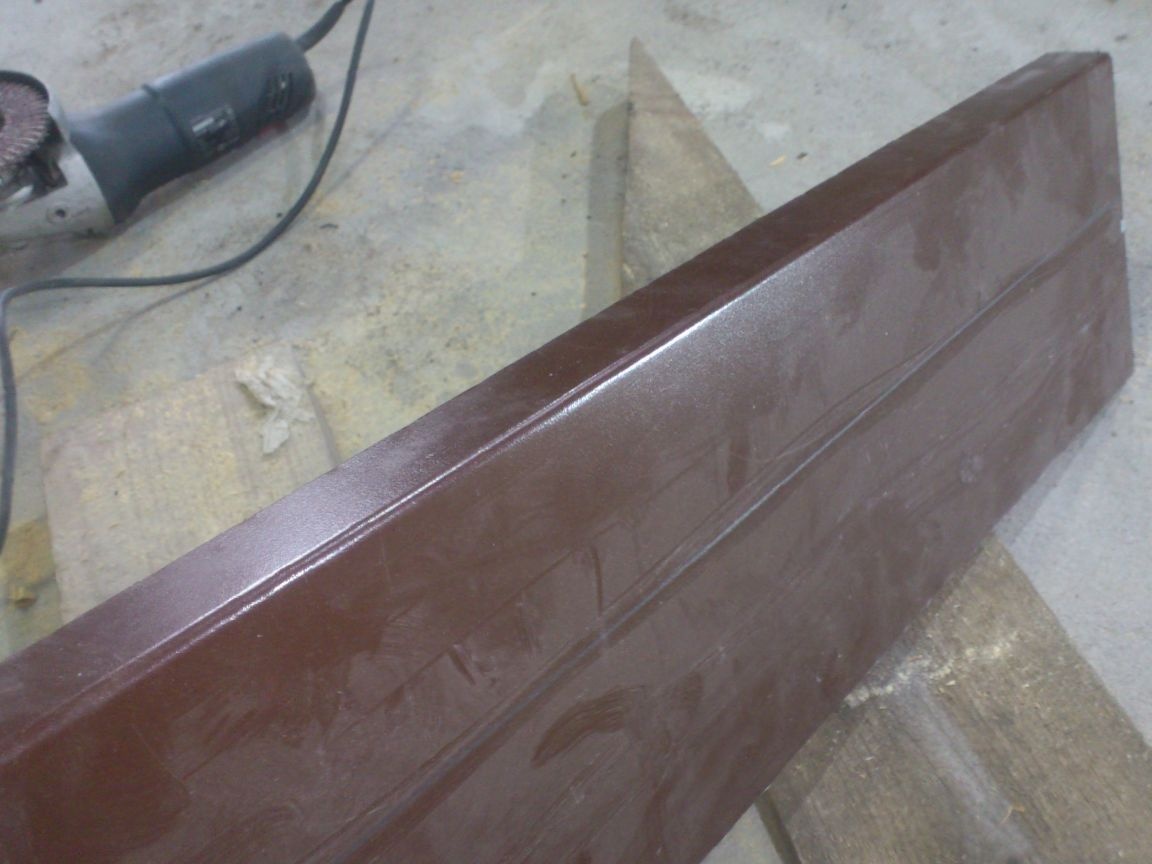
And he “framed” the edges using exhaust rivets.

There was no bend on the second part ... I had to make it a mallet, using a bar as a template:
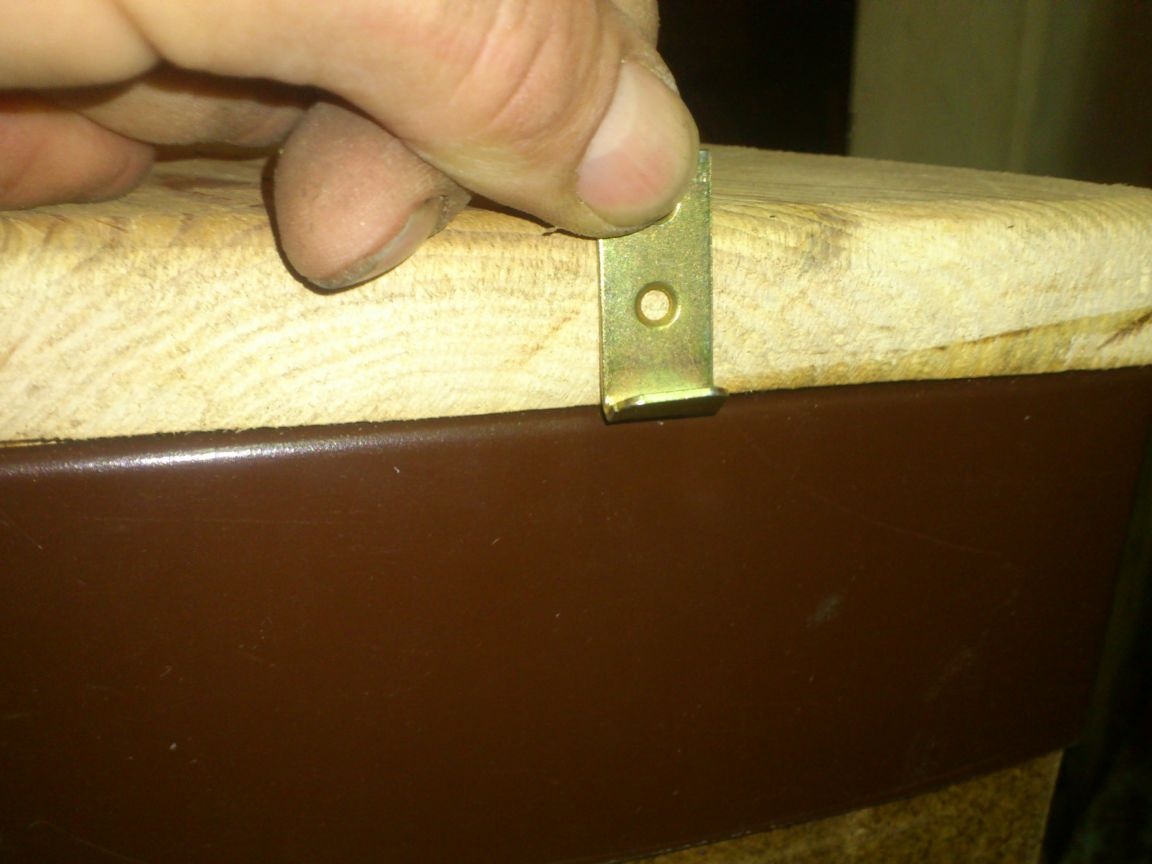
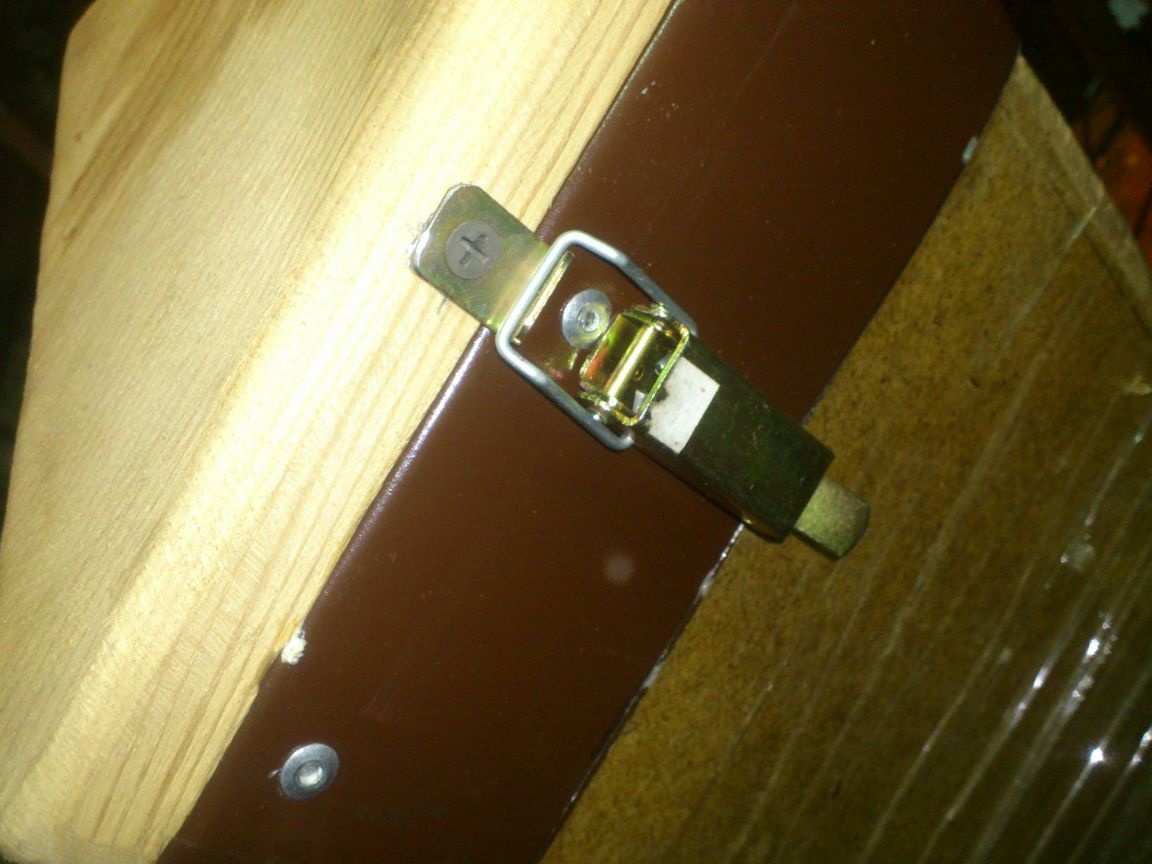
I decided to fasten the covers to the “tube”, “without further ado,” with locks that I used in many of my home-made products:

The hooks were longer than necessary ... I had to cut:
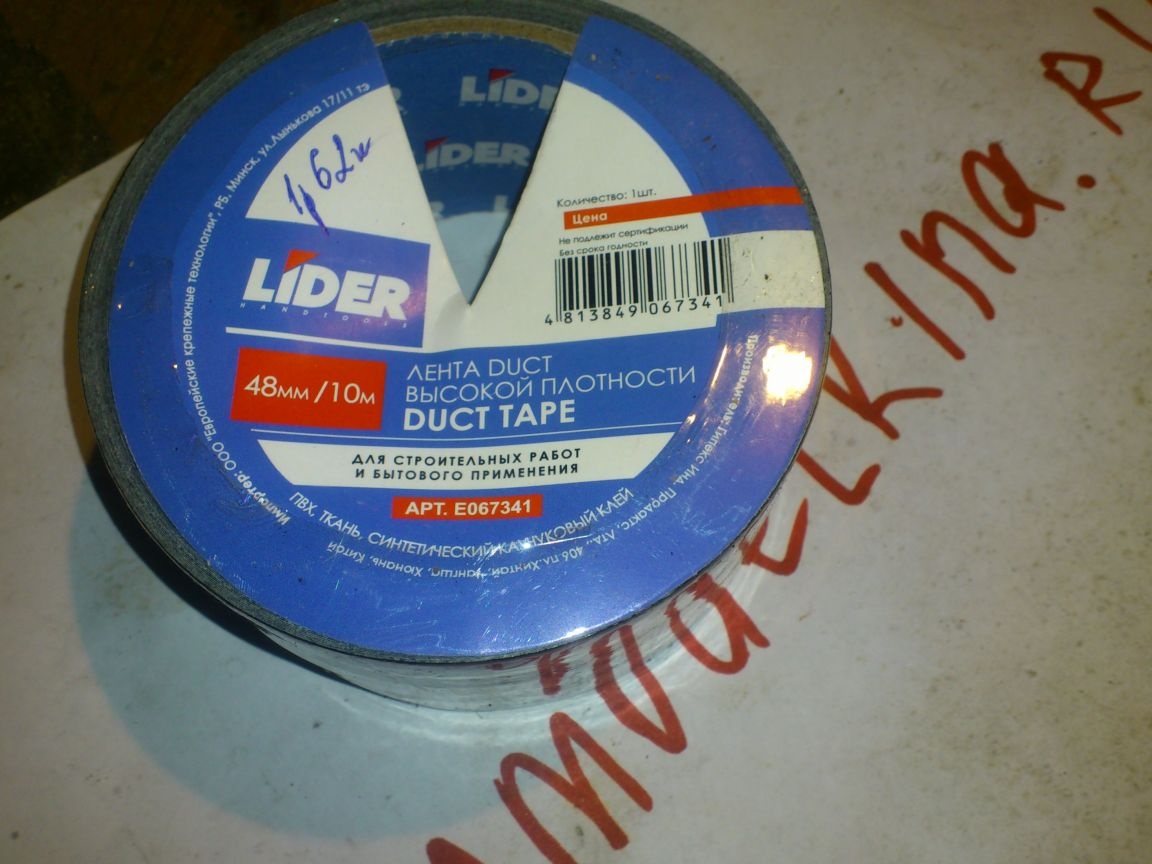
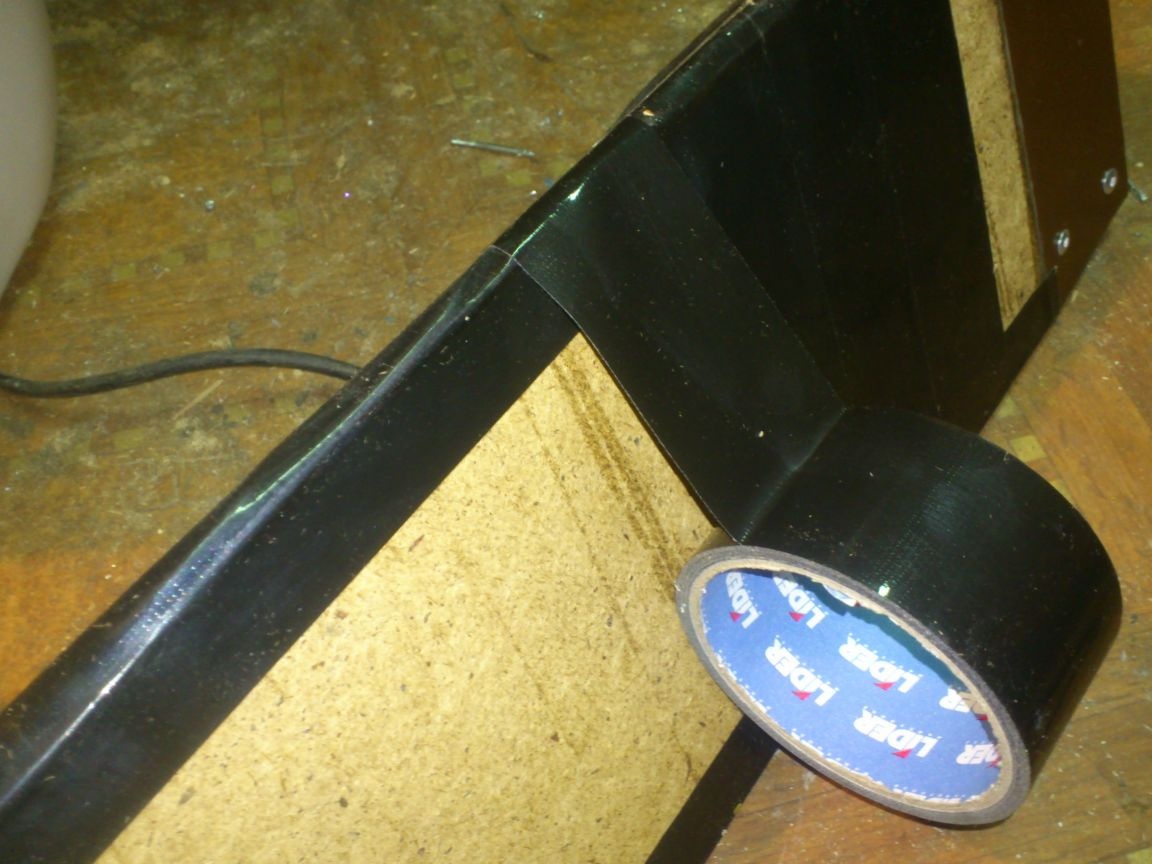
Well ... The case is almost ready. It remains to think how to decorate it. Adhesive tape is, of course, not bad .... but still ....

I did not become particularly philosophical. I simply cut and removed the adhesive tape (fortunately, the structure is already being held in place by a metal frame), and again wrapped the “tube” with adhesive tape. Only now it’s not with adhesive tape, but the so-called “universal economic tape” of black color. It will provide a strong wall fastening to each other, and a sufficient level of moisture protection:
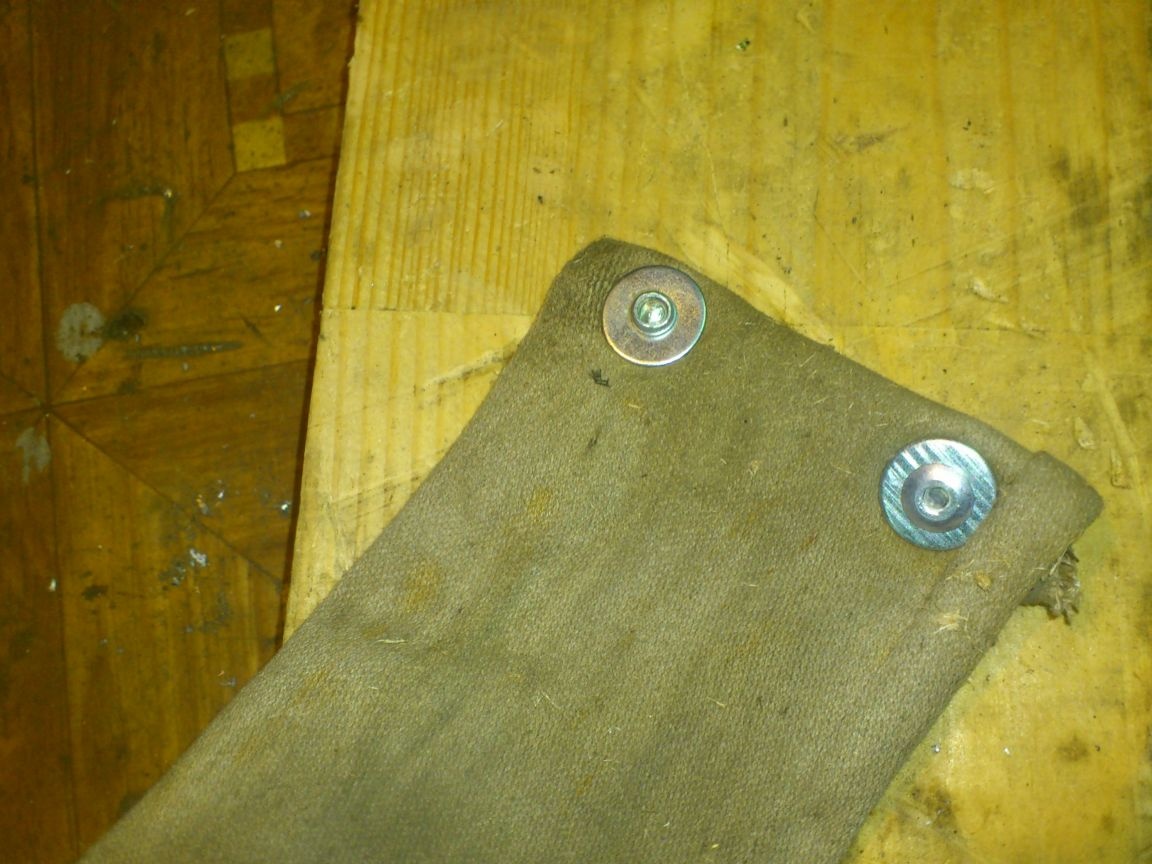
It remains to take care of the convenience of carrying. I have such a sturdy synthetic fabric belt. (It used to be a belt for securing cargo.)
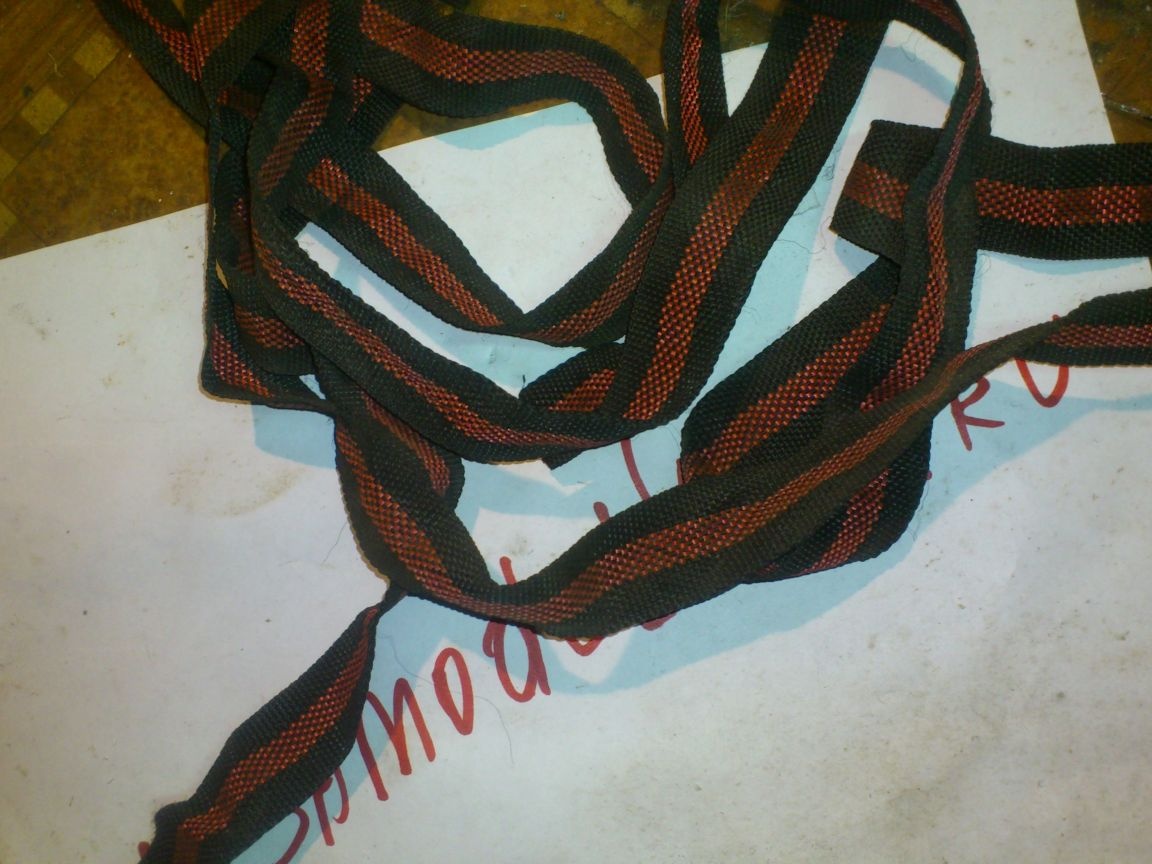
having cut off the desired size, I attached it to the case, curled the end in several layers, and riveted it with rivet through the enlarged M5 washers. At the same time, I drew attention to the fact that when carrying on the shoulder, it was the face on which there are no fasteners that fit.
All! The case is ready!
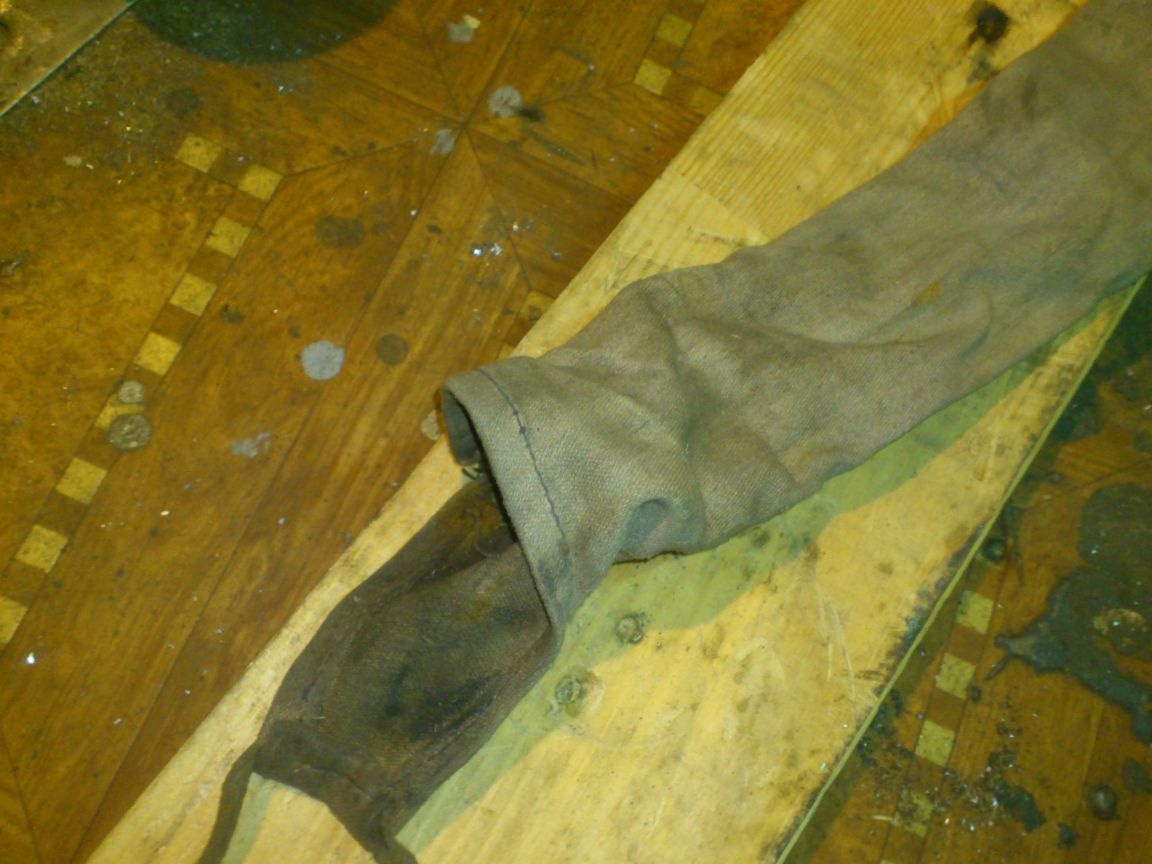
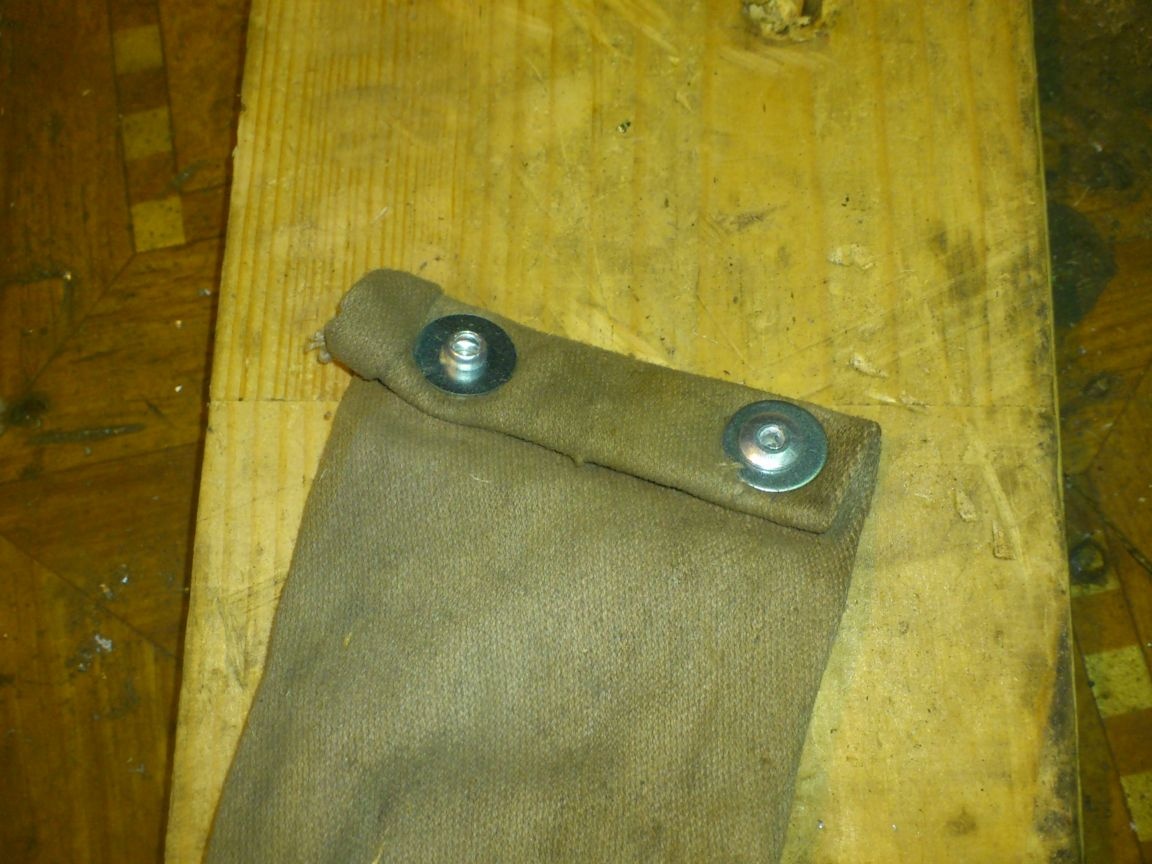
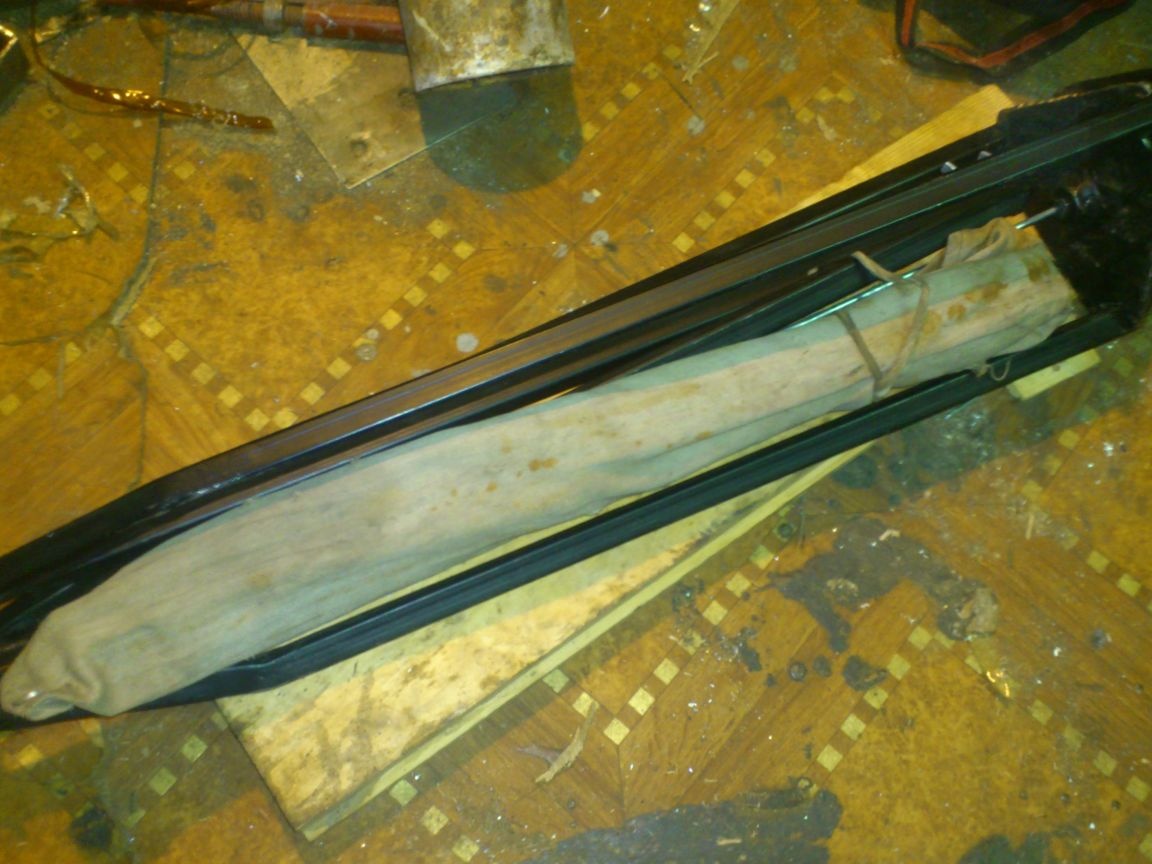
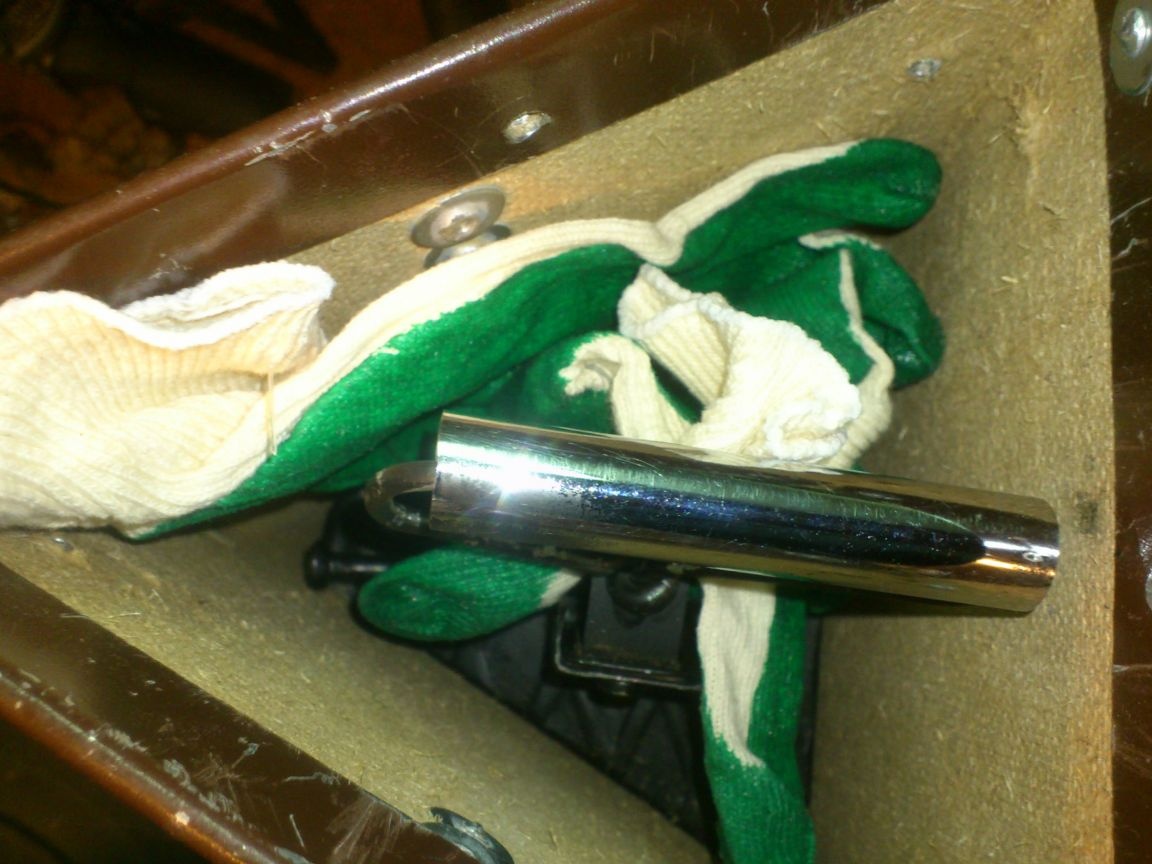
It remains to pack everything. The details of the disassembled frame can be inserted between the "legs" of the tripod, but it turned out that it would be inconvenient to put it in the case this way - everything strives to fly apart. I took a cover for a long time from an old fishing rod and decided to adapt it for storage of these particular parts. It was too long, and even with a torn bottom. Therefore, I shortened it and simply riveted the end of the pipe wrapped several times with rivets through the washers:
The frame is placed in a case and laid on a tripod:
For even greater ease of insertion, as well as to reduce such an important feature as "brand"
 I cut off a rubber ring from an old car camera
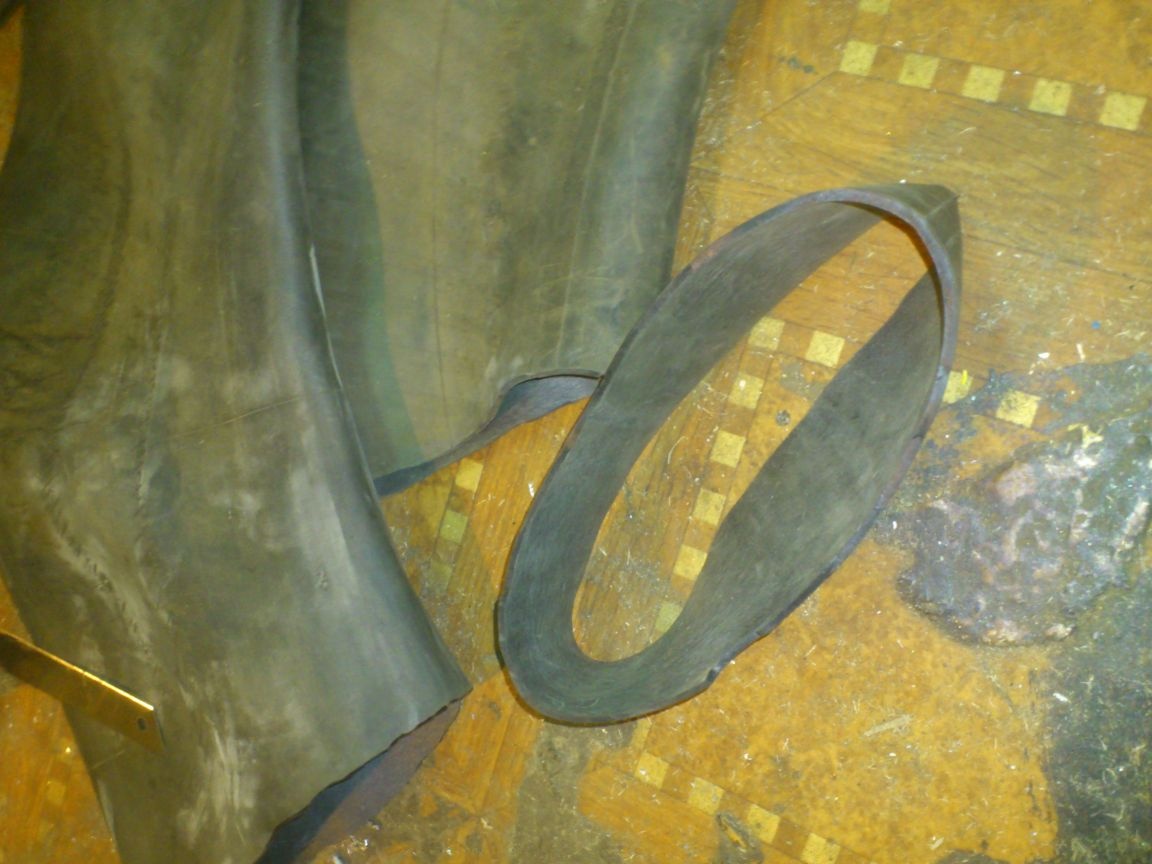
I pulled them a tripod with a frame inside it and put it in a container:
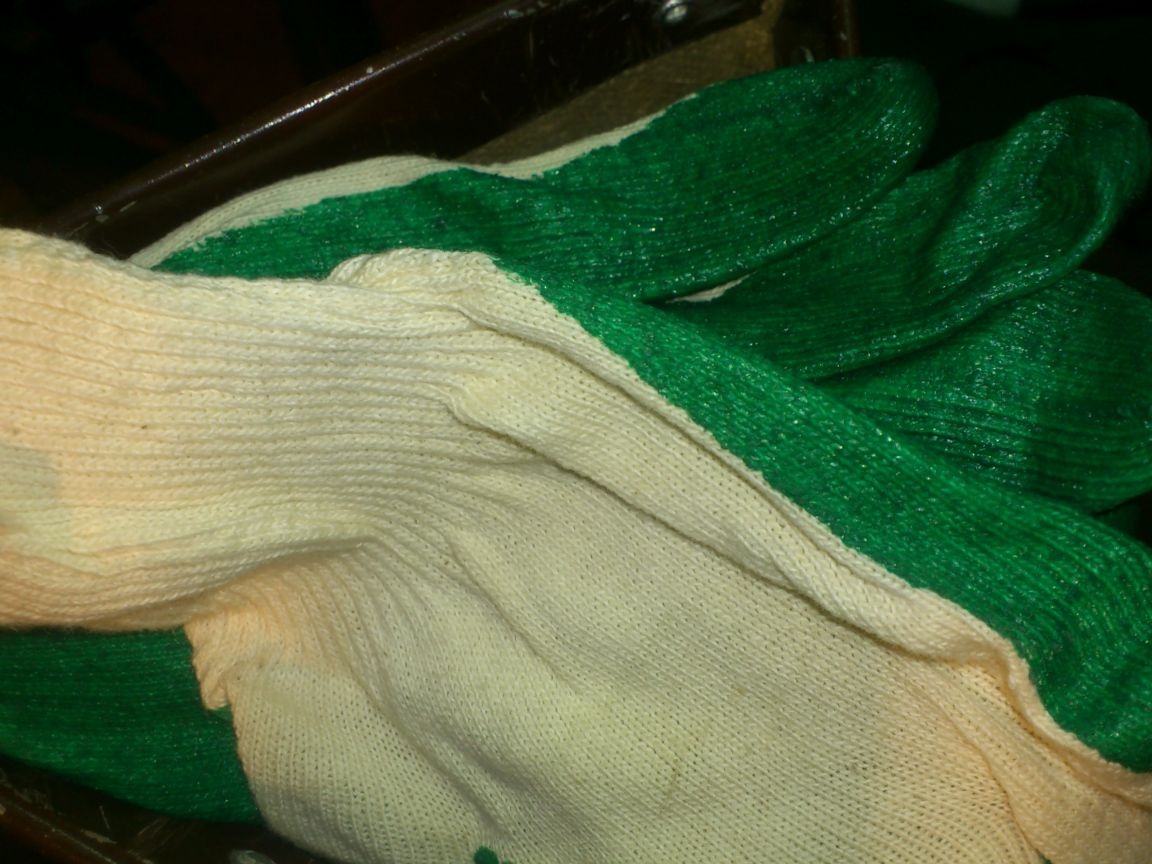
It remains to equip this “set of vacationers” with a pair of gloves:
All! The tripod goes to the shelf, where it will wait for the next exit "to the nature"