

The final part of the descriptions of my evolutions with antenna management. About previous experiments with log-periodic and Harchenko antenna already wrote. The line for the disk antenna, it is also an irradiator for the reflector from the antenna for satellite television. This is a self-made copy of MiG_offset_3G, the irradiator is manufactured industrially, it can be found on sale.
For mass production, special equipment is likely to be used, and the finished irradiators (I hope) are tuned to achieve the calculated parameters, however, the antenna design is not complicated, the likely equipment only increases the ease of assembly, and the lack of adjustment is regrettable, but with some accuracy and thoroughness of manufacturing elements and the assembly of the entire antenna allows it to work very well.
Turn to the drawing. It was found on specialized sites dedicated to antenna topics for data transfer.
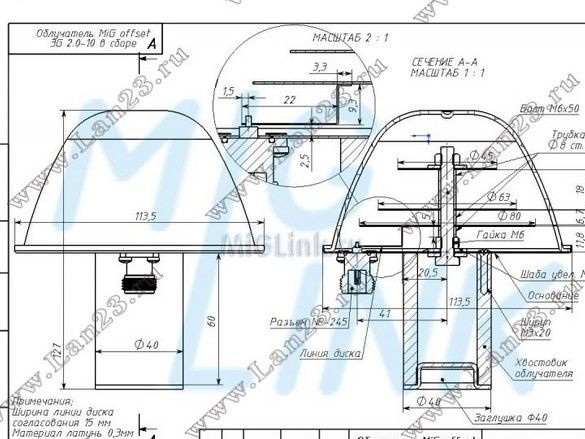
We see that the metal elements of the antenna are bodies of revolution, which simplifies processing. A standard bolt with a set of washers and nuts was used as a traverse.
A difficult part for homemade production is only a protective casing, however, you can try to pick up a plastic container similar in shape to the required size or mold it using papier-mache using shreds of fiberglass on epoxy resin. Carve a blank base from a tree. The latter method, of course, is preferable, because the packaging is hardly designed for durability at low temperatures and UV radiation. You can just take care to prevent corrosion by applying stainless materials or paintwork (can shift the resonant frequency of the antenna) coatings.
For work, you need a minimal set of bench tools, certainly a caliper. It is very good to have a drilling or lathe, but you can do well with a well-fixed electric drill and a screwdriver at last. Need an angle grinder - "grinder", it is more convenient small (circle diameter 125, 150 mm). Well, a bit of patience, of course, nowhere without him.
When selecting materials, we remember electrochemical corrosion (tubes of small diameter often come from copper, they will strongly oxidize in contact with the zinc coating of the discs and fasteners).Having picked up the workpiece, we cut out the disks with some allowance, drill a hole in the center with a diameter of 6 mm, carefully clamp the workpiece with an M6 bolt with washers and put the entire structure in a drilling (turning) chuck.
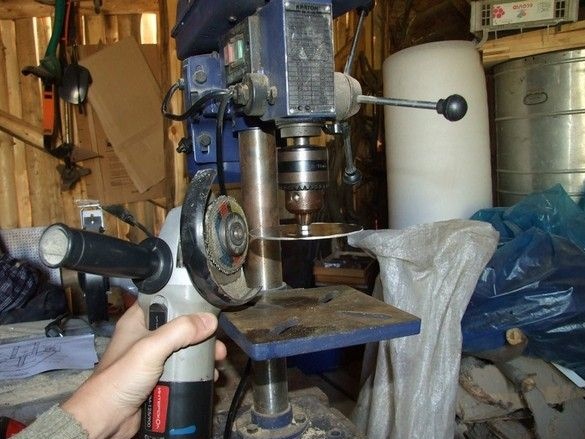
I turned it like this. In the beginning, not including tools, it is worth choosing a comfortable position of the hands (with elbow support). Be sure to take care of safety glasses or a transparent plastic shield, which is better. The direction of rotation of the drill clockwise, if viewed from above (in case it switches). If 0.5 mm galvanized steel is chosen as the material, as in the drawing, it is better to grind at least two workpieces at the same time, one vibrates a lot. Get an extra set of disks. You can immediately make a second antenna and give it to anyone :) A rotary disc of the “grinder” needs to periodically touch the edge of the rotating workpiece. In the beginning, it is easy and cautious, as unevennesses, bolder and a little stronger, are ground. Touching should be somewhat different, otherwise, sometimes it turns out a kind of oval. This is noticeable only with a caliper, but the difference with horizontal and vertical measurements can reach a millimeter - one and a half, especially on mild roofing steel. It is more convenient to apply an abrasive disk with a thickness of 2 ... 2.5mm. We measure more often, on a stopped part. We leave a couple of extra “dozens” and finalize with a small file, do not forget to slightly blunt the sharp edges. We remember the skin effect on the RF and try not to distort the surface of the disc. It doesn’t hurt to walk a little along the end face with a medium and small skin, so that it is completely smooth.
Spacing elements are best made on a lathe for metal, otherwise it will be difficult to achieve parallel discs to each other.
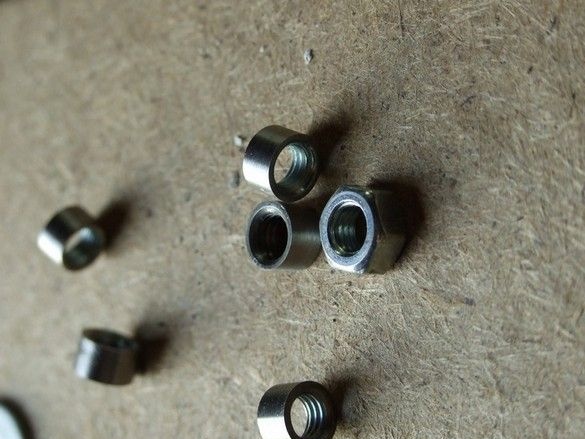
In the absence of access to the lathe, as an option - dial spacers from standard fasteners, nuts and M6 washers. This traverse is significantly thicker than the original. It was decided, if possible, not to deviate too much from the drawing. The nuts and washers were turned in the same way - having typed as much as needed on a piece of M6 studs, plus a few spare ones. After the "grinder" - a magic file and skin. It turned out pretty well and very close to the dimensions of the drawing.
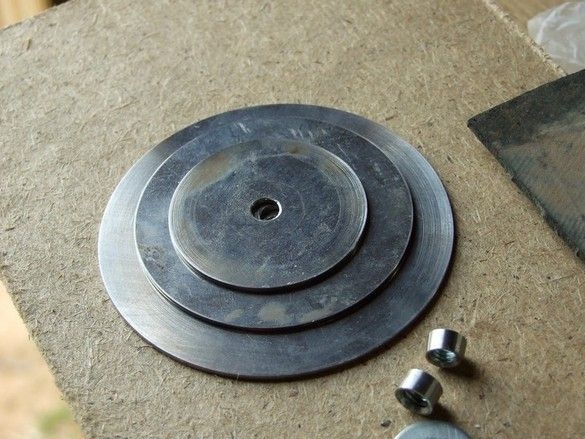
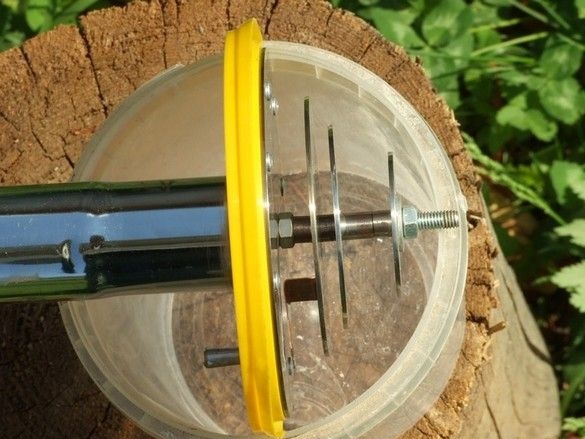
In the photo, ready-made home-made antenna elements. The discs are machined from stainless steel.
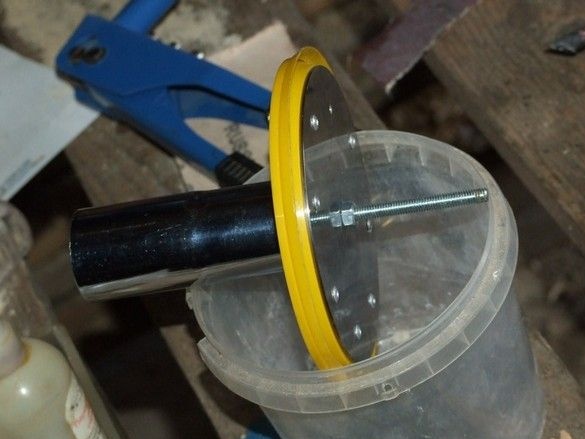
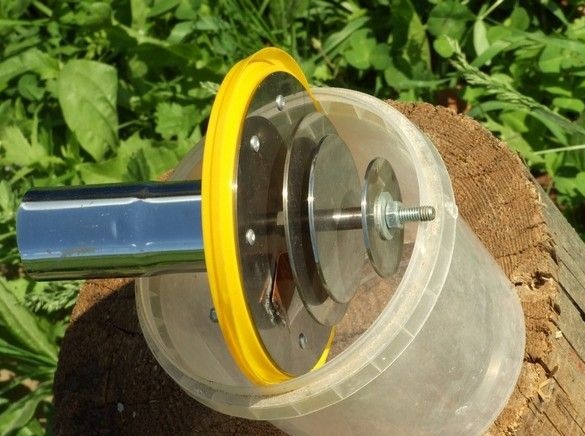
In the process of assembly. The regular “irradiator shank” from the plastic pipe seemed insufficiently reliable, here it is made of metal, a piece of suitable diameter, sawn off from the pipe of an old vacuum cleaner. As a plastic casing, a bucket of mayonnaise was used. The cover was sandwiched between the “base” of the antenna and the additional disk, to which the “feed shank” is already attached. Initially, it was decided to use the irradiator only as an independent antenna; work with a reflector was not supposed. As always - you want to make God laugh ... Then, when everything was hot, it turned out that the sides of the plastic cover did not allow the irradiator to be installed exactly in the focus of the reflector from the television satellite dish, I had to abandon the casing-bucket. The practice of about three years of operation, showed the feasibility of the solution, with the selected materials.
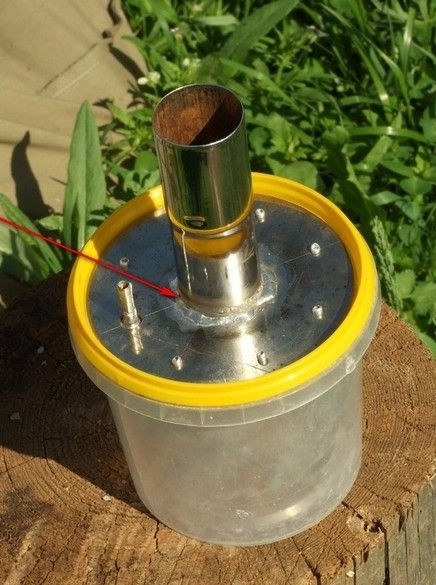
The photo shows the method of fastening the lid of the bucket, soldering the “shank” (by the way, its length is chosen so that the modem can fit inside, and the arrow shows a window for leaking possible condensation or precipitation) and a sleeve rolled up from brass foil (its inner diameter - the diameter of the central core of the coaxial cable in standard insulation, plus a screen cut). It was necessary to refuse a detachable connection - there was no good enough coaxial, tight connector.
Cutting the coaxial cable looked something like this.
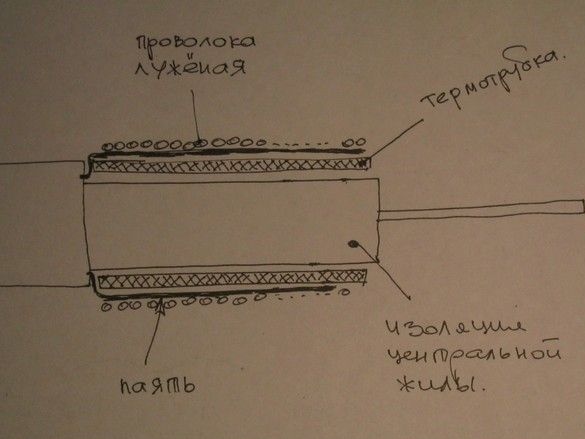
At the required length, the outer insulation of the cable is removed. It is better to do this - in the right place, the cable should be bent strongly and slightly cut with a sharp blade. The insulation at the bend is stretched and the notch itself “spreads”, repeat the action from the opposite side. Thus, it is possible to avoid cutting the veins of the screen.
Then the screen braid is braided, a thermotube is seated on the insulation of the central core (if the thickness allows, two is better), the screen is distributed over the thermotube, fixed with a bandage made of a thin tinned wire. It gets drunk. The excess is cut off. Without thermotubes, there is a great risk of melting the insulation and closing the central core to the screen. The thickness of the bandage, you can adjust the diameter of the cutting so that it fits tightly into the brass sleeve of the antenna.
All. It is inserted, the screen is sealed. It is checked by a short-circuit tester (the central core is not sealed, the brass matching petal is “disc line” in the drawing, it is slightly bent up so that there is no contact). If everything is in order, it is bent into place, in size, matching, and the central core is soldered. At the cutting site, several layers of the thermotube are seated more authentic.
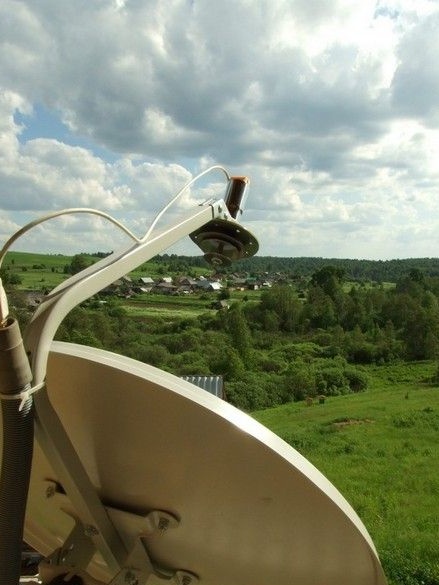
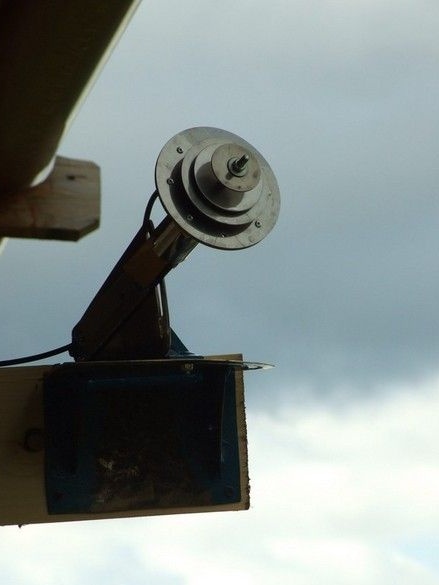
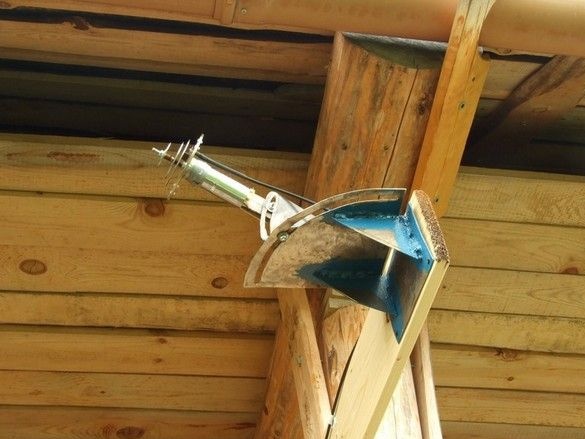
Reflector experiments. The modem in the shank of the irradiator, its power, is nearby, on the roof in a box. Not brilliant results, perhaps due to the very large remoteness of the cell tower (3G signal is half the scale, but the connection is not even established). Pay attention to the irregular position of the irradiator in the antenna - from above. In contrast to the reception of a satellite television signal, our antenna should not be oriented upward, but horizontally and the standard assembly would lead to the position of the antenna, that is, "with your nose buried in the ground." Not deadly, but not very sympathetic.

Finally, we move on to the well-proven configuration.
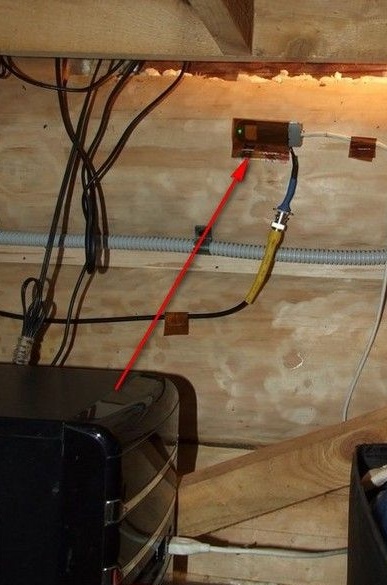
Actually, the key change was the transfer of the antenna itself as close as possible to the computer and the transfer of the modem to the house, to the system unit. To great joy, annoying periodic connection failures disappeared, normal long-term work became possible.
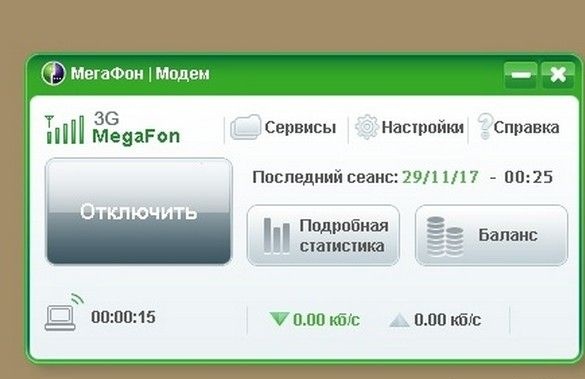
In the beginning, the irradiator was used without a reflector - like an antenna. Accurate guidance was carried out by a rotary mechanism left over from experiments with log-periodic antenna. Amplification was enough for reliable data exchange with a cell tower in a neighboring village - about 5 km in a straight line. 2 ... 3 out of five sticks.
The modem is located under the table near the system unit. I just pinned it to the wall with a construction stapler, in a pocket from a piece of a plastic bottle.
The length of the antenna cable is slightly less than 7 meters.
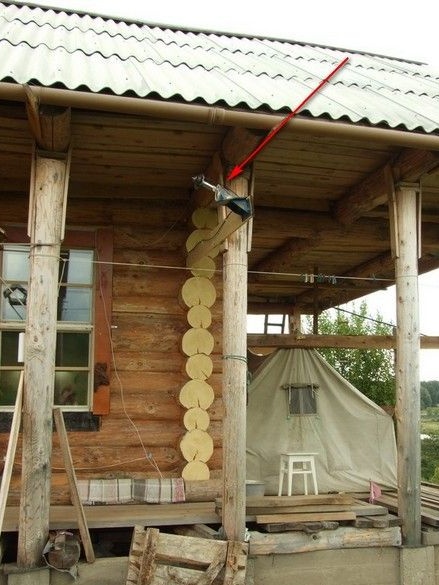
After a few months, something changed from the “other” side, the signal became very weak, at the limit of sensitivity. Often disappeared altogether. The antenna was reoriented to another tower, which is in direct line of sight, but much further - about 20 km. 3G signal was available, but very weak. I had to add the “ear” of the reflector from the satellite TV antenna.
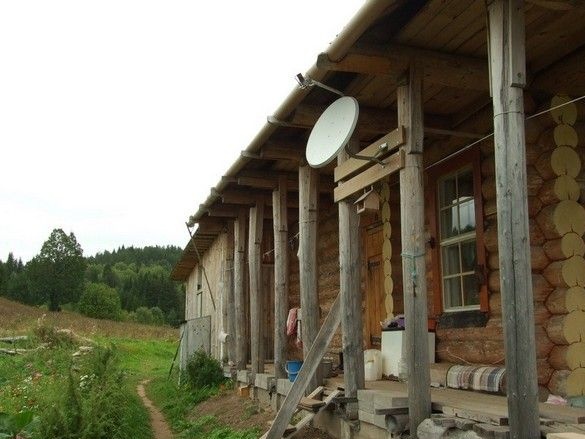
After fussing with orientation, a steady signal of a large level appeared. 4 ... 5 sticks out of five possible. In this configuration, the antenna with the modem has been working for the third year without any complaints.

Another such irradiator was made - the neighbors asked to make the Internet for their students. Made of galvanized steel. The rest is the same, the configuration is the same. Works well too.