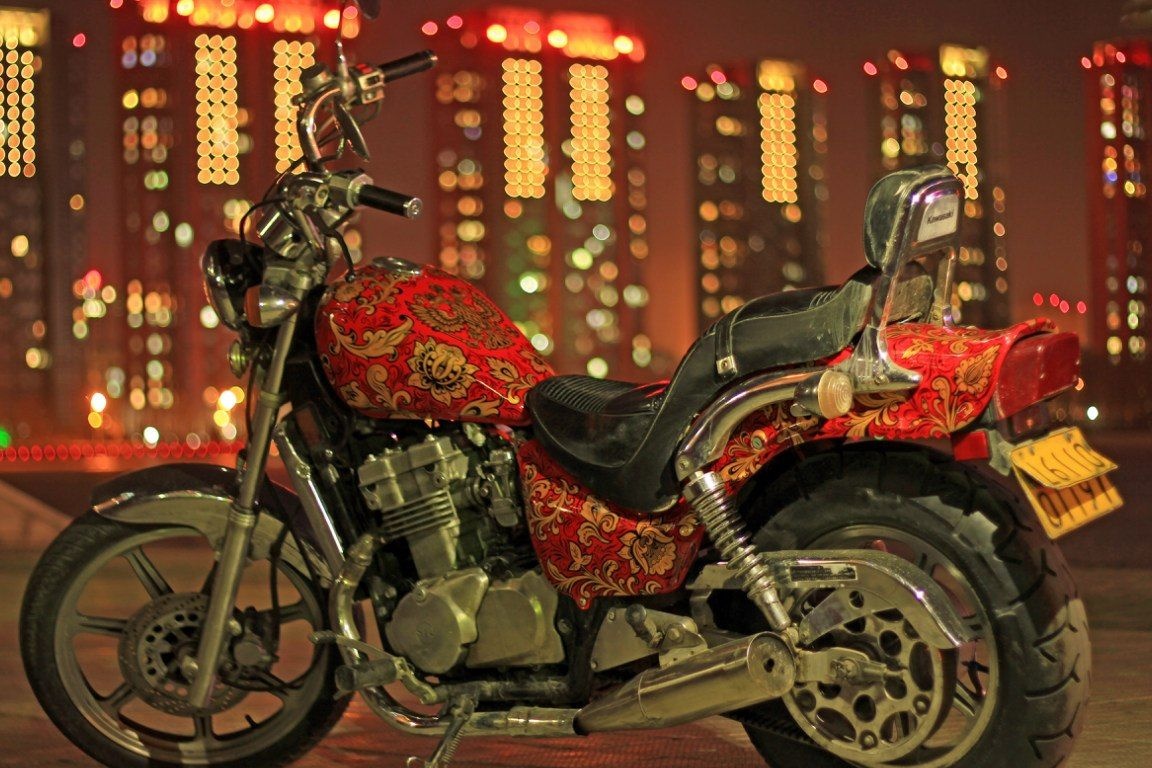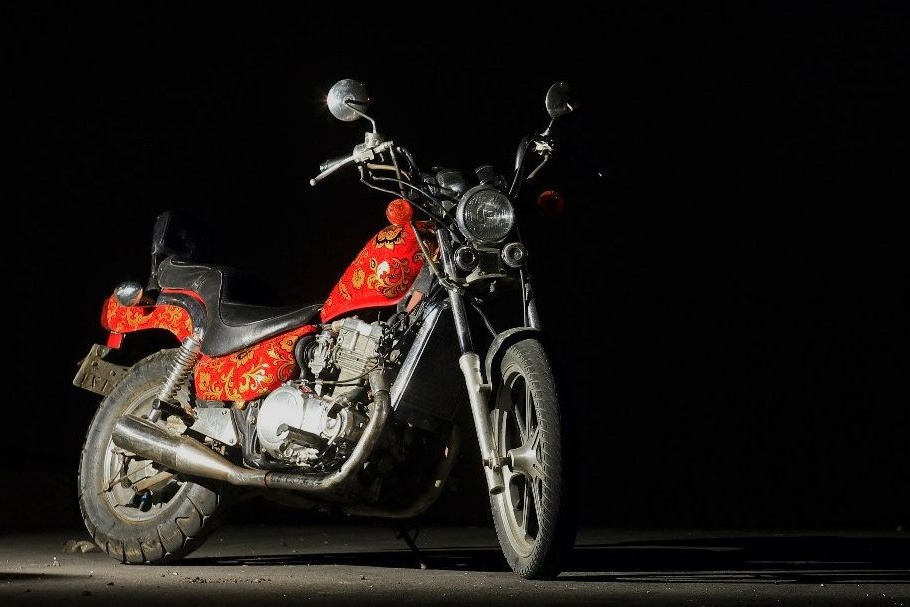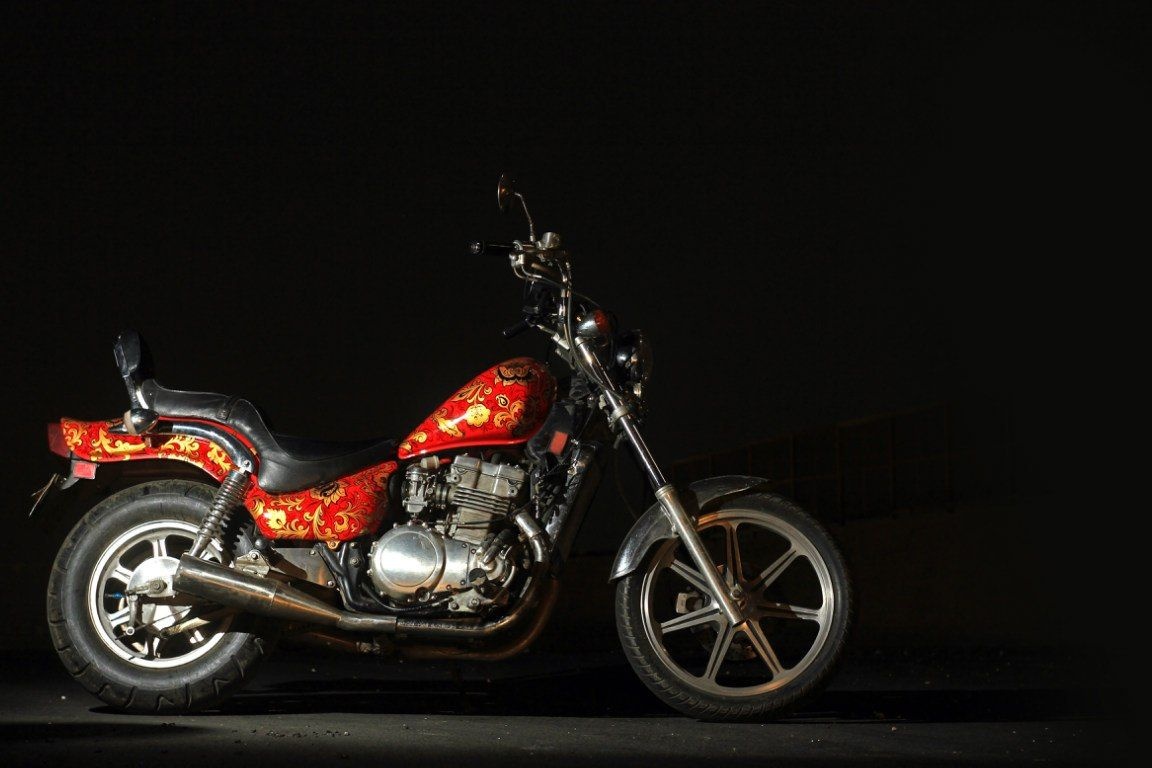
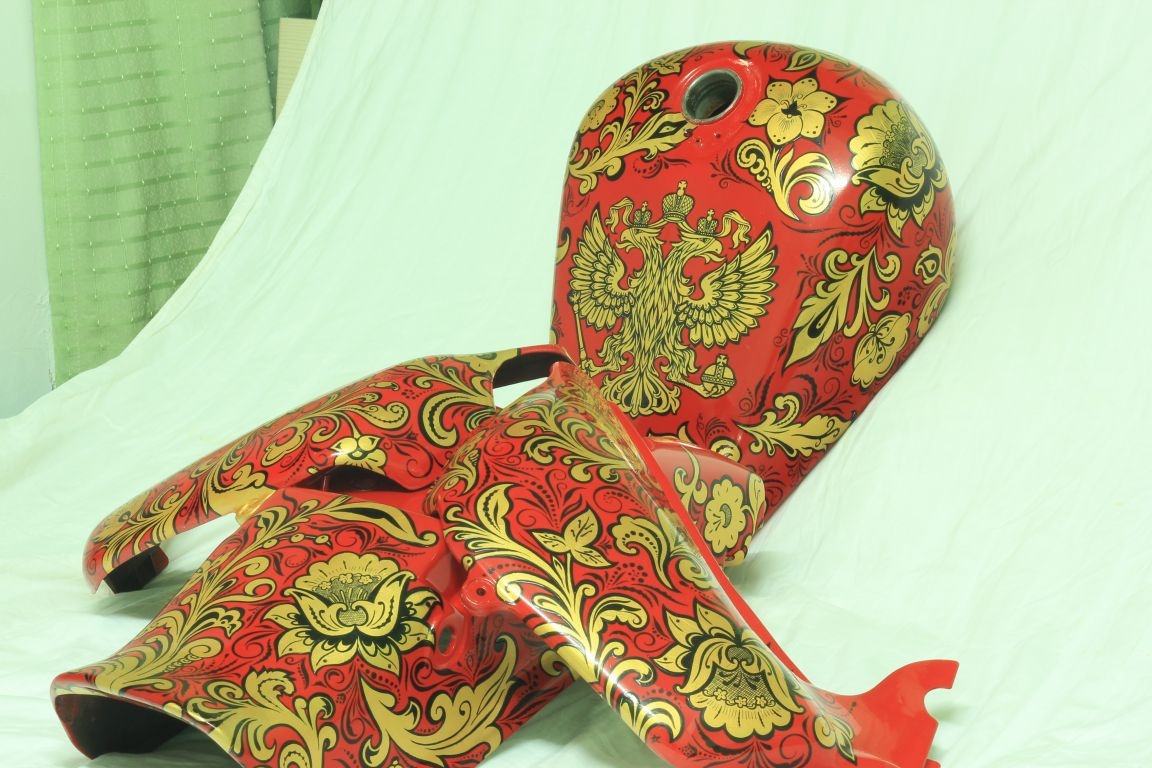
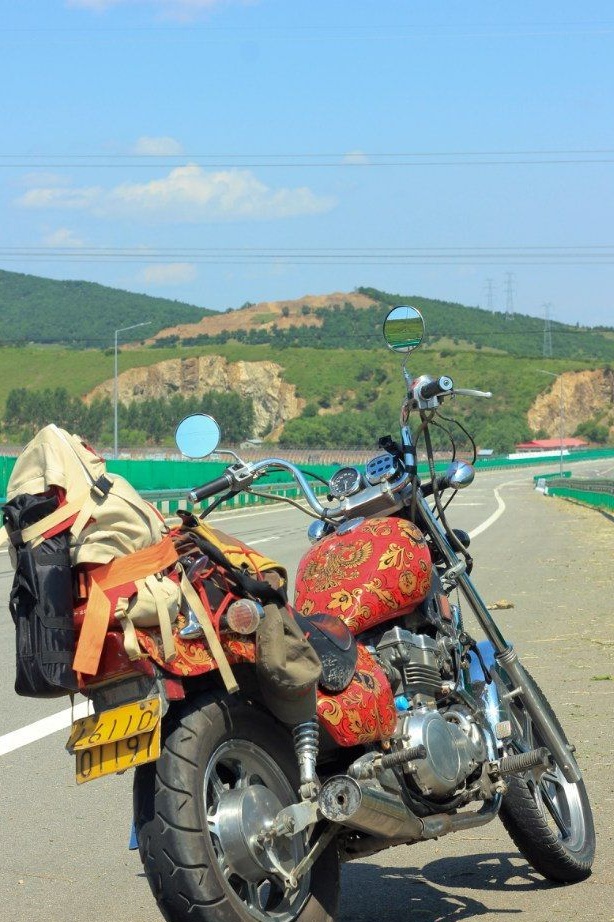
Idea to recolor motorcycle arose from the availability of free time and the desire to do something with his hands. And I wanted to somehow separate the motorcycle from the total mass of transport on the roads. As a result, I decided to make a drawing in the style of Khokhloma, one can say based on Russian folk painting. Living abroad very soon you begin to miss your homeland and all Russian, you want something of your own. Starting to do the project, I imagined it as a yellow pattern on a red background, simple, large and not very intricate, so that everything could be done in home conditions without special equipment and tools. What came of this in the end, read on ...
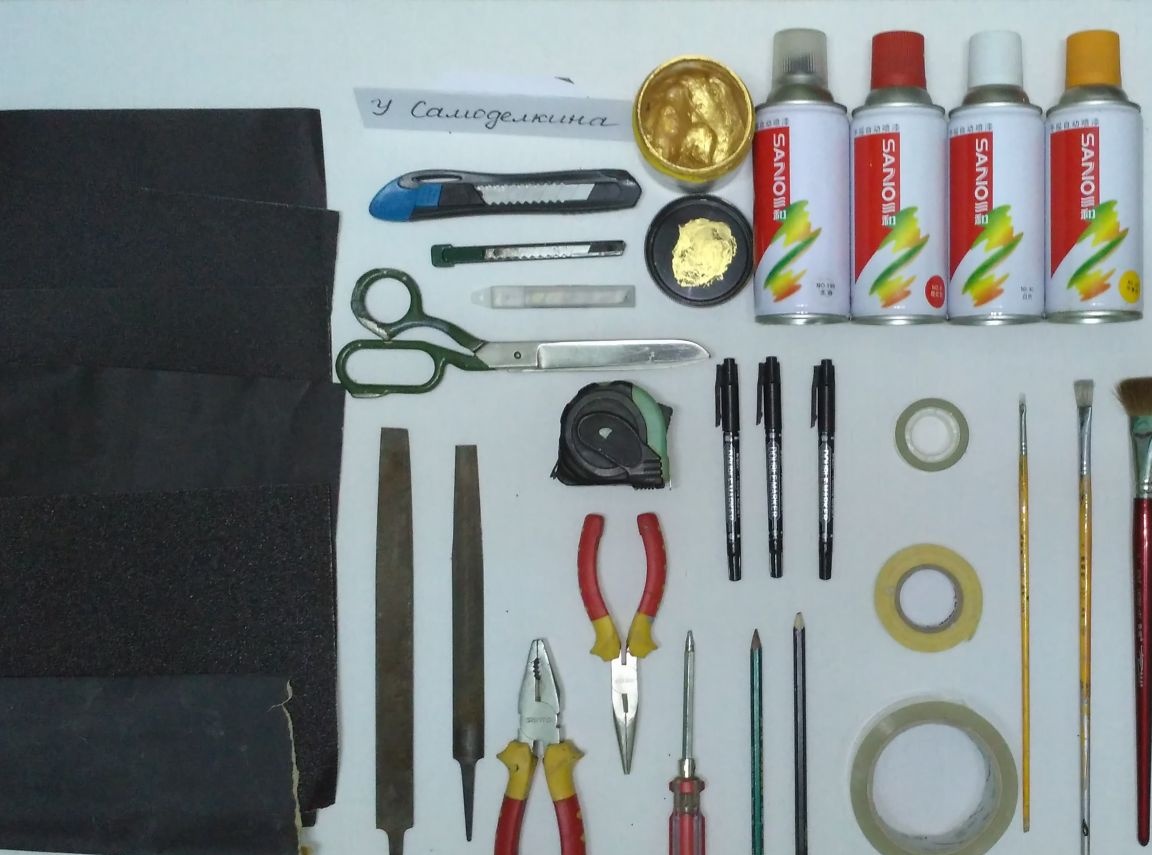
Materials and tools:
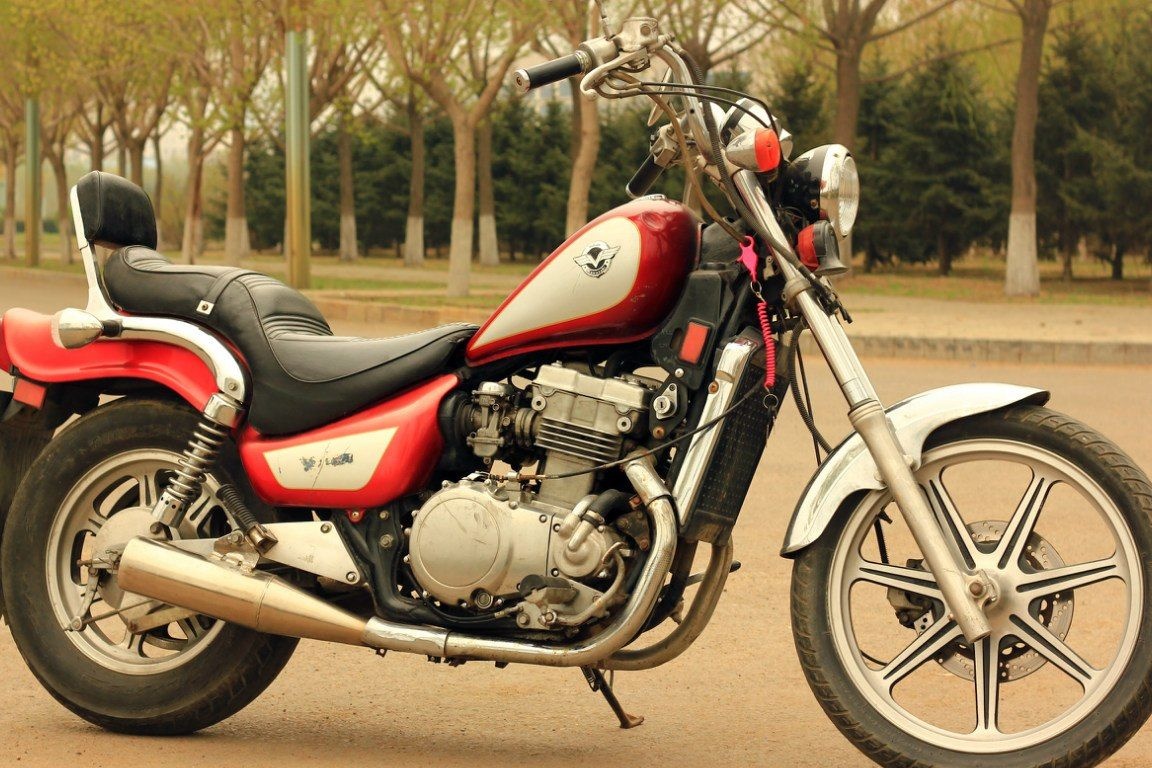
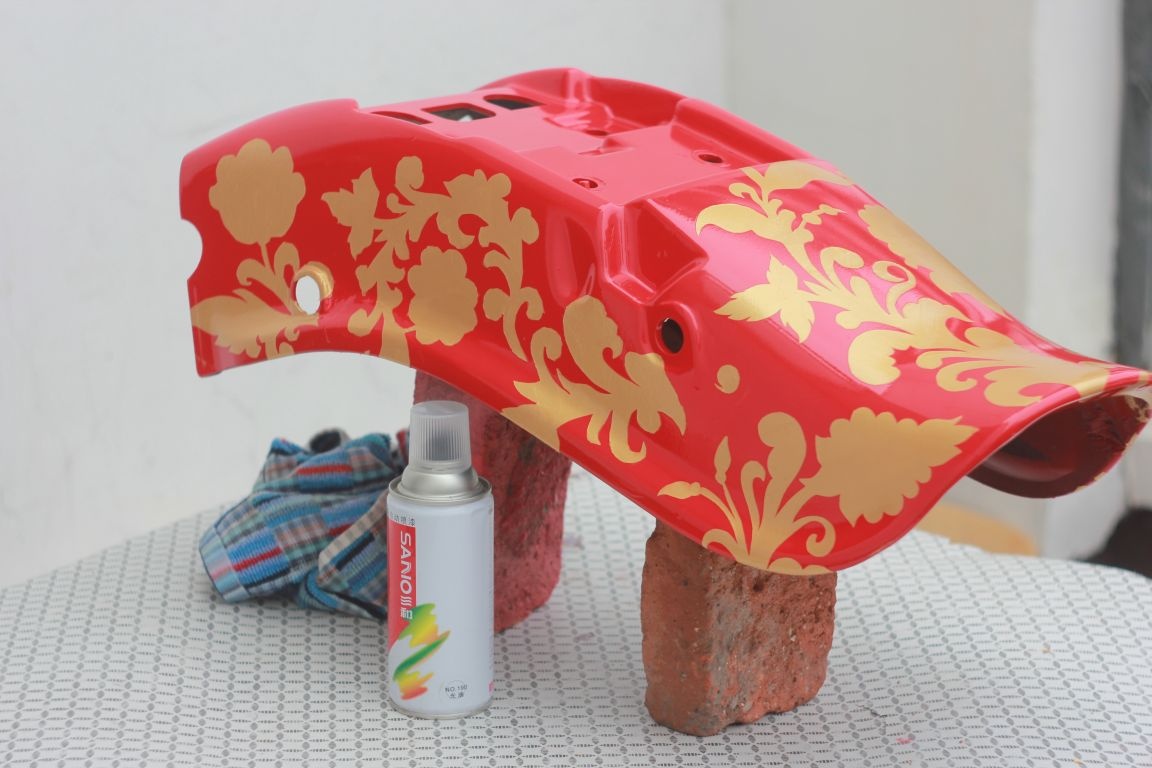
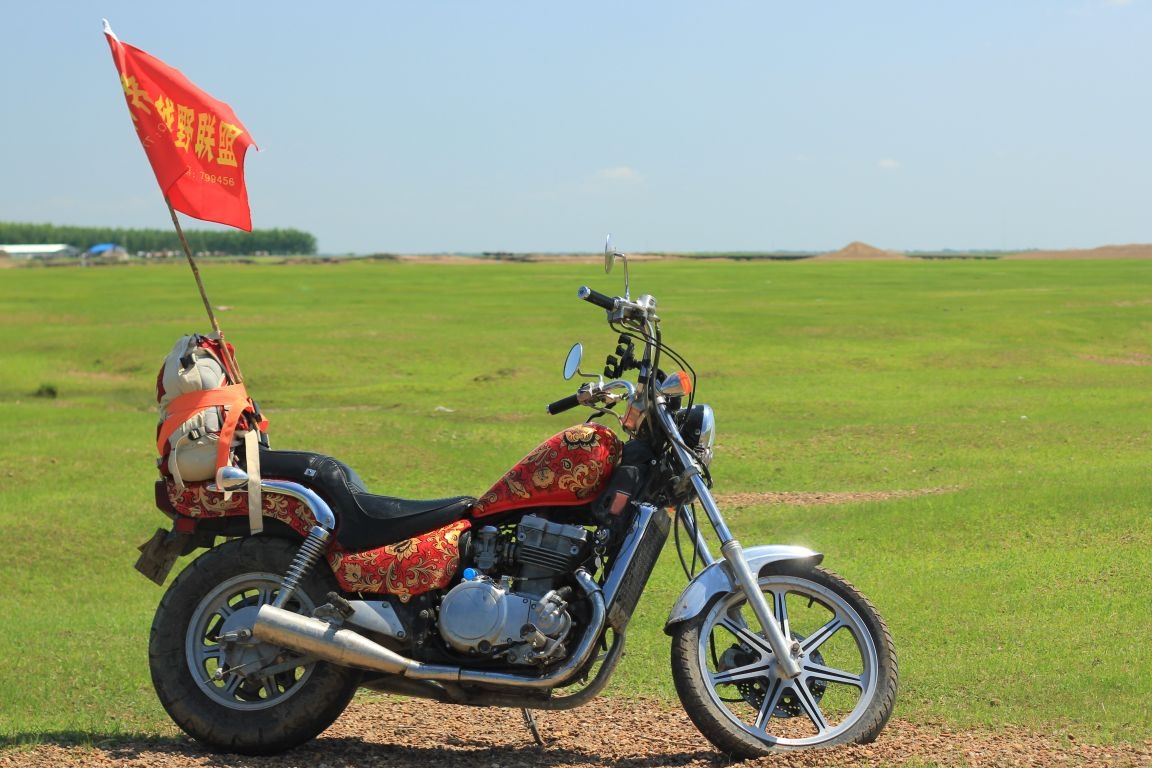
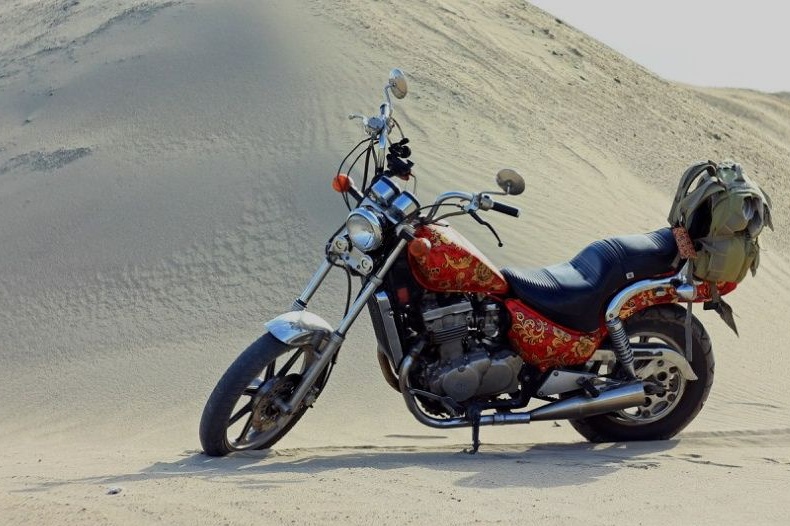
1 Kawasaky Vulkan EN400 Motorcycle
2 Oracal Adhesive Tape
3 masking tape
4 plain tape
5 Gold Paint Acrylic Windsor & Newton
6 White paint by Sanol spray
7 Red paint spray by Sanol
8 Varnish for car
9 Primer
10 Solvent
11 Emery paper of different grain sizes (60, 150, 400, 1200, 2000)
12 Key Set
13 pliers
14 screwdriver
15 File
16 Pencil
17 Brushes (slightly different)
18 Permanent marker (5 identical) I had two-sided with a thick and thin pen.
19 Roulette
20 stationery knife
21 scissors
Step 1: Disassemble the motorcycle.
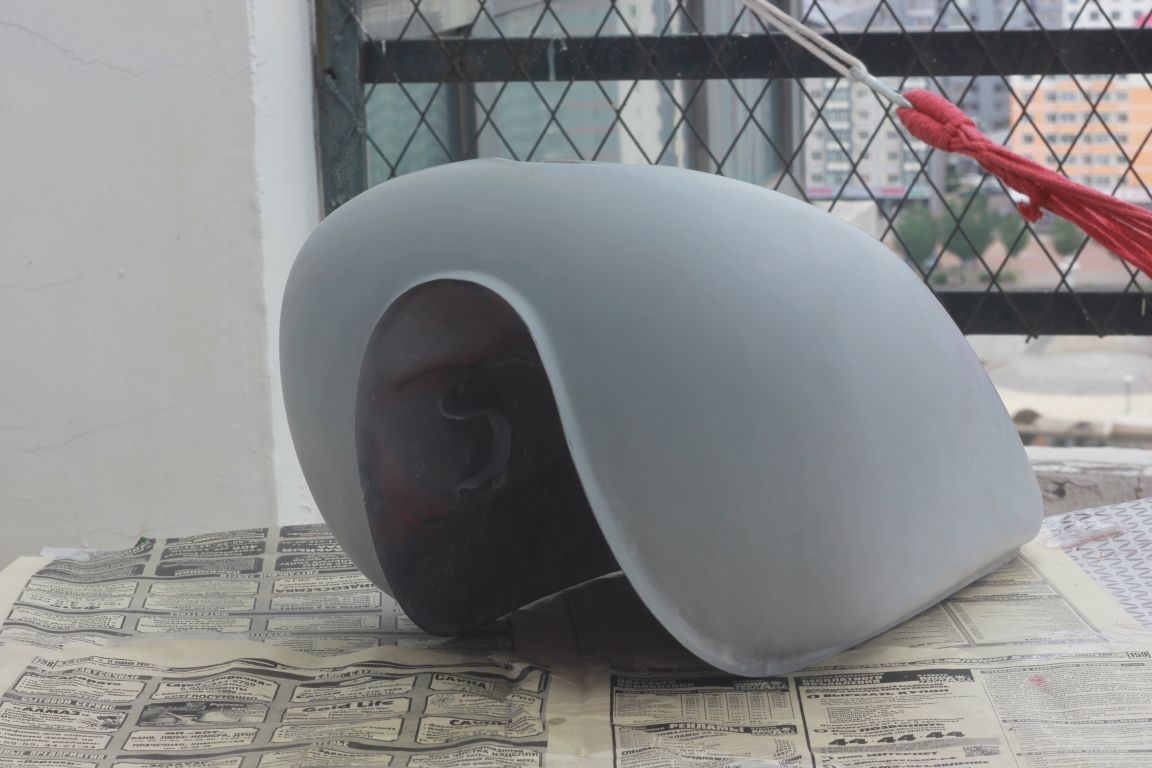
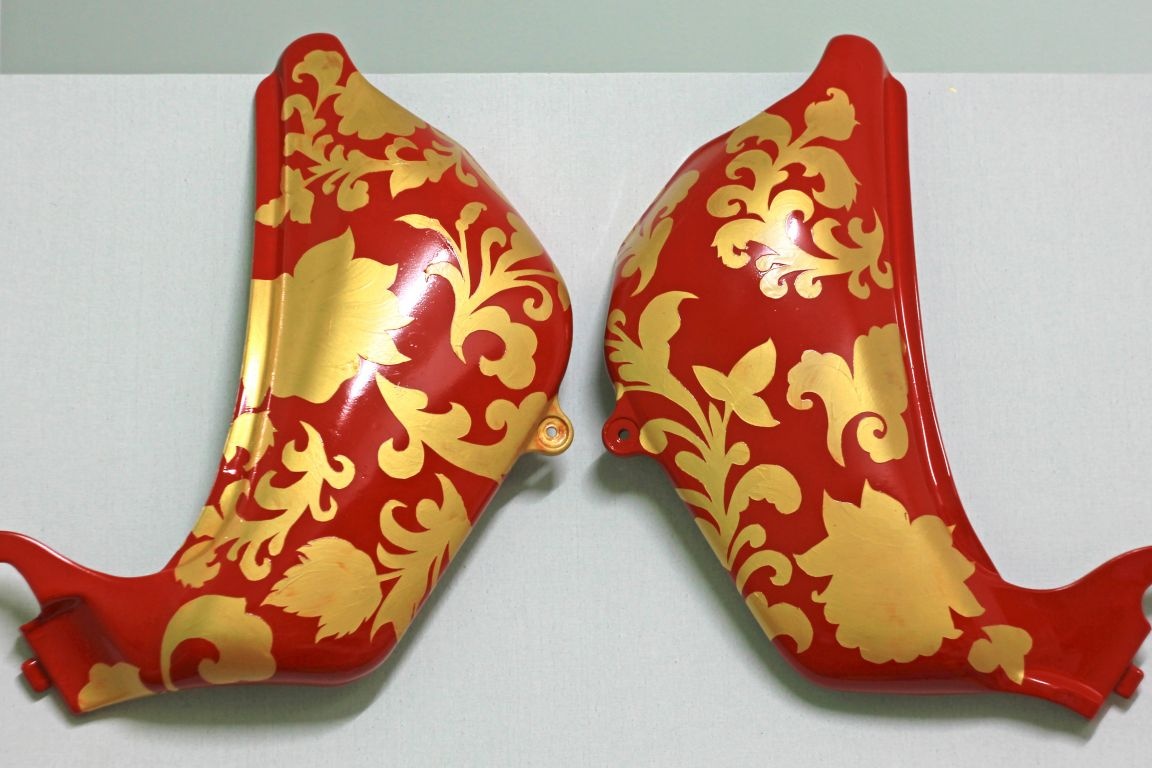
We remove all painted parts: gas tank, rear wing and triangular lining under the saddle. The front wing decided not to paint, as in the factory version it is chrome-plated and has been preserved well.
To remove all the details, I had to tinker a bit, especially with the rear wing. Through it, wiring from the taillight, turn signals and the seat lock cable is passed. Everything was a little complicated by the fact that I also planned to ride a motorcycle during painting work, so everything except the painted elements had to be put back and fixed. Well, organize something instead of a gas tank (but that's another story)
Next, an unnecessary piece of plastic was taken (I specially selected a piece with complex geometry - bending corners) and experiments began with staining, color combinations, methods for applying a yellow layer, options for stroke and other paint brushes. Before that, I had never painted anything like this, a maximum fence in the country or something like that.As a result, I decided to make the main pattern of gold acrylic paint, and apply it with a brush through a stencil. The outline stroke was the best and easiest to do with a permanent marker, in any other way it was disastrously difficult, like a sunset by hand without asbestos gloves. And without a stroke, the picture looked kutse and nondescript.
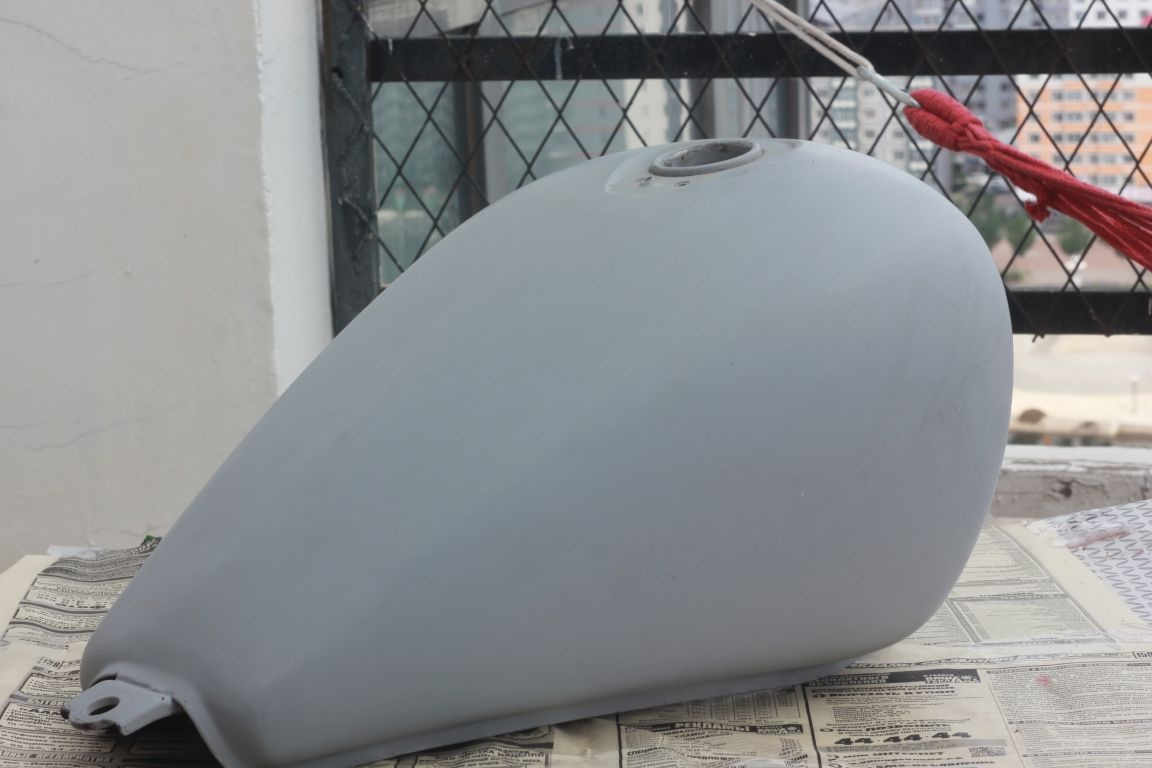
Step 2: Sanding, puttying, primer.
To remove the old paint, I had what is called up to the metal. Because the factory drawing was three color and until all the paint came off, the relief remained from a thin strip between gray and burgundy colors. In the photo it is almost invisible, it is made of oracal (self-adhesive film) and the paint did not burn out under it, therefore it had a density different from the rest of the coating. He skinned with large sandpaper 60cw and 150cw, constantly pouring water.
Putty, I had quite a bit, literally one square centimeter on the gas tank (there was a small dent)
And for some reason I did not guess to photograph these stages, somehow I did everything in one fell swoop and primed it. And only then I remembered about the camera.
In the absence of a spray gun and a primer in the spray cans, it was necessary to apply the soil with a brush, and then carefully sand it (sandpaper-400 cw). I took the putty and primer at the nearest service station, I even offered them money later - they didn’t take it. The only thing I bought was a primer thinner to keep the layers even.
Then there was drying. They say you can’t wet the primer with water, I still don’t understand why, but just in case, skins dry.
Step 3: Staining.
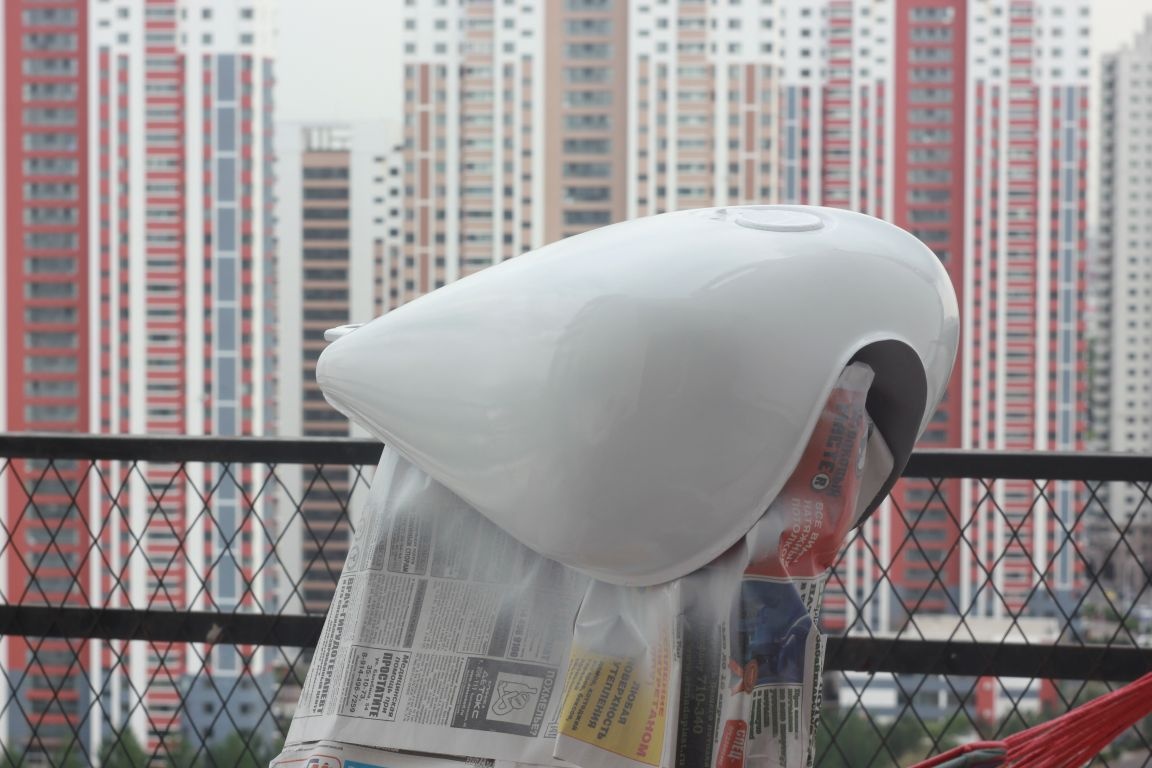
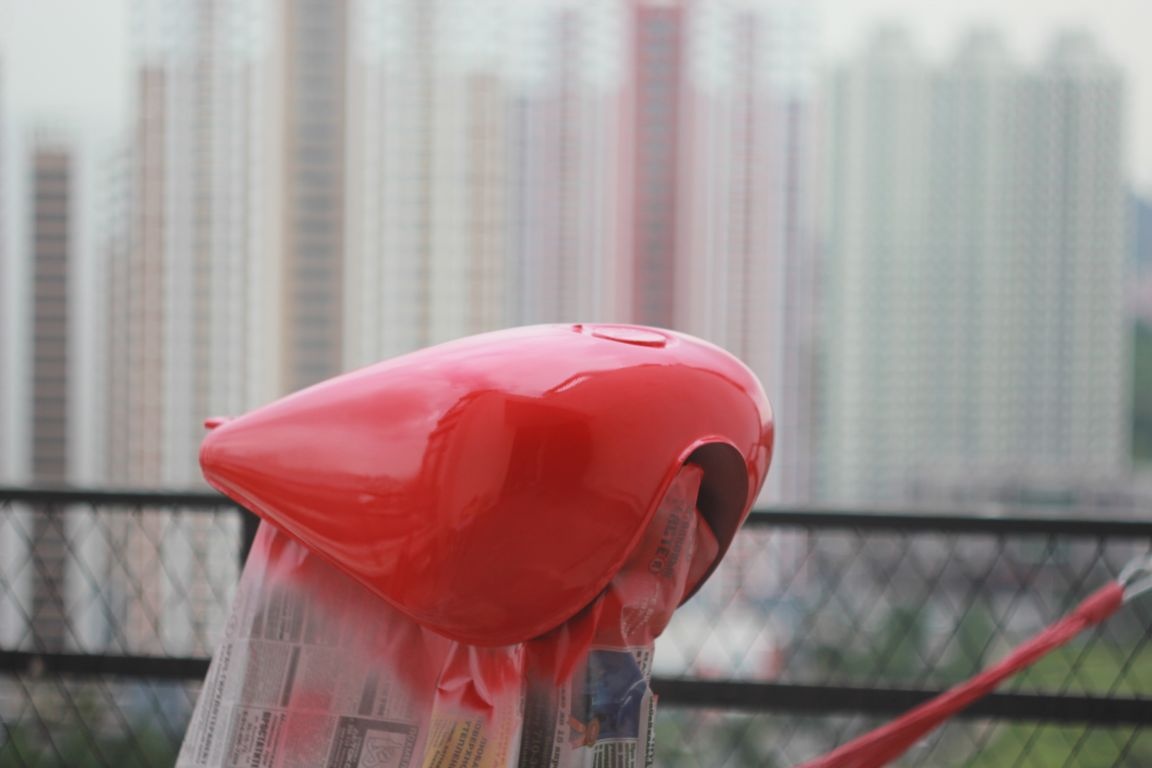
First, he applied a white layer so that the main red seemed to glow and was generally brighter. One layer was enough for white, but red already laid down in three. I bought paint in cans (the cheapest), which I later regretted several times, but I could not find anything more suitable. As a result, I can say that Sanol paint lays quite well, and in general there were no complaints about the application. But this infection dries up for about a year and a half (then I did not suspect it yet) and I am not joking at all! Maybe it can be dried ten times faster in an ultraviolet drying chamber, but I only had a glazed balcony.
The problem of non-drying paint was aggravated by the fact that it was planned to paste over all the details with stencils from self-adhesive film. I don’t remember exactly how many months I waited, but the whole project took more than a year. This wildest procrastination taught me not to use spray paint anymore. I even bought an inexpensive electric spray gun, but that was after finishing work on this motorcycle ...
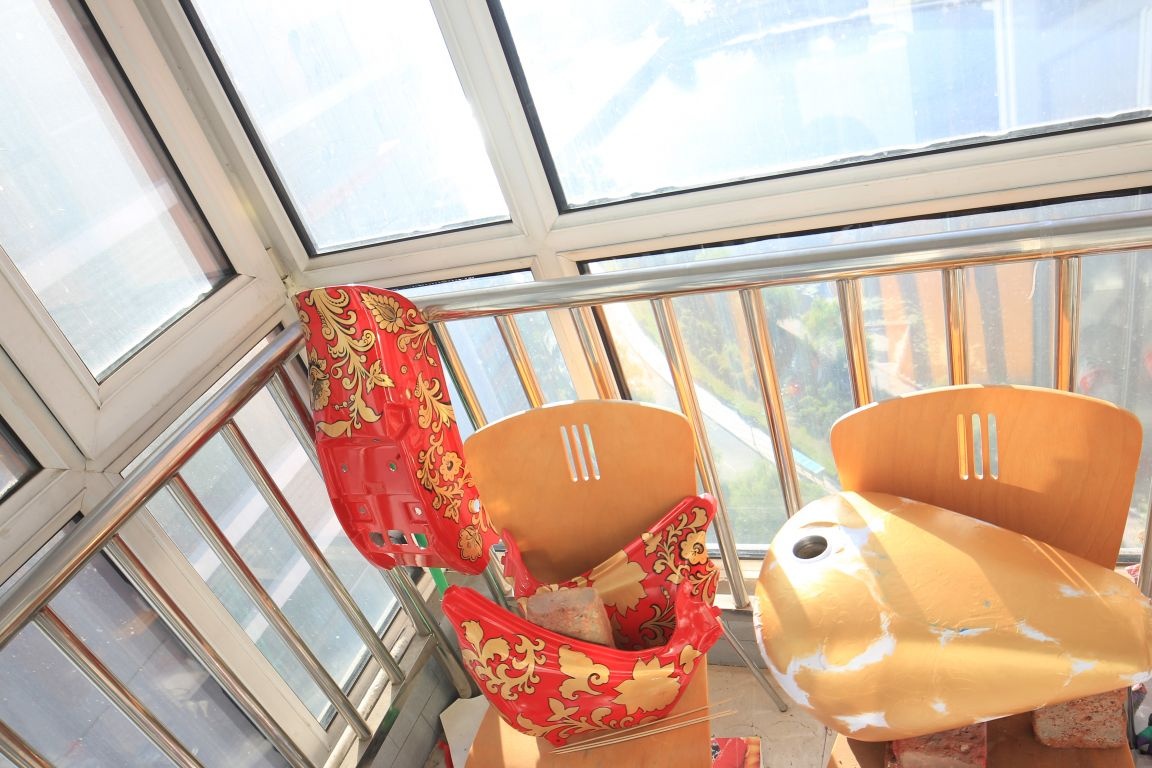
Step 4: Stencils and applying "gold".
At this stage, my artistic skills were no longer enough. Rather, they initially could not be enough, therefore, everything related to drawing and similar things, I asked my friends to help. The four of us cut out the stencils and it took us about five hours, and this apart from the development of the drawing itself, the manufacture of patterns and the transfer of self-adhesive to the surface.
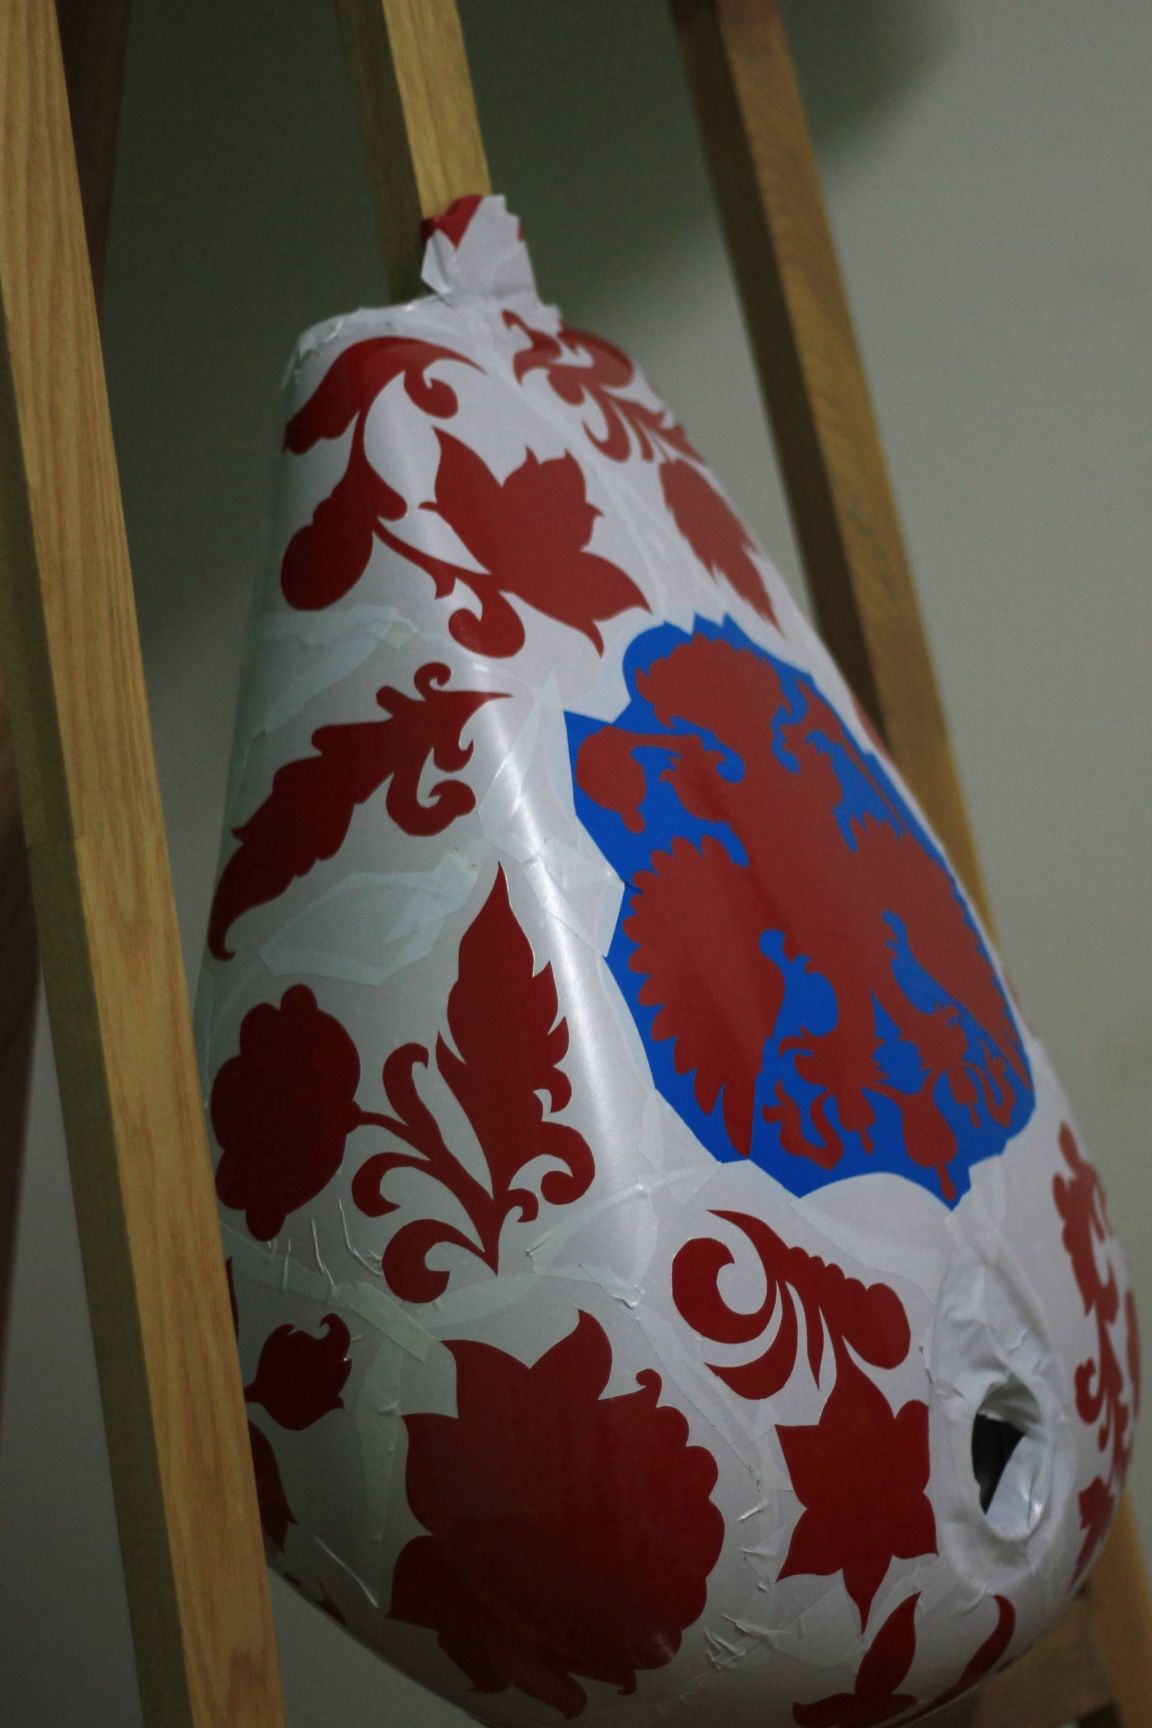
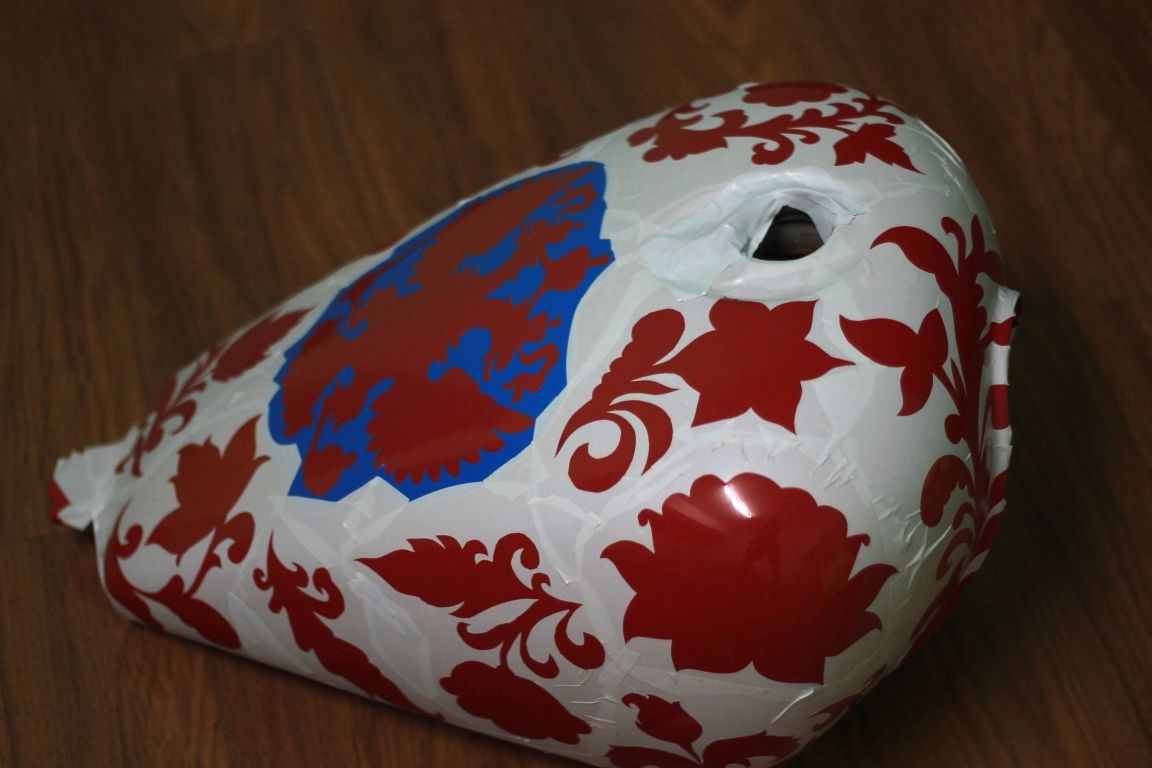
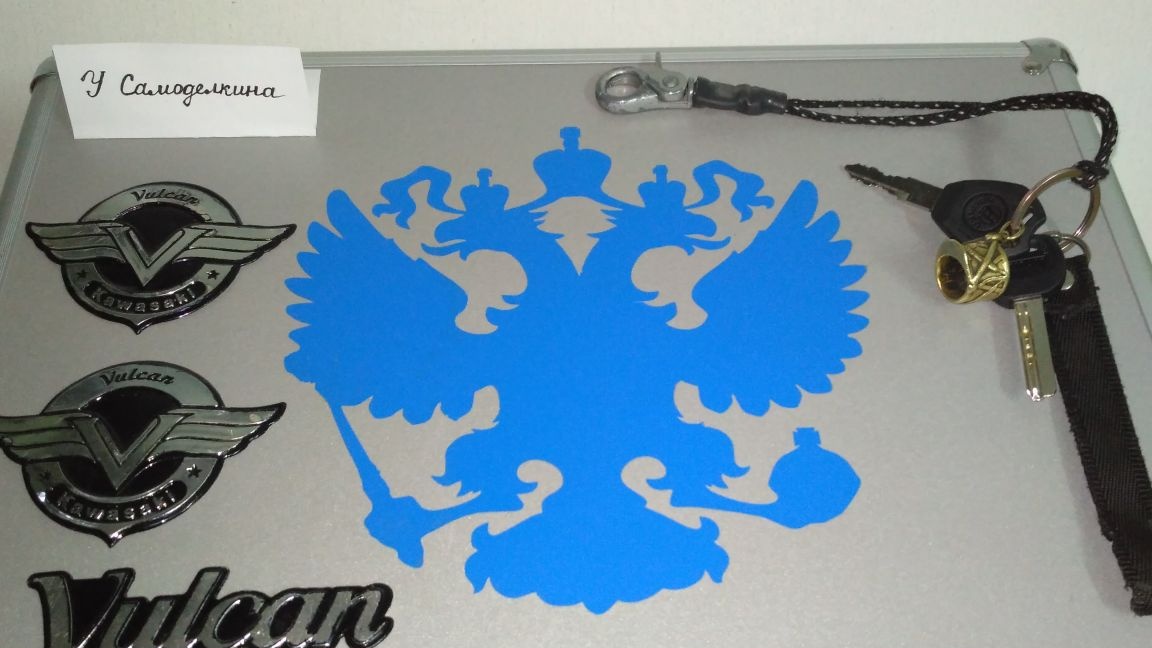
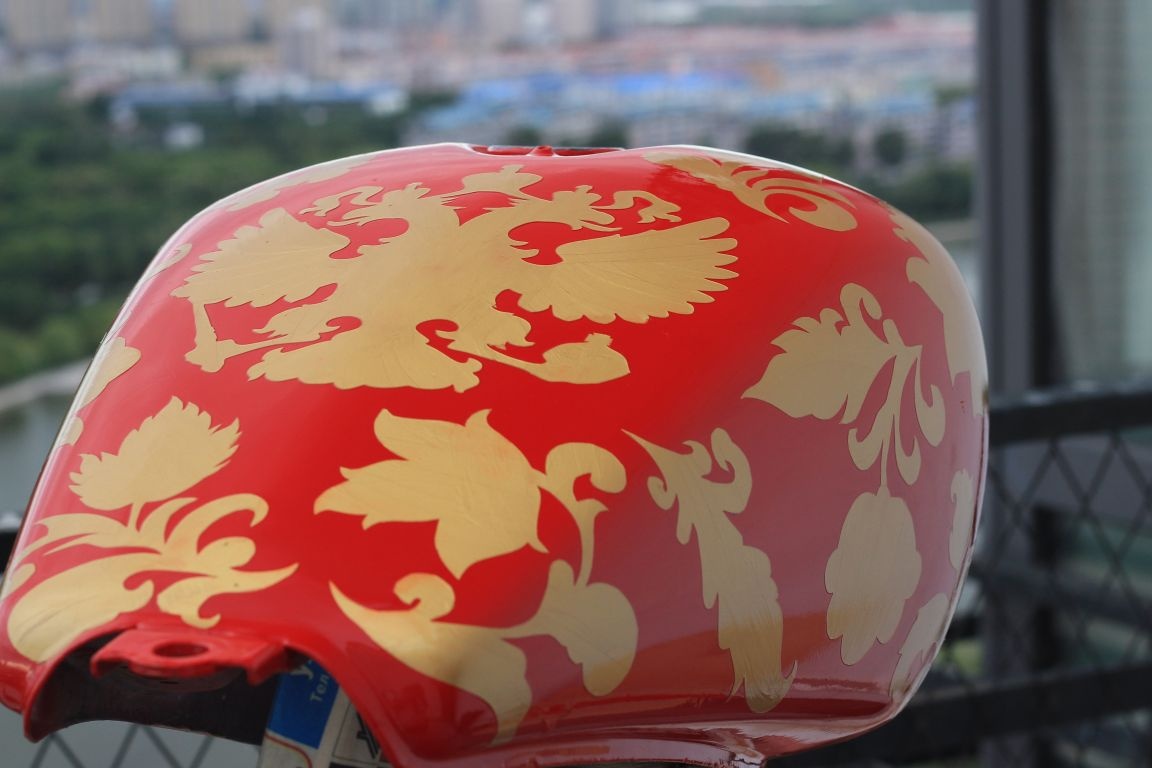
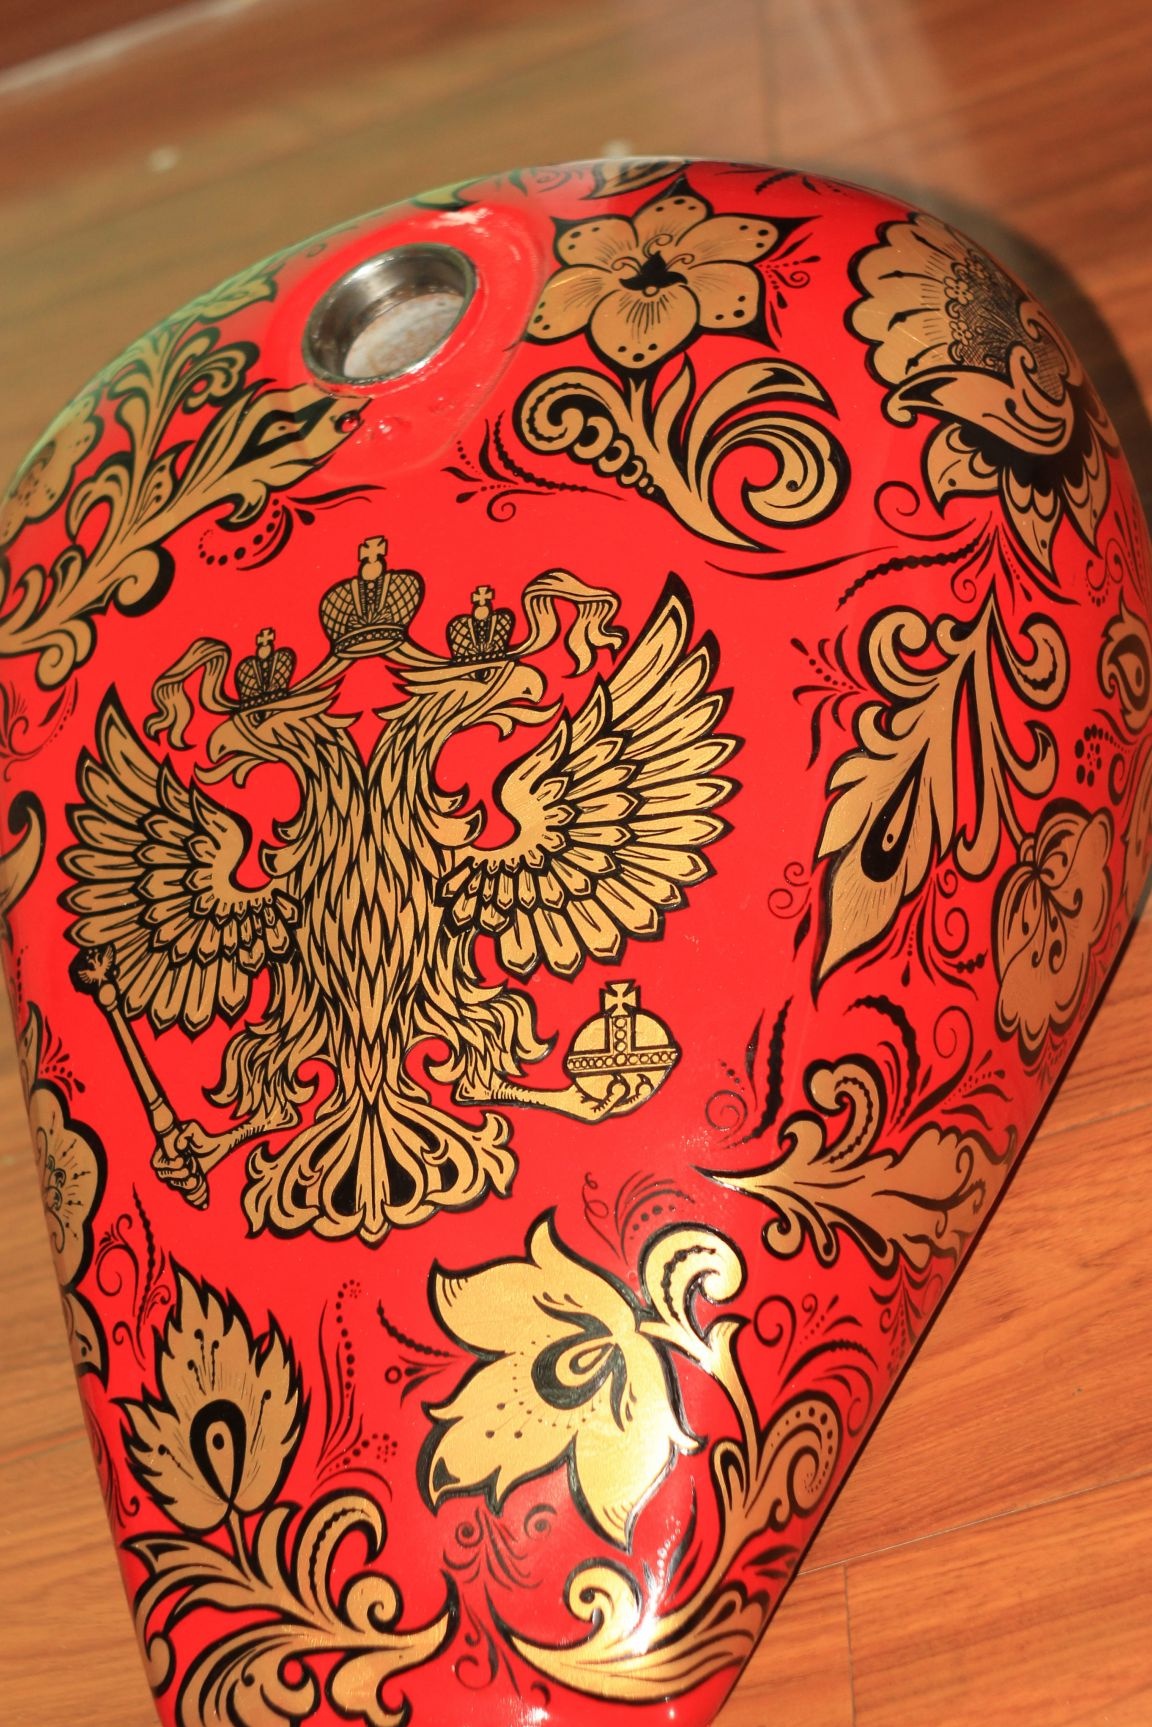
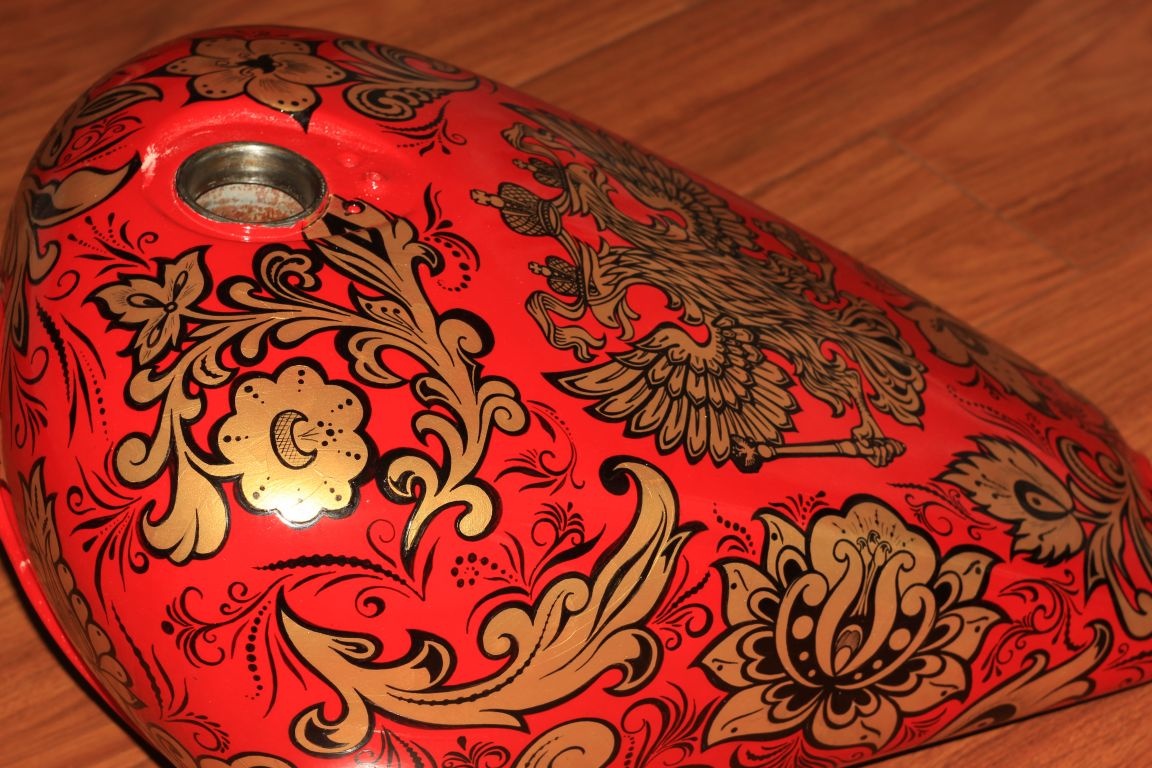
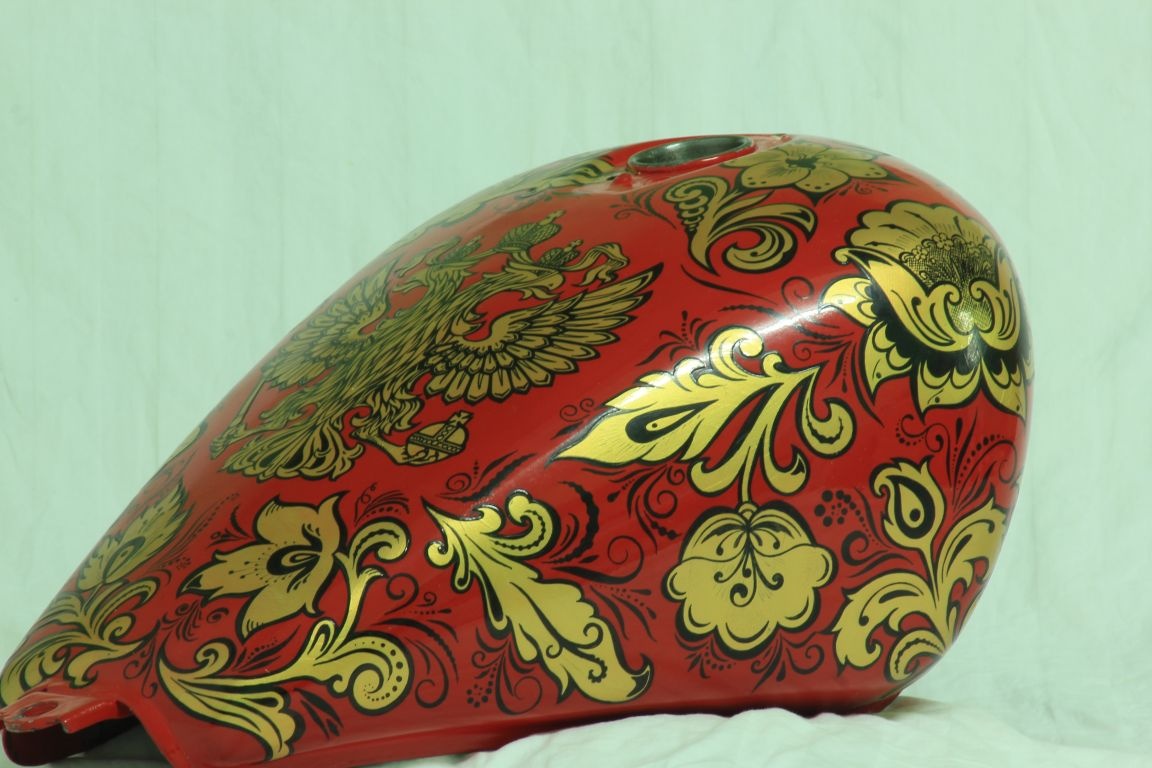
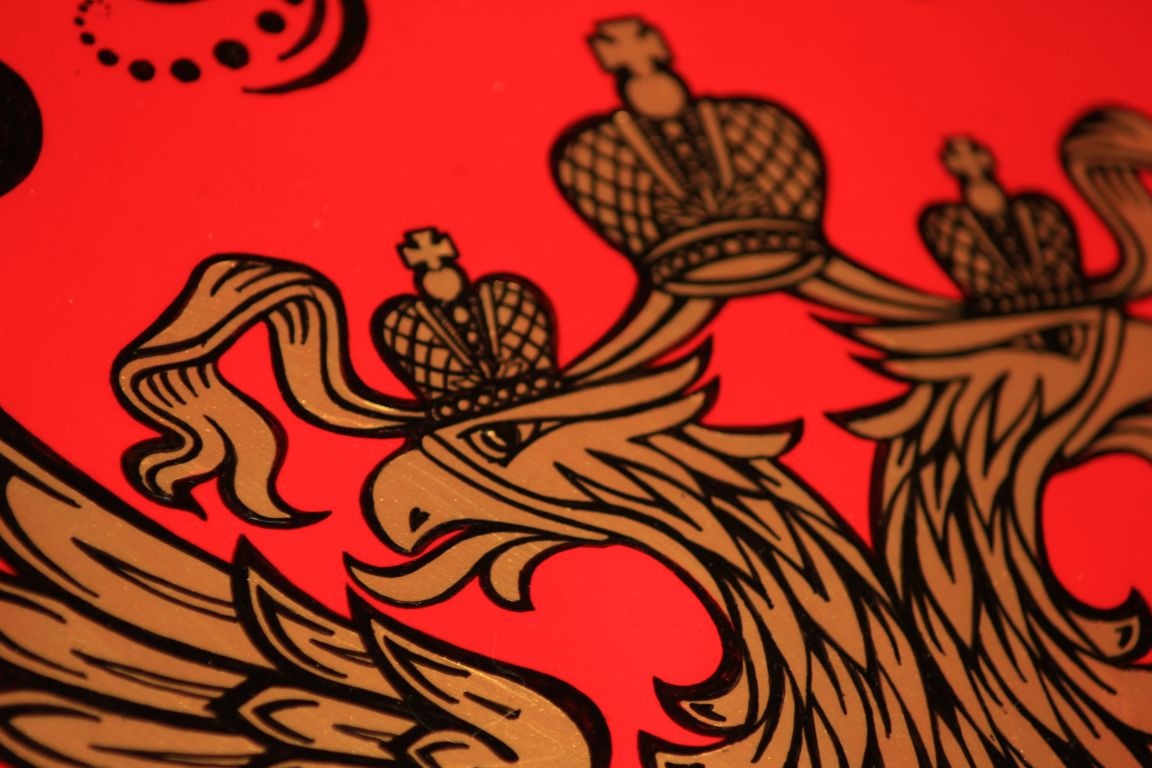
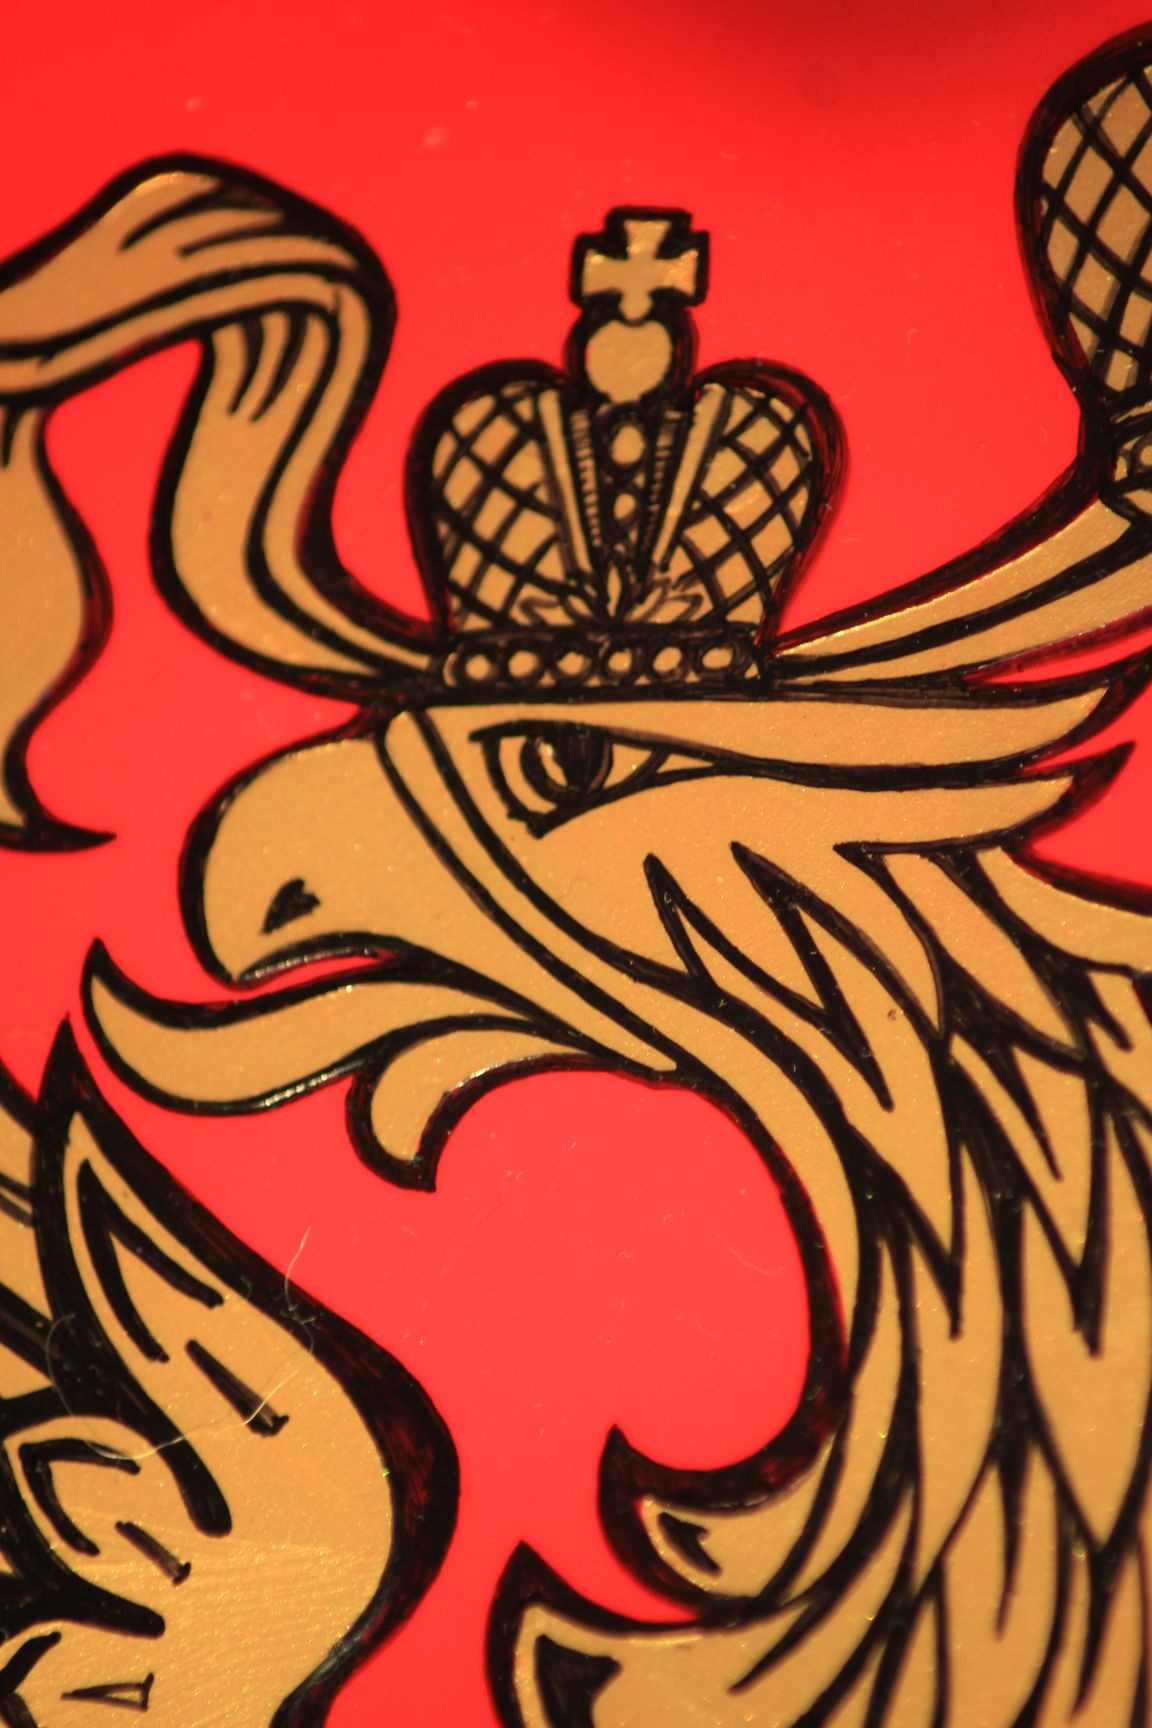
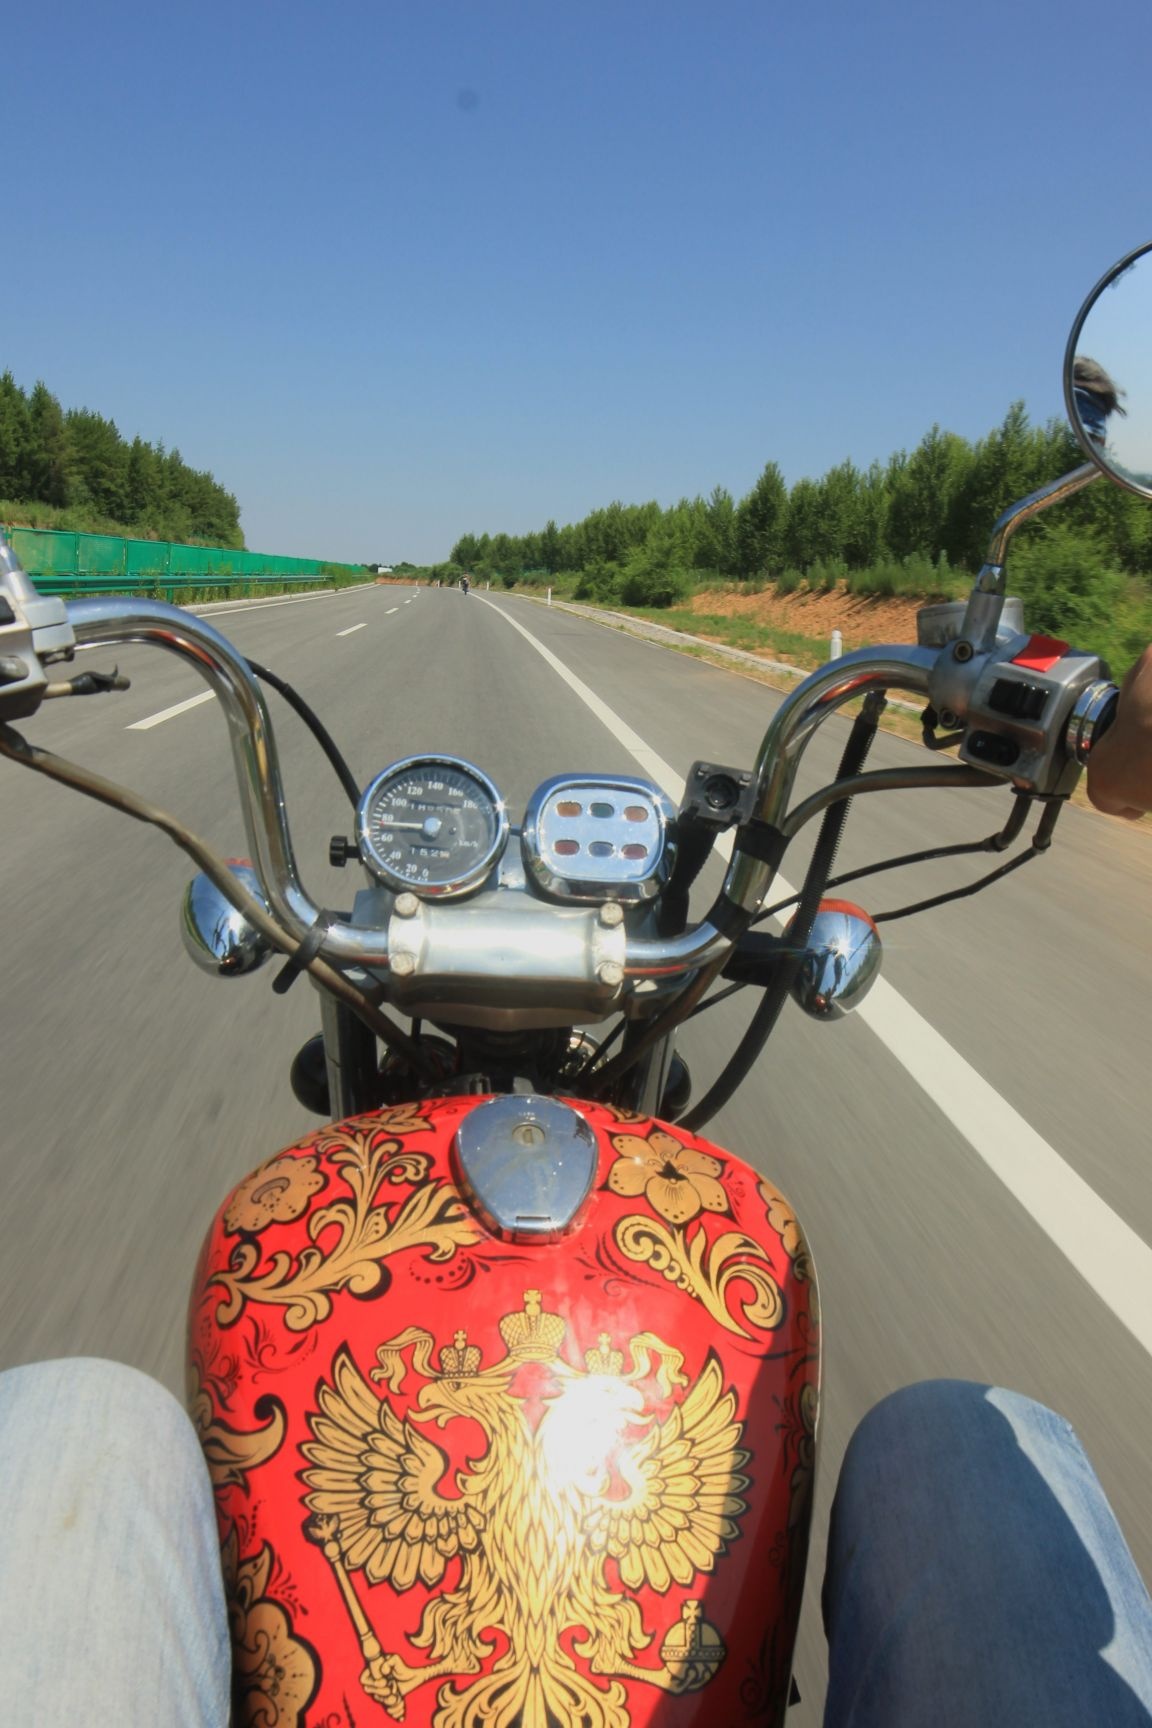
In general, you can draw it on a computer in the evening and cut it out on a plotter in an hour, our project was done abroad and a lot of things in Russia could be easily solved in a couple of minutes, it created serious problems. It was just maybe with an eagle on the tank - I found a picture in a vector format (by the way I downloaded it from the Kremlin website) and ordered a plotter cutting in an advertising studio. Since I needed only the outline, I stuck the eagle itself on the tool box. It turned out that the most difficult stencil was done in 2 minutes.
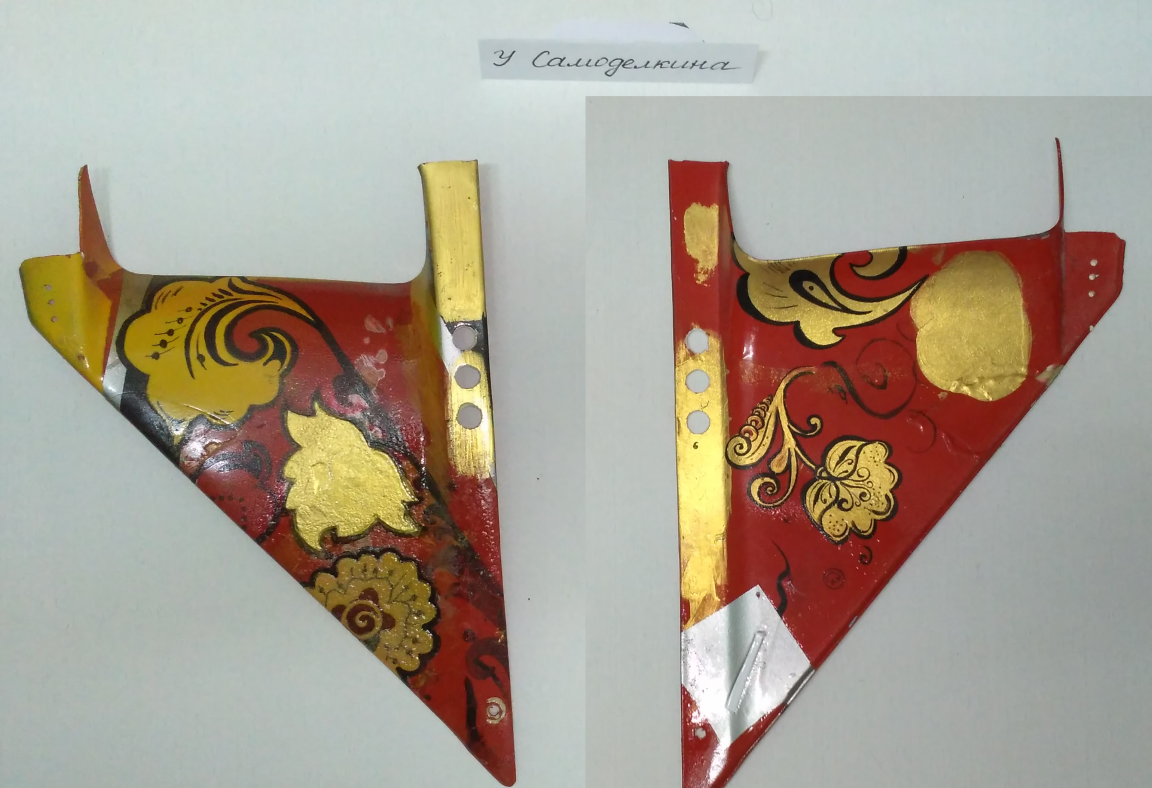
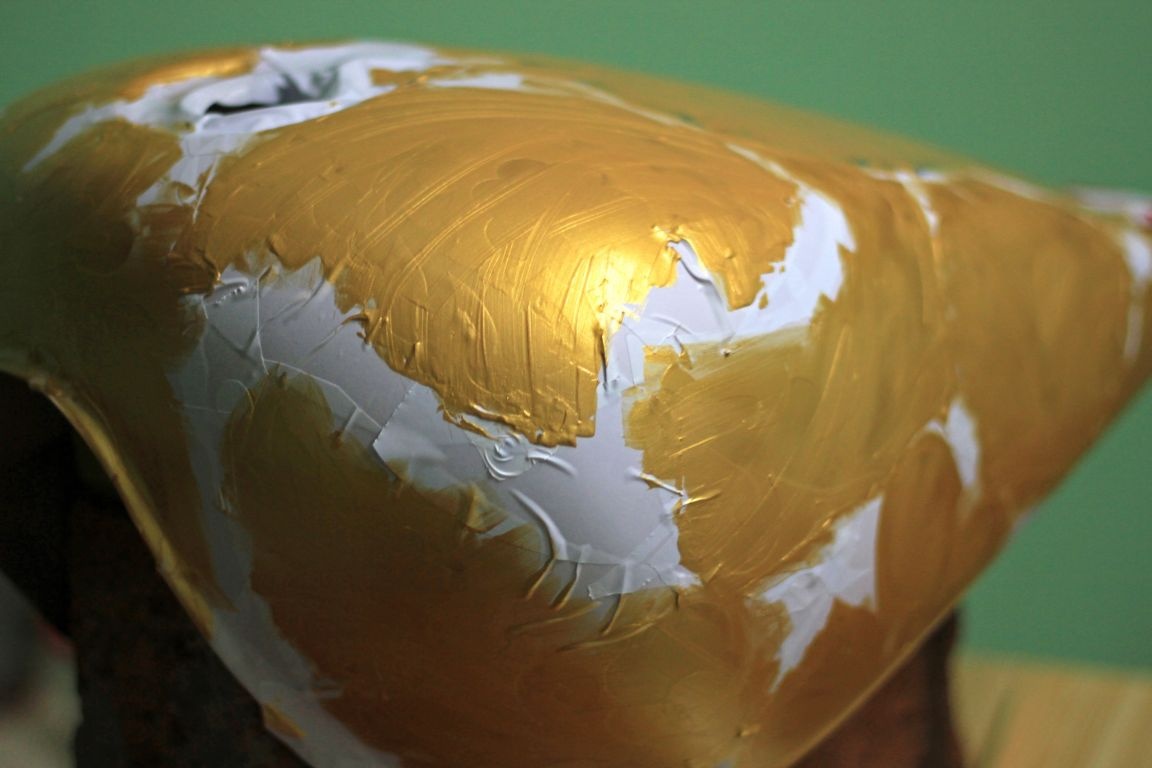
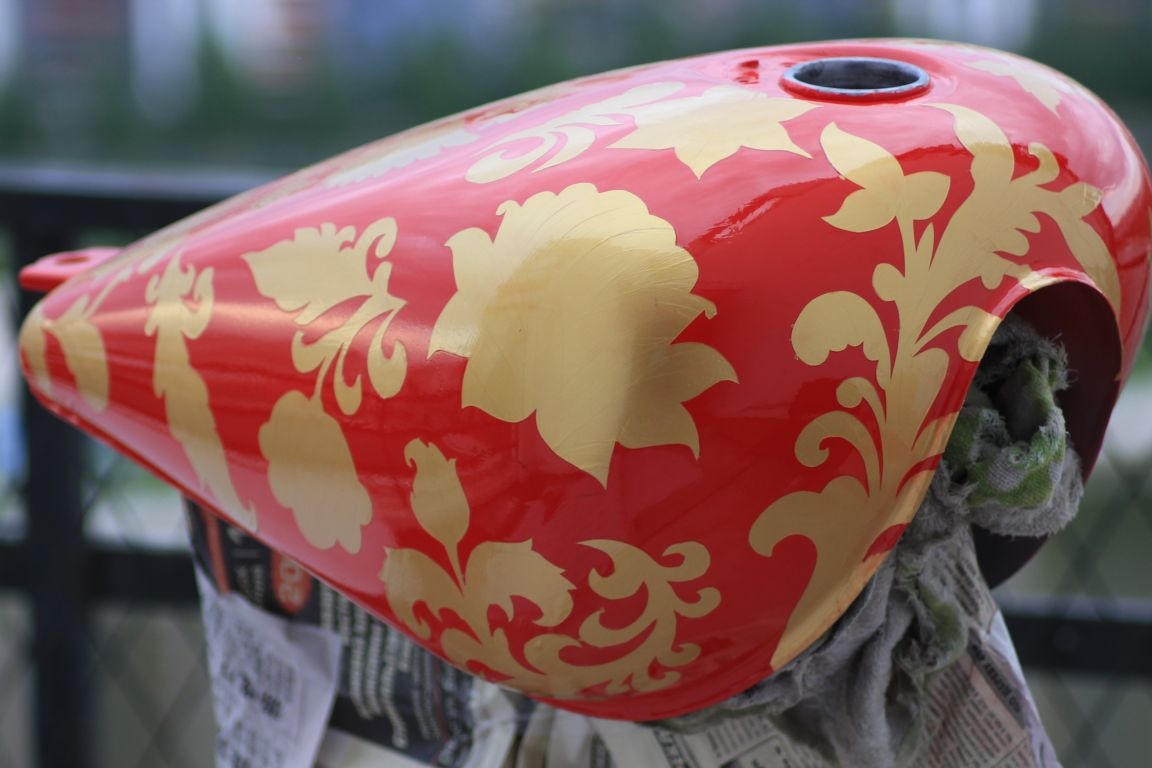
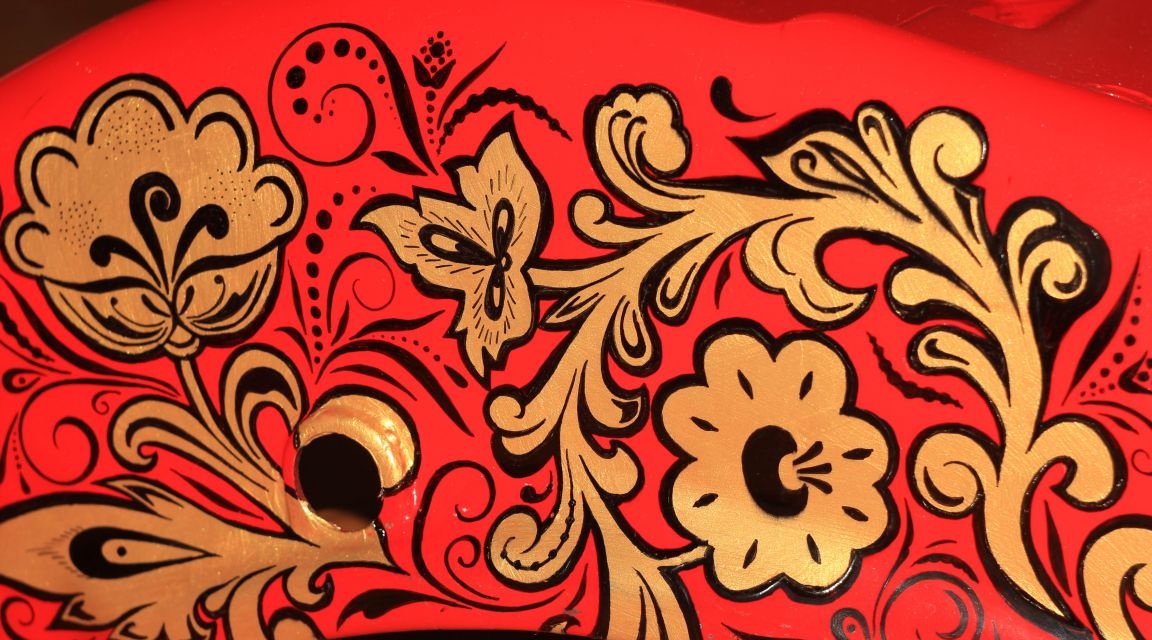
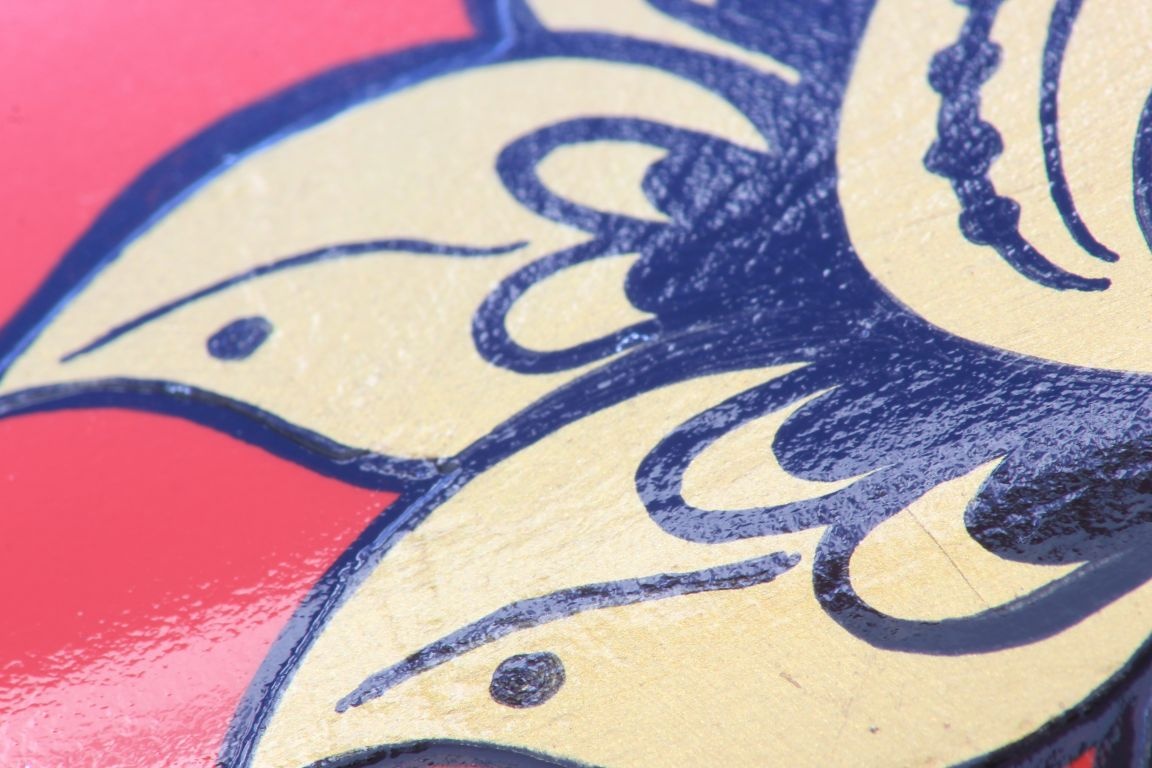
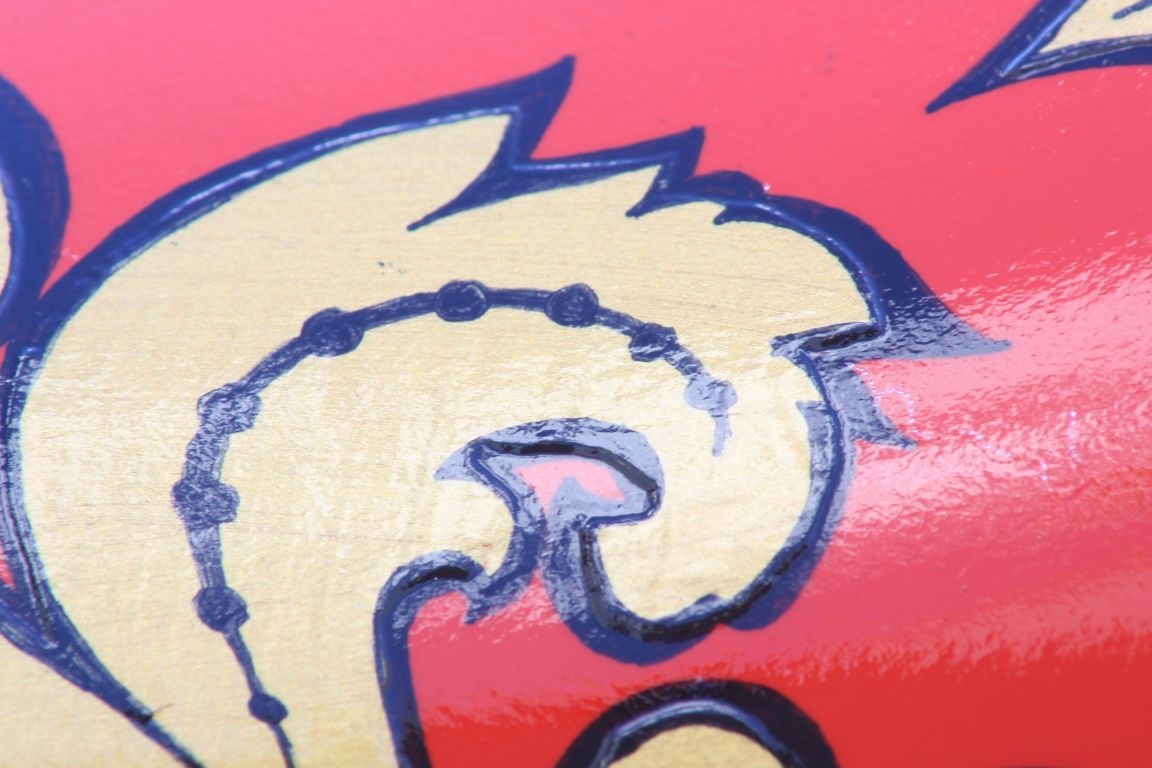
Gold paint was applied with a brush in long strokes. He removed the excess paint between layers with sandpaper after drying, wielding sandpaper directly on top of the self-adhesive (sandpaper 1200cw). At the finish layer, I specially saved the texture from the brush so that the picture looked “richer”. It took three layers, sometimes four, so that the red background ceased to shine through. It is better not to finish the extreme layer to the end, it will be easier to remove the stencils.
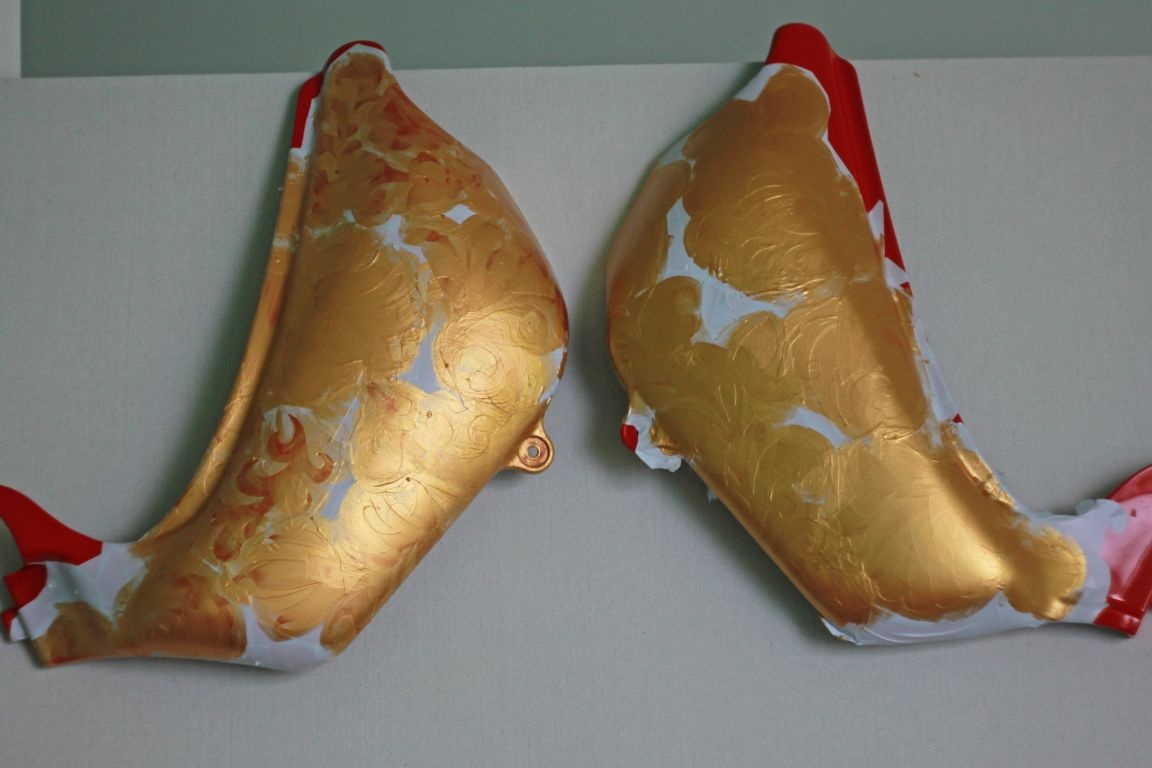
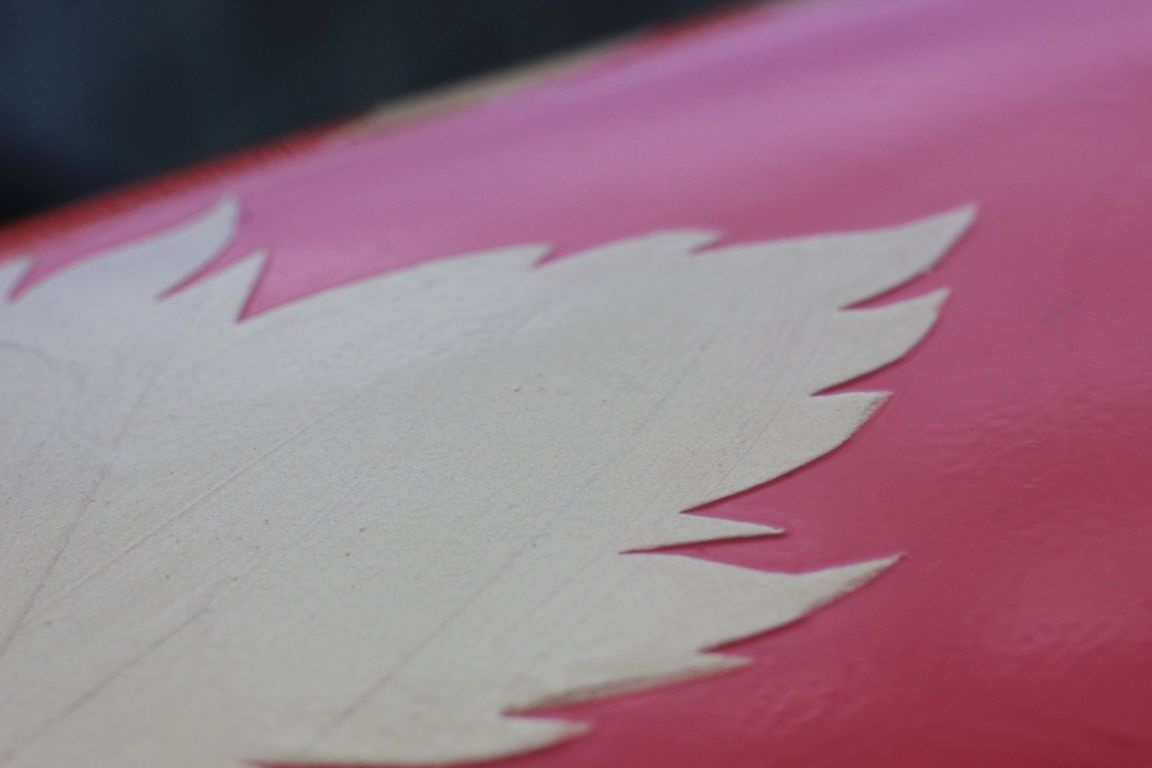
On the left overlay one layer, on the right two
Step 5: Remove the stencils.
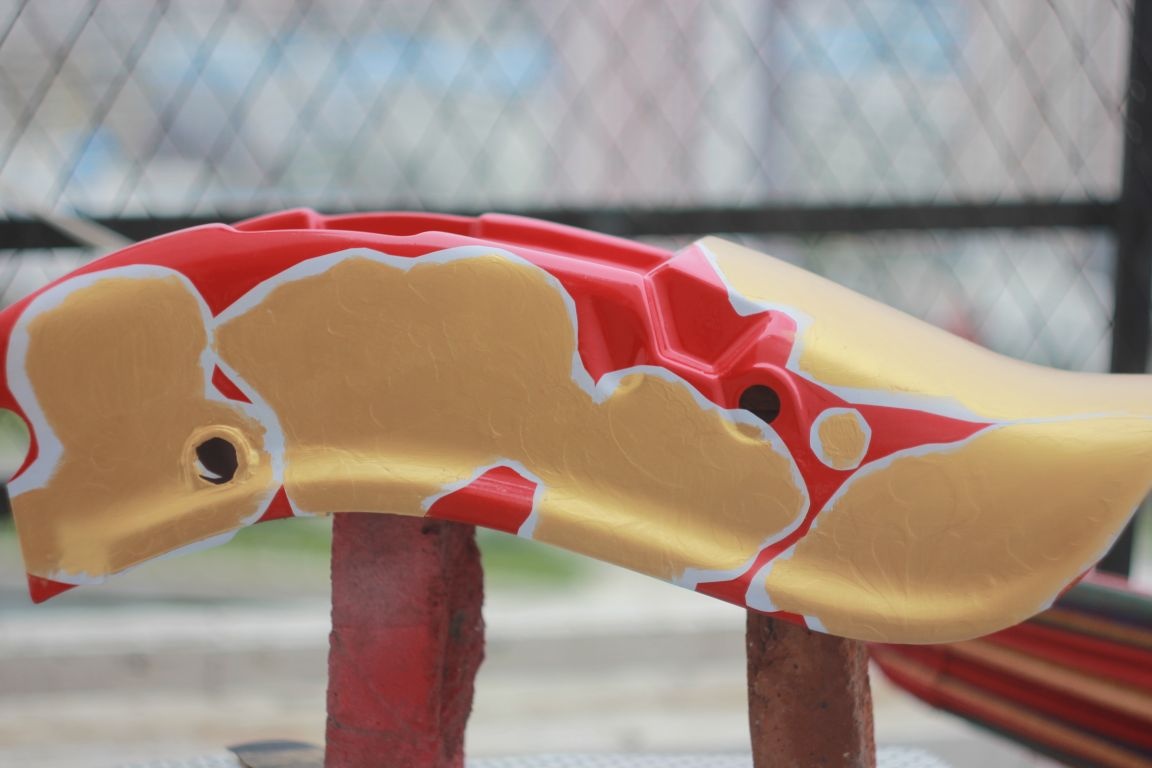
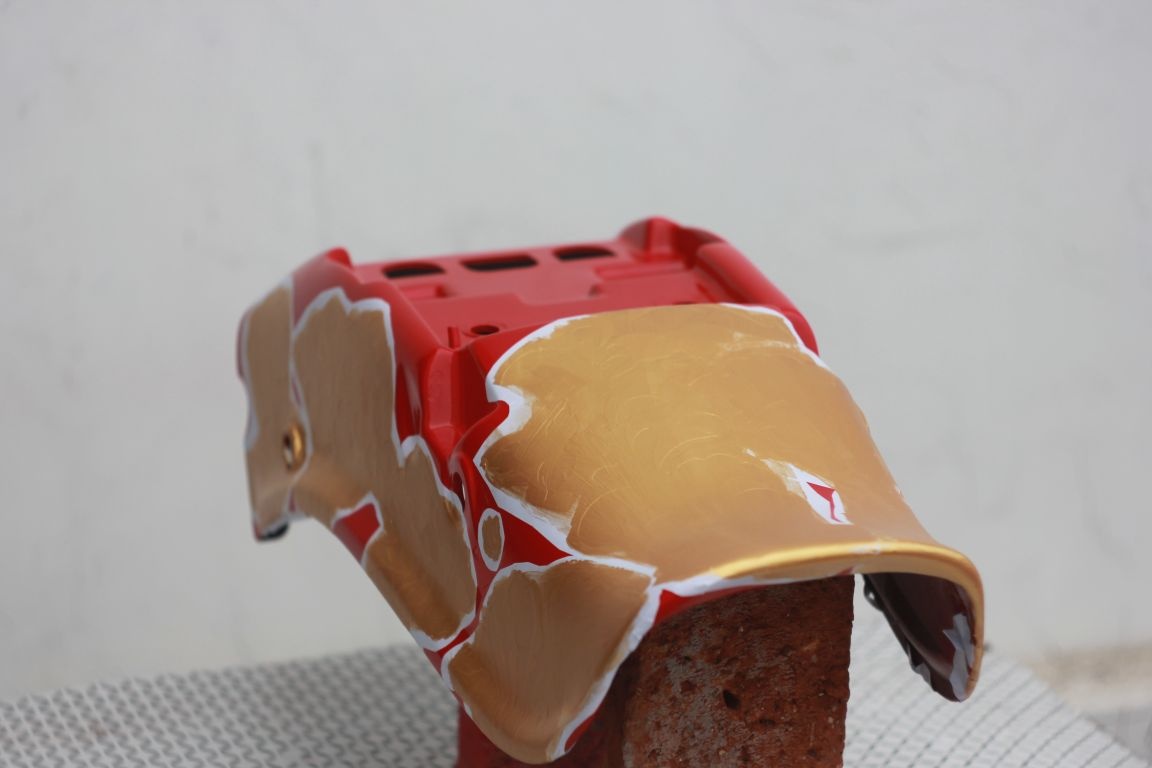
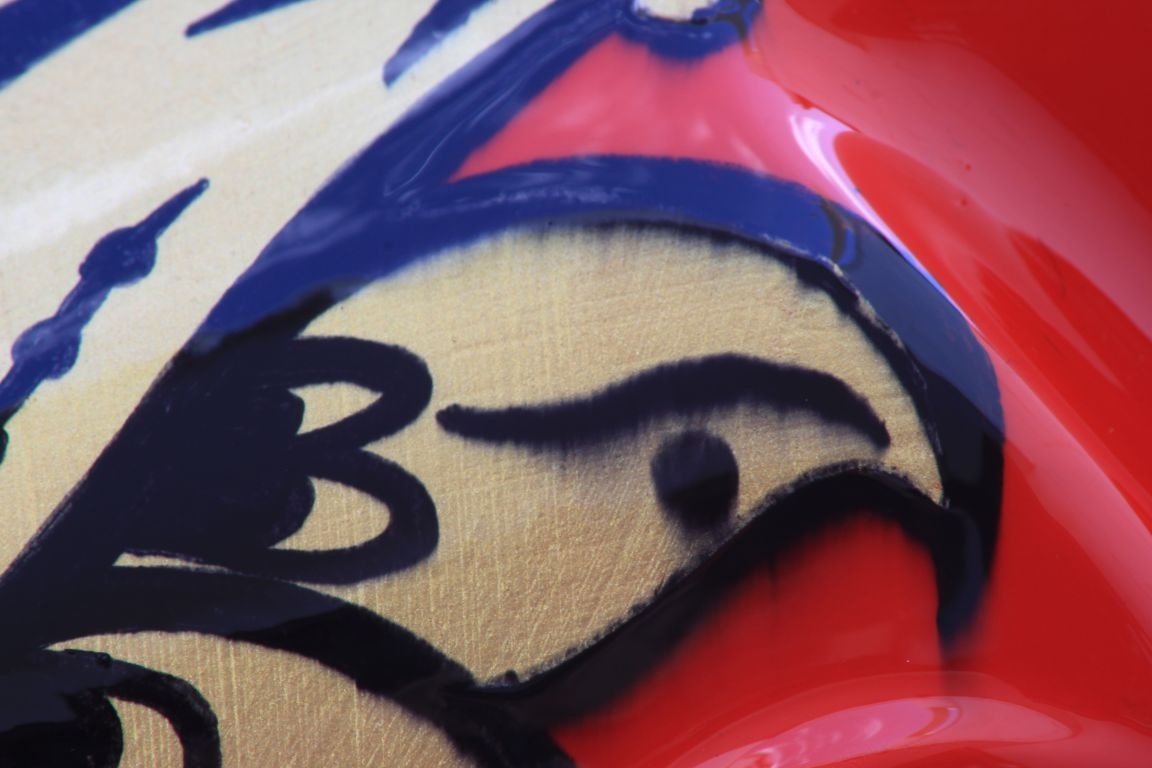
Carefully, without sudden movements, remove the film, armed with a clerical knife.Acrylic paint, if you sharply pull the stencil can peel off, especially in places where the layer is thick - in such places we cut the paint along the contour with a knife. And immediately check and remove random spots of gold paint, if any, formed during the operation. You can gently scrub them with a knife, or you can wipe them with water (acrylic dissolves with water), but as practice has shown with a knife it’s easier and more convenient.
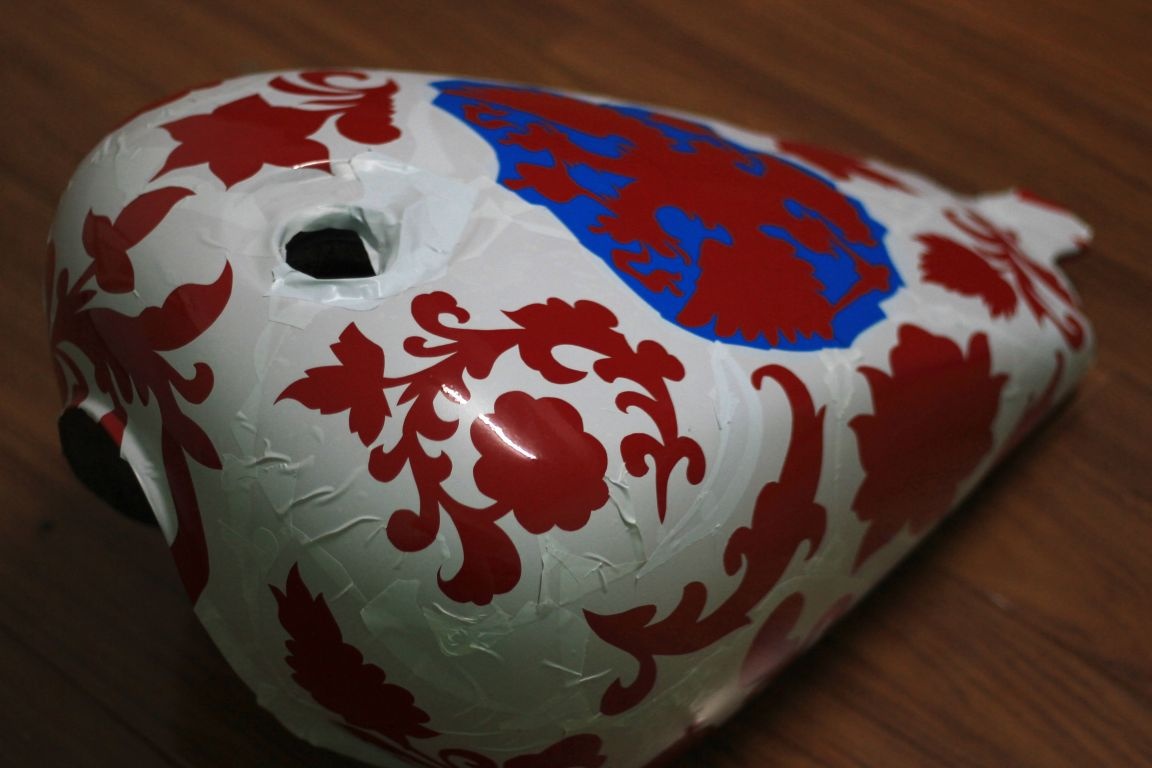
The red paint was a little deformed from long contact with the film (because the stencils were pasted without waiting for it to dry completely) But when I applied a thin layer of varnish to fix the acrylic and ease of stroke, all the roughness of the red layer disappeared because the varnish slightly dissolved the red layer and the surface " straightened out. "
here is visible damage on the red layer
and here already a layer of varnish fixed irregularities

the tank is already under a layer of varnish
after removing the stencils
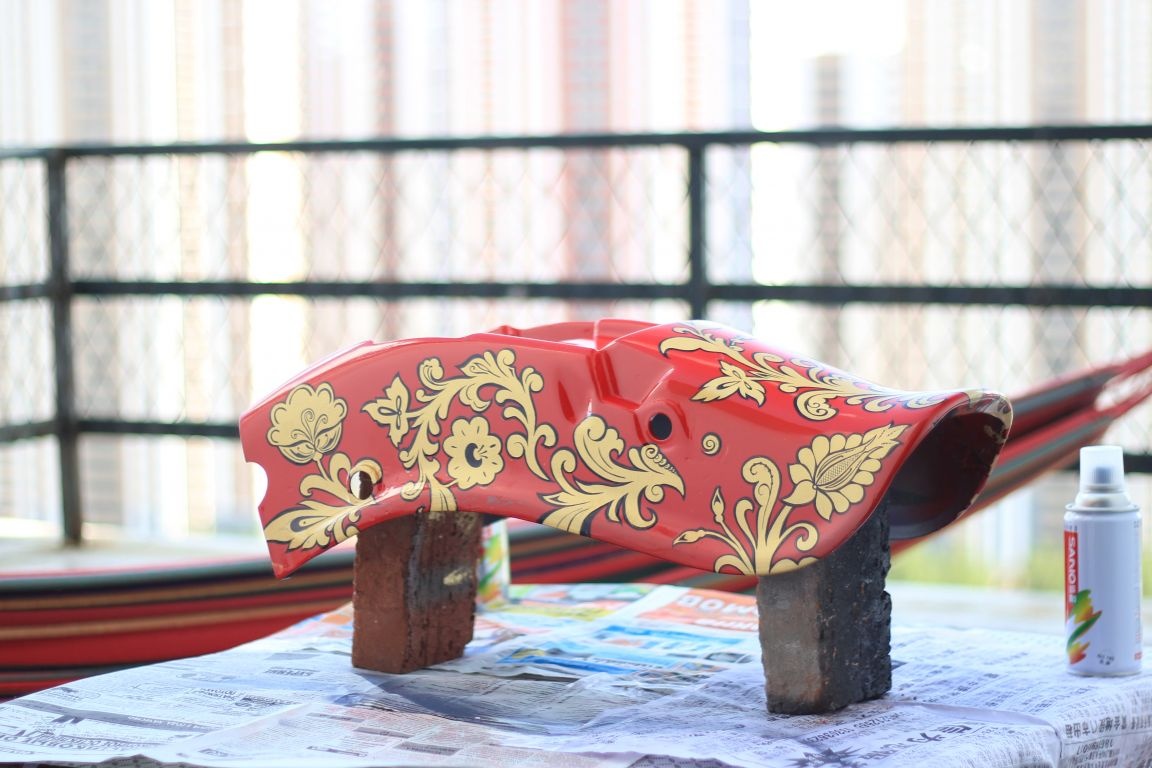
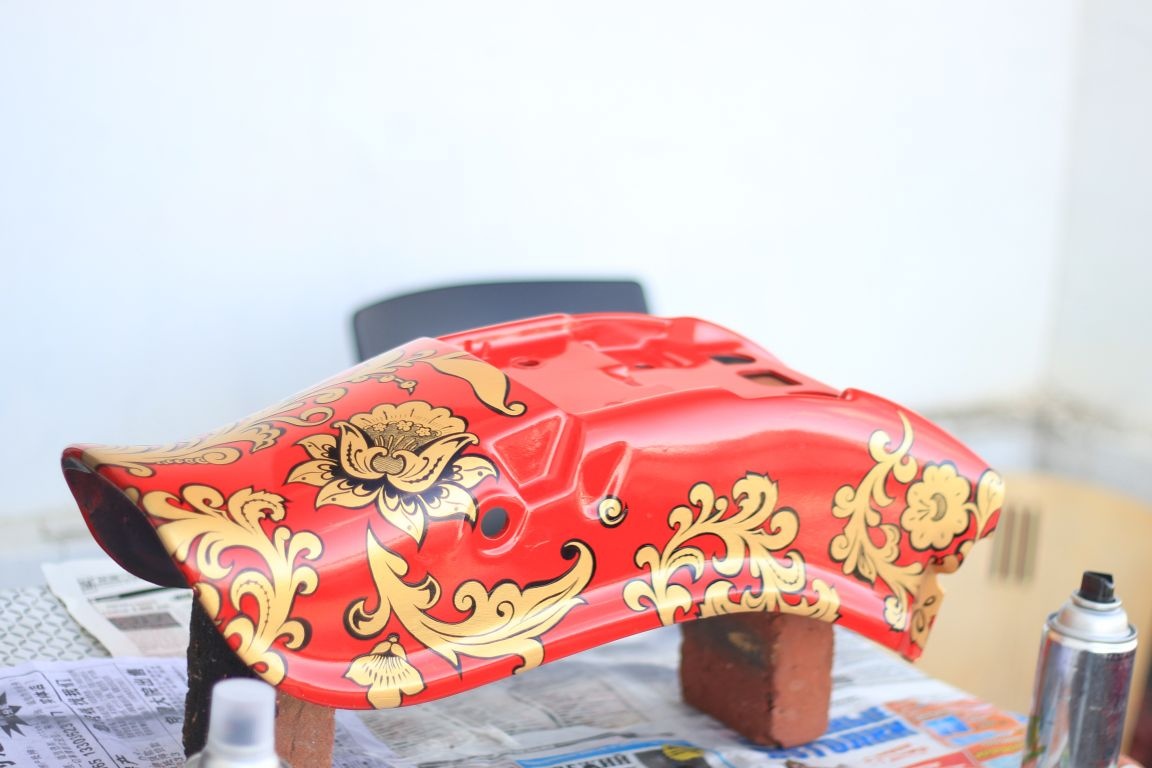
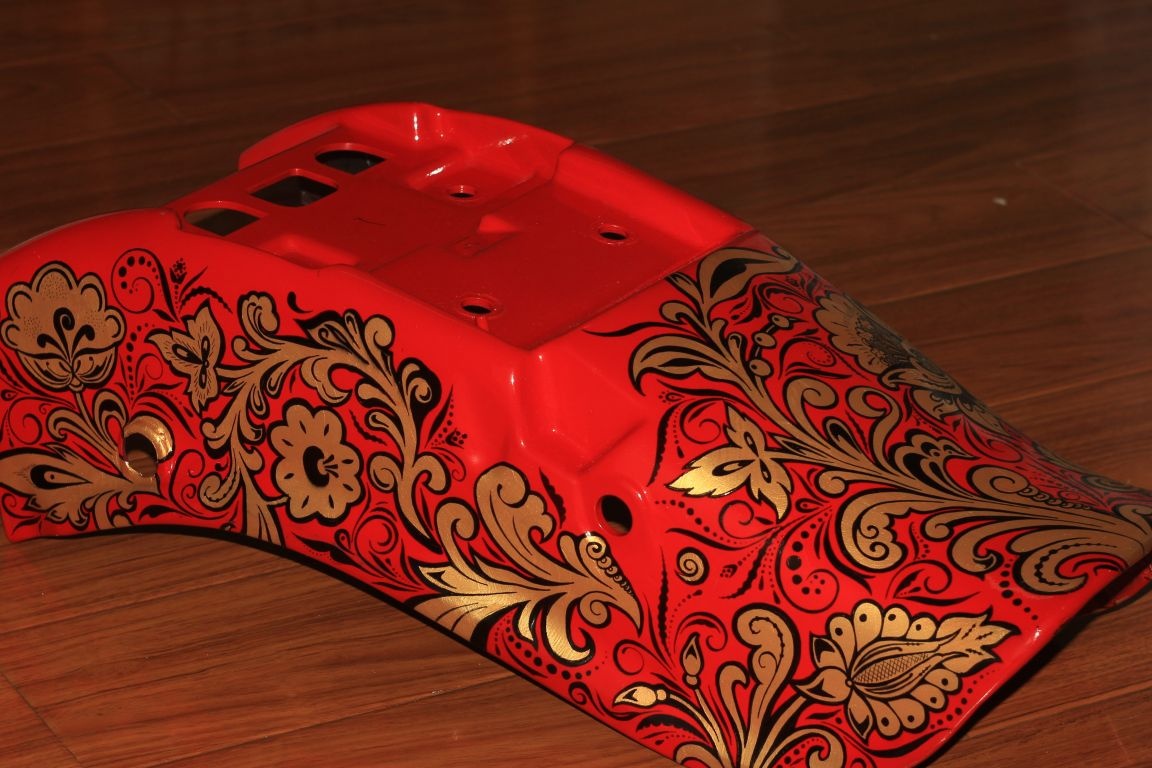
Step 6: Stroke.
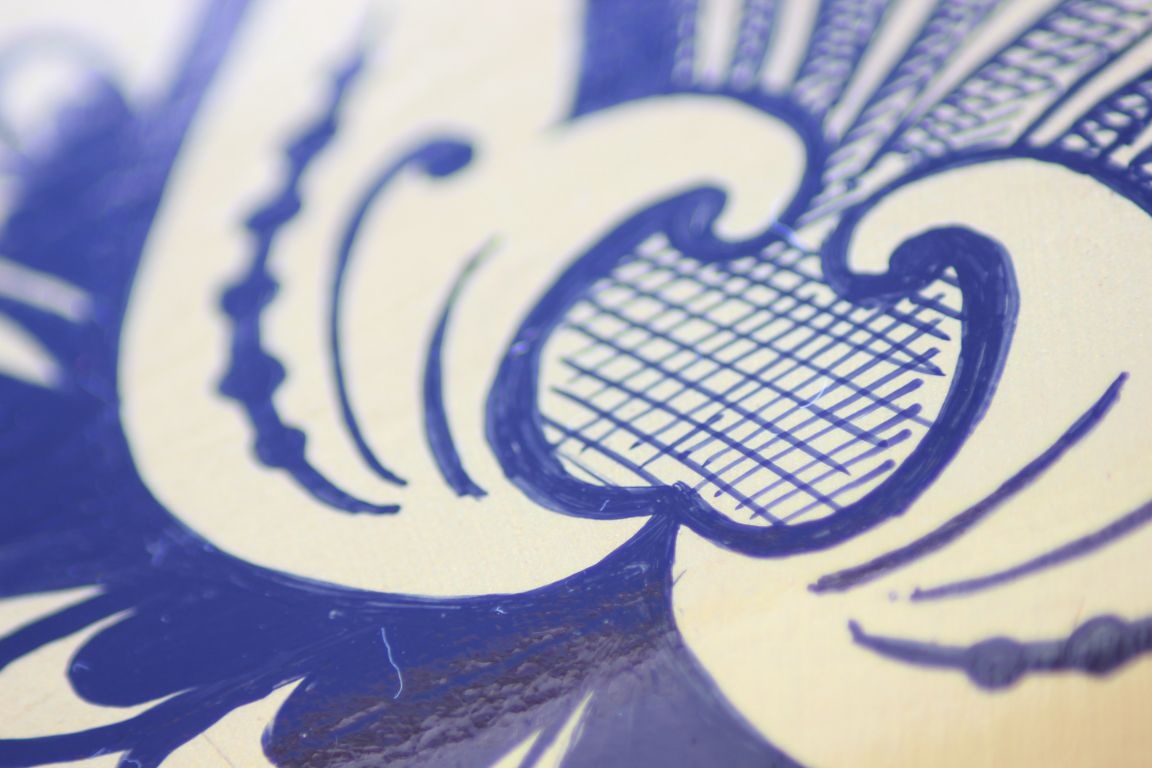
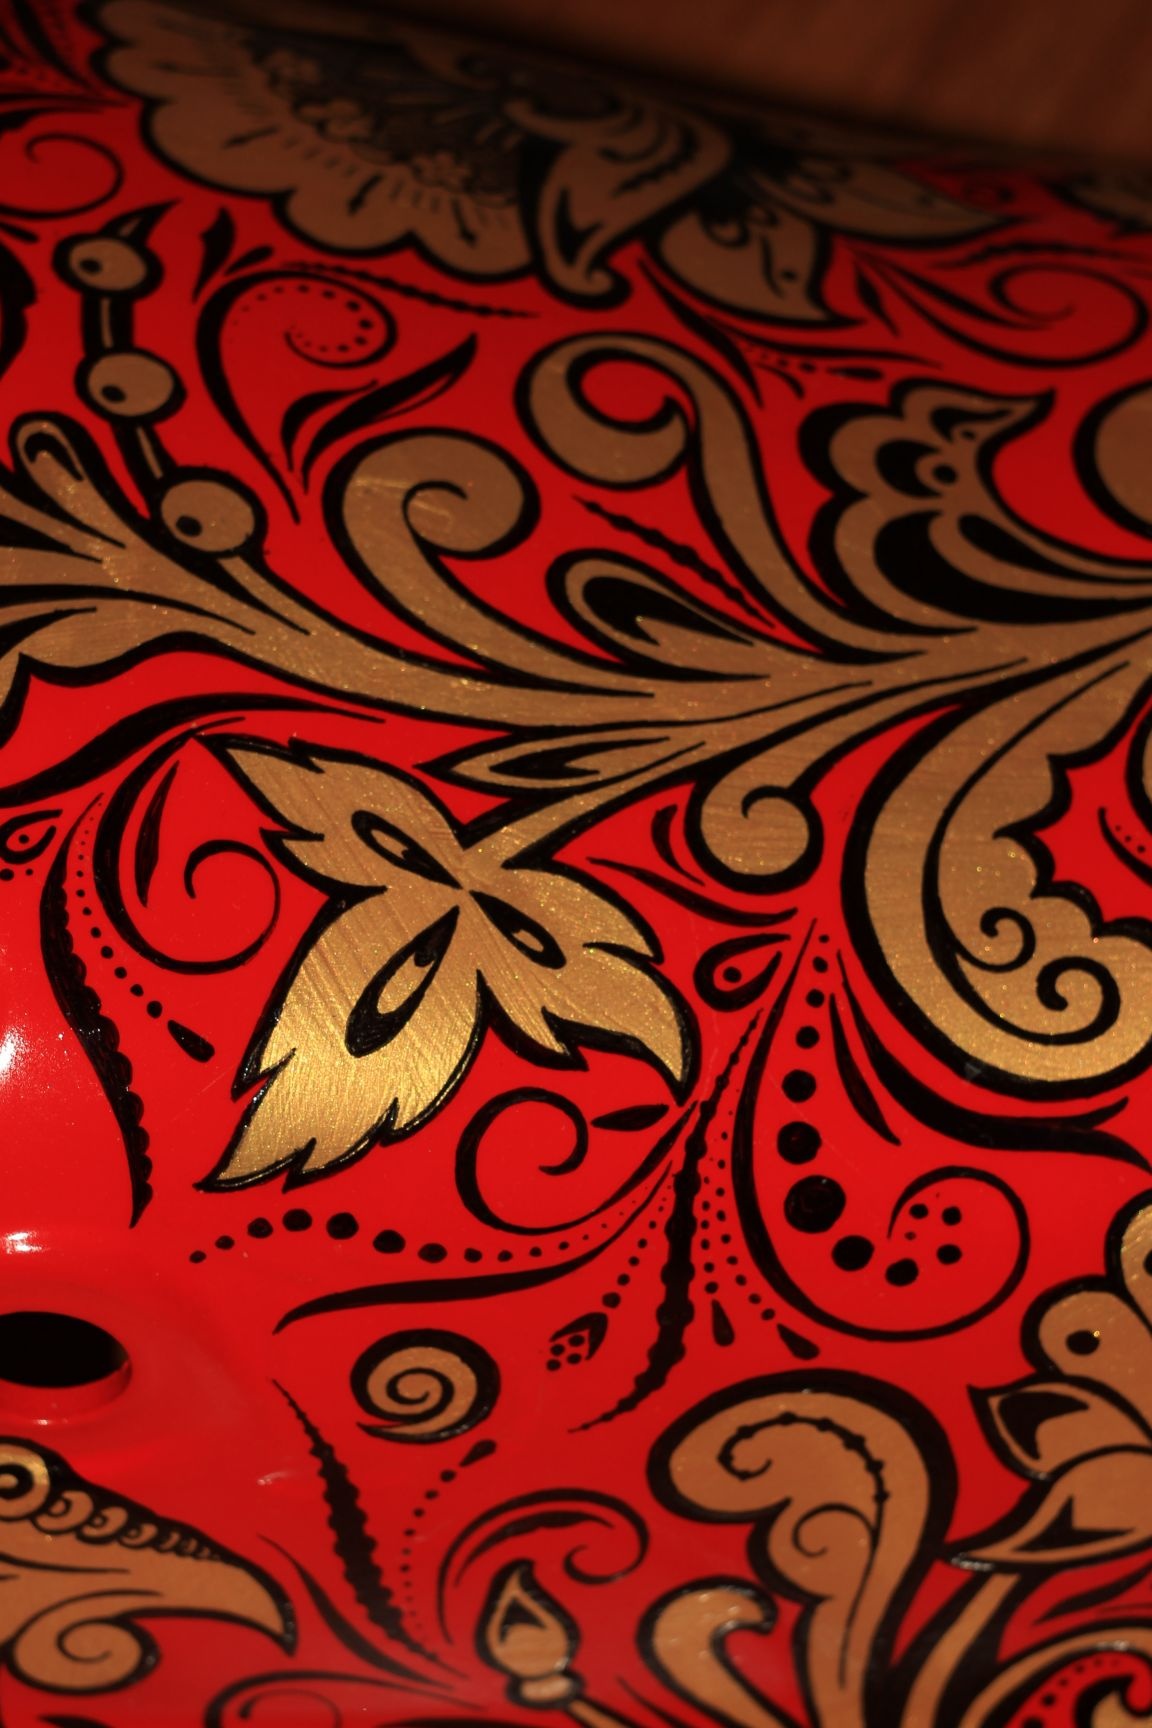
Although this could be called a stroke only at the beginning of the project, when it was planned to simply circle the golden patterns around the perimeter with a black marker and limit this. In the course of the project, the stroke grew into a full-fledged drawing and for me personally, with my lame art skills, its implementation became impossible. Fortunately for me, a girl with an art education helped me with art. And to be honest, it was she who refined my idea to such a level. She explained to me that as I want, it will be bad and need to be done differently. We can say that everything turned out beautifully, almost contrary to my ideas.
But back to the technical part. First, we circled the patterns on all the elements around the perimeter, and then began to “paint” with small details and all sorts of curls. And when we finished, it seemed to us that the gaps between the patterns should also be filled with patterns. This combined all the elements into a single composition, slightly muffled red and highlighted golden colors. Further on the photos you will see how much better it became. Actually, the whole project was born on the go, and everything was planned much simpler and generally a little different.
Step 7: Protective varnish coat.
Having learned from my mistakes, I decided to abandon varnish in spray cans. Because at this stage it was necessary to apply the extreme layer of the entire coating, and if it dries for a year, I just can’t stand it, I’ll put the parts on the motorcycle and, of course, spoil all the work done. And since I didn’t have a spray gun, and applying a car paint with a brush was just stupid, I had to take the parts to the service station and pay for applying several layers of varnish and drying. At market prices, they took me quite inexpensively, but relative to all the costs of the project it is very noticeable.
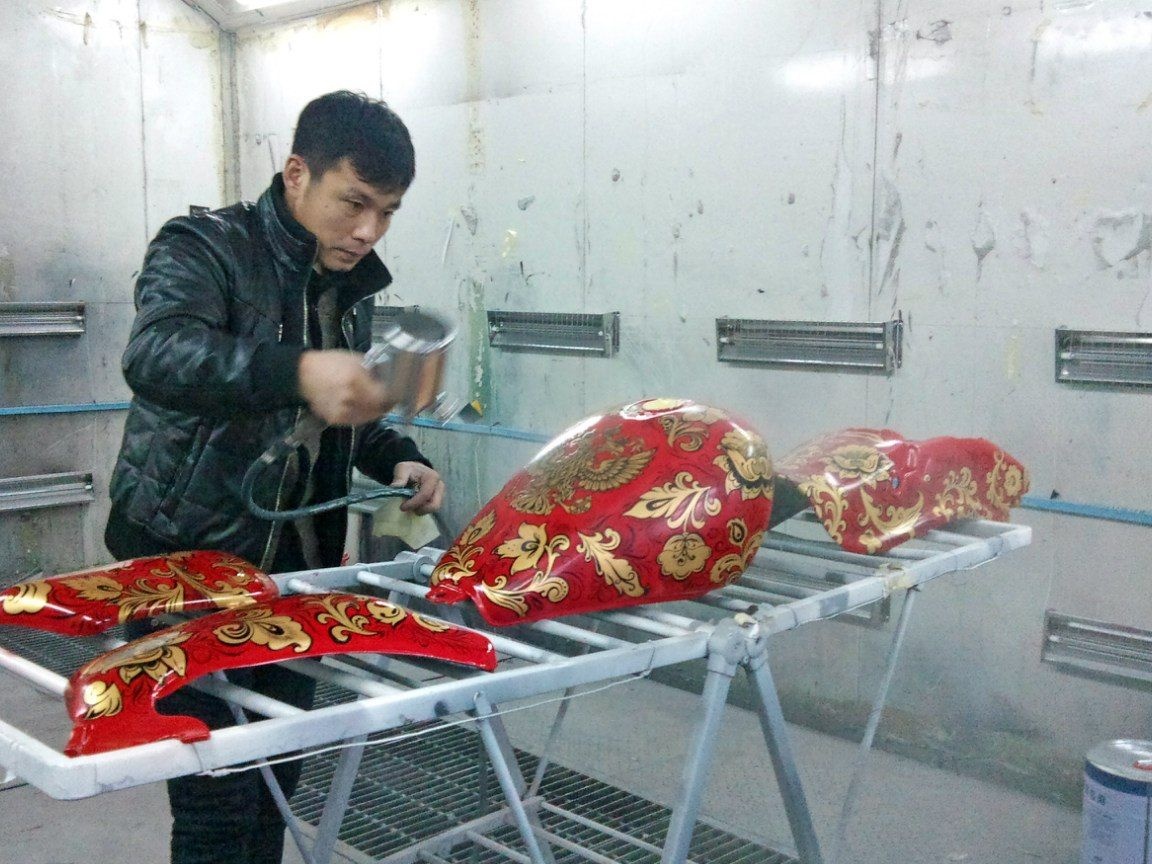
Already at the service station there was another problem. The master said that the entire surface of the valve is covered with hands (they were painted without gloves and did not think about it at all) and it must be either degreased with alcohol or pass with fine sandpaper. The option with alcohol was excluded, because alcohol - will erase the entire drawing made by the marker. I had to sandpaper (2000cw sandpaper), and then draw black lines where they were damaged. It took half a day, not counting the application of varnish.
It was necessary to pay for three layers of varnish more than was spent on all other expenses. But it was still worth it, because after a day I took the parts that could already be touched without fear of damaging the coating. And after a week of drying on the balcony, it was possible to begin assembly.
At this stage, I realized that you can’t touch the intermediate layers of the paintwork with your hands, otherwise the finish layer can peel off because there is always fat on the person’s hands (regardless of the cleanliness of the hands). Work only with gloves!
The upper part of the rear wing was varnished with a layer twice as thick, because there I usually go with a backpack and other luggage. The whole surface to the touch turned out to be embossed, it was possible to make it smooth just by polishing, but it seemed to me that it was even more interesting.
Step 8: Build.
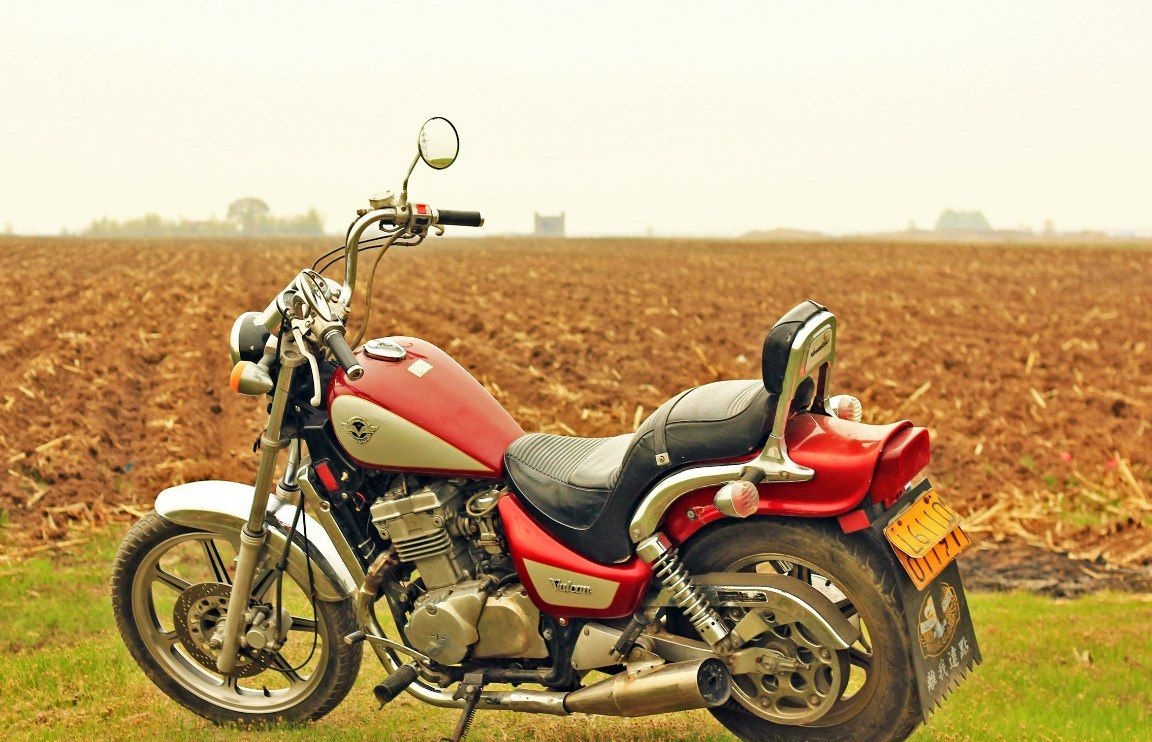
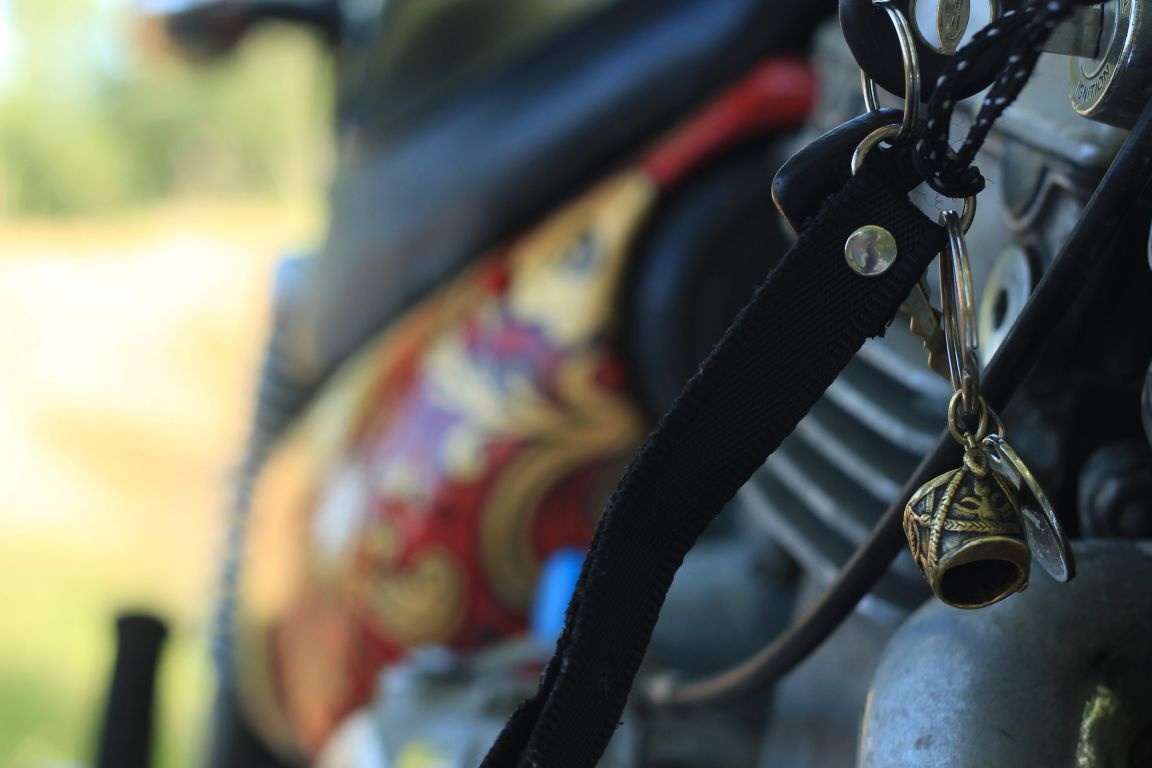
During the assembly process, no difficulties arose. The result of the work done more than satisfied all the project participants. The detail of the picture turned out so high that even in close-ups there is something to admire.The motorcycle began to draw attention to itself on the roads, and in the parking lots to collect around itself, sometimes whole crowds of people who touched it and examined it except under a magnifying glass. Near shopping centers, sometimes I had to wait for people to finish taking pictures on the background of the bike, and only then start and drive. By the way at the service station, the workers were afraid to apply the varnish themselves - they called the owner, he arrived and personally did everything.
In this country (where the project was made) it is generally not accepted that someone should do something on his own, here all even the smallest work is carried out in specialized places. The fact that the drawing was done independently at home caused the furor.

Conclusion
The whole project took about a year and a half. If you use high-quality materials, then you can reduce this period to about a month, and if you have experience in carrying out such work, even a week, or even less.
About 2,000 rubles were spent on materials, plus 3,000 rubles for services at the service station. A lot of conclusions have been made, experience has been gained even more, I tried to outline all the nuances on which our project was “burnt” in the text.
During assembly, it turned out that the nameplates (factory emblems) did not harmonize with the new paint at all, and it was decided not to attach them at all.
In Russia, I appreciated the application of such a drawing of 100 thousand rubles. The quality of execution there would, of course, be several times higher, but 100, damn it, thousands!
Get involved homemade - It is interesting, useful, and very profitable.
Thanks for attention.