

It all started with the fact that I was looking on the Internet for flying balsa models. I came across an ornithopter. Last year I already did an ornithopter, but it was something else. It was a mechanical prototype of a butterfly. I really wanted to do this, but the problem was that there were no drawings anywhere, only video flights. As a result, I did not find any drawings, but I found one picture.

It depicts an ornithopter - a butterfly (photo from the side). And below was a comparison of the flight paths of a butterfly and an ornithopter (to my great surprise, they were the same). But the most important thing was that on the side there was a butterfly wing diagram. And on that wing, the alleged stiffeners were painted. The material of the ribs, as I understand it, is some analogue of carbon. But, since carbon is an expensive thing, I decided to make ribs from balsa.
Let's get started!
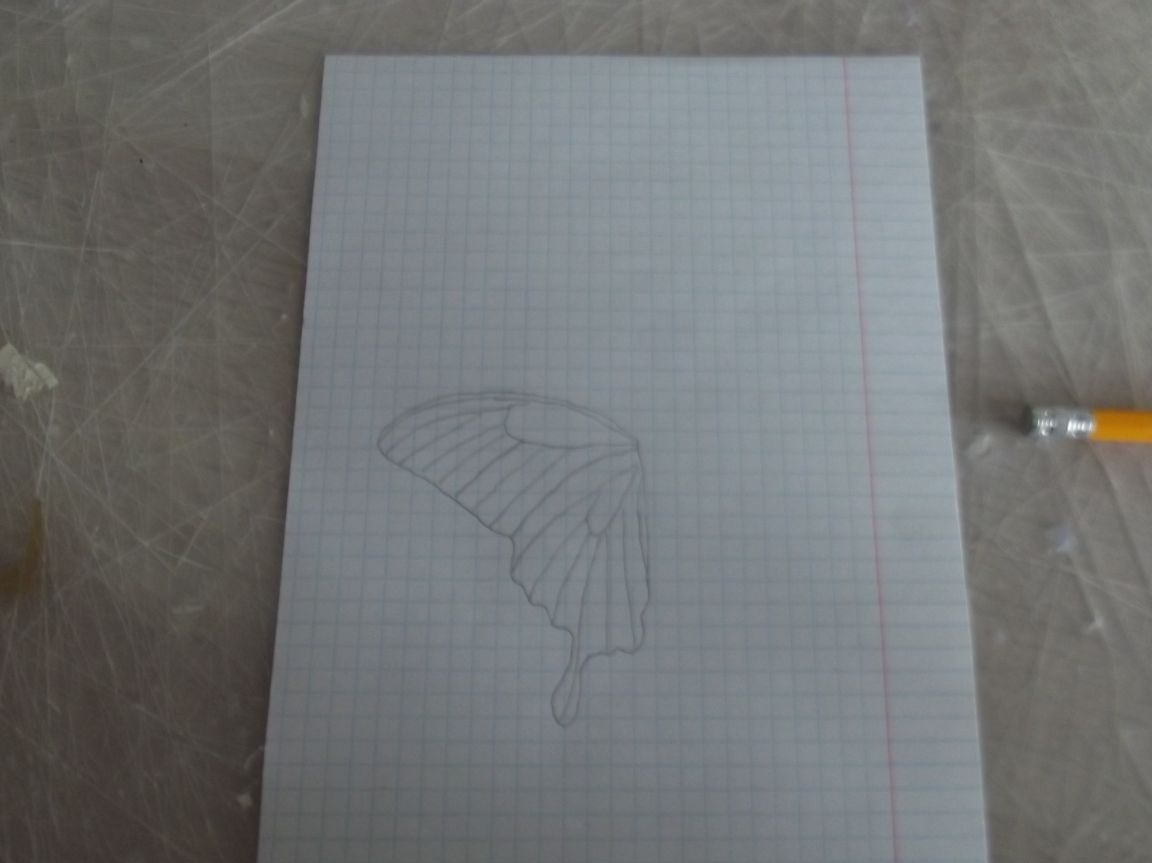
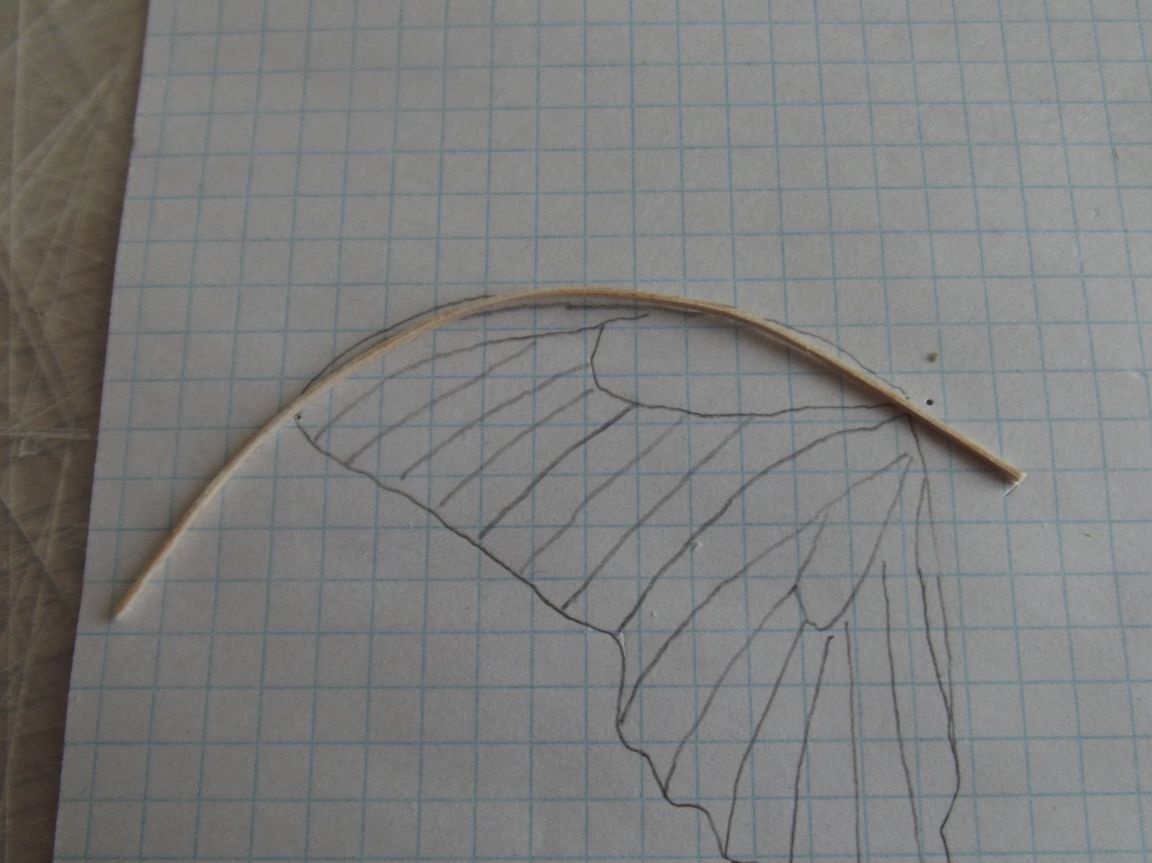
The first thing I did was redraw the wing onto a sheet in a cage.
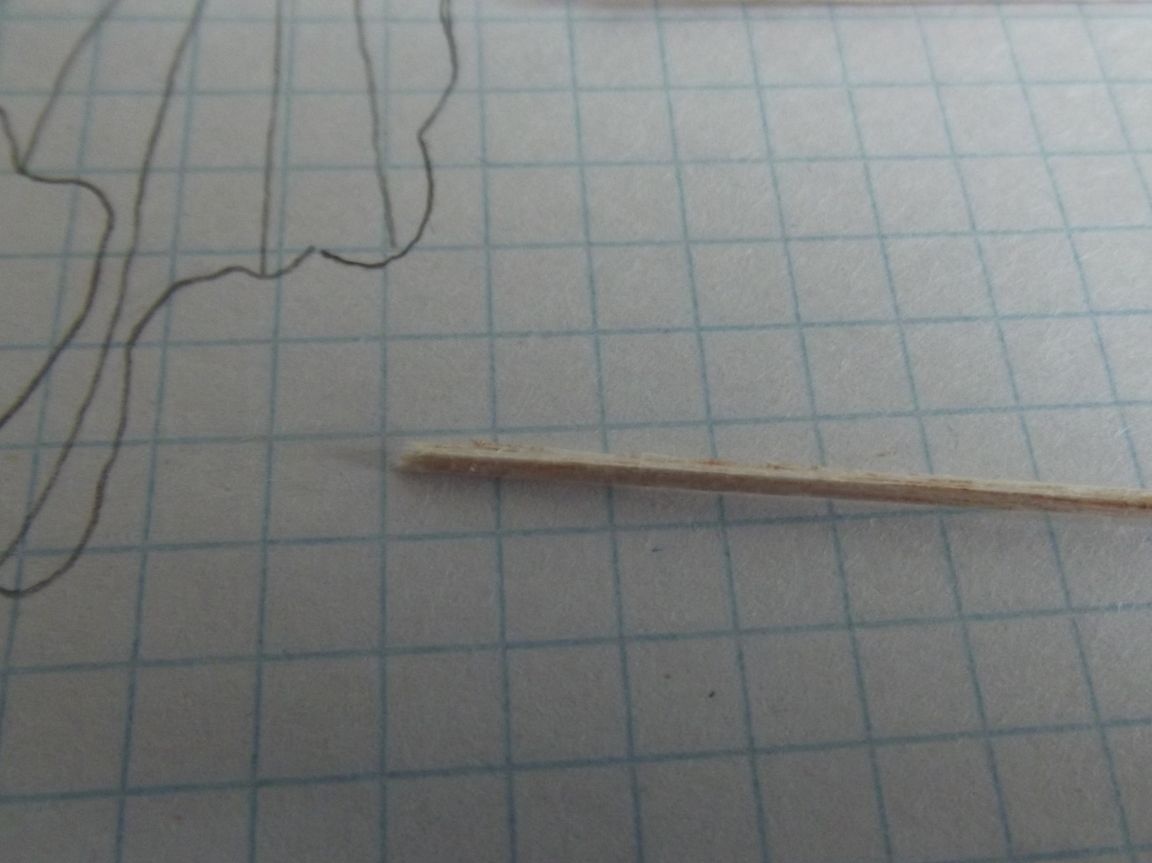
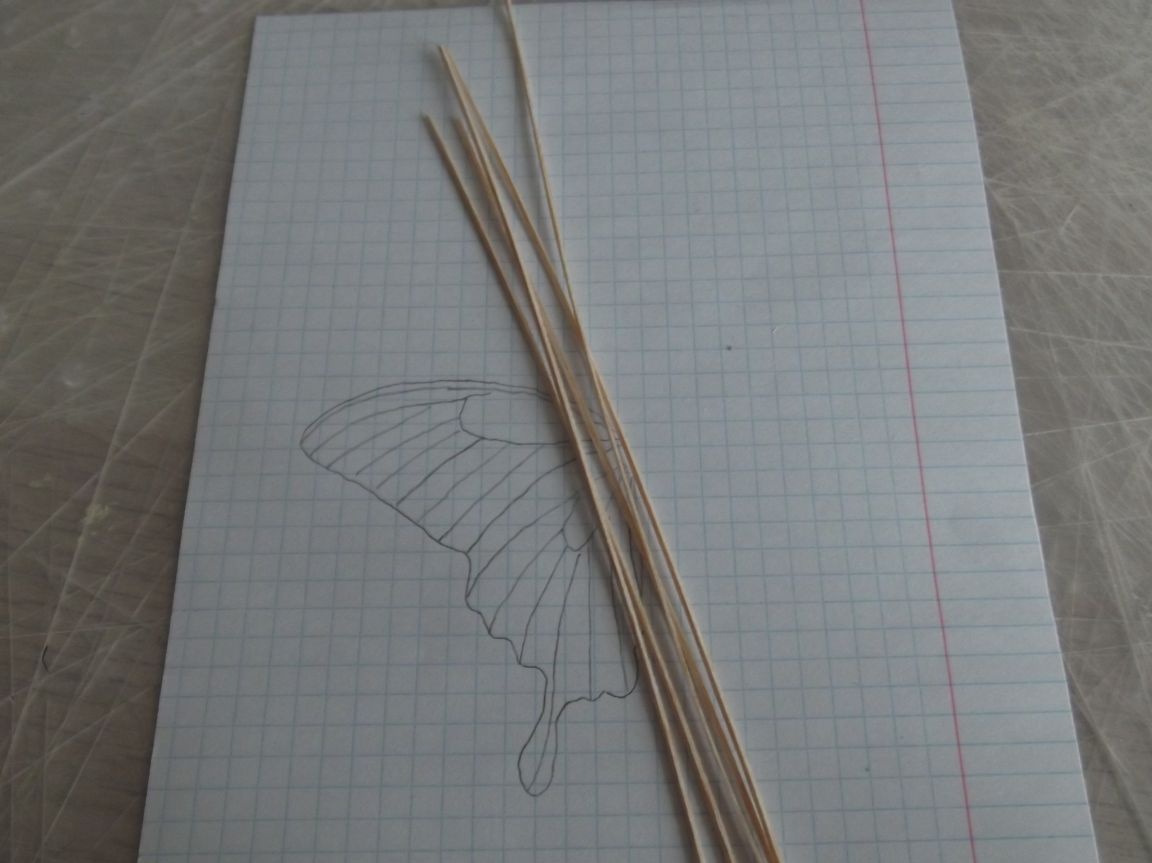
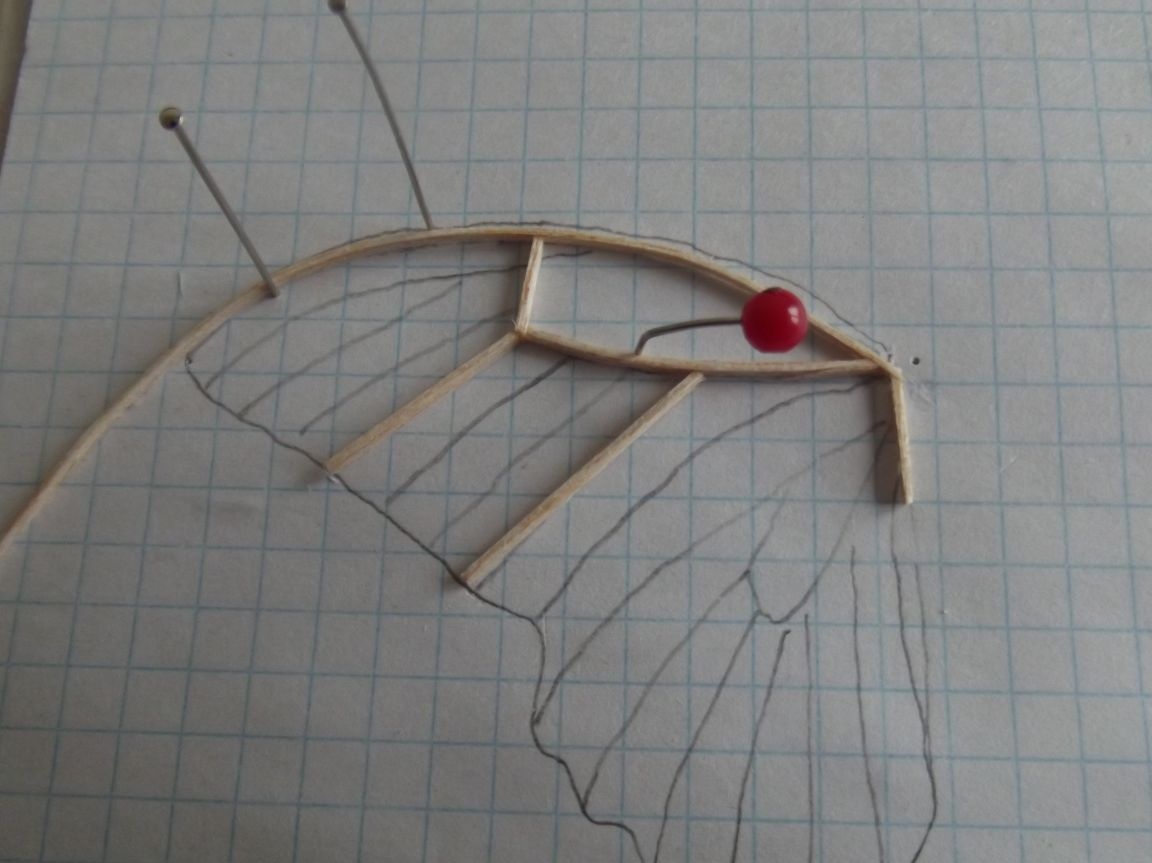
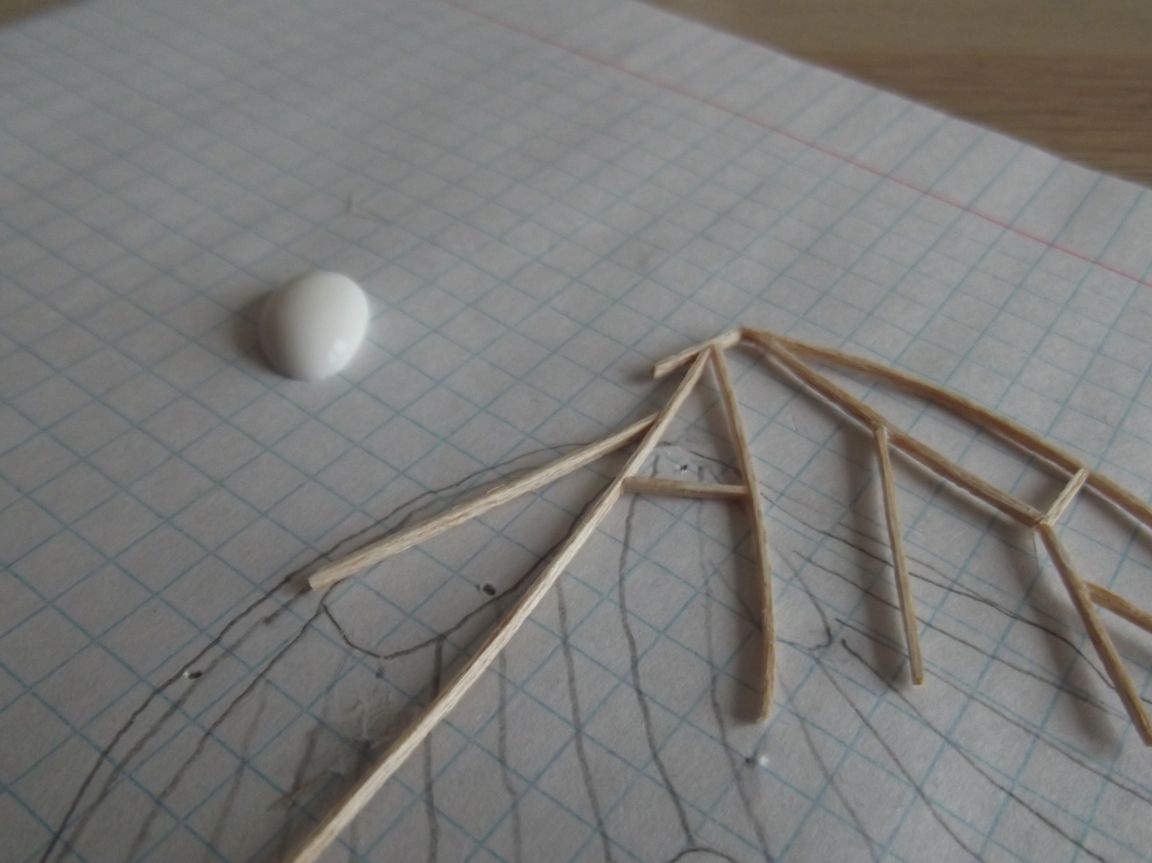
Then I cut a lot of rails 1 to 1 mm. Of these, I will make the ridge of the future wing.
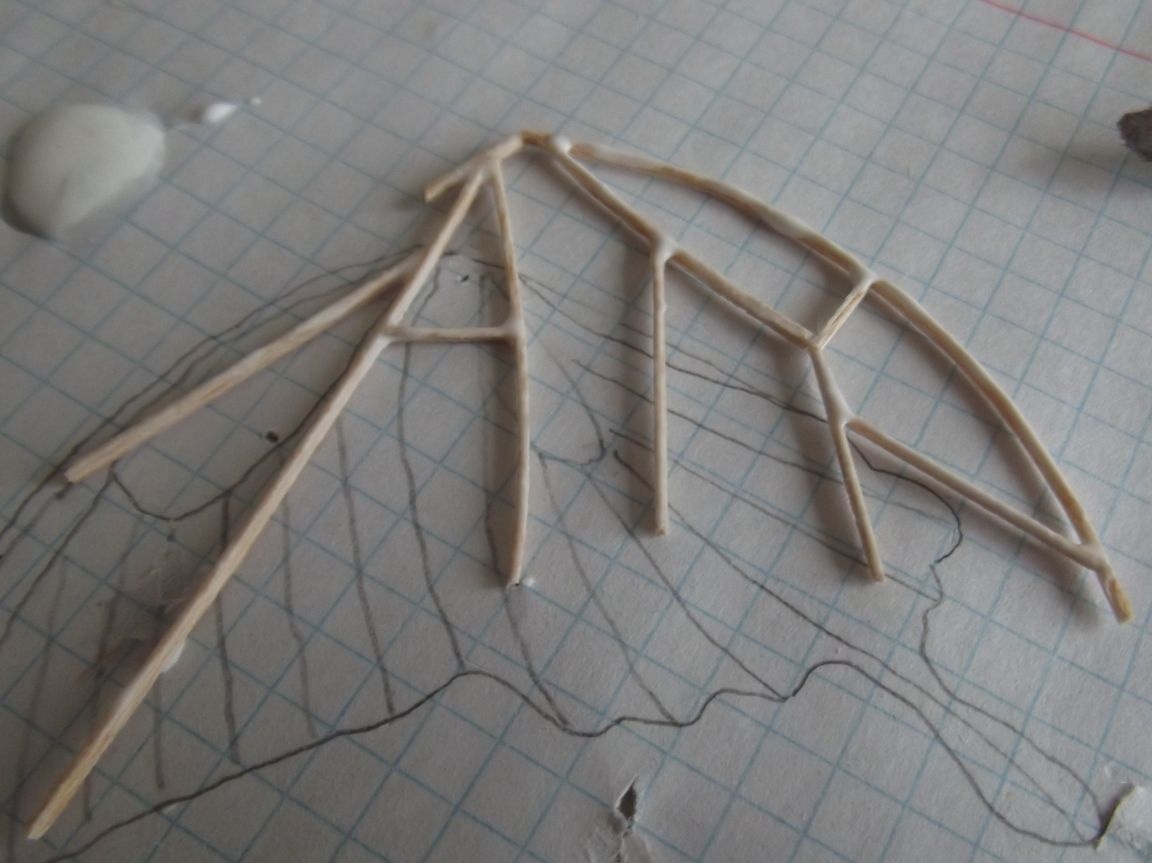
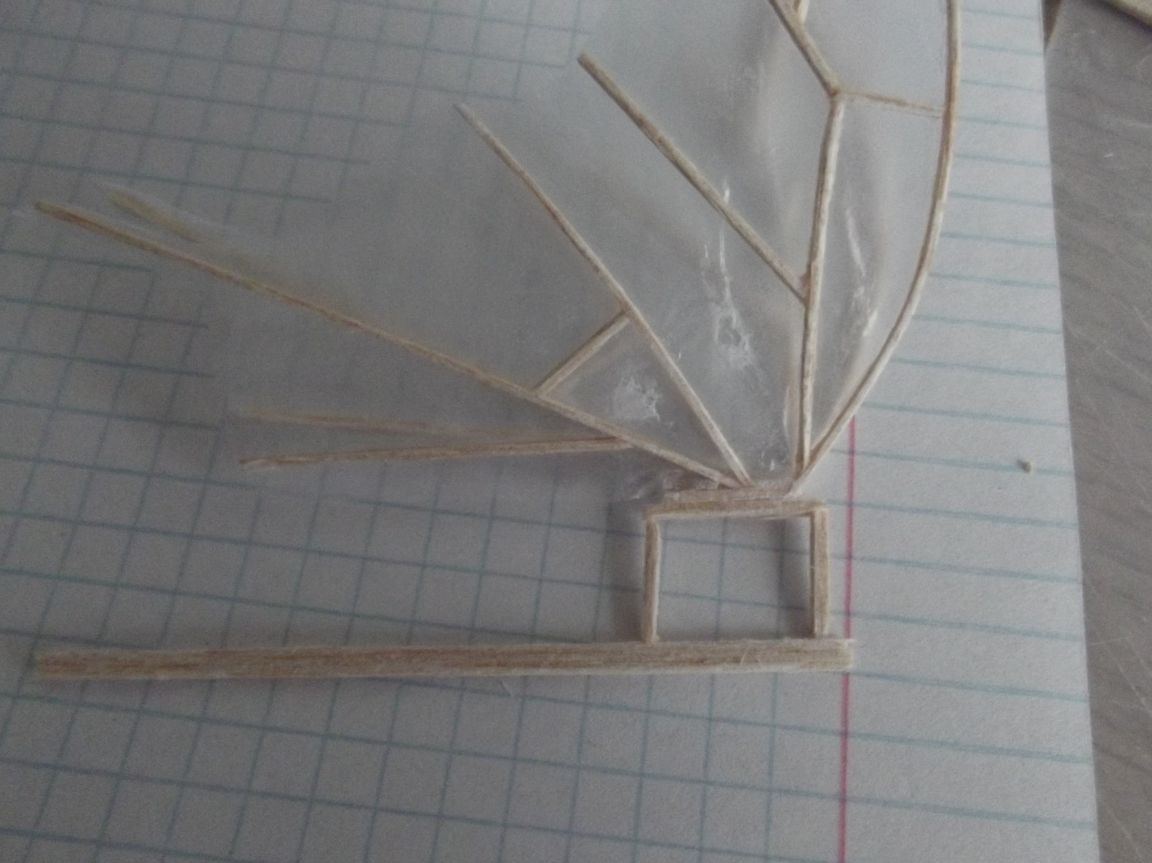
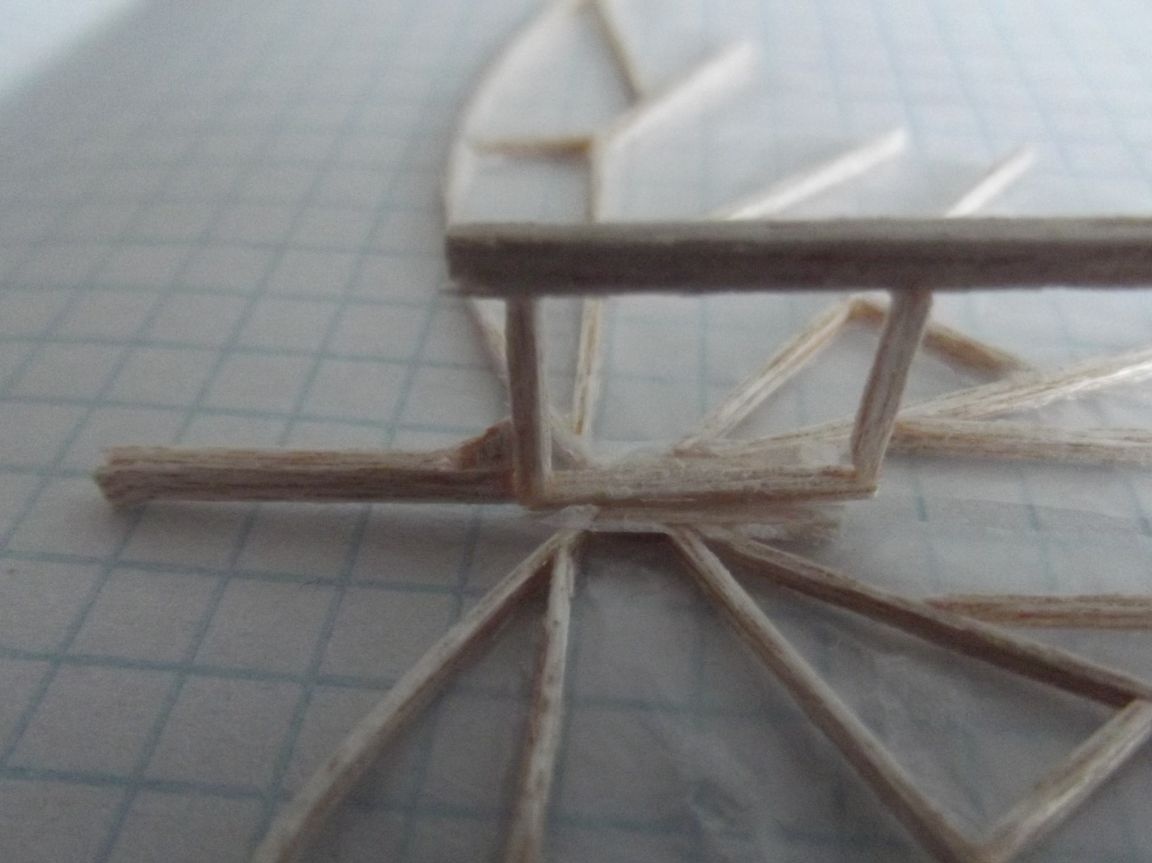
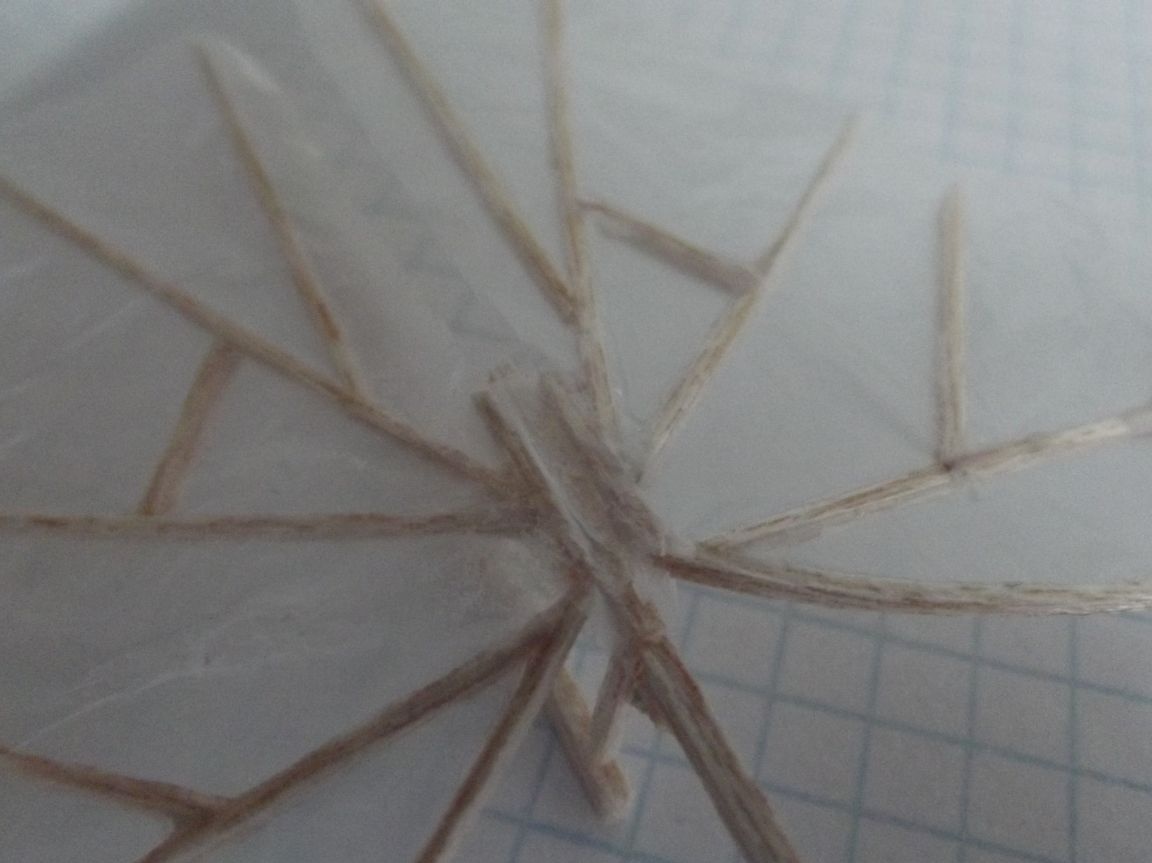
Now the hardest work has come: you need to bend the balsa, cut the appropriate parts from the rails and glue them together strictly according to the drawing. It took me half an hour to do this: they broke, cracked, peeled off on the general frame (for greater convenience, I inserted pins to give the rails a more perfect shape)
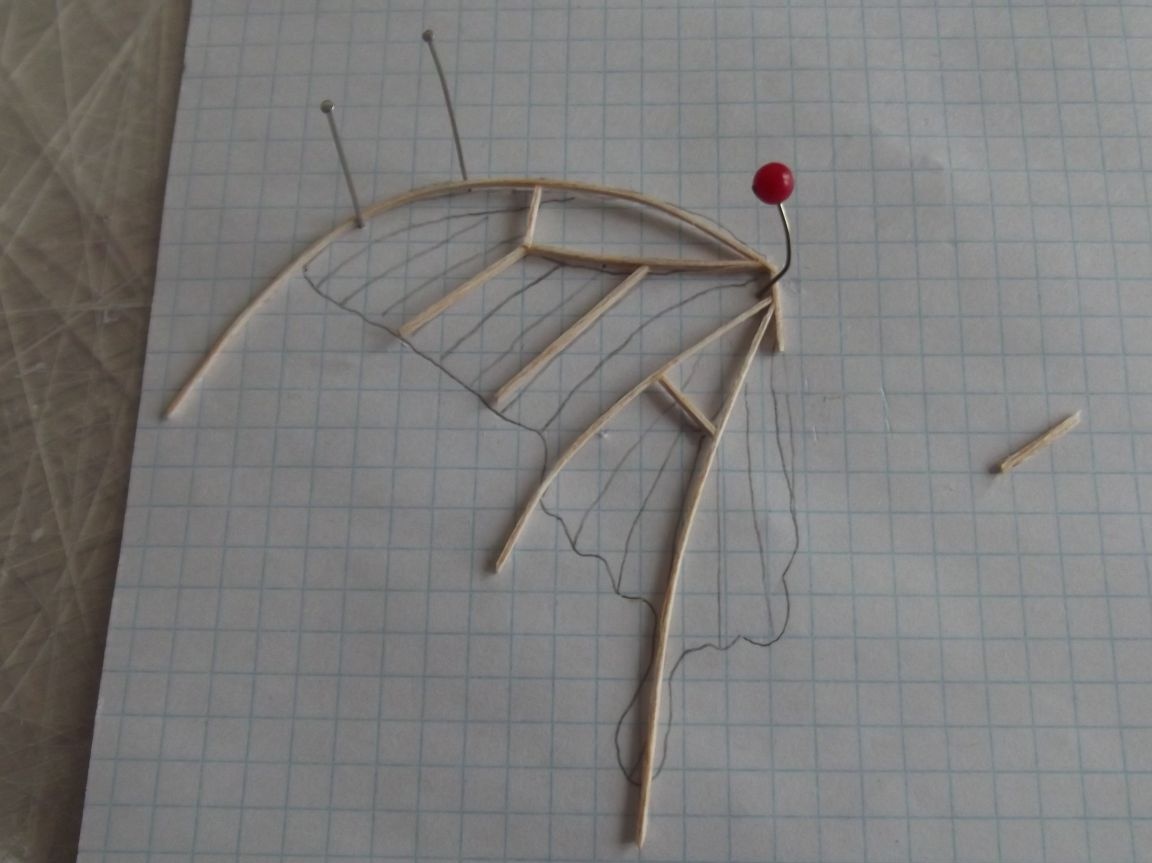

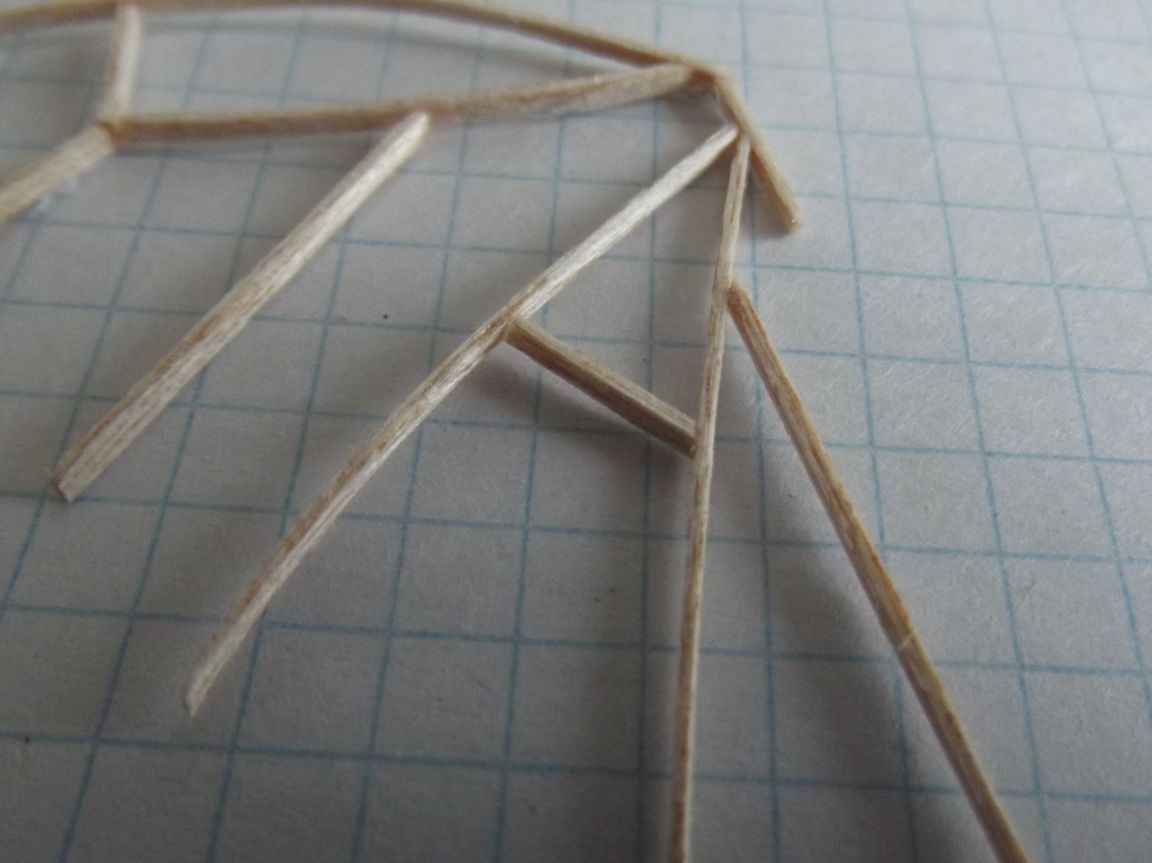
Finally, I still managed to complete that laborious work. Now I carefully removed the frame and again glued all the joints for greater strength.

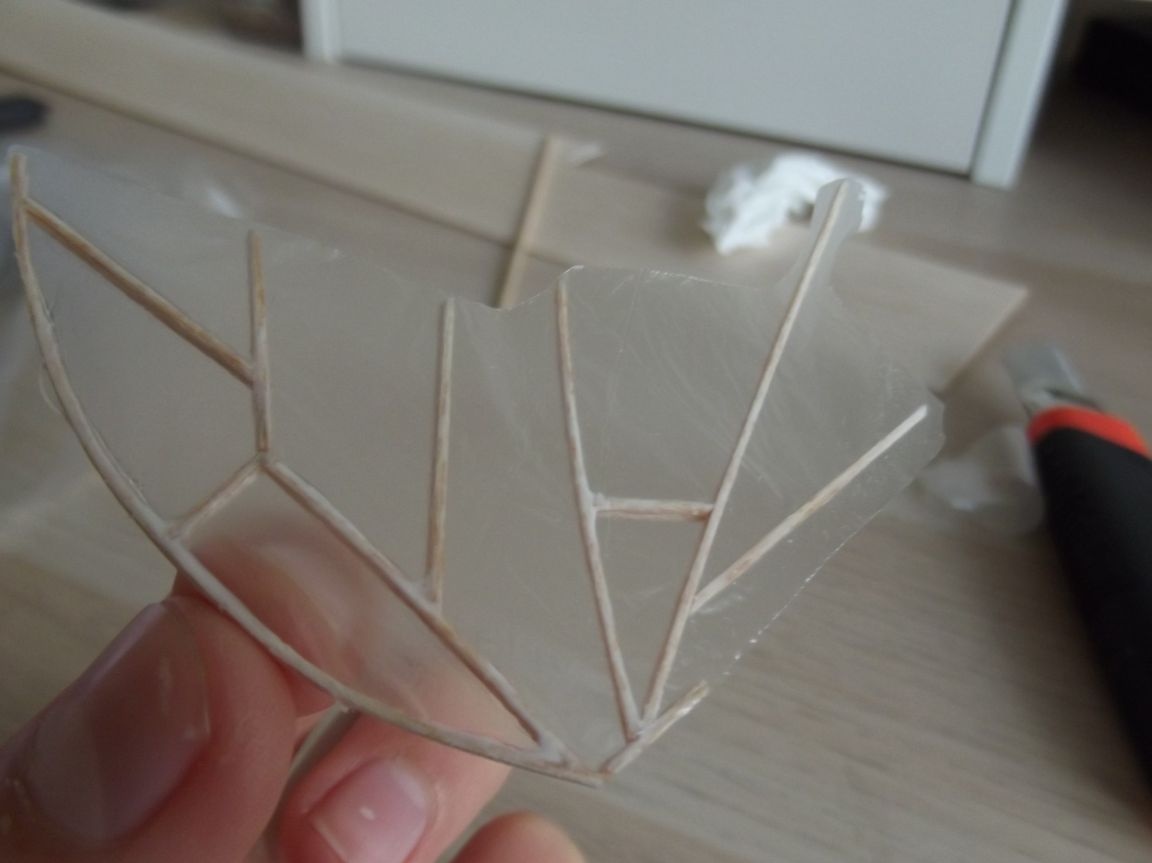
Now we need to sheathe the wing. At first I wanted to sheathe it all with microfilm, but it would be too dreary (I need to dissolve the pin - pong balls in acetone, then make a frame, then remove the film, then dry it, etc.) I decided that I would try it next time, well in the meantime, I decided to use the old-fashioned way: sheathe a package.
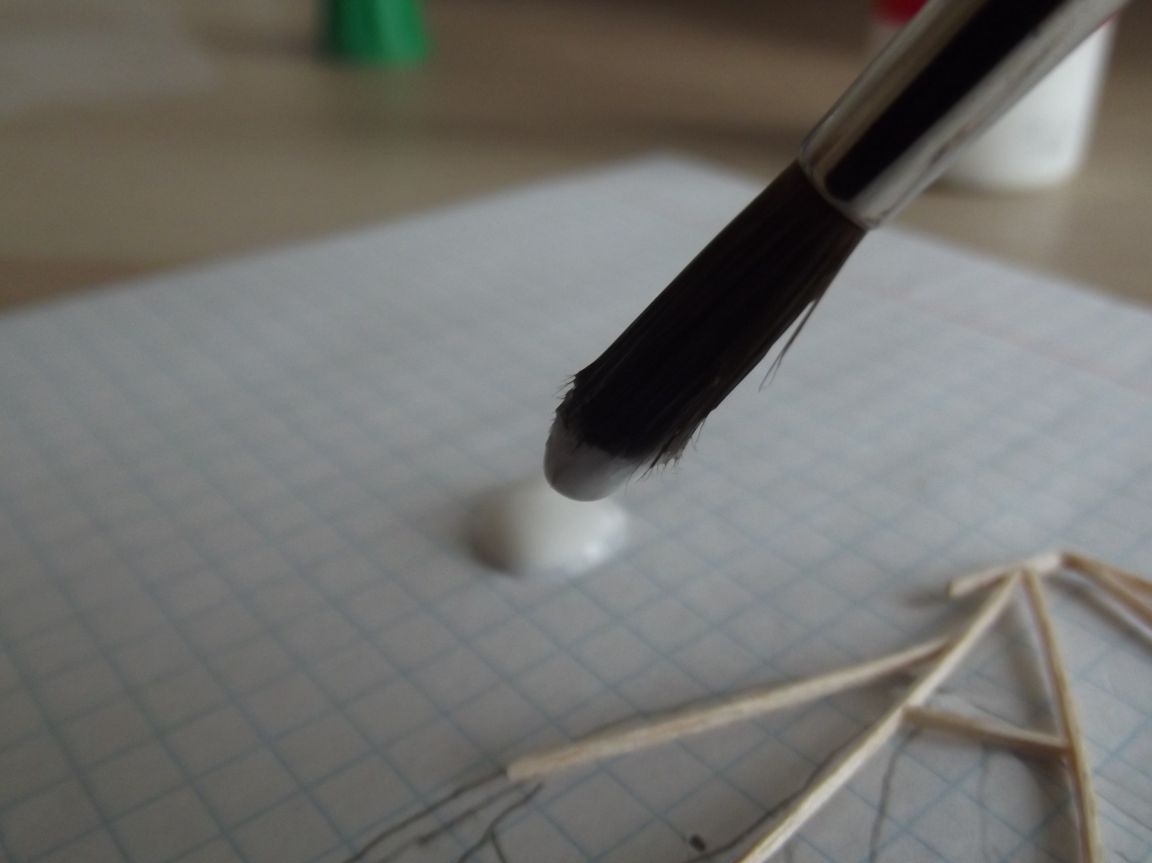
To begin with, it was necessary to smear the entire wing frame with glue (it is better to use glue-pencil, but I have run out of it. Therefore, I took pva.When I poured a little glue on the sheet, I realized that it was too thick ... Therefore, I dropped one small drop of water into it and mixed it. Now I missed everything very carefully with a brush. Then I opened the bag and smoothed it on the table. Now I carefully put the frame, pressed it down with a big book and left it all to dry for an hour.
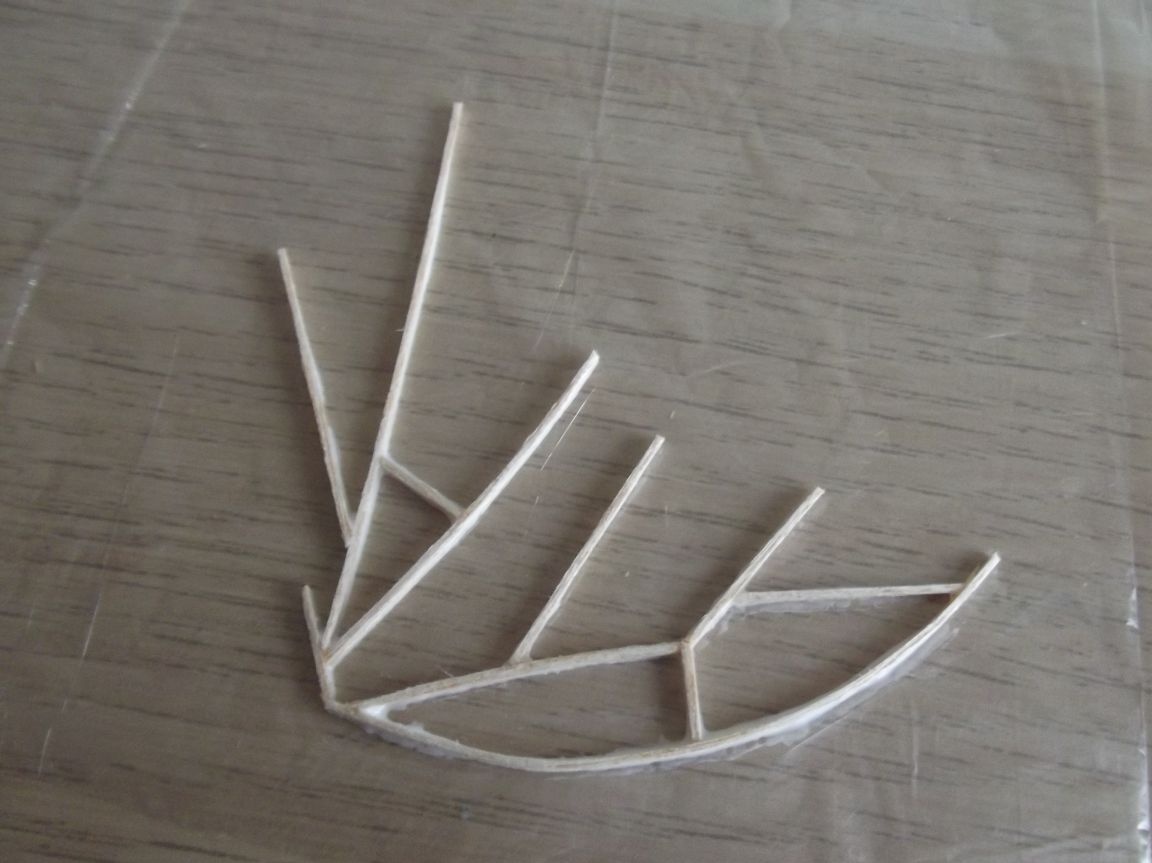
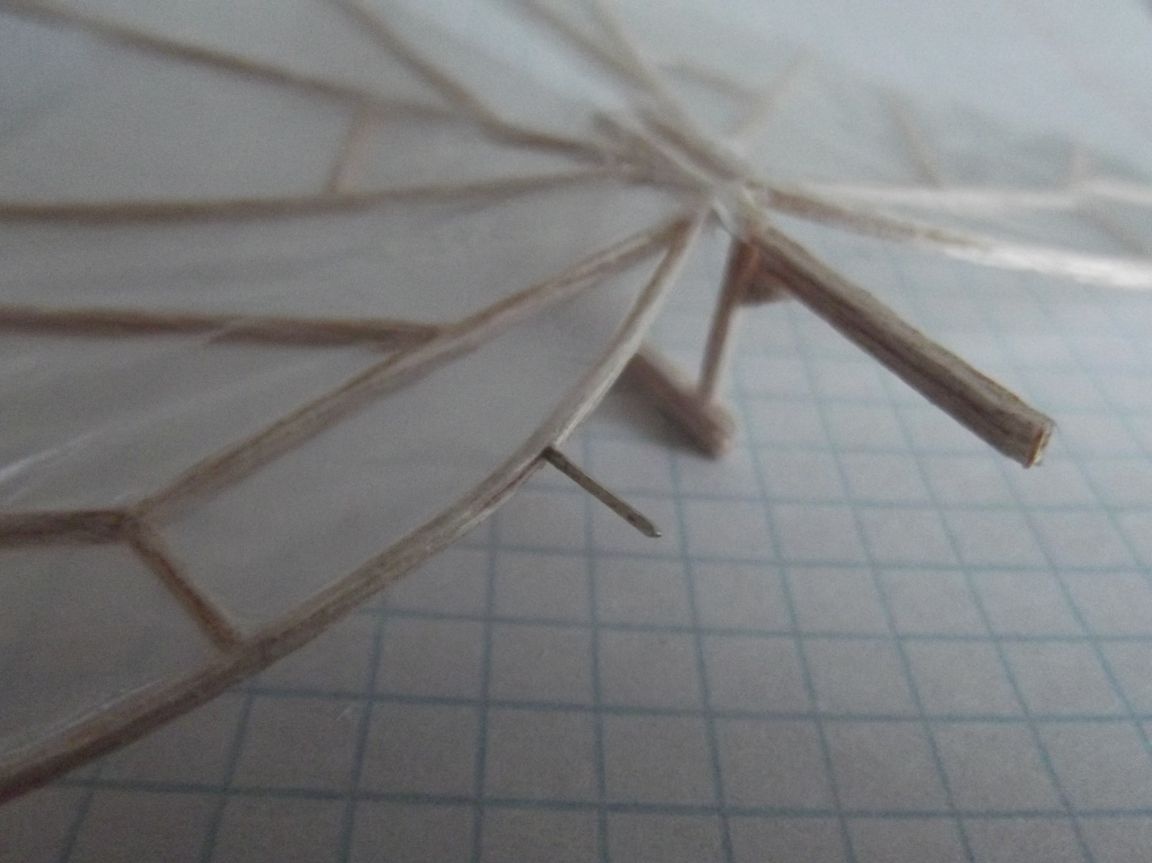
After this hour, I took all this out of the press and carefully, following the drawing, cut it off.
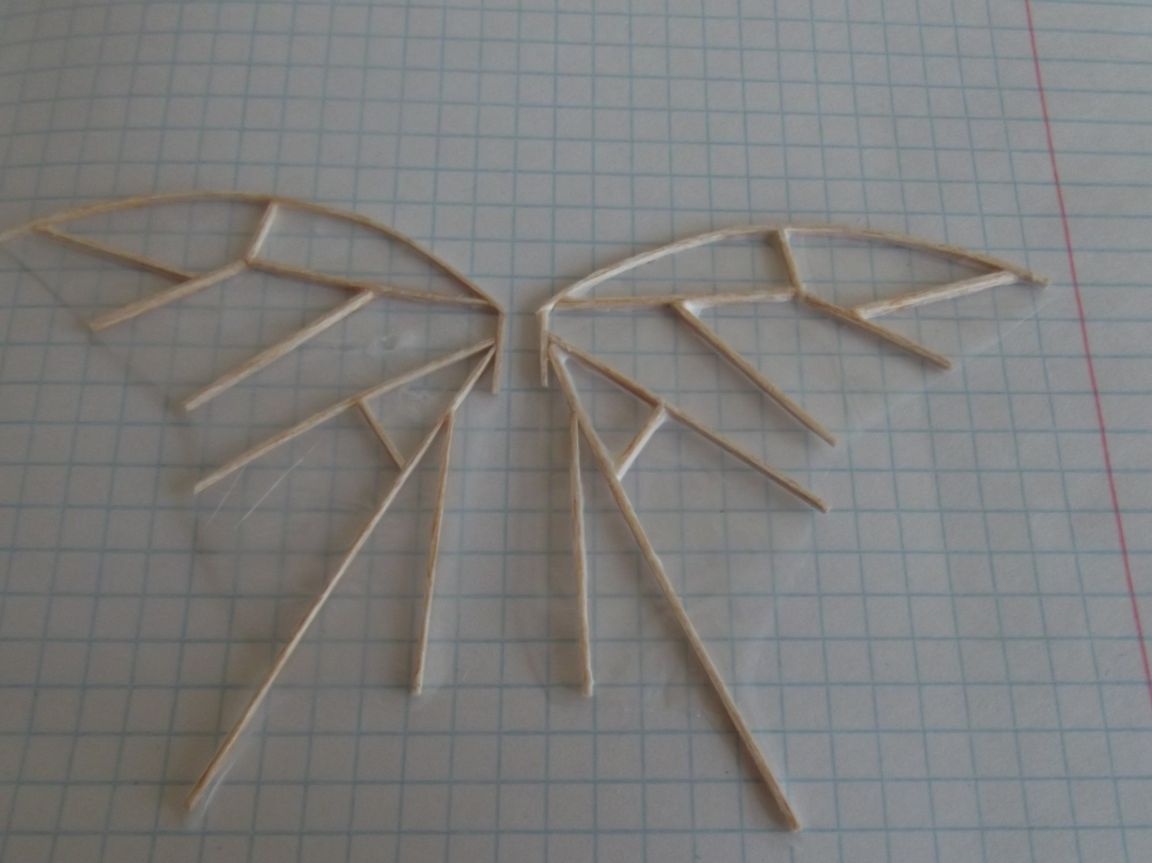
Now even more difficult work was ahead: to make exactly the same wing. It was the hardest part. I redid the wing twice: either the rails broke at the very last moment, then the rails turned out to be too small. But still, I managed to make an almost perfect copy.
Now we had to make the fuselage of our ornithopter. I did it in much the same way as my first ornithopter.
The fuselage in all its beauty. Now it was necessary to attach the wings to the upper beam, at first I wanted to make loops and a small wire, but changed my mind and attached them to a small piece of the bag, which fastened the wings themselves together with the fuselage. It was also necessary to make a “nose” to adjust the center of gravity.

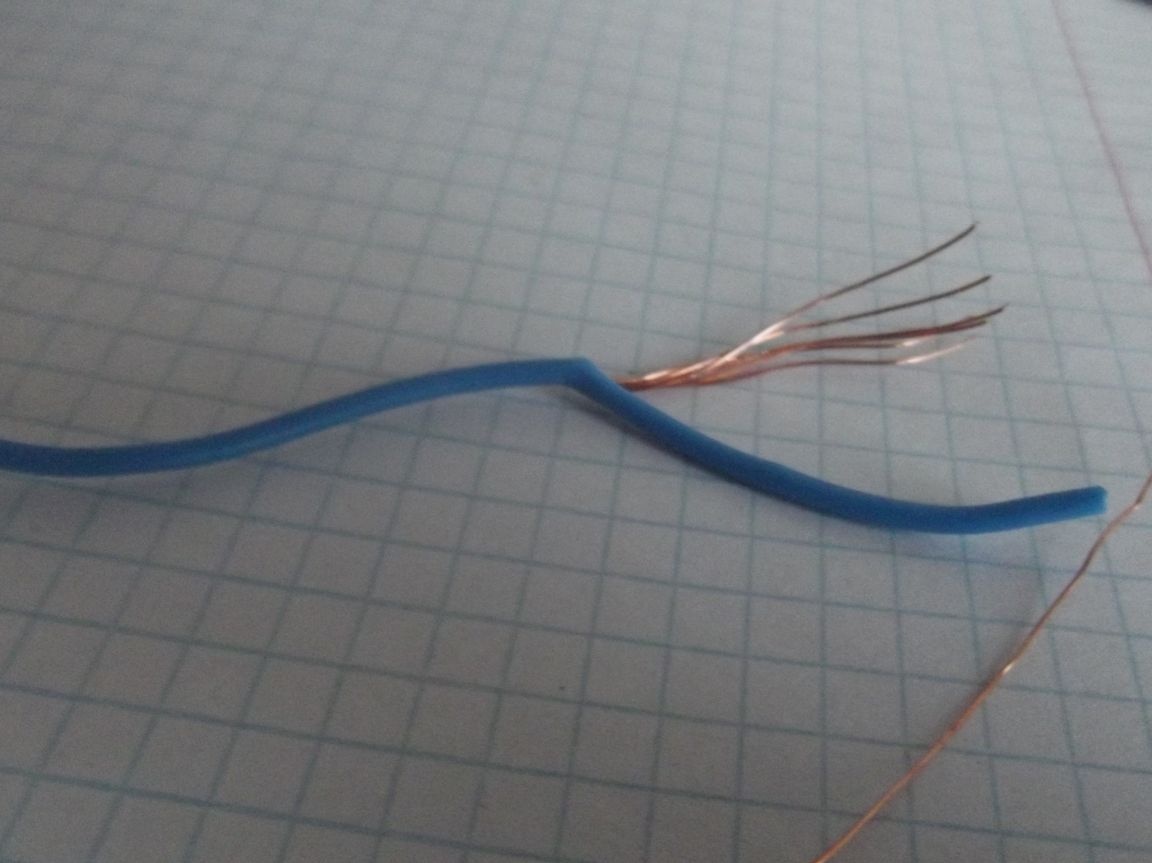
Then I started making a crankshaft and a gum hook. For a long time I could not decide what to make of it, but then a piece of wire fell into my arm. The wire inside it was quite strong, and it was decided to make a crankshaft with a hook out of it.
There was nothing complicated further.
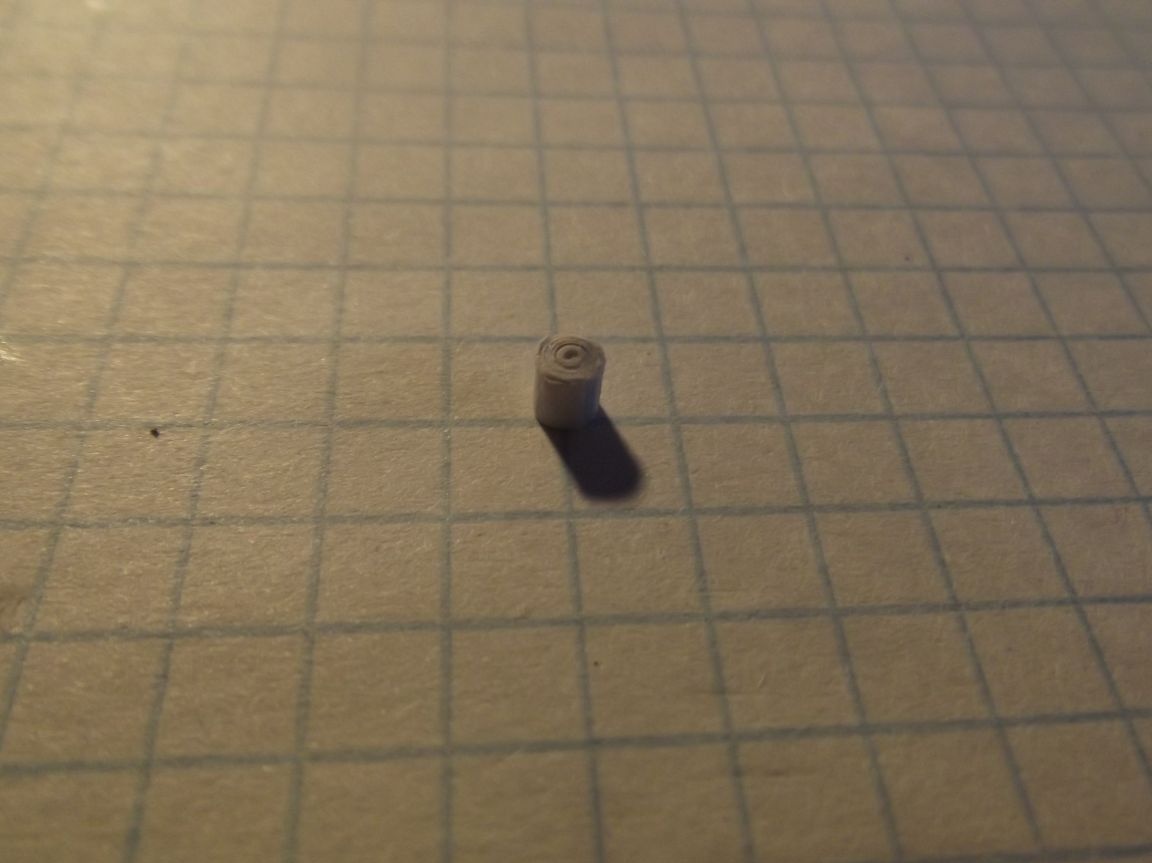
The axis is a small paper tube soaked in glue.
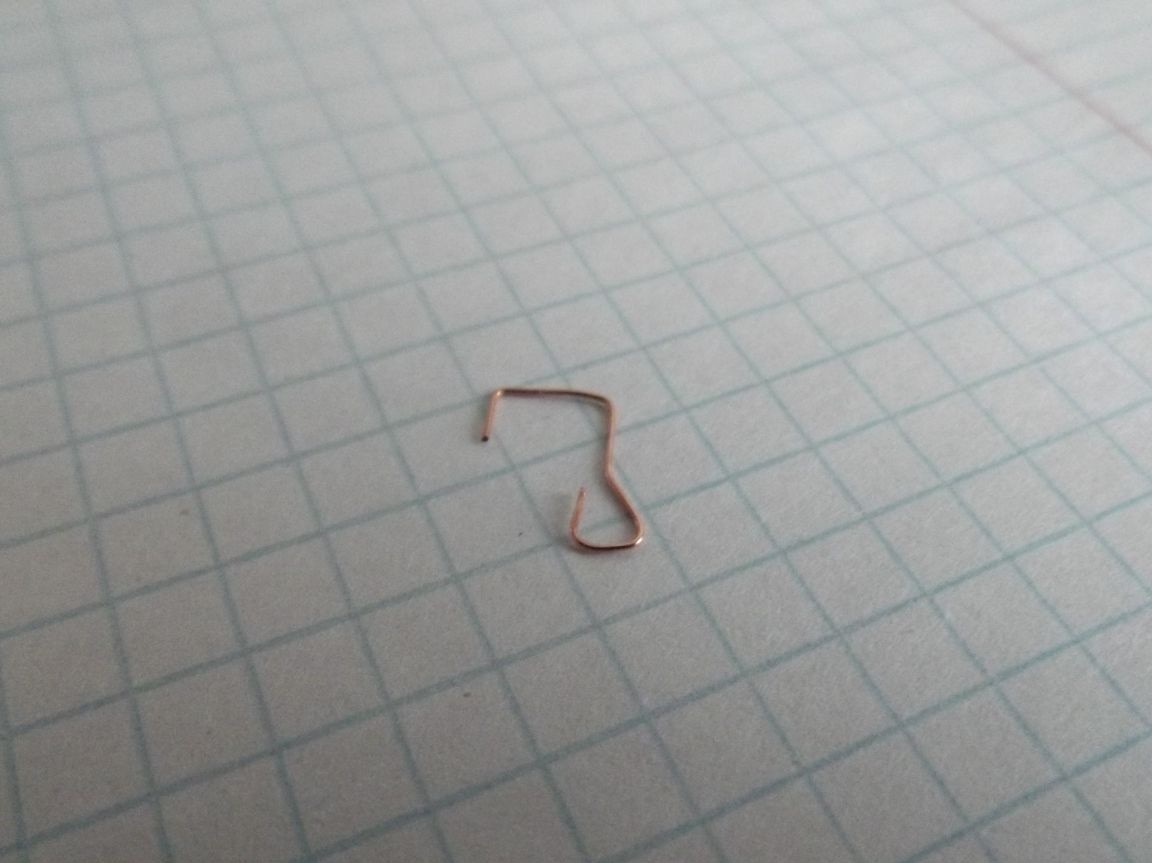
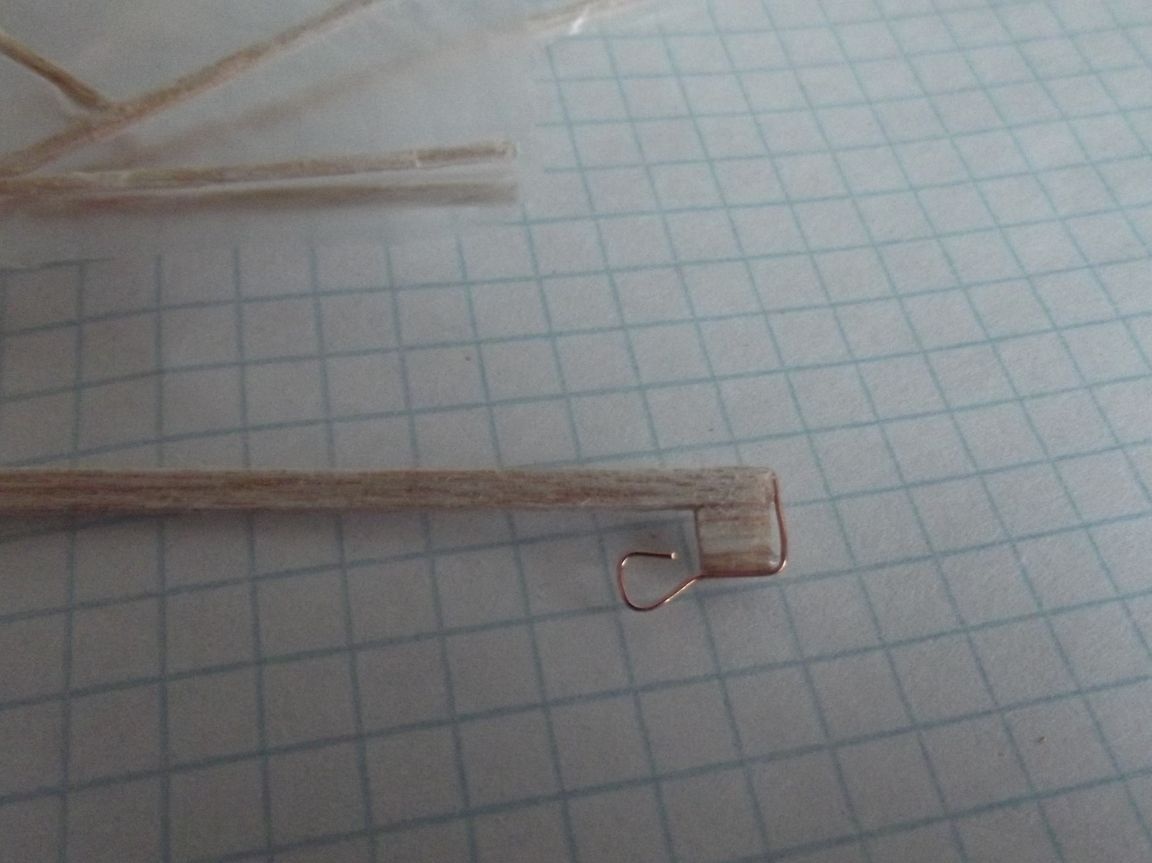
Hook
Now I glued a piece of balsa to the body, and then the axis to it
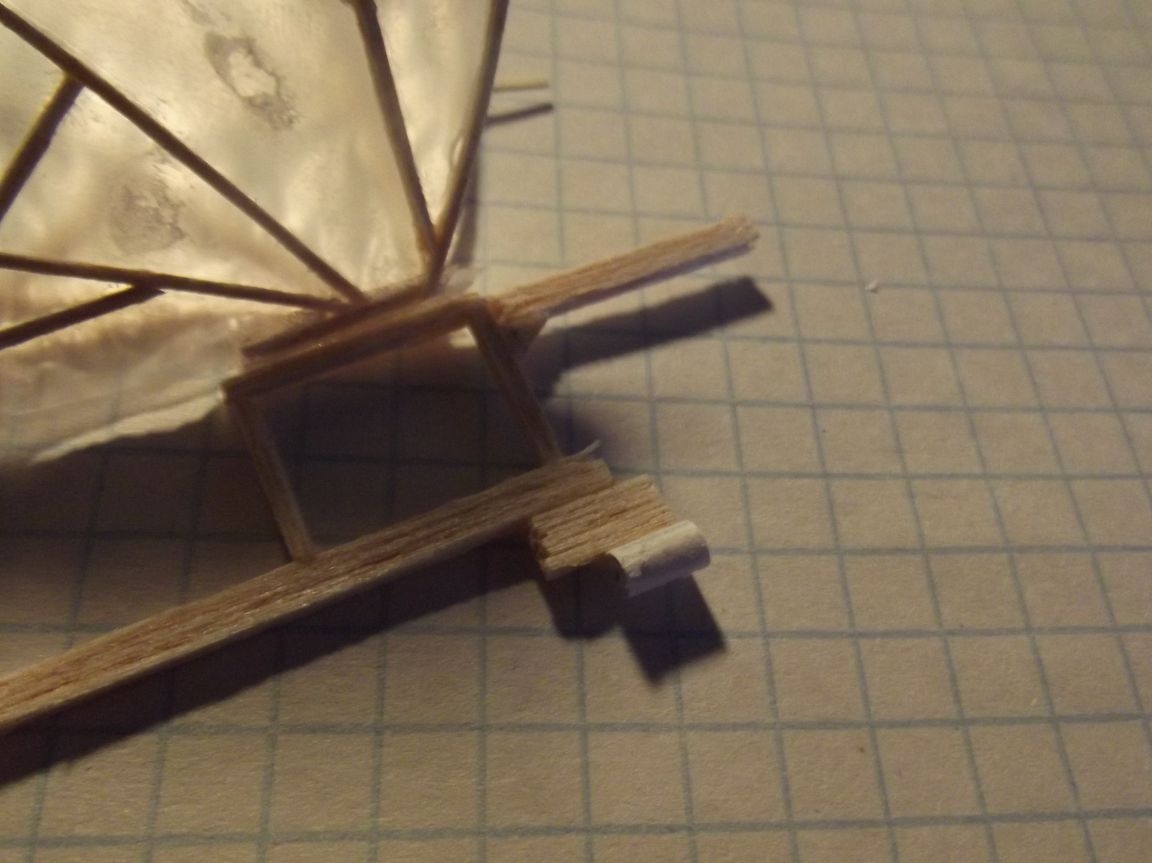
I did a similar operation with a hook
I made the crankshaft from the same wire
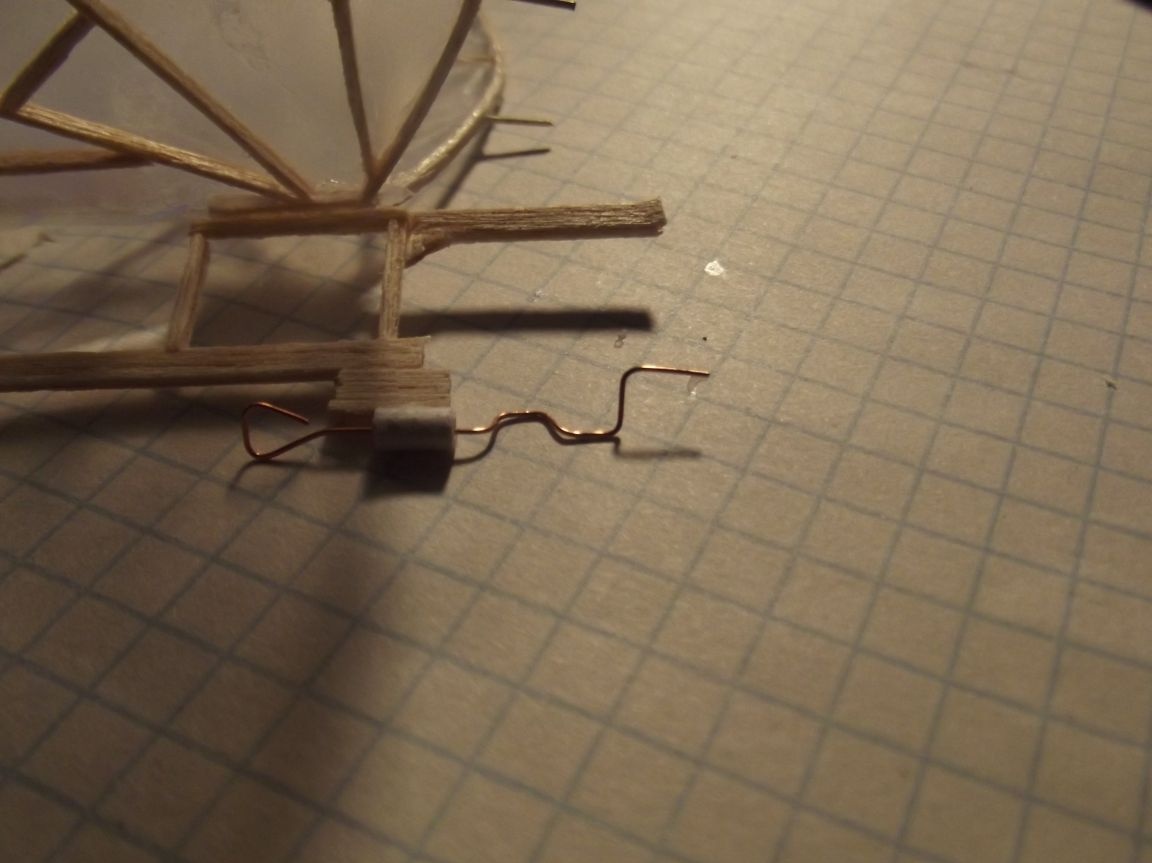
A small piece of wire needed to be attached to the wing (I will cling to it)
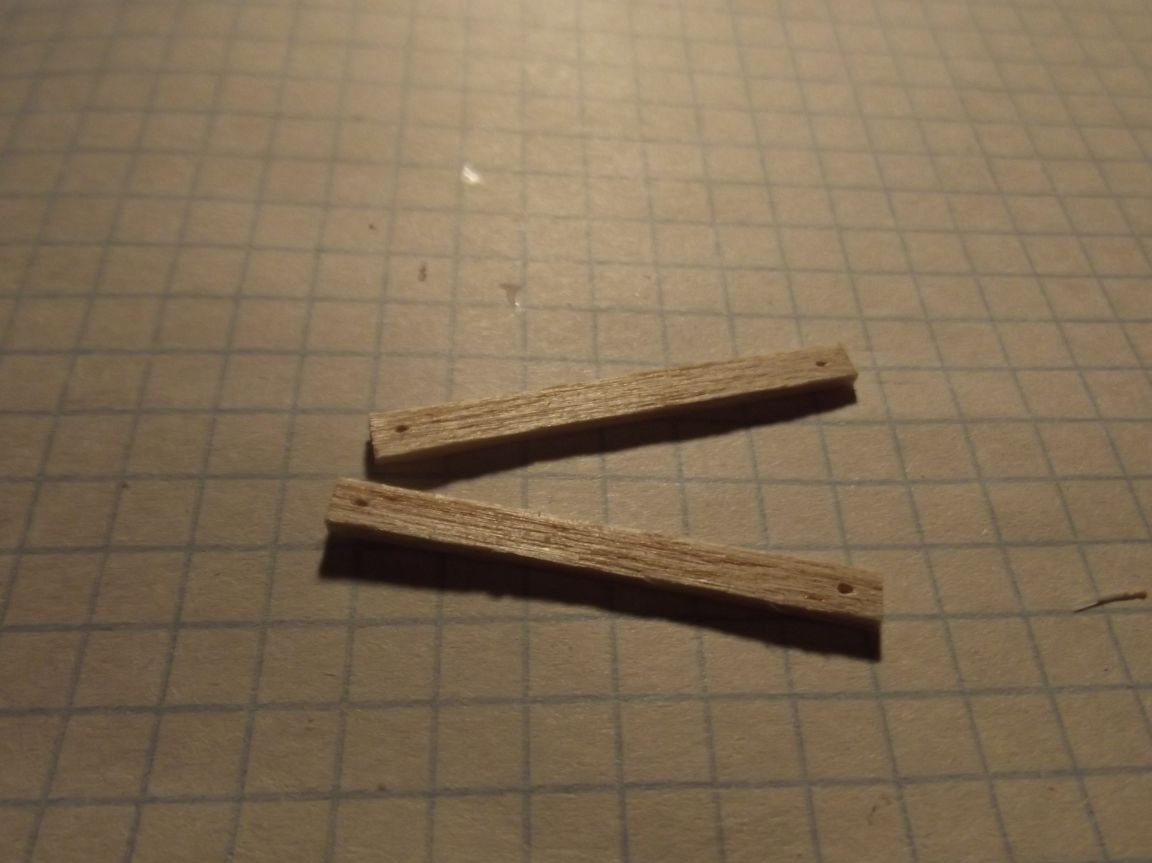
I made rods of very thin rails with holes at the ends.
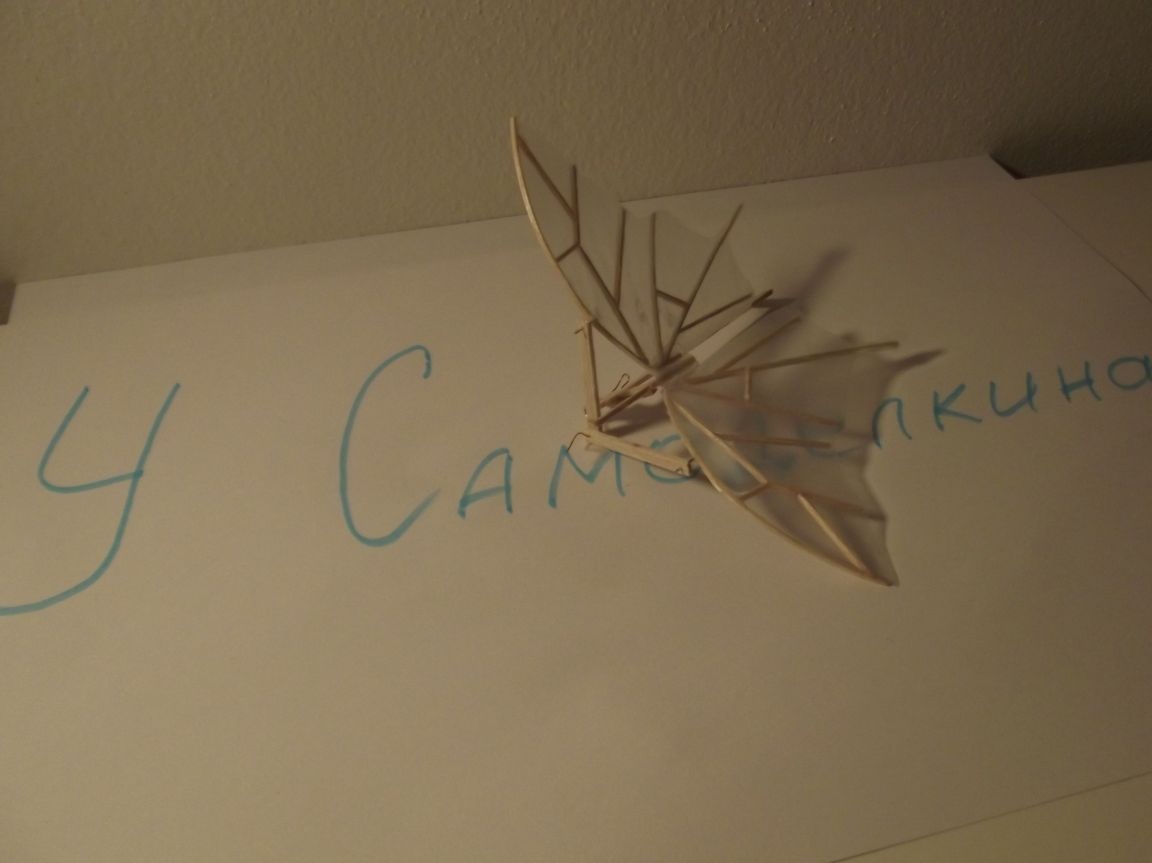
Well, that's basically it.
This model I really liked it, the design flies, and is better than all its predecessors. With a full gum factory (by the way, I used the gum from my pants, that is, pulled small threads of gum from a large gum), the model makes many revolutions throughout the room. But during the construction and flights, I revealed a couple of drawbacks: the design turned out to be a little heavier than I thought. Everything needs to be done even less. It is also necessary to redo the design of rods. In the future, I intend to correct all my mistakes, and make a truly real butterfly.
Thank you all for watching