Reading compared to watching movies and cartoons has undeniable advantages, especially for children with a fragile nervous system. We love to read for ourselves and contribute in every way to the development of this activity in the child. Largely due to this, as it was, a charming tradition of reading before bedtime developed. Sometimes one book out loud, sometimes side by side, each his own. A "bed", or rather a sleeping place - under the ceiling, in the manner of ancient flights, opposite the sleeping place of the parents, that is, us. The clothespins available didn’t fit well. It required a lamp mounted on a wall or ceiling, with the possibility of a large movement of the light source. So that you can drag in any convenient place above your head, a fairly wide "bed". The lamp should be quite powerful, the equivalent of a 75 W incandescent lamp. With a relatively deep and completely opaque lampshade - so you can read without disturbing the rest. Shop lights completely disappointed and had to invent a design on their own. More precisely adapt, somewhere seen to your requirements, conditions and materials.
It was decided to use an energy-saving lamp with a large base. At that moment, another possible use of the lamp was born - I remembered how my grandfather used the blue medical lamp all the time to fight old chronic colds - years of work on a mining excavator affected. So, it is worthwhile to include in the design of the lampshade and electrical fittings the corresponding heat-resistant materials and the lamp, if necessary, easily turns into a convenient medical device. Fortunately, such a "regime" was not in demand.
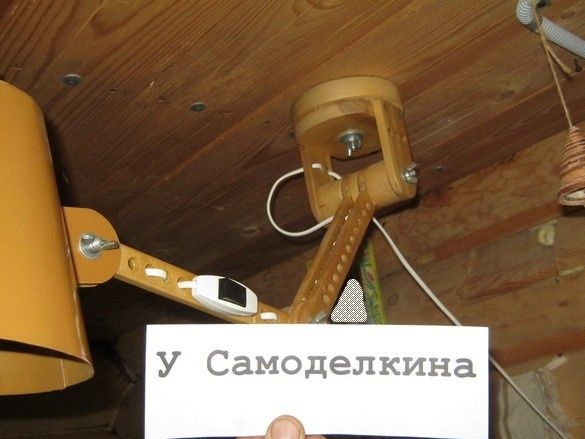
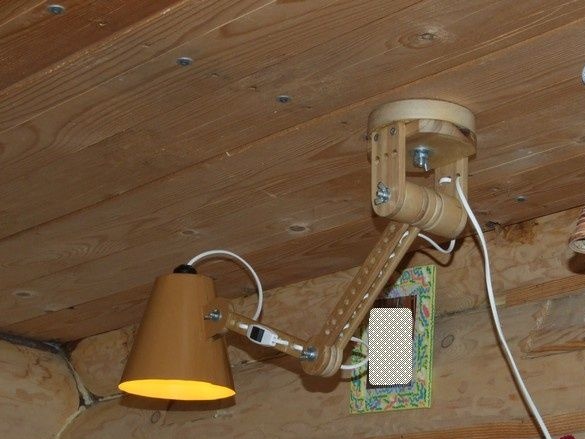
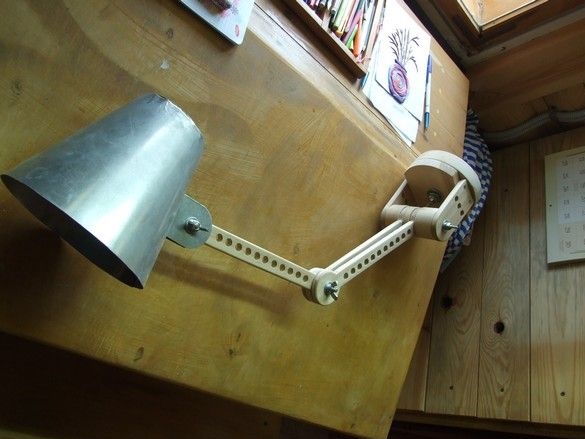
If possible, the lampshade of the lamp should have several degrees of freedom, for convenient use. Allowed such a design with "joints." The fastening turned out to be best done from the ceiling, it is flat, unlike the log walls. The configuration of the lamp gradually emerged.
Materials
The tree is birch. Miracle is so good for of furniture and crafts. Wood is not the most beautiful, but solid, durable and very cheap, at least in the middle lane.
Lampshade - 0.5mm galvanized steel roofing. You can certainly not galvanized, still had to be painted.
Electrics - plug, power cord, key switch to wire, lampholder, lamp.
A few hardware for the axes of the joints of our lamp.
Instruments.
The minimum set of metalwork and carpentry tools. Necessarily scissors for metal, marking tool. It’s good to have a jewelry jigsaw with files or just files from it (they can be charged into a regular jigsaw on wood), a “pioneer” jigsaw on wood, files to it.
Well, if there is a wood lathe. Powerful soldering iron or small gas torch for soldering, solder, fluxes.
Sandpaper.
Like varnish for wood, paint for the metal you like, colors, solvents for them, brushes.
Shade.
Markup.
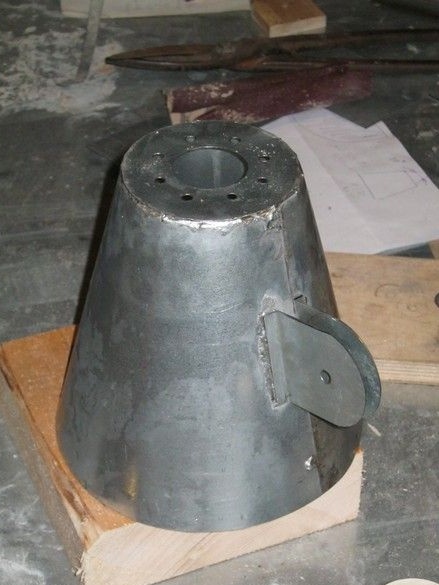
Having picked up a suitable piece of roofing iron, we draw on it a scan of a truncated cone with the desired dimensions. How to build a scan of a truncated cone can be found on the Internet, refreshing the school curriculum in mind. I recommend adding “tin work” or “tin works” to the search keywords. Links will be closer to our task.
Do not forget the seam allowance where necessary, 10 ... 15 millimeters. Above in the form of petals bending inwards.
The cap is cut out. Hot air outlet holes are drilled. A large hole for the cartridge is cut out with a jewelry jigsaw. An extremely useful tool for such cases. The edges are smooth, not deformed, and working is a pleasure. If there is no jigsaw or files from it, we do it in the good old way - we drill holes in a circle, gnaw out the middle, finish with a round file. Or a little more modern, in the presence of an engraver, "dremel". We cut it out with small cutting discs, then bring it with a file or the same engraver with a cylindrical abrasive nozzle.
The “ears” for attachment to the “joints” made a rather large diameter - the friction coefficient of a pair of varnish-on the surface of a tree - painted metal, it seems is not large, and so that the lampshade would not bite its nose spontaneously, it was necessary to increase the contact area in the hinges. However, it turned out pretty nice.
After bending and fitting the parts, solder the lampshade parts.
A few words about soldering. Structural soldering from radio mounting, differs primarily in massive parts and a variety of metals. The first trouble is neutralized by a powerful soldering iron or additional heating, the second, by selecting the appropriate flux.
In this sense, galvanized steel is a simple case - it is wonderfully soldered by “soldering acid” (zinc chloride), orthophosphoric acid. If an open flame is used for soldering or heating, do not solder rosin - it flares up and leaves soot making soldering difficult. The place of the finished soldering, after cooling, rinse thoroughly with water, otherwise the remaining flux will destroy our glands.
Another very good soldering option is a small gas burner and a flux with solder designed for this kind of work.
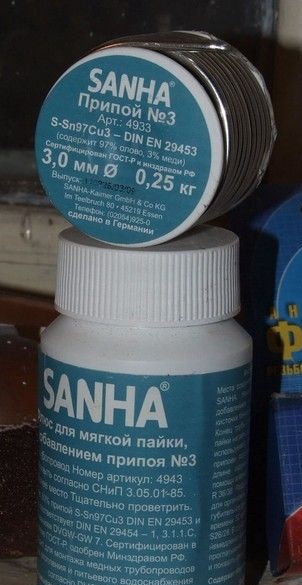
For example, such. They are used for soldering copper water pipes. Flux in the form of a thick gray paste. Inside on the lid of the jar is a brush. Very comfortably. Native lead-free solder, tin-copper, but also works with lead solders.
Thick flux is not thickly applied to both well-polished parts at the soldering place, the parts are folded and preferably fixed in the desired position. The place of soldering, without any luck, we heat the flame of a gas burner. Of those that are wound on spray cans for tourist tiles or on a larger spray can, like mine.
The flux darkens as the parts warm up, and when its surface shines slightly (the small solder particles that make up the flux melt), touch the end of the solder rod to the soldering point. The solder melts and is pulled by capillary forces to the junction.It works very well, soldering is very convenient. But for capillary forces to arise, it is necessary that the parts are sufficiently adjusted to each other, and there are no large gaps.
The place of soldering should also be washed well with water - there seems to be a little acid in the flux.
It is convenient to solder the “ears” on the lampshade both at once, screwing them with a bolt through the technological piece of a piece of wood with a hole. The thickness of the plate of the tree should correspond to the thickness of the future part of the joint. The lampshade is fixed so that the soldering surface is horizontal and the temporary assembly (two “ears” plus a process gasket) are mounted on top. Fixing the assembly is not required.
The assembled lampshade is washed with water and dried. Sharp edges and burrs are filed with a small file and cleaned with a sandpaper. The lampshade is degreased, painted in several layers with intermediate drying. Here applied universal enamel in the spray can. Ocher color.
Joints and knot of turn are made of wood.
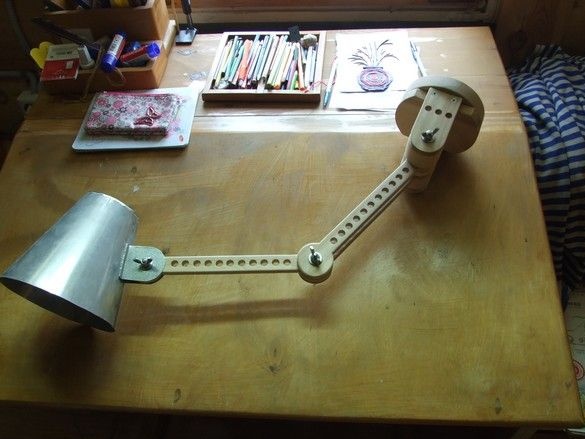
Wide rails are cut on a circular saw. Ostrugany. The hinges are cut by a “pioneer” jigsaw on wood, straight sections on a circular saw.
Marked and drilled holes along the "joints", taking into account the pulling of the wire. So that the holes did not have torn edges on the other hand, I drilled on a machine, at high speeds, with a drill on wood. Until the end did not drill. The wood drill has a sharp guide pin at the end, slightly protruding in front of the cutting edges. If you drill a hole without completing a few millimeters, then turning the part over, we will see a small hole from this guide spike, showing the center of our hole. We focus on it as a center and drill from this side. If you left a slightly larger thickness of the "bottom" of the hole and the guide spike did not come out on the other hand, showing us the center, we help him with a sharp awl.
We mark and install in the lathe the workpiece of the rotary assembly.
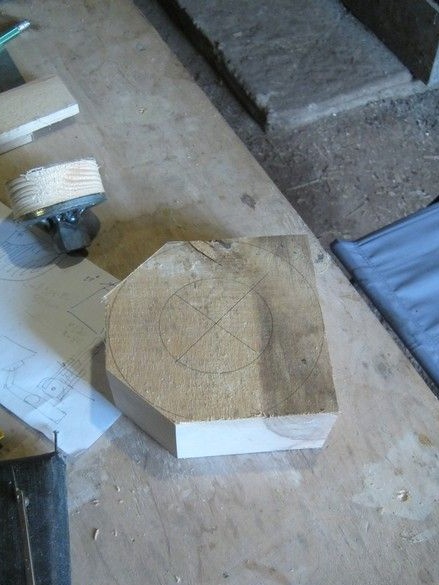
Glue the improvised faceplate to the workpiece with hot-melt adhesive.
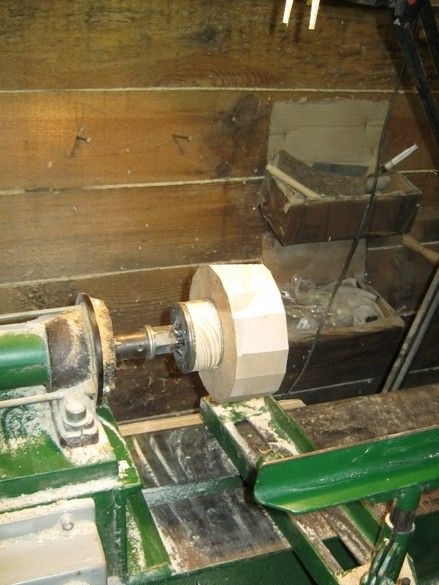
This bonding area is sufficient for reliable retention of the workpiece. In the beginning, with rough turning of the corners, it is also worth “squeezing” the workpiece with the rear center to avoid shock loads, but after “fumbling”, you can grind without it.
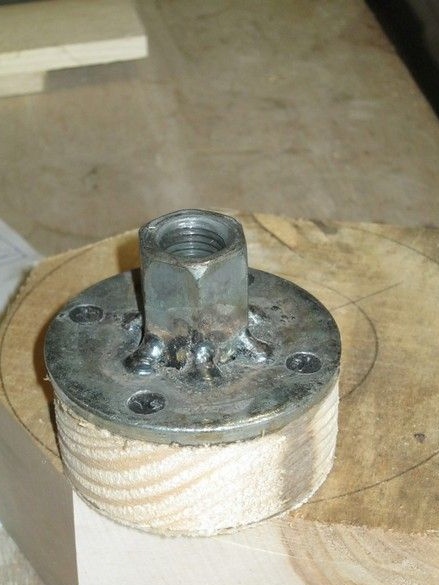
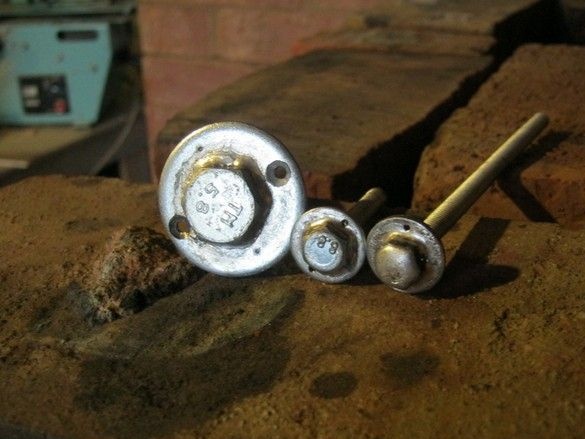
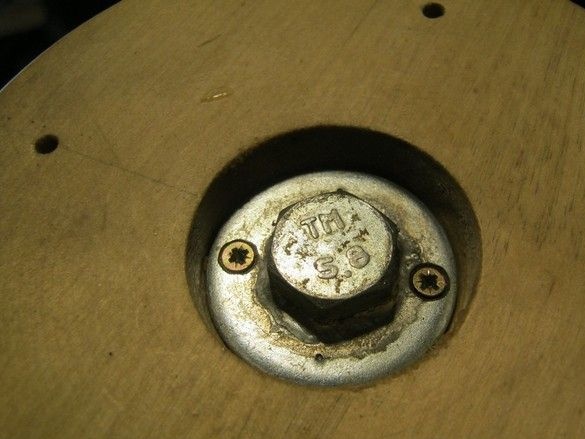
The hinge axles are made of standard M6 bolts. At the end of each wing nut to control the hinge turning force.
To exclude the rotation of the bolt heads when tightening, they (heads) are fixed - soldered to reinforced washers, in which two holes are drilled. Through these holes, the washers are attached to the tree with small screws or studs.
The solder was used without lead - so that after each twisting, do not run to wash your hands.
After, sand, cover with several layers of varnish, which one you like. We wait until it finally dries, collect.
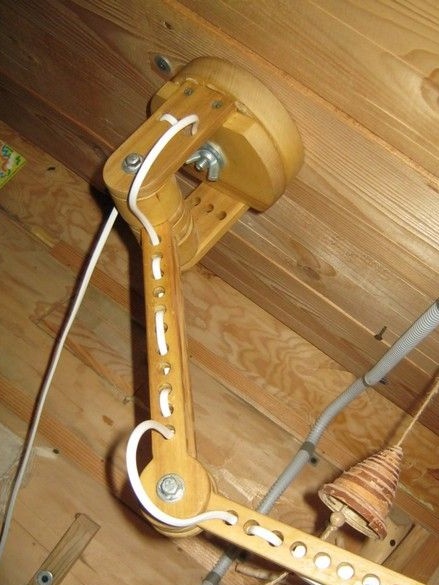
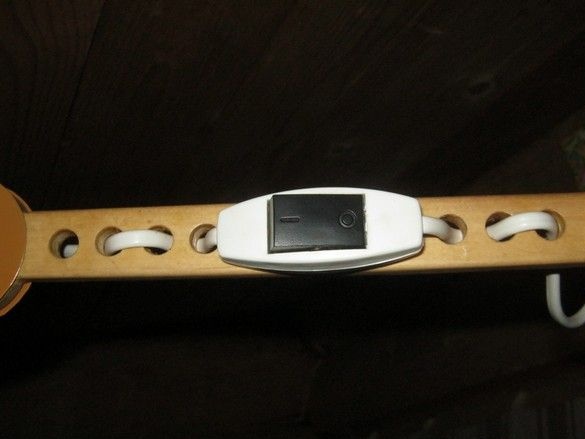
We stretch the wires, providing loops in the joints. The switch does not have a separate mount, rests on tightly tightened wires.
Mounted on the ceiling. Voila! The child does not spoil his eyes, dad well done.