

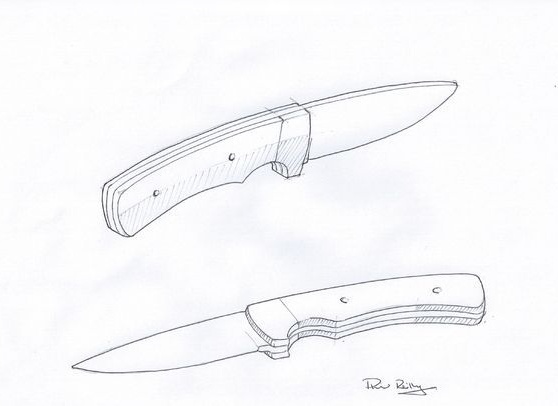
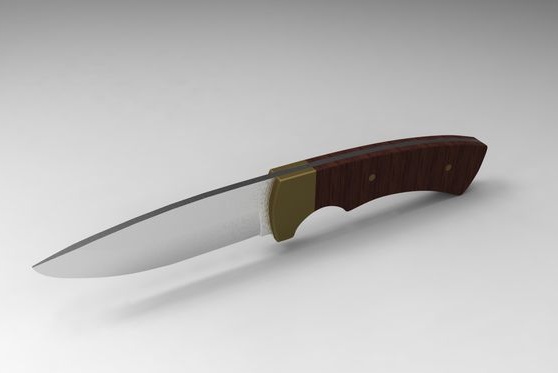
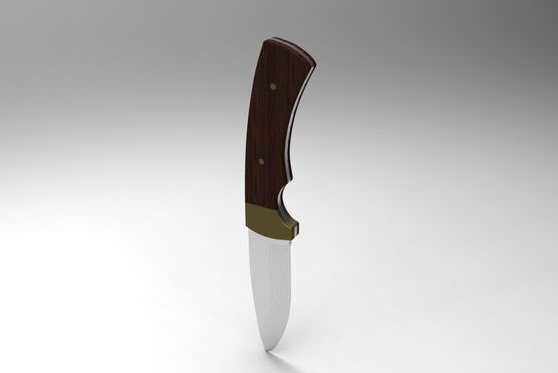
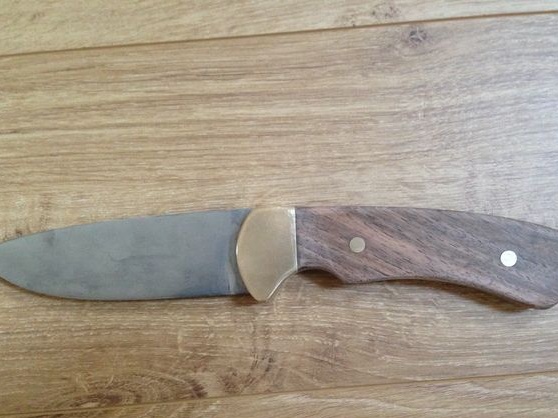
If you like working with metal and you want to make a good knife, you can take a closer look at this project. The blade is made of high carbon steel and is quenched. For the most part, everything is done with hand tools, but if you have at least a grinder, a grinder, and even better a belt sander, everything is made much easier.
Materials and tools for making a knife:
- a piece of high carbon steel 4 mm thick;
- drawn profile;
- wood for finishing the handle (the author used a walnut);
- brass for the manufacture of the front of the handle (optional);
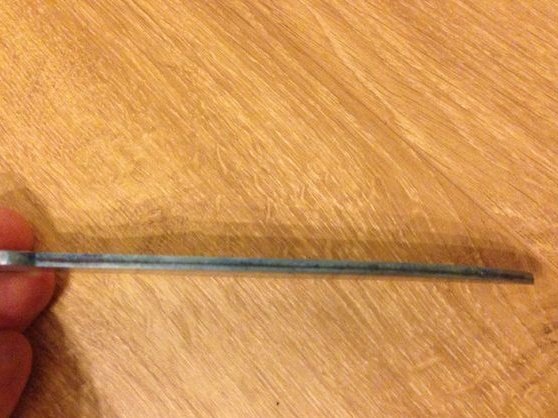
- brass rod with a diameter of 4 mm for the manufacture of pins;
- a wide set of sandpaper;
- a hacksaw for metal;
- drill;
- files, as well as a rasp (for forming the handle);
- 4 mm drill (for pin holes);
- oil for wood impregnation;
- epoxy;
- vise;
- grinding stone and more.
The process of making a knife:
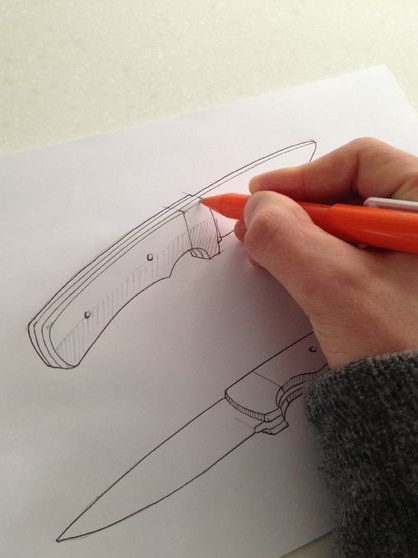
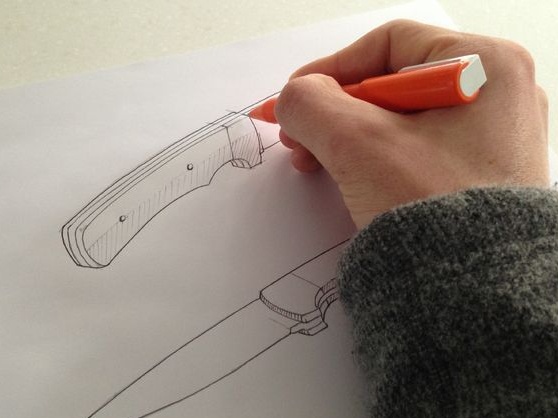
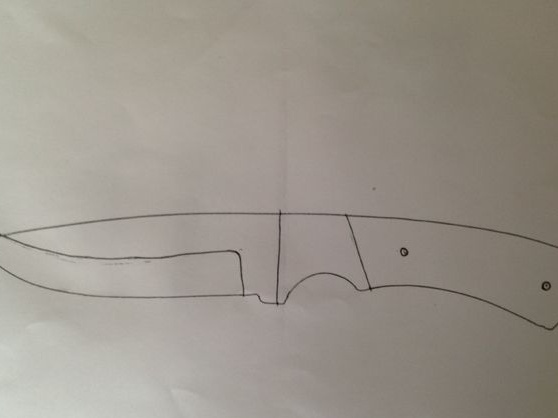
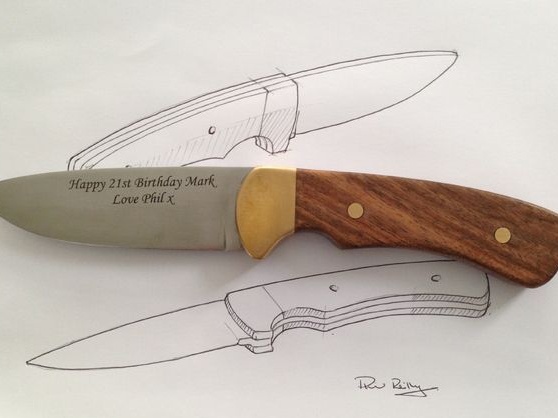
Step one. We draw a knife profile
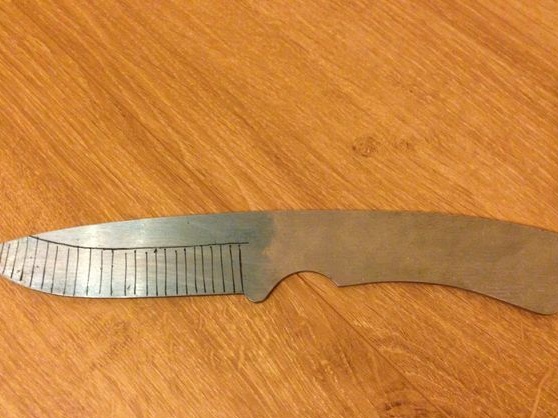
The first step is to come up with a profile to draw a future knife on paper. The author decided to approach this matter very responsibly, he drew 3D versions of his knife and even made model knife on the computer. All this, of course, is not necessary at all. You only need a flat profile of the knife, which could then be cut out of metal. Finally, cut the profile out of paper so that it can be glued to steel.
Step Two Cut the knife profile out of metal
To make the blade, you will need high carbon steel, in which case it can be hardened. The author used grade 01 steel for these purposes. There are other types of steels, such as stainless steel, damask, D2 and others. The thickness of the steel is 4 mm.
Before work, you must make sure that the steel is not hardened, since it will be very difficult to work with it. If the metal is poorly taken with a file, heat it and allow to cool gradually.
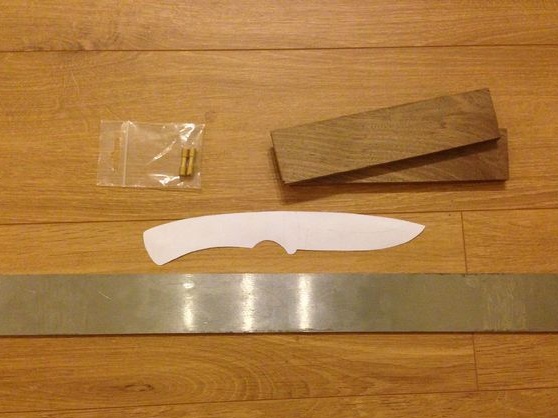
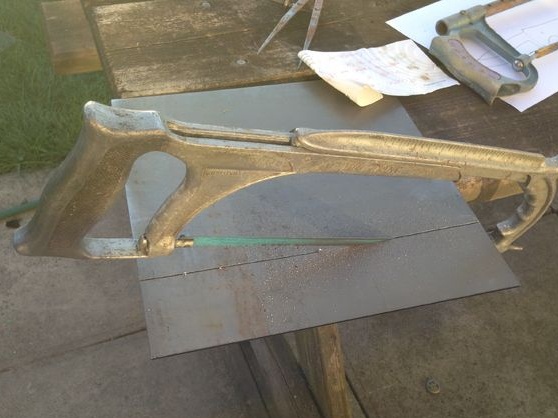
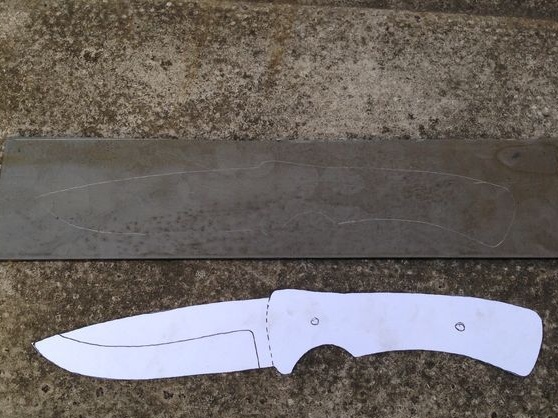
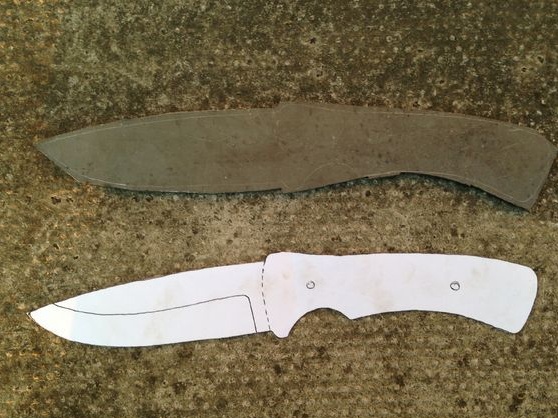
From a piece of metal cut off the plate of the desired length. The author makes this such a primitive tool as a hacksaw for metal, it will turn out faster than a grinder. Next, apply a template of paper and circle with a marker or just a sharp object. Also, you can simply stick the paper template to the metal, but the glue should be good so that the paper does not peel off during operation.
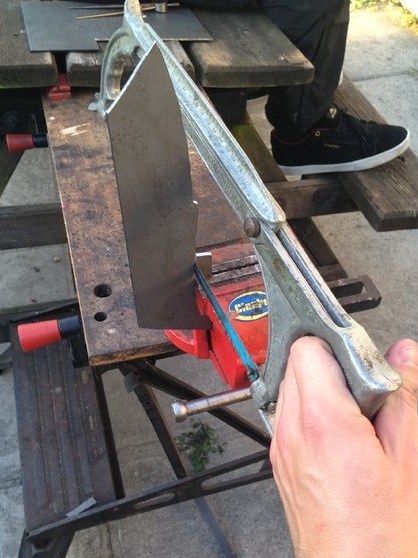
We clamp the workpiece in a vice and use the same hacksaw to cut out the rough profile of the knife.As for the bends, they are usually cut out in parts, making a pair of transverse cuts.
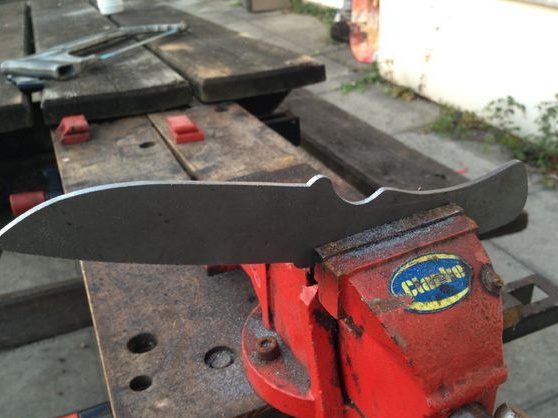
After that, we take our set of files and finally grind off all the excess from the knife profile. We need to bring it to the state in which we drew it.
Step Three We form bevels
There comes the most crucial moment in the manufacture of a knife - the formation of bevels. All cutting characteristics of the knife will depend on this parameter. To make the knife sharp as a razor and easily sharpened, the bevel should be as wide as possible, that is, the blade will be thin. Bremen drill with a diameter of 2 mm, which is equivalent to half the thickness of the workpiece, and draw a central line at the site of formation of the bevels. This will make the bevels symmetrical. We also draw a line on the knife that will determine the width of the bevel.

Now you can start the formation of bevels. The author works with a hand tool, using only a file. So you can make bevels, but it takes a lot of time and effort. We clamp the blade horizontally. First we grind one side, then the other. We try to ensure that the metal is removed evenly, otherwise the knife will not be of high quality, and it can easily be skewed.
Significantly these work are facilitated by a belt sander, and some use a conventional grinder.
Step Four We drill holes and finish working with metal
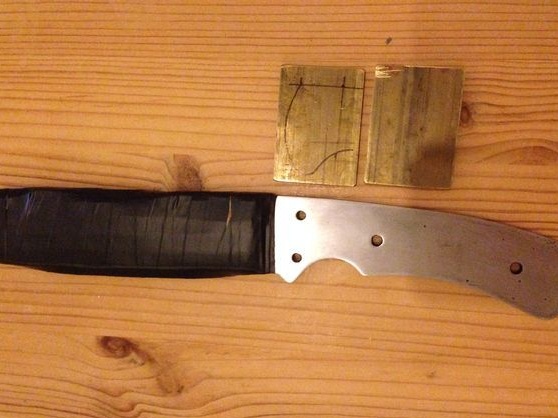
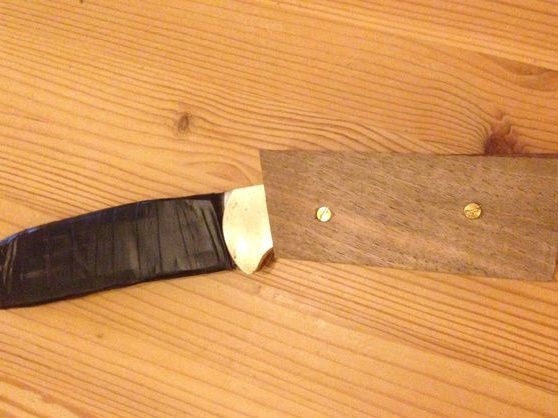
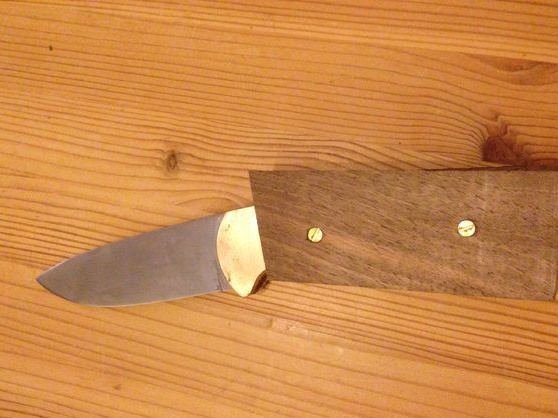
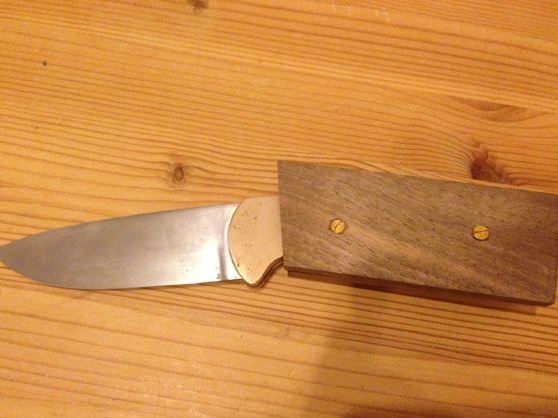
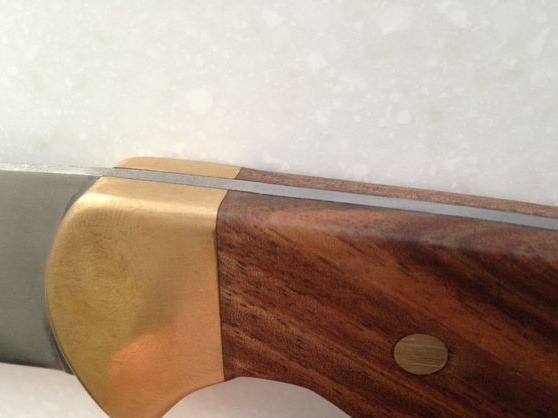
At this step, you have to drill holes for the pins that hold the handle. They should be the same diameter as the pins you have. For beauty, the author inserts a brass insert in the front of the handle; it is also fastened with two pins, for which holes need to be drilled. If you do not drill holes at this step, then it is unlikely that you will be able to do this further, since the metal is hardened.

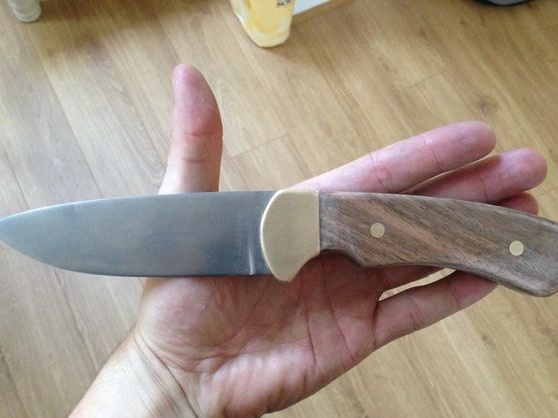
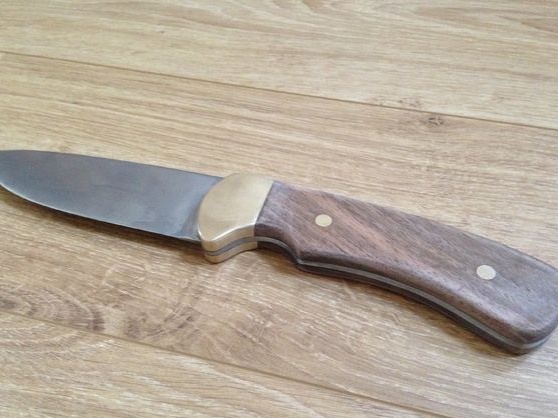
At the end of this step, you have to finally finish working with metal, since after hardening the steel will become too strong. We grind the knife, make it perfectly smooth, remove various scratches and other defects. Sand also the place where the handle is attached, so that it fits well on a flat surface. The author completes the final grinding with 1200 grit sandpaper.
Step Five Metal hardening
To temper the blade, you need a stove or a good bonfire. You can get the desired temperature using an ordinary household hair dryer. We heat the workpiece until it turns bright yellow. You can check the metal with a permanent magnet, in a hot state it should not be attracted by a magnet. We cool the heated billet in oil, you can use motor or vegetable.
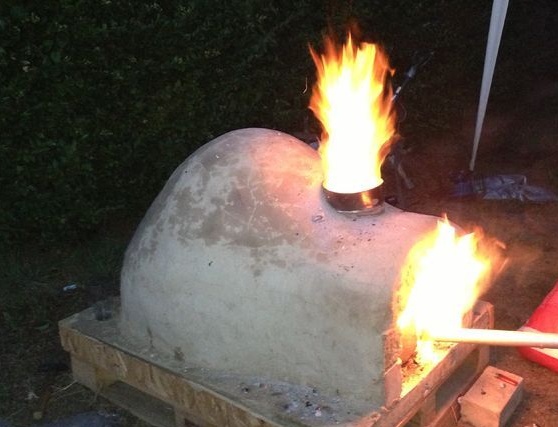
But this is only the first stage of hardening, then it is necessary to make metal tempering, since after hardening the metal will be very fragile. Vacation slightly weakens the hardening, and the metal becomes more springy. For a vacation you will need a domestic oven. Heat it to 200 degrees Celsius and place the blade for an hour. Allow the oven to cool with the blade. Vacation is over.
Step Six Metal finishing
After hardening, there will be many spots on the metal, they need to be removed. We take small sandpaper and grind the surface of the knife. You can polish it if you wish. For easier cleaning, you can use the WD-40.
Seventh step. We fix the brass part of the handle
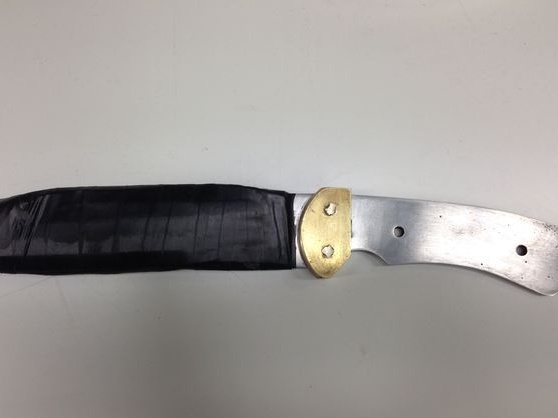
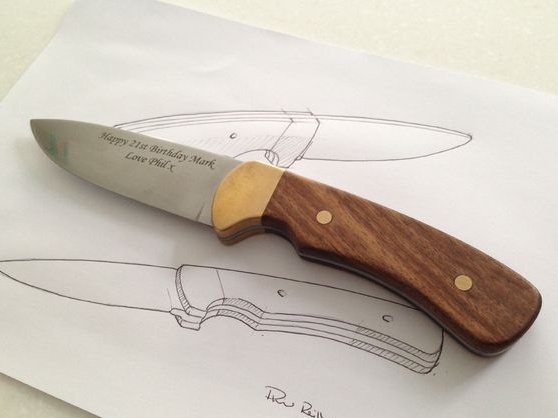
In front of the handle, the author decided to make a brass insert. To do this, you need two brass plates, cut out of them two parts of the desired shape and size. We drill the parts under the brass pins and try to assemble everything. If everything is going well, mix epoxy and glue the parts on the handle.
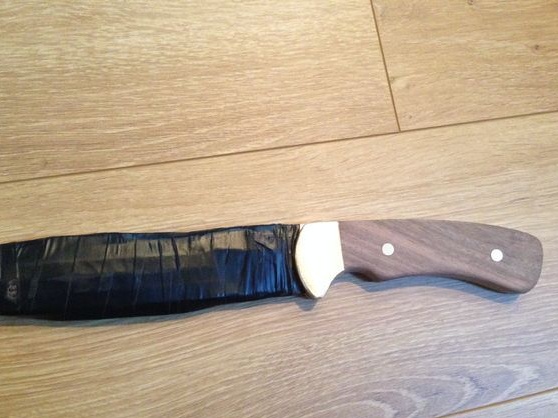
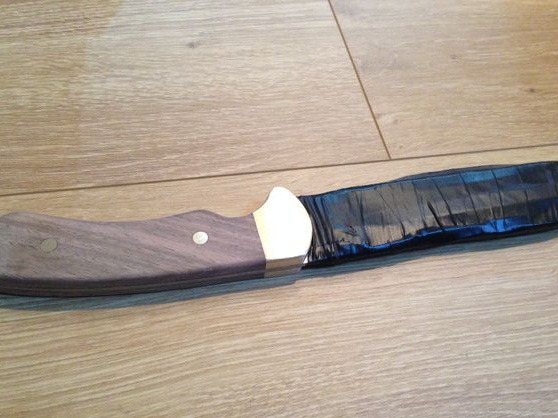
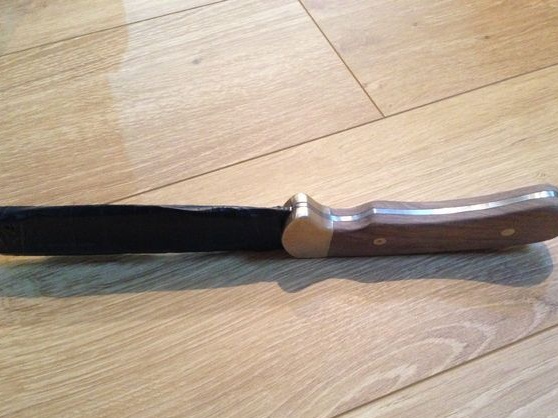
For security, the author wraps the blade with tape and paper.
Step Eight. Handle pads
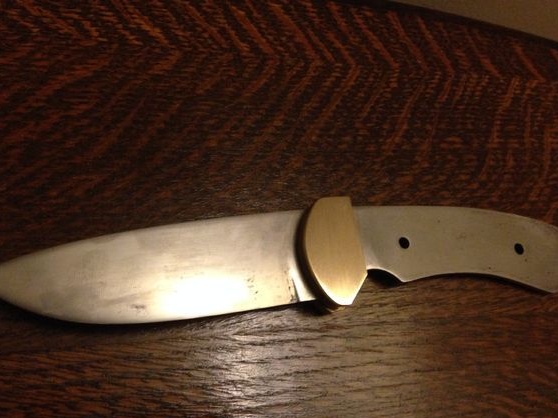
The author makes overlays on the pen from walnut. We cut the blanks in accordance with the shape of the handle and collect everything on the pins.At the end we glue it with epoxy glue. We hold it with a sturbation and wait until the glue completely dries.
Step nine Grinding pen
We take sandpaper and carefully grind the handle. The task will be to make it absolutely smooth, with flowing shapes. First, we work with rough sandpaper and files, remove excess parts of wood. Well, then we use everything smaller. It would be easier to work with a belt sander.
In addition to polishing wood, you also have to grind brass inserts.
In the end, it is necessary to protect the wood from moisture. To do this, it is impregnated with oil. You can use linseed oil, or purchase a special impregnation for wood. You can also use a mixture of linseed oil with wax. The oil will have to dry.
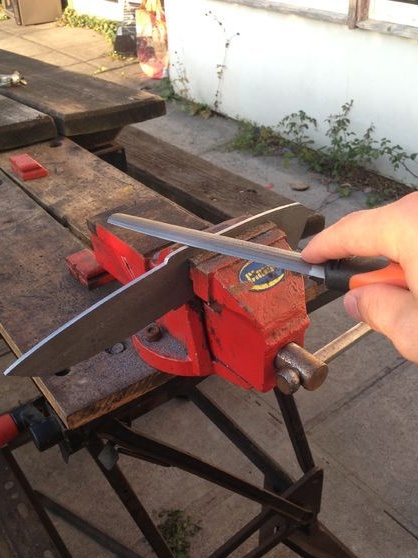
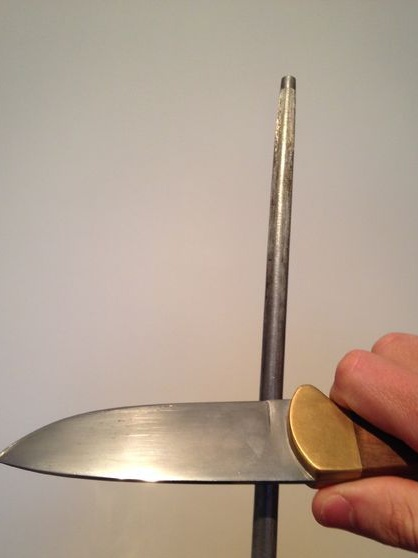
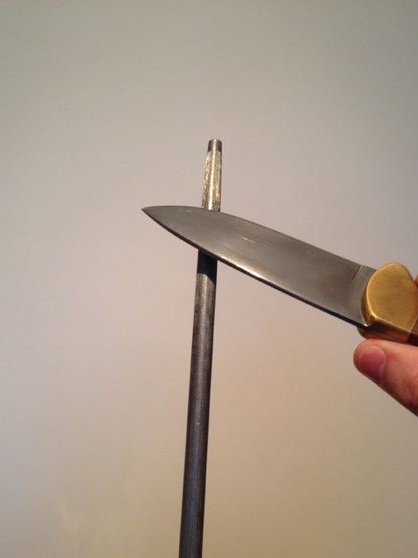
Step Ten Sharpen the blade
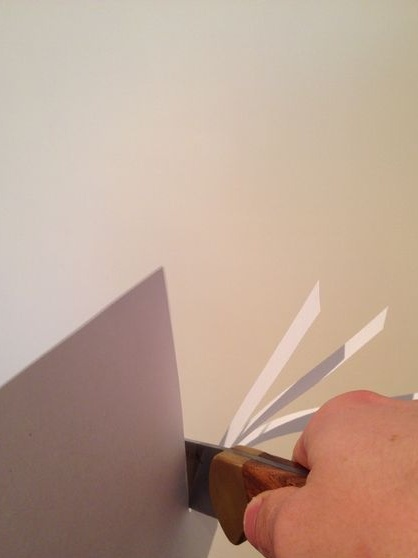
Sharpen the razor blade. A good blade should cut paper easily. For sharpening, you can use different fixtures, the author uses a tool for sharpening kitchen knives. A more professional approach is the use of Japanese water stone. You can use fine sandpaper.
Step 11. Drawing on the metal
To make a knife unique or gift, you can put an inscription or drawing on it. This can be done by etching or other methods, the author used a laser engraver. This step is optional.
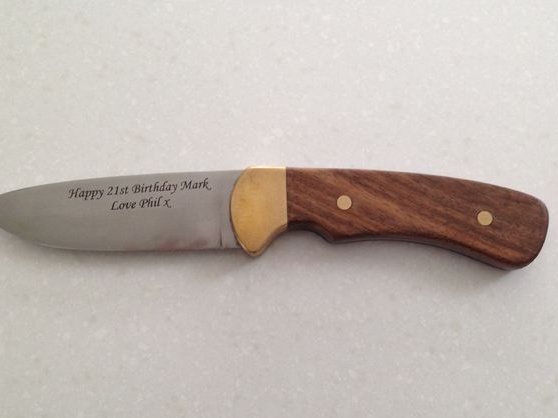

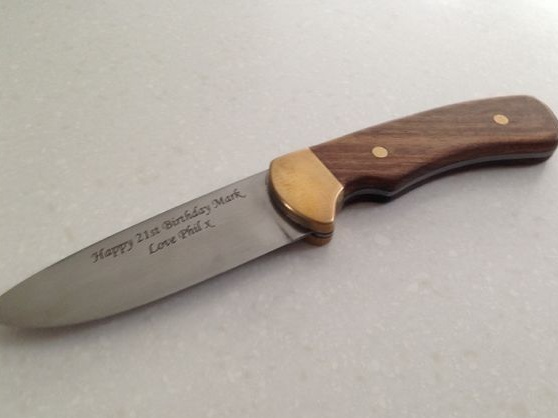
That's all, but completely ready. As you can see, you can make such a cool knife with ordinary hand tools without a grinder, or even a grinder.