

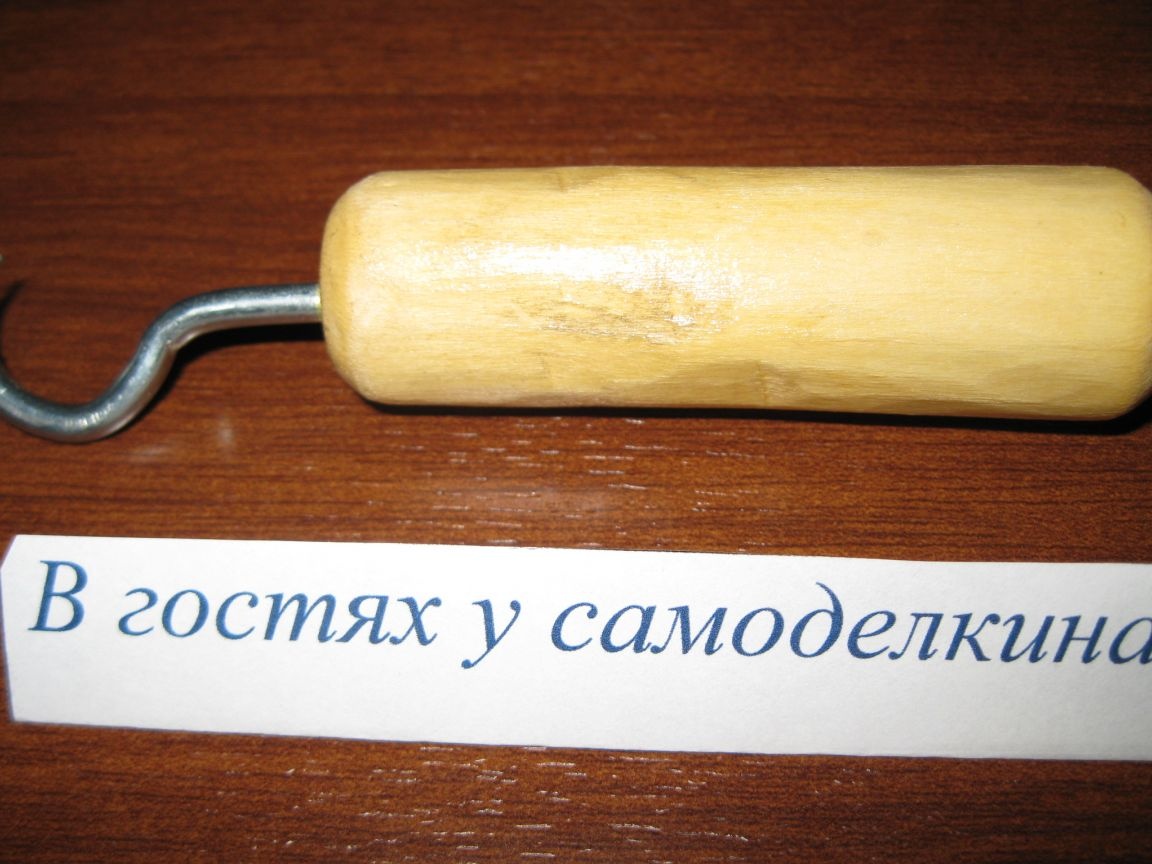
A simple home-made tool that facilitates the opening of screw caps on glass jars with homemade blanks.
Winter has come now, which means it's time to try different homework canned food, as well as other pickles and preserves, harvested since the summer.
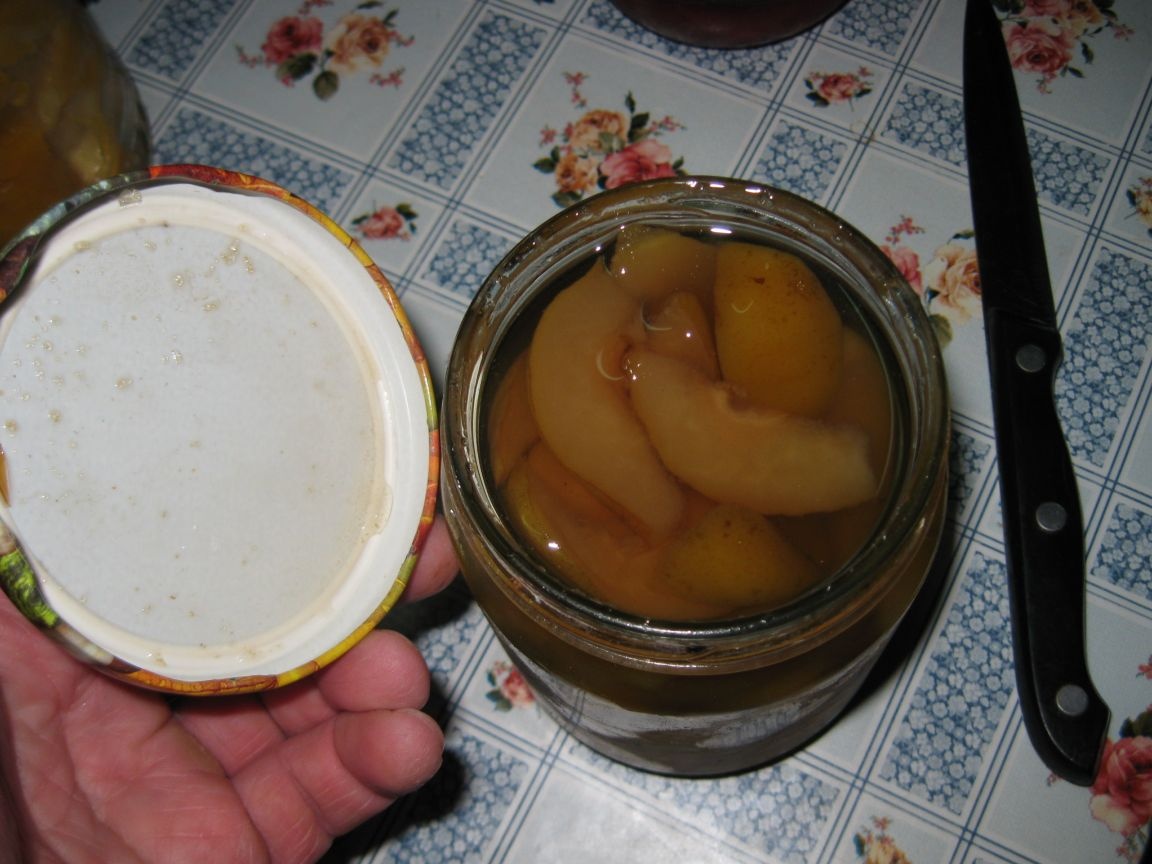
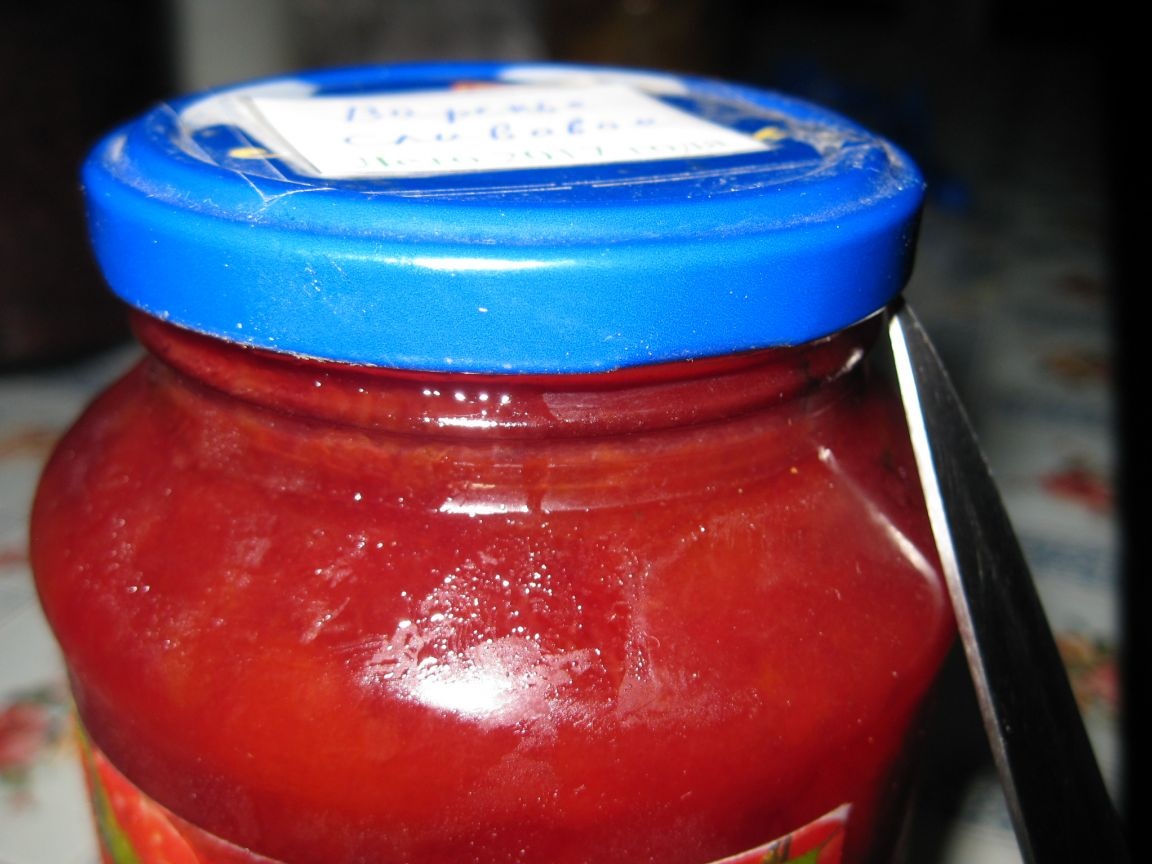
I must say that now for closing glass jars with home canned goods such screw caps are very often used.
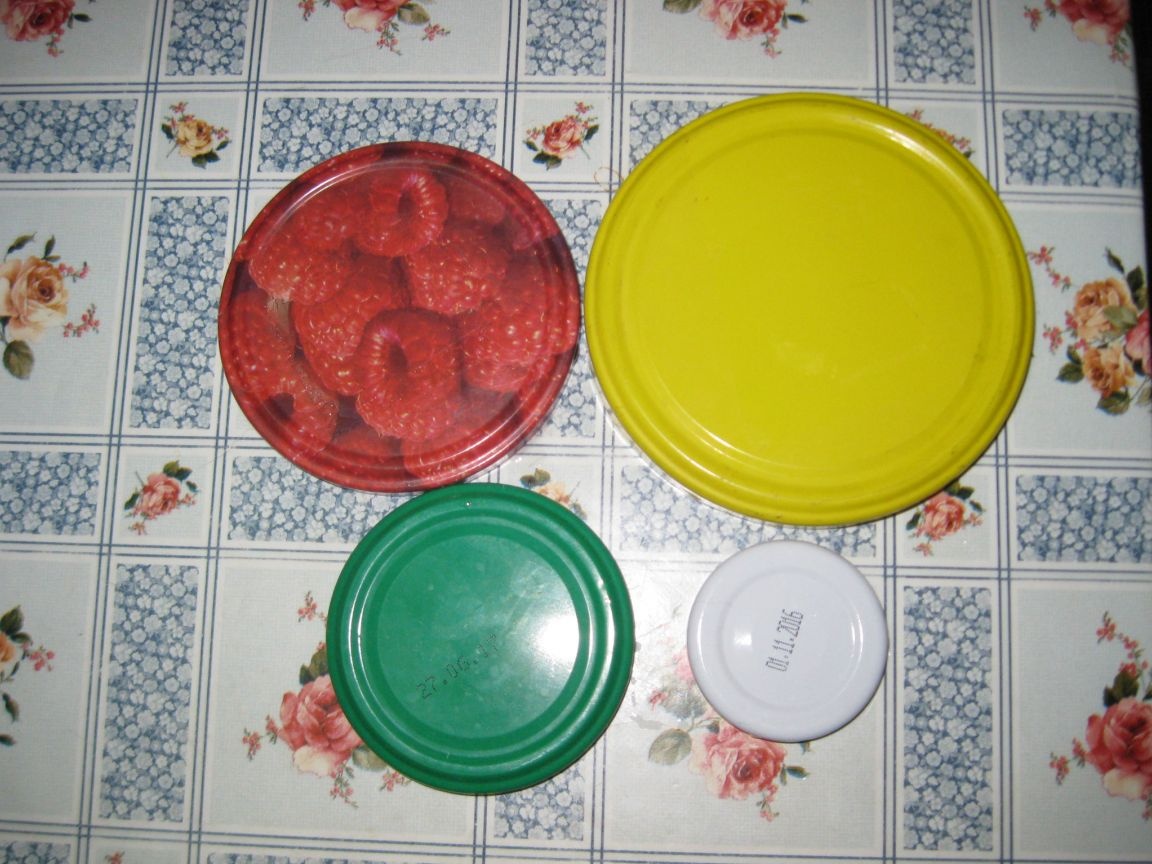
As you can see, these covers come in different diameters, both large enough and very small.
These covers are good in that no closing machine is required to close them, since they close quickly and simply with a single movement of the hand. In addition, you can use such covers repeatedly, well, at least - three, four.
But there is one significant drawback of these covers, namely that they are very difficult to open. Often, even a physically strong person can not afford to open a can closed with such a lid.
That is why many friends are trying to make homemade keys to facilitate opening these covers. However, the industry has long been producing plastic wrenches that are suitable for opening screw caps on almost all available sizes.
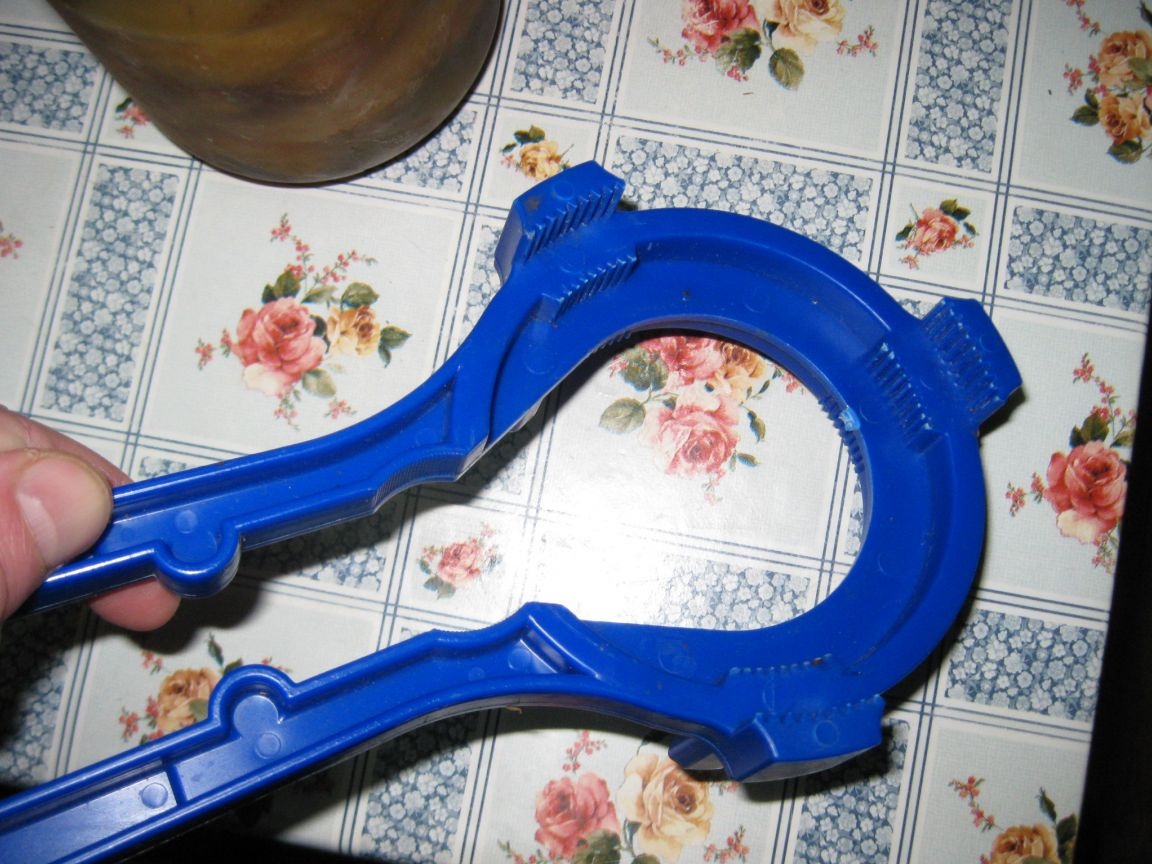
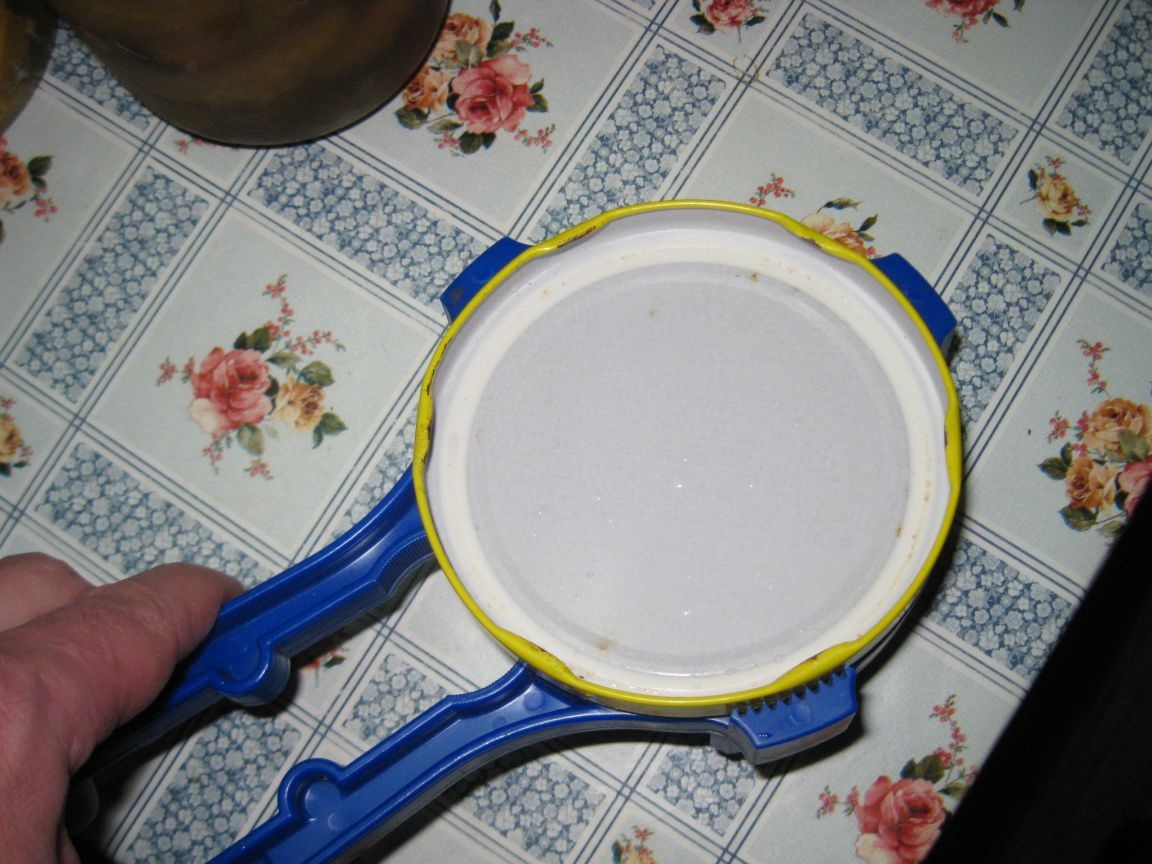

However, such a key is often not very convenient to use, especially when opening large cans, since such a can cannot be held with one hand. As a result, you have to open such banks together, when one person holds the can, and the second opens it with the key. In addition, the keys of this design often break off the side jaws.
However, by and large, no keys are needed to open such covers, since they can easily be opened in other, fairly simple ways.
So, for example, a jar with a screw lid can be easily opened, if for a while, lower its lid in hot water. However, this method, in my opinion, is not very convenient, and also in some cases not safe. For example, if the can is very cold (say, it was just taken out of the refrigerator or the underground), then it can easily burst from hot water.
I believe that perhaps the easiest and fastest way to open cans with similar lids is to pry off the lid with a regular awl or knife with a thin tip.To do this, simply slip the tip of the knife from underneath the lid, and acting as a kind of lever, try to slightly pull the side of the lid off the neck of the can. Naturally, this must be done very carefully so as not to damage the lid and the jar.

In this case, you need to listen, because if everything goes fine, a characteristic click should be heard. This means that the pressure inside the can is balanced and equal to atmospheric pressure. After that, the lid is very easily opened by hand, and even a child can cope with it.
Here, by the way, you need to make a reservation that such a tight opening of the lid is caused just by the difference between the pressure of the air gap, inside the can and external, that is, atmospheric pressure. Since they close the home blanks in glass jars in a hot form, the air gap inside the jar is also hot, which means its pressure is increased. However, after cooling, the pressure of the air gap decreases and becomes lower than atmospheric pressure, that is, a vacuum forms under the cover. As a result, the lid is pressed strongly against the neck of the can under the influence of atmospheric pressure, and it is very difficult to open it. Therefore, prying off the lid with a knife, we simply balance the pressure under it, after which the lid easily opens.
But the fact is that the knife is not always convenient to use to open such covers. For example, it is very inconvenient to pry off with a knife, lids on such jars with wide shoulders.
Therefore, I decided to make a rather simple home-made tool, for more convenient opening such screw caps, which would be suitable for almost all cans. And by and large, it will, of course, be a prototype, which can then be further developed, according to the results of its use.
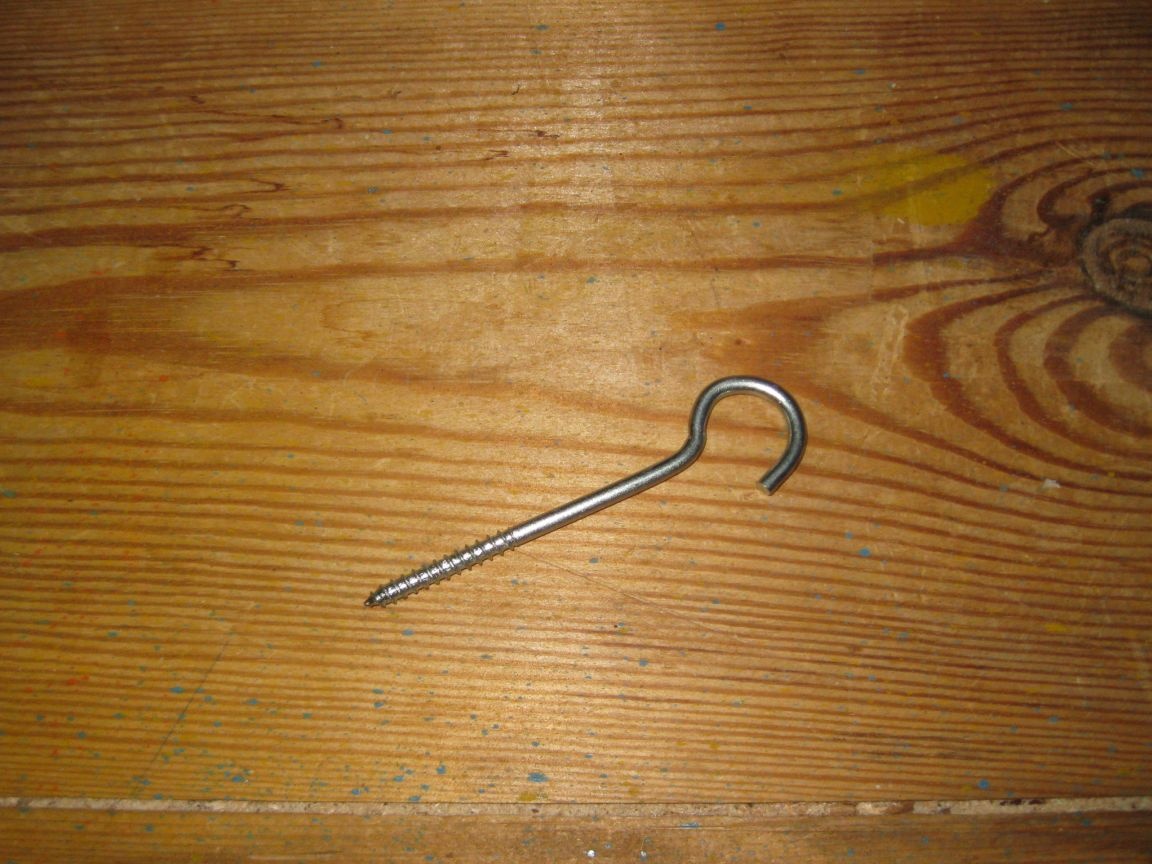
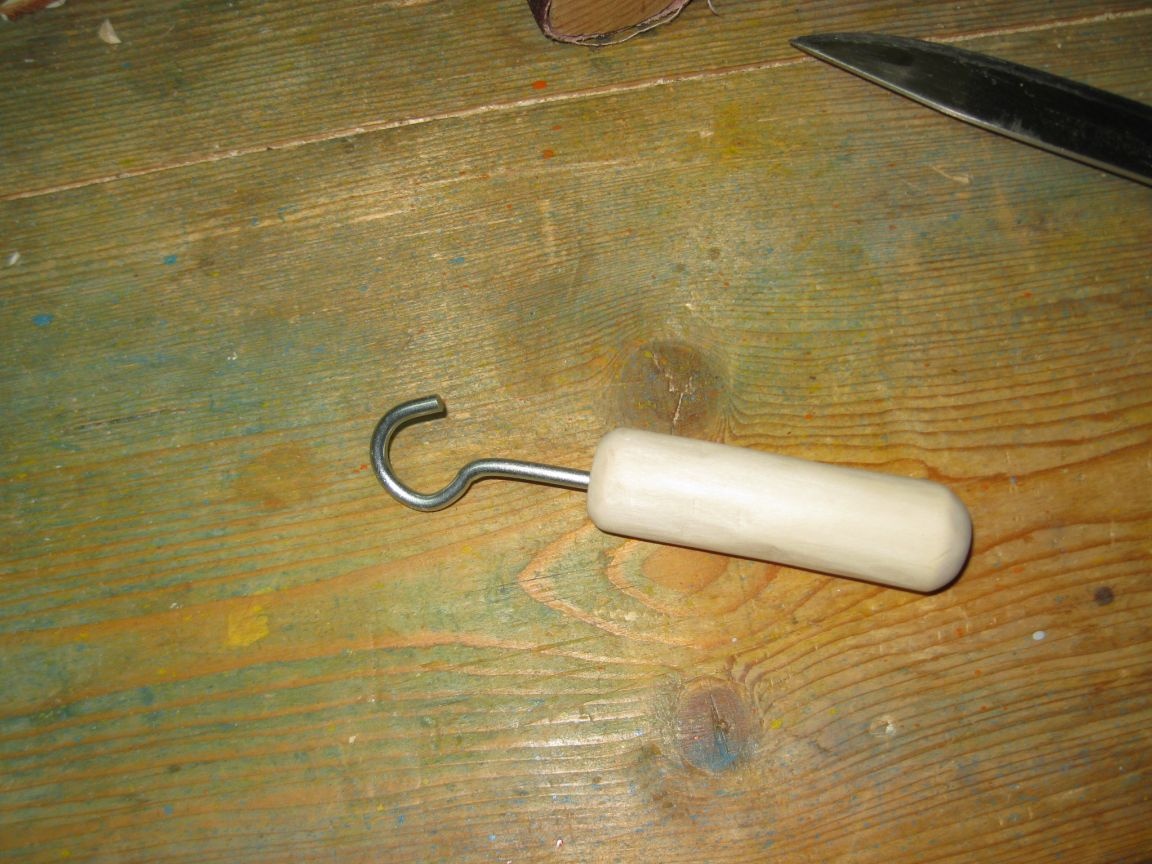
And as the basis for this tool, I decided to use such a hook with a screw thread (it is also called a screw ring or half ring), which is sold in almost any hardware or construction store.
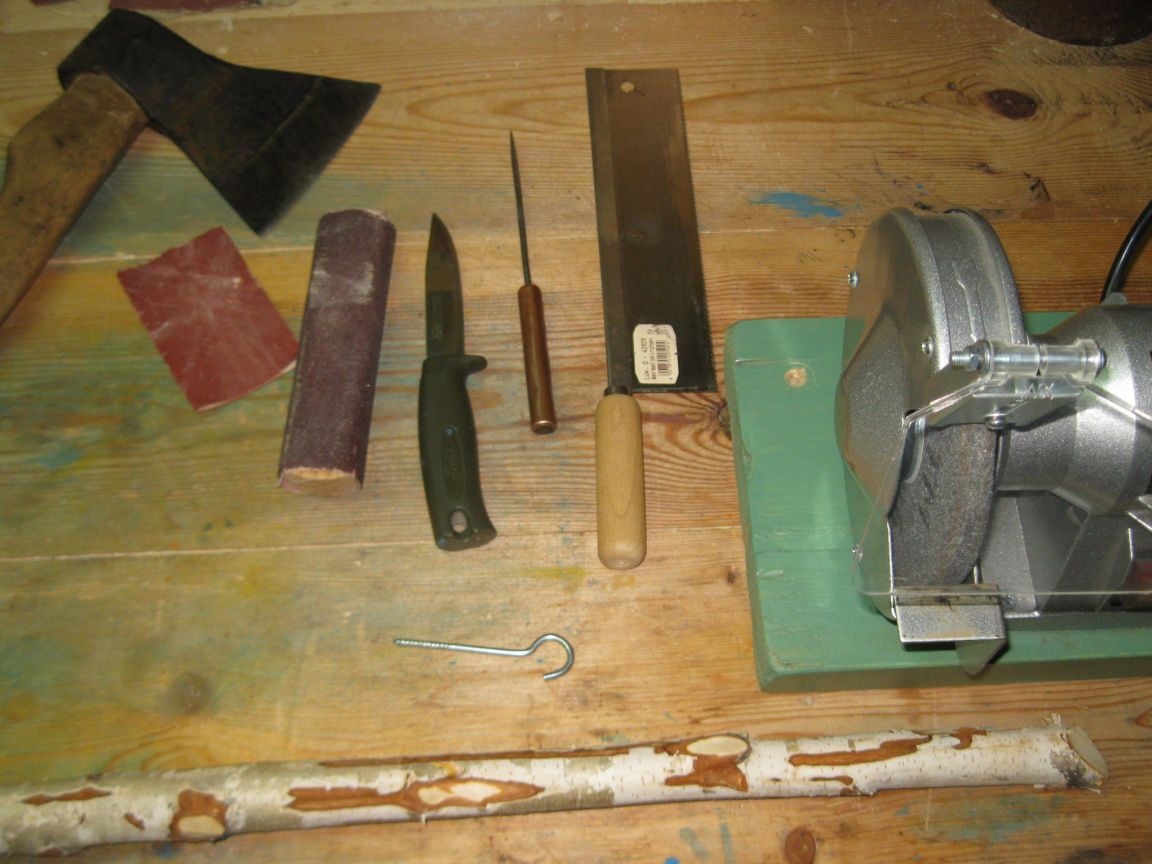
In total, for the manufacture of such a tool, we need the following accessories:
Materials:
• A section of well-dried birch branches with a diameter of 3-4 cm and a length of 20-30 cm.
• Screw-ring with a diameter of 3.5-4 mm.
Instruments:
• Awl.
• Ax.
• Knife.
• Electric drill.
• Electric sharpener, as well as abrasive whetstone.
• Drill for metal with a diameter of 2.5 mm.
• Hand saw with a small tooth.
• Anvil with a hammer.
• Chisel.
• Pliers.
• Sandpaper.
Instrument manufacturing procedure.
Stage 1. Making a wooden handle.
Step 1. Roughing the handle.
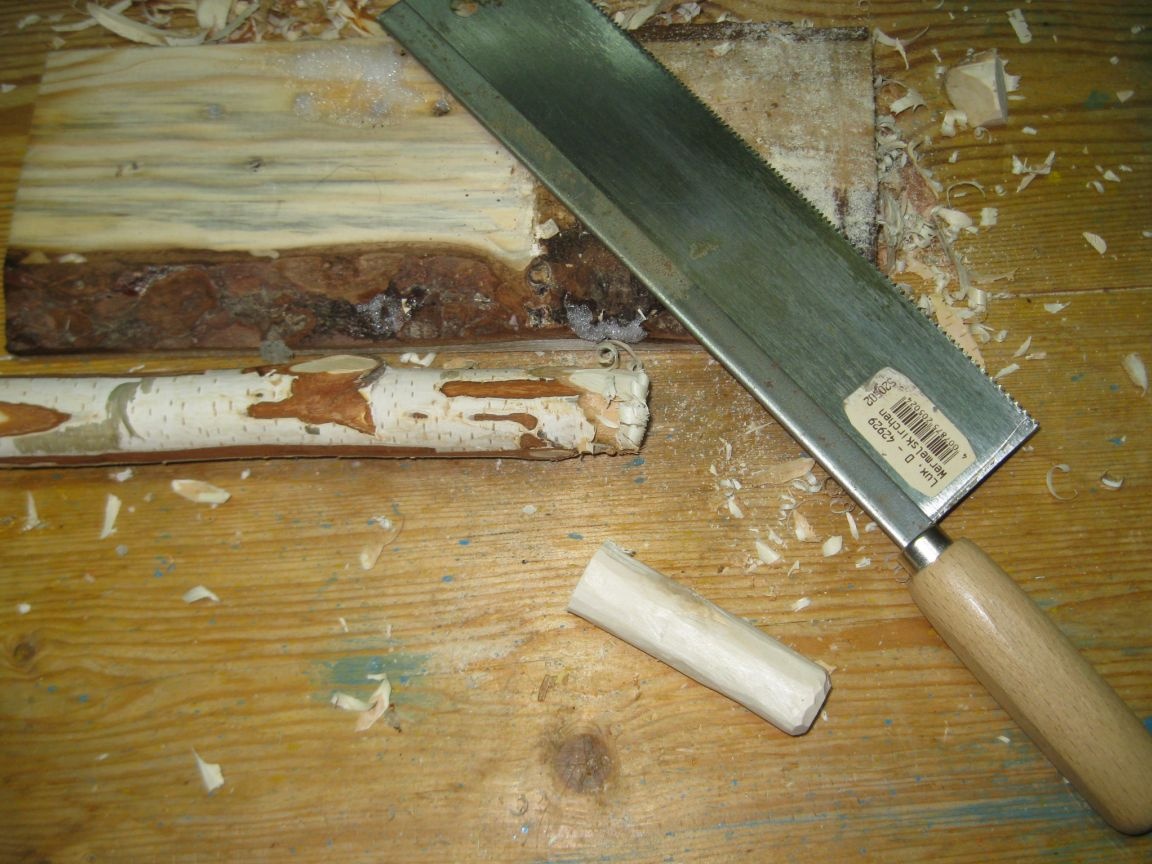
Using an ax, we perform roughing, that is, we cut the tip of the birch branch to a diameter of about 3 cm.
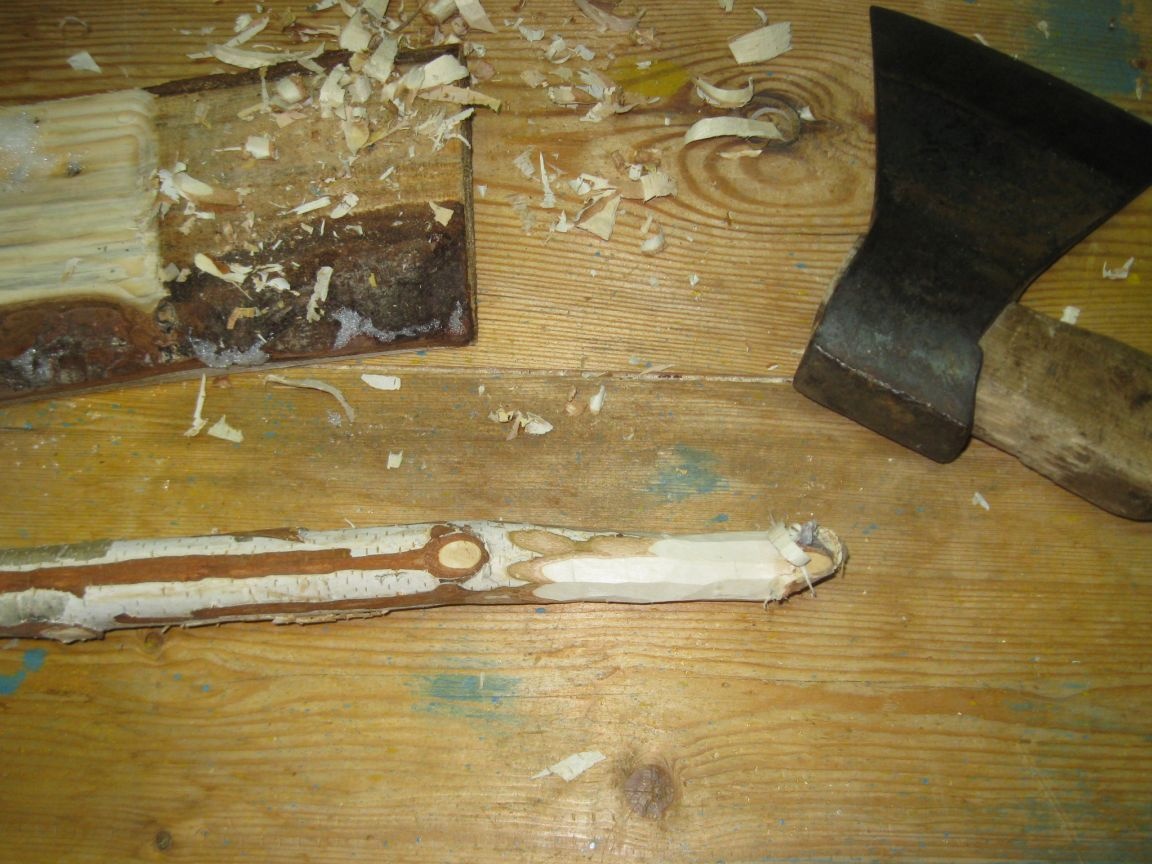
By the way, I must say that to facilitate this work, you can take a segment of a ready-made round handle for a garden tool, for example, a rake or a chopper, but I did not have one at hand.
Step 2. Sawing off the tip of the workpiece.
Using a saw with a small tooth, we saw off the tip from the workpiece of our handle.
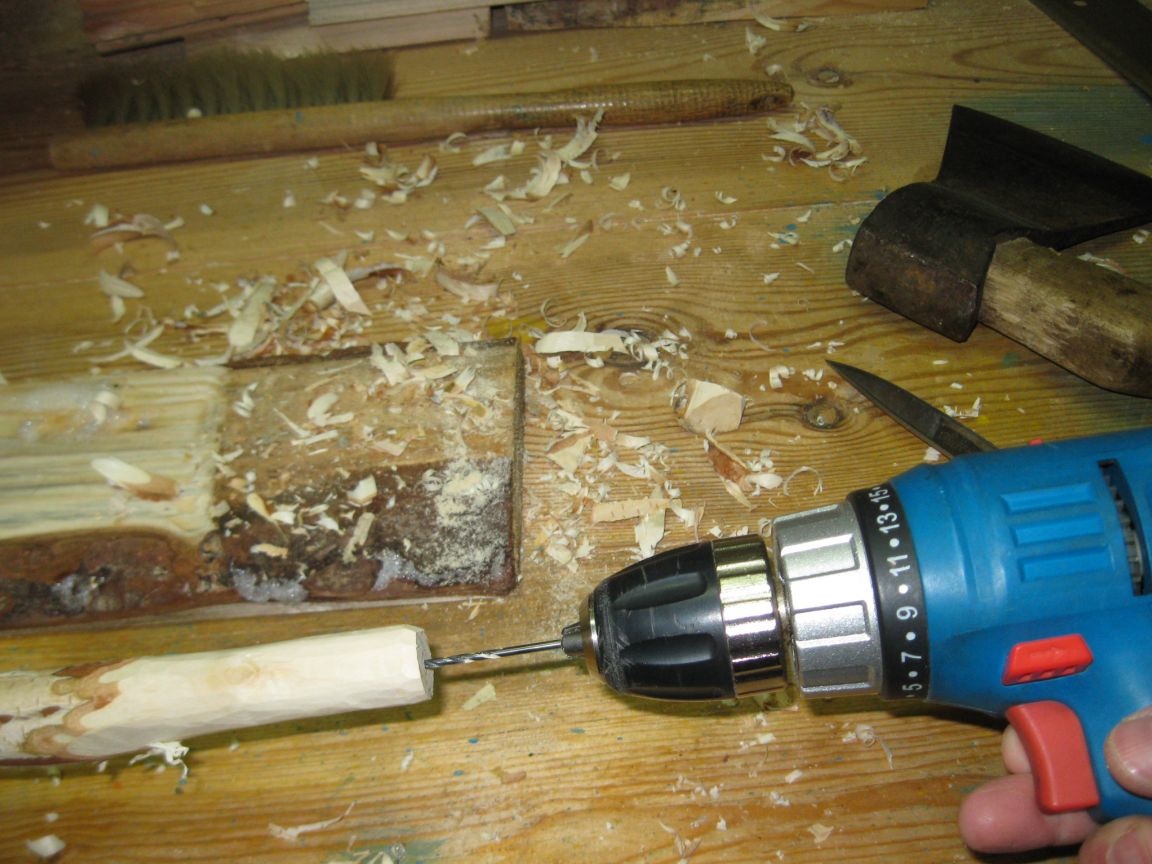
Step 3. Drilling a hole for a screw ring.
In order to make it easier to screw a screw ring into our handle, and also so that it does not crack, we drill a hole with a diameter of 2.5 mm in its end.
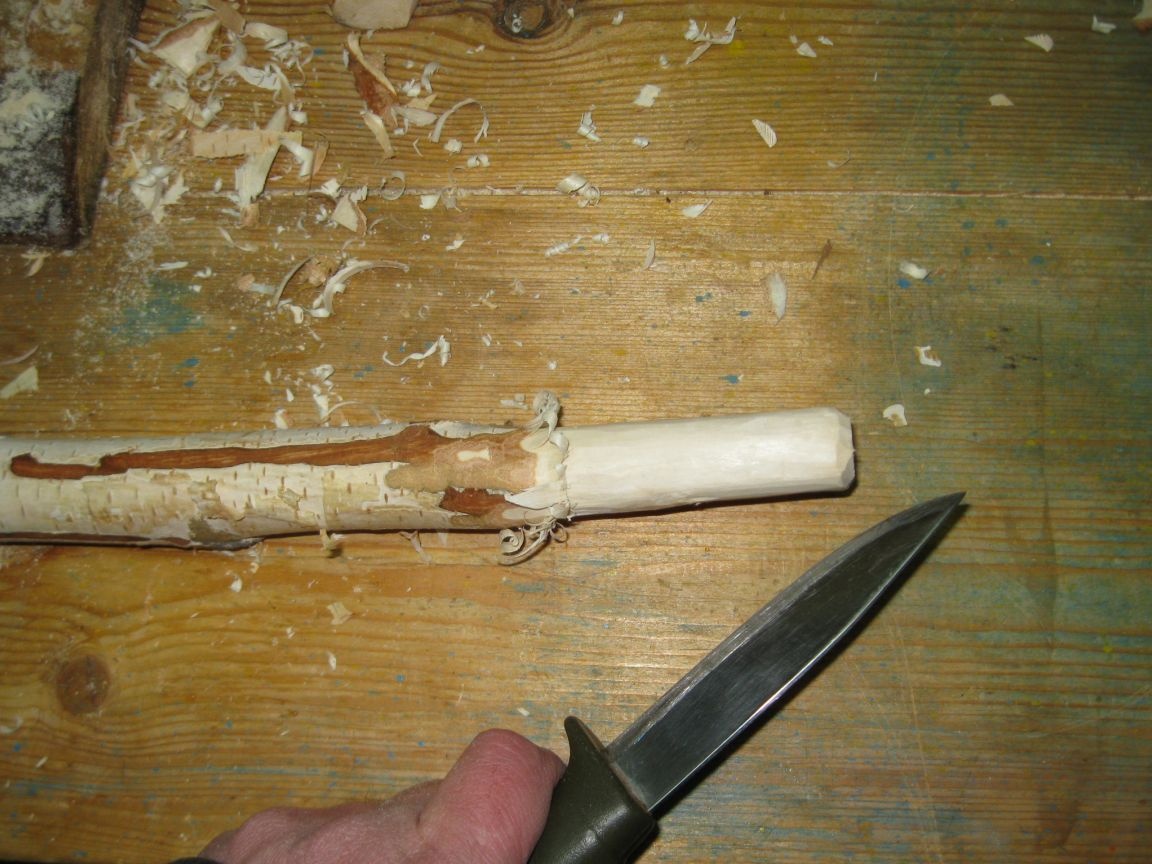
Step 4. Finishing the handle blank.
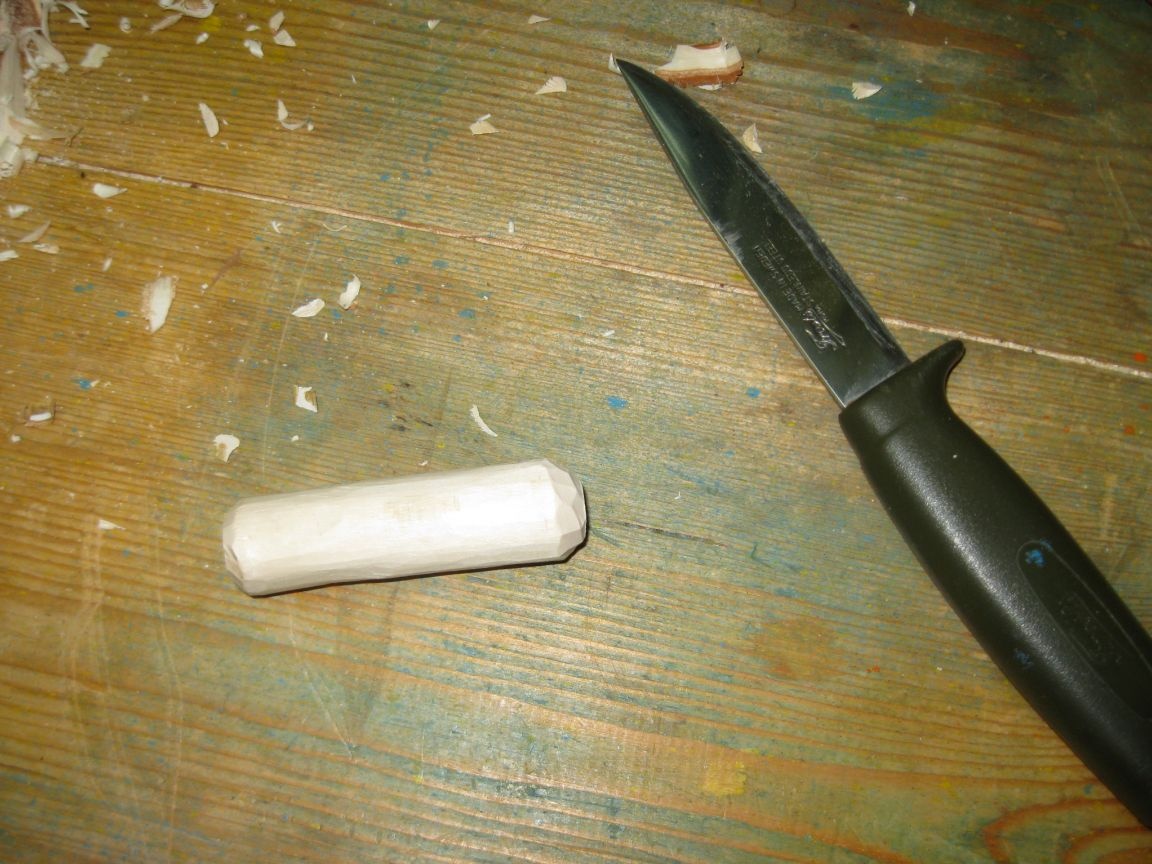
Using a knife, we process the blank of our handle cleanly, trying to cut off small irregularities and give it a cylindrical shape.
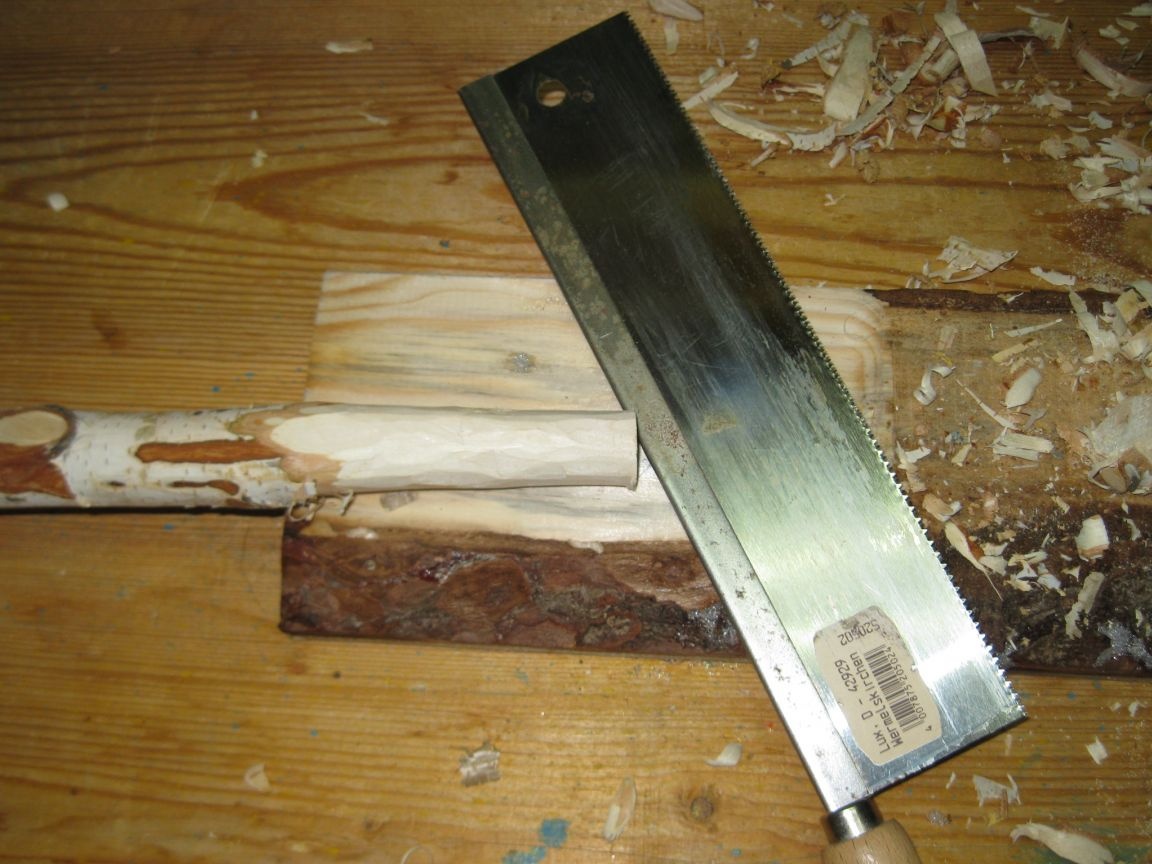
Step 5. Sawing off the handle blank.
Using a saw with a small tooth, we saw off the workpiece of our handle.
Step 6. Processing the ends of the handle.
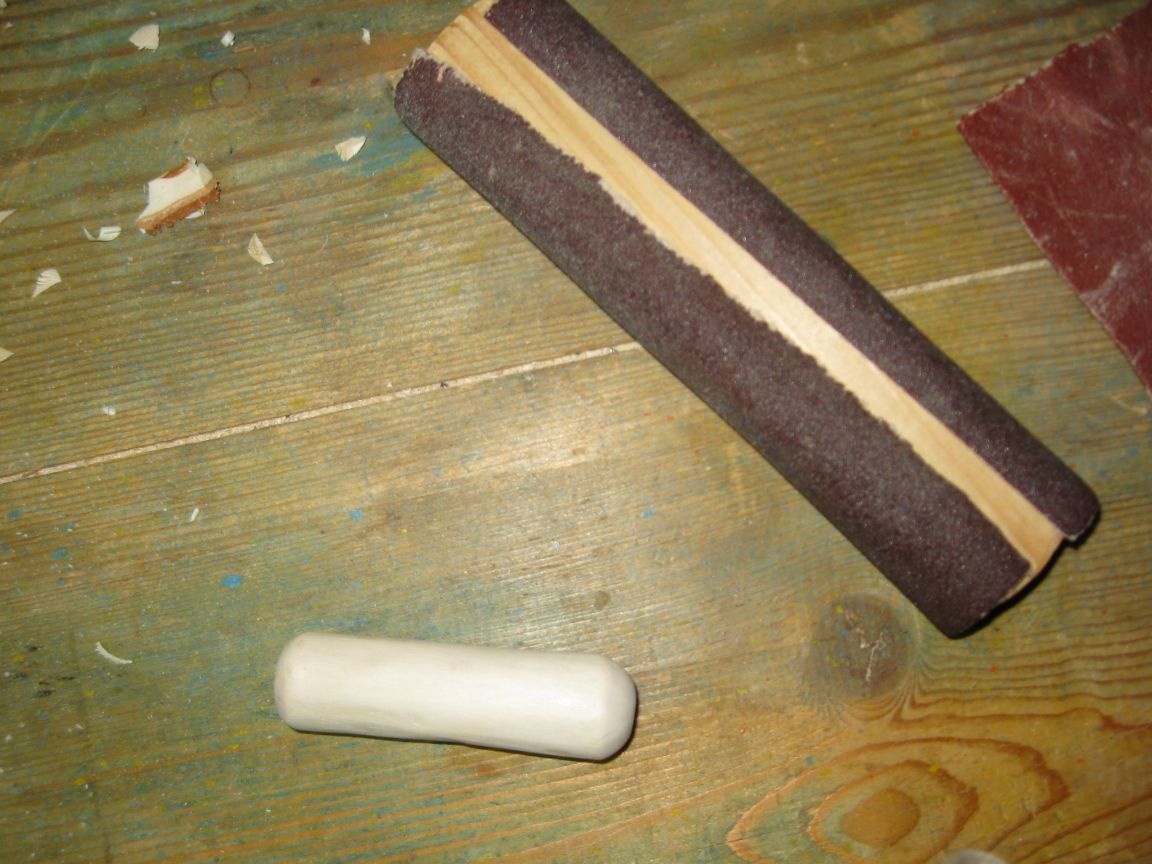
Using a knife, we process the ends of the handle, trying to give them a rounding.
Step 7. Finishing the handle.
Finally we process our handle with sandpaper.
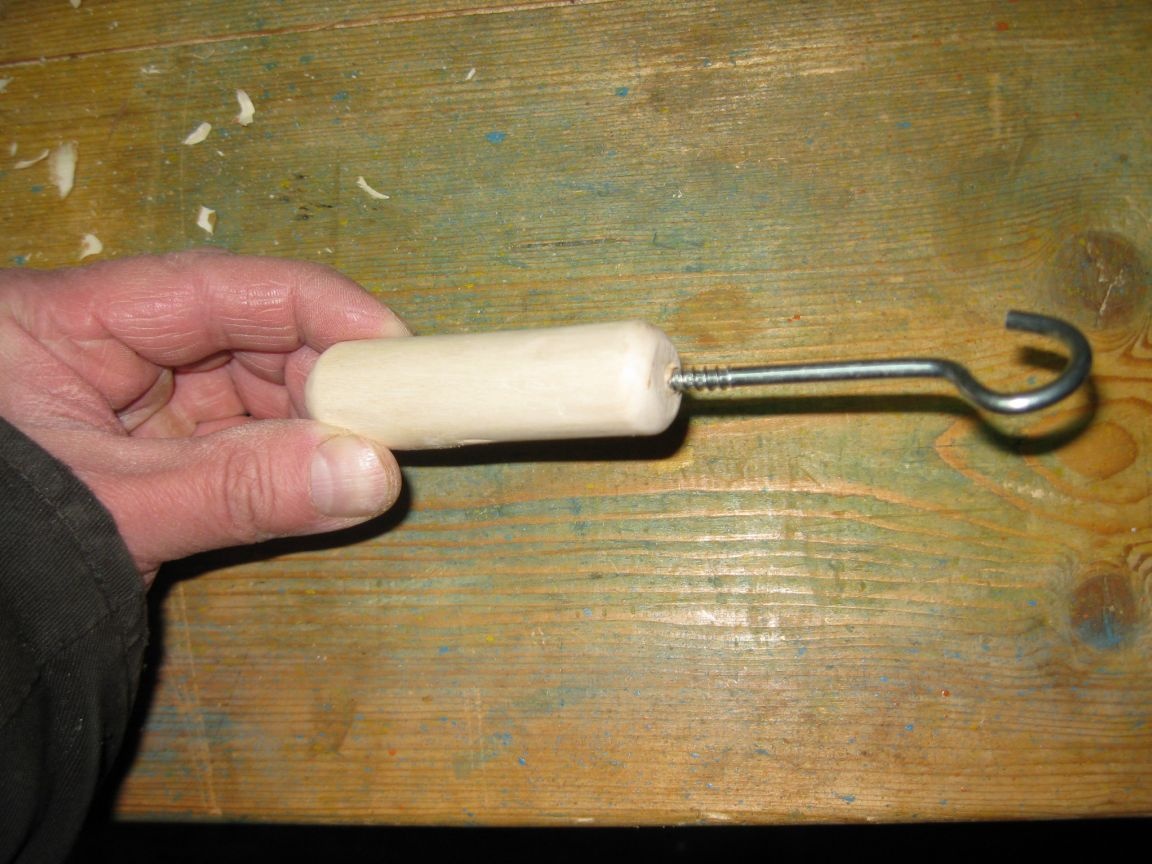
Step 8. Screw the screw-ring into the handle.
We screw the screw ring into the handle, but not to the end for the convenience of its further processing.
Stage 2. The formation of the working part of the tool.
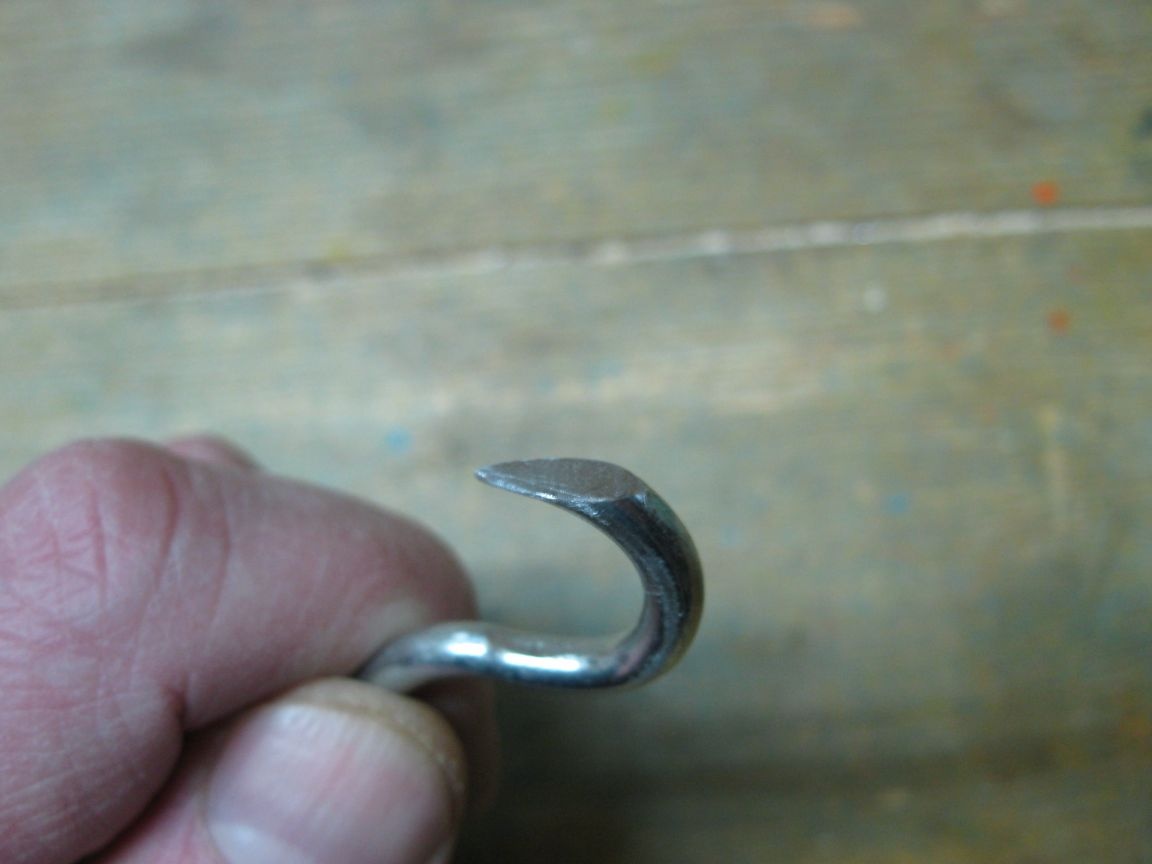
Step 1. Shorten the tip of the hook of the screw-ring.
Using a hammer and a chisel, chop off the extra tip of the hook of the screw-ring, putting it on the anvil.
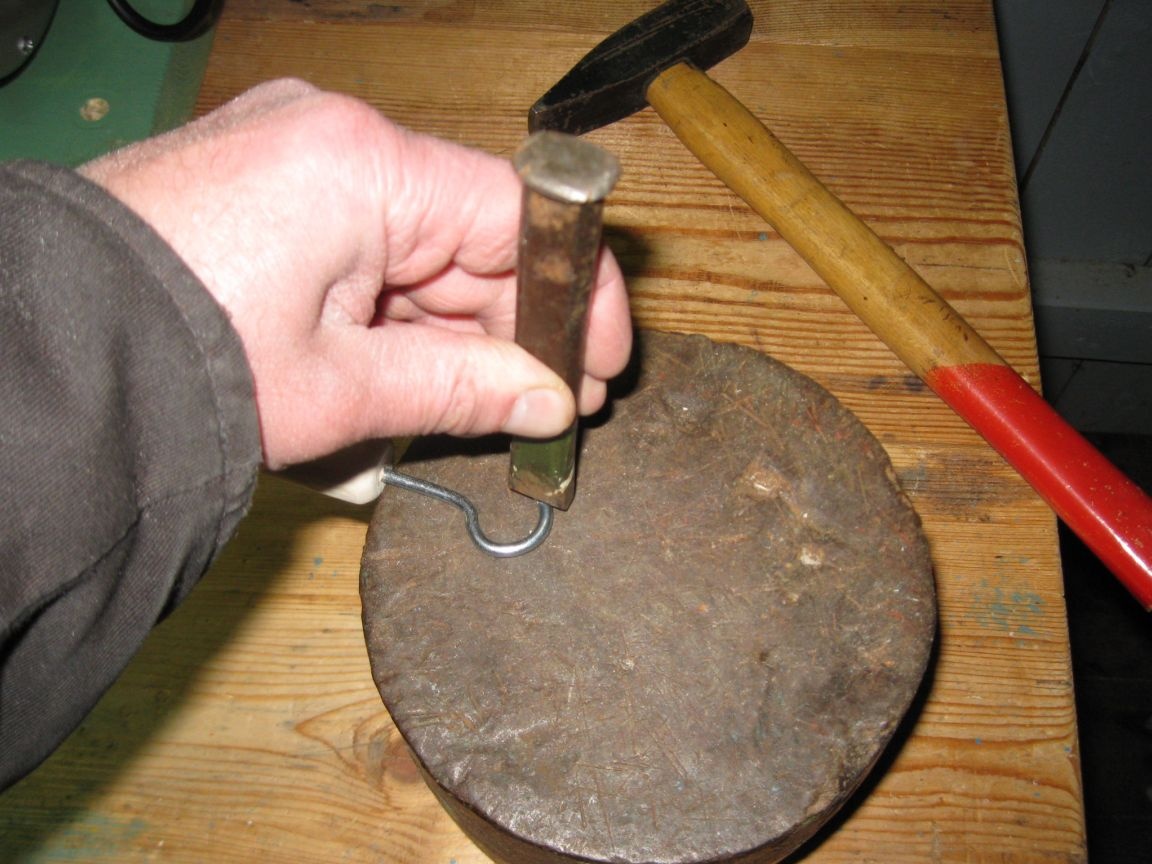
This is perhaps the fastest way to shorten the tip of the hook, much faster than, for example, sawing it off with a file, a hacksaw for metal or a grinder.
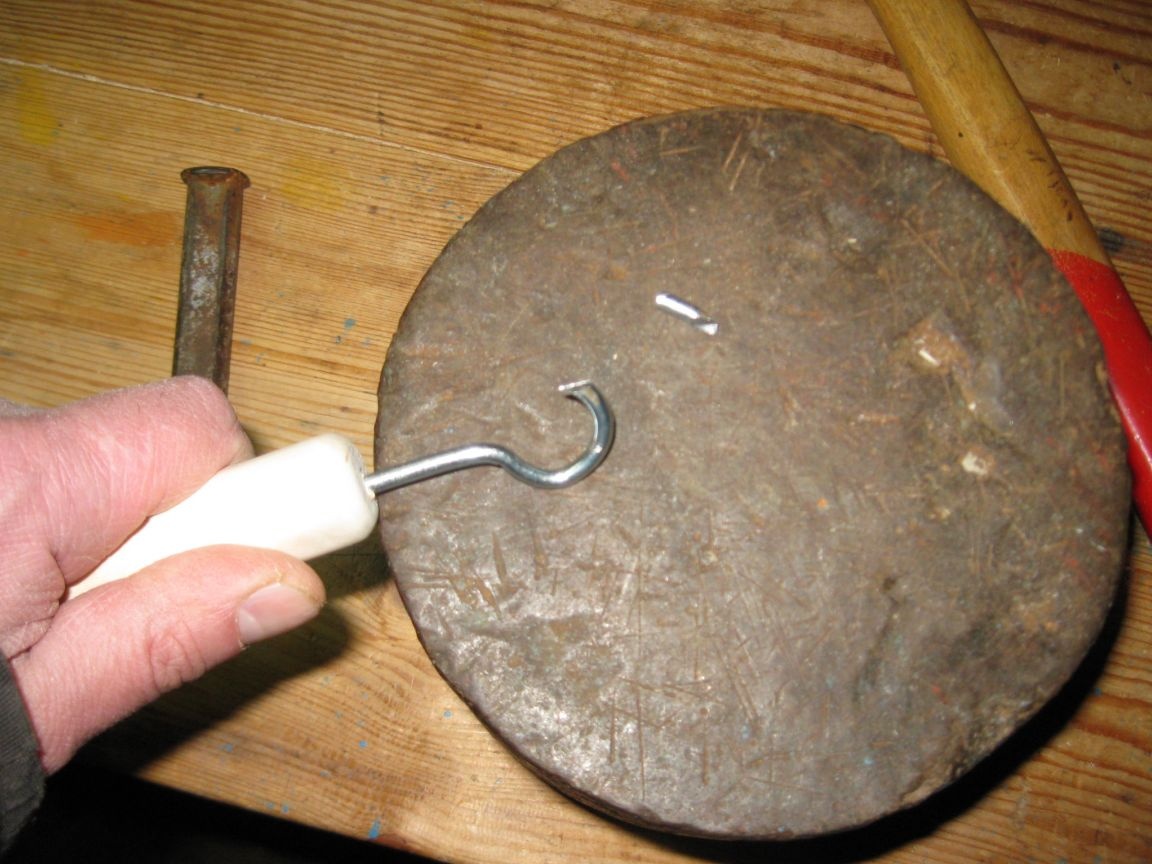
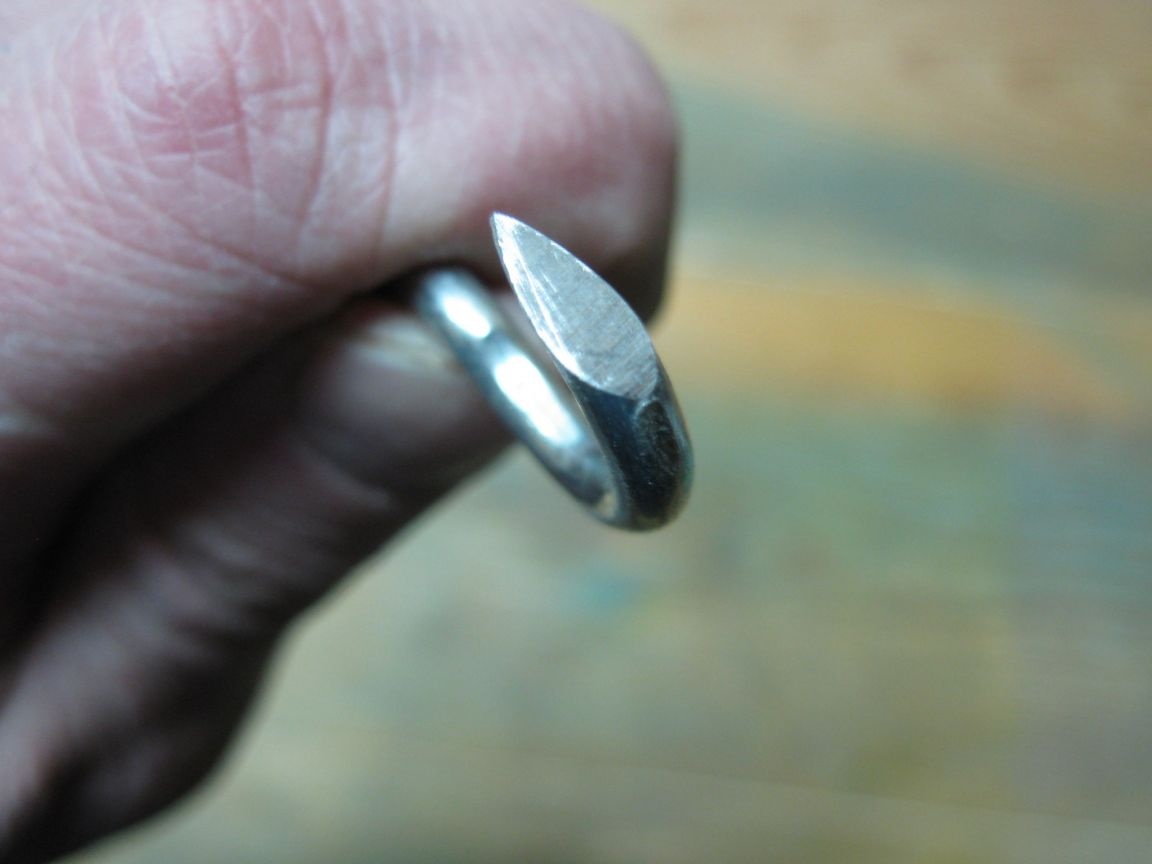
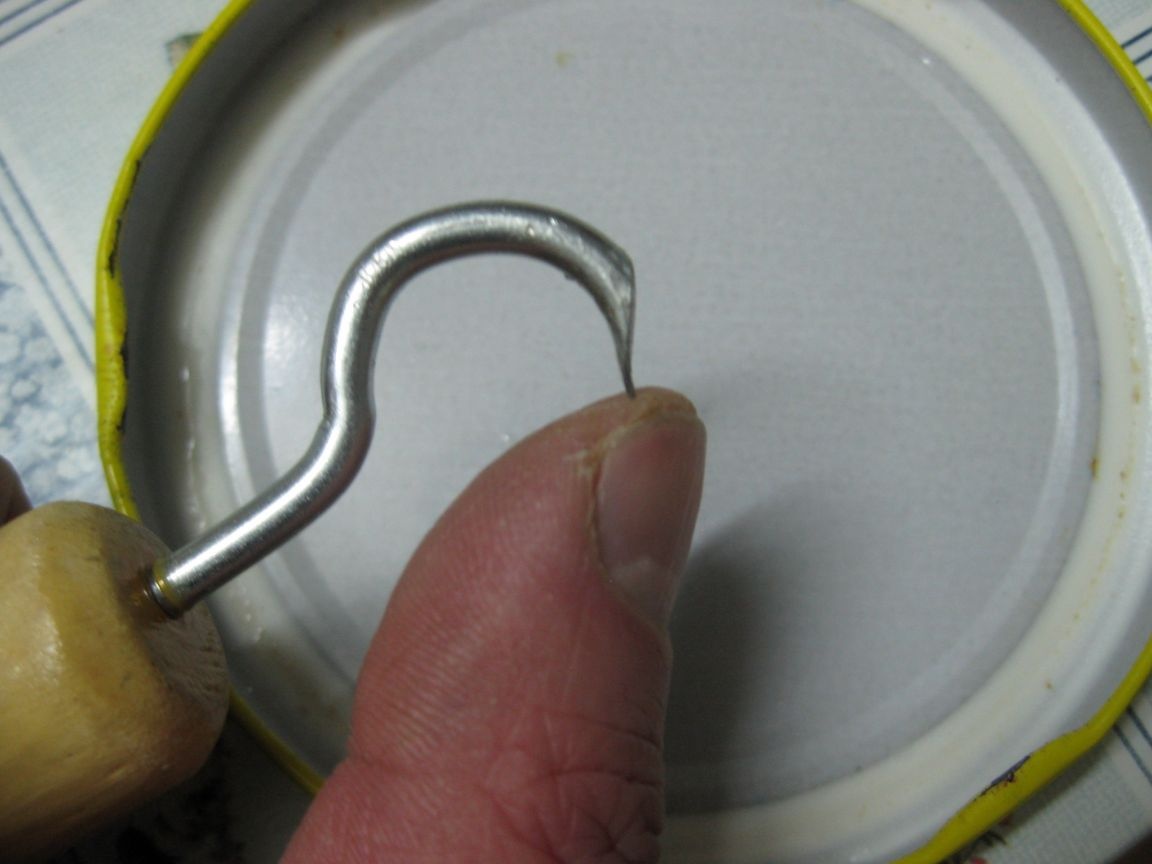
Step 2. The formation of the working tip of the hook.
With the help of an electric sharpener, we grind the end of the hook of our screw-ring, thus forming its working part.
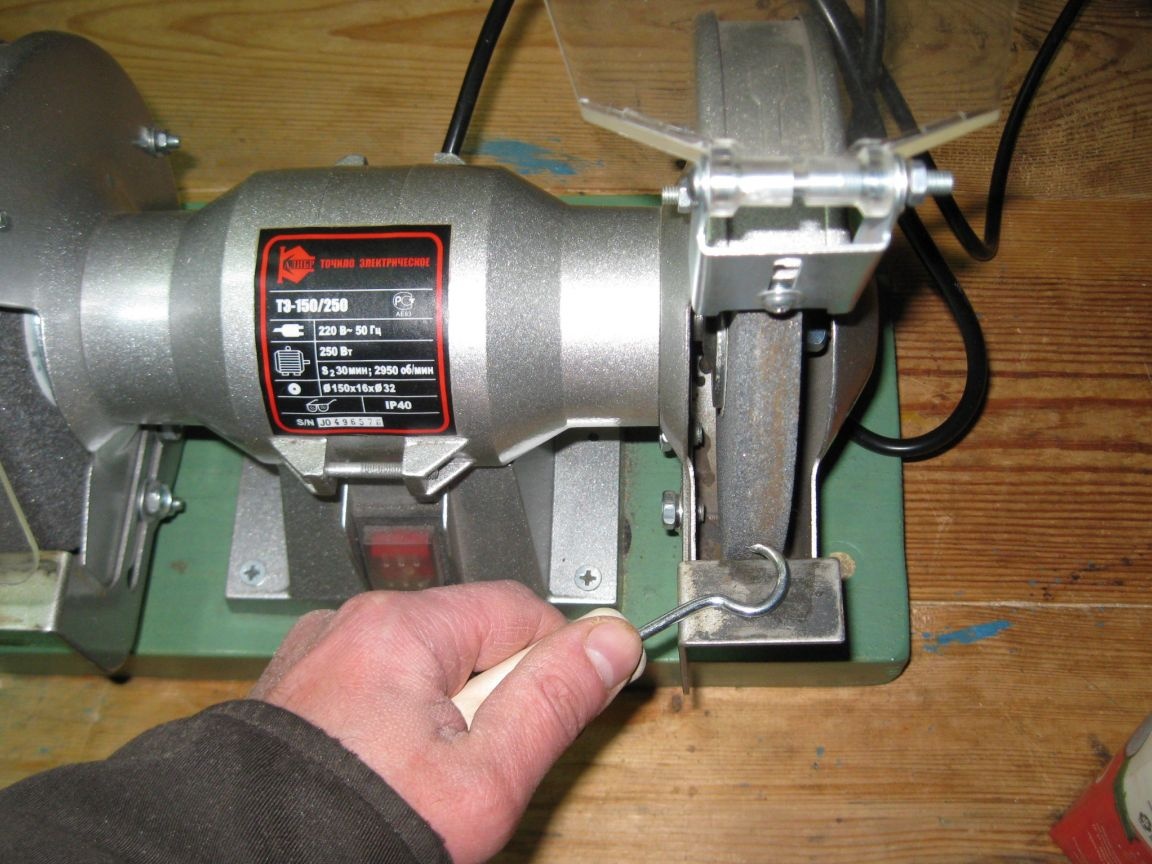
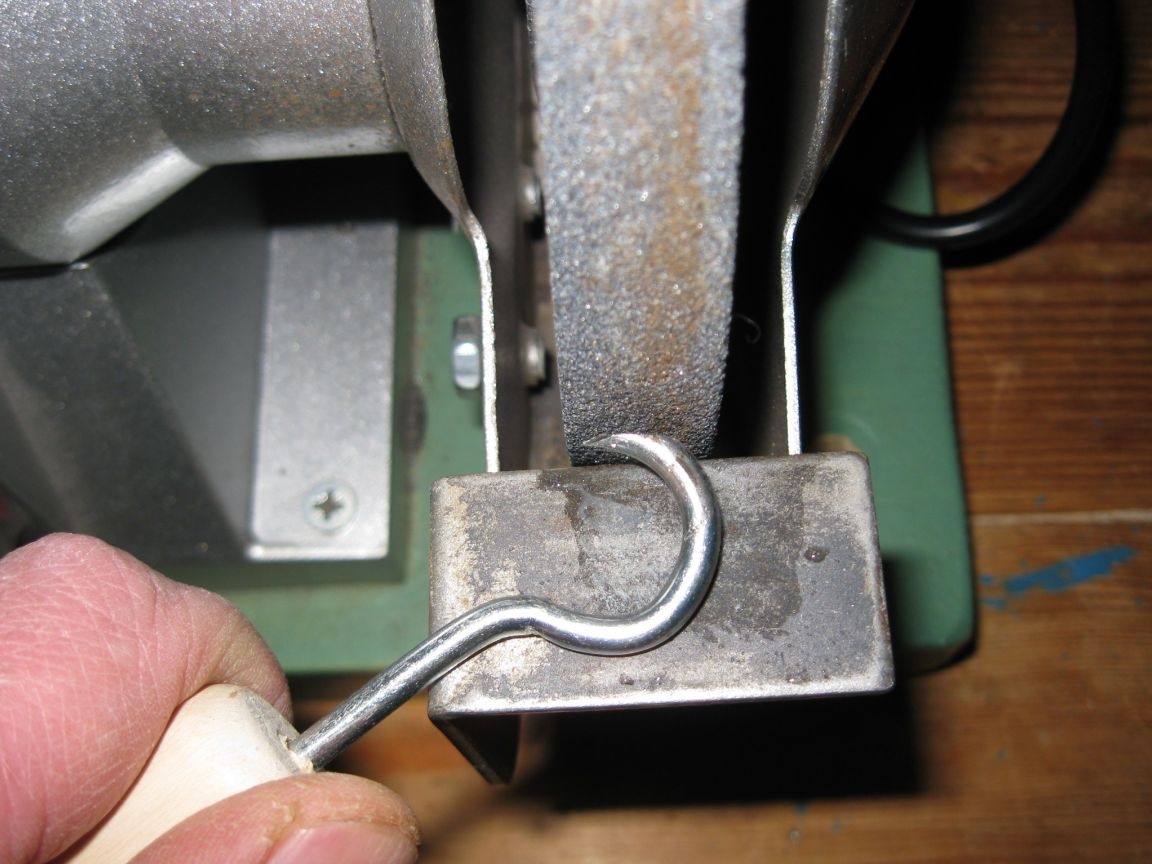
And finally bring it to the abrasive bar.
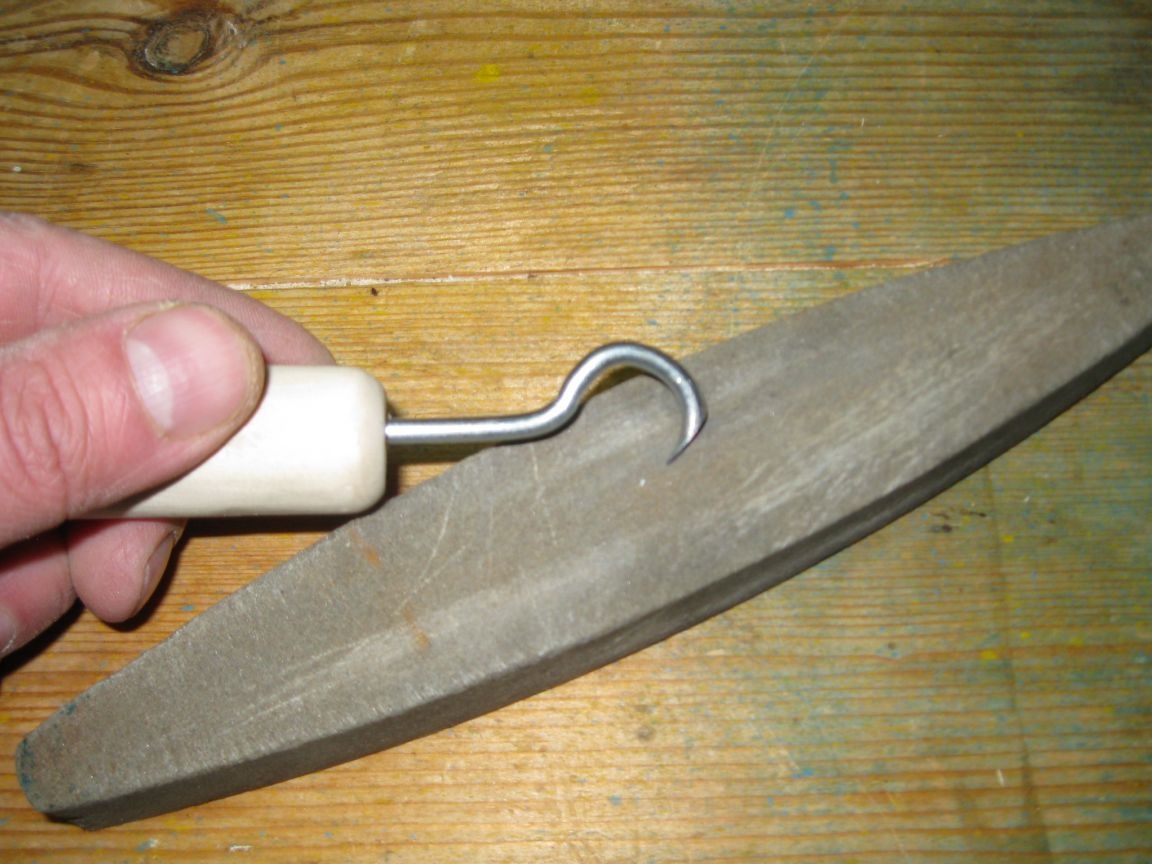
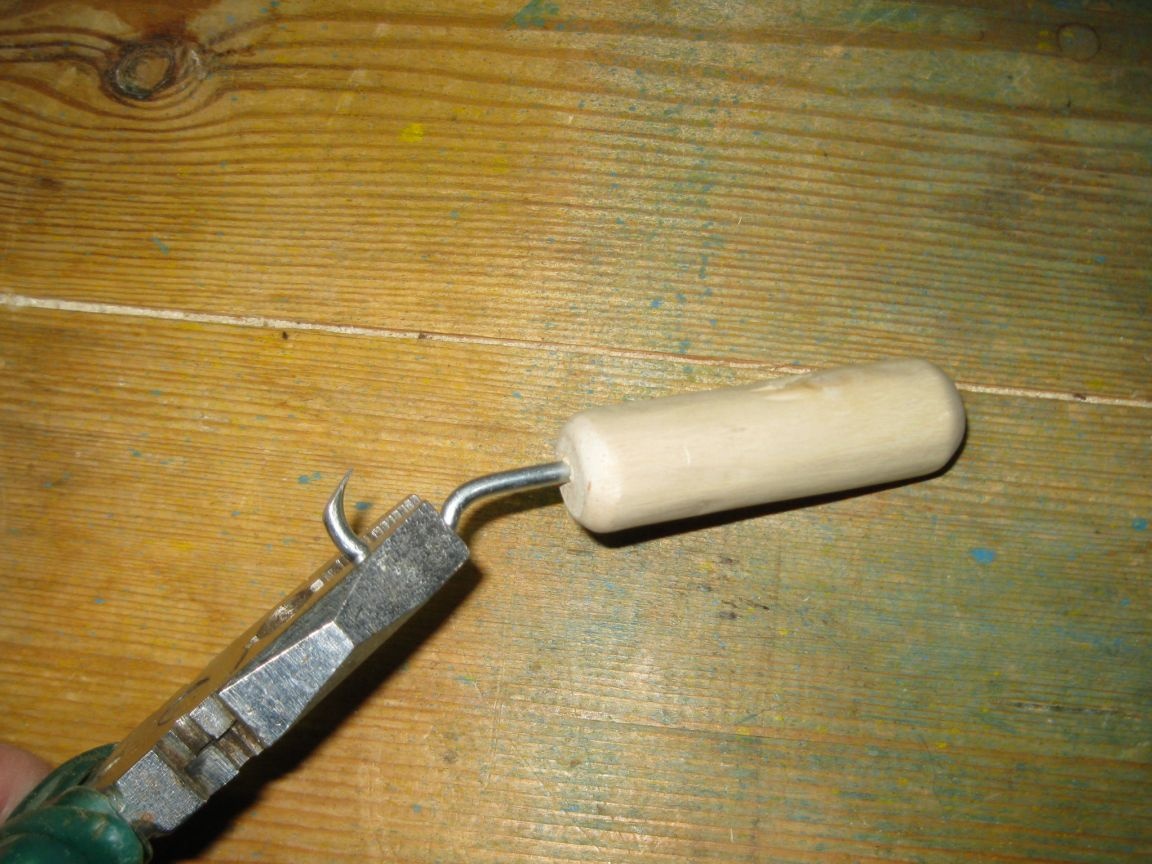
This is how the working part of the hook finally looks, which, in fact, we will pry the lids on the banks.

Step 3. Finalization of the tool.
With the help of pliers, we finally screw the screw-ring from which our hook is formed into the handle.
Step 4. Varnishing the handle of the tool.
We cover the handle of our tool with varnish. I chose a matte varnish of a light shade.
Thus, our tool is finally ready.
Tool test.
It remains to test our tool in practice.
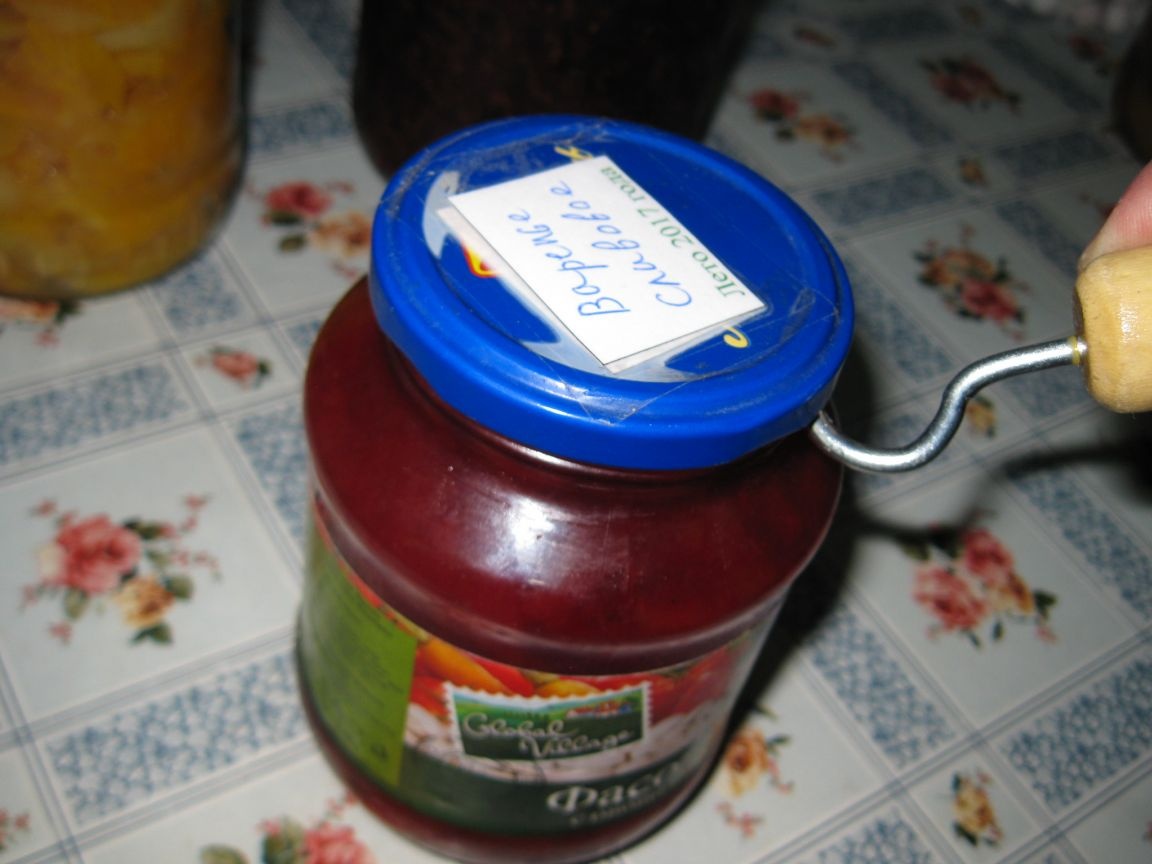
Therefore, we take the jar closed with a screw lid and gently palm off the tip of the hook of our tool under the lid, between the threads of the jar, and then slightly pull the lower edge of the lid.
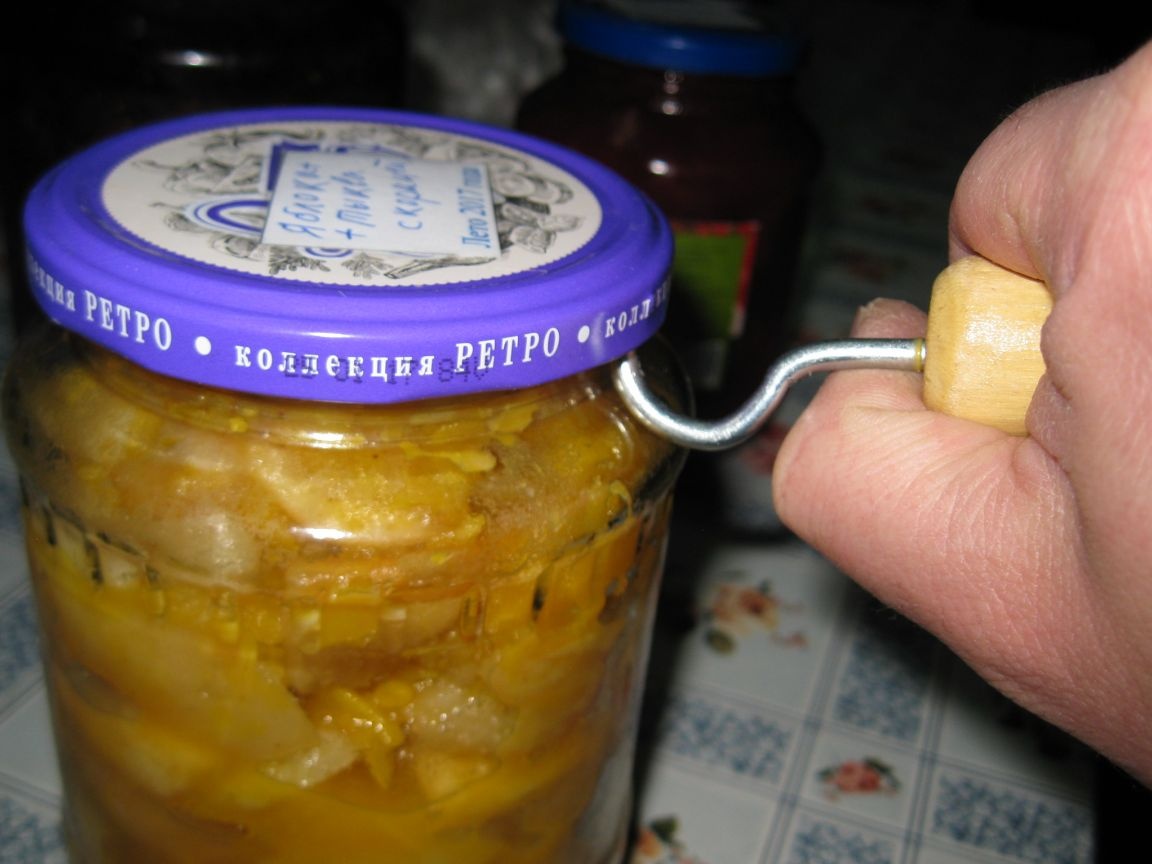
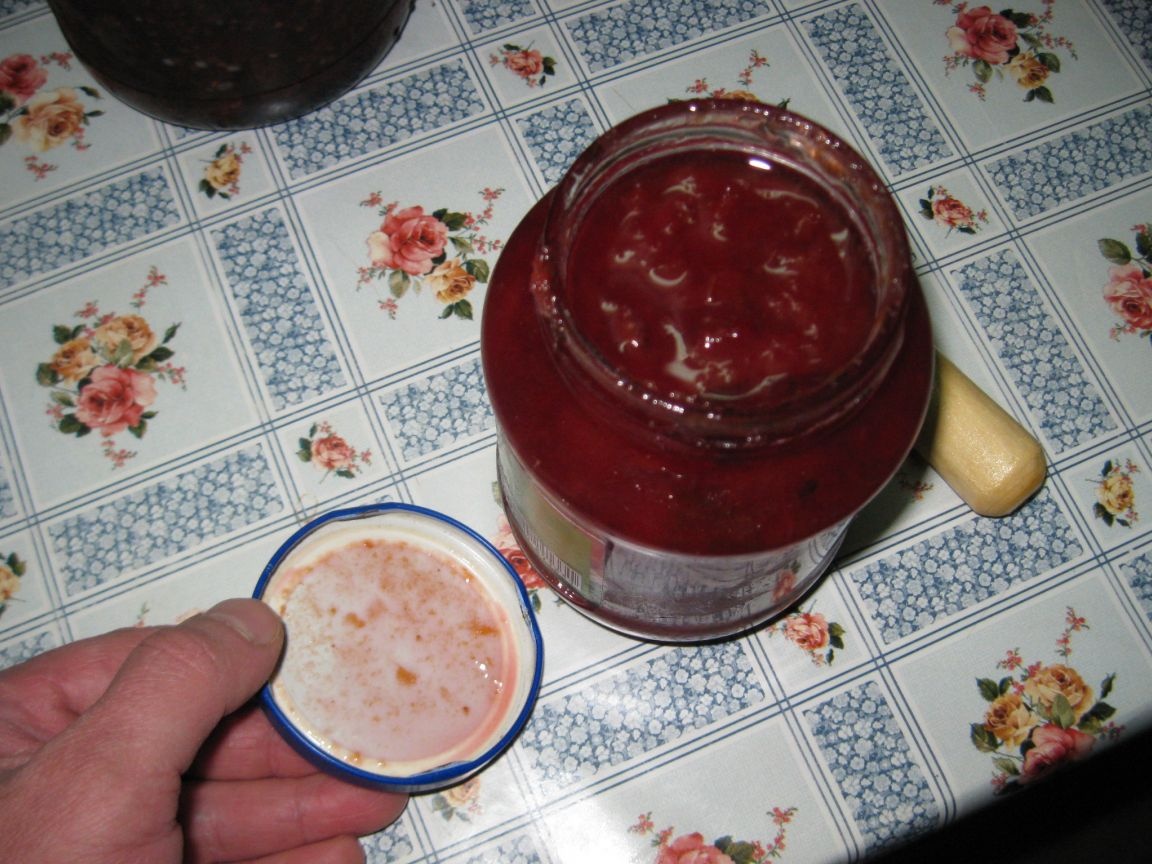
After a click is heard, easily open the lid with your hand.
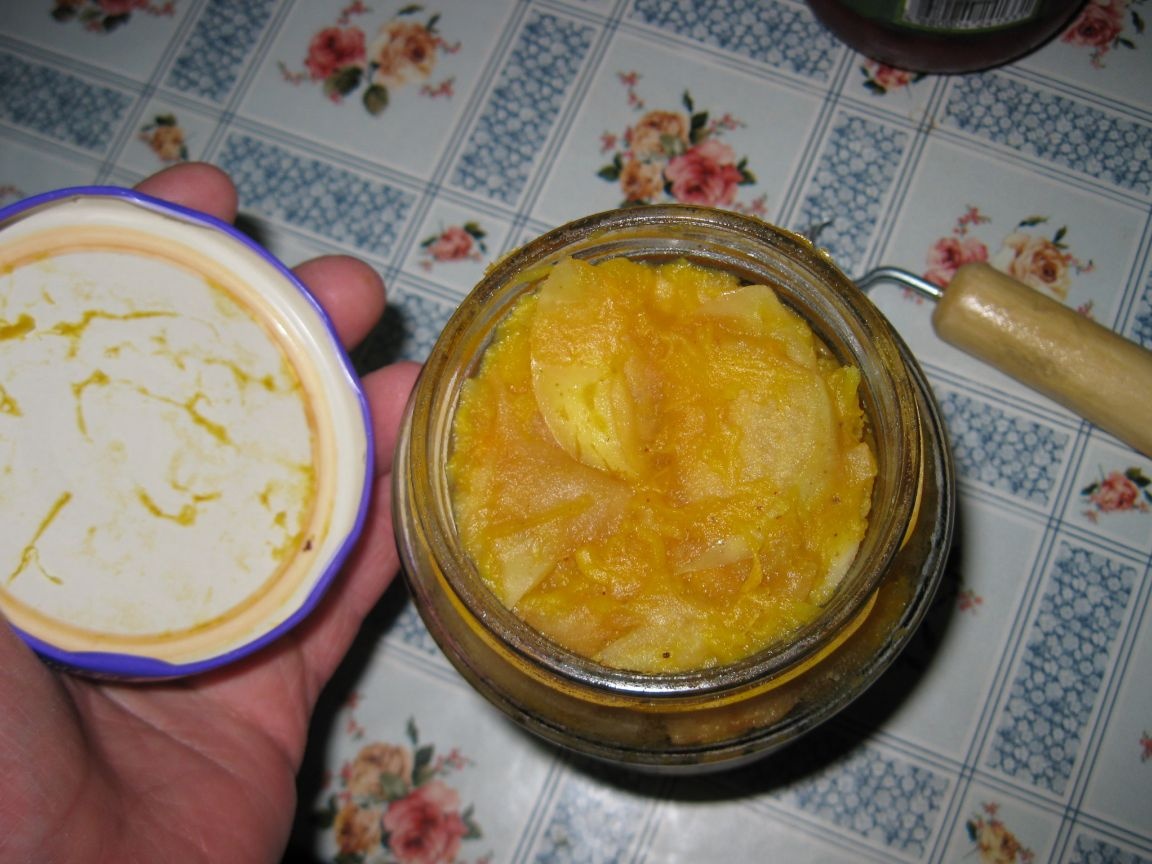
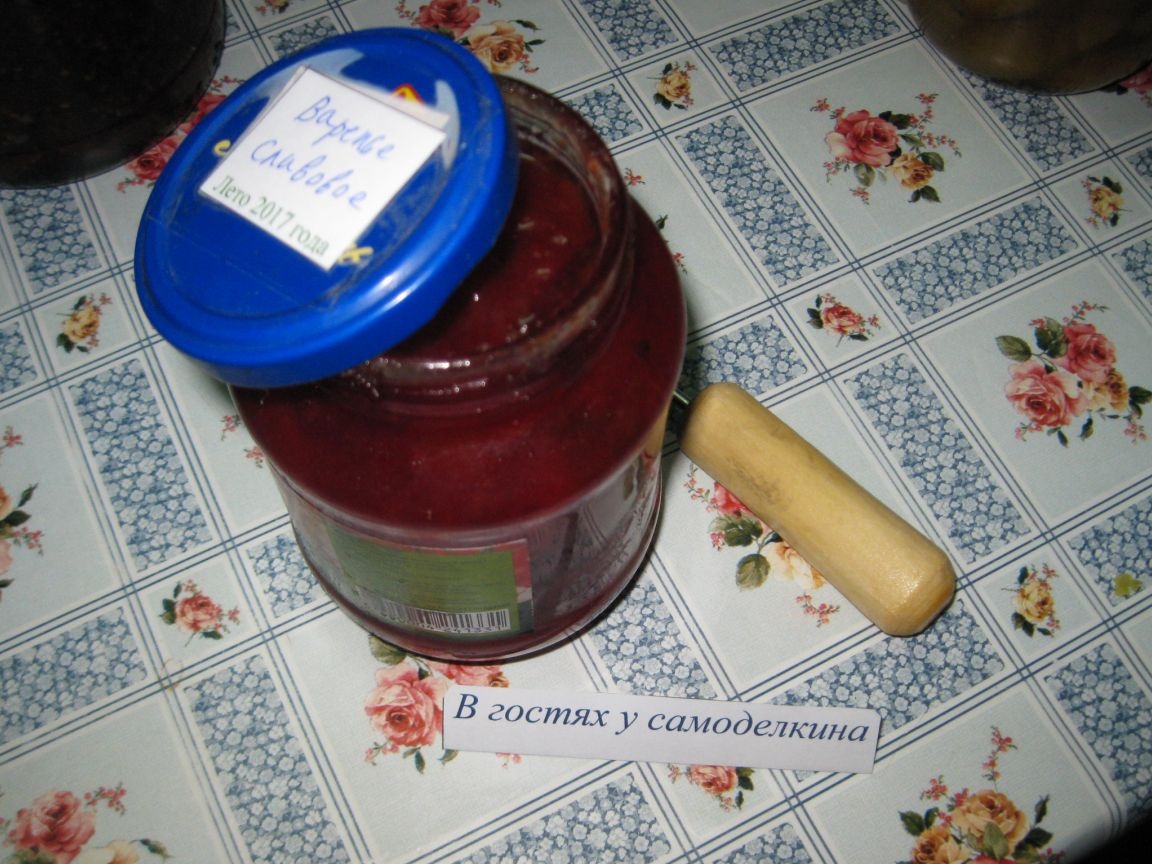
Similarly, I opened another can.
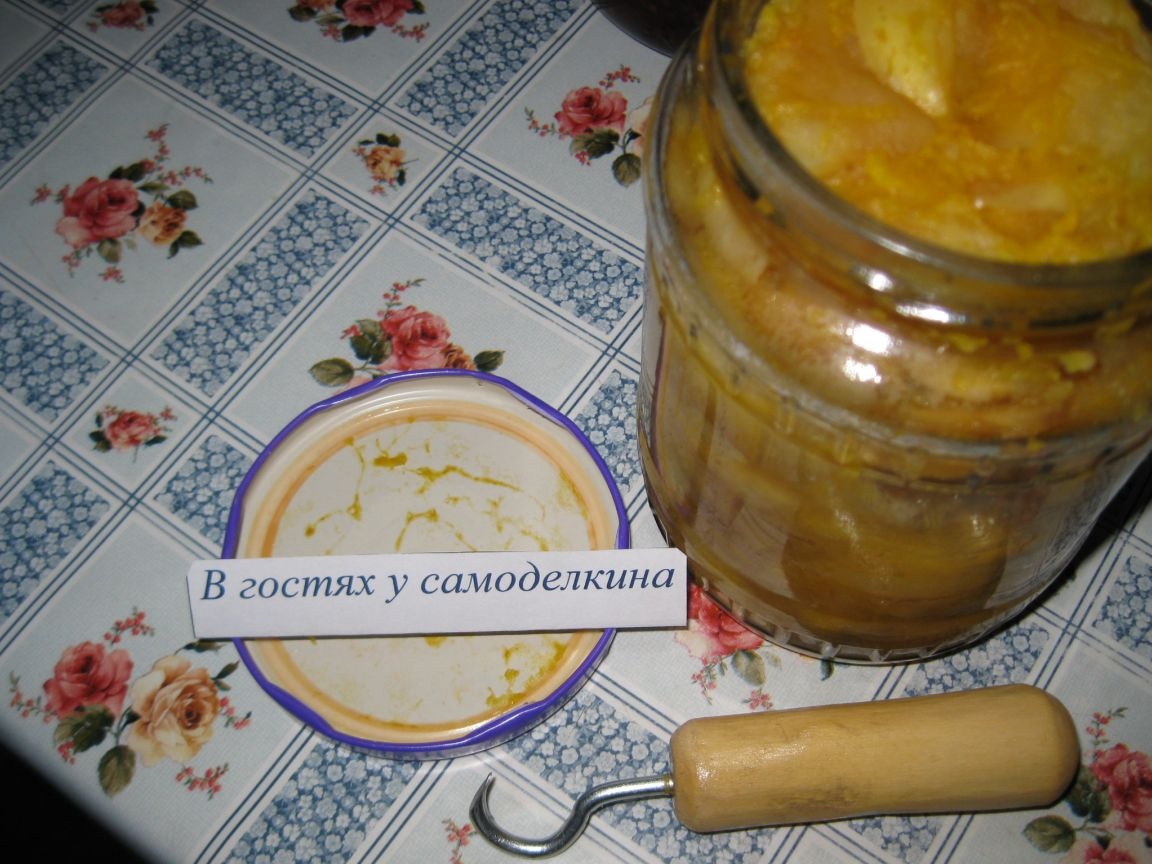
In conclusion, I want to note that, in general, my tool copes well with the task. And the shape of the working part itself in the form of a hook turned out to be very convenient.
True, it should be noted that, nevertheless, the steel on the screw-screw was soft. Since after several times of use, the tip of the hook is slightly bent.
In addition, it turned out that such a sharp tip at the hook is also not particularly needed. Over time, it will be possible to grind and round it. Well, in general, since it was a prototype, in the future I will probably make a similar tool from more durable steel.