
An old file is an excellent preparation for a quality knife. The file uses high carbon steel, which can be hardened. Thanks to this, the knife becomes durable and does not stupid for a long time.
The most difficult thing here is the formation of the profile, as well as the manufacture of bevels. Bevels are best done using a belt sander. But many masters work with ordinary manual files, as well as a grinder.
Materials and tools for homemade:
- file;
- belt grinding machine (there are machines on Ali);
- domestic oven (can be used for holidays);
- oven and hardening oil;
- paper, pencil, scissors (for profile manufacturing);
- grinder;
- vise;
- pins;
- wood for the manufacture of pens;
- drill or drill machine (select);
- epoxy glue (profitable);
- sandpaper, electrical tape, clamps and other little things.
The process of making a knife:
Step one. Metal tempering
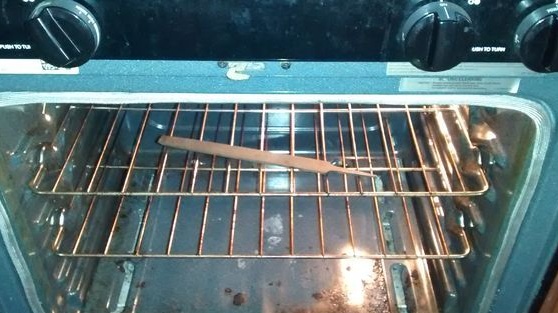
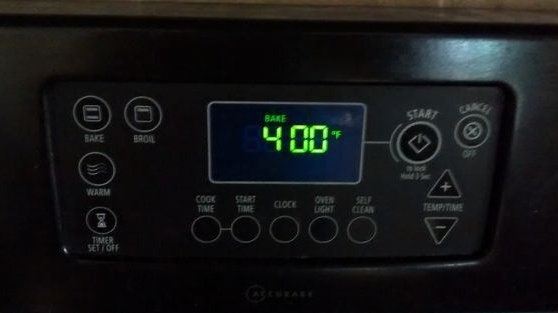
The first thing you need to do is to release the metal, since the file steel itself is brittle, and too strong for work. Vacation can be done in the oven, warm it up to about 200aboutC and put the file for an hour. Finally, let the oven cool with the metal.
If you want to make the workpiece absolutely soft so that it can be easily processed with hand tools, just throw the file into the fire and then let it cool in the open air.
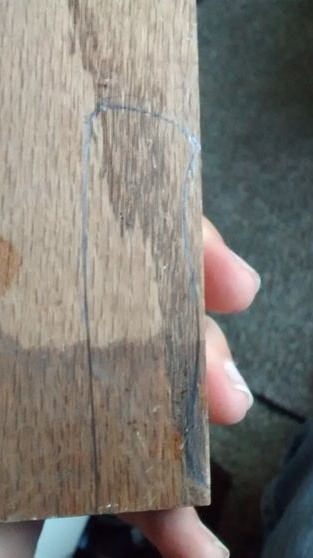
Step Two Knife profile
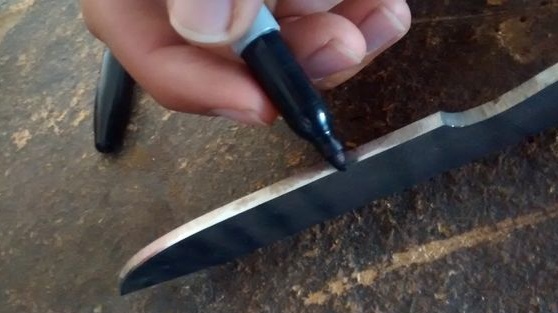
Now you have to come up with or find a knife profile on the Internet. You can change the existing one. Just draw it on paper and then cut it out. By the way, it is best to cut the profile out of cardboard, so you can hold it in your hand and make sure that the knife will be convenient.
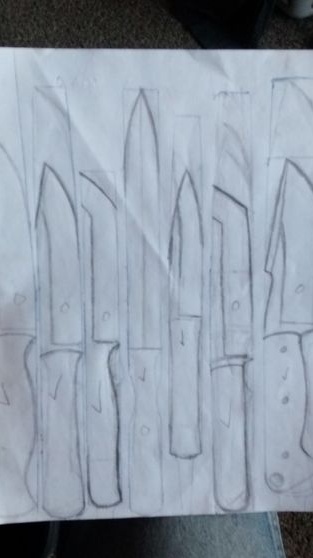
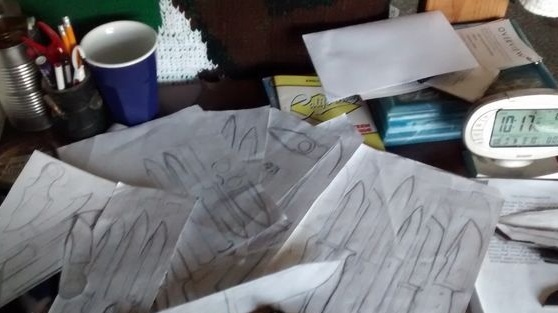
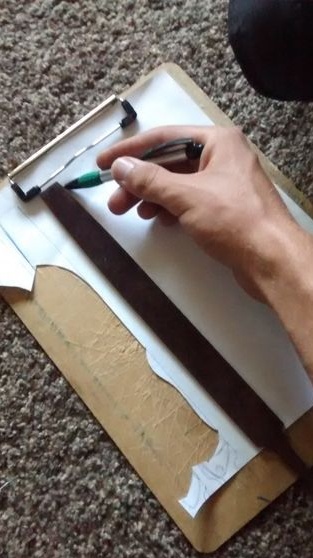
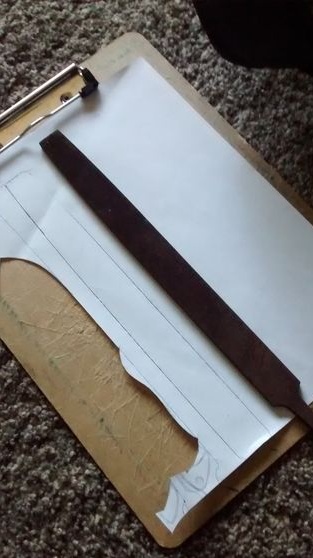
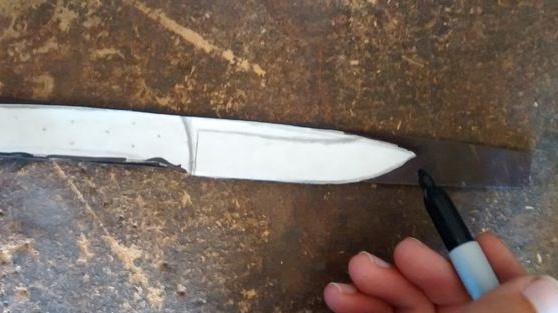
When the profile is ready, attach it to the file and circle with a marker. To make the marker visible, sand the surface of the file a bit with sandpaper.
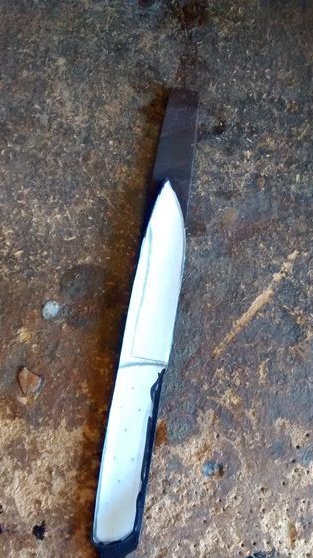
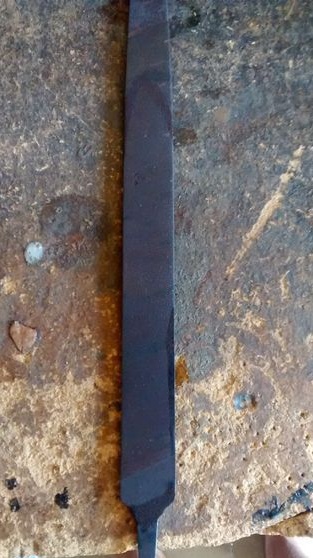
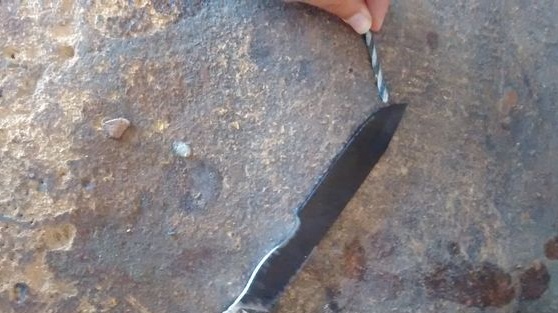
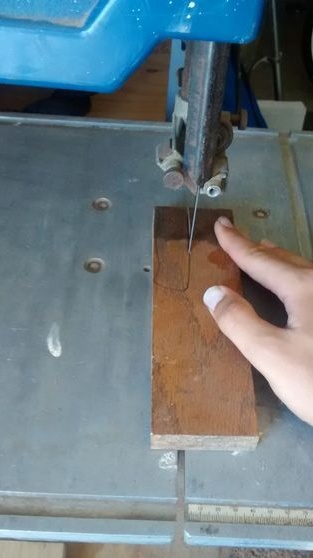
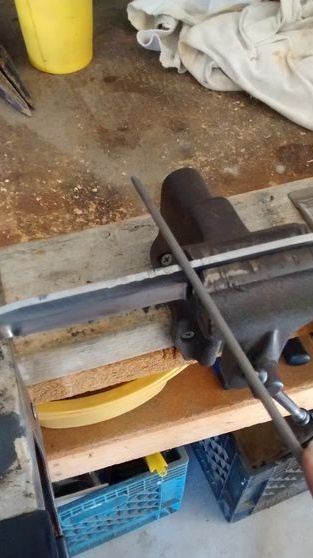
Step Three Cut the workpiece
Now you can start cutting out the profile, the author makes this an ordinary grinder. We clamp the workpiece in a vise and slowly cut it out. Try not to overheat the metal, as this leads to its tempering. Water the workpiece with water and make sure that the metal at the cutting point does not change color.
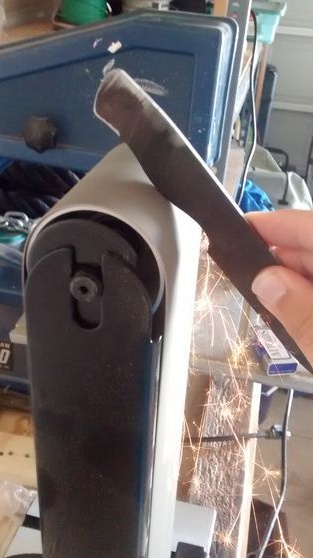
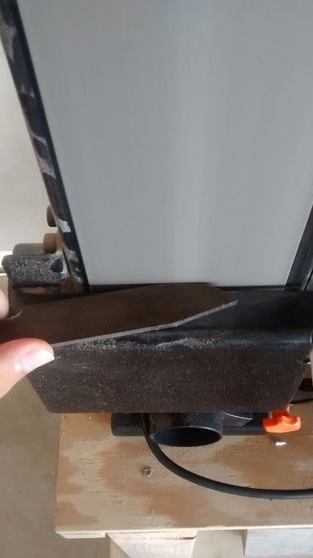
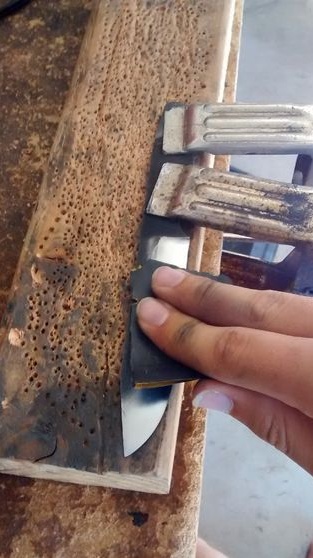
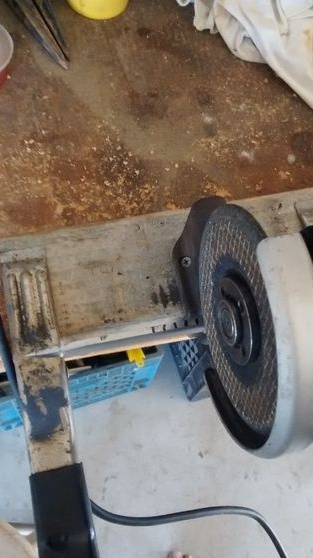
After that, you can proceed to grinding the contour. Use the same grinder and grind off all the excess edges, make the profile as it was intended.The easiest way to get flat planes is with a belt sander.
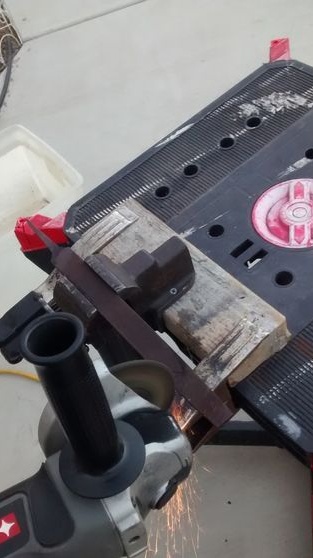
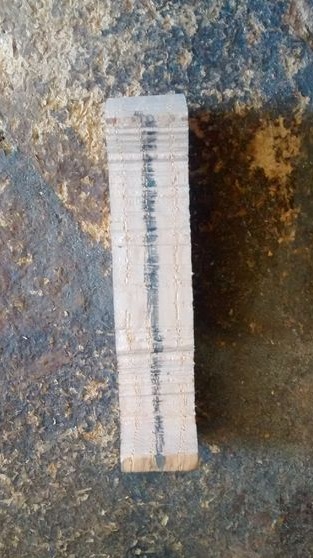
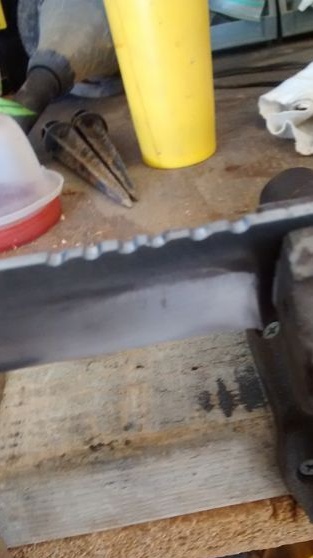
Step Four We form bevels
The cutting characteristics of the knife will depend on the bevels. The thinner the blade, the easier it will be to sharpen and the sharper it will be. But too thin a blade means it can be fragile, so choose your middle ground.
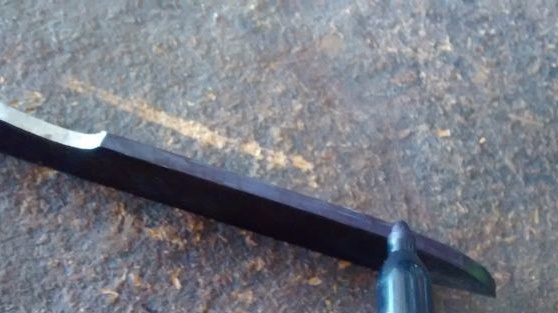

First of all, take a marker and draw a future bevel. You will also have to divide the future blade into two parts, so that there is something to focus on when grinding metal. We take a drill of the same diameter as the workpiece, apply the workpiece to a flat surface and draw a line with the drill.
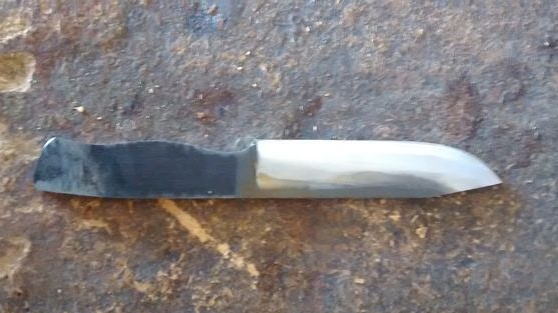
Now you can start grinding. How to make the bevels exactly depends on whether you have the right tool. The professional solution is to use a belt sander. If there is no such method, we use a grinder or a good set of files for metal.
When working with electric tools, do not overheat the metal; cool the workpiece in water all the time.
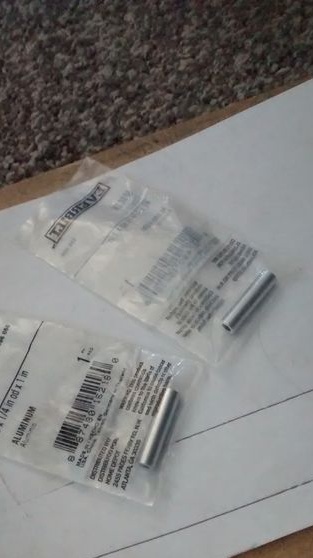
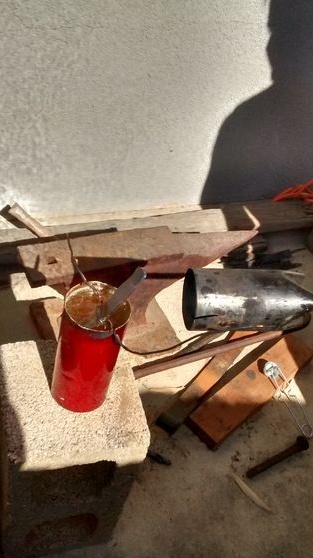
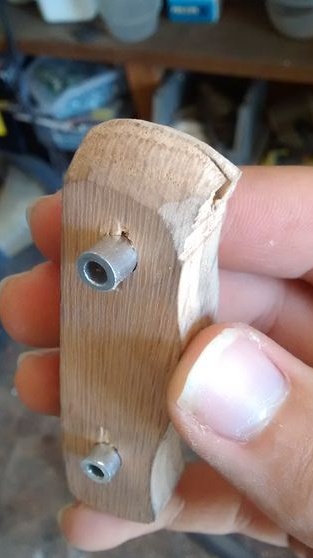
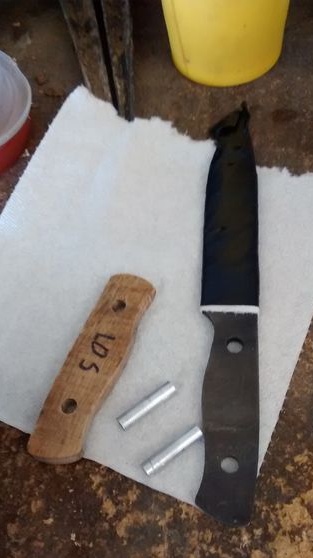
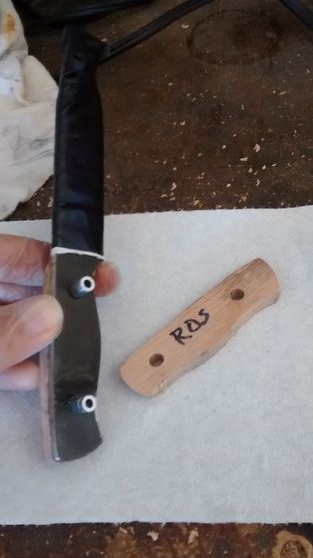
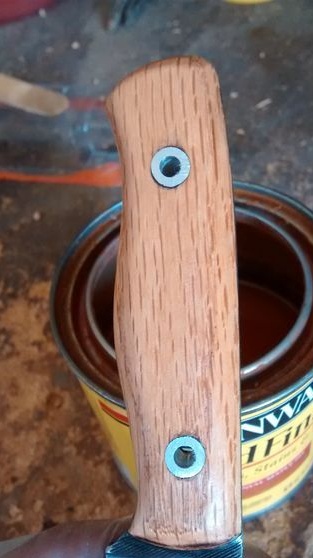
Step Five Preparation of pins and blanks for pads
The pins are needed to hold the handle pads. They can be made from various materials. You can use wire, steel nails, pins and more. In our case, the author used steel tubes.

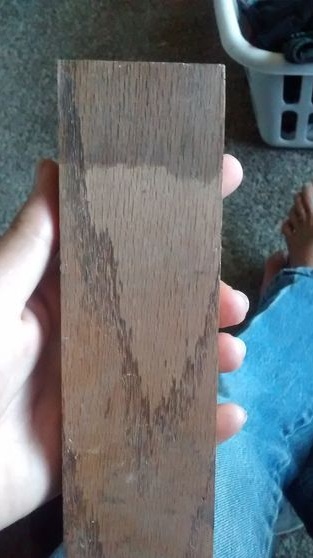
As for the pen, then you will need wood. Although this is not necessary, you can use horns, bones, plastic, textolite and so on.
Step Six Soften the handle of the blade
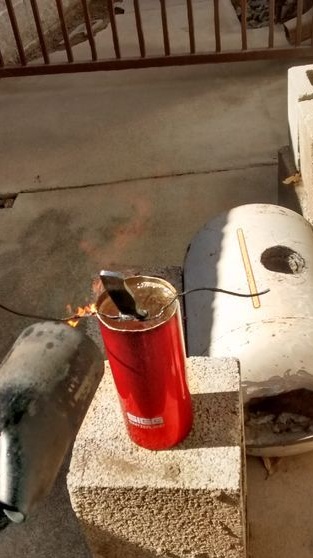
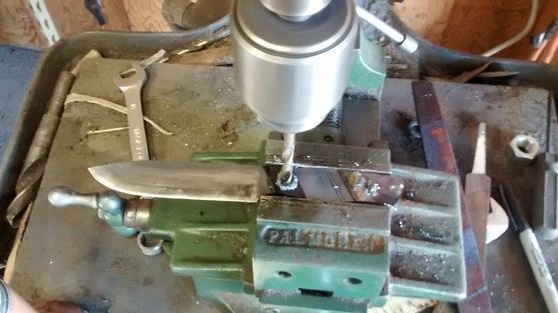
Since the author did not make a complete release of metal, it will be practically impossible to drill holes in the handle. To solve this problem, put the blade of a knife in a container of water, and heat the handle to a red color with a burner. When the metal cools down in the open air, it will begin to drill without problems.

We drill holes for the pins, it is easier to use a drilling machine. There should be at least two pins, but more can be for beauty.

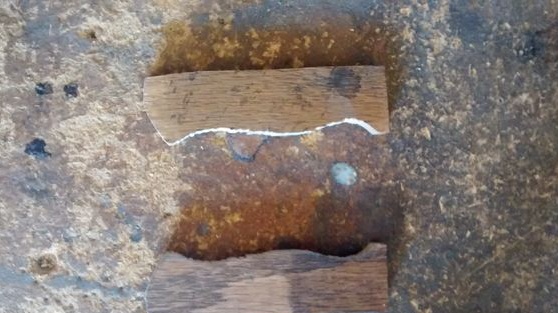
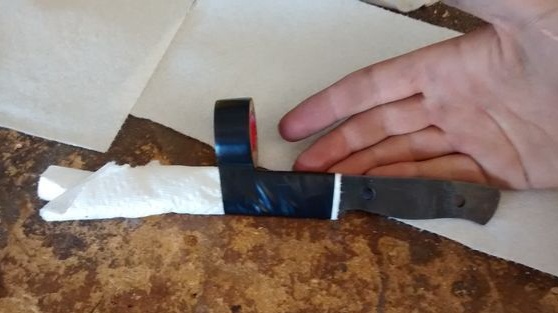
Seventh step. We clean the metal
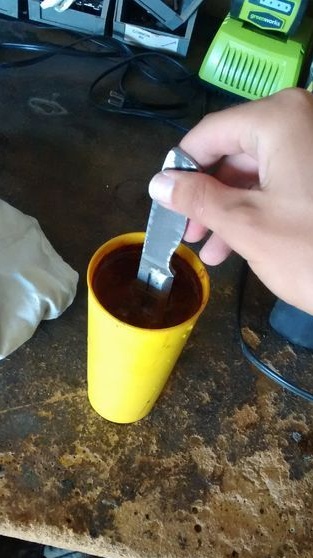
At this step, the author cleans the metal. For this, vinegar is used. We put a blank in it for a couple of hours. But there is no need to overdo it, since the acid corrodes the metal quite quickly. After 24 hours, the steel will be covered with a patina, which will be very difficult to remove.
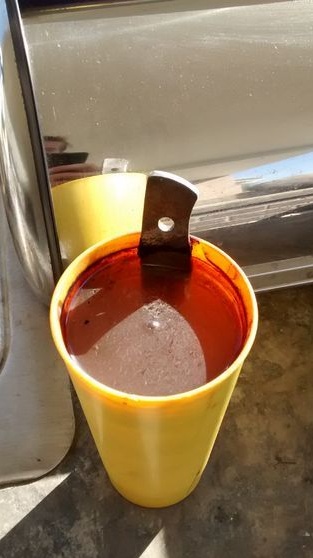
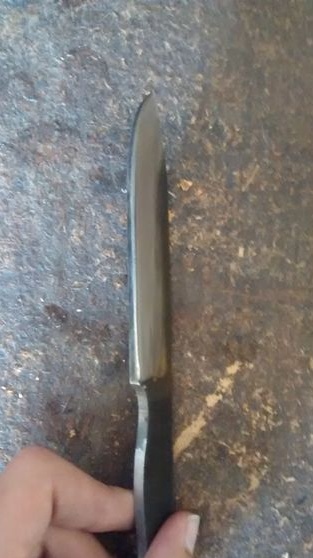
After cleaning in vinegar, the metal will be dark. You can leave it like that, or you can polish it to a shine. The author does this manually with sandpaper.
Step Eight. We work with wood
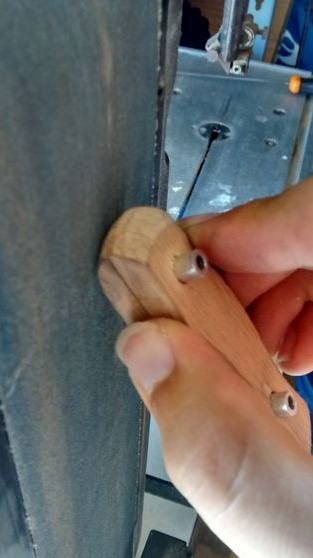
We place the blade with a pen on a tree and circle. We cut two pieces, it is convenient to work with a jigsaw. First, the author cut one blank, and then cut it lengthwise, in the end two came out.
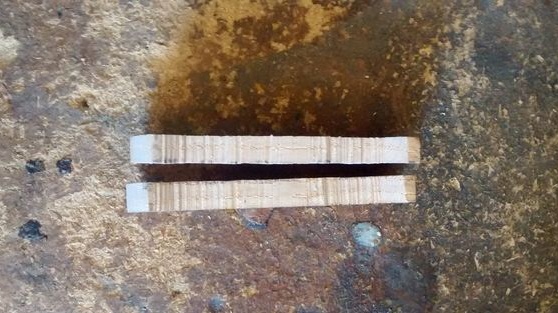
Next, you will need to drill two holes for the pins in the tree. We attach the workpiece to the handle, clamp and drill holes of the desired diameter. Now you can assemble a pen to figure out how it will look.
Grind the workpieces, thereby preparing the handle for gluing. Also strip the metal so that the adhesive adheres well to it.
Step nine Cogs on the blade
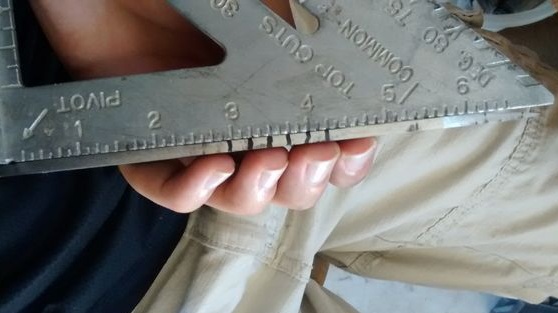
This step is optional, but you can apply cloves to your blade if you wish. So it will look more severe, and you never know where they can come in handy. We mark everything with a ruler, and then cut it with a file, holding the workpiece in a vice. You can also use a grinder.
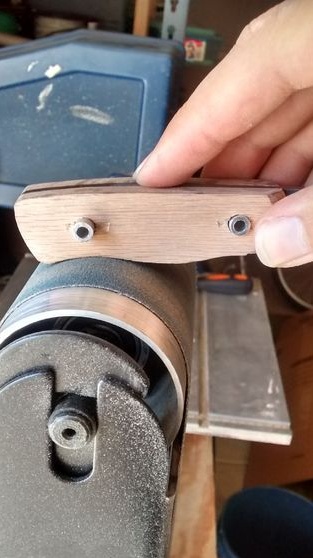
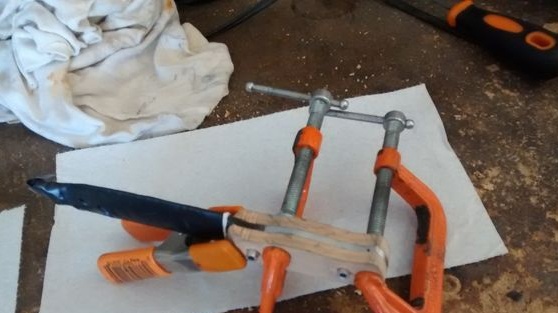
Step Ten Glue the handle
Stir the epoxy in the desired proportions and glue the handle. So that everything sticks together well, clamp it with a clamp or in a vice. It takes 24 hours to fully dry the epoxy glue.

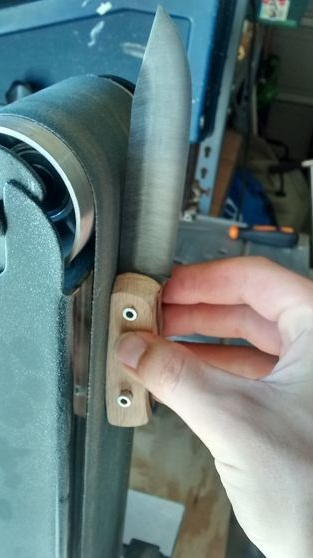
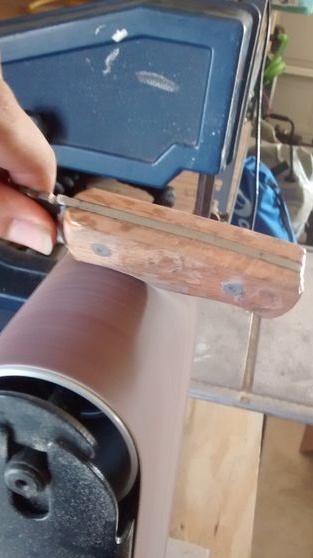
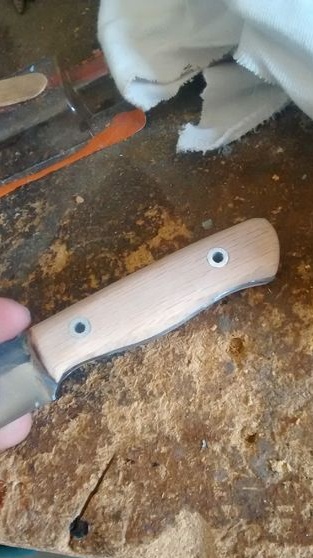
Step 11. Grinding the handle
After the glue has completely dried, we grind the handle on a belt grinder. Your task will be to bring its form to the ideal. When the mold is fully formed, bring the surface to a perfectly smooth state by hand using fine sandpaper.

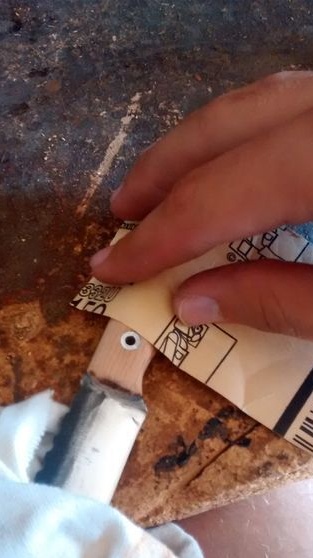
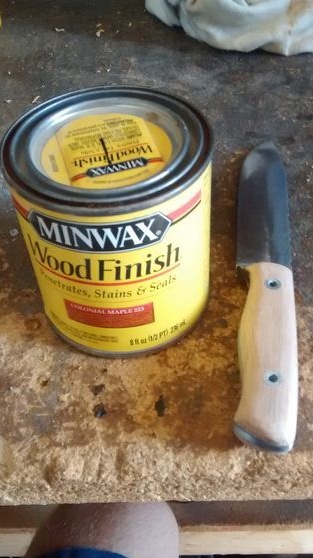
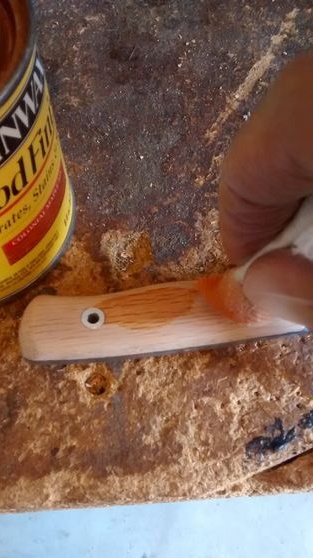
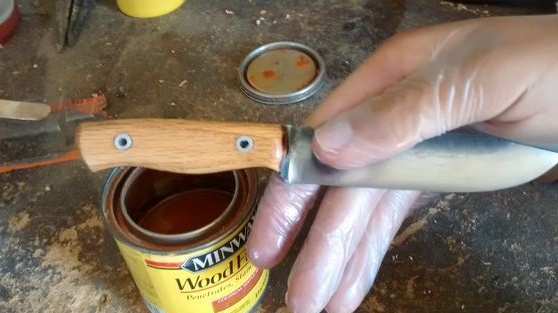
When the handle is completely ready, do not forget to cover it with water protection. You can use linseed oil and other impregnations.
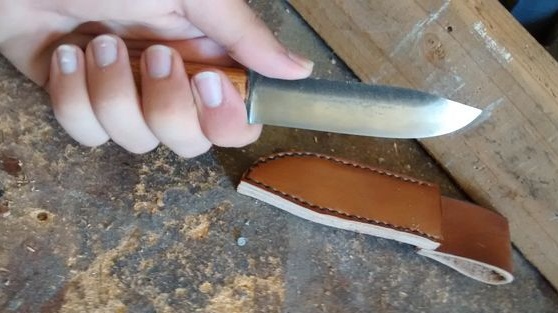
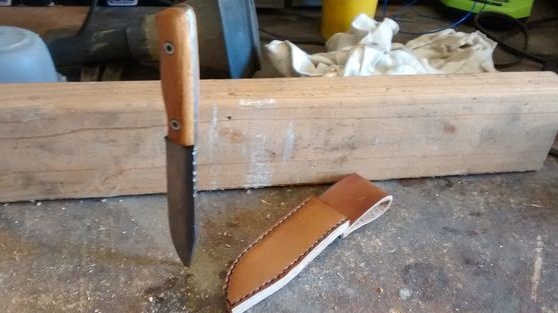
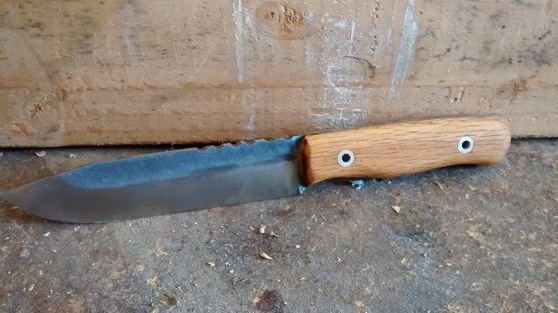
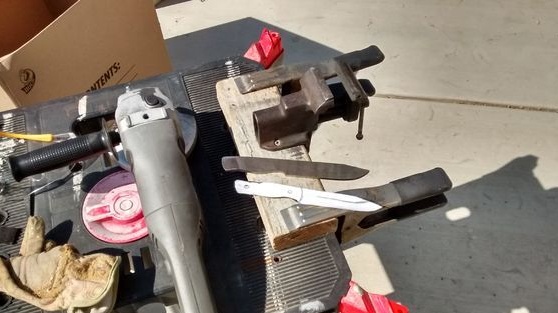
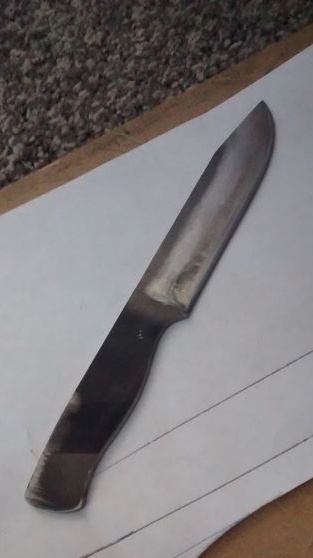
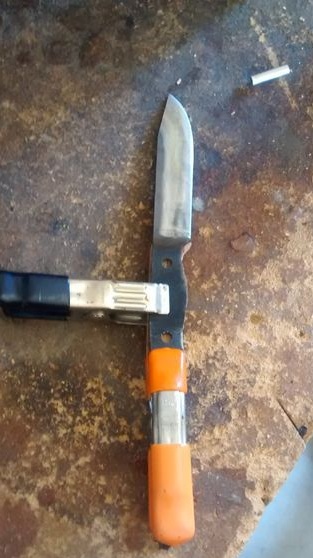
Step 12. Everything is ready
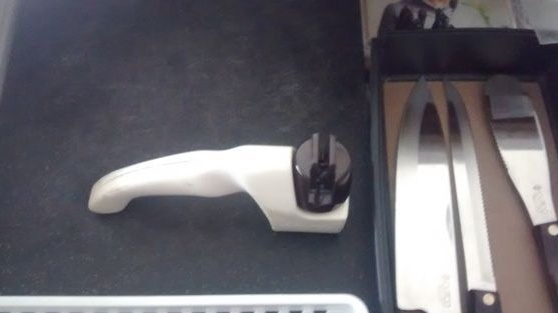
The knife is ready, it remains to sharpen it well. For such purposes you can use various fixtures. A grindstone can be used; Japanese water stone is especially good. Household kitchen knife sharpeners are also suitable.
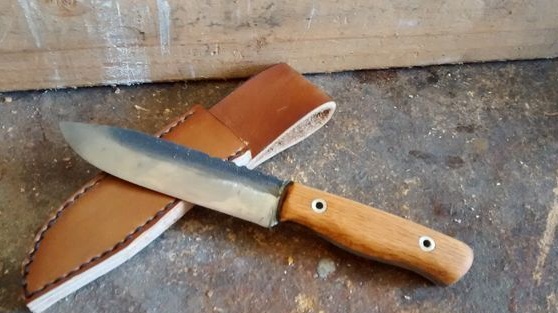
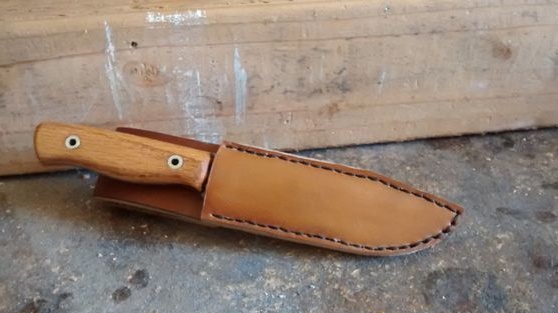

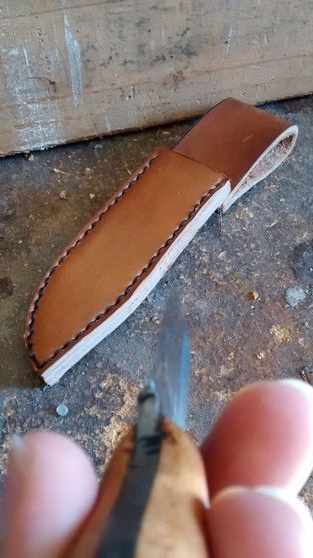
To make the knife comfortable and safe to carry with you, make a sheath for it. You will need leather and sewing supplies.
As for hardening, it is not produced, since the metal of the file is already hardened, it only needs to be released to a certain value so that it is not brittle. This author did in the first step.