
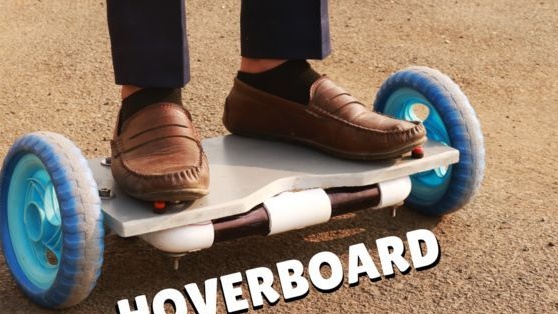
"HOVERBOARD" is translated as a flying board. it device you should immediately remember the film "Back to the Future!".
Of course, the construction with wheels made of PVC pipes is not able to soar, it is just a simple device for movement and entertainment. More homemade resembles a gyro scooter, although it does not pull on it, because there are as many as four wheels, instead of two. Nevertheless, the costs here are small and for a child such a homemade product will be quite interesting.
Materials and tools for homemade:
- two electric motors for 12V (suitable);
- lithium batteries (you can buy);
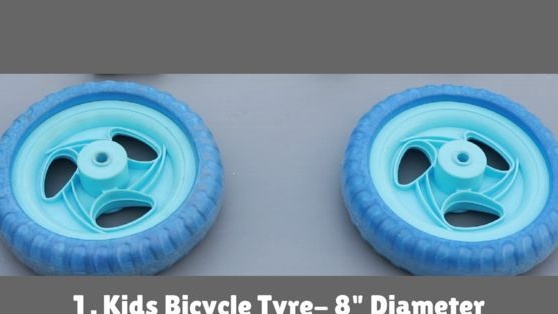
- two large and two small wheels;
- glue for wood;
- screws with nuts;
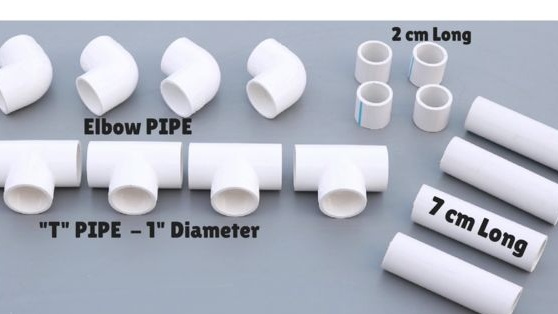
- PVC pipe. (All have a diameter of 1 inch);
- pipe "T" - 4 pcs;
- pipe with an angle of 90 degrees - 4 pcs;
- straight pipe - 9 pcs;
- plywood or other sheet material;
- two buttons for control;
- wires;
- a hacksaw;
- wrenches and screwdrivers;
- marker;
- roulette and other little things.
Homemade manufacturing process:
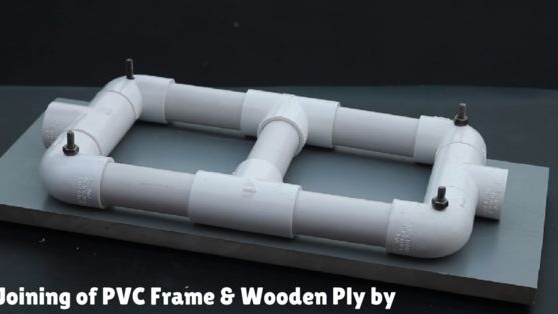
Step one. Frame assembly
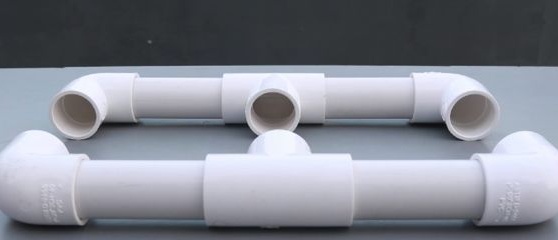
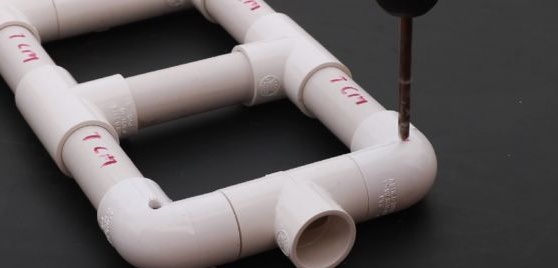
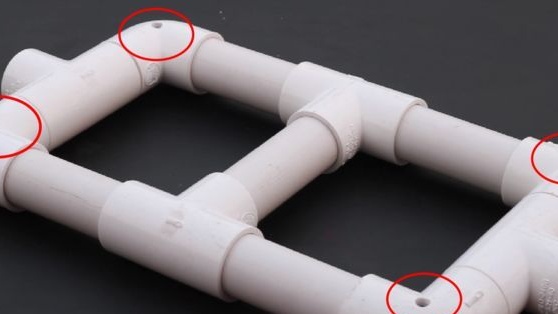
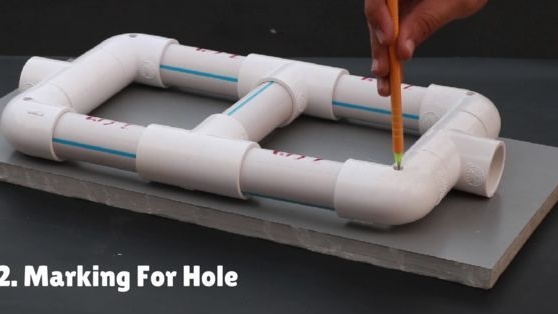
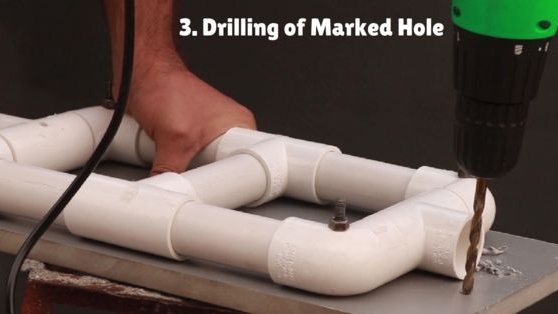
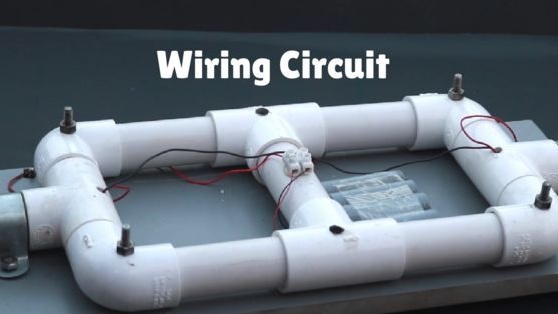
The homemade frame is assembled very simply, all the parts are made of PVC pipes, you just need to cut them into the necessary pieces and then glue them according to the pictures or video. The frame will be quadrangular, it is needed to hold two electric motors. At the corners of the structure, the author drills through holes with a diameter of 10 mm.

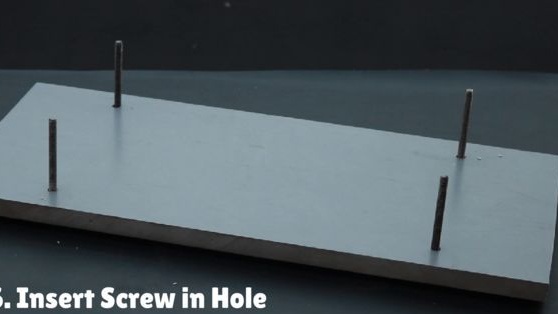
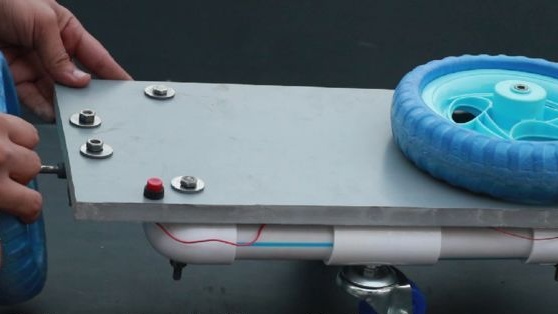
Step Two Prepare a wooden plate
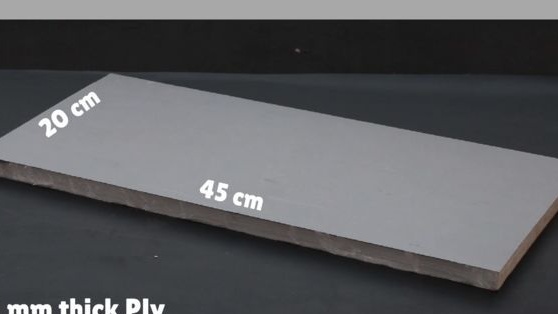
A wooden plate additionally strengthens the frame, and thanks to it, you can stand on the device reliably. You will need a piece measuring 45 by 20 cm. It is important that the material is as light as possible, since maximum speed and energy consumption depend on weight.
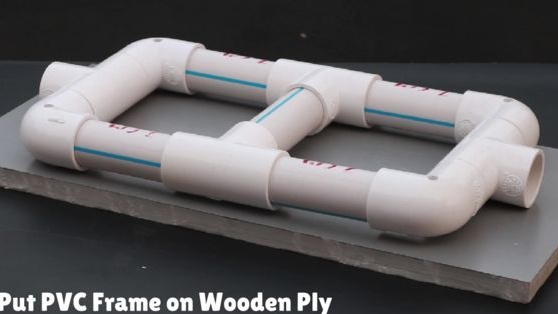
Step Three We fasten the plate to the frame
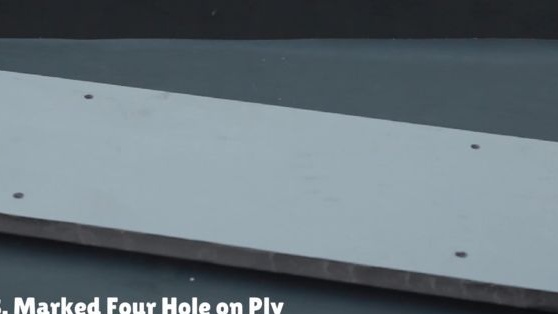
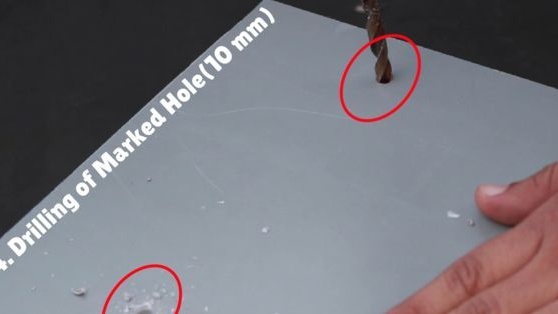
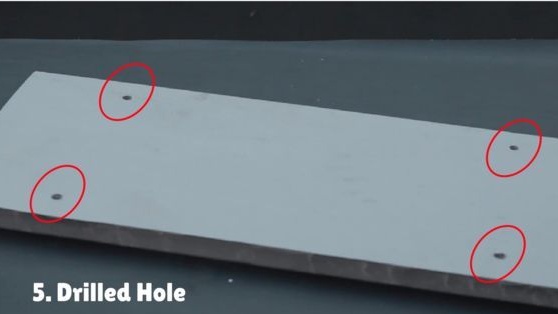
When assembling the frame, the author drilled four holes in the corners, they are needed for fastening a wooden plate. You need to drill similar holes in a wooden plate. Well, then the whole thing is connected using bolts with nuts and washers.
Step Four Install the engine
You need a special engine for homemade, it must be equipped with gearboxes, that is, the shaft must have low revolutions at the output. Due to their low revs and high torque, motors can move the vehicle with the passenger. The author uses the engine on 12V.
It is also important to note that for a homemade motor only with a steel gearbox is suitable, since the plastic will immediately fall apart under the weight of the passenger.


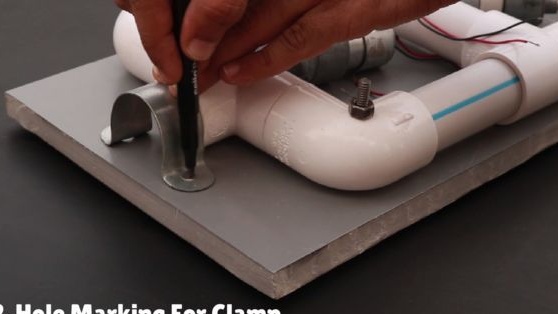
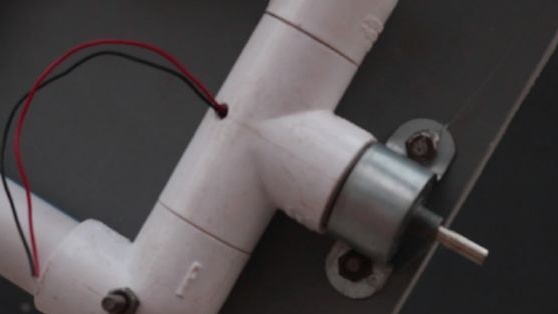
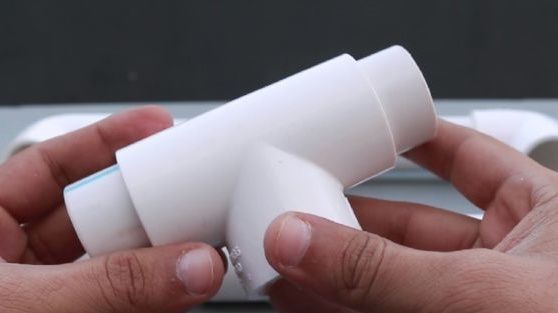
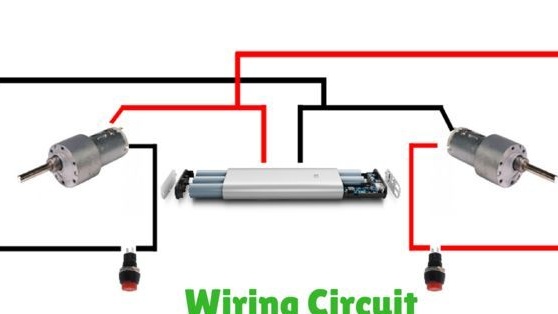
For fastening, the motors are installed in their place in PVC in the form of the letter "T". Here they need to be put on glue for reliability.Among other things, the motors will need to be fastened with clamps to a wooden plate, only these factors will ensure reliable fastening and they will not fall off when driving. Do not forget to drill holes in the pipes for the motor wires and bring them to the center.
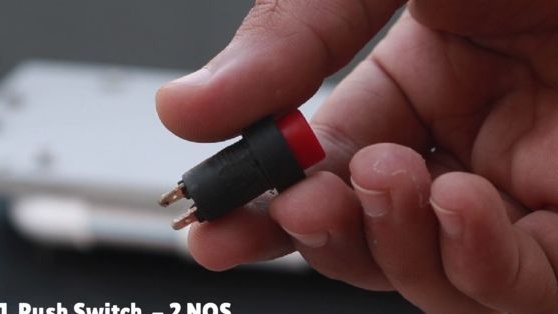
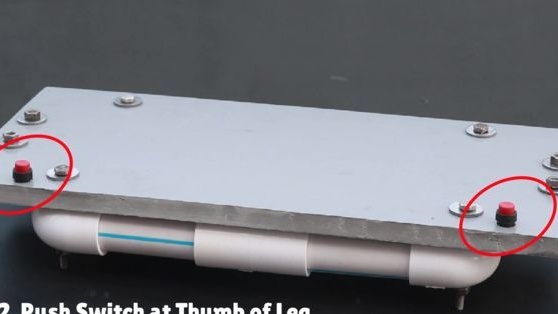
Step Five Set the buttons
You will need buttons that close the circuit only when you click on them, that is, without locking. Thanks to them, it will be possible to control the engines. Each motor has one button. We drill holes for them in a wooden plate and install opposite each leg. Now, if you press both buttons together, the homemade product will go straight, and if only one, the car will turn in the right direction.
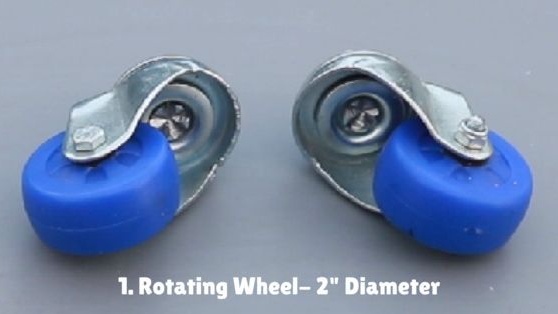
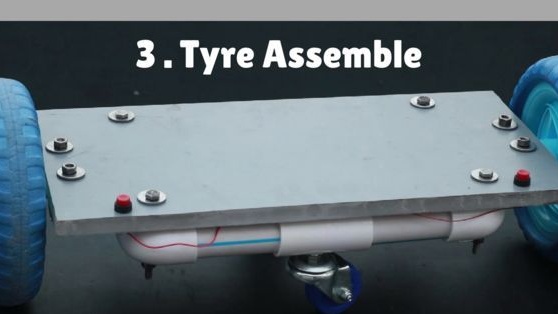
Step Six Installation of swivel wheels
To maintain the weight of the passenger, two more wheels are attached to the homemade product, which can be rotated 360 degrees. These are usually used on carts, strollers and other equipment. We drill holes through PVC pipes and a plate, then securely fasten the wheels in place. You will need to install them at the same height as the drive wheels.
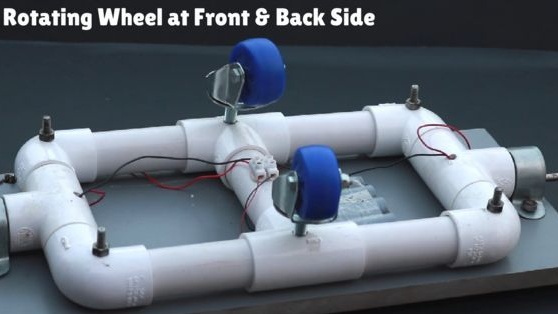
Seventh step. Install the drive wheels
For driving wheels, wheels from strollers, children's of bicycles and other equipment. The author uses 8 inch wheels. It is important that the wheel fits tightly on the motor shaft, for reliability it is advisable to glue it. If the shaft dangles in the wheel, make bushings to ensure alignment and secure fit. The wheels can be glued with epoxy.
Step Eight. We connect an electrician
It is time to connect all the necessary wires. As a power source, the author uses four cells, probably 18650 or the like. They are connected in series and provide approximately the necessary voltage to power the 12V engines. True, it is better to use the capacity at least twice as much. We install the batteries on the bottom.
That's all, after connecting the motors to a power source, you can experience homemade work. To begin, adjust the swivel wheels in height. We put the transport on a flat surface, carefully stand and press our feet on two buttons at once. Technique should go ahead. If you press only the right button, the right motor will turn on and the homemade product will turn to the left (like a tank) and vice versa.
In conclusion, I would like to note that for such home-made products you need to install an engine controller, otherwise this mode will quickly land your batteries, and besides, a deep discharge is harmful.