When working with small pieces of iron, it is worth paying attention to the tools, reagents and technologies that jewelers use. Of course, highly specialized equipment and tools are too expensive for use in the home, hobby business, however, some of the jewelers' tools are quite accessible and very easy to work and improve the quality of our crafts.
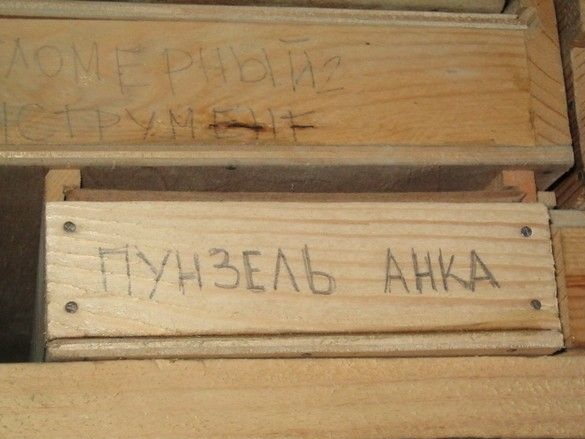
In the manufacture of crafts, sometimes there is a need for the manufacture of small metal hemispheres or spheres. Sometimes as an independent object, sometimes as a certain bulge on the part. It can be either a purely functional or a decorative element. They make it, as a rule, from thin sheet metal by plastic deformation. It is quite possible to complete it with a hammer with a semicircular brisk, but it will take a fair amount of skill and patience to make the result look decent. Small hemispheres are extremely convenient to make using a special tool common among jewelers. The correct form and cleanliness of the surface are wonderful. Meet the punzel and anka.
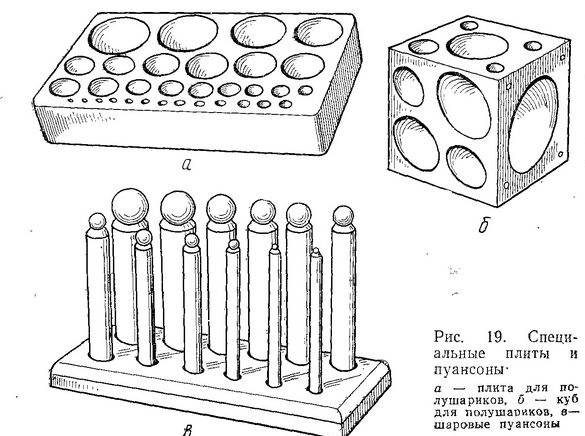
... are used for stamping and molding jewelry parts. In accordance with the configuration of the slots in the plates, they are equipped with punches with the same configuration and are made of high-quality alloy steel, and their working part must be heat-treated and polished. Telesov M.S. Vetrov A.V. "Production and repair of jewelry."
It’s clear that it’s most convenient and enjoyable to simply choose and buy, but the cost of it, like any good tool, is pretty high (especially since there are usually kits on sale) and often we do not dare to tear the corresponding amount from our family budget for our own entertainment.

However, there is a way out - to do do it yourself. Let not a copy, but, let’s say so - a functional analogue, and its cost will be minimal. We are talking about lead anchovy and ball punches from bearings. Waste material, a finished tool, it may turn out not so beautiful, but quite working. Moreover, on a lead anchor, it is possible to squeeze out not only a hemisphere, but sometimes a rather intricate shape, you only need to take care of the corresponding punzel. Lead, of course, is much less durable than tool steel, but no one forbids the re-welded anchor to be re-melted and used again.In short, for infrequent use in a hobby, that’s it.
What do we need.
Instruments.
Useful is the usual minimum set of bench tools, a heavy hammer ... closer to the sledgehammer. Here we also take a good deck or anvil, where they (with a hammer) can be wielded without fear of breaking something up.
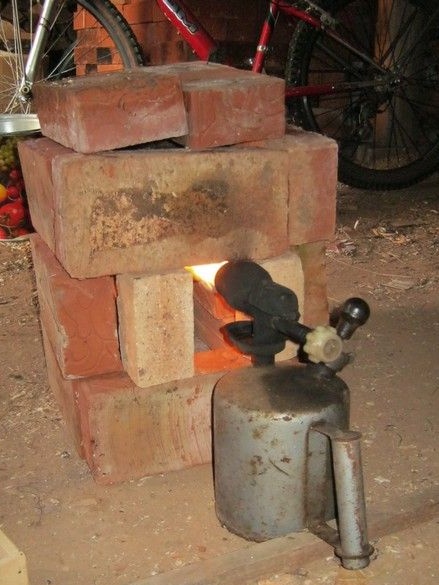
Pretty powerful heat source. A blowtorch was used, and a gas torch of comparable power would do. In the end, the hooligans cast their brass knuckles out of lead, melting it on an ordinary fire.
Something to gently take a hot, heavy jar from and pour molten lead from it. Hardly many have blacksmith mites, but it must be something like that. Two pliers were used here. Perhaps, ticks are also suitable for pulling out not large nails. By the way, it’s worth taking care of good tarpaulin hands, at the worst, a pair of ordinary work gloves, put one on top of the other — burns, is a very painful thing and does not heal quickly, especially on the hands.
Materials
Scrap lead. Really, I don’t know where to get it, except from the batteries. There are still some mythical cables with armored lead tape braid. I met her trim, but the cables themselves did not happen. Probably still somewhere.
A mold for potential anka - a tin can is good. From canned fish. Such a flat, not high.
A dozen bricks, for the construction of a fireproof shelter during smelting, so that the heat does not swell around.
Metal can crucible. For lead and single melting, a tin can is quite suitable, although the volume should be appropriate. Used with a capacity of 3l. for, despite the fact that the volume of our future ancha is small, the volume of scrap is much greater. If there is no sufficiently large capacity, it can be thrown up during the smelting process.
Balls from failed bearings. It is worth looking at scrap metal collection points.
So.
A disused battery from a passenger car was disassembled auto. The plates were free of dried packing as far as possible. After washing with water, they are well dried and rolled up. They hammered a little on the anvil with a hammer, so that they take up less space in the crucible.
The shape was made of wood. With the expectation of ease of extraction. The square shape, in addition, seemed more attractive.
A suitable metal container was found. In an empty drovnik, away from the woods, on the earthen floor, a kind of brick stand was erected. Its task is to prevent the heat from blowing up from the burner on the sides, and the “cover” on top, somewhat reduces the loss of infrared radiation. All this is more relevant when melting, for example, aluminum, but here it will not hurt. Fire hazard, again less.
By the way, it would not be bad to put a bucket of sand close to sin, from sin. And one more thing - do not forget that lead fumes are very dangerous and all our evolution should be performed outdoors or under a good exhaust hood, and after working with lead, wash your hands thoroughly with soap. And no snacks and smoke breaks - the metal accumulates in the body for a long time without any external signs, and then it will be too late.
Until the lamp is lit, we try to pull out and overturn our crucible with the help of improvised blacksmith mites. In full ammunition - wearing gloves. If everything works out well, we kindle the burner and wait.
We periodically look inside. The molten lead from the battery plates floats below, and oxides and packing residues float up. They will have to hold with a stick or a piece of iron when pouring lead into the mold.
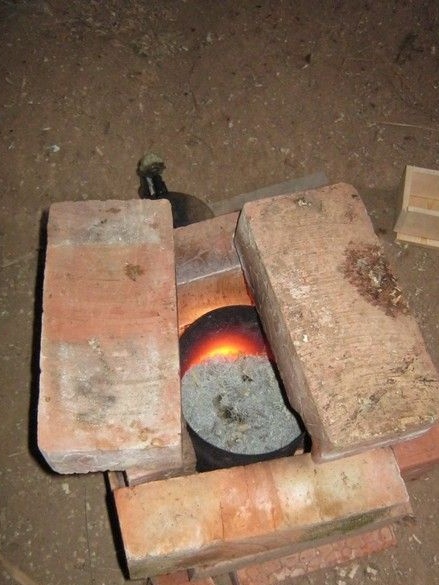
So, they waited for the melting, warmed a little more so that there was a certain margin in temperature and the lead did not freeze during the pouring process. We put out the lamp or the burner, dress up in gauntlets and pull out with pliers or whatever we have in store from the tools, a jar from the nest. Pour molten lead into the mold.

Oh la! Well, after all, I regretted a good piece of wood to the bottom, nailed a more or less suitable piece of a thin one, that’s the corner and it burned out, however, it would not have worked out very much - the woods were coniferous and because of the high resin content they were very charred and burned.The surface of the casting is not particularly smooth. Well, the first heat is lumpy.
But since we all gathered here, we should try how it works. Actually, it was interesting how difficult it is to knock a recess in the casting.
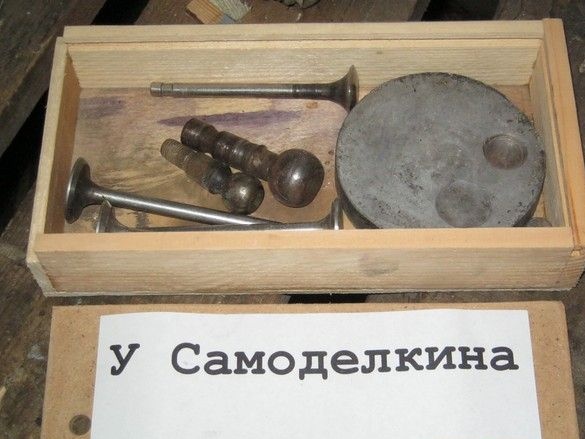
From the old valve from the engine of the car, made, with permission, a punzel.
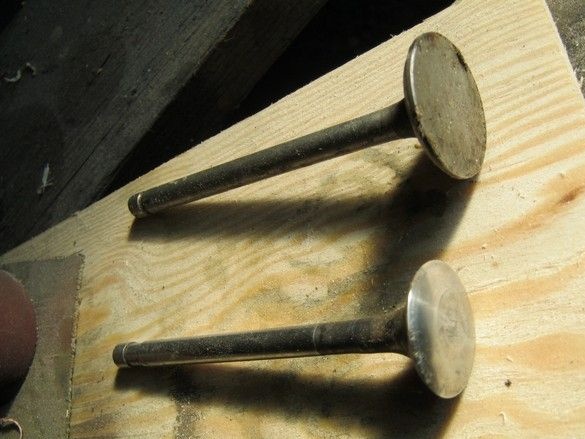
Grind on a small emery and polished a little.
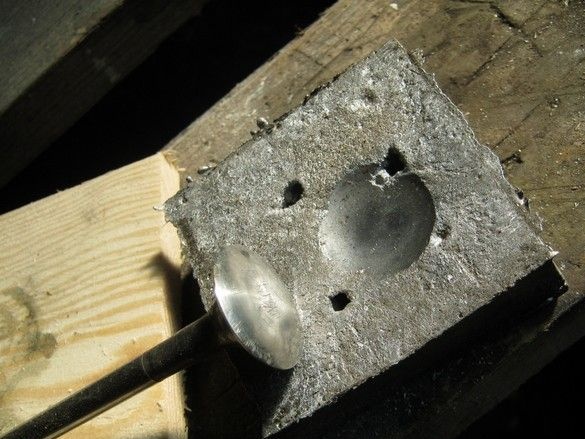
Well, everything turns out, but you have to act with a sledgehammer, otherwise such an area is not "imprinted".
Without further experimenting with wooden forms, I cast it into a tin can. From the fish. Eat the contents, wash the jar and the pan is ready.
The second heat. There is no sludge from oxides, and in general, experience is a great thing.
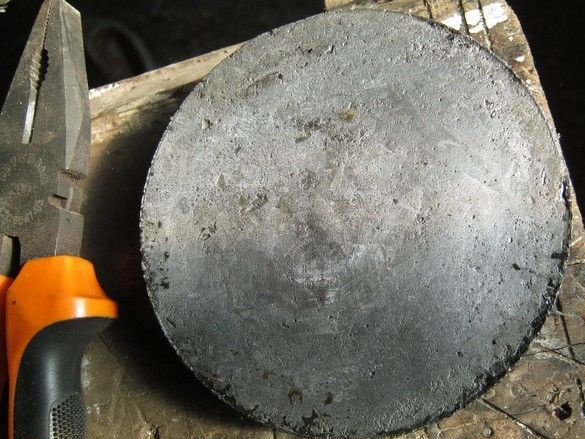
Voila! The surface turned out to be much more even, no pores and shells. Better hopes, lead did not solder to the bank to death. True, in several places, having struck a hacksaw with metal, saw through the thickened side of the can and break the tin along the cuts. By the way, this is also better to do in mittens - a high probability of cuts.
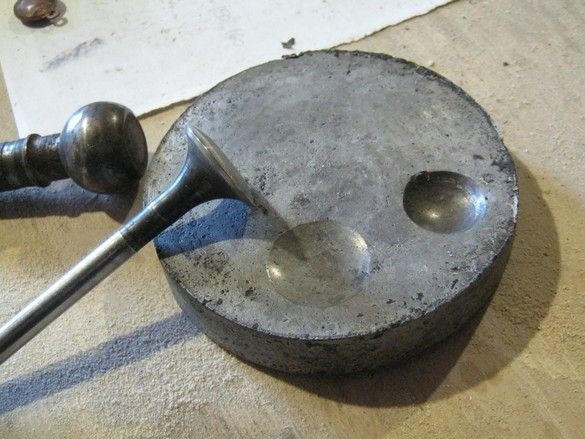
There was also another “punzel” - a ball joint, a part from the steering levers of a car. I laid it on a barrel and YOU BREATH with a sledgehammer.
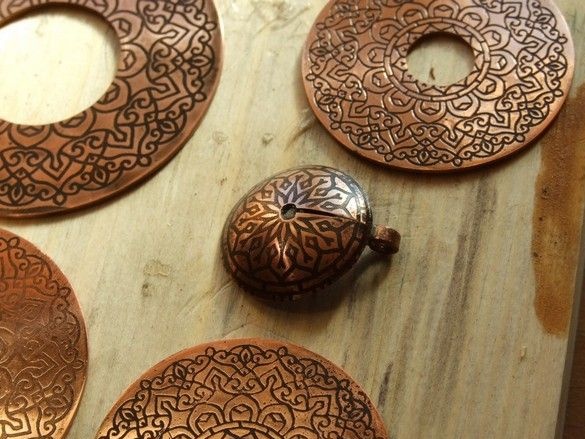
Here is what we can do. In the center - this is the middle of a large ring sawed by a jewelry jigsaw. Actually waste. The material is copper. After annealing, molded for testing with my new tools. It turned out quite nicely, so I took it, soldered the ear, varnished it from “greening” and gave the child a pendant. I was very pleased. Anticipating questions - rings with patterns, these are details from a wooden candlestick.
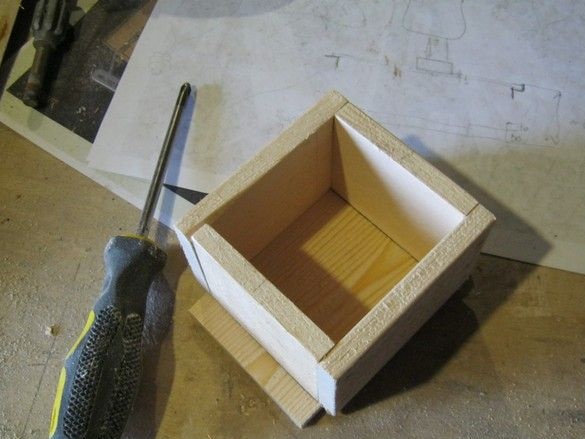
Well, and “cherry on the cake” - make a box so that the instrument is lying, not lying. Blanks made of wooden laths are cut in advance. With grooves for the cover of plywood or fiberboard. It remains to cut the desired size, glue and cloves on top. Cut the bottom and cap. The bottom is also on the PVA with cloves, and in the cap there is a hole for the finger. All.
Oh yes. Also sign the end of the box so as not to rummage.