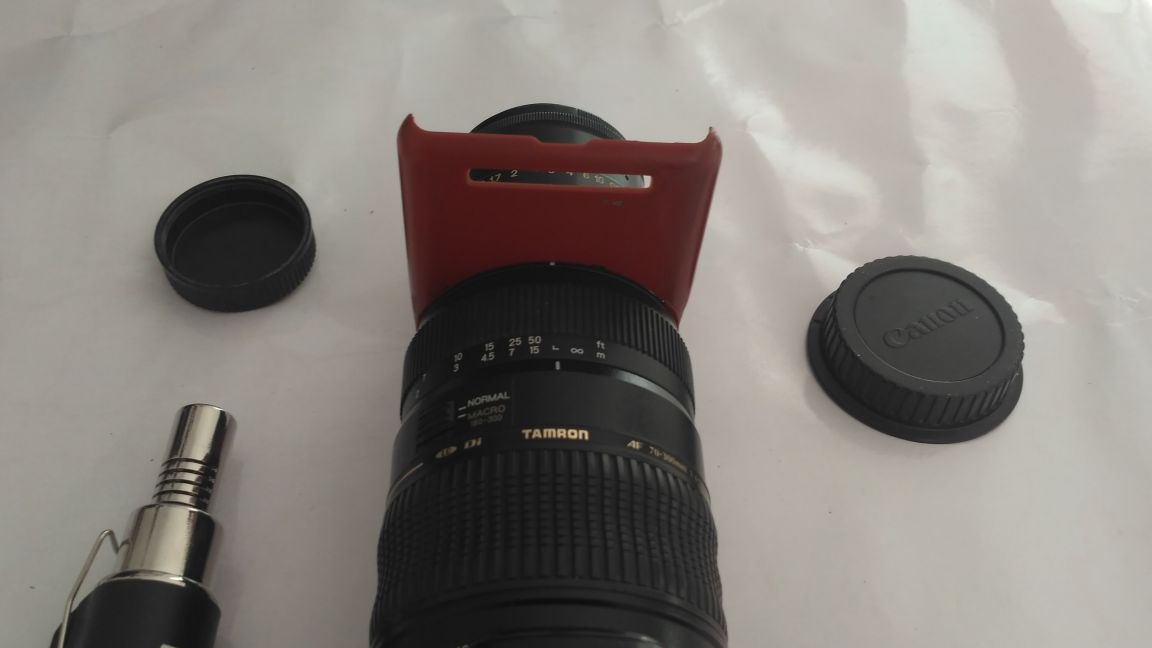
Macro photography is an almost inaccessible area for a budding photographer with a limited budget, since real macro lenses are very expensive, and inexpensive macro optics have big disadvantages. For example, my Tamron (one of the most budget lenses in its class) has a “macro” marking, but the minimum distance to an object in this mode is about one and a half meters. The inscription “macro” here is in my opinion just an advertising trick, because from this distance you can photograph a butterfly or something of a similar size. And as it seems to me, such pictures can be called macro, only with a big stretch. Yes, large, but still not macro. Below are pictures from this lens (Tamron 70-300) in macro mode
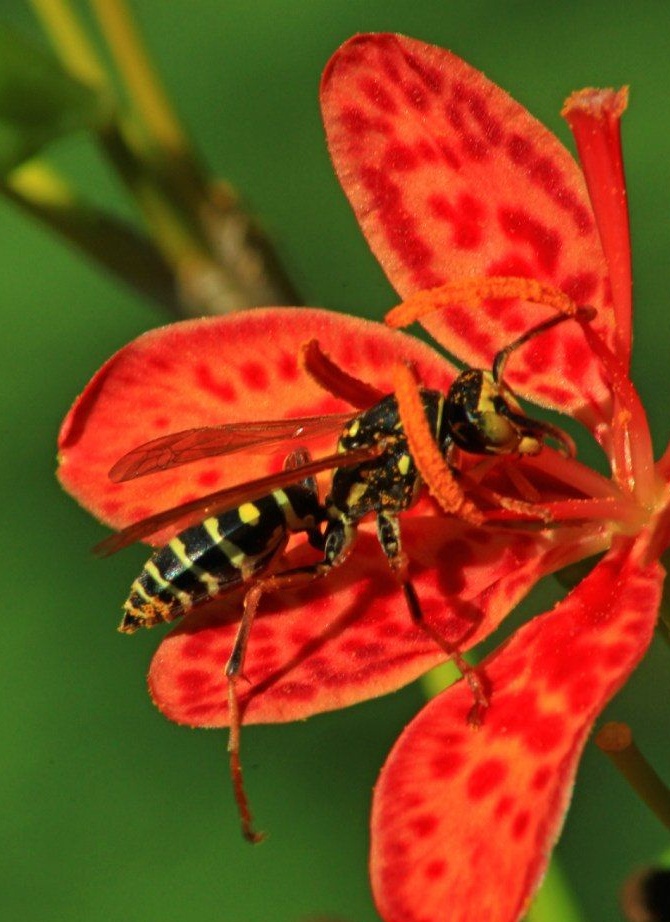
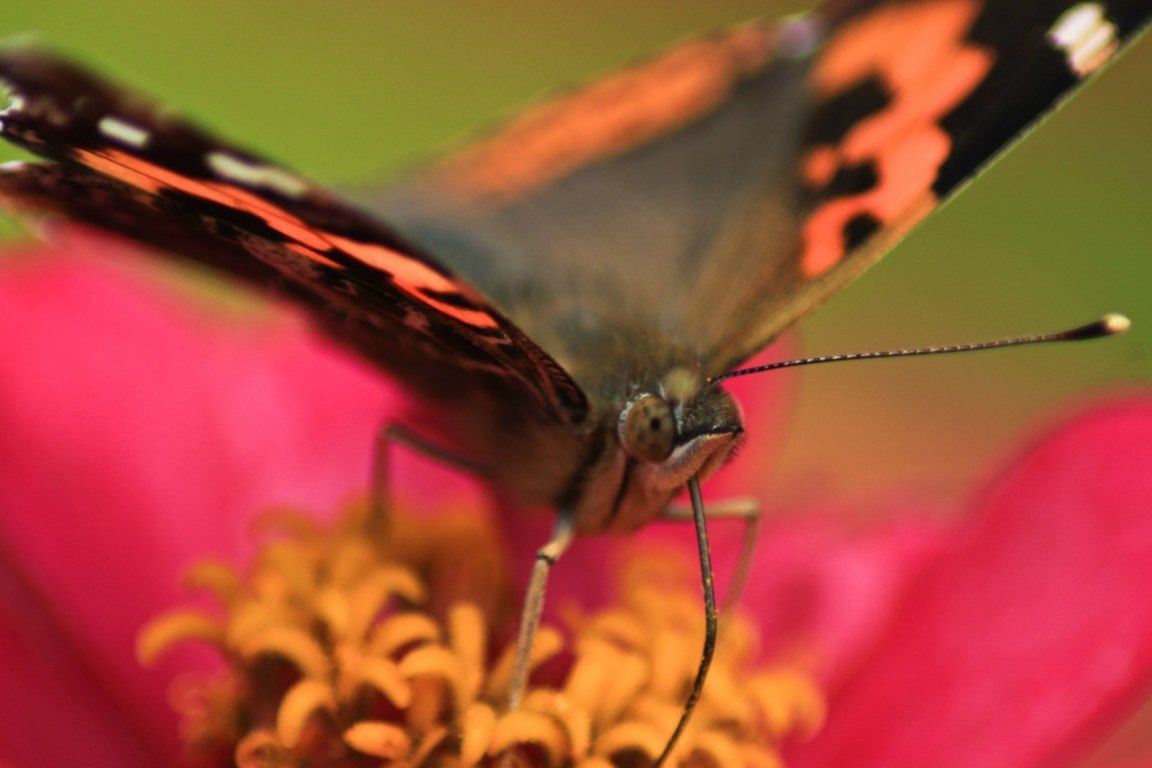

And the next two pictures were taken with the help of macro optics, the manufacture of which we will analyze in detail in this article.

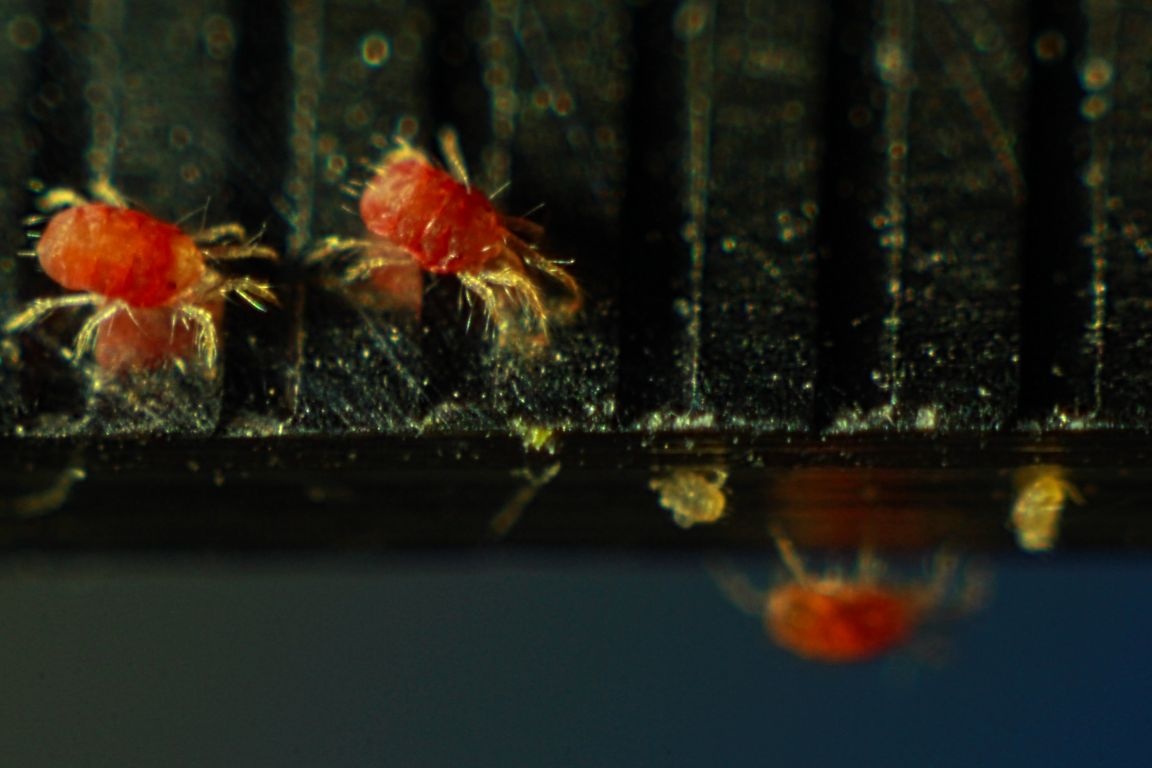
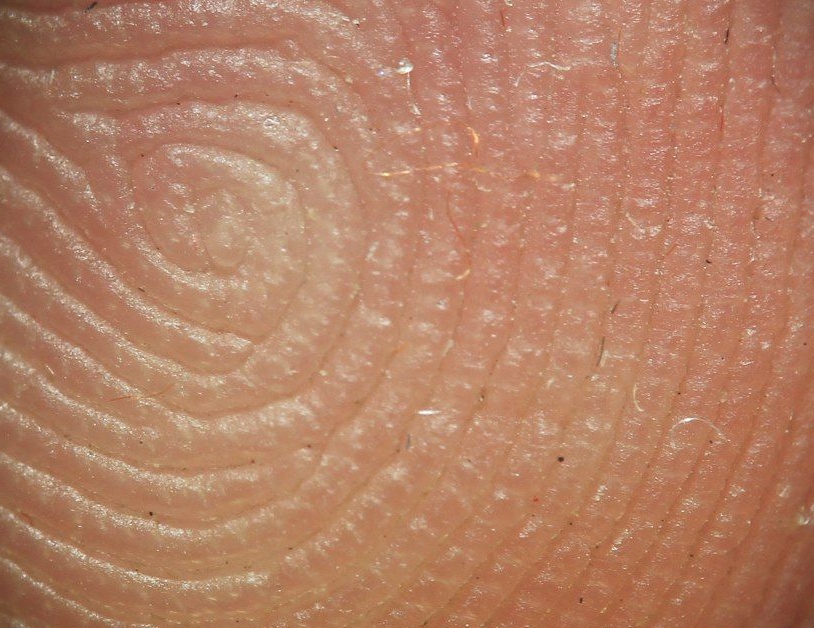
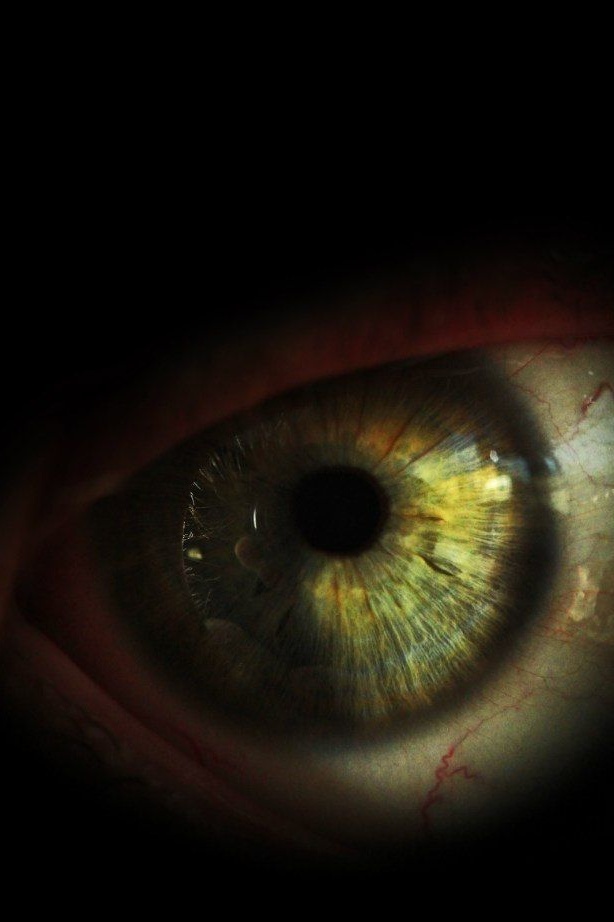
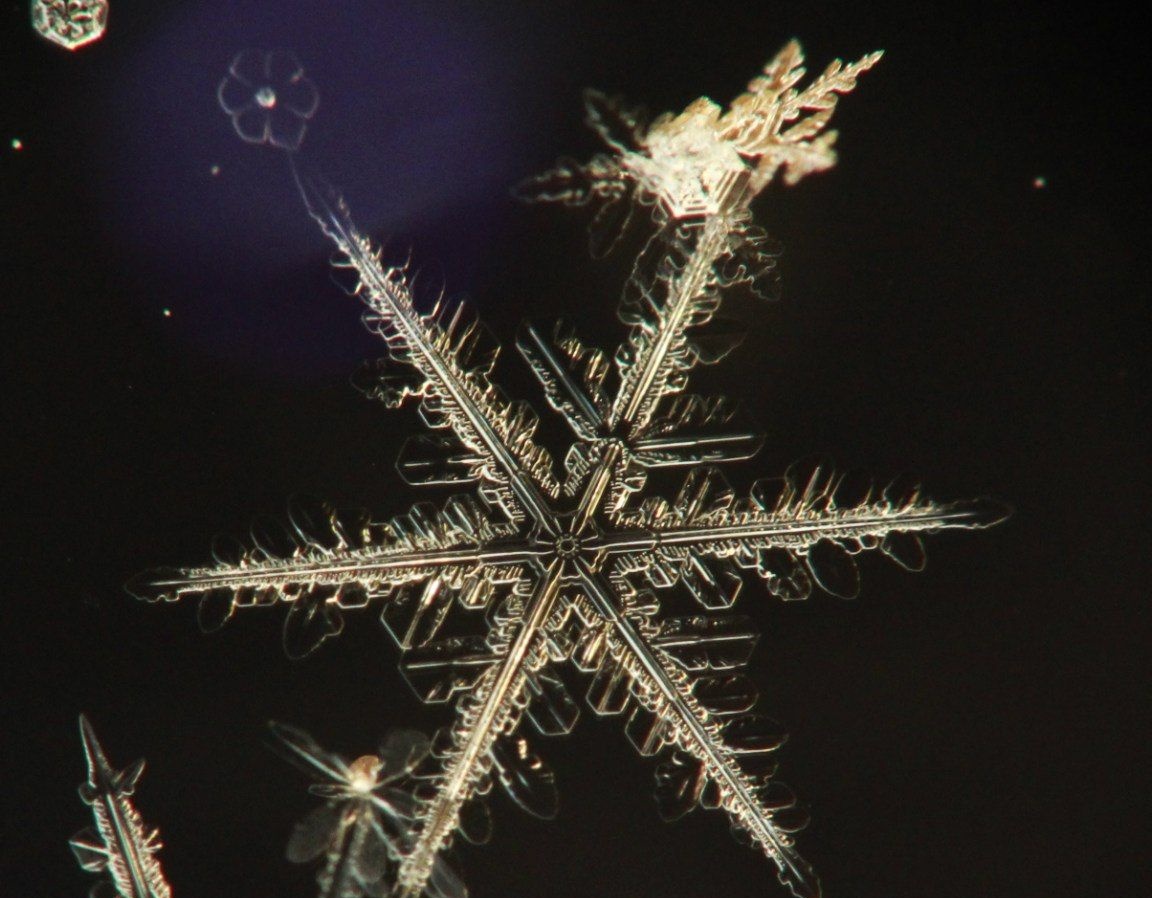
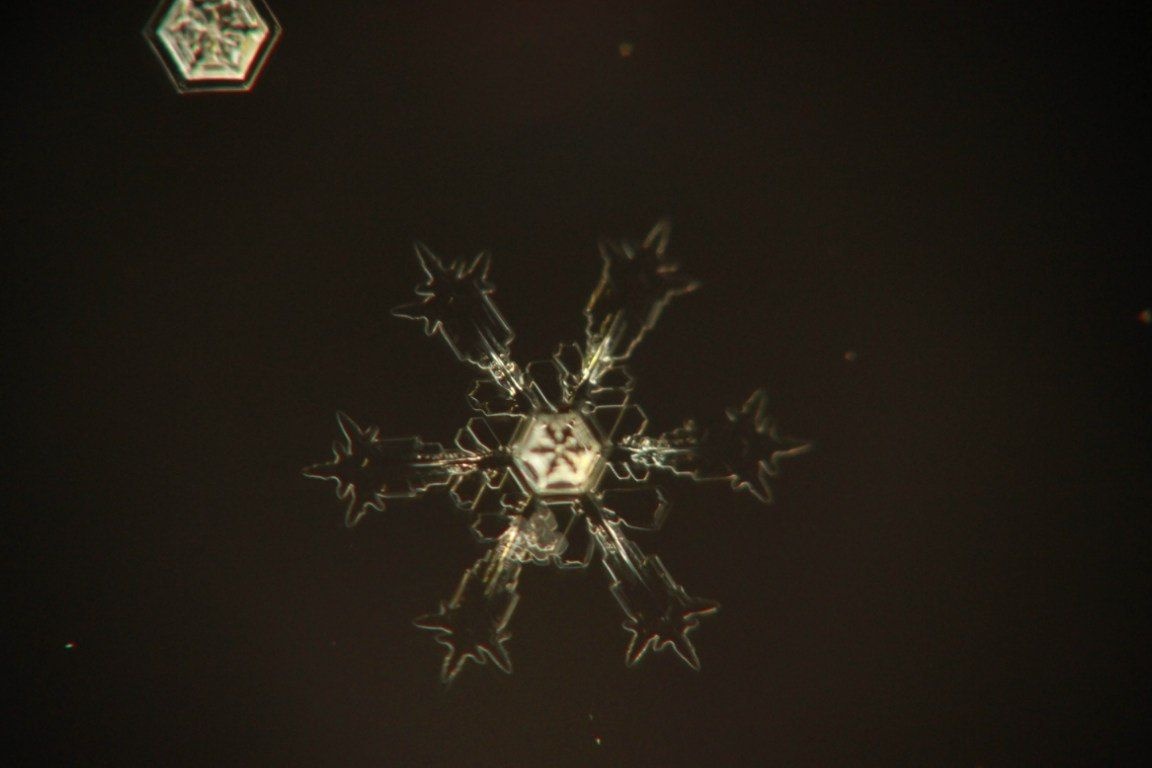
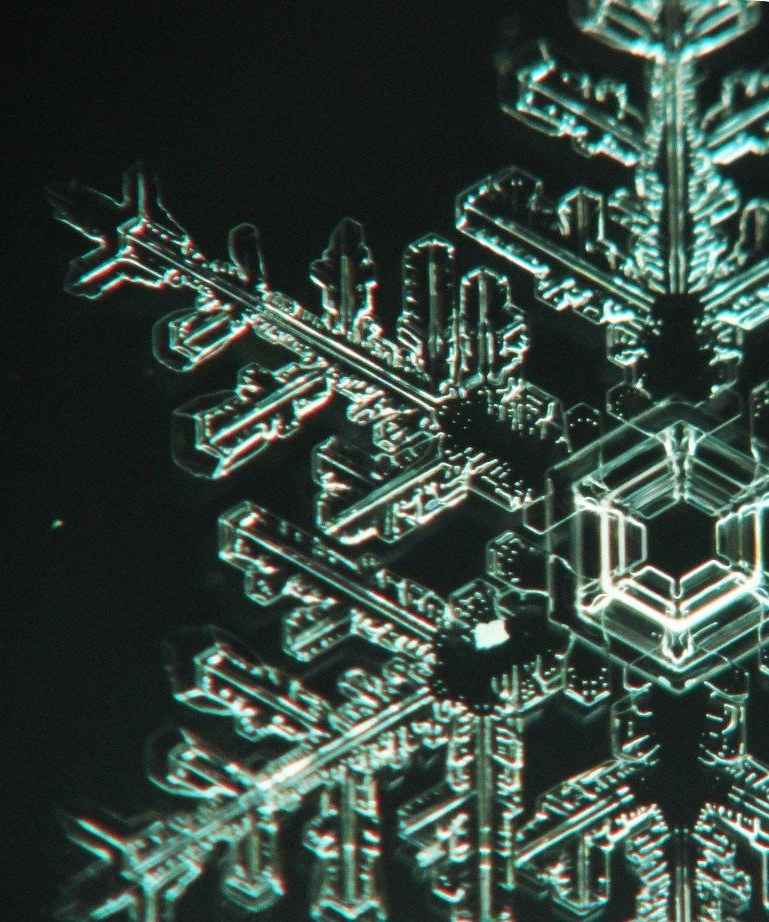
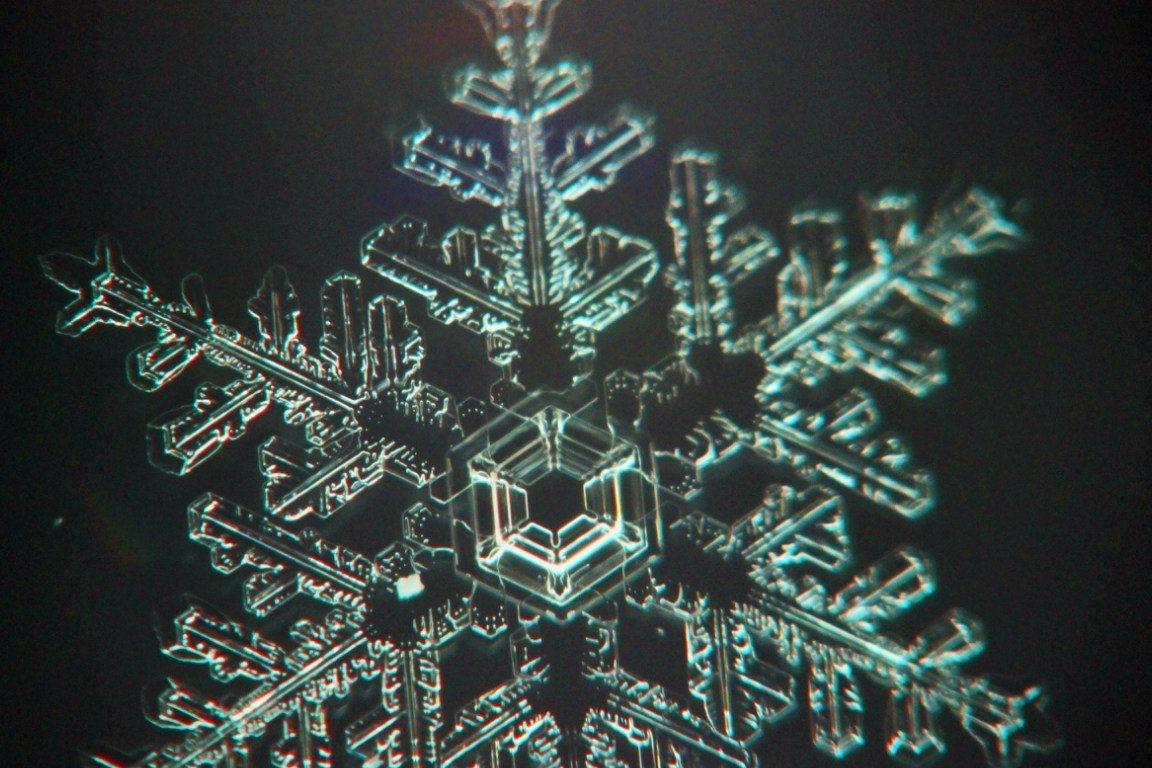
Personally, I was seriously puzzled by the “construction” of a macro lens, because I really wanted to photograph the iris of the human eye, the pollen on the wings of a butterfly, the “face” of a fly, snowflakes, but there is hardly any beauty hiding in the “macro world”. And so the desire to capture hidden under our noses, plus a very limited budget, led me to this design. Helios 44-2 bought for 1000 rubles, I substituted the reverse side to another lens mounted on the camera. And that's it, macro optics is ready, you can take pictures. I made the first option simply by attaching the second lens to the electrical tape.
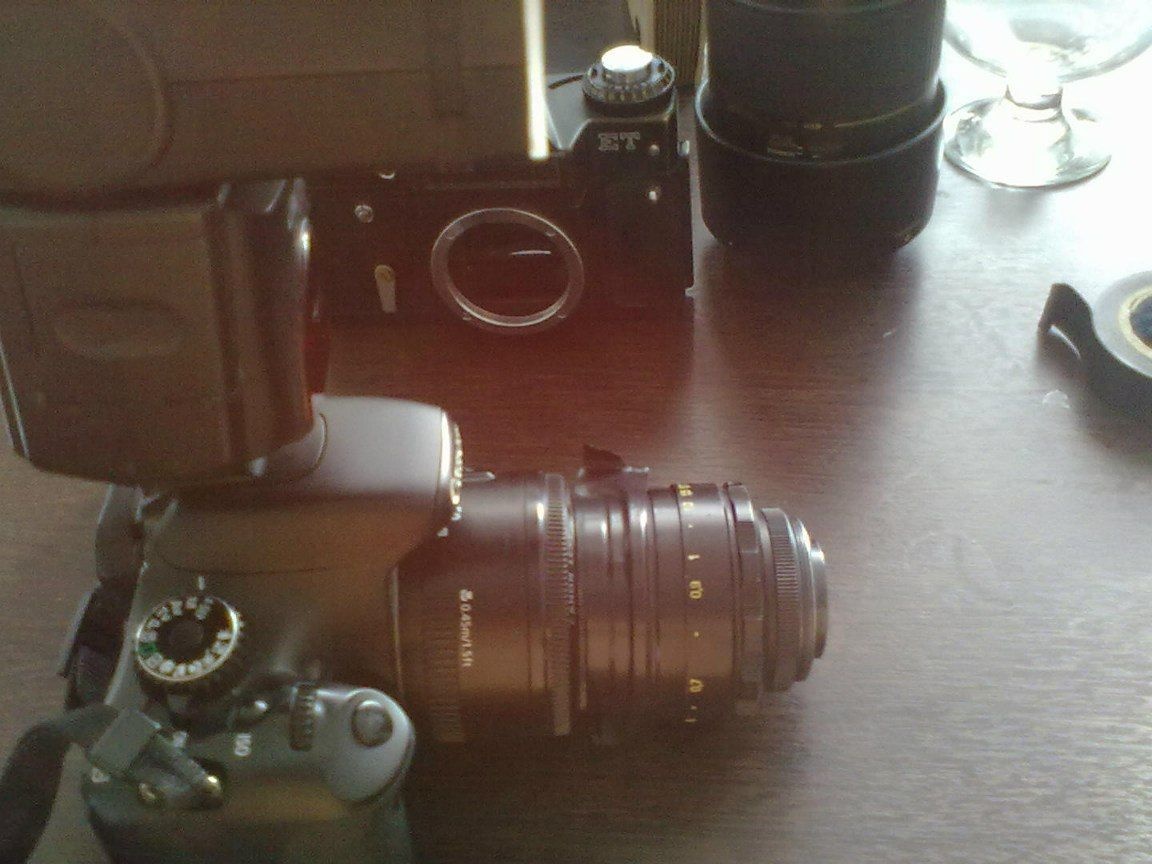
But the electrical tape blocks access to the aperture ring of the second lens. But even without mounting, it’s also not an option, because holding the camera with one hand and the other lens all the time is inconvenient and not really possible, because you still need to press buttons, twist the tuning rings on a mechanical Helios and do many others manipulations where at least one free hand is needed. So, we mount two lenses with each other, with the possibility of placing on it also a light source (flashlight)
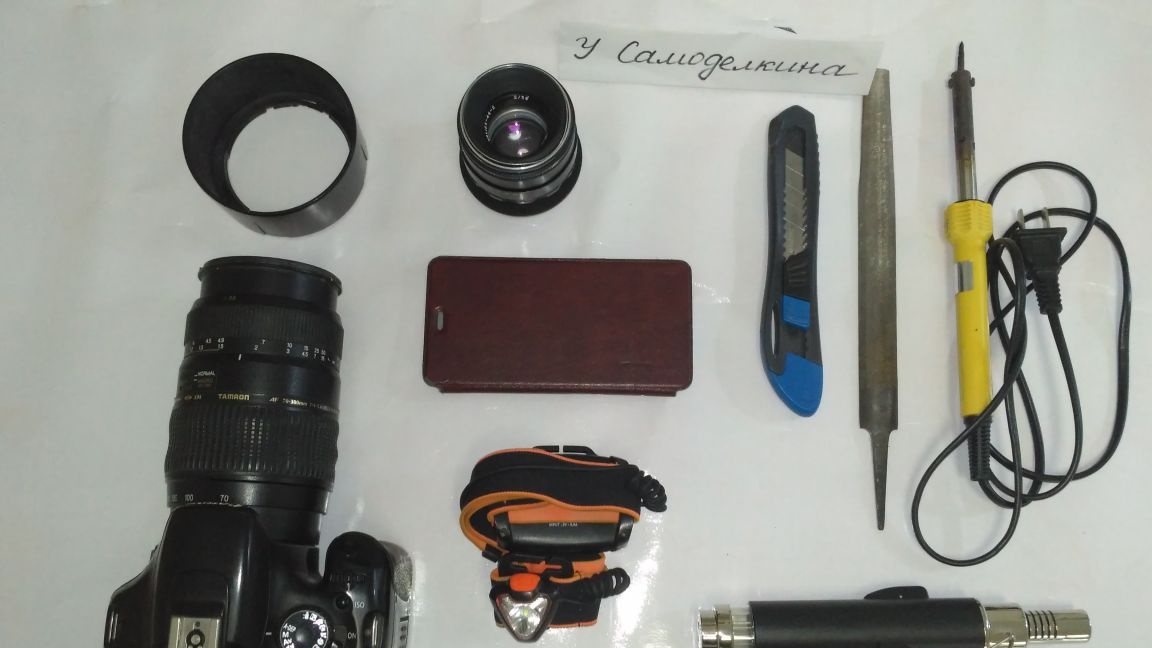
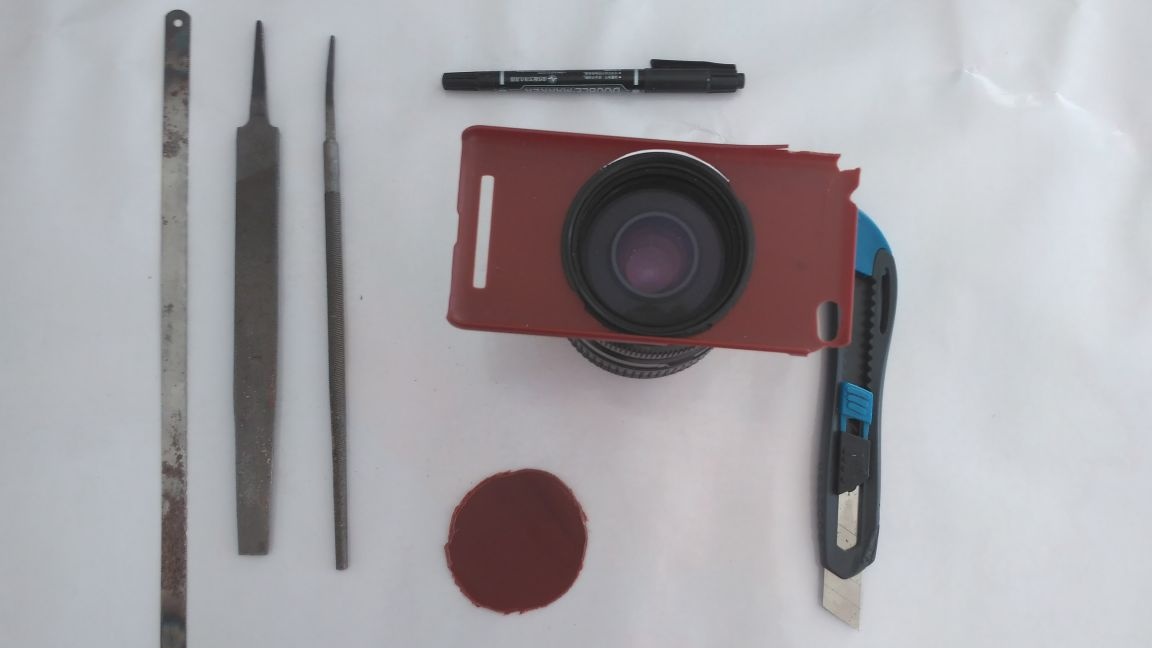
Materials and tools:
Two lenses (e.g. Helios 44-2 and Tamron 70-300) The Tamron 70-300 lens can be purchased.
A piece of plastic ABS (which does not prick)
Soldering iron
Files (round and half winged)
Gas hair dryer (can be bought)
Stationery knife
Jigsaw (You can do without it)
Pliers or clamp (and this is optional)
Step 1
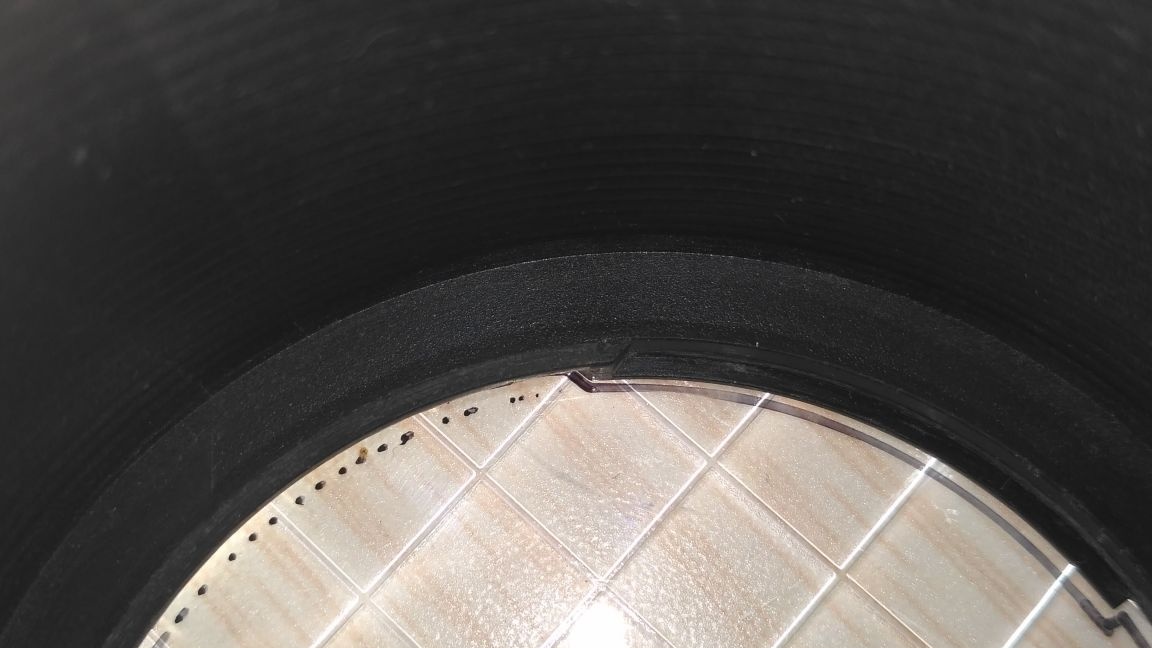
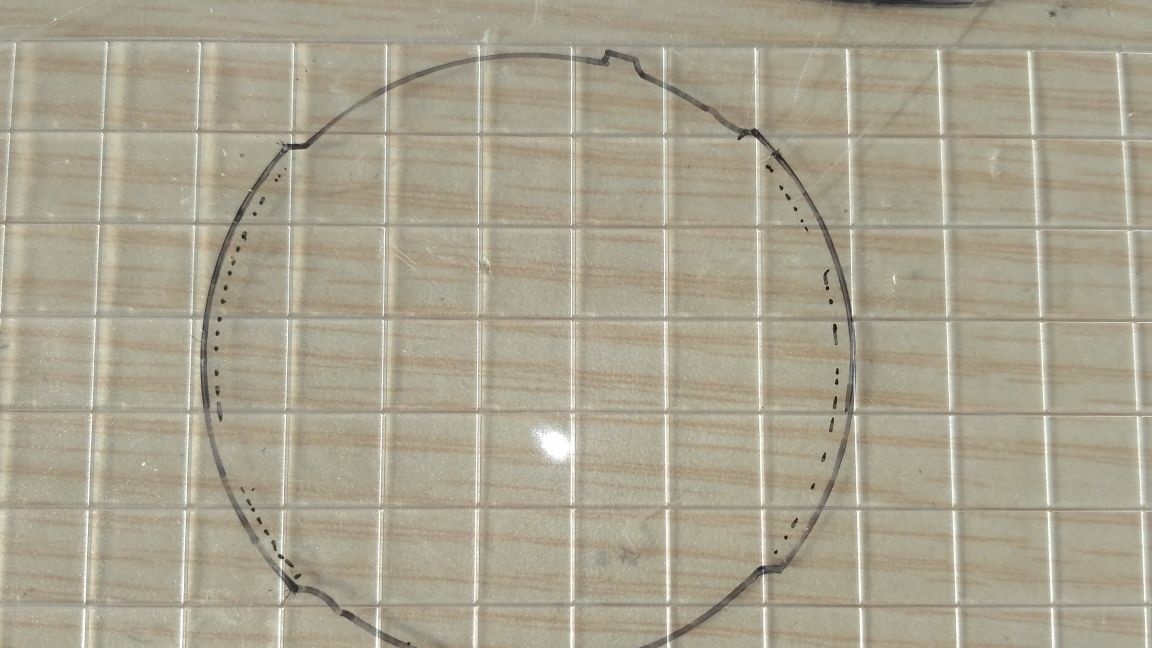
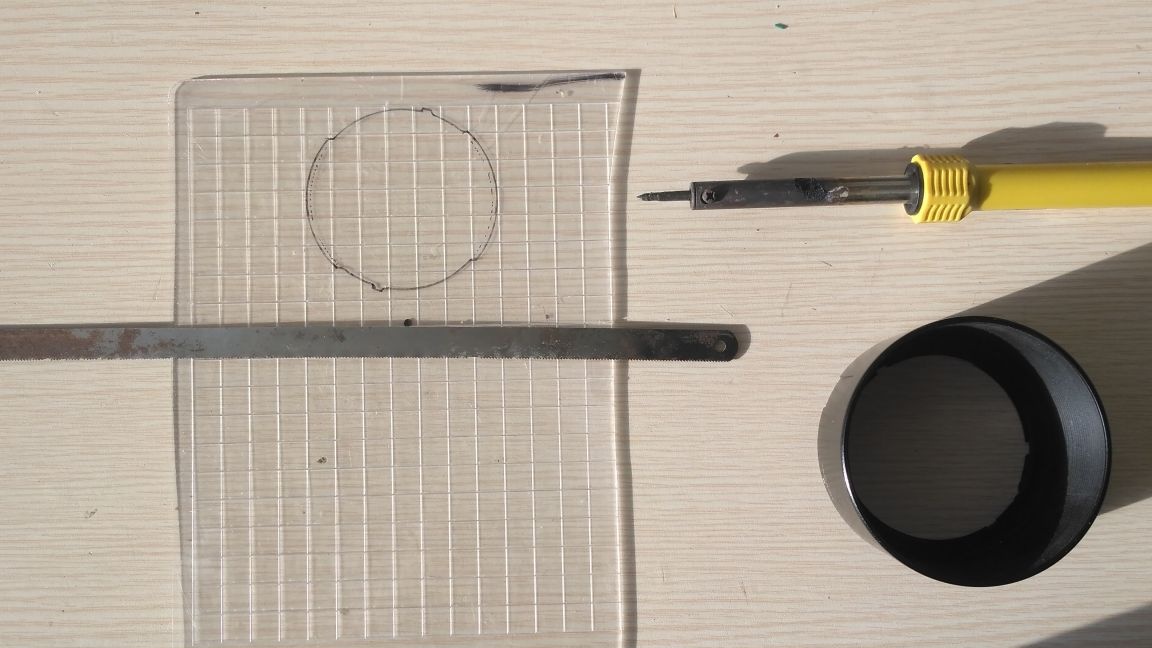
We take a piece of plastic, apply a lens hood (such plastic nonsense that is attached to the end of the lens and closes the lens from side light) from Tamron and outline the mounts to the lens. Then cut a hole along the drawn lines. You can do this with a jigsaw or drill in a circle of small holes, to whom it is more convenient, I did it with a soldering iron. As a result, we need to copy the hood mounts so that a piece of plastic then snugly holds in its place.
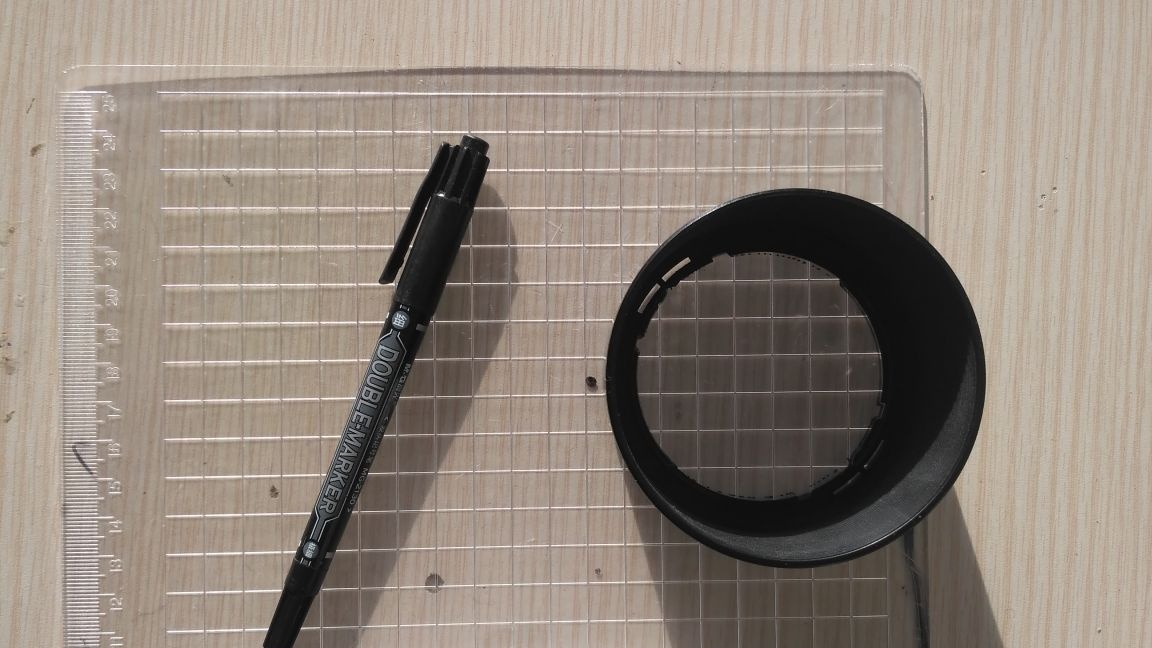
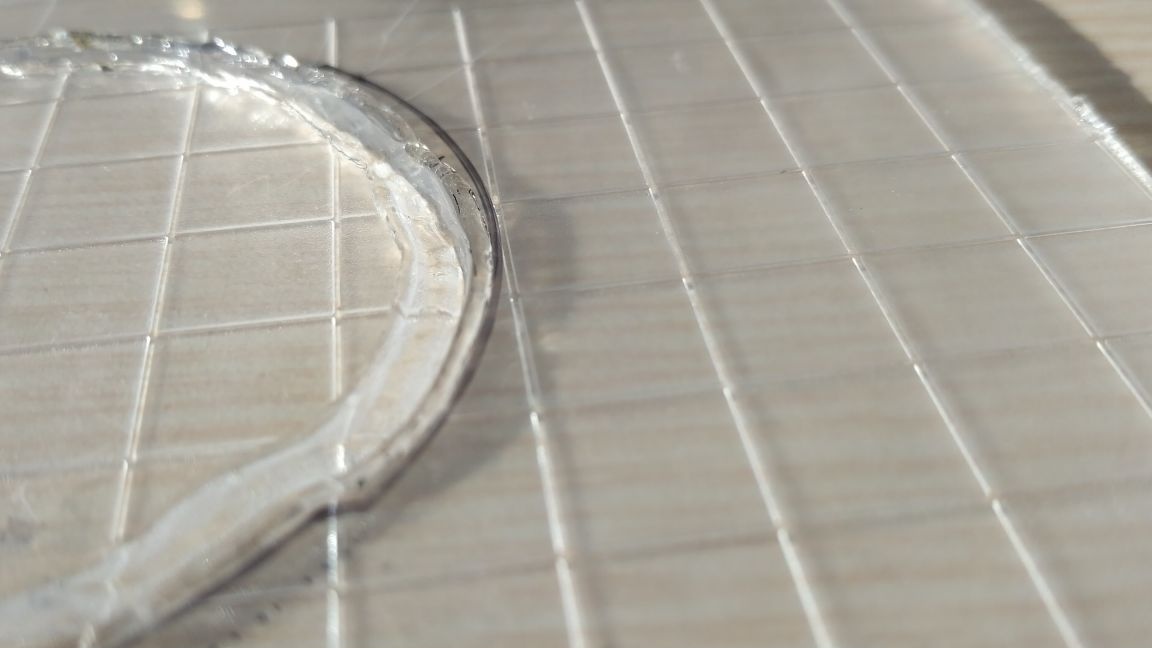
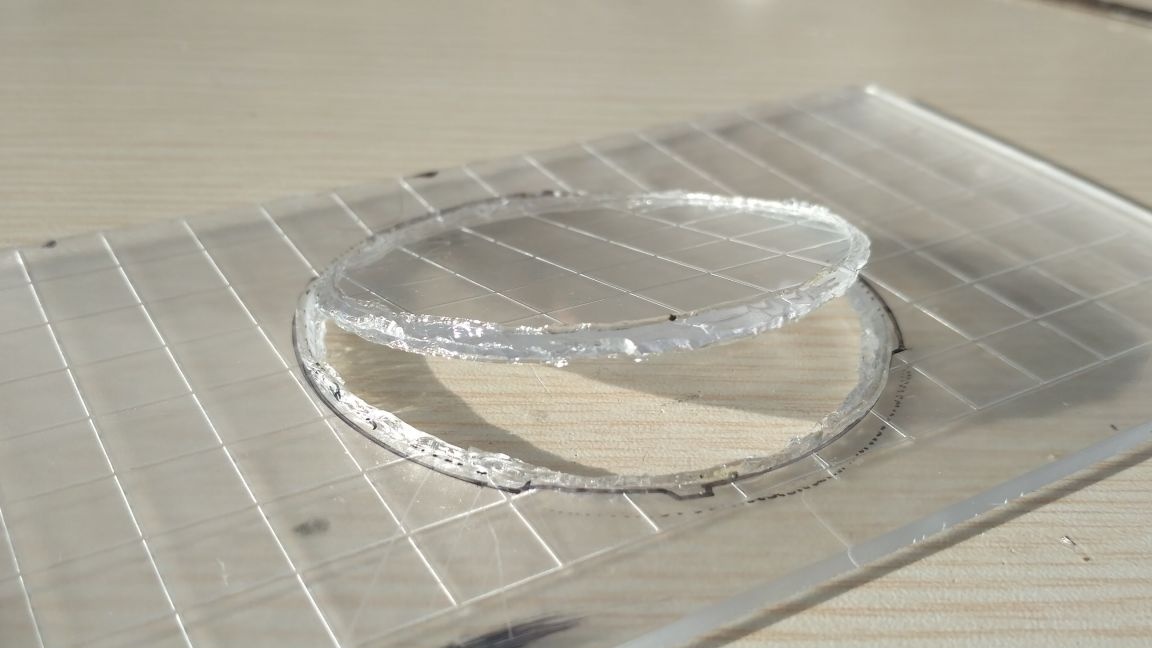
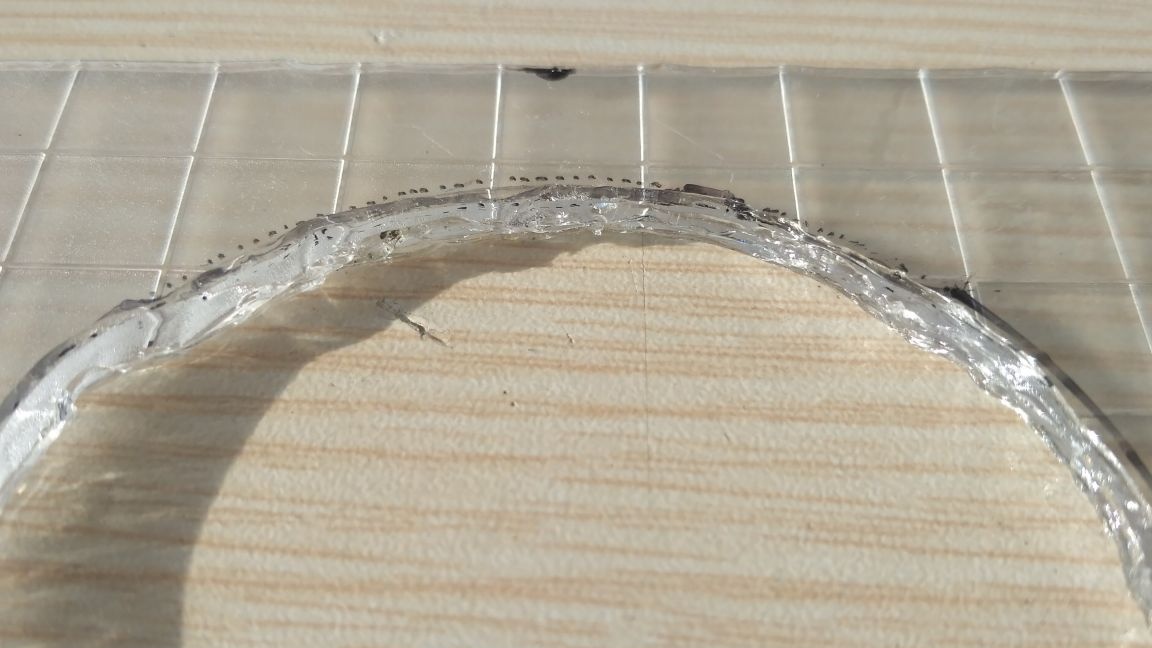
At first, I didn’t take into account that the plastic should not be sticky, and when I had already cut a hole, I immediately split the workpiece, starting to work on the edges.
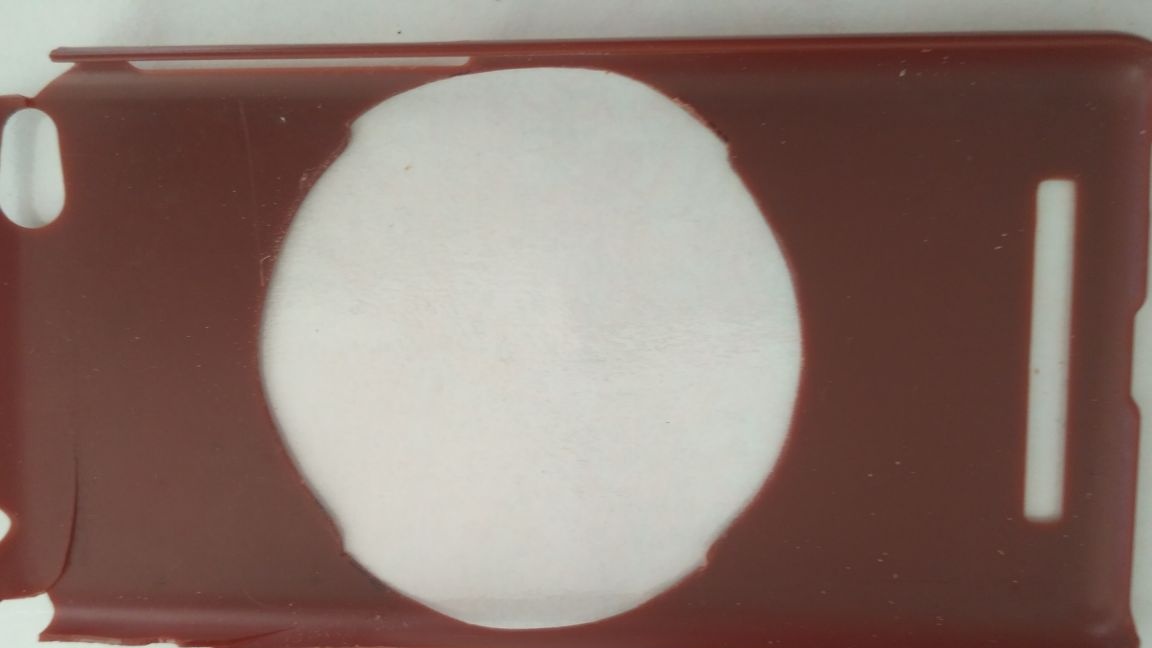
I took the next piece of plastic from an old phone case. He, too, is not quite what is needed, but nothing more suitable was found. Next, I repeated the procedure with a soldering iron, adjusted the hole to the shape of the mounts on the lens and processed the edges.
Step 2
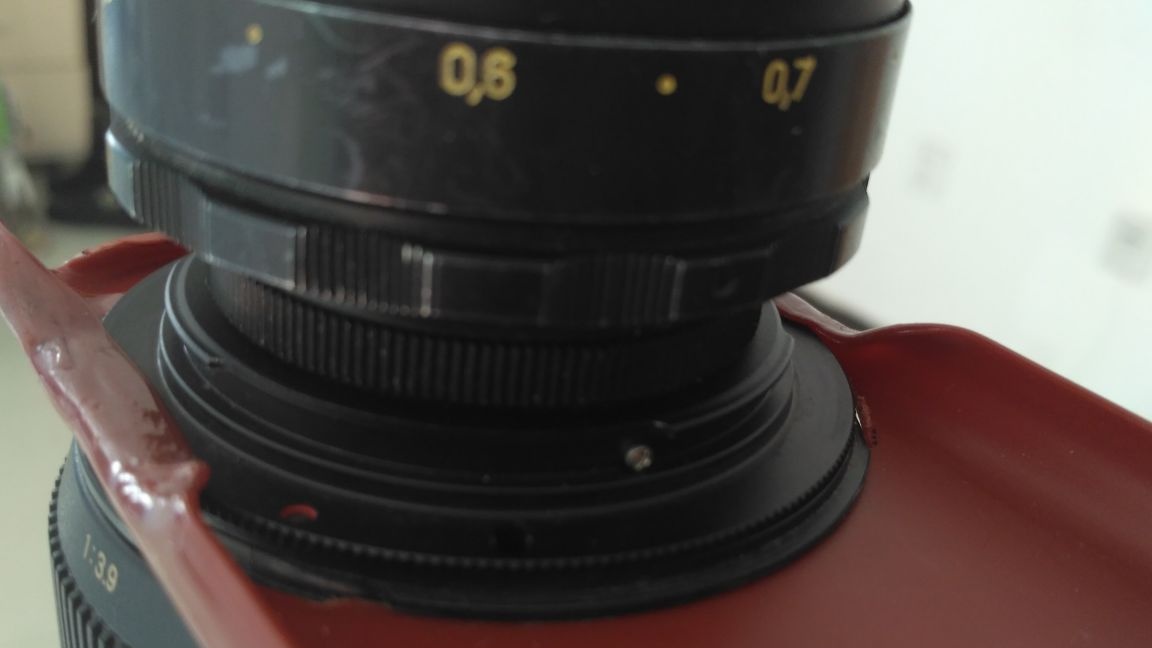
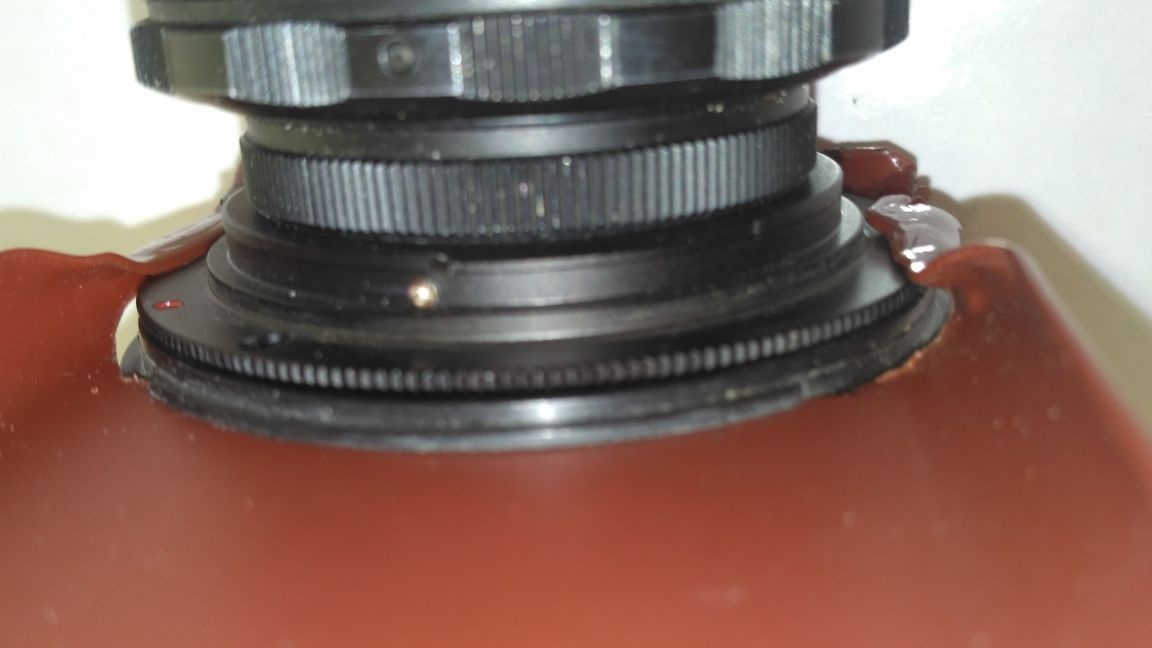
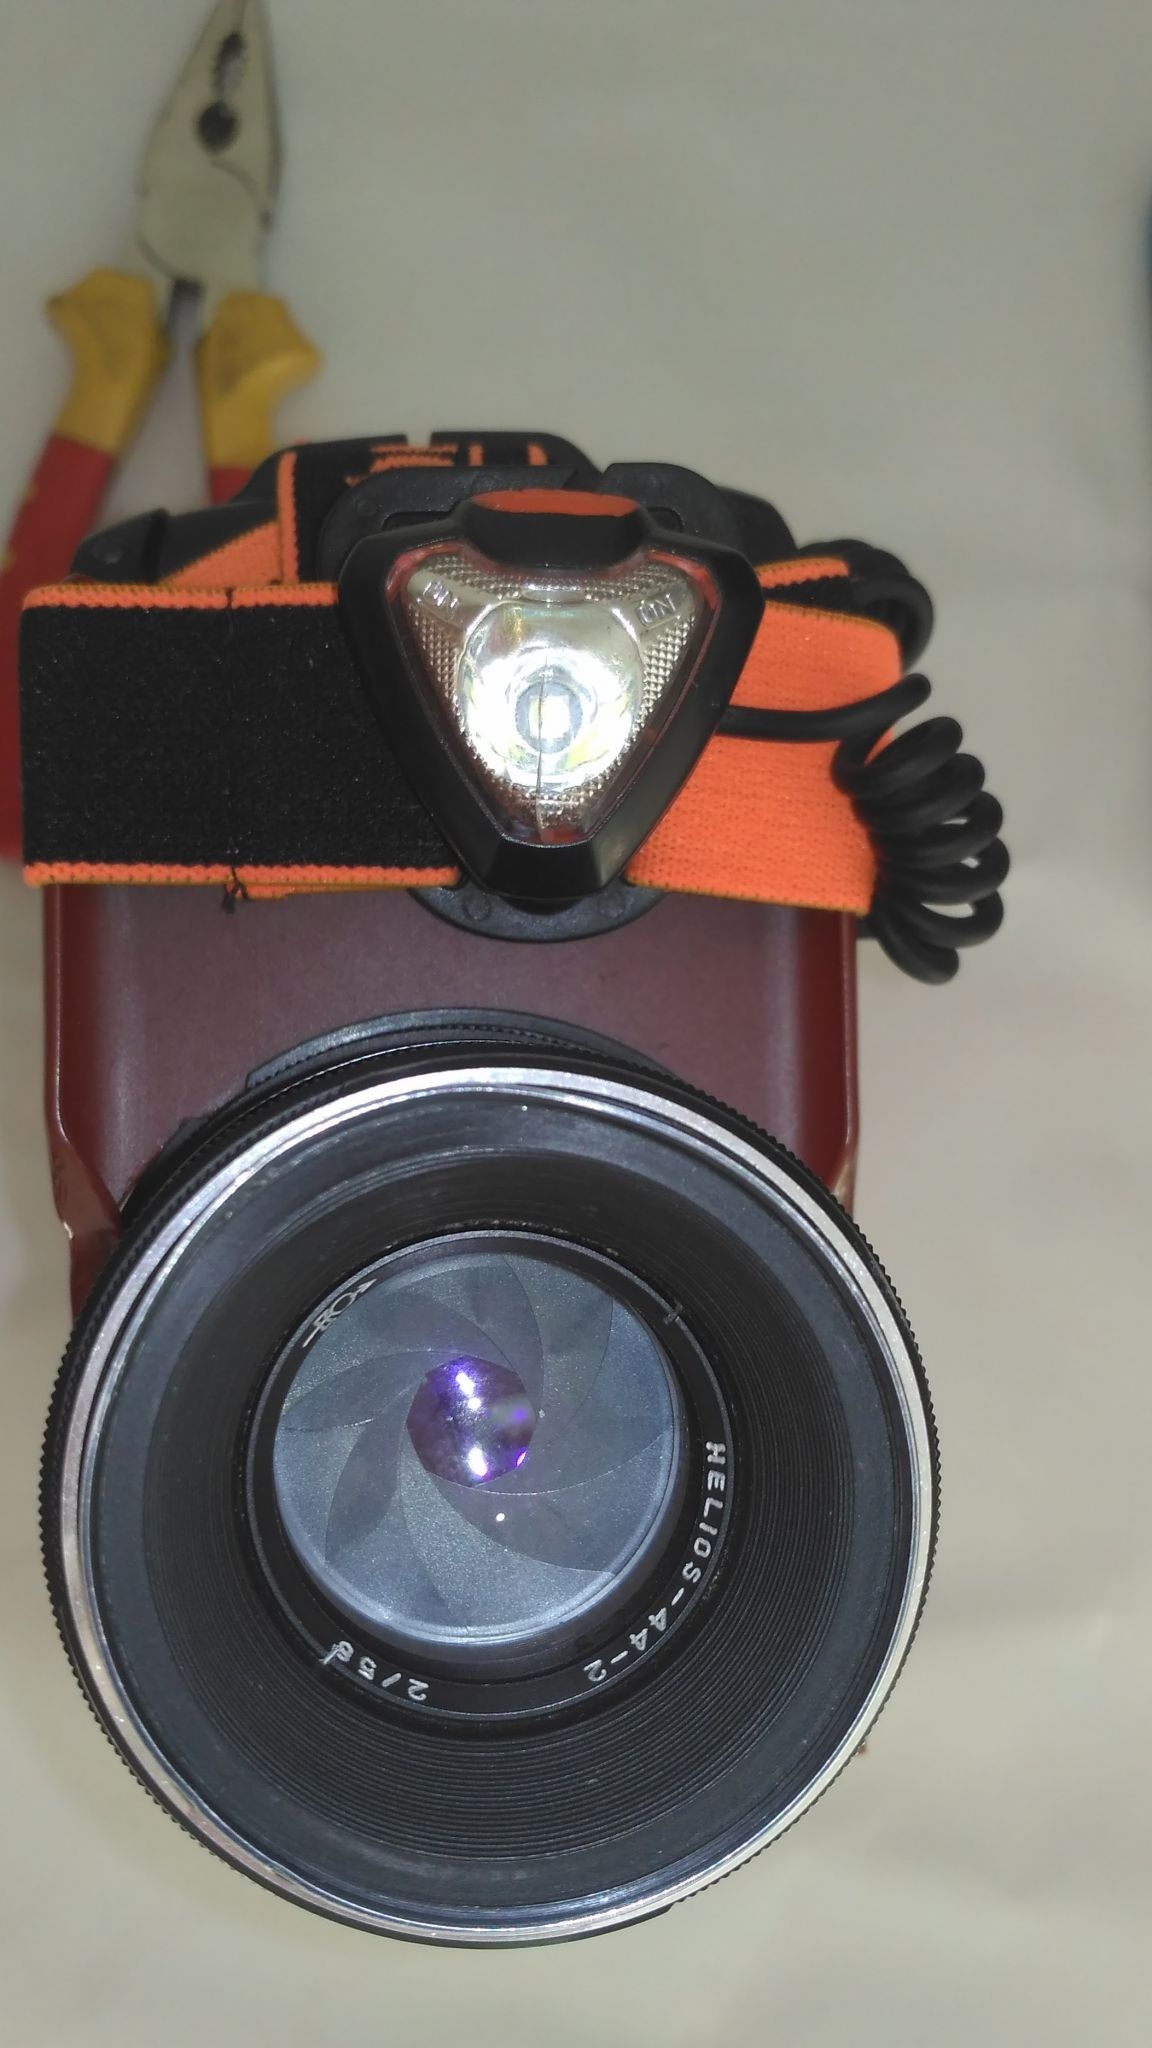
We take Helios 44, unscrew the adapter ring (through this ring it is mounted on my DSLR) and fasten it backwards, so it will be more convenient to make fasteners for it and there will be no need to seal the joint between the lenses.
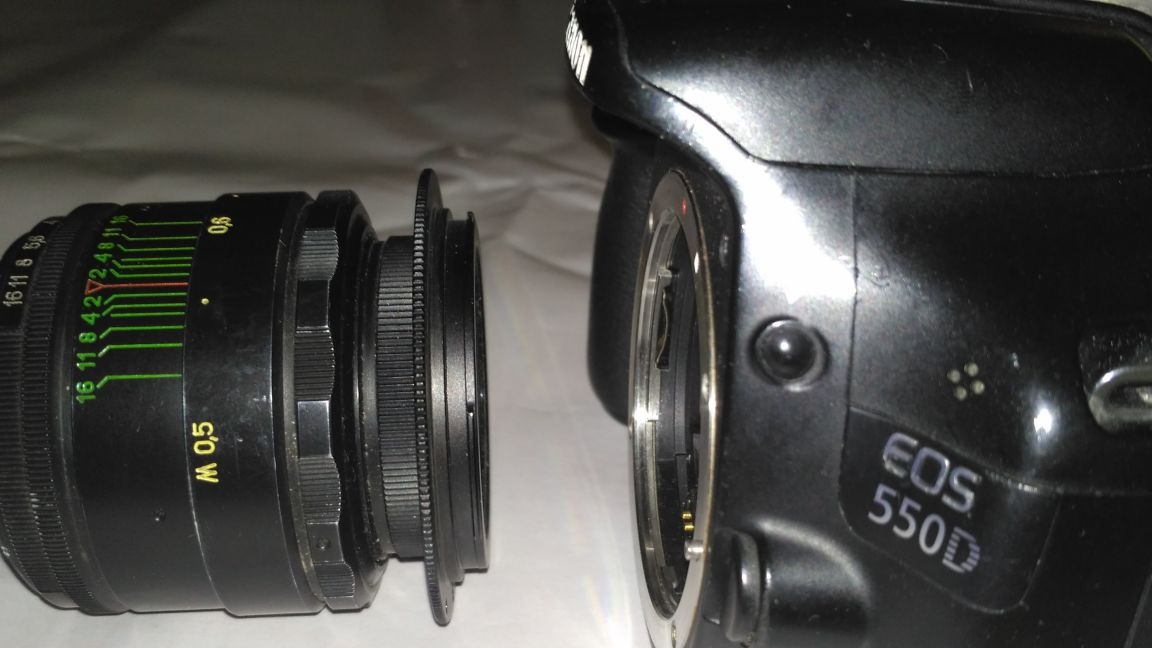
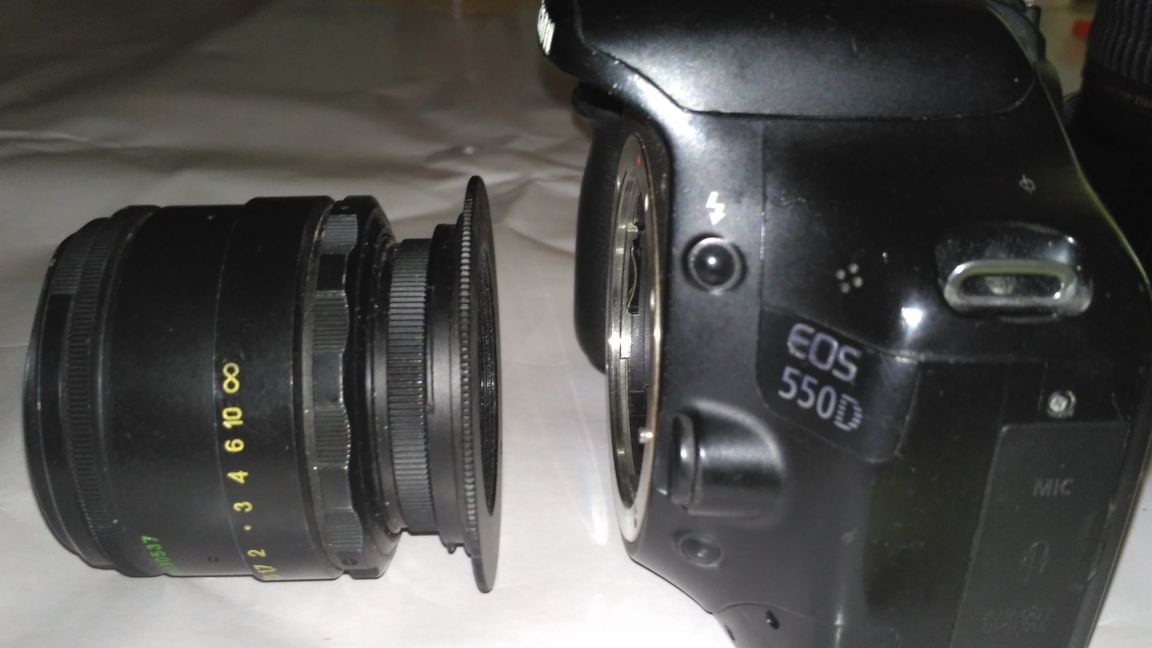
We try on Helios with an inverted adapter to Tamron, on which a piece of plastic with a ready-made fastener is already dressed. It turned out so that the adapter ring is a millimeter larger than the diameter of the lens mounted on the camera, so the whole design has no gaps into which unwanted light could get into. If there are any, for example, when assembling this homemade from other lenses, they must be carefully insulated, otherwise there will be glare or other defects when shooting.
Step 3
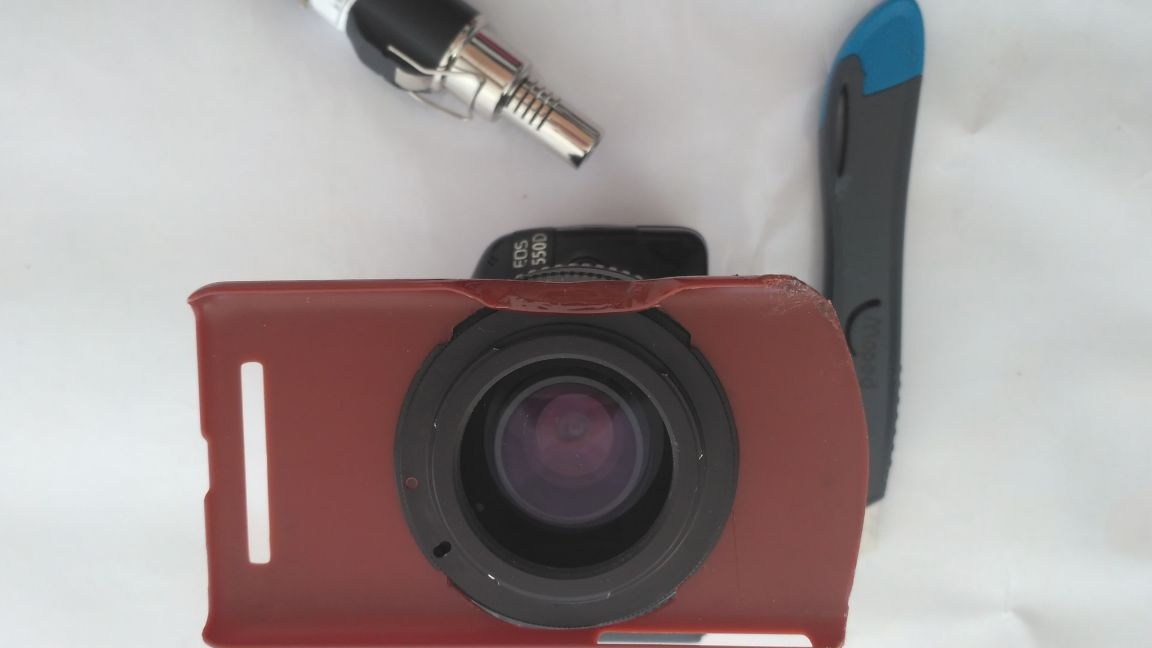
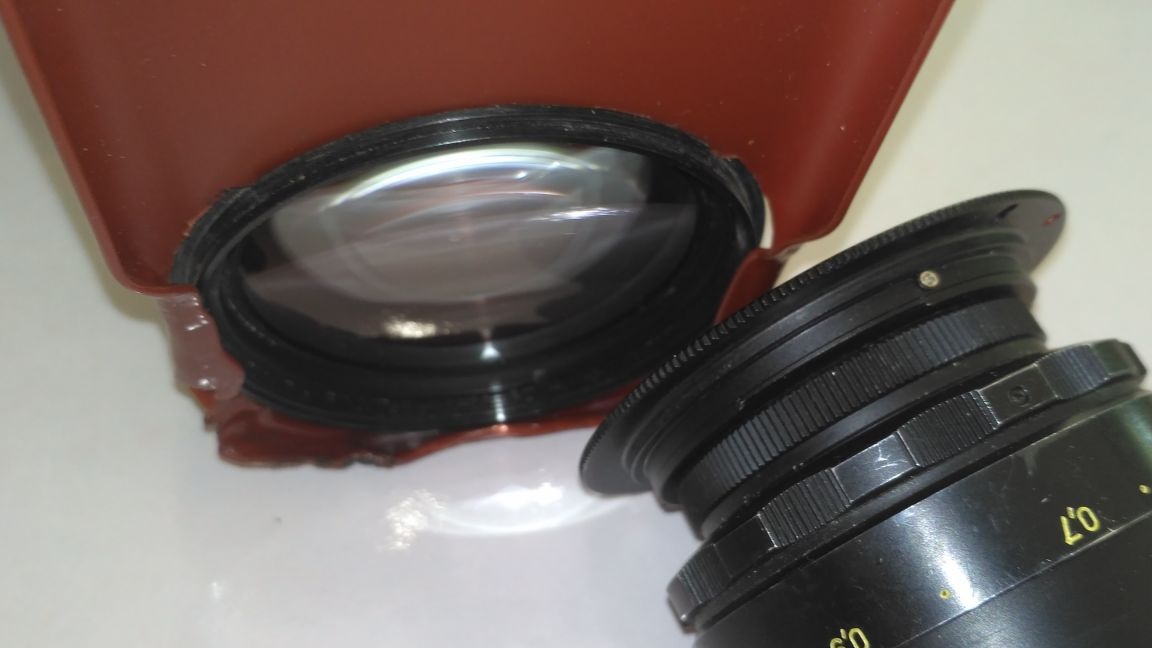
We unscrew the adapter ring from the lens so that it does not interfere while we will mount it. We warm the edges of the plastic dressed instead of the hood, bend and press the adapter ring with them. We do this on three sides to make a “pocket”, into which a ring with a lens attached will be inserted from above. You can make such bends on all four sides, so that the second lens can be removed along with the mount. But I decided to use one of the sides (top) to place a flashlight on it.
Step 4
In our design for macro photography, the focal zone will be 20-30 mm from the edge of the second lens, that is, we will shoot right at point blank range. For example, when shooting a human eye, the lens almost touches the eyelashes. Therefore, the built-in flash, like the “shoe” flash, simply does not hit the subject and additional light is needed that will illuminate the area directly in front of the lens.
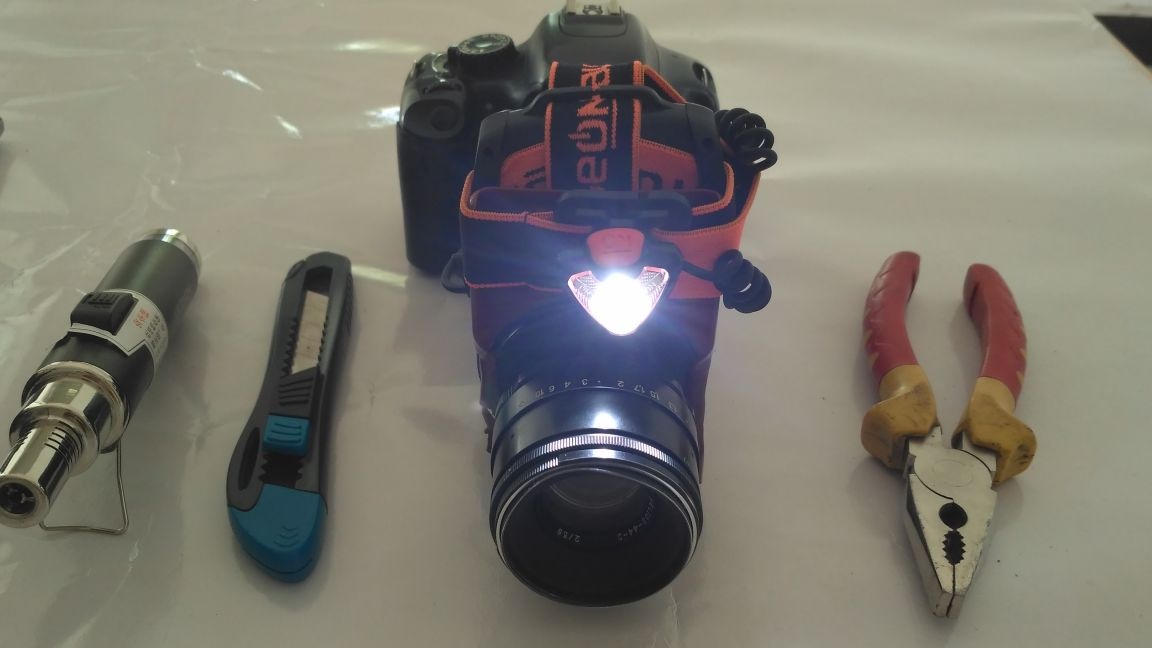
I use a bright flashlight with a movable mount to be able to adjust the direction of light in the illuminated area. Subsequently, after the tests, the flashlight was extended even closer to the edge of the lens by several centimeters.
Conclusion
Of course, this “macro optics” has drawbacks. For example, without additional light or the bright sun of such a design, there is not enough lighting, plus electronics camera in auto modes incorrectly estimates the amount of light and selects incorrect settings. Although in my personal opinion, the only serious drawback is the small depth of field (depth of field) when shooting flat objects such as snowflakes, this does not affect the pictures, but when shooting volumetric objects, I already want to increase this figure. And it increases only in direct proportion to a decrease in photosensitivity due to the closure of the diaphragm.
But such a macro device does not require monetary costs if you have two lenses, it gives an excellent increase steeper than any macro rings (which by the way also cost money), it allows you to look into the “macro world” and photograph something there. It seems to me that these advantages outweigh the cons.
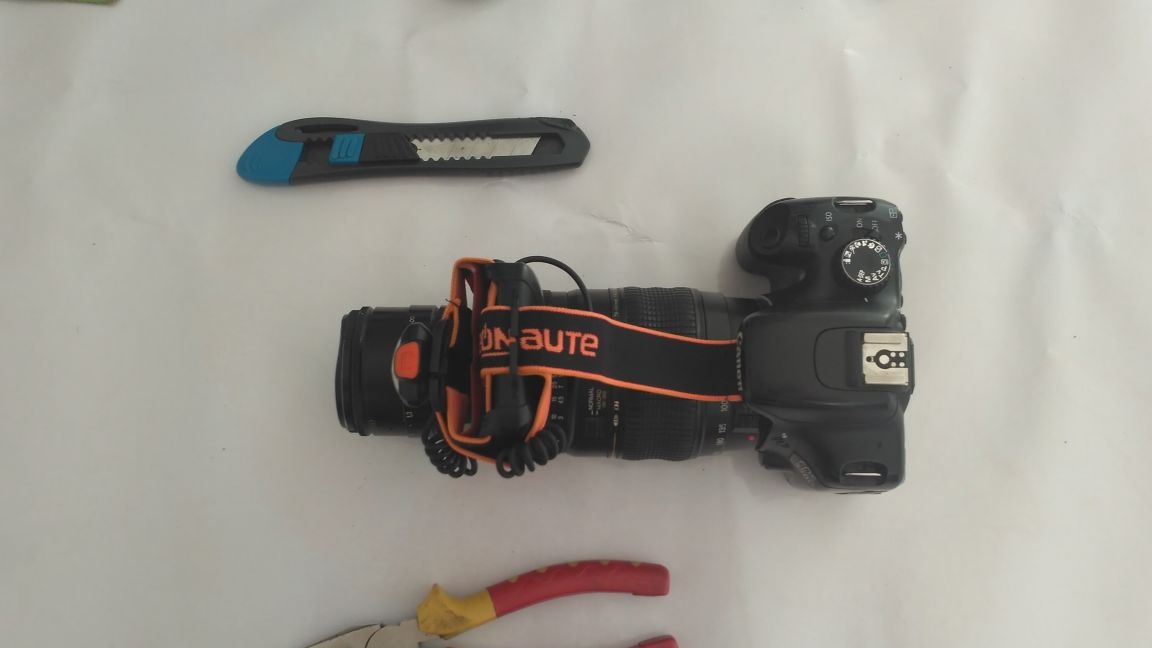
All that remains is to set the camera to the convenient shooting mode (I shot it completely manually), select the appropriate settings for the camera and both lenses and voila, we get here such interesting pictures that not even all serious photographers can boast.
I wish you creative success!