Wood-burning brick stoves are still quite common in rural areas and in other places remote from gas pipelines and urban central heating. A lot of brick kilns are already in operation, a certain amount is being built, so questions of improving the operational characteristics of individual units in particular and kilns in general are important. One of the most frequently malfunctioning parts of a brick kiln is a furnace door, or, to be more precise, its closure. Indeed, the furnace door is exposed to high temperatures, mechanical shock loads when loading logs. Often, after a short time, relative to the entire service life of the furnace, the door begins to hang, bricks crumble and even fall out around it, large cracks form. Of course, absolutely deplorable cases, as a rule, are a consequence of errors in the termination. However, even without them, the seal does not last too long and requires periodic repair.
The main, often used method of fastening the furnace door in the brickwork of the furnace is to embed wire “braids” in the seams, threaded into four holes on the door frame. As a more perfect option - instead of wire, use motorcycle spokes.
Perhaps, it is worth mentioning here the method of securing the door with modern metal dowels.
Another rather simple way of sealing is with the help of clamps (paws). Metal strips are screwed or riveted to the door frame, which are then molded and sealed in horizontal and vertical masonry joints.

The method at first glance is good.
Here it is worth recalling an important rule in the furnace business - to take into account the difference in the coefficients of linear expansion of materials when heated. In metal and brick, it (coefficient) differs most of all and it is necessary to separate these materials with a relatively soft fire-resistant gasket. In the old days, it was an asbestos cord, in its pure form or soaked in liquid clay, now they often use modern refractory materials - fireproof ceramic wool and felt.
Let’s get back to the clamping closure.If the door frame itself can be insulated, for example, by wrapping it around the perimeter with an asbestos cord, then the metal strips of the clamps cannot be insulated nor will they paint the clay mortar from the joints.
As a kind of variation, there are metal elements fixed to the door frame, but not fixed at the seams, but holding the door by bricks. Already much better - you can lay refractory cardboard and get rid of cracks in the future. The strength of the seal is also good, a large area of "holding" allows you to more freely handle firewood and poker. It’s not at all expensive, not complicated and economical in terms of materials.
For stoves made of simple clay bricks, perhaps, more is not necessary, but in modern versions of brick furnaces with a furnace lined with refractory bricks, the method is not good enough.
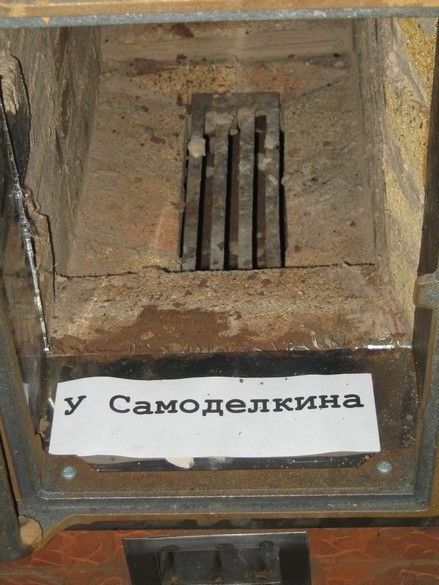
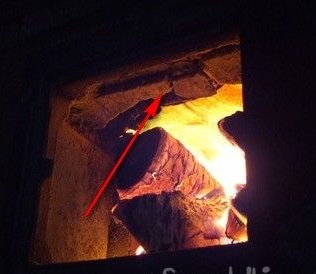
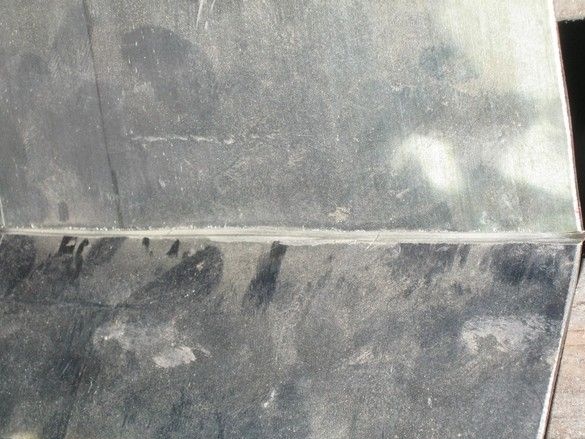
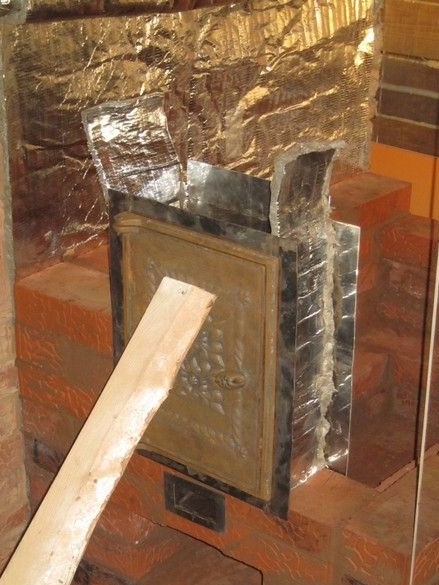
By lining the firebox with chamotte, we significantly increase its resource, but closing the furnace door according to the latter method leaves several places where high temperatures affect clay bricks. In the photo above, these are the ends of the masonry, on the sides of the door, on the next - top and bottom.
The last seal, after five years of operation, showed good reliability - the door didn’t shake at all, it stood rooted to the spot, but the clay bricks from the inside were destroyed from the top and needed to be replaced, while the rest of the firebox, protected by fireclay chamotte brick, wore out of course, but it did well.
That is, everything is required, the same thing, but with paws around the perimeter. Something like that.
The method is somewhat more wasteful in terms of materials, but it is very reliable and can be recommended for use. We will consider it in more detail. So.
What is needed.
Instruments.
The most common set of locksmith tools, a small cutting machine (grinder) with abrasive discs, thin for cutting, at least one thick for stripping. Safety glasses or better - a shield for the whole ... for the whole face. If we want to listen to Beethoven not by means of a hearing aid by the age of eighty, we add protective headphones or earplugs to this - when stripping with a typewriter, the rumble and ringing is pretty good. Something manual for drilling. A small welding inverter with accessories was also used, plus thin (2mm) electrodes. I tried MR-3, SSSI work well, you can certainly special for stainless steel, if not sorry. In the first production variant, where it is only flexible, welding can be dispensed with. Yes, in addition to the usual marking tool, it would be nice to have a large square, with a side that way half a meter. This will greatly increase the accuracy of the layout.
Materials
Suitable in size, a piece of stainless steel sheet. It is very desirable that it be heat resistant. Not to be confused with “heat-resistant” (scale resistance). The only time in the network was a video of a similar design, where the author used heat-resistant stainless steel, a very small thickness, something around 0.5 ... 0.75 mm. In this case, it is clear that only the manufacturing method is flexible, unless you have special tools for welding thin stainless steel.
In the author's version, stainless steel of an unknown (and hardly heat resistant) grade, 1.5 mm thick, was used. Not on purpose, what it was. Practice, however, has shown a sufficiently high resistance of the material. Also, a somewhat excessive thickness, however, allows the use of conventional manual arc welding.
Fasteners - standard bolts or screws M5 with nuts. Perhaps it is better to choose massive heads so that they do not burn longer.
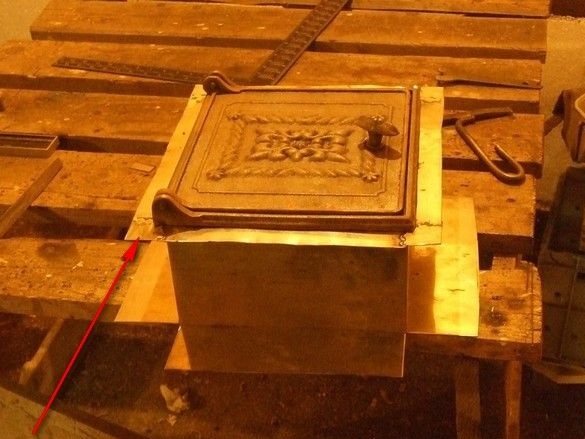
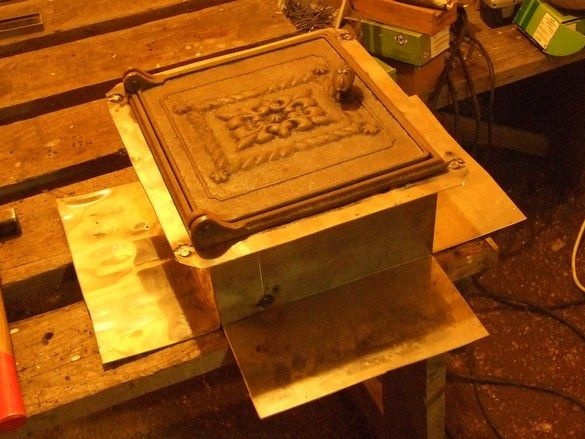
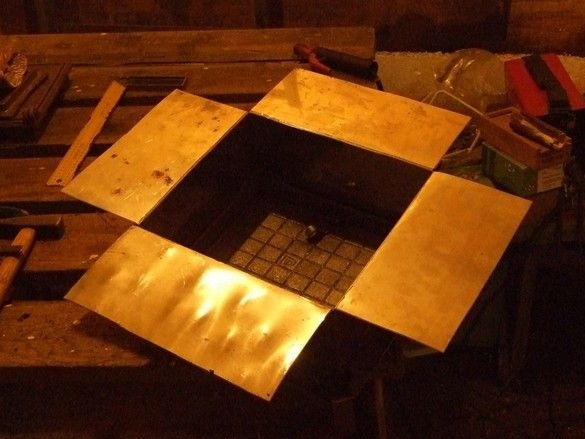
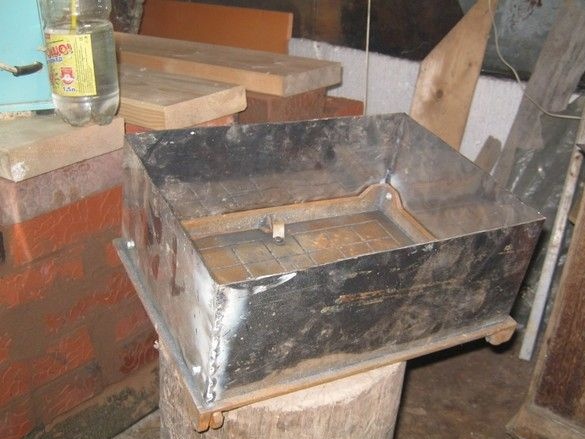
The mount box was made in two ways.
First - a general large sweep was made andby bending, it turned out a kind of box without a bottom and a lid. Perpendicular to the walls of the box, the petals bent. A door was installed, holes were marked and drilled. The door was fixed with cogs and that's all.
Marking and cutting the workpiece.
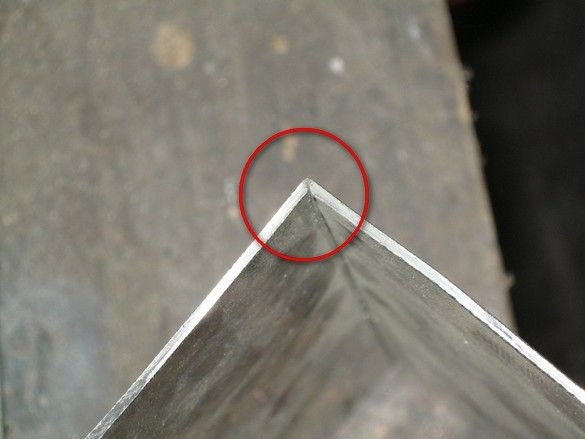
Here, it is worth saying that to obtain a small bending radius, with such a thick material, some preparation of the bending point is required.The preparation consists in cutting the material along the fold line, about three quarters of the thickness, and cutting - giving the cut a V-shaped profile. With an angle of 90 or slightly more degrees at the base. The only tool more or less suitable for this purpose is a cutting machine (grinder). As for my taste, it is worth using the option with less power and a smaller circle diameter.
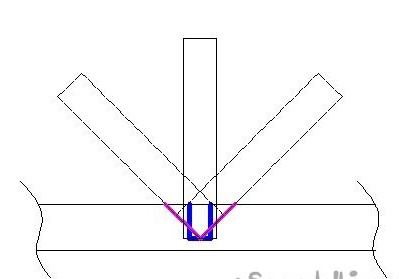
You have to act like this. The first cut is perpendicular to the surface of the material, to the desired depth along the marking line. It is quite difficult to do well the first time. It is better to do the cut not immediately to the full depth, but in several passes, so there is less chance to cut through and it turns out more evenly. The hardest thing to do is the very first straight groove. As a rule, it turns out better for me, the less responsible the part - when working, it is worth liberating the shoulders and arms somewhat and not attach much importance to possible small flaws.
After the first cut, two more passes are made along it as on a guide, with a tool rotated each time by 45 degrees relative to the main one. Approximately, of course, but a little better. This is no longer difficult, you just need to turn or turn to the workpiece so that the groove is from right to left, and not from top to bottom. It turns out smoother. Well, the Bulgarian intercept differently.
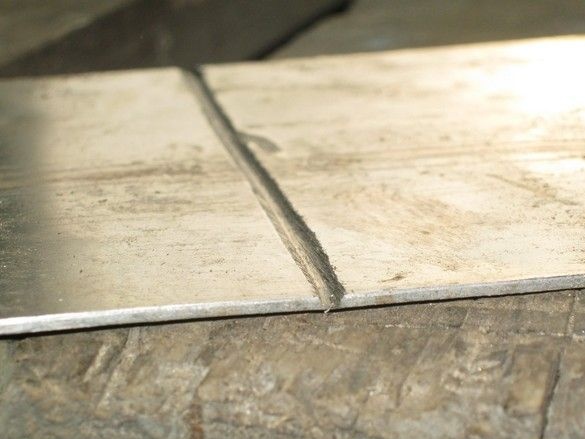
Then bend so that the cut is inside. There is no need to use any stops or guides, the bend will still go to the place of minimum thickness, as they sawed.
The depth of the first cut, in the ideal case, should be such that the workpiece on the finished cut is bent, with some, pretty decent effort, but with your hands. In this case, the outer surface of the bend will be slightly dull, but without noticeable cracks.
The form was cut, ideally should lead to a complete closure of the walls on the finished bend.
So, blanks were cut out, cuts were made in the right places, through and for bends. Here you need to be careful and fully imagine the finished product - a number of folds (their cutting) are located on the opposite side.
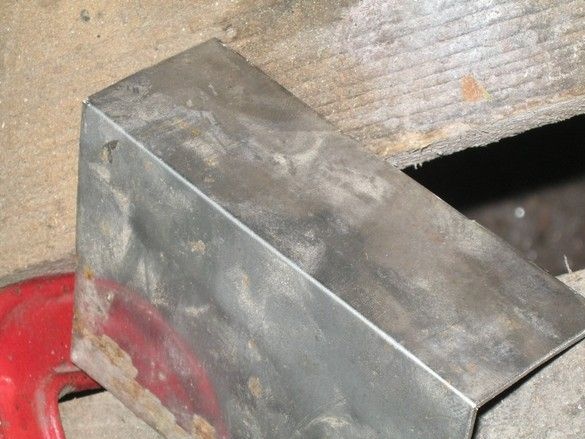
After fussing with cuts, in several movements, a box with petals bends along the lines.
We try on the door, mark holes, drill, fasten. We cut off excess from the thread. Fastens with a screw and nut. M5. Stoporov and puck is not used, but if in doubt, you can tilt the center of the cut.
Now we weld corners from small scraps. On the front side, otherwise the design is somewhat unfinished. Pieces with a right angle are simply attached to the right place, at least a little more than necessary and welding, is fixed by several points. Then the excess is sawn off. Welds are cleaned. Sharp edges become blunt.
The paws on the side of the firebox are a bit big, you can get by with smaller ones.
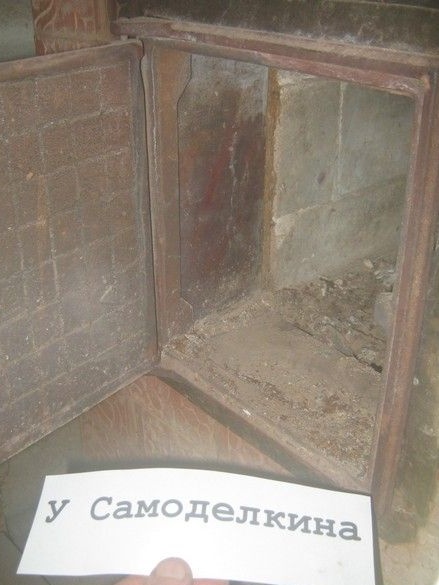
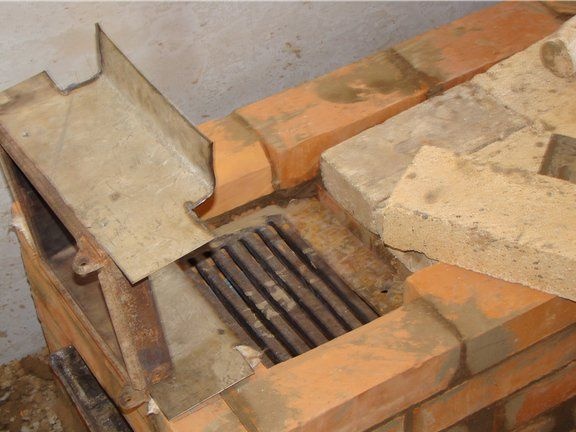
The same termination, after 3.5 years of operation in a brick sauna stove. On the bottom shelf of ash, consider the side. There is a little bit of scale, there are no noticeable distortions and bends, the bolt heads are not visible in the photo, but I dare to assure them, too, in very good condition. The outer brickwork has no destruction, especially the lining. In general, the condition is excellent, and given the much more intense heating of the bath stove compared with the heating, it is completely excellent. Perhaps this was facilitated by the significant thickness of the material and the overall rigidity of the structure.
The embedment, despite the high cost compared to common methods, is a miracle as good, but the method of manufacturing a box with paws, flexible, is not very accurate. By definition. It is difficult to consider up to a millimeter, all the evolution of the workpiece during bending and, as a result, the door does not fit in, or the gaps are too big. You can fill them with the same refractory felt, but this is not the case.
The second manufacturing option. By welding.

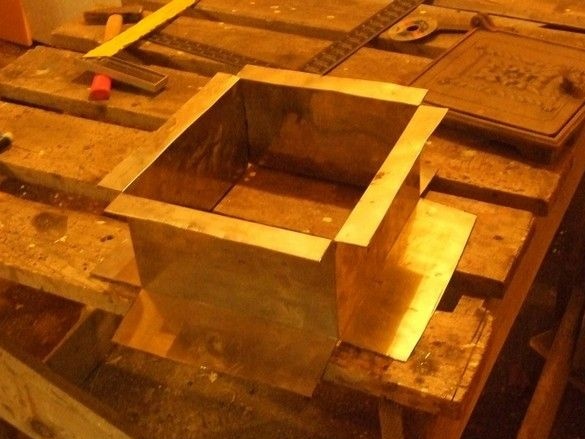
The other day, I decided to try it. The main box was made of two L-shaped parts.
After trying on, cut the edges to size and welded. Special tightness is not required here - in dots, through a centimeter and a half. Then clean out all the excess at the seams.
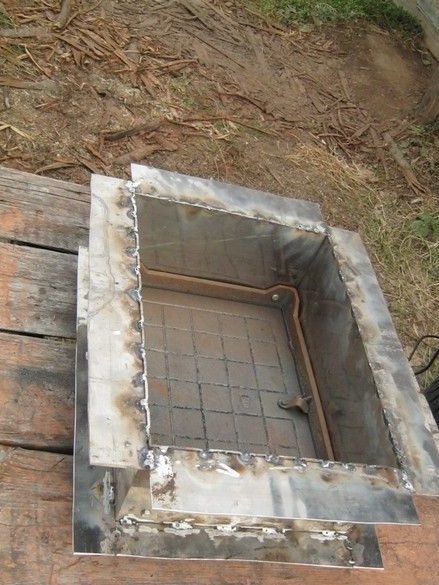
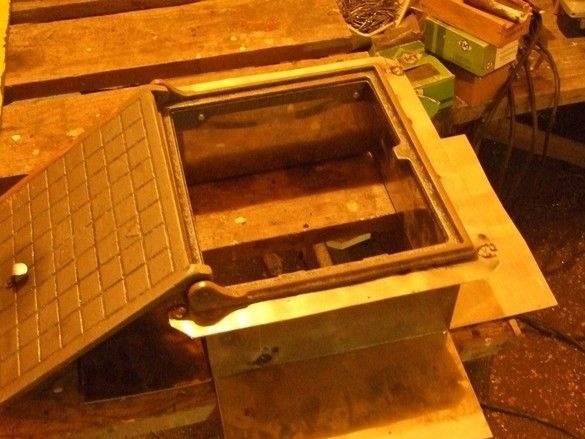
After, in a similar way, paws are welded.
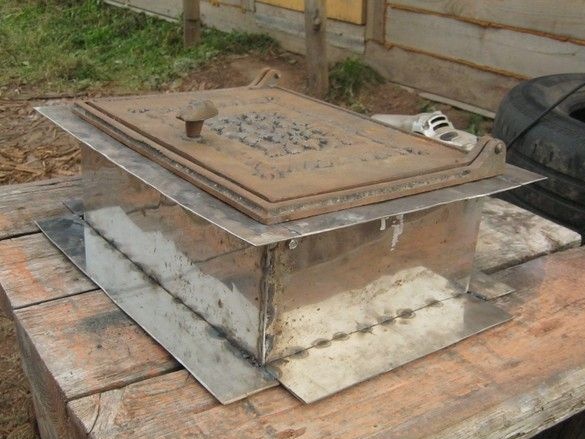
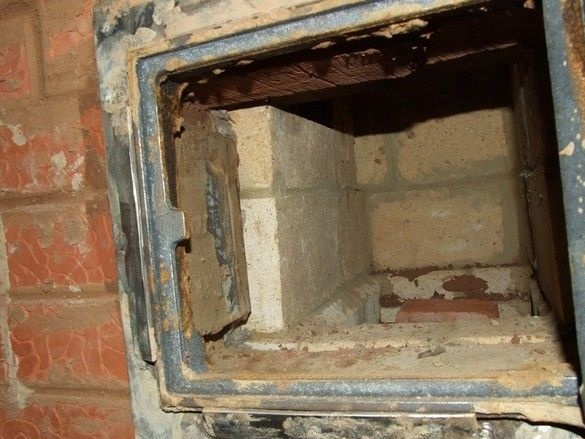
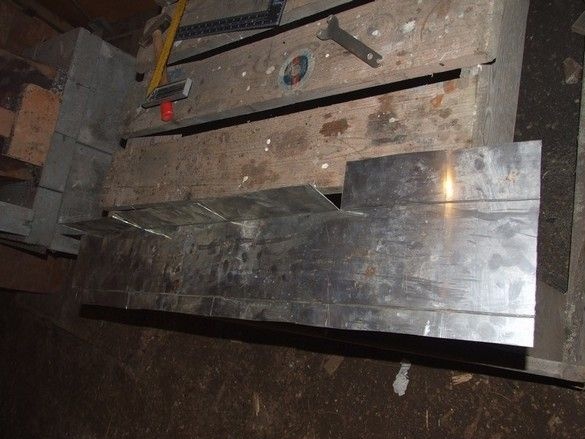
After stripping, it is possible to brick up on a place of service, having wrapped previously soft refractory. In the photo below, a basalt quilted mat with a thickness of 10 mm is used.
The method, despite the somewhat greater complexity, liked more. The door sits much more tightly, in the manufacturing process, there are significantly fewer anxieties - the door will fit / not fit at the end. Moreover, for the design, you can use smaller pieces of material, which is sometimes very convenient.
There is no experience in operating a seal of this type of manufacture yet - the furnace is not finished yet, but there are no reasons to doubt it either.