
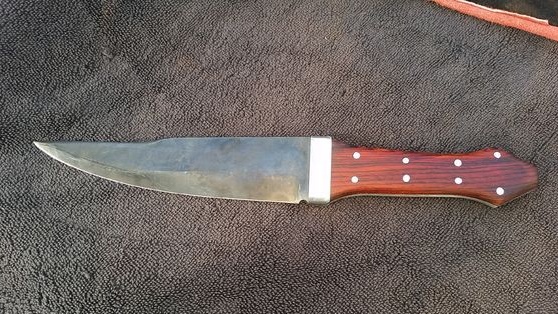
This time we will review the instructions for making a knife from an automobile spring. This is a strong steel that lends itself well to hardening and does not blunt for a long time. This knife belongs to the category of knives "Bowie Knife". These are usually massive sharp knives that have a cutting edge on the butt. The bevel on the butt has a curved shape, it is also called the "pike."
Materials and tools for homemade:
- car spring;
- rods for pins or ordinary nails;
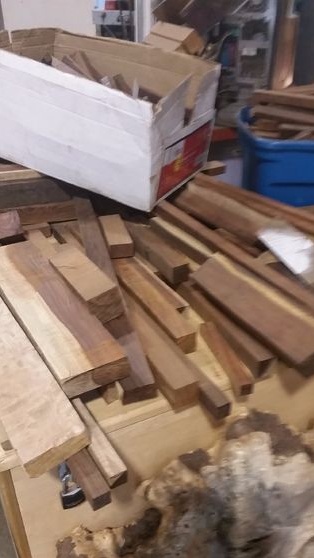
- wood for finishing the handle;
- epoxy adhesive;
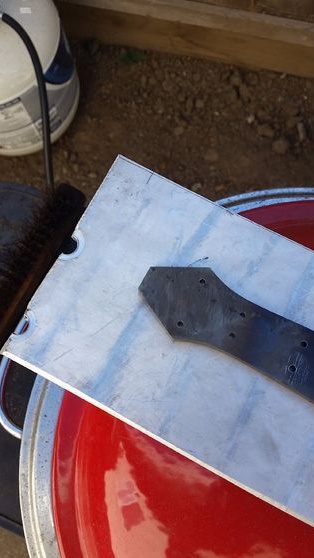
- aluminum for the manufacture of the stop (front of the handle);
- ;
- or a drilling machine;
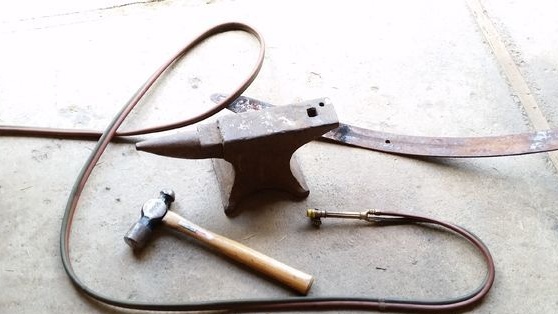
- hammer;
- files;
- sandpaper of various grain sizes;
- oil for impregnation of the handle;
- a furnace for hardening metal and oil;
- scissors and paper;
- a jigsaw or other tool for cutting wood;
- useful;
- clamps;
- Anvil and other little things.
Since we make the knife quite high quality, you will need a considerable supply of tools.
Homemade manufacturing process:
Step one. We prepare materials
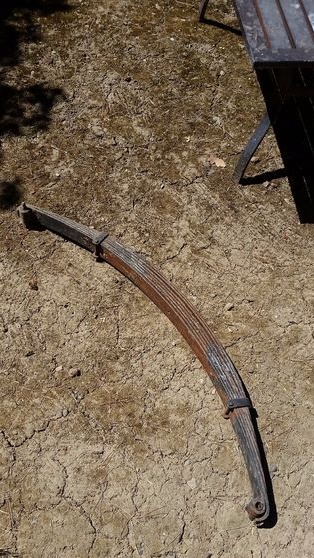
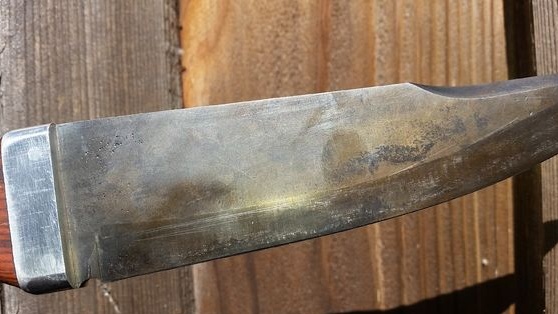
First of all, we prepare all the necessary materials. As a source material, the author used a spring leaf from an old car.
Since the spring has a curved shape, you have to bend it. To do this, the metal is heated and allowed to cool gradually. You can use a burner, or just throw steel in a good bonfire.
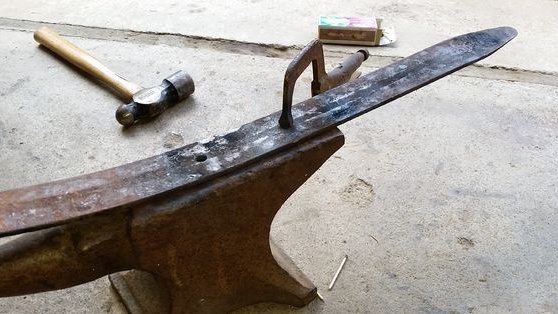
When the workpiece cools down, take a hammer, anvil and give the spring the appearance of a straight plate. Vacation will make the metal soft and can be easily cut, drilled and so on.
Step Two We make a knife template
First of all, we make a knife template, the author found on the Internet already ready. If you wish, you can upgrade it. Next, print the template and glue the paper to the cardboard. Using scissors, cut out the pattern. As a result, you can hold the template in your hands and figure out what it will be.
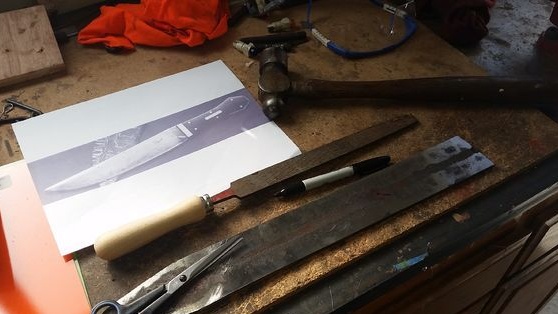
Well, then we apply the template to the metal and circle with a marker or felt-tip pen. Before this, clean the spring a little with sandpaper so that the marker is visible on the metal.
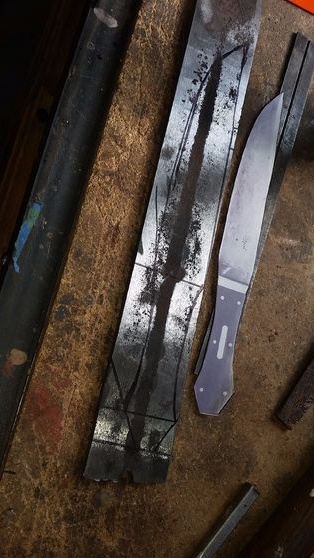
Step Three Cut a rough profile
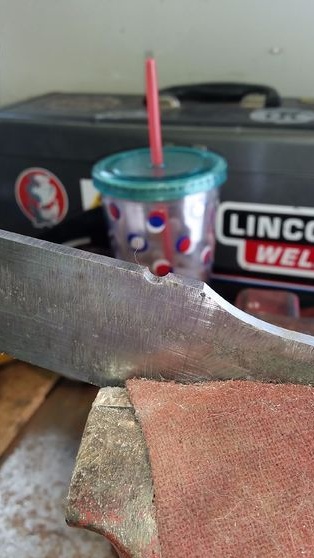
Now begins the hardest of all the work. We have to cut a knife profile. It is convenient to work with a band saw, but the author did not have it at hand. A grinder will come to the rescue, only when working with it, do not overheat the metal. If steel changes color at the cutting point, immediately water it.However, a color change already indicates that the metal is overheated. Those places that can not be cut, you can "drill." Just drill a series of holes and then break off this part.
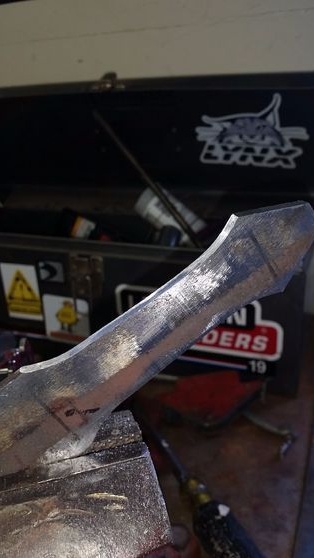

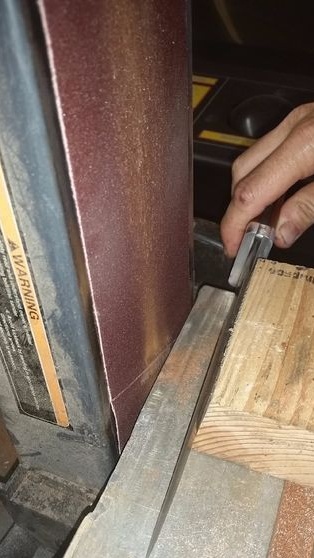
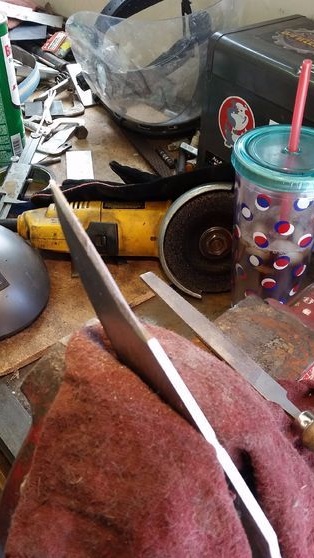
Step Four Grind the knife
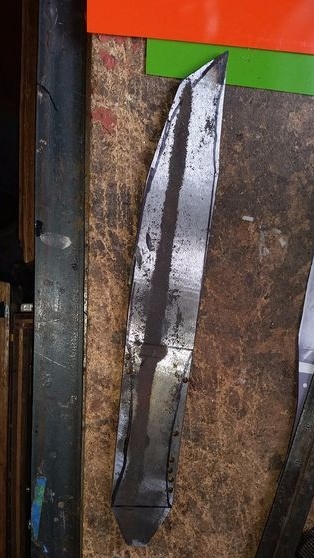
At this step, the author completes the formation of the main profile of the blade. Such work is convenient and easy to do on a belt grinder. As a last resort, grip the workpiece in a vice and work with files, this is a bit difficult, but the most error-free option. More skilled can use the grinder. Grind the outer surface of the knife to a high gloss as well. To press the workpiece to the sanding belt, the author uses a bar. Here also watch for metal overheating.

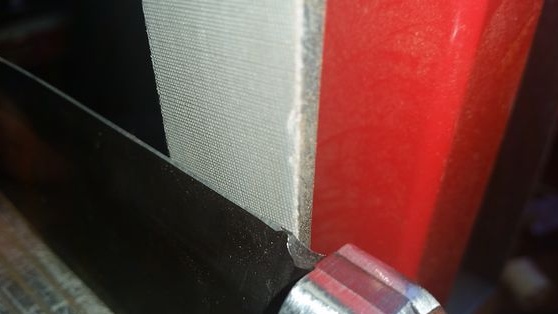
Another crucial point in grinding is the manufacture of bevels on the knife. Thanks to the bevels, the knife has the necessary cutting characteristics. First, draw the bevels on the workpiece with a marker, and also divide the future blade into two parts, this will be the center line that you will be guided by when forming the bevels. This line is usually drawn using a drill of the same diameter as the thickness of the workpiece. Just apply the workpiece and drill to a flat surface, and draw a straight line.
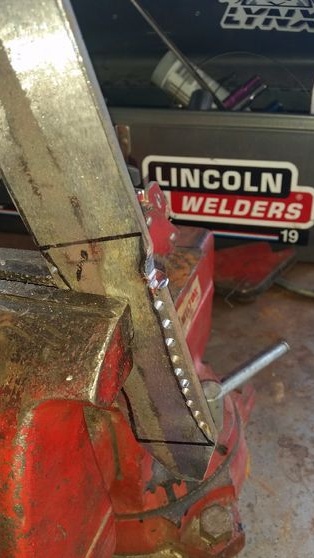
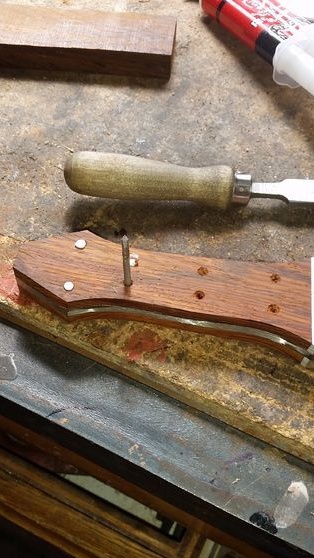
Step Five We drill holes for the pins in the handle
To securely attach the pads to the handles, 4 knives are provided in this knife. We drill holes for them. We select the diameter in accordance with the available pins. Brass rods are conventionally used as pins, but ordinary steel nails can also be used.
Before the next step, you must complete all the basic work with metal, since then it will be hardened, and after that it will be very difficult to work with metal.
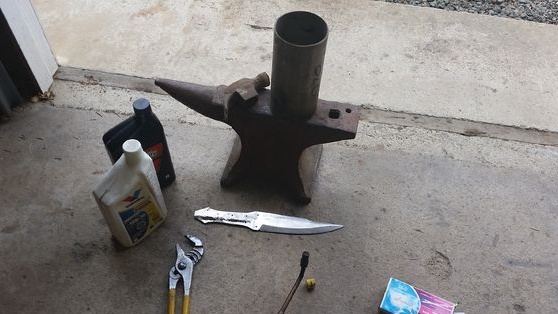
Step Six Metal hardening
Hardening will make the blade durable, it will not be dull for a long time. For hardening you will need oil, you can use motor or vegetable. You will also need a stove or a good bonfire. The metal must be heated so that a permanent magnet ceases to be attracted to it. According to the author, such steel has a dull red color when heated. Well, then lower the workpiece into the oil. Be careful, as oil often ignites, smokes, and splashes fly in different directions. The hardening tank should be made of metal.

It happens that during quenching the metal is deformed. This is sad, but fixable. To solve such a problem. Heat the workpiece, level it, and then try hardening again.
After hardening, be sure to leave the metal, otherwise your knife will be very fragile. The vacation will soften the metal a little, and it will become elastic, like a spring spring. For a vacation you will need a domestic oven. We heat steel for an hour at a temperature of 200oC, and then let it cool gradually. When cooling the oven, do not open, let the workpiece cool with it.
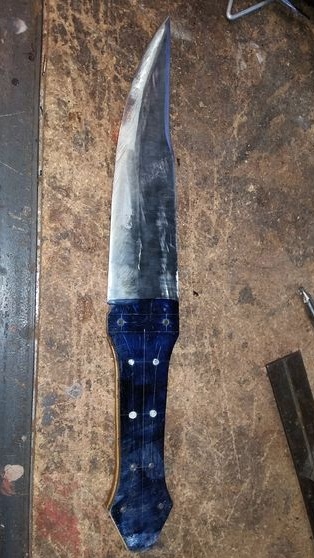
Seventh step. Handle finish
You will need two not thick pieces to make pads on the handles. Cut them to the desired size and then drill holes for the pins in them.
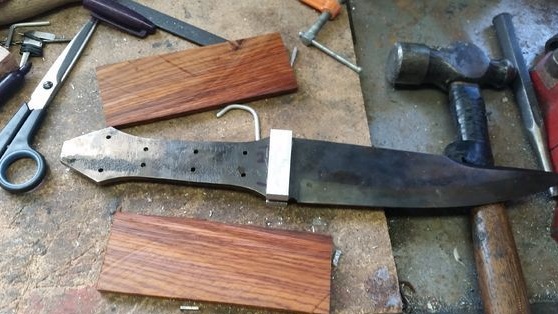
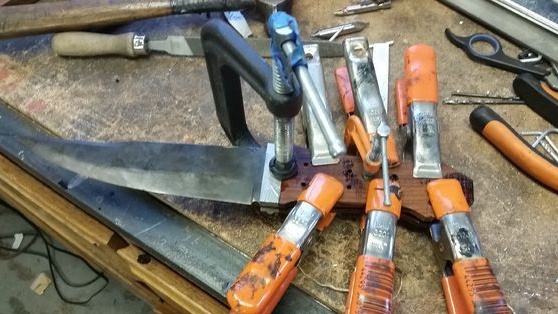
Now the workpieces can be glued together. We prepare epoxy glue and apply a good layer to both linings. Next, insert the pins and carefully clamp the handle with a clamp. The glue must be allowed to dry completely, usually it takes 24 hours. The remnants of the displaced glue should be cleaned immediately with a cloth or toilet paper.
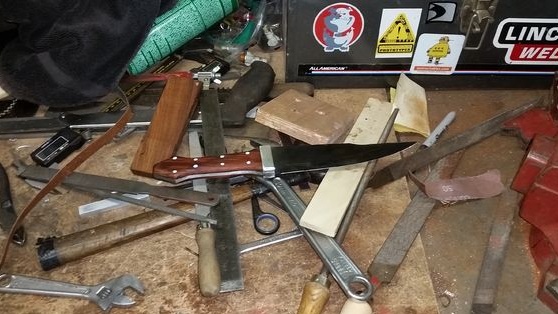
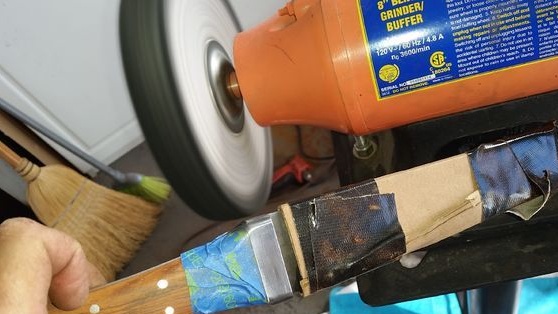
When the glue dries, we take out the knife and finally form the shape of the handle. Work is carried out on a belt sander. If you work manually, there will be the necessary files for wood. After rough work, we bring the pen to the ideal manually, using fine sandpaper.
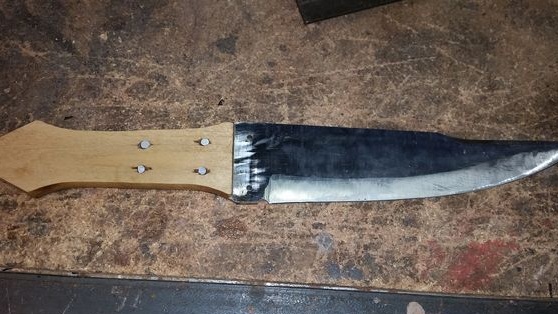
Step Eight. Finishing touches
In the end, the author polishes the knife, if you wish, you can make the metal mirror. The handle can also be polished to make it smooth.
Wood must be impregnated with linseed oil or other impregnations should be used.Some craftsmen mix linseed oil with beeswax by heating.
The final step is to sharpen the knife well. The most affordable option is to use fine sandpaper. Grinding stones can also be used, and Japanese water stone is best suited. Your knife is ready! Be careful and take care!