

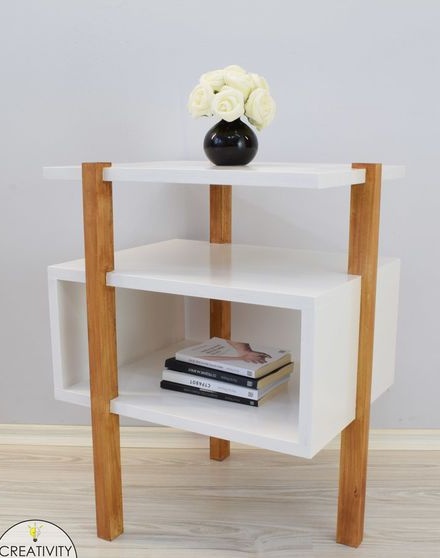
Today we will look at how to make a simple modern table that stands on three legs. In addition to the countertops, the table is also equipped with a shelf where you can put books and other things. The table turned out to be light, simple, looks stylish, and it’s not going to be very difficult. Materials here are not particularly expensive, and a minimal set of tools is needed.
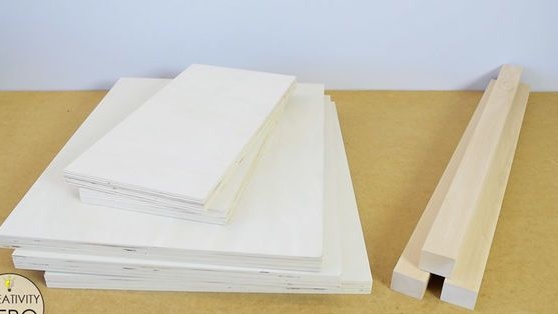
In total, plywood and a wooden beam will be needed for the table. Instead of plywood, you can use a board.
Materials and tools for homemade:
Material List:
- plywood;
- glue for wood;
- masking tape;
- dowels;
- Oil paint;
- wooden bars for the manufacture of legs;
- wood stain;
- putty on wood.
Tool List:
- ;
- ;
- ;
- sandpaper, pencil, clamps and other little things.
The process of making a table:
Step one. We cut all the necessary components
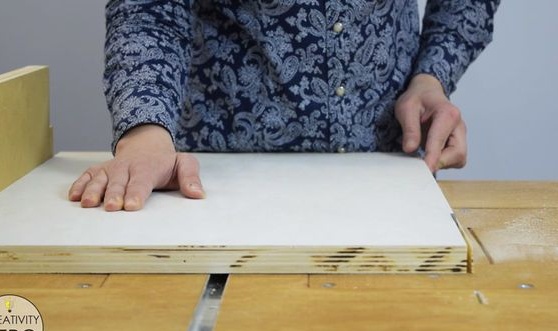
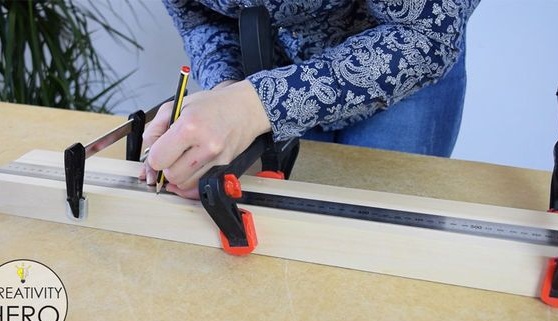
First of all, carefully mark out everything and determine the size of the future table. Well, then the necessary details can be cut. The easiest way to carry out such work on a circular saw. An electric jigsaw is also suitable, in extreme cases, a hacksaw. Four parts are to be cut out of plywood for the manufacture of a shelf (bedside table), and another part will be needed for the countertop. In them, do not forget to cut out the grooves for attaching the legs. However, this can be done later.
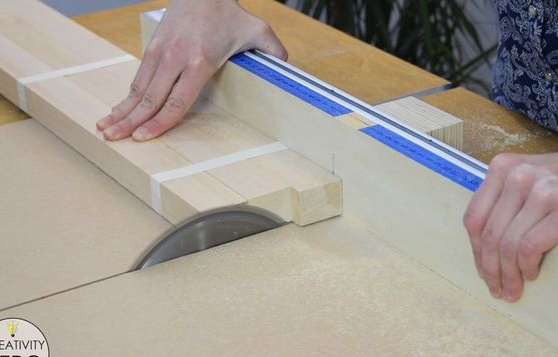
The author used three pine blocks as legs, as this is the most easily accessible material. We cut them all so that they are exactly the same length. We can fasten three pieces together with a skitem, and then simultaneously cut everything off into one level. The length of the legs of the author was approximately 66 cm.
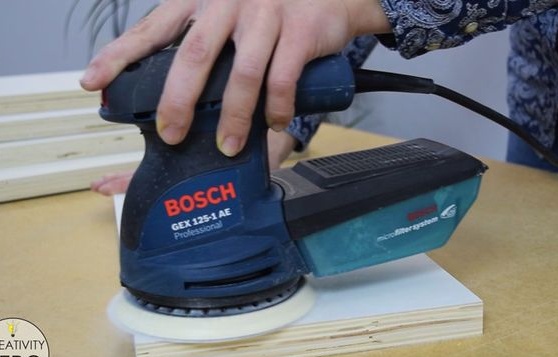
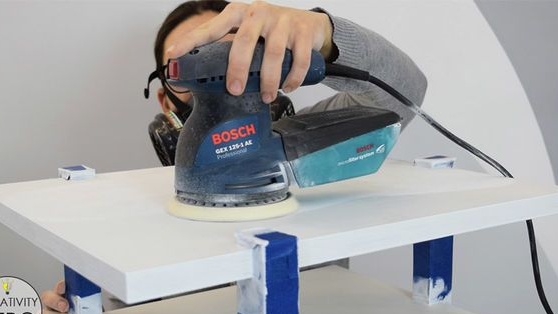
Step Two Grinding all the components
Next, you have to carefully grind all previously manufactured parts. Of course, it is most convenient to do this with electric tools. The orbital sander is best suited, the author used 220 grit of sandpaper. In the worst case, vibration machines can be used, however, no one canceled manual processing either, though this process is not so fast and more tedious.
We bring the workpieces to the ideal, they should become absolutely smooth.
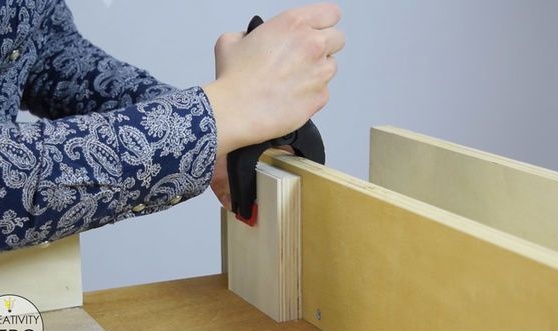
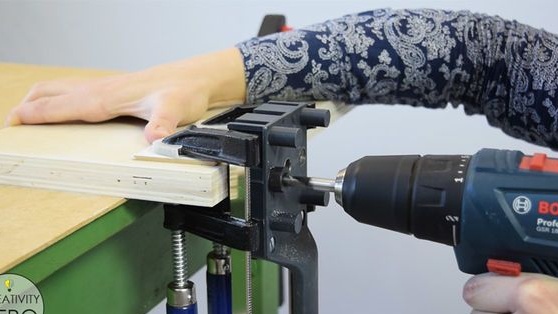
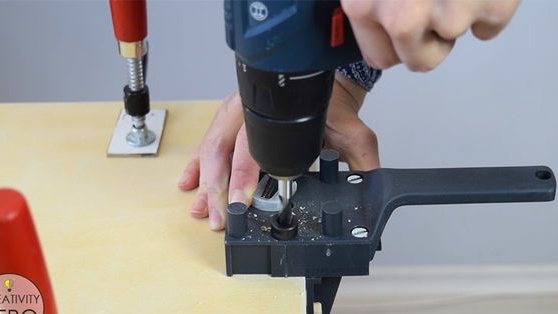
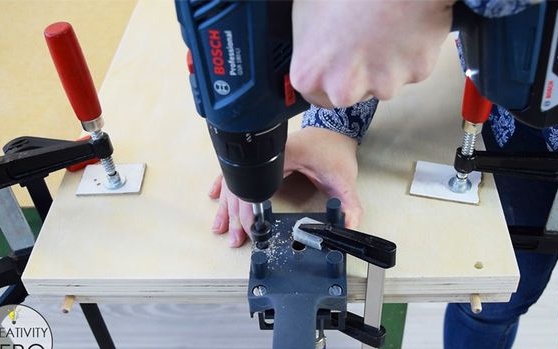
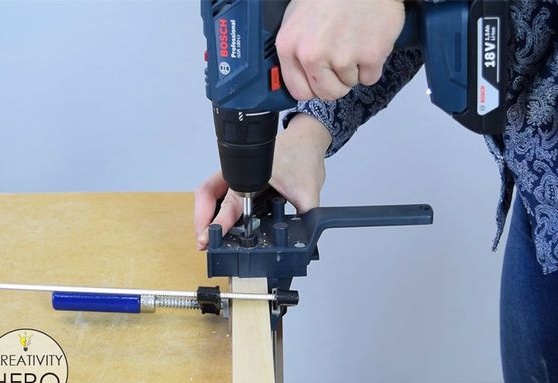
Step Three Drill holes for dowels
To assemble the entire structure, the author uses wooden dowels and glue for wood. This is the easiest and most reliable way to connect. So on of furniture caps from self-tapping screws that need to be hidden will not be visible, and indeed this approach allows you to assemble furniture without the use of metals.
We arm ourselves with a drill and drill holes for dowels in the right places. For precision and ease of work, when drilling at the joint, clamps with a special guide for the drill can be used. As for the depth, it should be such that half of the dowel goes into each part. Choose the diameter of the hole so that the dowel comes in with some effort, but not too strong, since the workpiece can easily be split. The author decided to start the assembly from the frame (bottom shelf).
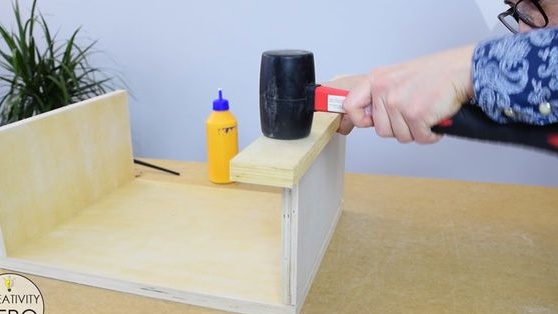
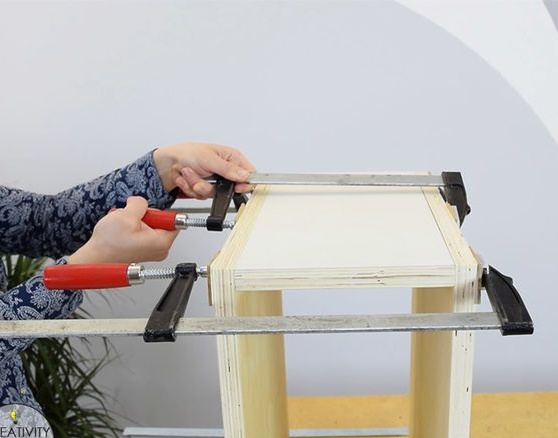
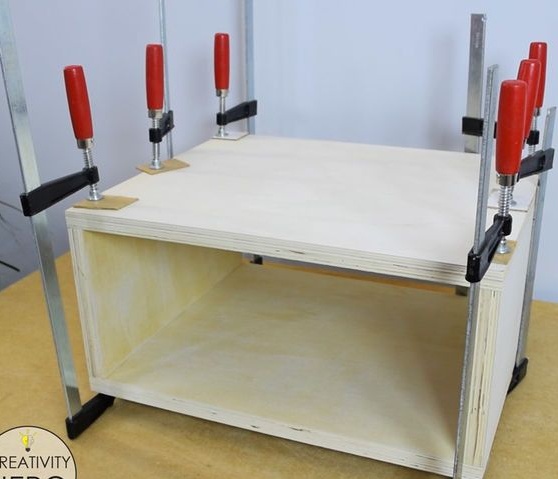
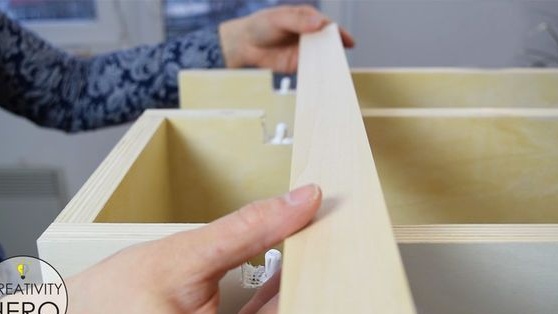
Step Four We hammer the dowels and collect the "frame"
We lubricate the dowels thoroughly with glue on the wood and carefully hammer them into their places with a hammer. However, even without glue they will hold perfectly. Apply glue to those parts that will fit together. Well, then all four parts can be assembled. With light strokes of the hammer, we stuff the parts on the dowels. It is best to use a rubber hammer, this will not damage the material. Well, in the end, carefully tighten the structure with clamps until the glue is completely dry.

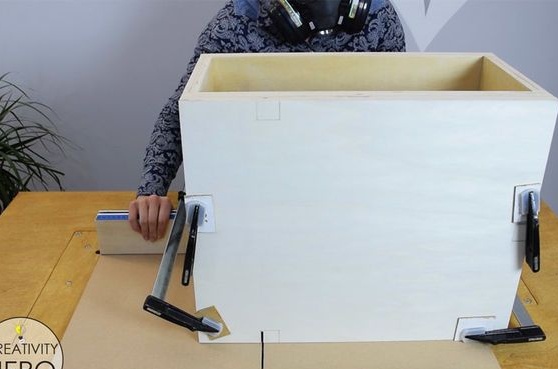
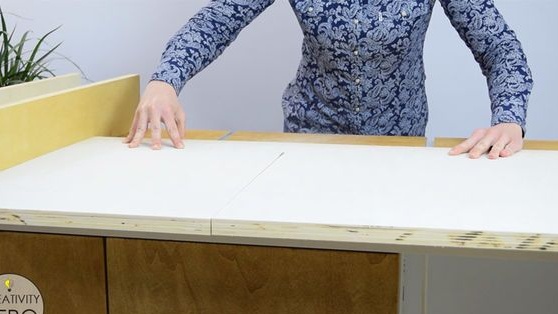
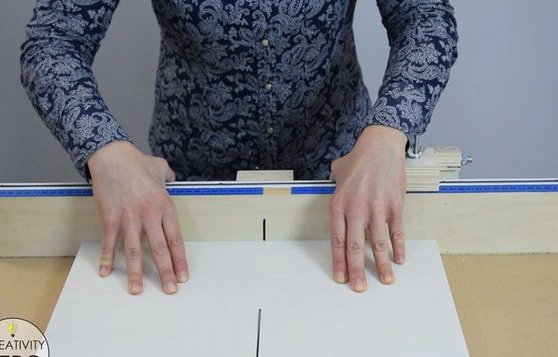
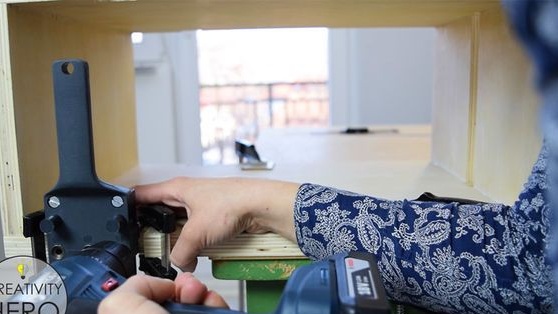
Step Five Cut out the grooves for attaching the legs
In the countertop, as well as the frame, grooves will be cut into which the legs will go. They should be the same width as the legs. First we mark everything up, then cut out the squares. For cutting, the author used his circular saw, although it is easier to do this with a hand tool, using, for example, a hacksaw.
When you cut out the grooves, sand them well, remove the nicks. The legs should enter the grooves tightly, then they will be fixed securely. Make sure that they lie flat, otherwise the table will be crooked.

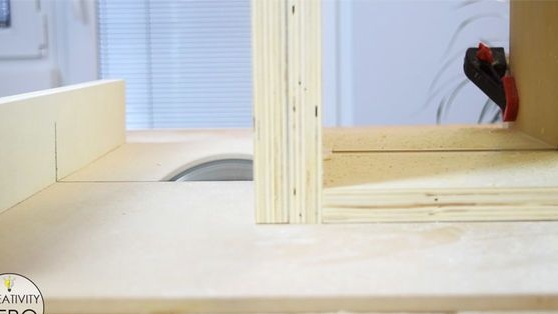
Step Six Leg preparation
The author decided to fix the legs using wood glue and dowels. We drill holes in the grooves, as well as in the legs themselves. Next, grease the dowels with glue and hammer into the groove of the countertops and into the grooves of the frame. As a result, one leg is attached in three places, which allows you to get a pretty solid design.
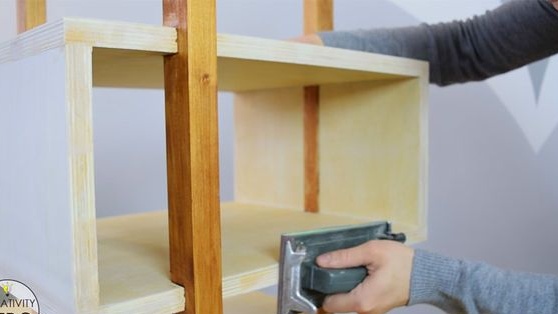
Seventh step. Fasten the legs
Apply glue to the grooves and dowels, and fix the legs. Just slowly, with light blows of a rubber hammer, we drive them into their places. It is important that your legs after installation come out the same length. However, if you made a little mistake, it’s not scary, the legs can still be filed. At the end, we compress the whole thing with clamps and let the glue dry completely.

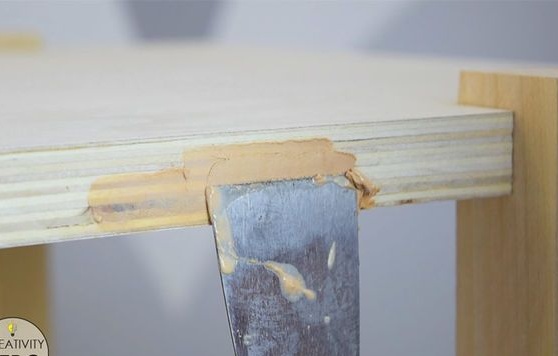
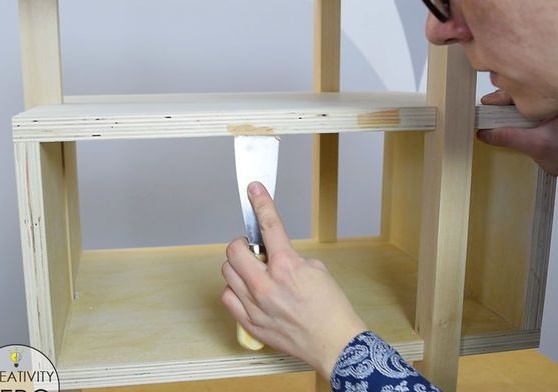
Step Eight. Putty table
To hide all defects before painting, the author uses hard putty on wood. Choose the desired color and cover all the defects of the tree, and you can also process joints. By the way, you can make putty yourself, just mix wood sawdust with wood glue. When the putty is completely dry, thoroughly sand the treated areas. The surface should be perfectly smooth. Here you will come to the aid of small sandpaper.
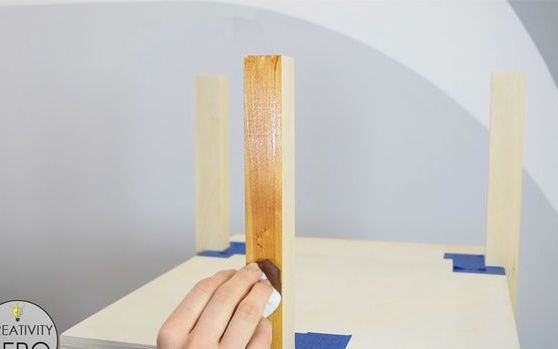
Step Nine. The final work. Painting
To make the table look good, it can be painted. The author decided to soak the legs with stain. We use a brush, but before that, cover with the masking tape the joints of the legs so as not to accidentally smear the tabletop and shelf with paint. When the stain dries, the legs can be ground with fine sandpaper and varnished.
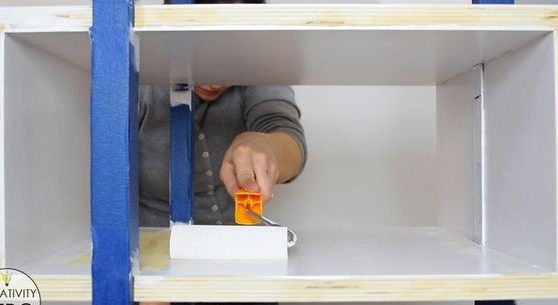
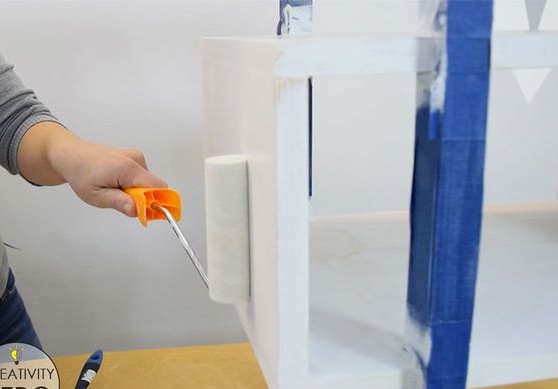
As for the countertops and shelves, their author decided to paint in white. Apply the paint, wait until it dries, and grind it with fine sandpaper. Then it will be possible to apply varnish or just another coat of paint.
That's all, the table is ready! Despite the presence of only three legs instead of four, it is quite stable. It looks beautiful, but it’s easy to assemble.