
Thanks to epoxy, the possibilities in terms of self-production of various interesting things have greatly expanded. Indeed, in fact, epoxy is a liquid plastic, or even better, because it is not afraid of high temperatures, acids and other things.
Due to the fact that today epoxy can be bought in large volumes, it began to be actively used in the manufacture of furniture and even cast floors.
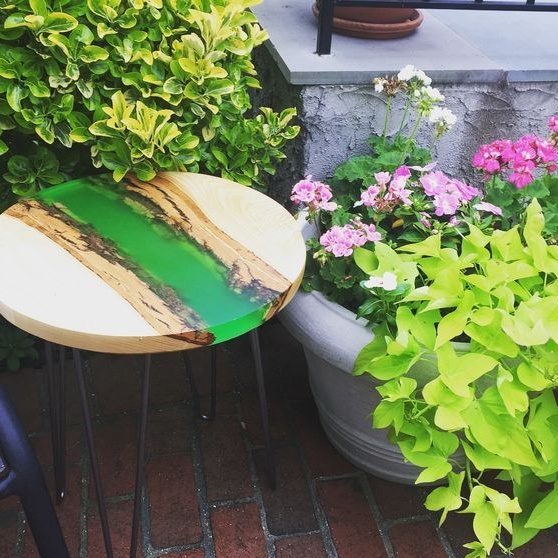
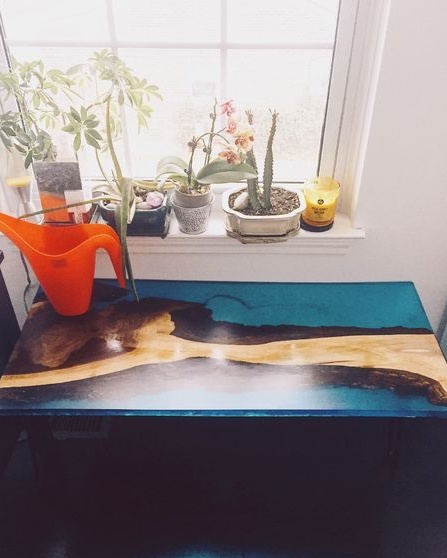
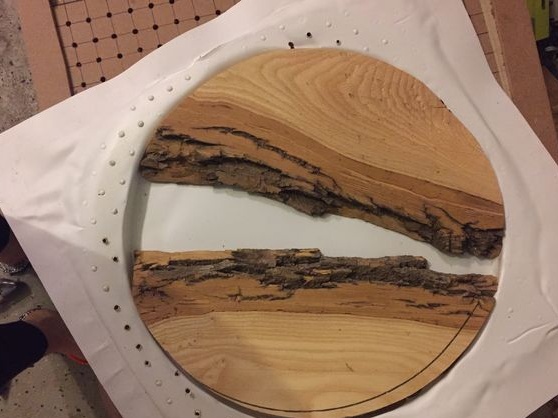
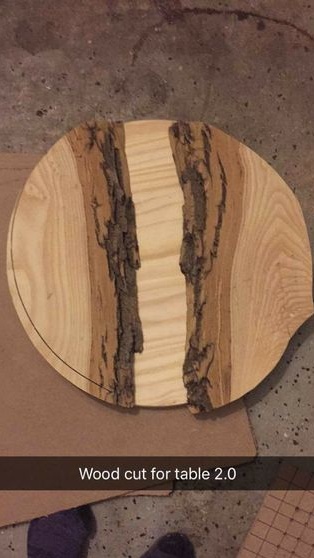
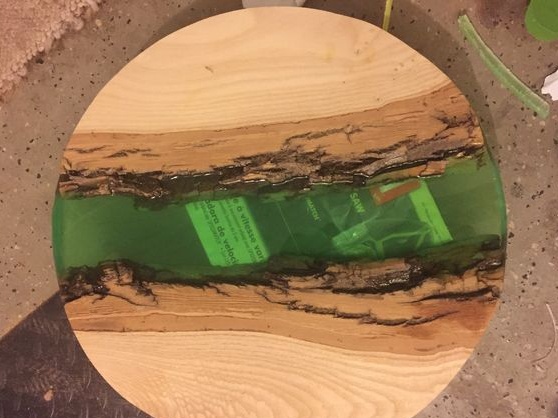
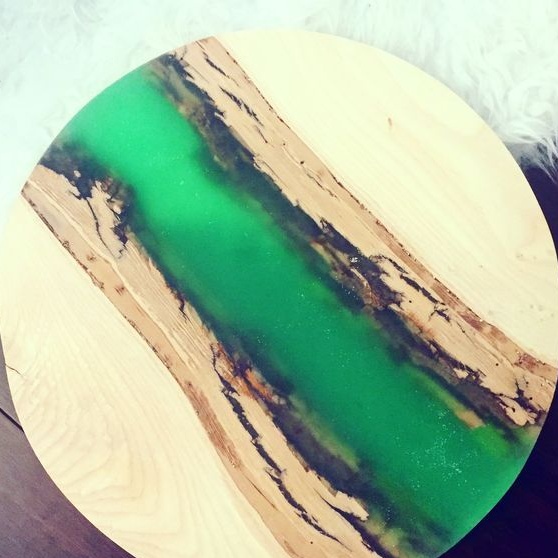
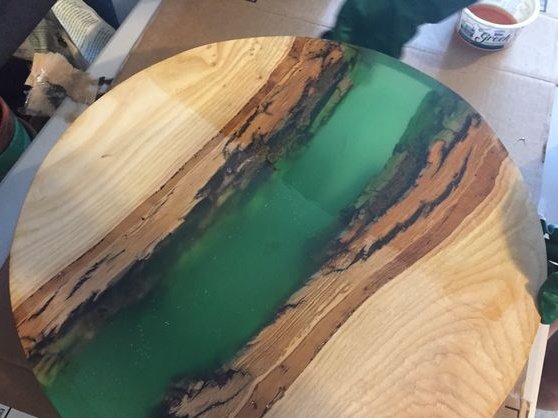
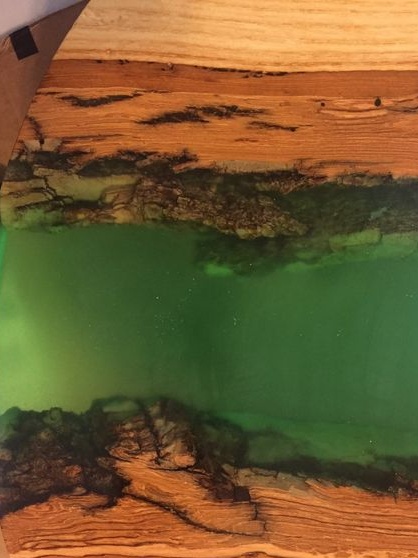
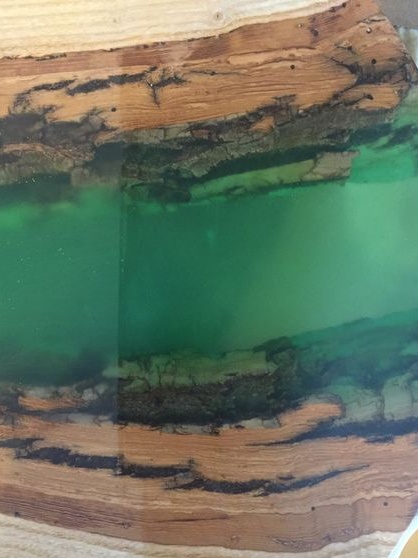
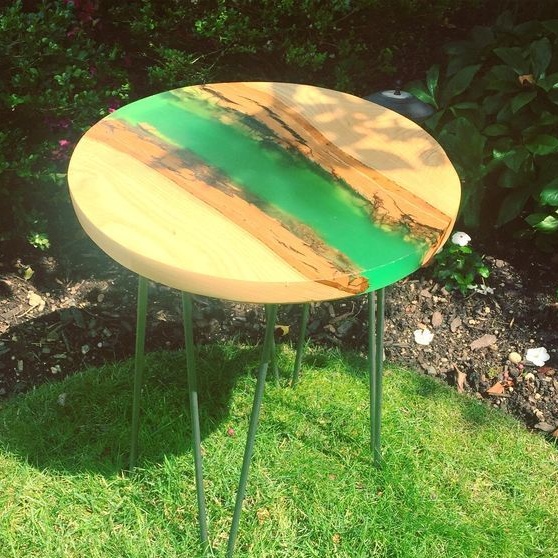
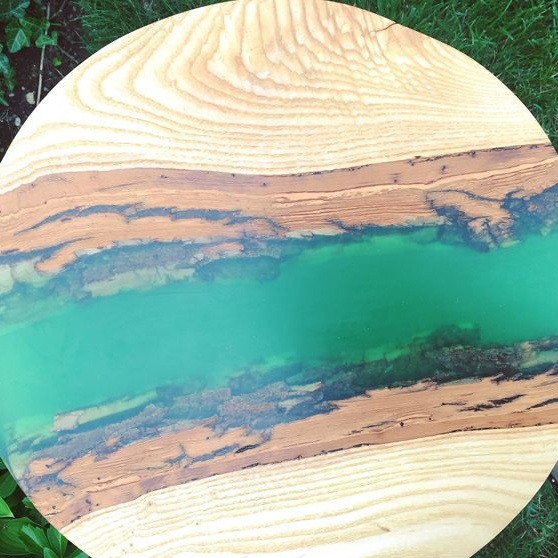
Today we will look at a simple example of how you can make a cool little table with a pattern resembling a river. By this method, you can make a chair. To create a beautiful “coastline”, the author decided to use the bark of the tree left on the boards. Under epoxy, it looks very impressive.
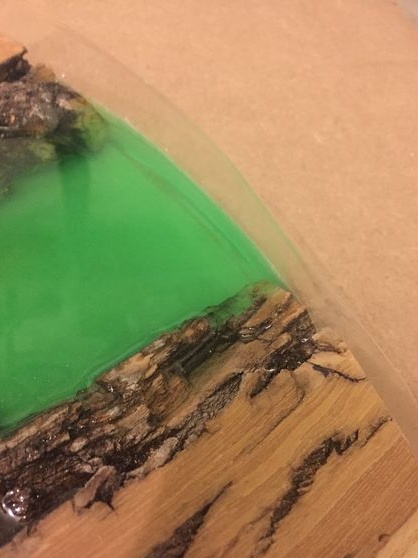
As for the "water", it was decided to paint it green, it resembles something exotic. You can also, if you wish, make a lake or other, which is enough for imagination.
The author used the following materials and tools to make the table:


Material List:
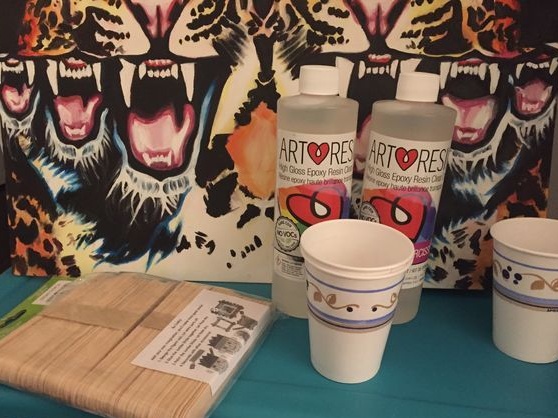
- epoxy resin (and, of course, hardener);
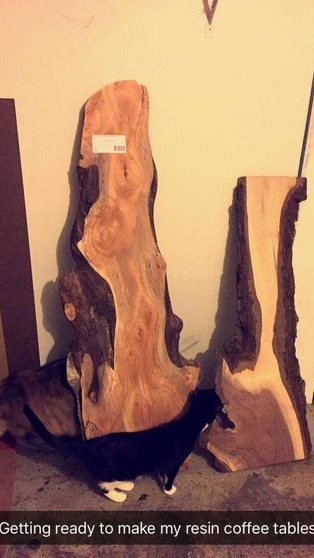
- Uncut board (which is with bark);
- dye for the resin of the desired color;
- varnish;
- steel rods and metal plates for the manufacture of legs;
- self-tapping screws or screws.
Tool List:
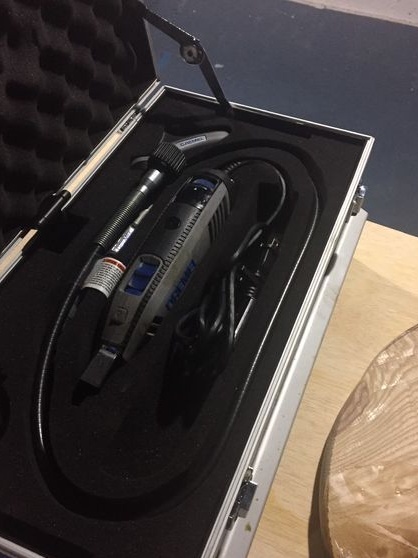
- sandpaper of various grain sizes;
- jigsaw or other tool with which you can cut the board;
- screwdriver for screws;
- (cut steel rods for legs);
- welding;
- ;
- brush;
- ;
- polyurethane;
- the finished form (or a vacuum molding machine, as well as a sheet of plastic).
The process of making a table:
Step one. Project plan
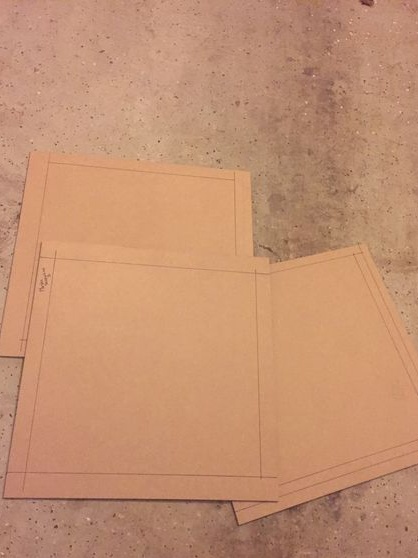
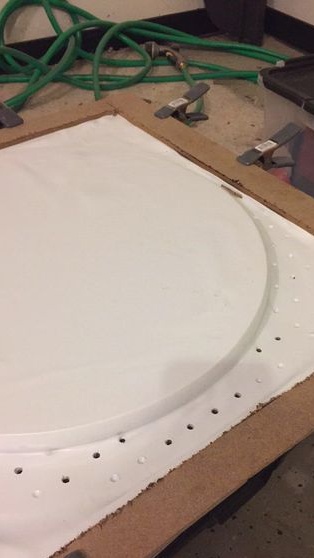
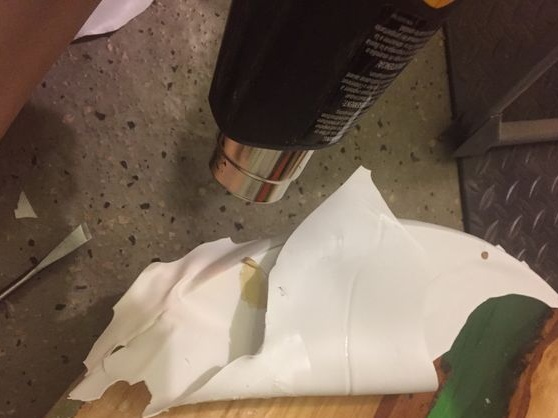
The procedure is as follows. First of all, you will need to make a round shape. In principle, you need to figure out what to make the base from, so that the epoxy does not stick to it, as well as the formwork. The author decided to make himself a mold out of plastic, but for such purposes a vacuum moulder will be needed. It is not difficult to do it, you just need to spend time on it, but the form will turn out good, and it can be used in the future.
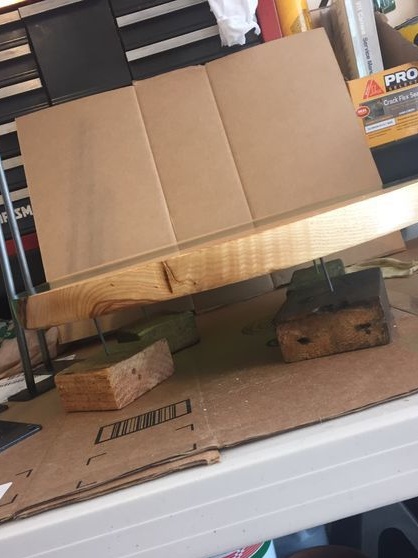
Next, you will need to cut off two pieces of the board and round them so that they fit in the mold. The bark of the board is located inside, as a result, this part will be the future "river bank". Well, then you can fill it. After pouring, it remains to grind the surface, cover with varnish or polyurethane, as the author, as well as make and screw the legs.That, in fact, is all.
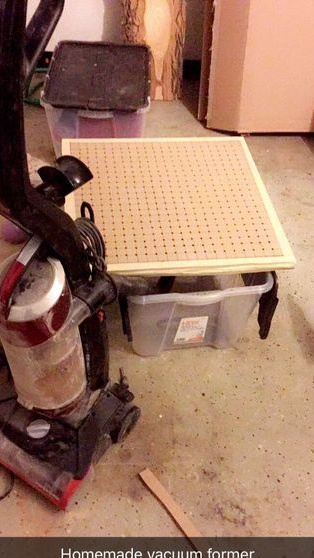
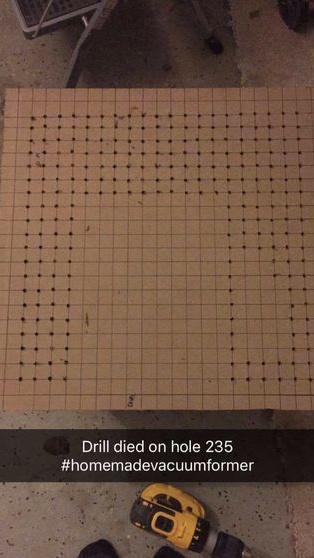
Step Two Vacuum Moulder Making
Vacuum molder allows you to make any form and much more interesting. True, you need to buy plastic for it, but still it pays off. The vacuum moulder consists of two frames, the most important is the lower one, there are holes in it through which air is sucked from the working area. For exhausting air for domestic purposes, you can use a conventional vacuum cleaner.
Well, the upper frame is needed in order to press a sheet of plastic on top and close the camera.

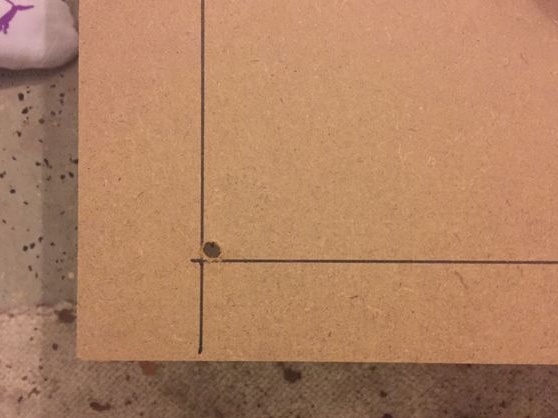
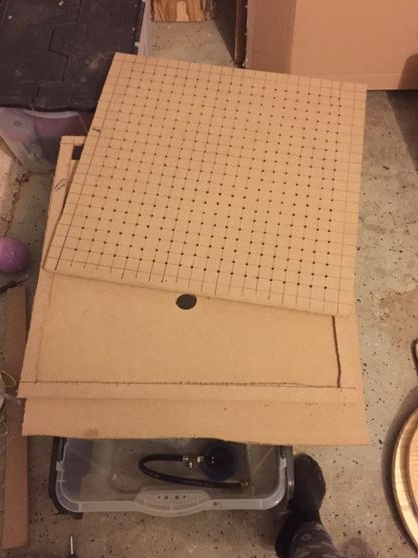
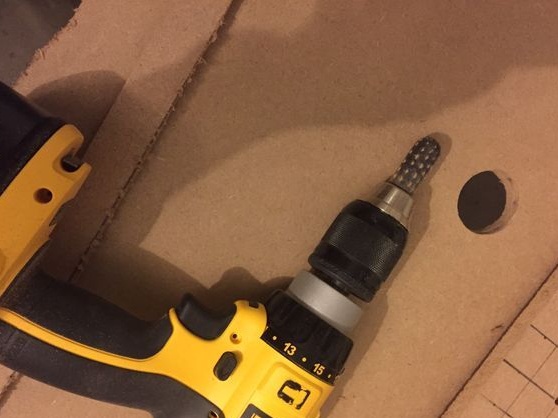
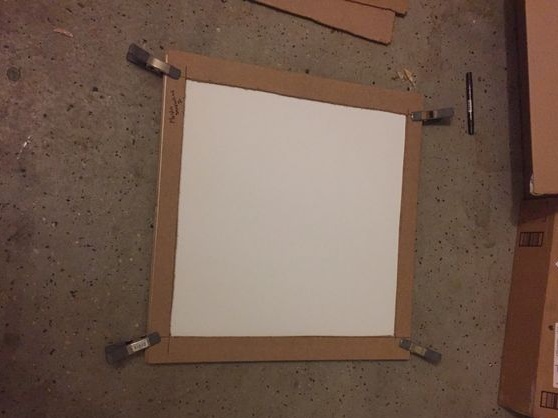
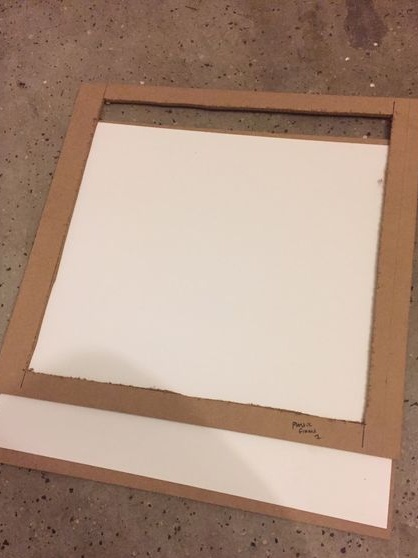
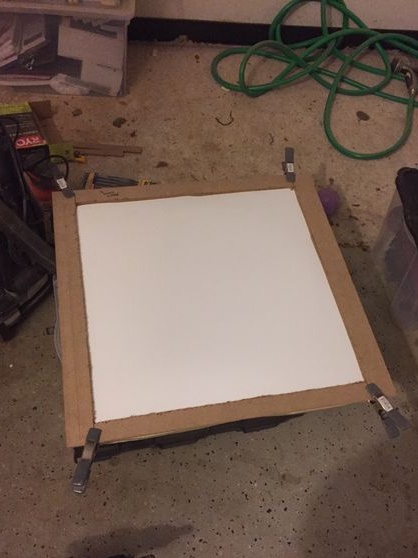
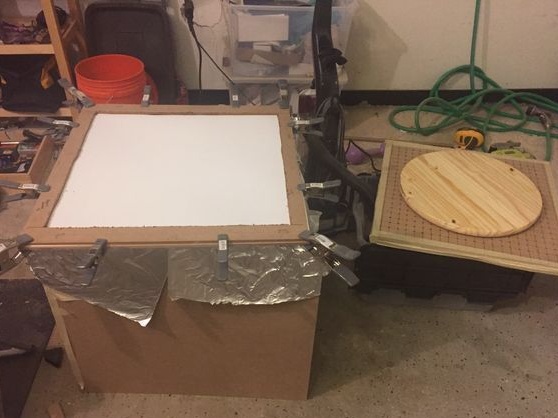
Vacuum moulder is not difficult, you will need thin plywood or fiberboard, as well as boards. For the lower frame, two sheets of fiberboard will be needed, cut them into two squares and fasten to the board so that a camera forms between them. Further, in the part that will be the “desktop”, we drill many holes at an equal distance. In the opposite sheet, we drill one hole for connecting the hose from the vacuum cleaner.
For the upper part, you can assemble a frame of four parts, so that it simply presses the sheet.
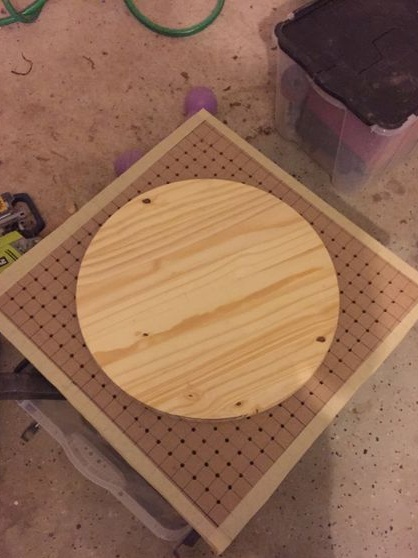
Forming is as follows. We put a round object on the “desktop”, the author used a round timber made of wood. Next, we heat the plastic sheet in the oven or from the heater and put it on top of the desktop and the round timber. Quickly press the plastic on top of the frame and turn on the vacuum cleaner. Well, then the plastic will fit snugly to the round log and around it, as a result, you will have a finished form.
Step Three We prepare the wood and lay in the mold
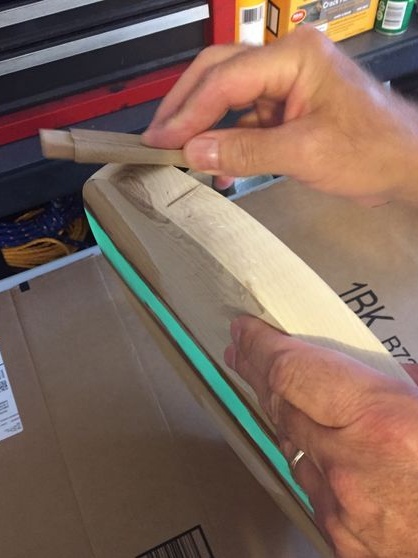
Take an uncut board and cut two pieces of equal length from it. Then round the boards so that they fit in the shape, the bark of the board should be located inward. When you reach the desired result, carefully sand the boards so that there will be less work. Make them smooth and smooth to the same thickness using sandpaper or a grinder.
Step Four Pouring and grinding
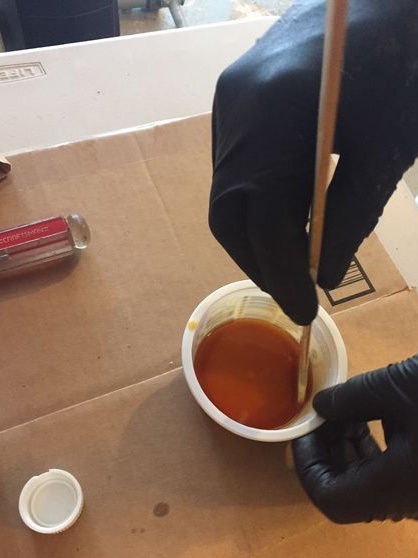
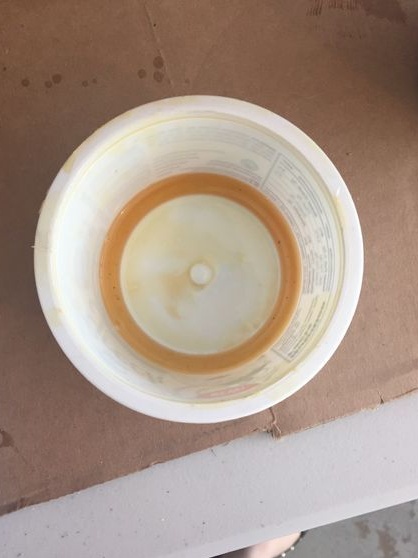
First of all, do not forget to put oilcloth or other material on the bottom of the mold, to which the epoxy does not stick. You can also just grease the mold with wax or other grease. Then put prepared trims. You can breed the resin. Mix it in the exact dosage with the hardener, mix thoroughly and carefully pour into the mold. Do not forget to add dye to it.
Now it remains only to wait, usually the epoxy resin dries for 24 hours, but since there is a lot of it, it may take longer. So it’s better to leave this whole business of the day in two.
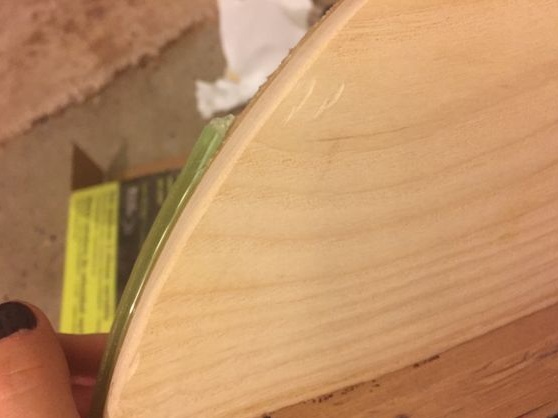
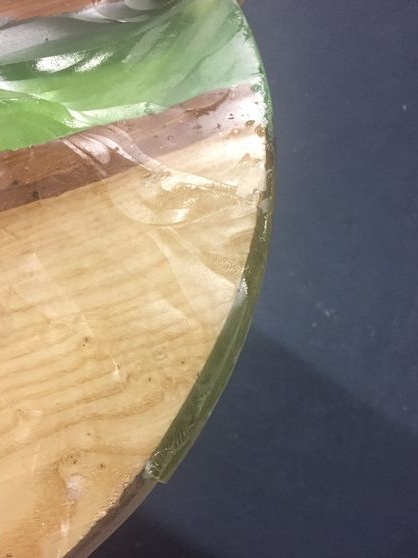


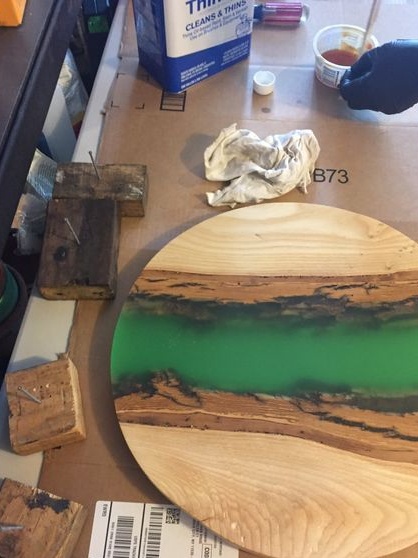
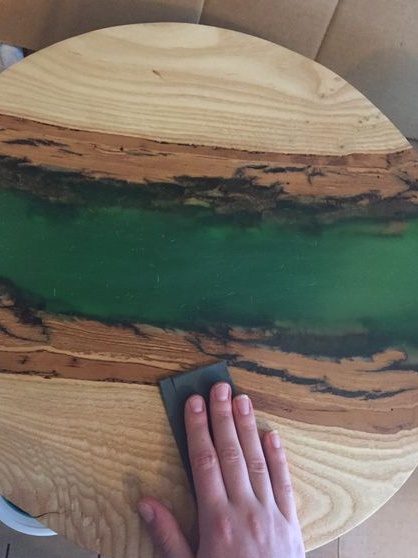
When the glue dries, the product can finally be removed and see what happened. We take sandpaper and proceed to grinding. First, grind the product in a circle to smooth the circle. As for grinding planes, it’s convenient to work with an orbital machine, the author used nozzles with a grain size of 100, 150, 220 and 320.
Step Five Apply varnish to the table
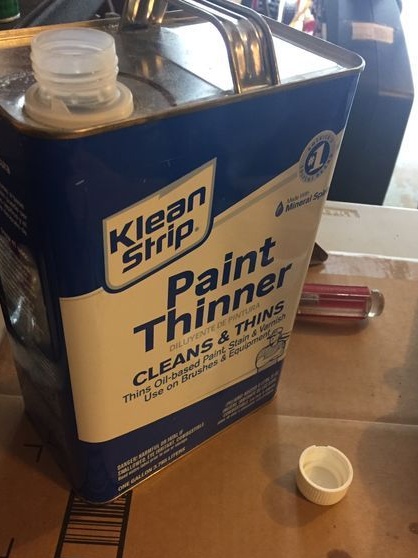
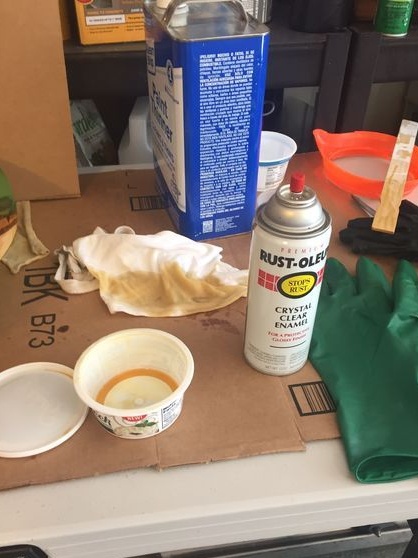
After polishing the table, the surface of the resin will become a bit dull, but it's not scary, the varnish will return its former transparency. Instead of varnish, the author decided to use polyurethane. Before applying, be sure to manually grind the entire surface with 320 grit sandpaper so that the coating adheres well to the surface. Polyurethane will need to be diluted to a liquid state, this is done with the help of mineral alcohols.
We apply the first layer with a brush and let it dry completely. After the coating hardens, we grind the whole thing with 420 grit sandpaper and apply the final layer. At this stage, work with the countertop is completed.
Step Six Table legs
To make the legs, the author needed steel rods. They should be so long that everyone can be folded in half. The result is very strong legs with a normal base for support. However, the legs, you can make anything and from anything at your discretion.The most important thing is to ensure that they are strictly the same length.
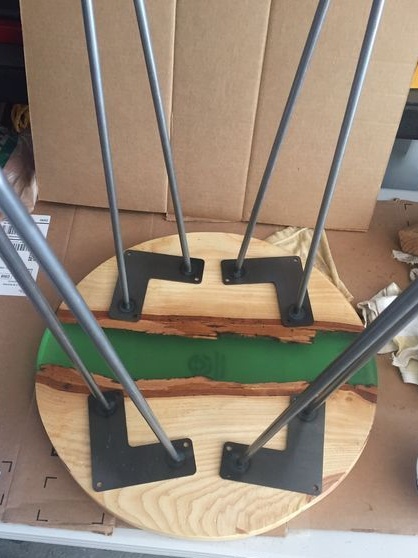
To fix the legs you will need metal plates. The author carved four pieces in the form of the letter "G". These plates will need to be welded to the legs, but before that, do not forget to drill mounting holes in them. We weld the plates and fix the legs into place. You can fasten it quickly using self-tapping screws, you can use screws for wood, but in this case, holes are drilled under them. Set the table on a flat surface and make sure that it stands level and does not swing.
At the end, the legs can be painted; the author used green paint to suit his own style.
Seventh step. conclusions
If you do not take into account the manufacture of a vacuum molder, then the stool is assembled quite simply and quickly. The main catch here is the manufacture of a round shape. However, if you think carefully, you can find easier ways to solve this problem.

The table turned out beautiful, unique, and it’s even difficult to say that it was made do it yourself.