
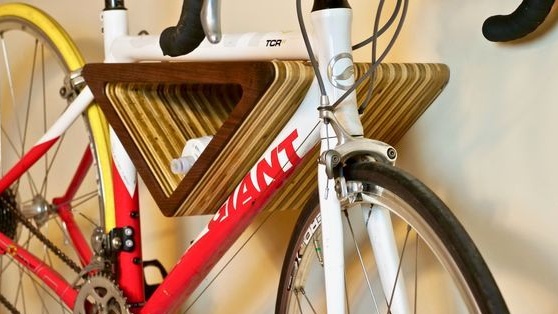
If you are a cycling enthusiast, you probably have a problem with storing your bike. If you put it in an apartment near the wall, it often falls, scratches the wall, and you yourself do not so rarely stumble over it. There is a way out of this situation, you can hang your own bike on the wall. Thanks to this, the bike will not only no longer hang you, but you will also win extra space in the room.
In addition to the hanger, the manufactured fixture also has the function of a shelf, so that you can put all of your bicycle piers there.
According to the author, for making this homemade not many materials and tools are needed. A ready-made template is attached to the article, according to which you can cut out the necessary details, and then you just have to assemble a homemade product.
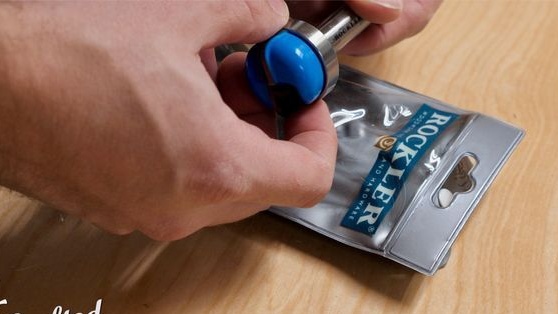
Materials and tools for the manufacture of hangers, which the author used:
As for tools, then you need a very narrow assortment, but if you do with the bare minimum, then there should be a jigsaw, and sandpaper. Of course, a more professional solution would be to have an electric jigsaw, stock up on a good amount of clamps and so on.
Material List:
- plywood;
- dowels;
- glue for wood;
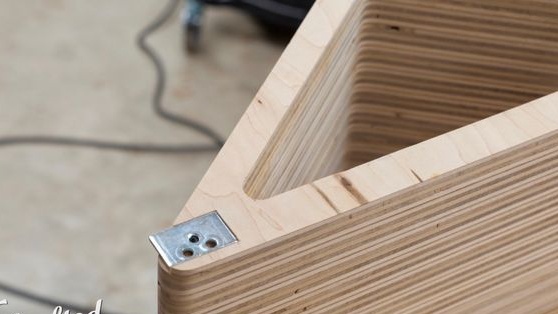
- hinges for attaching the hanger to the wall (metal plates);
- screws and other little things.
Hanger manufacturing process:
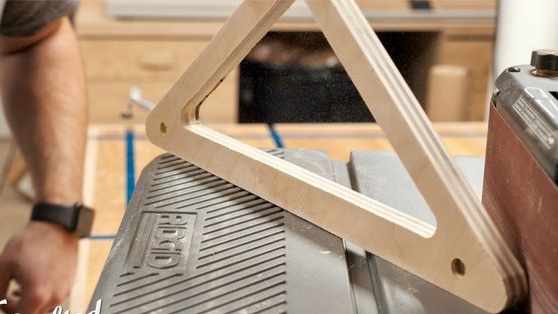
Step one. Cut the first triangle
First of all, you will need a printer, print a template on it, which was attached by the author. If there is no printer, it’s not scary, just arm yourself with a ruler with a pencil and you can easily draw the desired project. In addition, when making a template yourself, you can choose the necessary angles of the triangle so that the frame of your bike specifically fits it perfectly.
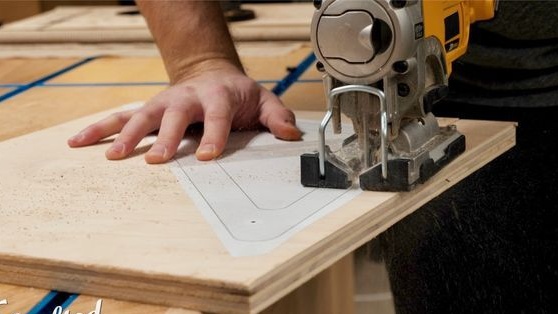
When the sheet with the drawing will be, glue it to the plywood, well, or cut it out of paper, and then circle, as it suits anyone. This figure will then need to be cut, the easiest way to do this is with a jigsaw.
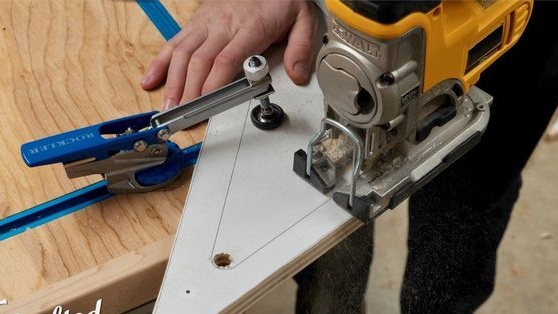
By cutting the first triangle, you can cut the following. As for the total quantity, it is already necessary to proceed from the thickness of the starting material. You need to achieve such a figure so that you can safely hang the bike on it and there is a small margin.
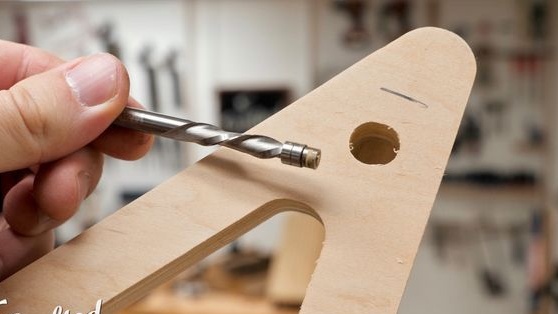
Step Two Drill holes
The holes in the triangles are needed for two purposes.Firstly, thanks to them, the entire structure is assembled using dowels. And secondly, the holes allow you to center all the other triangles. The holes are drilled in the places where they are indicated on the template. Drilling them is not difficult, it can be done on a drilling machine, as well as with a hand or cordless drill.
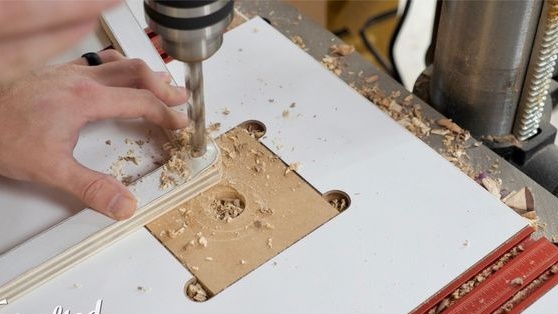

When the holes are ready, their edges will have many burrs. These defects must be eliminated, otherwise the triangles will not have to be adjacent to each other. It’s easy to remove them, you can use ordinary sandpaper. More advanced ones may use a power tool such as a grinder.
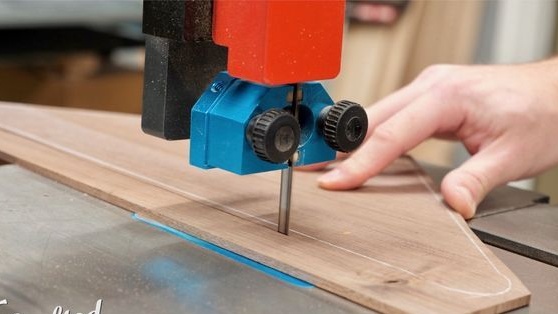
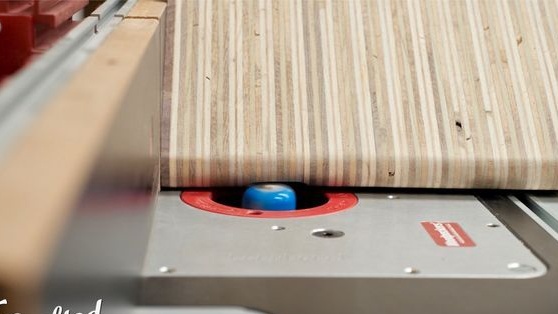
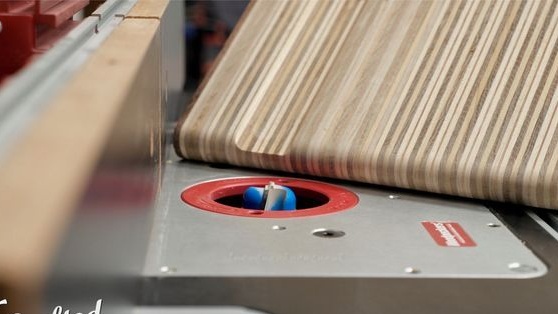
Step Three How did the author cut many triangles?
If you need to make a lot of triangles, then manually making them all the same will be problematic, and there will be a lot of work. The author used a fairly modern solution for such purposes - this is a router. Such a device can use an already made triangle as a source and precisely cut a copy of it.
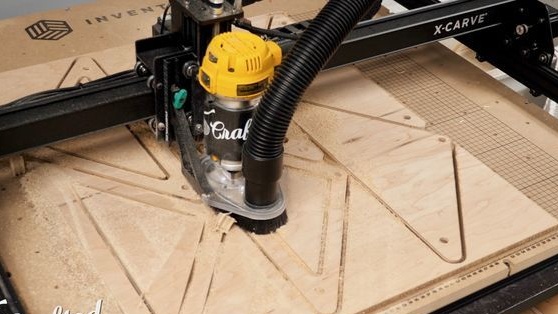
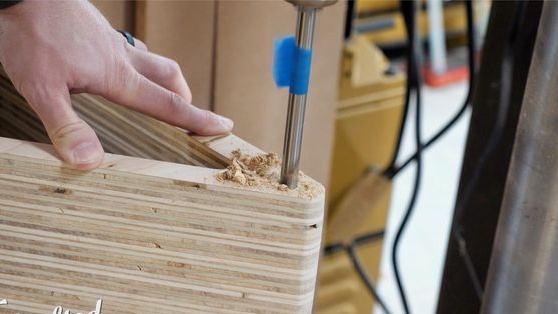
However, you can cut it out manually using a jigsaw. Then you just need to make some efforts to make all the triangles the same by grinding. In any case, after cutting, you have to grind the edges to remove burrs.
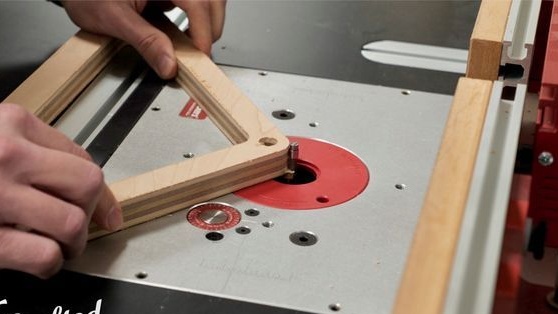
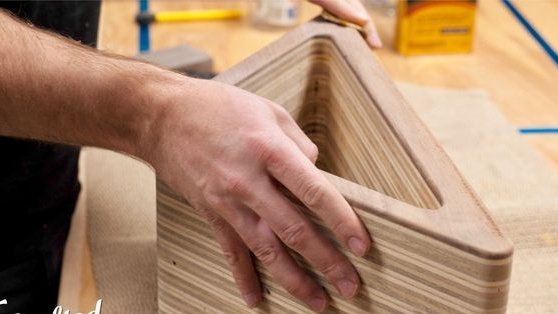
Step Four Assembly
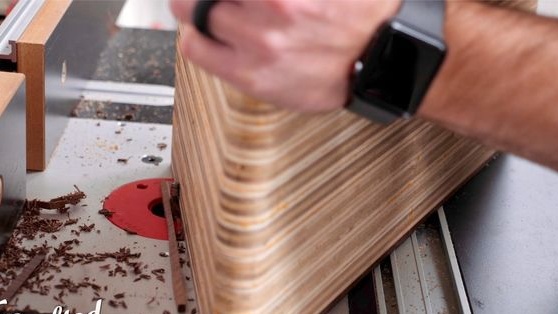
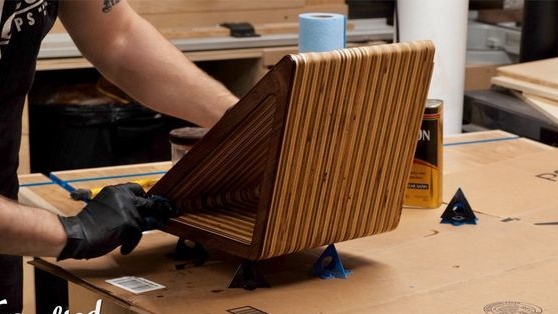
Using dowels and glue for wood, we assemble the structure. We apply glue to each layer, insert the dowel and carefully press down the triangle. When you assemble the entire structure, it must be pulled together with clamps to squeeze out excess glue and remove all possible gaps between the triangles. However, it is desirable to compress the entire structure as it is assembled, since the glue hardens quite quickly.
Step Five Veneer Finish
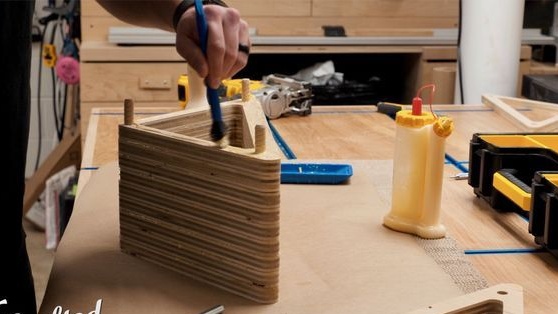
This step is not necessary at all, it is only a matter of aesthetics. The author decided to finish his offspring with veneer. To do this, take the desired material and cut off another triangle, which will be the front part. Now the homemade product will look rich and at first glance no one will say that it is made of plywood.
If you use individual parts, that is, three "pieces", then they need to be cut to the desired length at the right angle, and then glued. After gluing, the surface is ground to one level. When the glue dries, sand the lining, make it flush with the main structure.
In order not to bother. You can just paint the front.

Step Six Grinding and manufacturing frame grooves
Next comes the most tedious and long manufacturing process - this is grinding. Even if you arrange all the triangles perfectly evenly, it is still unlikely that they will be able to glue them all together, so in any case you have to align them. Quickly, this is done using a manual belt sander. Orbital is also suitable. You can do the work with your hands, fixing the sandpaper on the board.
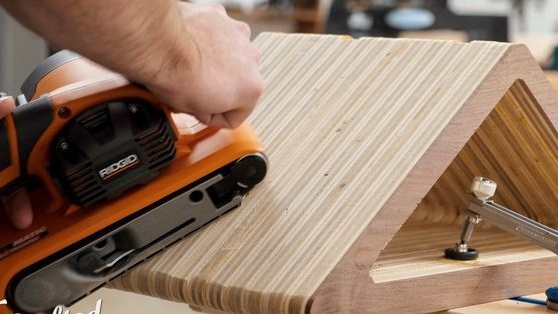
In addition, in the middle of the hanger you need to make a groove, thanks to which the bicycle frame will be securely fixed and will not slip. You can grind it using a router. But there are also manual methods, for example, the same emery paper fixed on a suitable object.
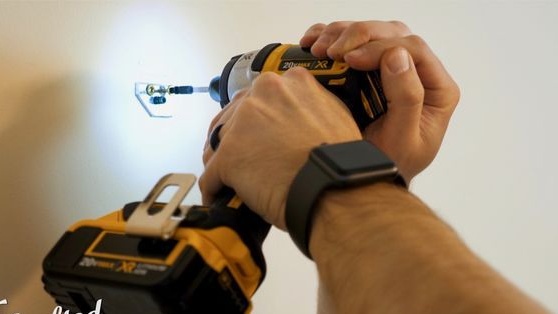
Seventh step. Drill holes for mounting studs
The entire structure must be securely fixed, as it must support the weight of the bicycle. Theoretically, usual external loops are enough here, but it’s best to drill holes in the attachment points and install long steel studs in them. The studs themselves will need to be glued, then you need good glue, it is better to use epoxy. On the other side of the studs there should be hinges, by which the structure is already attached to the wall.
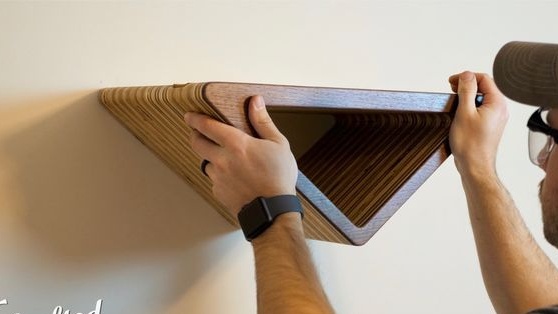
Step Eight. Final refinement
At the end, you can bring the surface to a perfectly smooth state and then polish it with polish, well, or use some other impregnation.
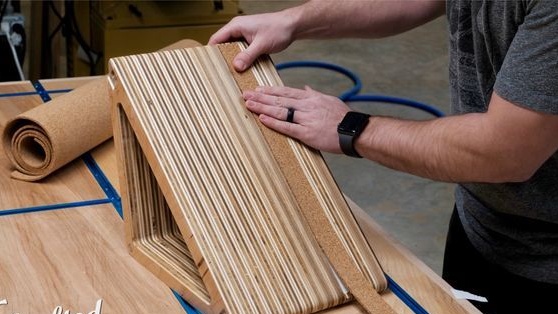
In addition, the author attaches a tape from the cork to the hanger, this will allow to securely fix the bike, and also save the hanger from damage. The tape is attached very simply, for this double-sided tape is used.
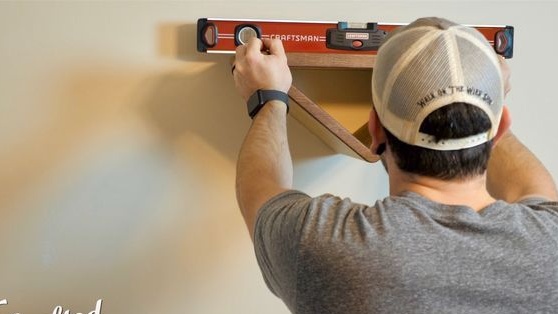
Step Nine. Fasten the hanger to the wall
We drill holes in the right places, for this we use the construction level so that the bike hangs evenly.Now you just have to fix the brackets, or in your own way fix the hanger. For reliability, it can be fixed at three points.
Step Ten conclusions
That's all, the bike hanger is ready. It looks stylish, takes up little space. Now the bike will always be in its place, and will not bother anyone.