To power the manufactured rechargeable LED lamp, description of which given on the website, a wind generator based on a DC motor (24v / 0.7A) with permanent magnets has been manufactured and is currently being used. The wind generator, under average weather conditions, depending on the wind speed, provides an output voltage of 0.8 to 6.0 volts and a current of up to 200 mA. Subsequently, a stabilized voltage converter converts this DC output voltage from the wind generator into the necessary DC voltage, sufficient to charge the battery or supply the required load.
The proposed wind generator is simple to manufacture, does not require accurate calculations and manufacturing of complex parts, the acquisition of expensive components. In addition to the variant considered in the above article, such a wind generator can also find other applications. We use it where a small amount of electricity may be needed to power a low-power device. For example, for the operation of a compact weather station, monitoring the water level in a tank, for emergency lighting and controlling the automation of a greenhouse. During the day, in the presence of wind, the device’s battery with a supply receives free wind energy, and at the right time gives it to the consumer as necessary. Of course, the wind energy that comes to us is not great, but it comes to us almost constantly. And if you make a device for its accumulation and use do it yourself, from improvised materials, then this energy is free, and the device, in addition, will be economical, compact, mobile and non-volatile.
This article proposes to make a wind generator from a DC motor.
Making a wind generator.
1. The choice of electric generator.
For use as a low-power generator for the device, you can use the finished stepper motor without alterations. For maximum performance, if possible, it is advisable to use an engine with the smallest possible sticking of the shaft and with as many steps as possible per revolution. A variant of altering the electric motor or starter into a generator is possible. Various rework options are described on the Internet.
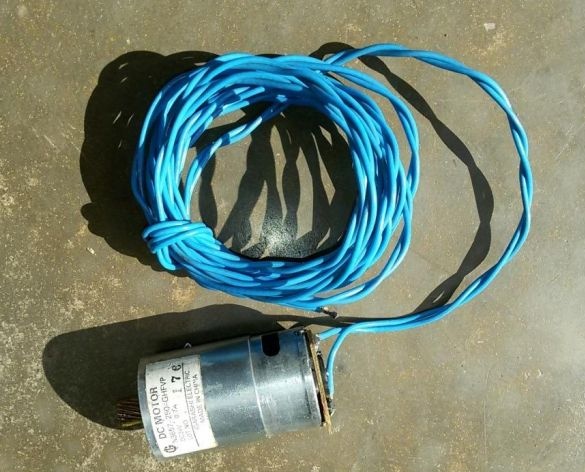
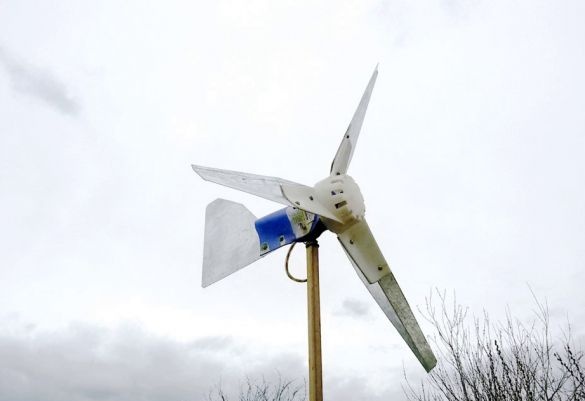
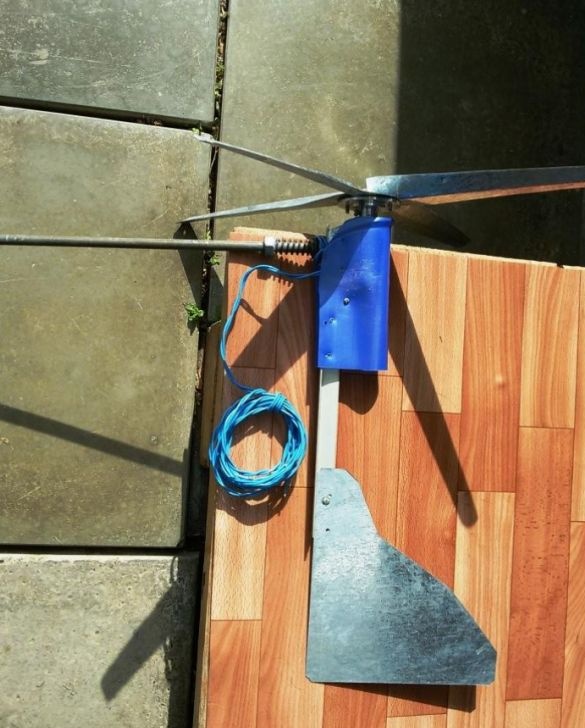
In our case, the simplest option was chosen.As an electric generator, we use a DC motor (24v / 0.7A) with permanent magnets, which does not require modifications. It has the property of reversibility - when its shaft rotates, voltage appears on the motor contacts. This electric motor was removed from a morally obsolete calculating machine.
2. The choice of propeller design.
In the first version of the design of the wind generator, to simplify manufacture, the plastic propeller, with a suitable landing diameter, from an industrial fan was taken as the basis of the propeller. To increase the torque on the generator shaft, the length of its blades was added with thin-walled metal plates with a profile close to the original.
However, this propeller design failed. In strong winds, due to the low stiffness of the plastic propeller, the metal lining of the blades deflected back and hit the structural stand, which eventually ended in failure.
When working out the first option, I decided on the design of the technological profile of the blades and their length. These propeller parameters affect its sensitivity to weak winds, and it prevails. It is necessary that with a little wind, the propeller can overcome the sticking of the shaft (attraction of the stator magnets) and begin rotation.
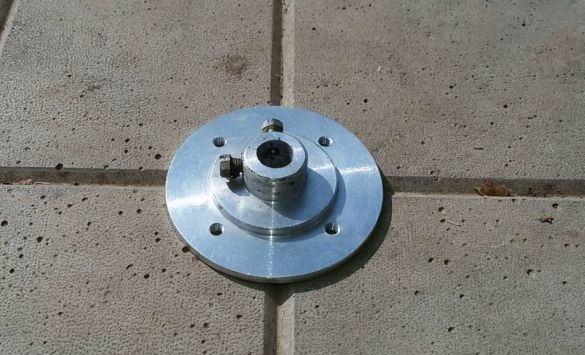
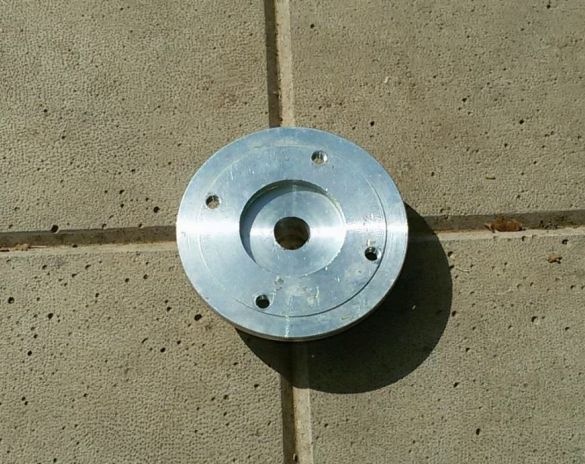
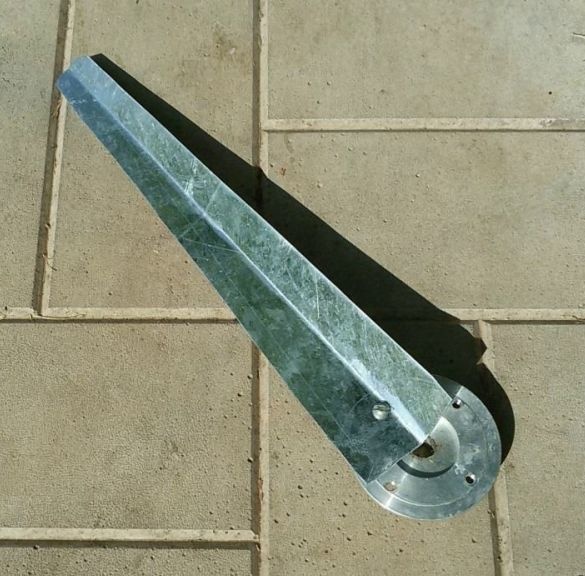
3. The manufacture of the propeller. We select or manufacture a hub for installing and attaching propeller blades.
In our case, it is an aluminum flange (4 mm thick, outer diameter 50 mm) with an axial bore along the diameter of the engine output shaft (8 mm - a gear wheel is pressed on the shaft, 10 mm long) and four evenly spaced M4 holes for mounting the blades. To fix the hub on the shaft, install one or two M4 screws in it (see photo).
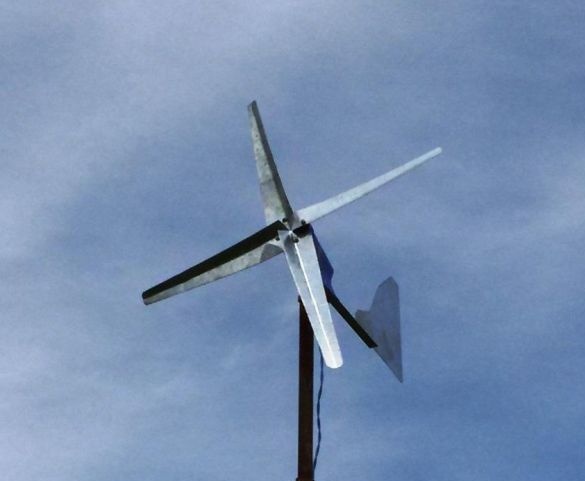
4. Production of propeller blades.
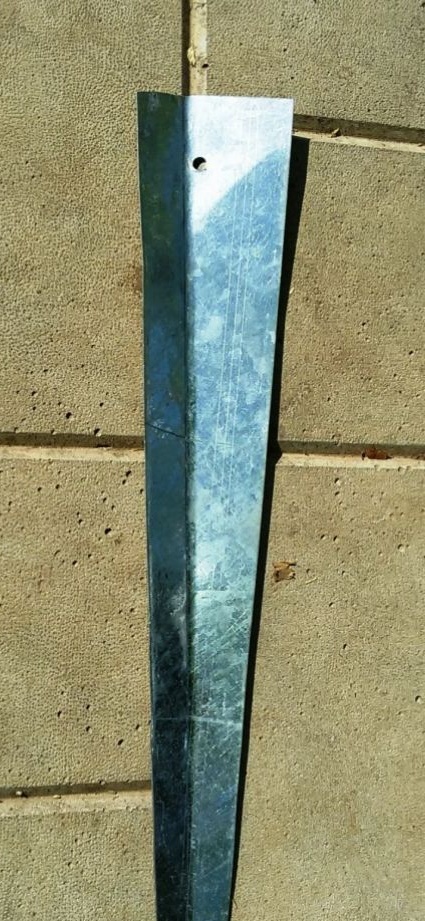
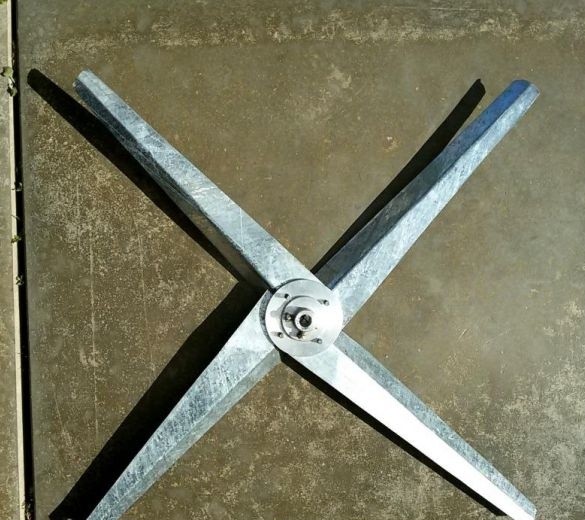
From a galvanized sheet with a thickness of 0.4-0.5 mm, we cut 4 workpieces in the form of an isosceles trapezoid: height 250 mm, base 50 mm, upper side 20 mm. We bend the blades in half along the height of the trapezoid (creating a stiffening rib) at an angle of 45 degrees (see photo). We blunt sharp edges and corners (for our safety).
5. Installation and fastening of the propeller blades.
We position the blade on the hub so that the bend point on the base is above the axis of the hub, and the adjacent half of the base is above the mounting hole of the hub (see photo). We mark and drill a hole in the blades for an adjacent fixing screw, 4.2 mm in diameter. We fix the propeller blades one by one with the screws.

6. Propeller balancing.
We perform static balancing of the propeller. For this, we install and fix the propeller on a calibrated (polished) bar with a diameter equal to the diameter of the engine output shaft. We lay the bar with the propeller on two horizontally calibrated at the level of the ruler (pattern surfaces) located at the ends of the bar. In this case, the propeller will turn and one of the blades will go down. We turn the propeller a quarter of a turn and if the same blade has again lowered down, it needs to be lightened by cutting a narrow strip of metal from the side of the blade. We repeat a similar operation until the bar with the propeller does not stop turning after installation in any arbitrary position.
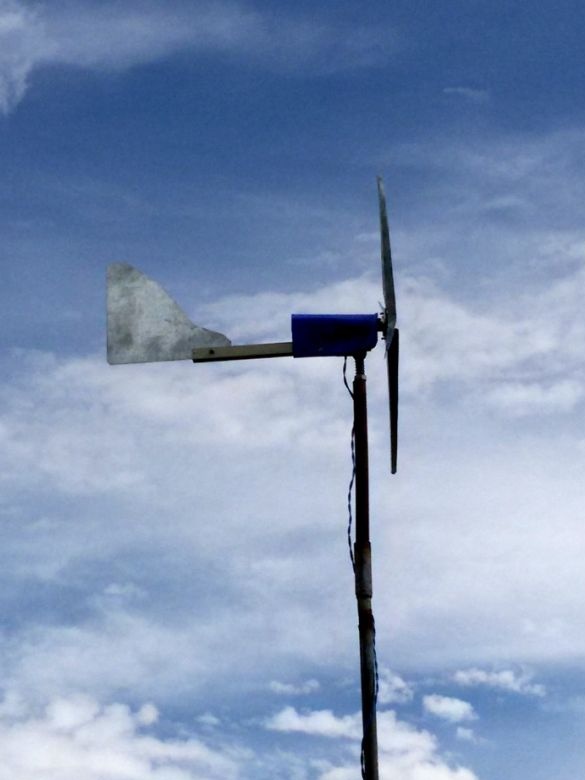
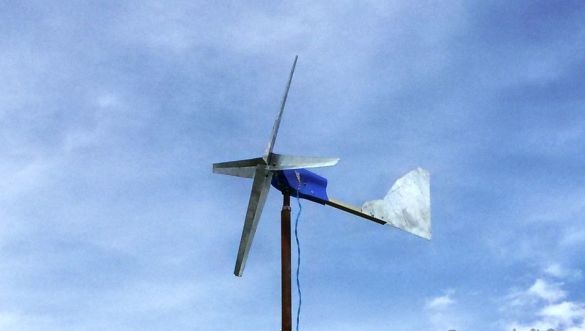
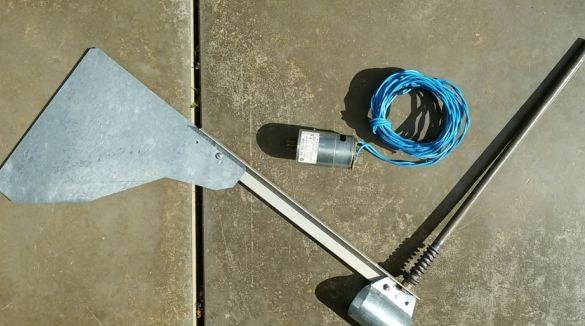
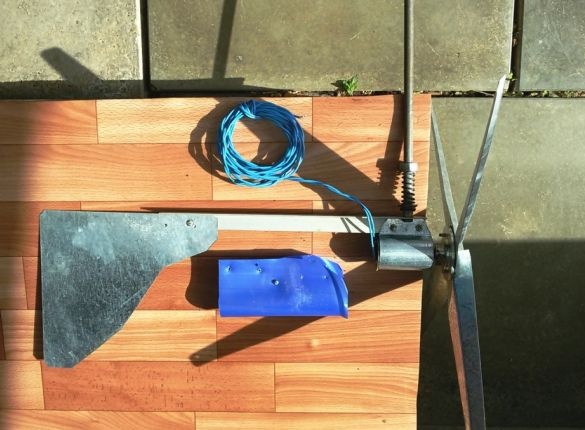
7. Production of the vane part of the wind generator.
We cut the aluminum square 20 x 20 mm to a length of 250 mm. On one side of the square, for one or two screws (rivets) we install a vertical stabilizer of the direction to the wind.
On the other side of the square, we install and fasten a clamp on two screws to secure the engine - generator. The clamp and stabilizer are also made of galvanized sheet with a thickness of 0.4-0.5 mm (anticorrosive material used is possible). The length of the clamp is equal to the length of the engine. The length of the stabilizer is approximately 200 mm, the shape is to the taste of the manufacturer.
On the lower flange of the square, in the middle of the clamp, tightly fix the rod (it is desirable to provide for its corrosion protection) to install the structure in the tube of the wind generator strut. The best option for determining the location of this rod is to determine the center of gravity of a pre-assembled and completely assembled structure, followed by drilling holes for fixing the rod there.
8. Assembly of the wind generator.
We install the engine - generator in place and fix it with a clamp. We fix the propeller to the motor output shaft. To protect the generator from atmospheric precipitation, we cut out and install a protective fence from a suitable plastic bottle. Fasten it with a screw.
9. Debugging a wind generator.
Pre-install the assembled wind generator in an open area in the direction of the wind. We form a variable profile of the blades. We bend the bent part of the blades so that at the ends of the blades (narrow part) the amount of limb is 10 ... 15 degrees (minimum resistance to air at maximum peripheral speed on the blades). To the center of the propeller, the magnitude of the limb on the blade varies to 30 ... 45 degrees. With an increase in the bending angle, the sensitivity of the wind generator to the wind increases, but because of the increase in resistance, the generator speed decreases, which leads to a decrease in output characteristics. Therefore, by changing the angle of the limb of the blades we select the optimal profile in the wind.
10. Installation of a wind generator.
To install a wind generator, a stand of the required height (preferably above the surrounding trees) is made from a pipe (water) and fixed to the object. The mounting rod of the wind generator must rotate freely in the pipe rack. Before installation, a sequential washer is sequentially put on the wind generator shaft - an intermediate washer to facilitate rotation, a spiral spring to smooth out the residual imbalance of the propeller, a protective washer to reduce the ingress of precipitation into the rack tube (a suitable size nut is installed in this design).
The wire from the generator is fixed mechanically from the contact breakage, descends along the rack with a margin in length for possible twisting around the rack and a mandatory loop for dripping drops from precipitation before entering the consumer.