

I want to introduce my homemade pretty easy job for me.
YouTube video. Rechargeable portable soldering iron:
The fact is that my work is connected with soldering, wires, plugs on such equipment for which a potential of 90 volts on the tip of a soldering iron can cause the product to “die” and from 30 to 500 tr gaps in the budget. Agree, it stimulates?)) And besides, everything happens in such a FIELD environment that, looking around you can see a plowed field, brush off raindrops from your face and rearrange boots with adhering dirt to dig for carrying to connect a soldering iron. All this made me think about an adjustable rechargeable soldering iron. From the pros, no need to ground, no wires, compact. Of the minuses, a small power (8 W) and an adapter is needed for periodic charging.
So the idea was born to make such a soldering iron yourself.
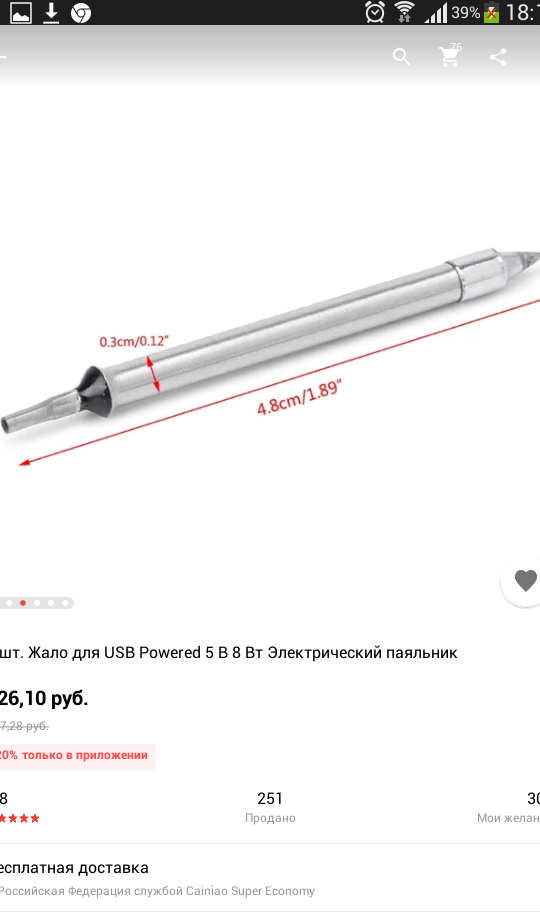
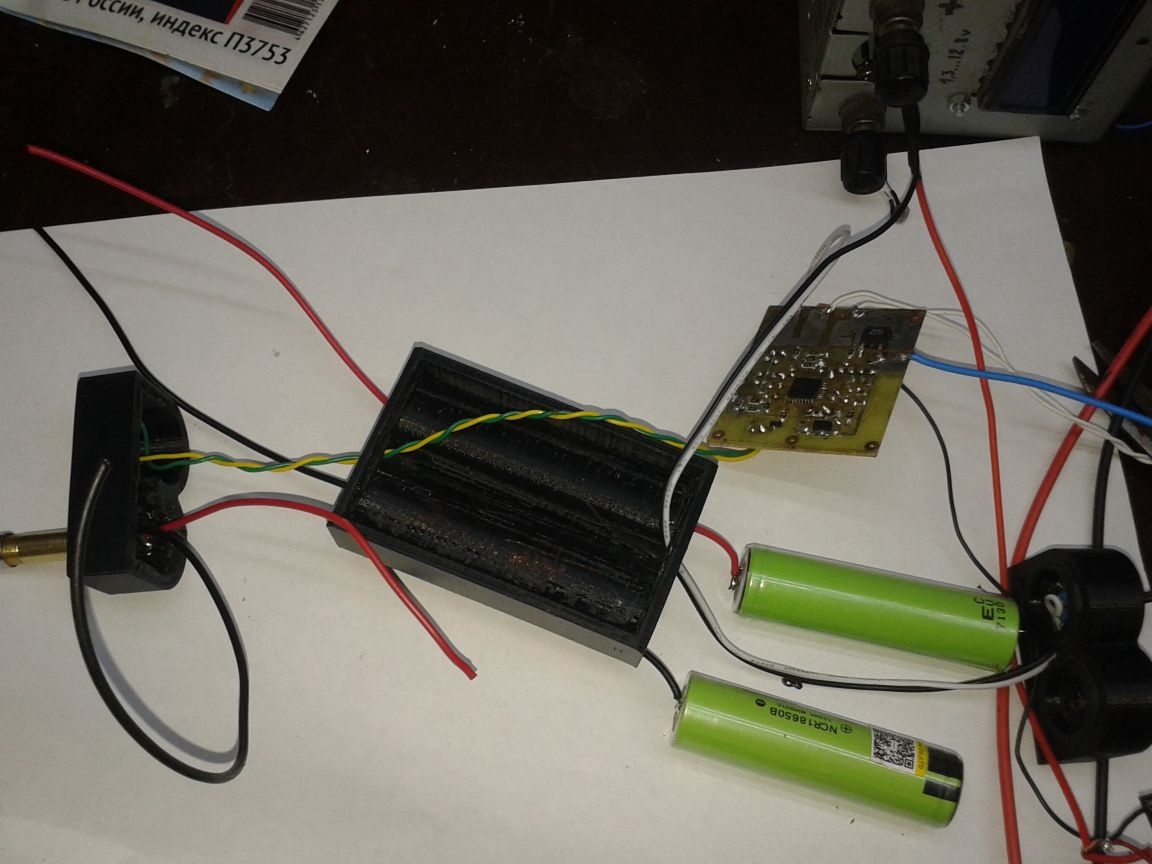
It will consist of a sting (bought in China, 8 W 5 volts, 130 rubles), two 18650 batteries (I will explain. Yes, you could use 1 type 18650 battery, solder the 5 volt boost, but this is not our method, throw it up to 20 % of energy into heat, and not at the tip, but in the soldering iron case. And two li-ion will give us a voltage in the range from 5.2 volts to 8.2 volts. There are no conversion losses, we work longer without charging. I like it. Do you like it?). The sting took this
Move on. I always want to know how long I can count on working with a device on akb. Therefore, there will be a discharge indicator for each battery. For such a forgetful person, the auto-shutdown scheme will not be superfluous. Well, since you have to solder sometimes and at dusk, there will be automatic backlighting.
For such a smart soldering iron, you need an appropriate brain. The choice fell on the Atmega8 in smd performance. Not because no other would fit. Not. I just have a lot of them, they are cheap and they have a bunch of legs)), and they will need a lot: two times three legs for the LEDs of two channels of a digital voltmeter, two legs for the inputs of these voltmeters, an output for the backlight brightness sensor and a foot that controls the backlight,a PWM control leg of a powerful polevik supplying a heater for a soldering iron tip and two legs for PWM filling adjustment buttons (I want to adjust the tip temperature, right?).
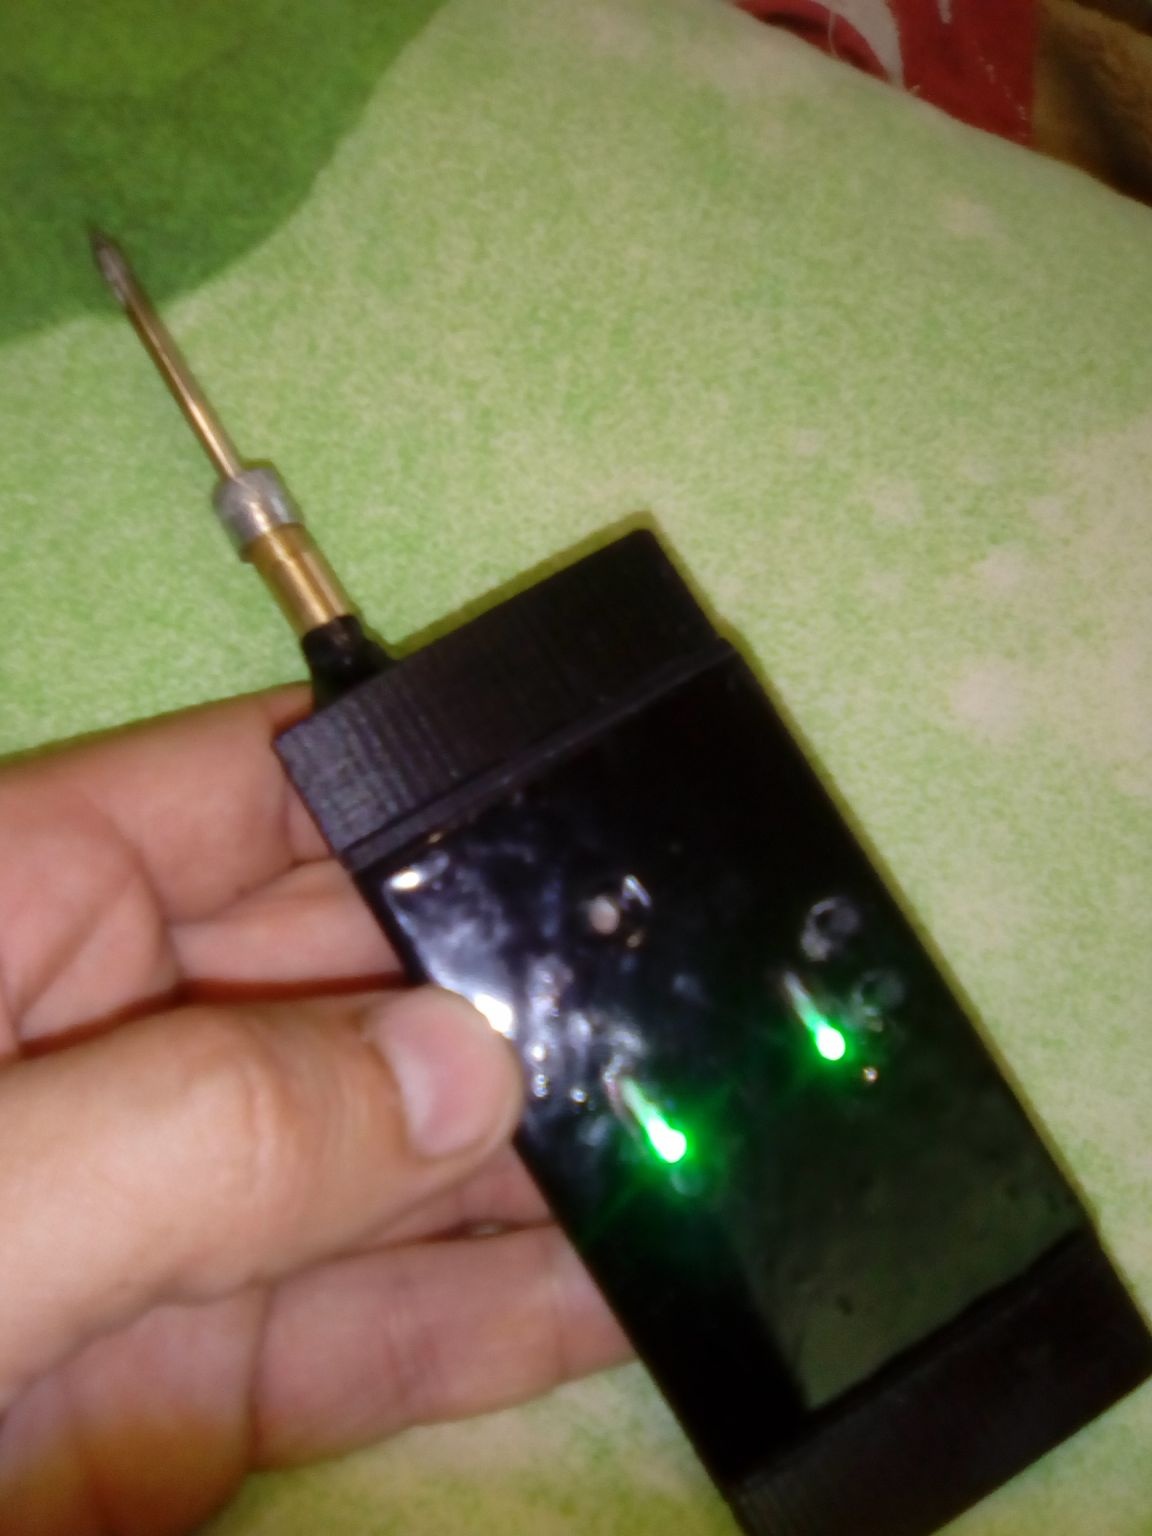
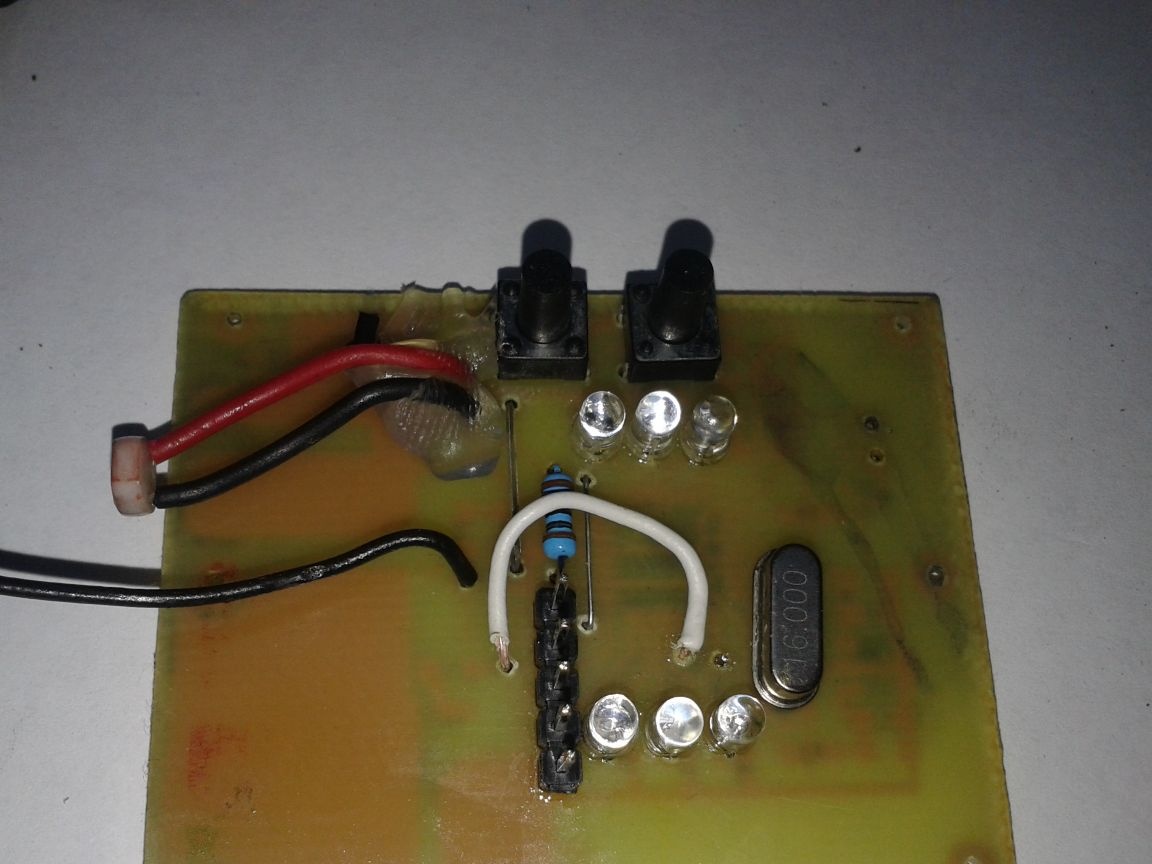
Three LEDs are used to indicate the charge of each battery. Green lights up at a voltage of 4.2-3.7 V, yellow 3.7-3.0 V, red 3.0-2.6 V. The working voltage zone is yellow and green indicator light, red is better to put on charge. With a further voltage drop, the ATmega8 will turn off the heater and backlight, which will reduce the current consumption from the battery, but it does not save you from having to turn off the toggle switch. Until the power is turned off, an alarm from the two red LEDs will blink.
This is what happened:
View online file:
Portable soldering iron with adjustable power output. When you turn on the power supplied to the tip is approximately equal to 100% of the rated power of the tip. Then with the buttons you can increase the power to about 150% (for faster heating, which is not useful of course) and reduce it to zero. Total adjustment steps 12. Starts when turned on with the ninth.
Automatic shutdown of the heater after 5 minutes for the forgetful with the alarming light indication (two red LEDs flashing alternately). To turn on the soldering iron again, turn off the power and turn it on again.
The backlight turns on in low light and or at that moment when the hole in front of the photoresistor is made in the lid, it will be blocked by a finger when the soldering iron is gripped. The photoresistor used in the circuit is marked GL5549, but you can use any other R6 to select the backlight.
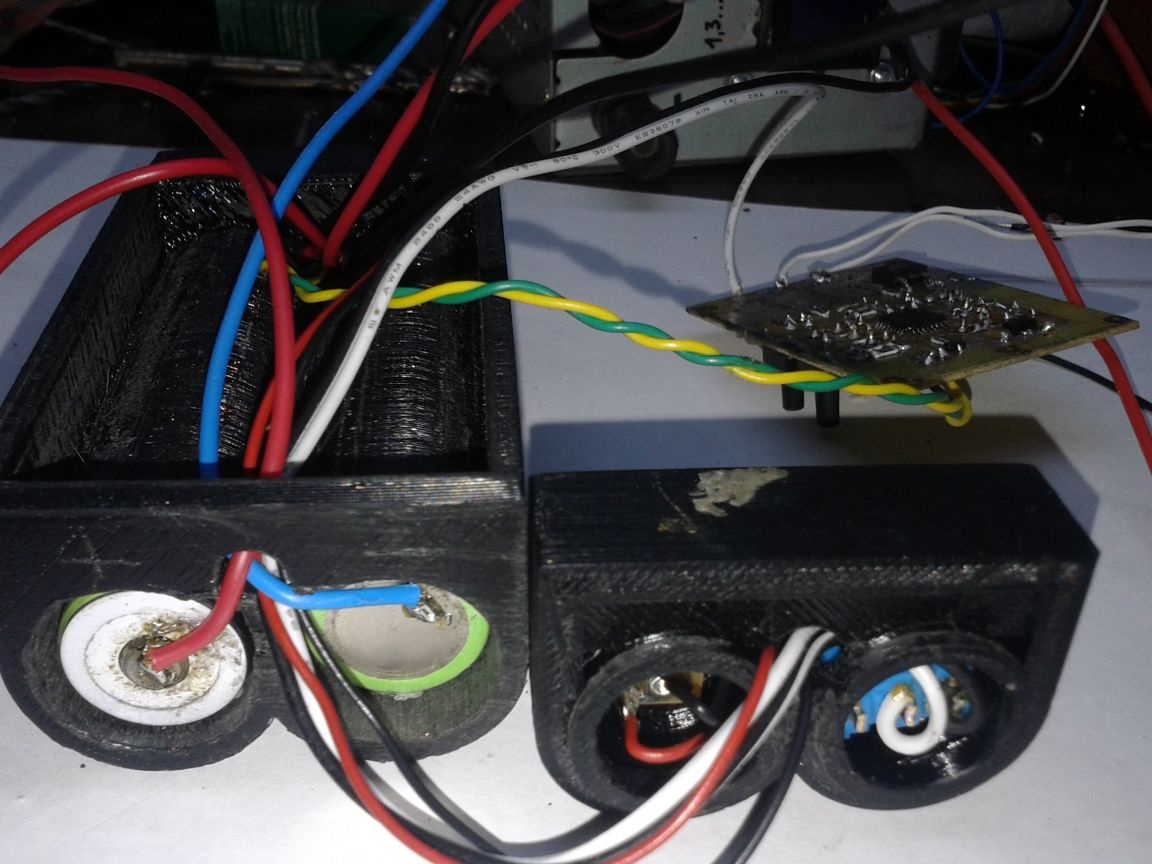
The charge indication on the three LEDs of each of the two 18650 batteries installed inside.
Firmware in HEX format
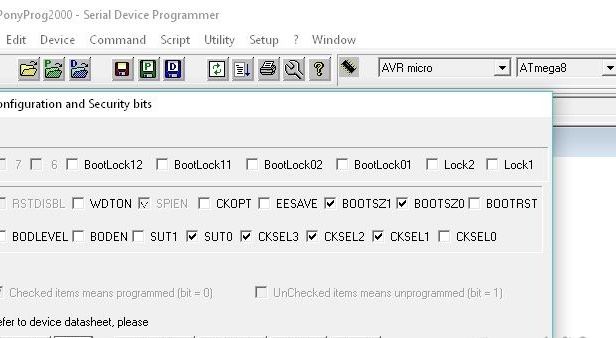
Fyuzy for poniprog such (are ticked off)
For the case, please do not scold me. Most recently, I became the proud owner of Anet A3 3D printer, and began to master modeling in the program FreeCad. Photos of my modest attempts to master a new field of activity for me, you can see below.
The case consists of 4 parts:
1. The basis.
2. The front part.
3. The back.
4.Lid.
The base was printed the longest, it took 71 grams of ABS plastic and 6.5 hours. The front is 1 hour 45 minutes and 19 grams. The back is 2 hours and 20 grams. The lid is 13 grams and an hour of work.
Total 123 grams and 11 hours of printer operation.
Printer Settings:
Layer Height - 0.2mm
Density-100%
Printing speed is 50 mm / s.
Temperature is 235.
The temperature of the table is 100.
Type of support is everywhere.
Type of sticking to the edge of the table.
The diameter of the plastic rod is 1.75 mm.
Table blowing off.
The nozzle diameter is 0.4 mm.
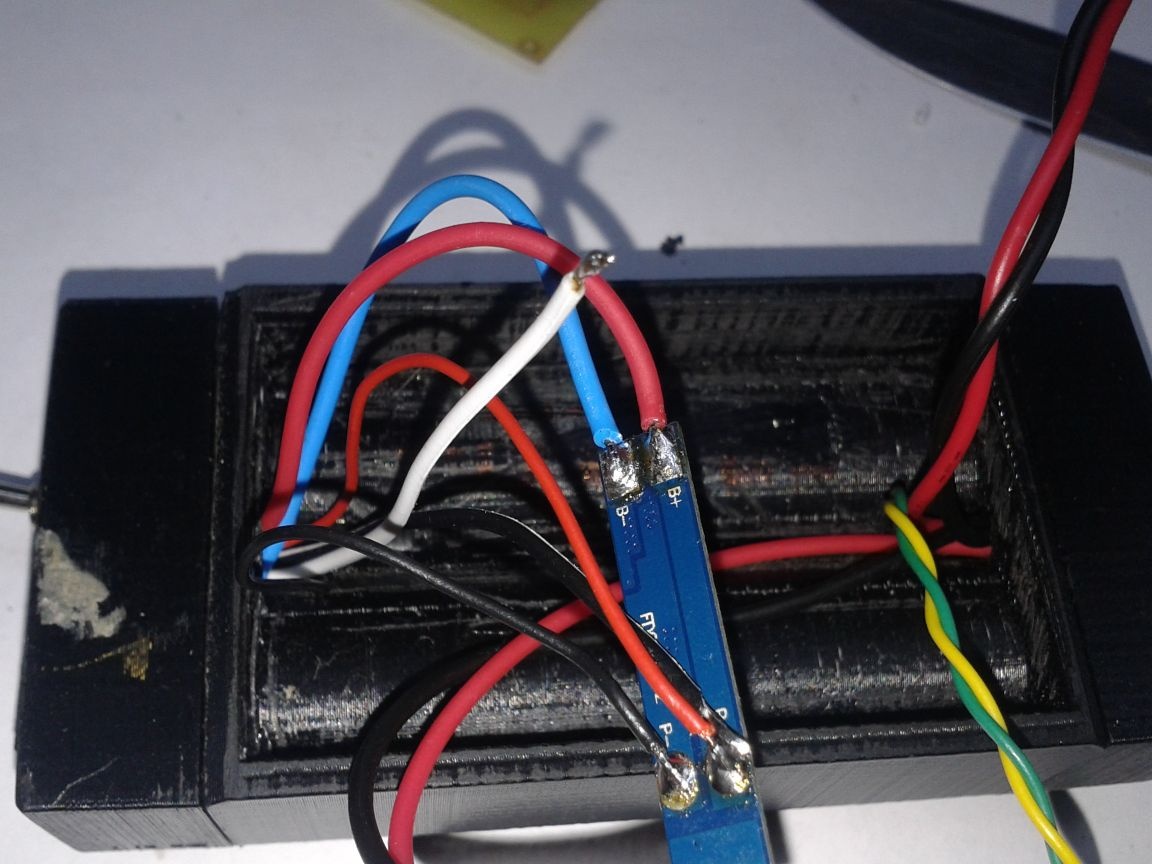
During assembly, be guided by your common sense. My build option is not the only one possible.
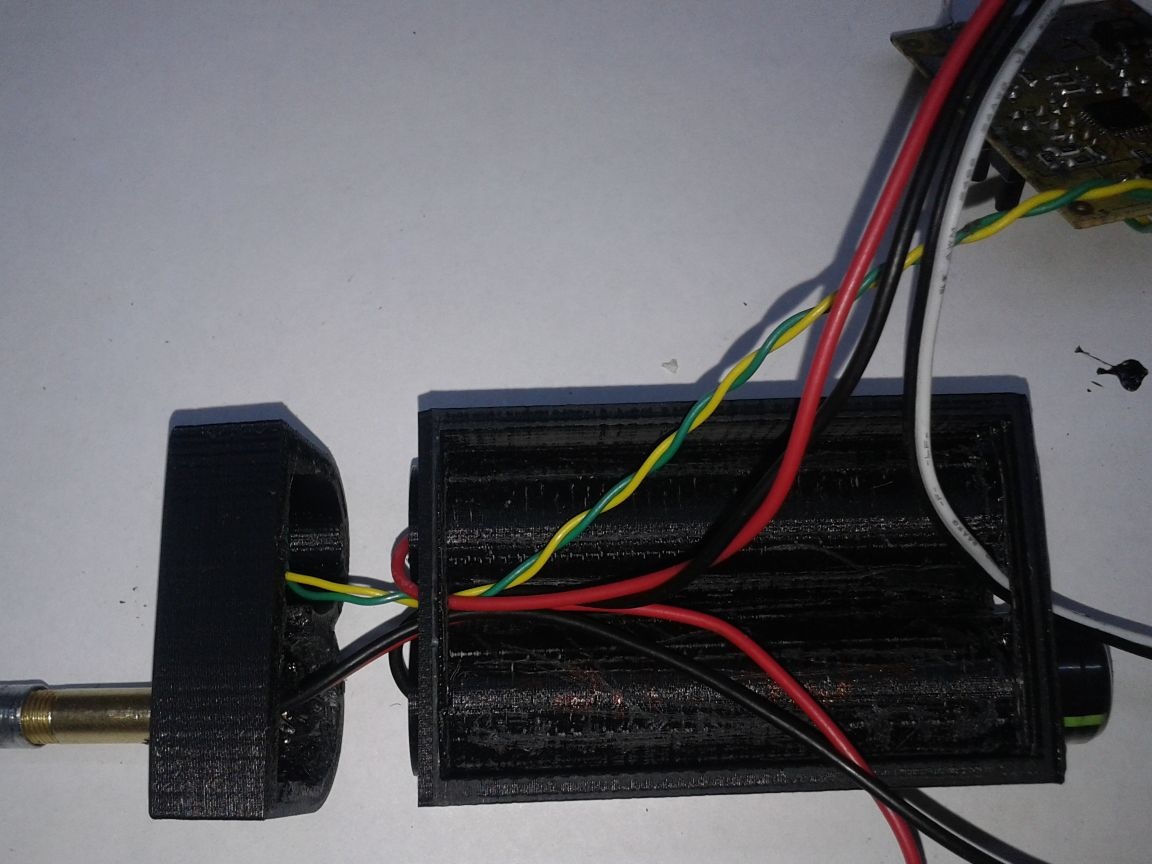
Here are some photos during assembly.
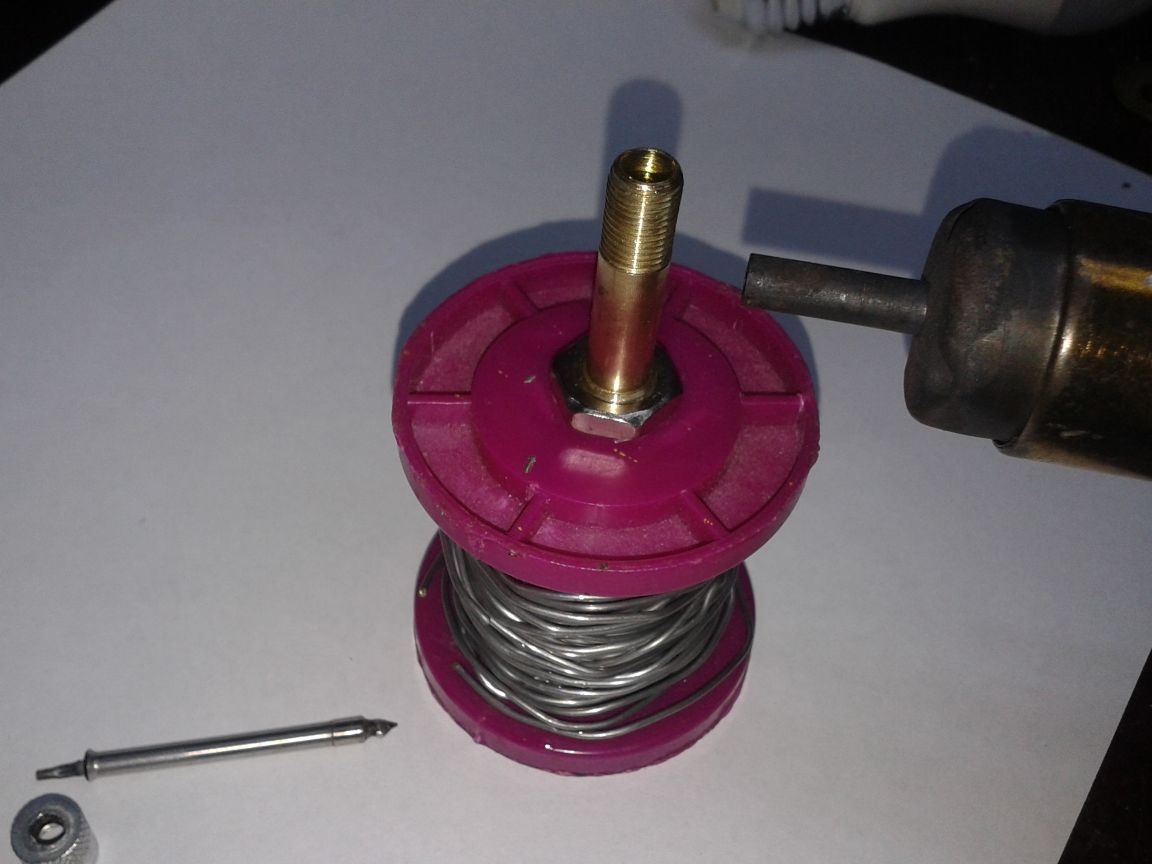
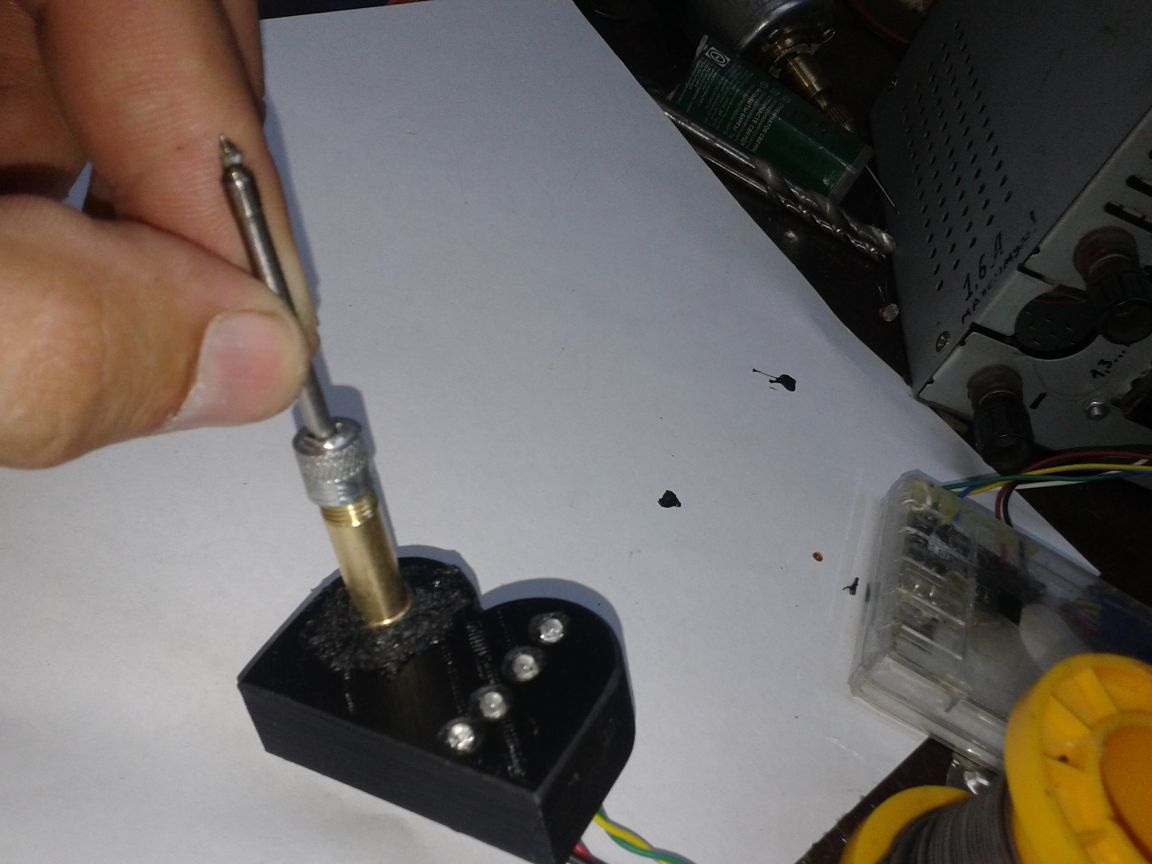
In the photo, the sting itself, a brass tube from the nipple of the car camera is 2/3 filled with plasticine and 1/3 epoxy. A soldering station dryer blows hot air at 120 degrees. The curing time was 10 minutes. The bottom left is a modified cap. The pin is bitten off and a 3.5 mm hole is drilled.
In the front of the soldering iron, drill a hole and insert a tube there. We fix the glue made of acetone plastic dissolved with acetone. Dries fast. Insert the wire into the central contact of the sting and crimp it. In a cork made of epoxy resin, we drill a through hole 2.5mm in diameter, thread a wire there and fasten it as in the photo. Solder the second posting to the tube. In the same part of the housing are LEDs with a resistor.

Front end assembly.
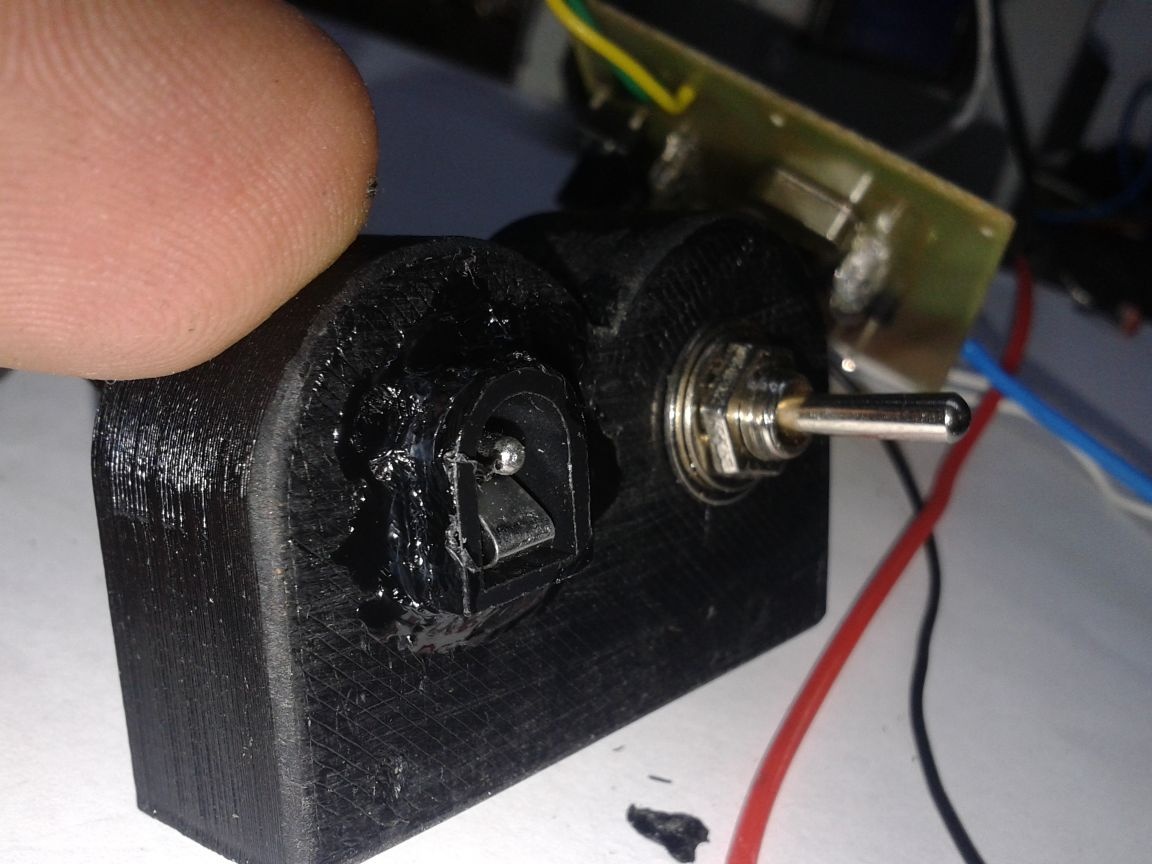
The back is complete. A switch and a connector for the charger are installed.

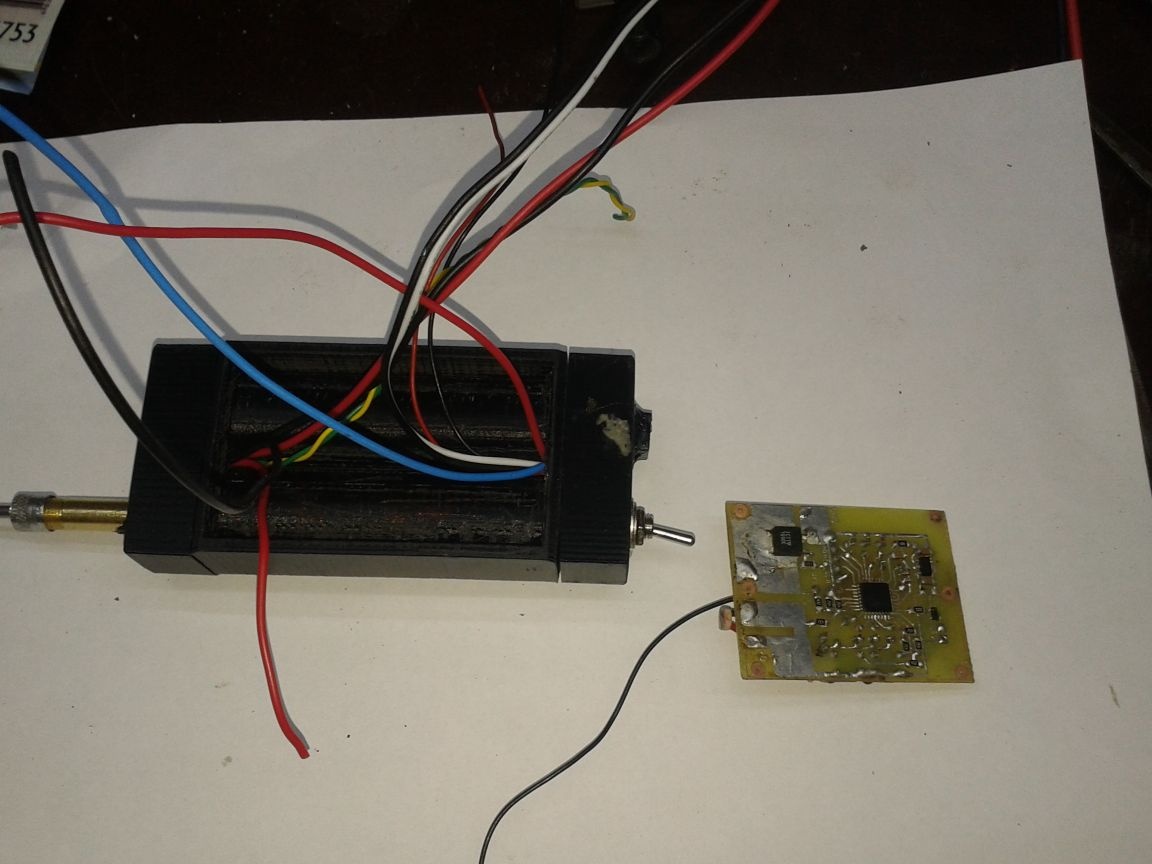
Files with the circuit, printed circuit board and files for printing the case in the archive.
After printing, I had to work an hour with sandpaper and a nail file, removing some irregularities and removing layers of support. I had to drill holes for wires and modify the case with more rude means. Yes, in my imagination the case looked more hmm .. beautiful, or something. But that is, that is. I need a workhorse. I will not remodel, there is a new idea.
The case was going to live, because all the details enter each other tightly. Bonding them together made a drop of acetone on the compound. It is completely reliable. The Chinese sting was fixed in the nipple of the car tire as advised on YouTube. The nipple itself is inserted into the hole in the front of the case and fixed with plastic glue dissolved in acetone. The sting itself of course is the epitome of Chinese quality, but it is quite functional. It is attached to the neck of the nipple with a drilled cap, pressing against the base on top of the nipple filled with epoxy in which the hole for the central conductor is drilled.
The diameter of the drill for the cap is 3.5 mm, the diameter of the central hole is about 2 mm.
Good luck to everyone and creative mood.