» Electronics » Metal detectors »Scheme of a more advanced detector" Kid FM2 "with metal selectivity

The scheme of a more advanced detector "Kid FM2" with metal selectivity


The Kid FM2 circuit is a bit complicated compared to the simpler "Kid FM”, Added new parts, added light indication of metals, the sound in the speaker is amplified (headphones are not needed), and the device itself has become more stable in operation. But all these improvements will not hinder to assemble it to people far from electronics.

The device is powered by a simple crown 9c, the detection depth is basically no more than the diameter of the search coil. Perfect homemade metal detector for the beach or to the lookout.

For assembly we need:
1) Textolite
2) Drill
3) Varnished copper wire 0.3mm
4) Soldering iron

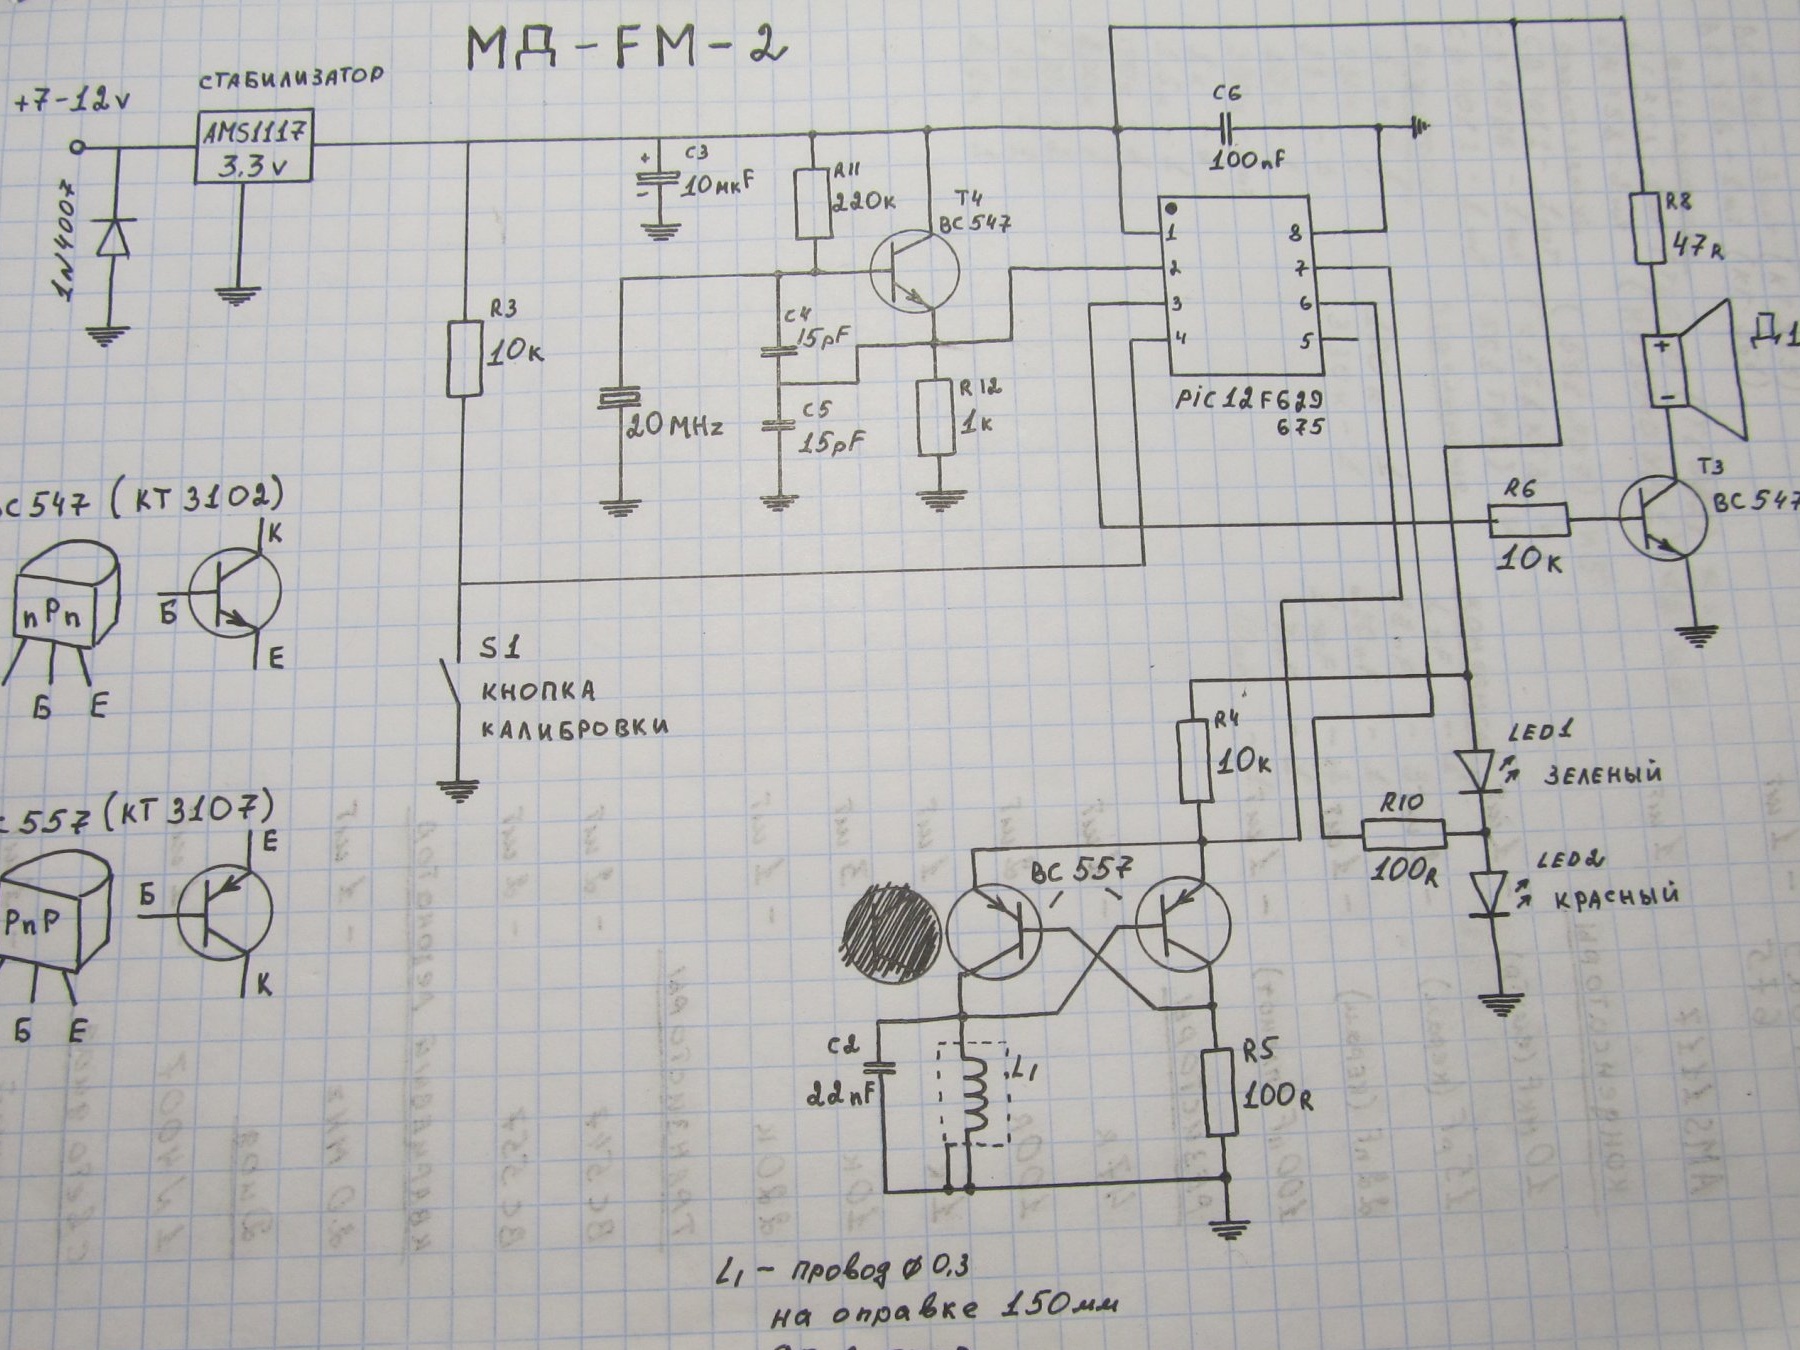
Here is a diagram of the improved Kid FM2

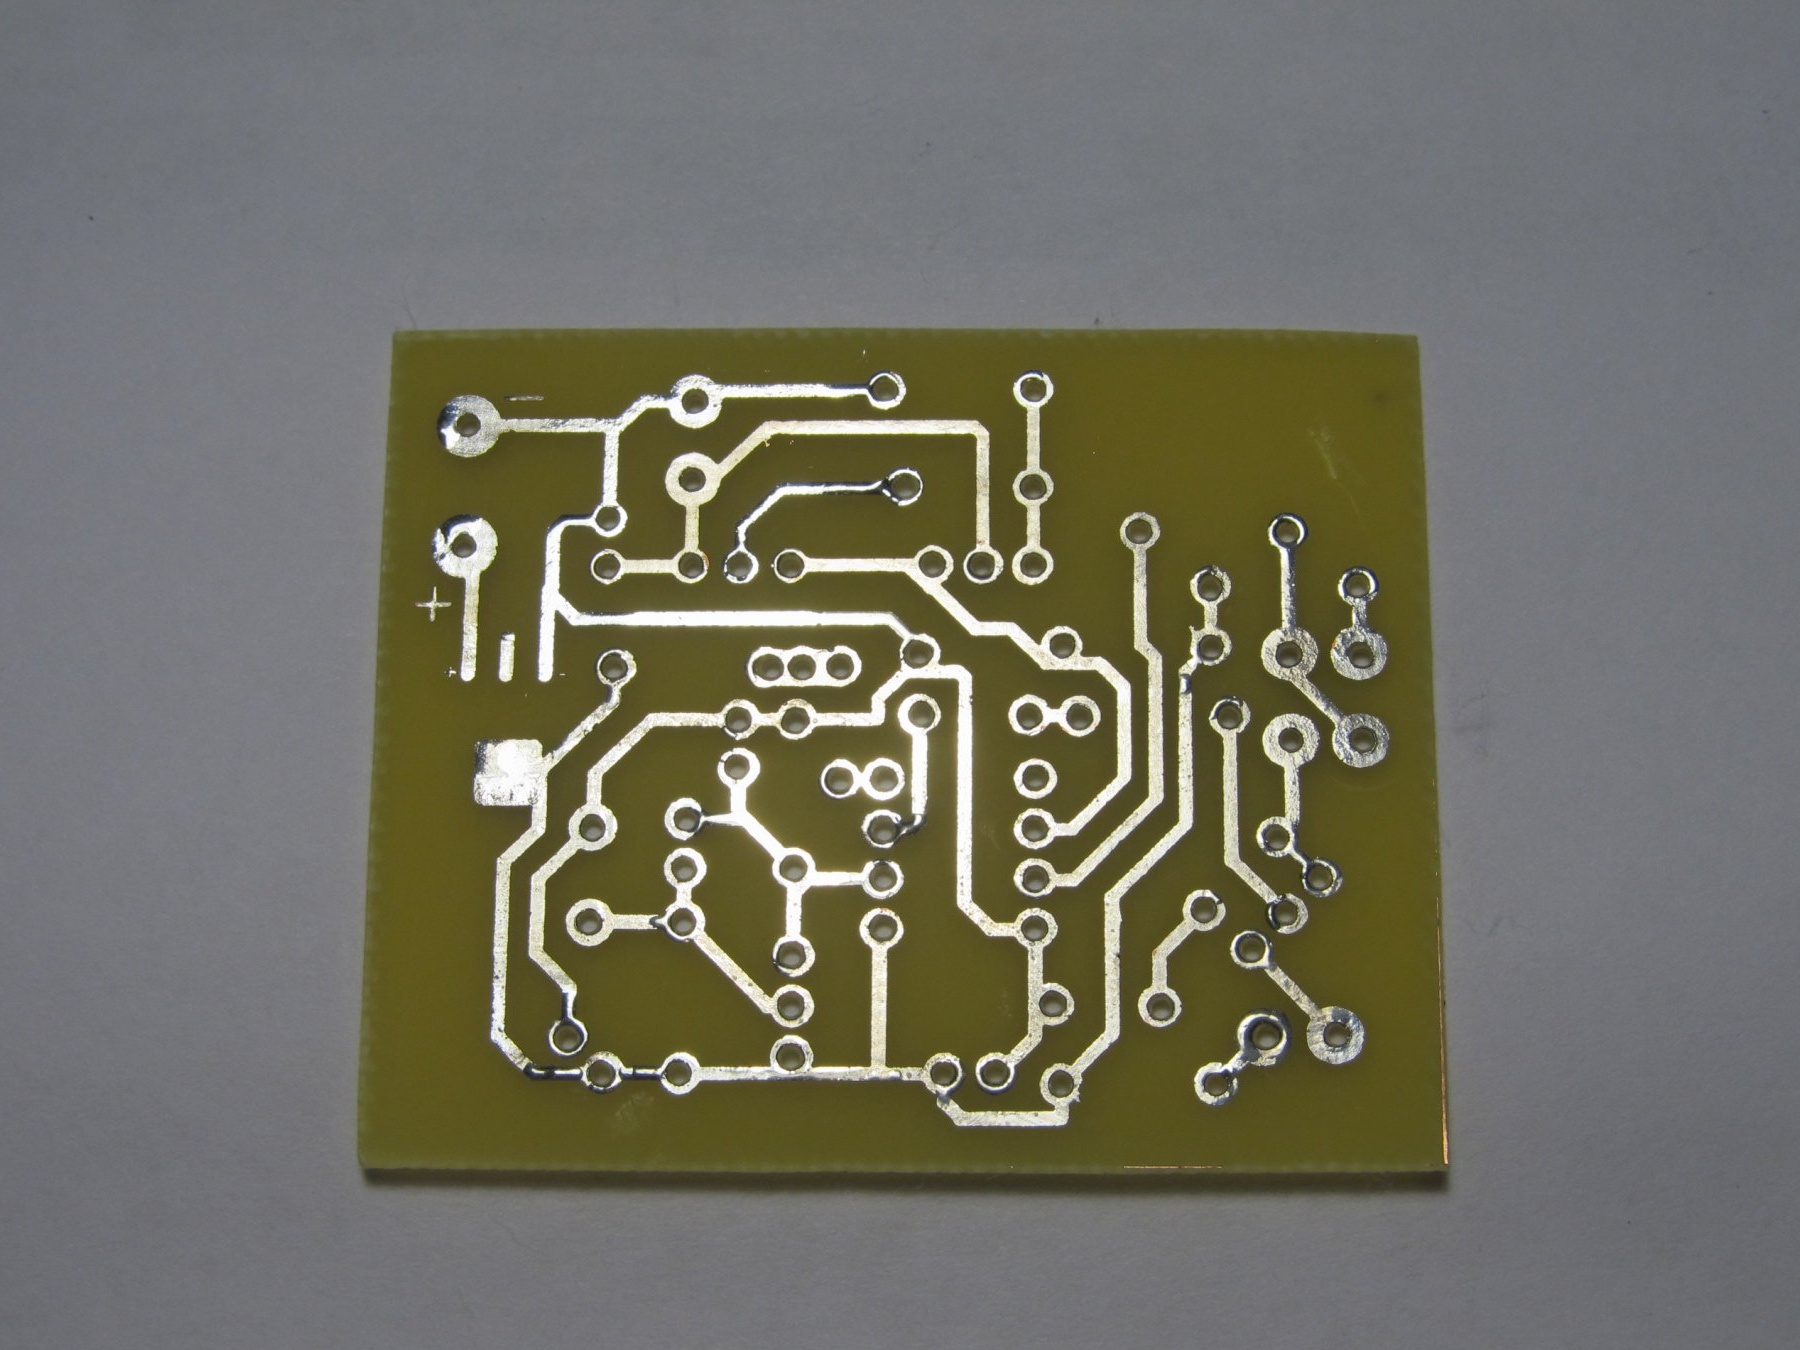
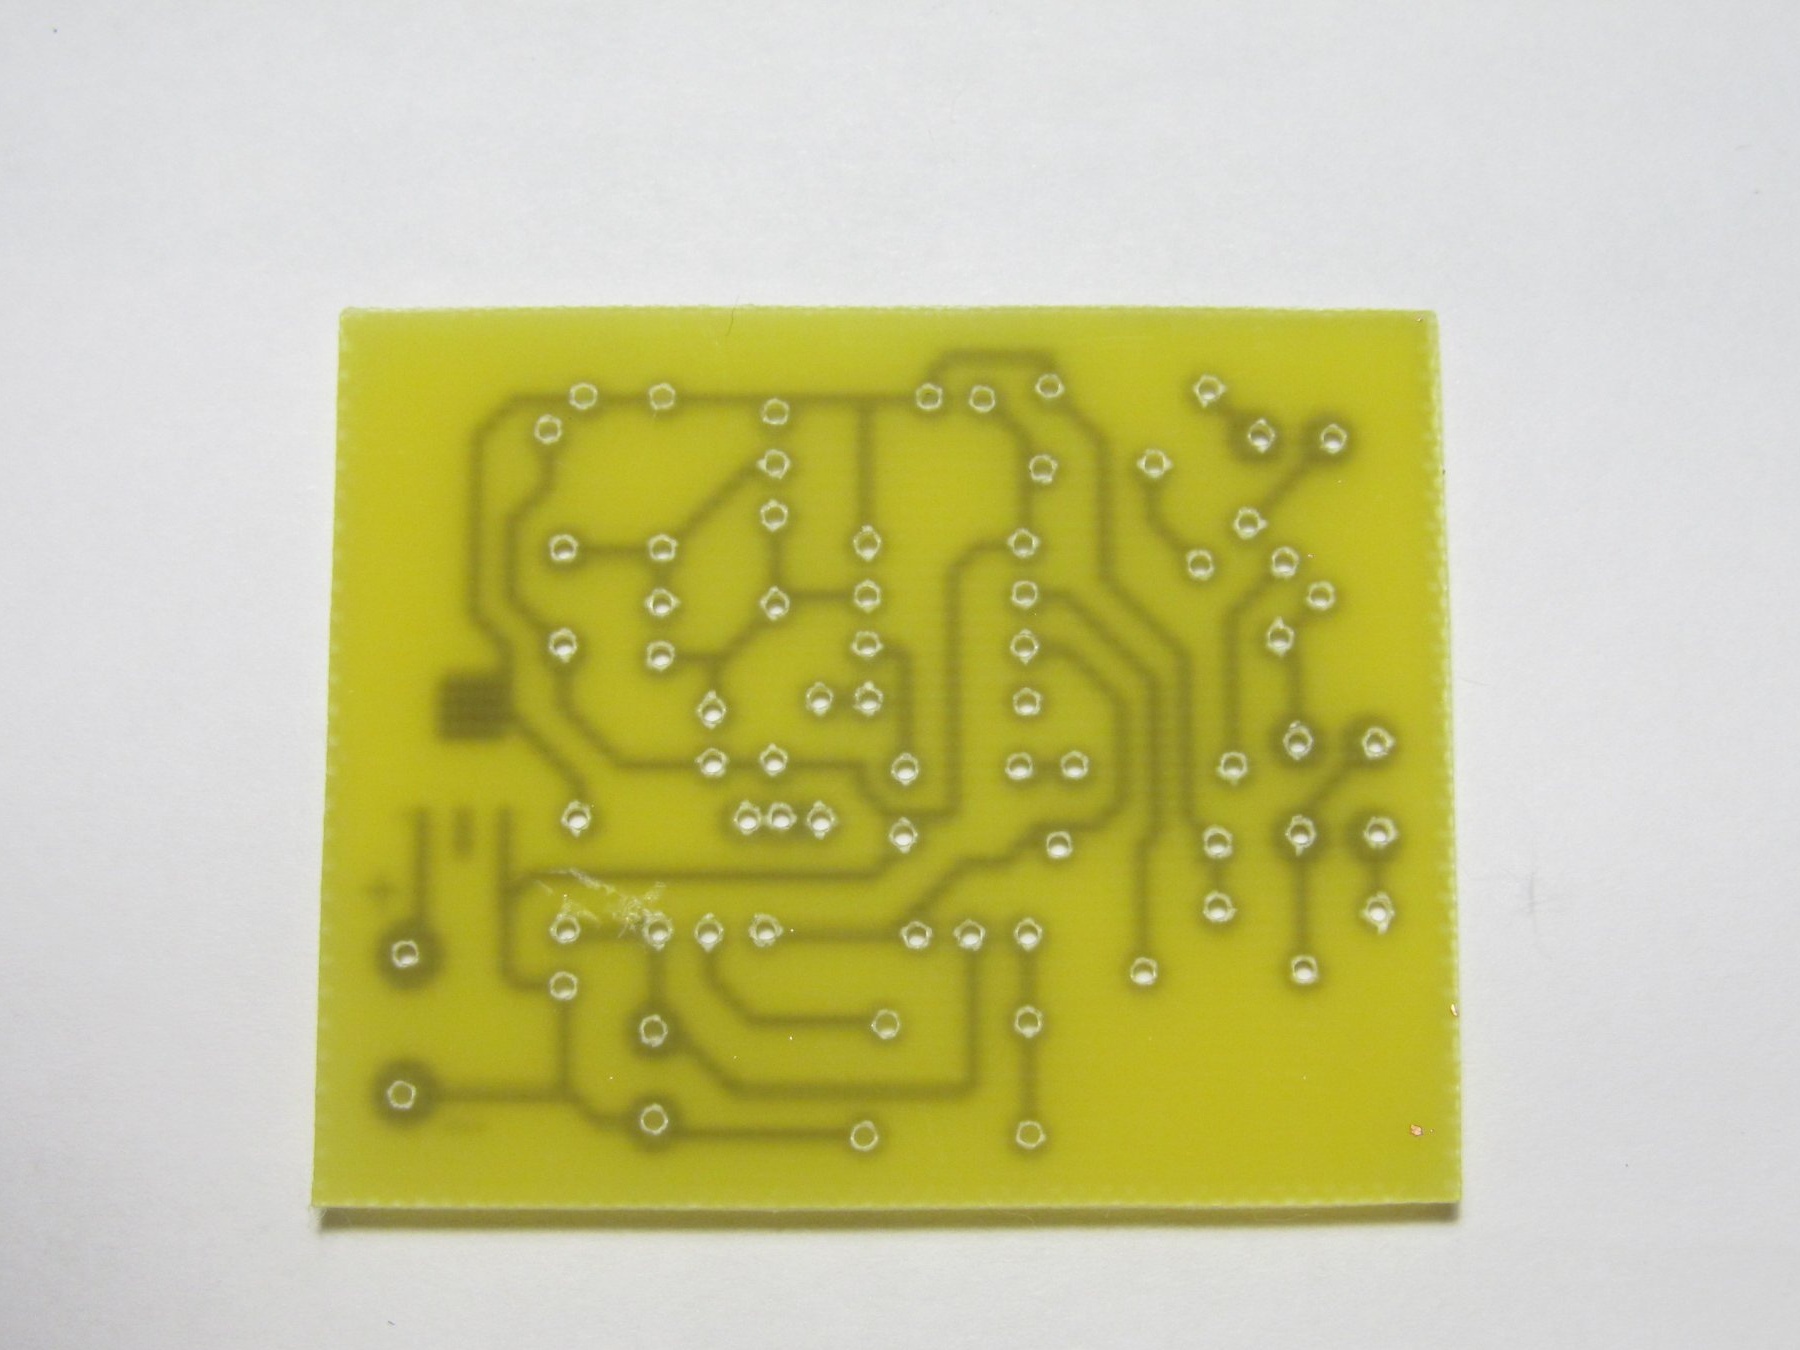
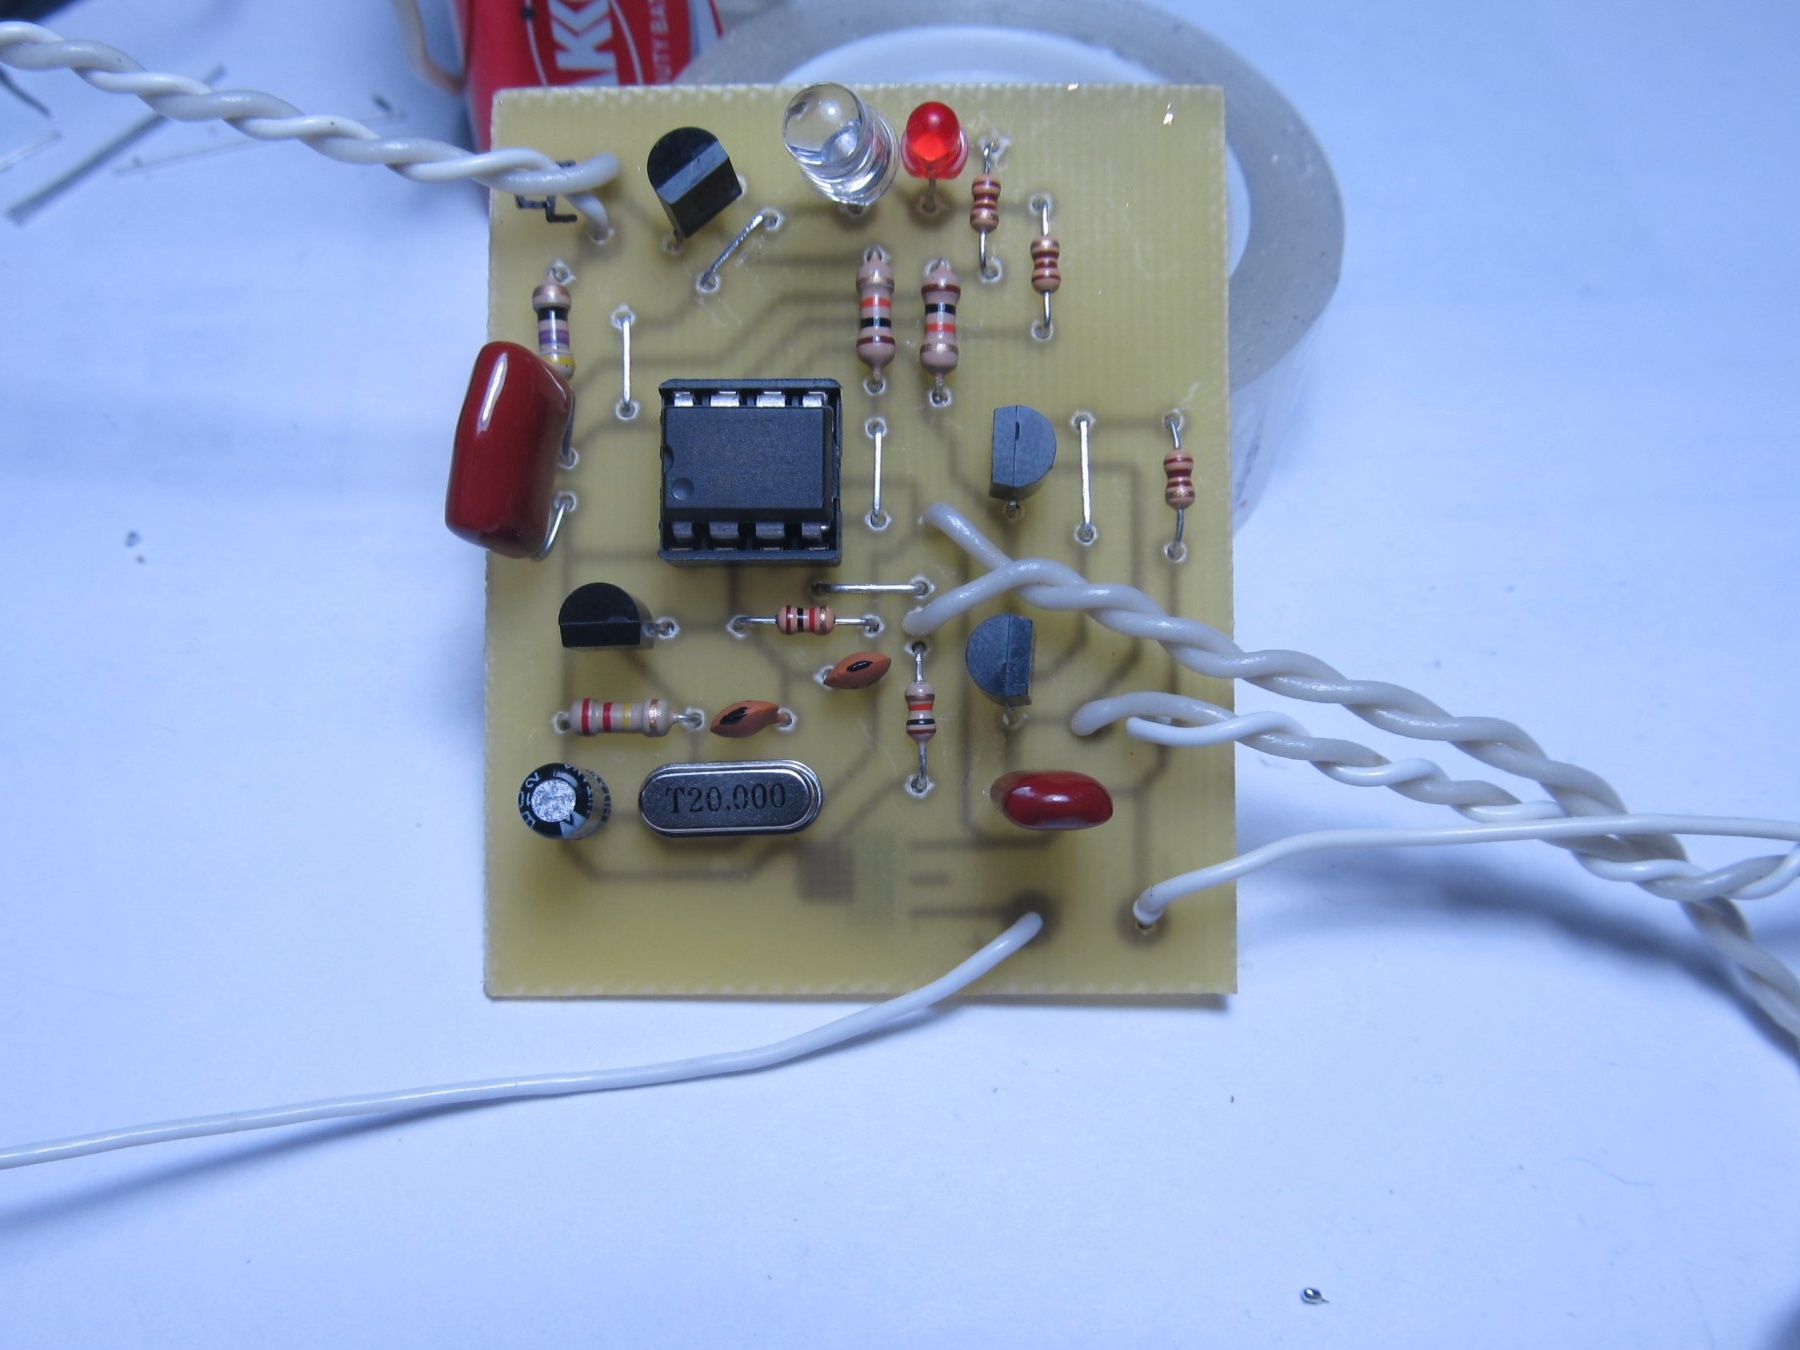
I specifically made the board for DIP components, it’s easier to mount


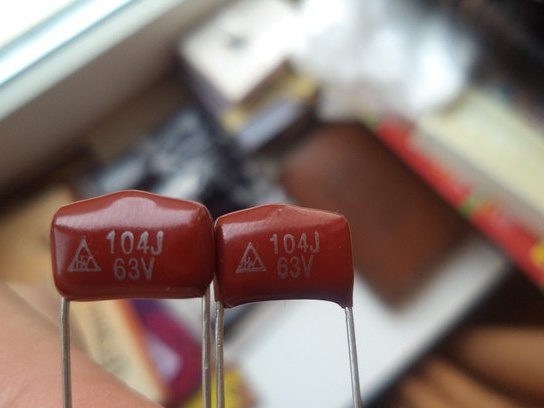
I must say right away that the capacitors C2-22nF and C6-100nF should be film
The scheme of a more advanced detector

We place all the details on our board according to the scheme

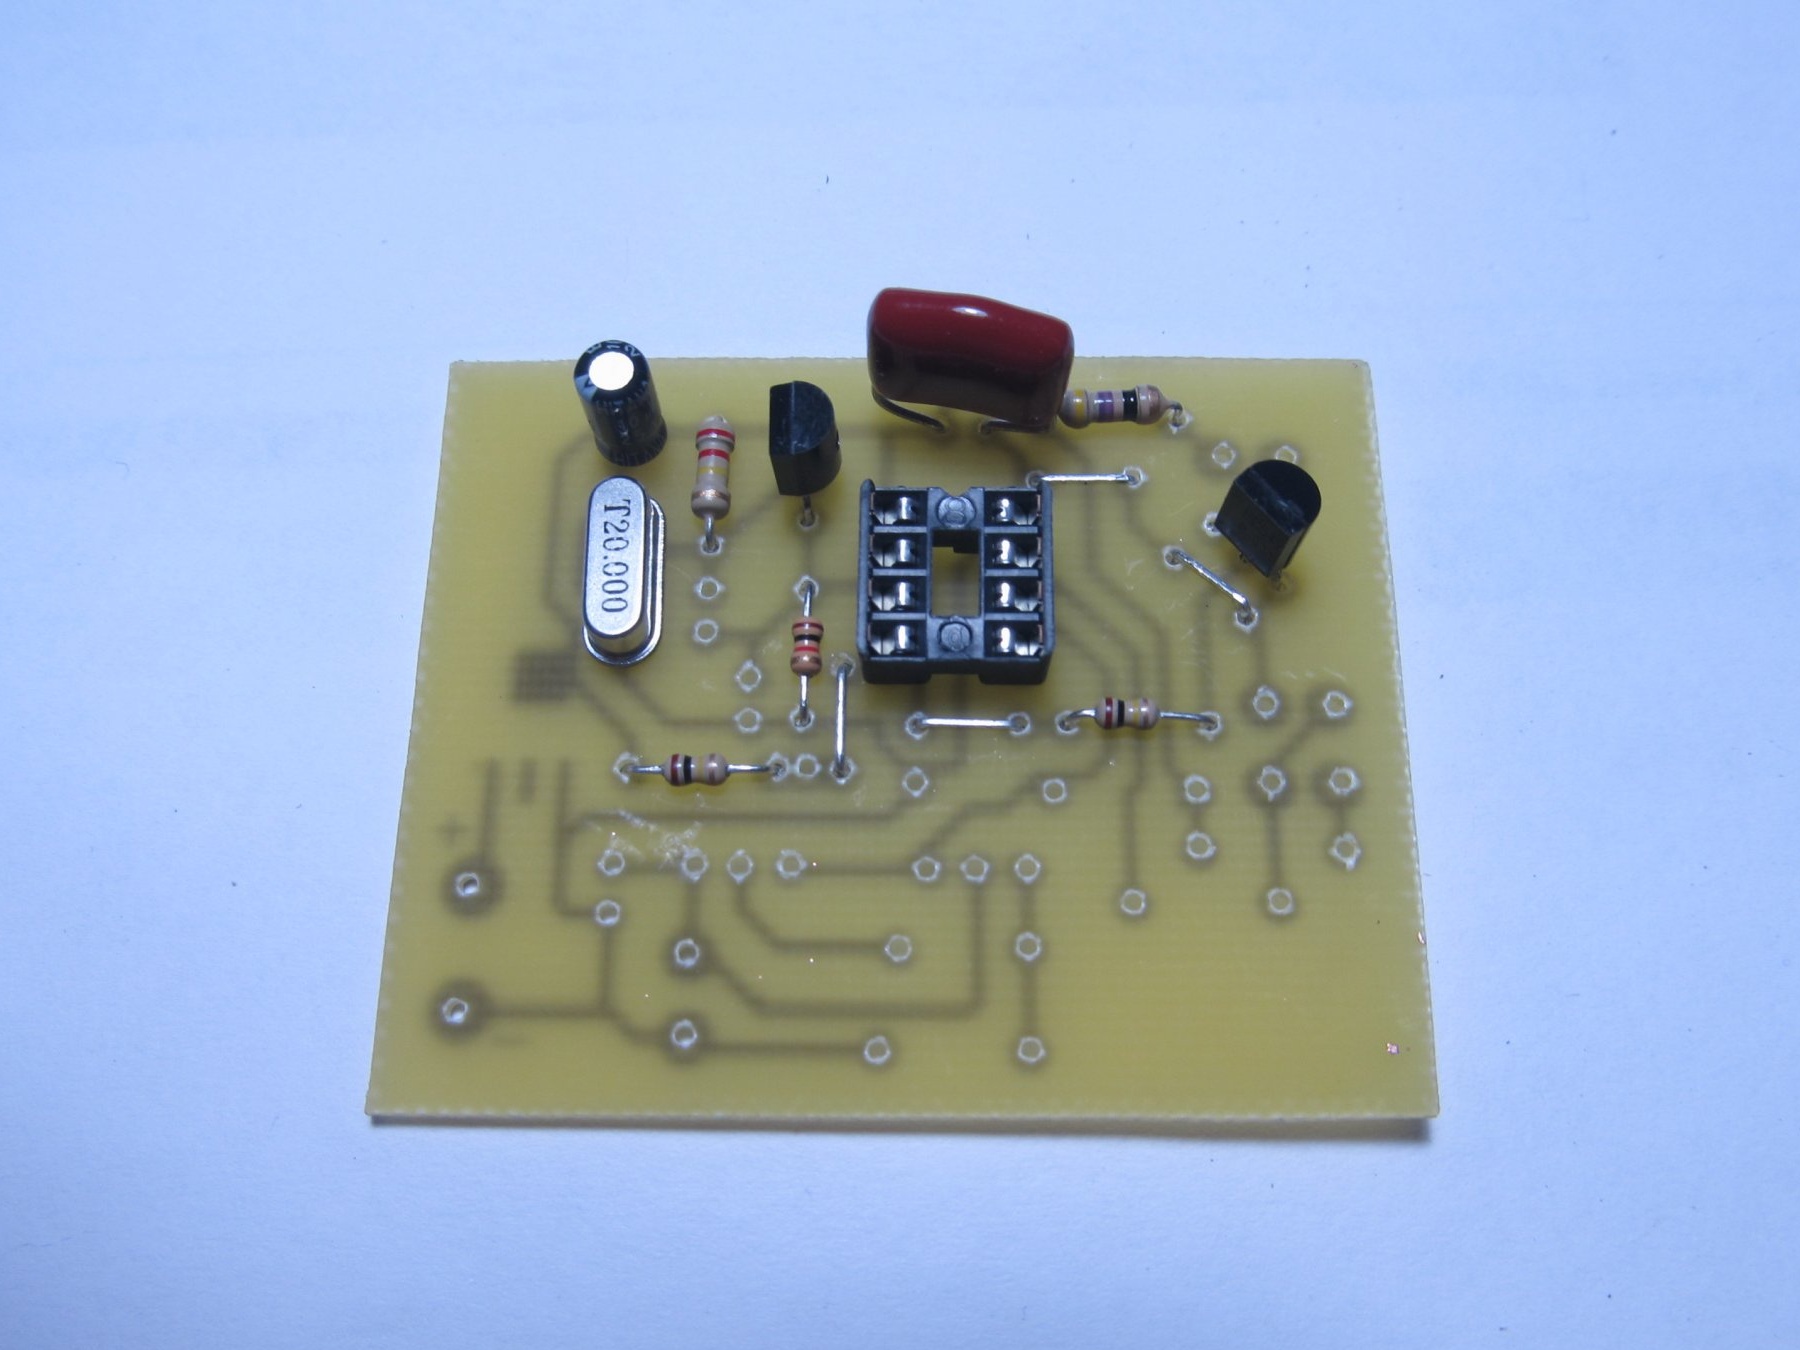
There are circuit boards on the Internet. But they are all in SMD, I did not find in DIP, so I did mine. I will post the file with the board below, but the details and jumpers are not signed on it, so it will take you to collect from the photo or make your own board or SMD.

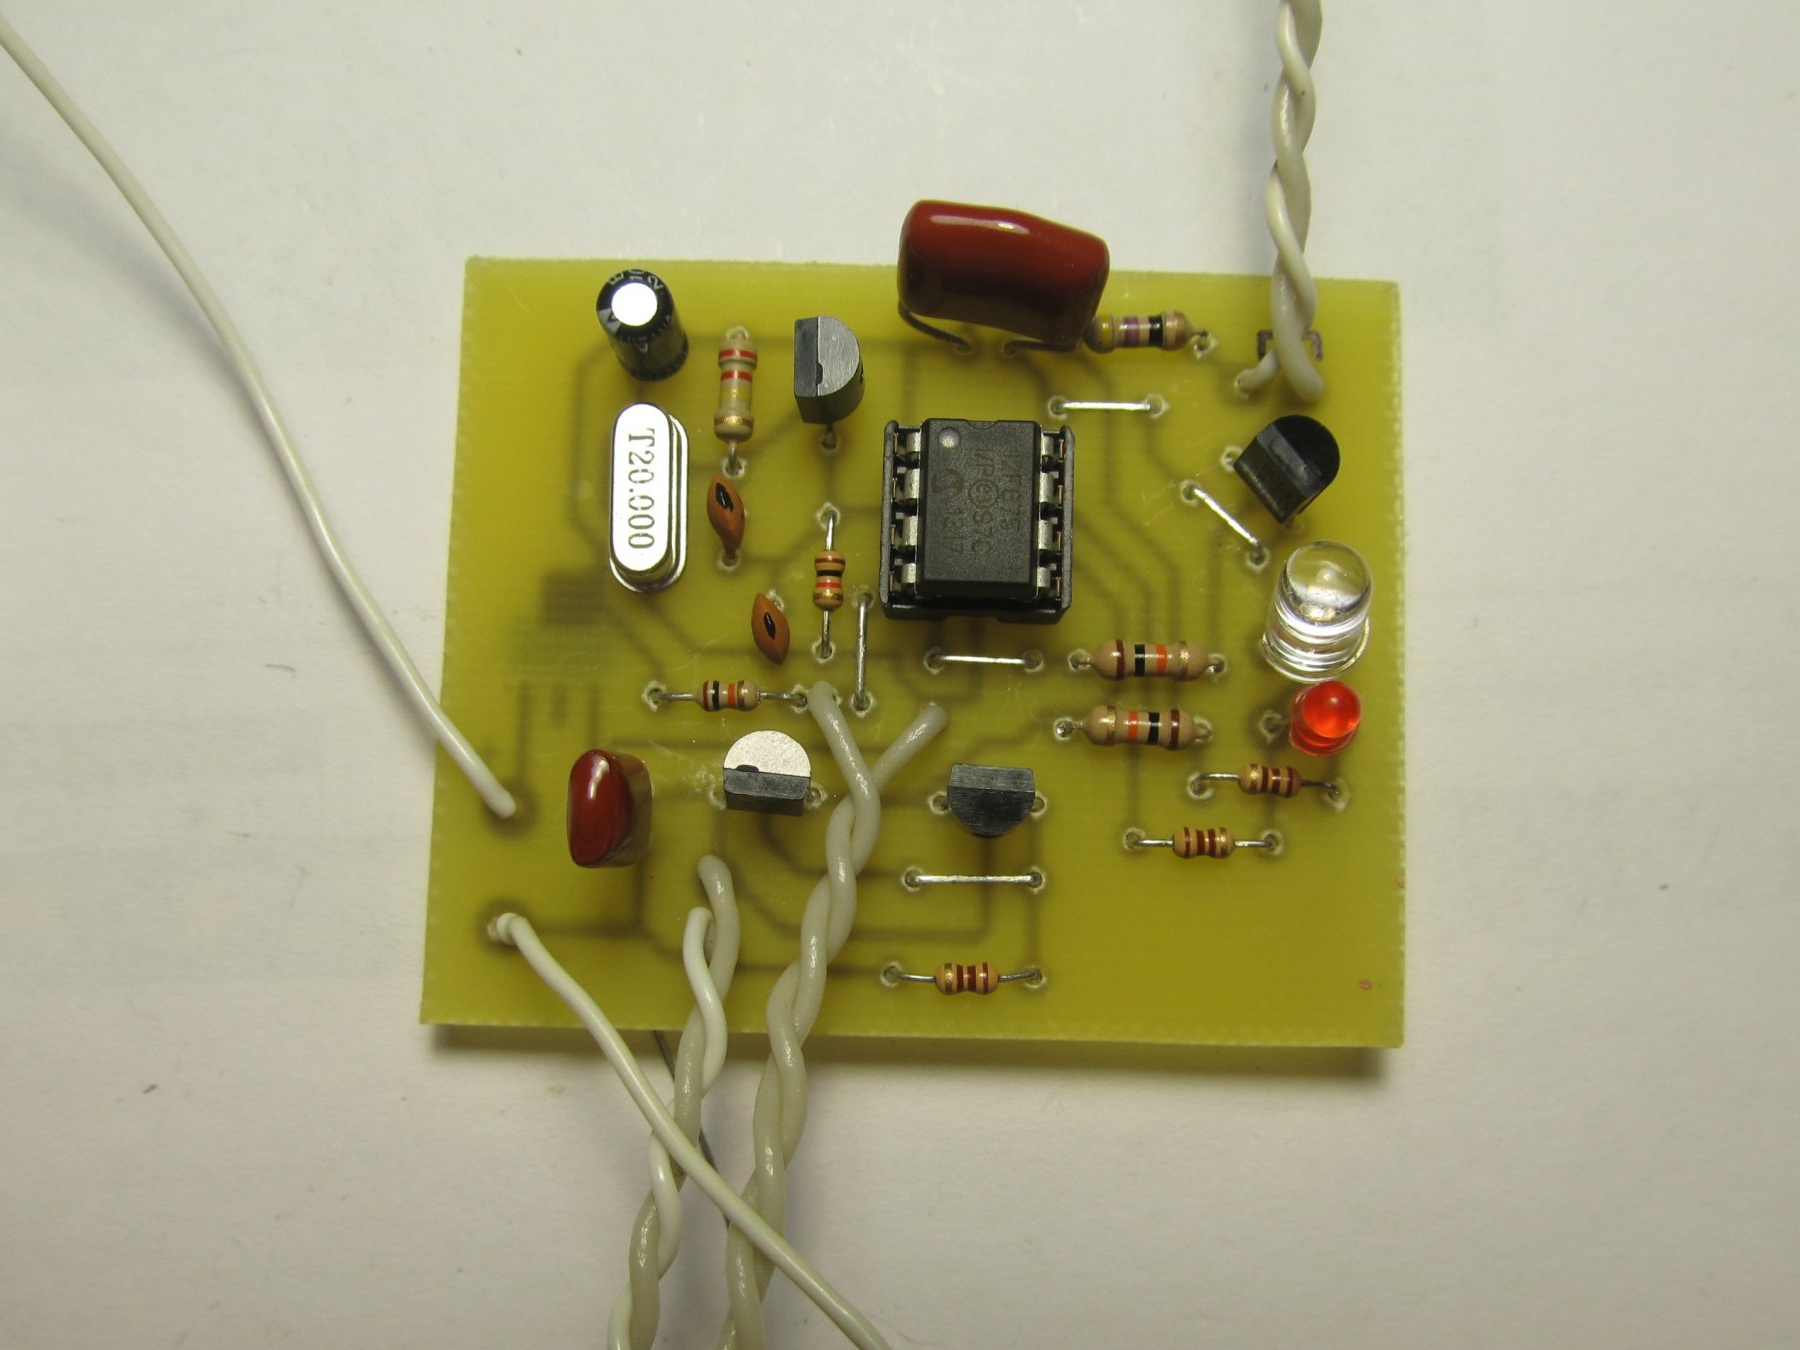
Well, everything is soldered into place


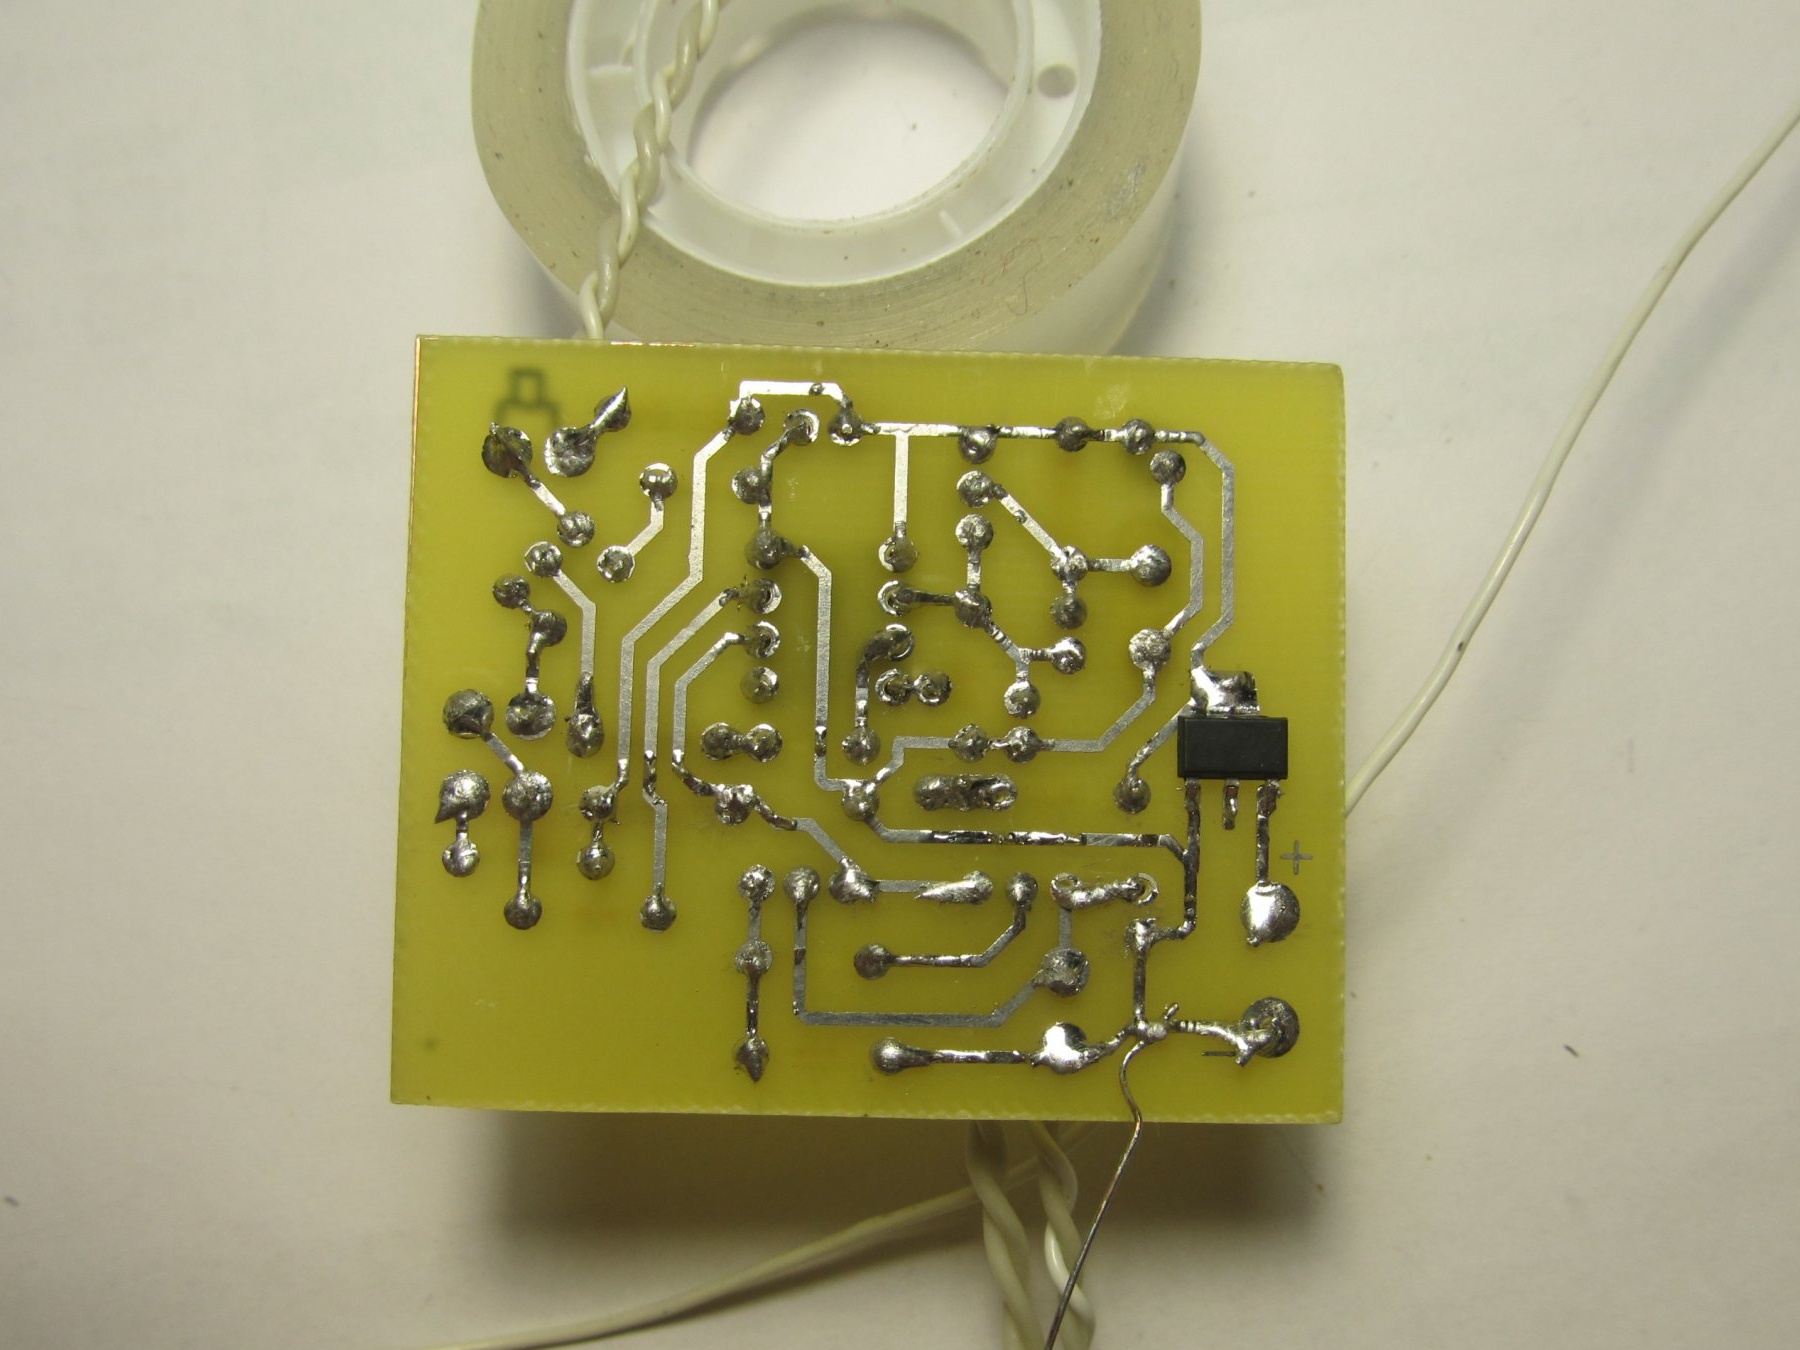
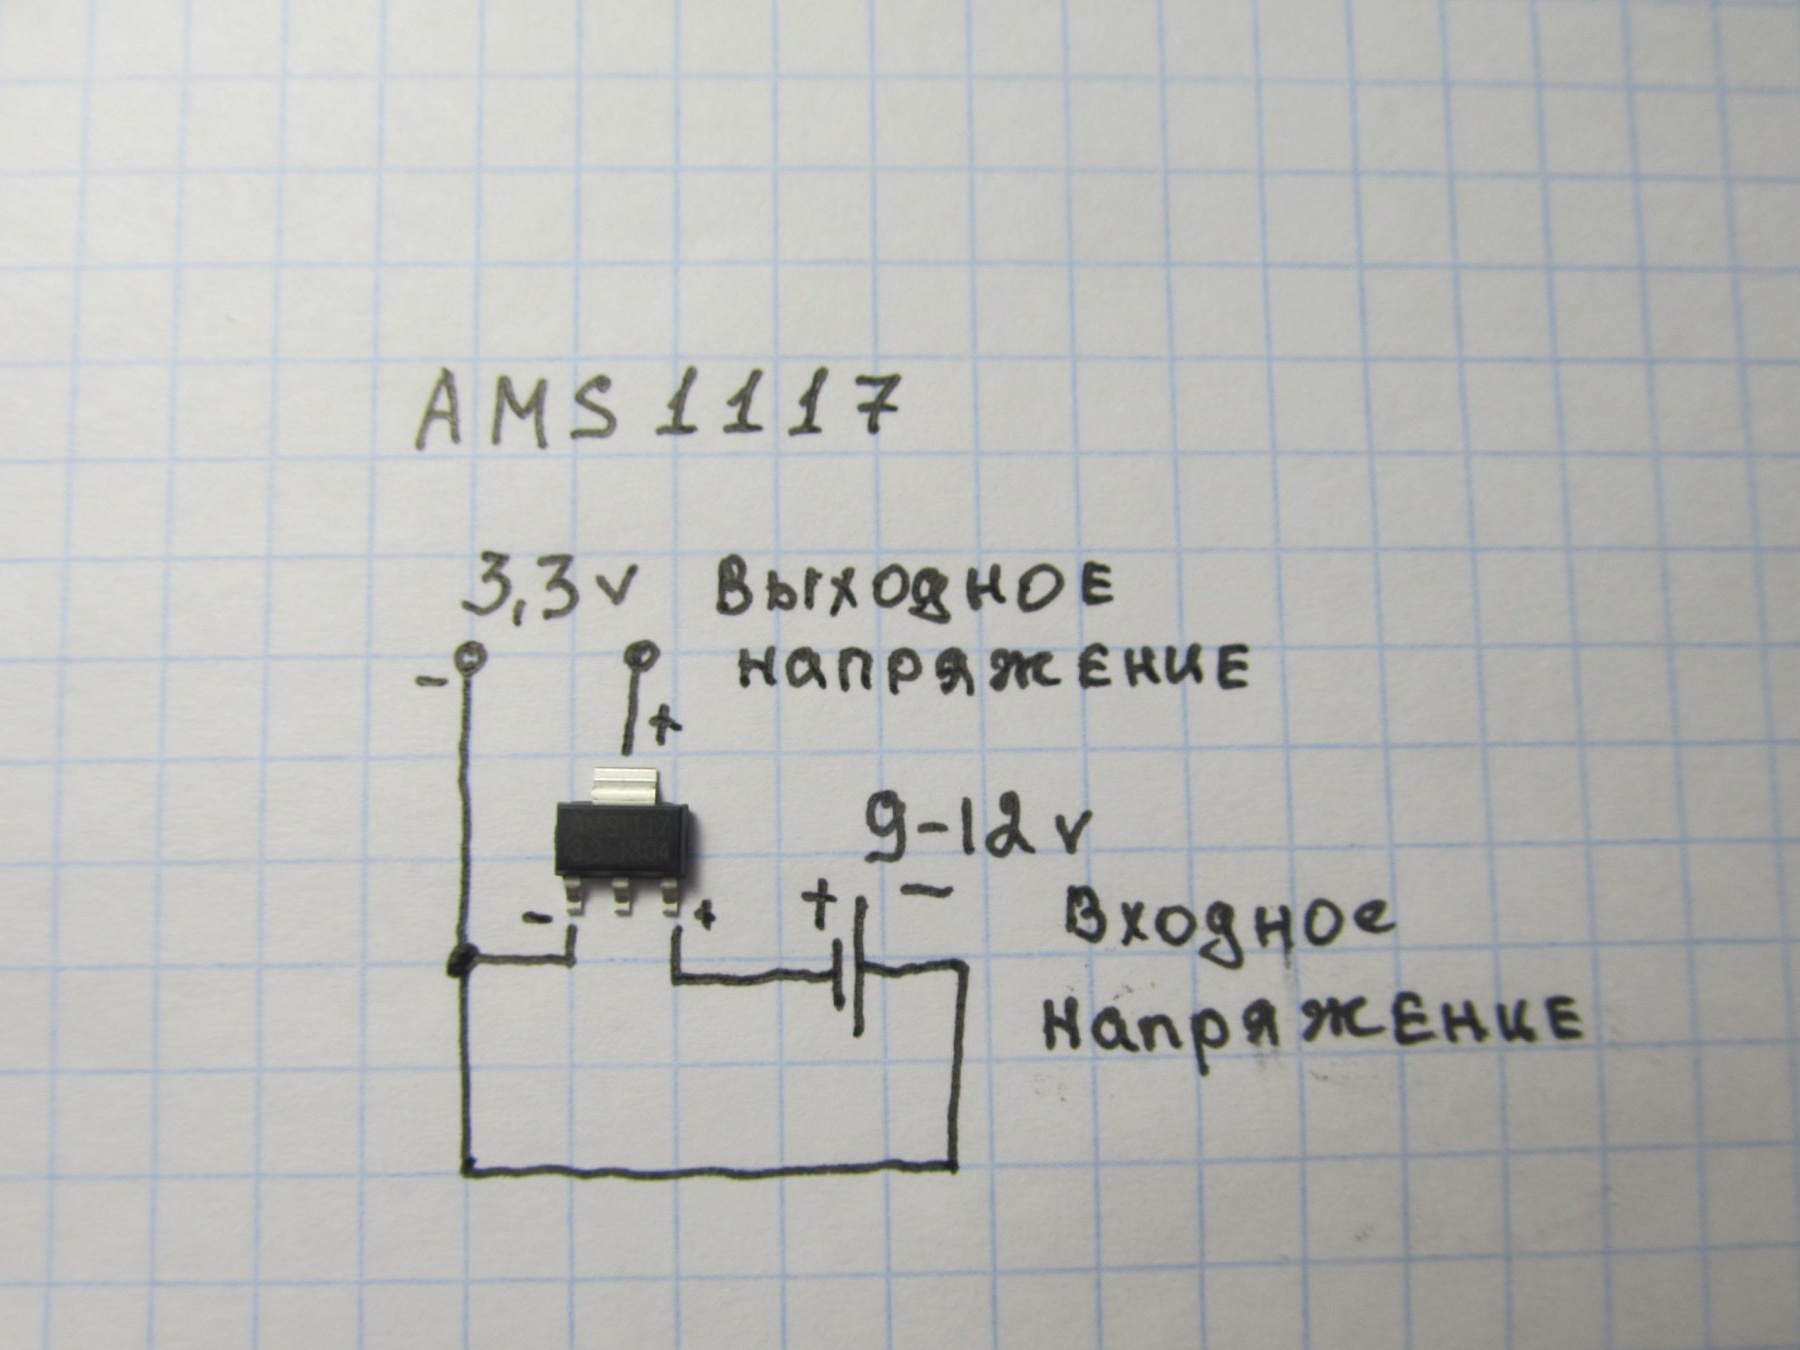
Voltage stabilizer AMS1117 -3.3v.

I advise you to take the LEDs in different colors, I took red for ferrous metal and blue for non-ferrous.

Proceed to winding the coil. The diagram says about a coil with a diameter of 15cm. But I decided to do less, because the smaller the coil, the finer the find she sees, if the coil is large, then the detection depth is slightly larger. But she sees little goals. Since the detection depth is not very large in this metal detector, I decided to make a 10-11 cm coil for myself. To do this, you need to wind a wire on a 10 cm mandrel (I don’t have 0.3, I wound 0.4) 130 turns.

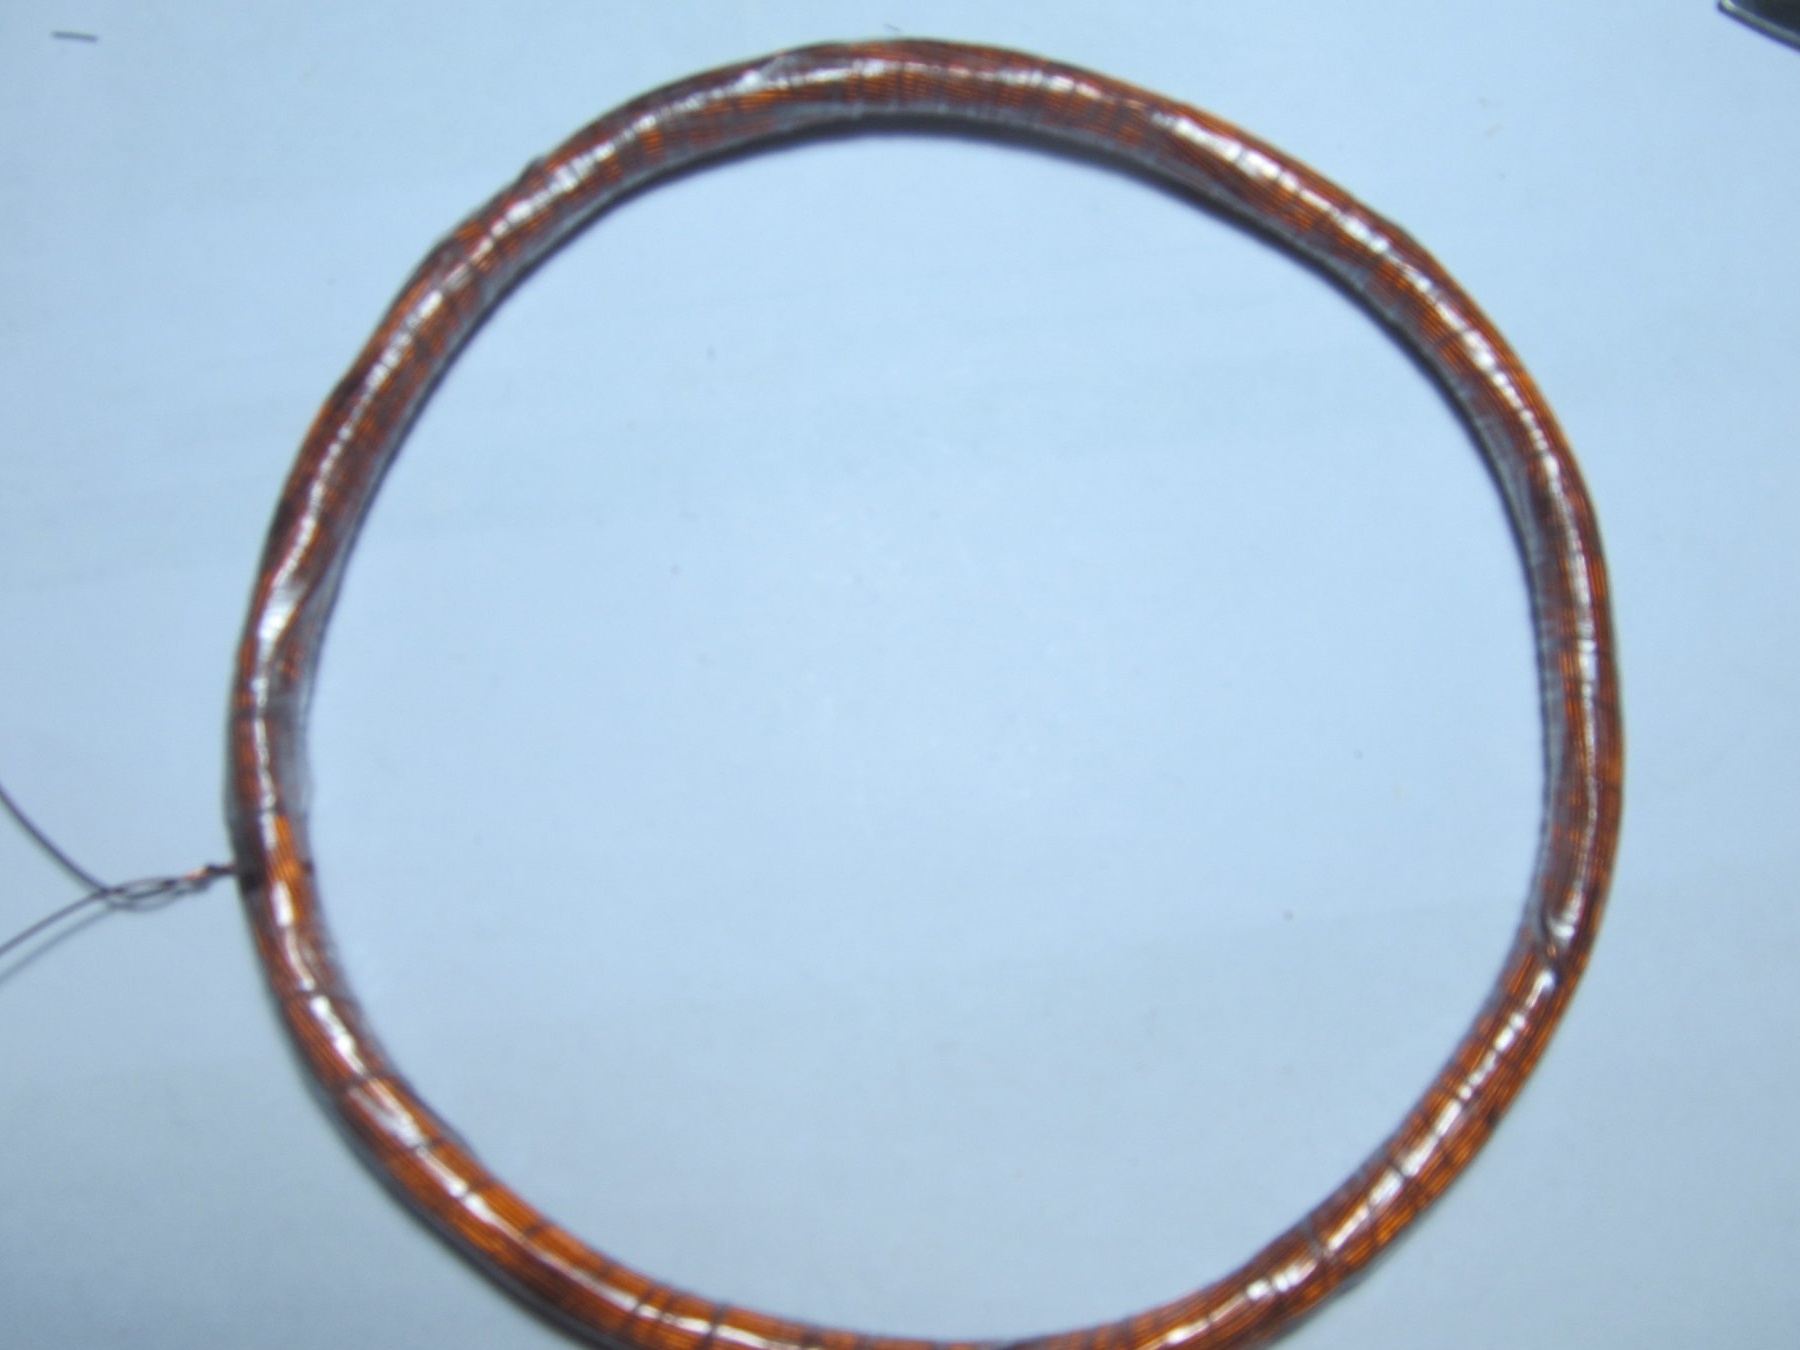
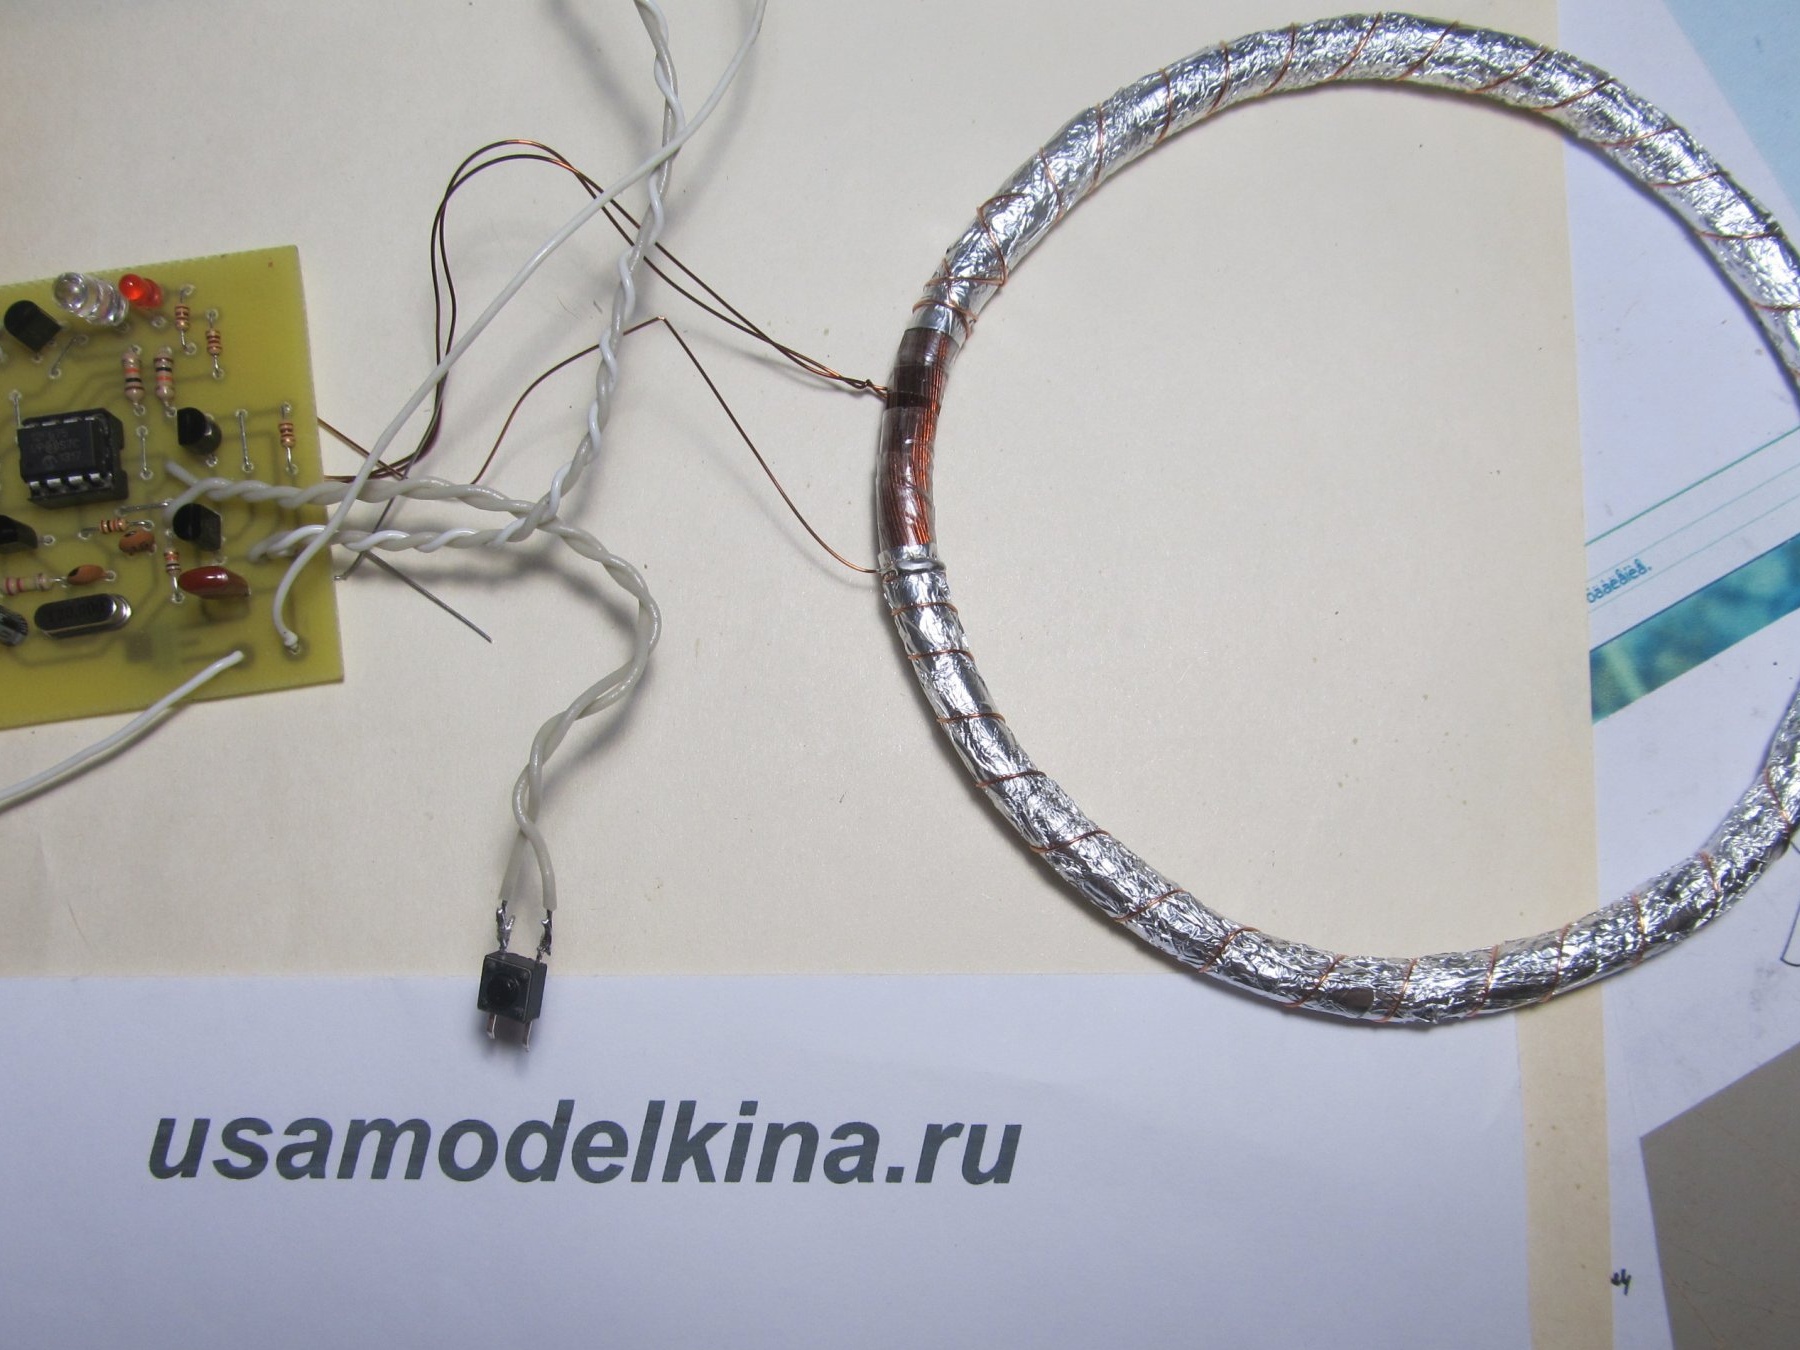
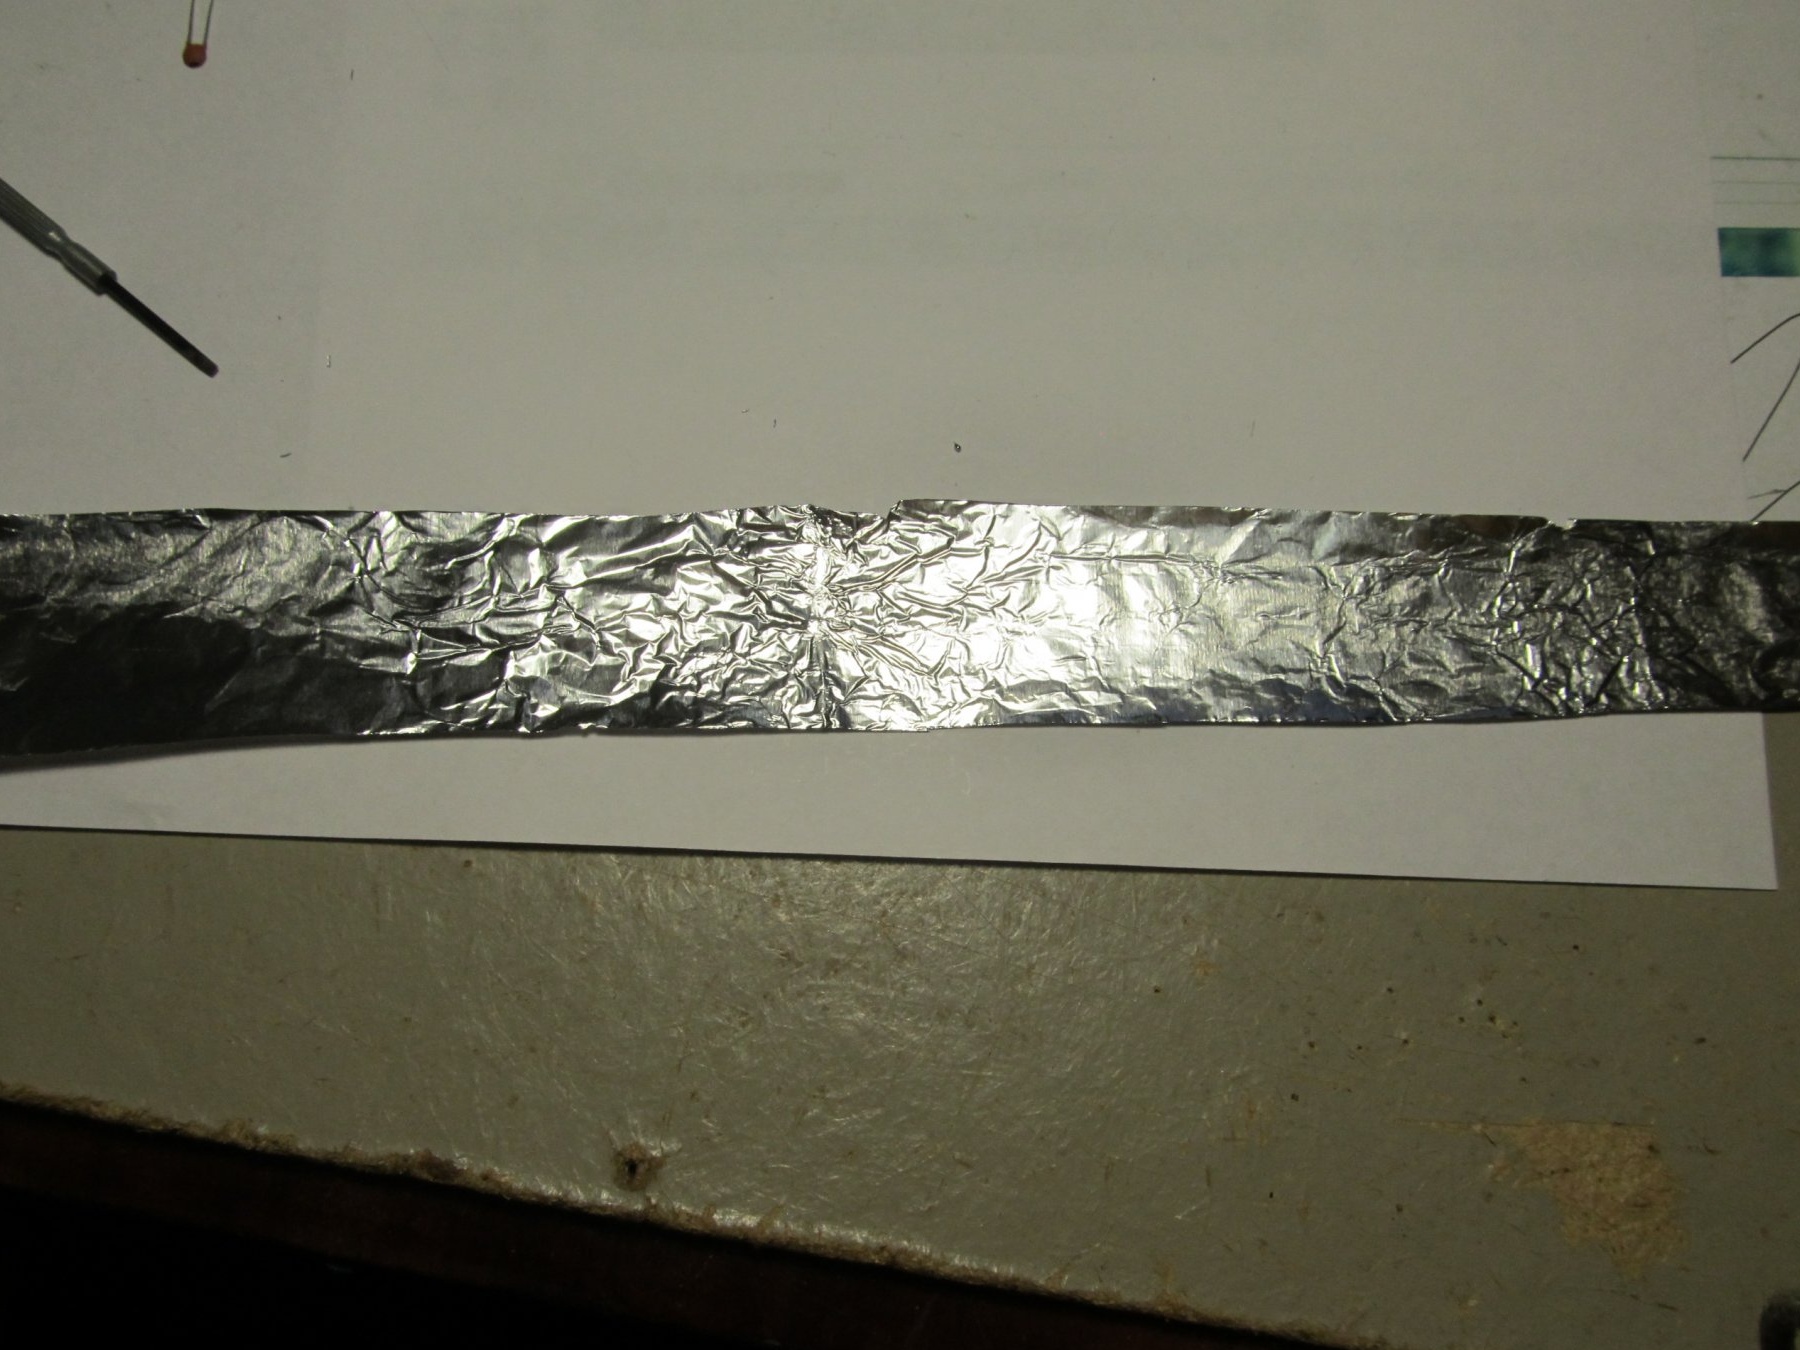
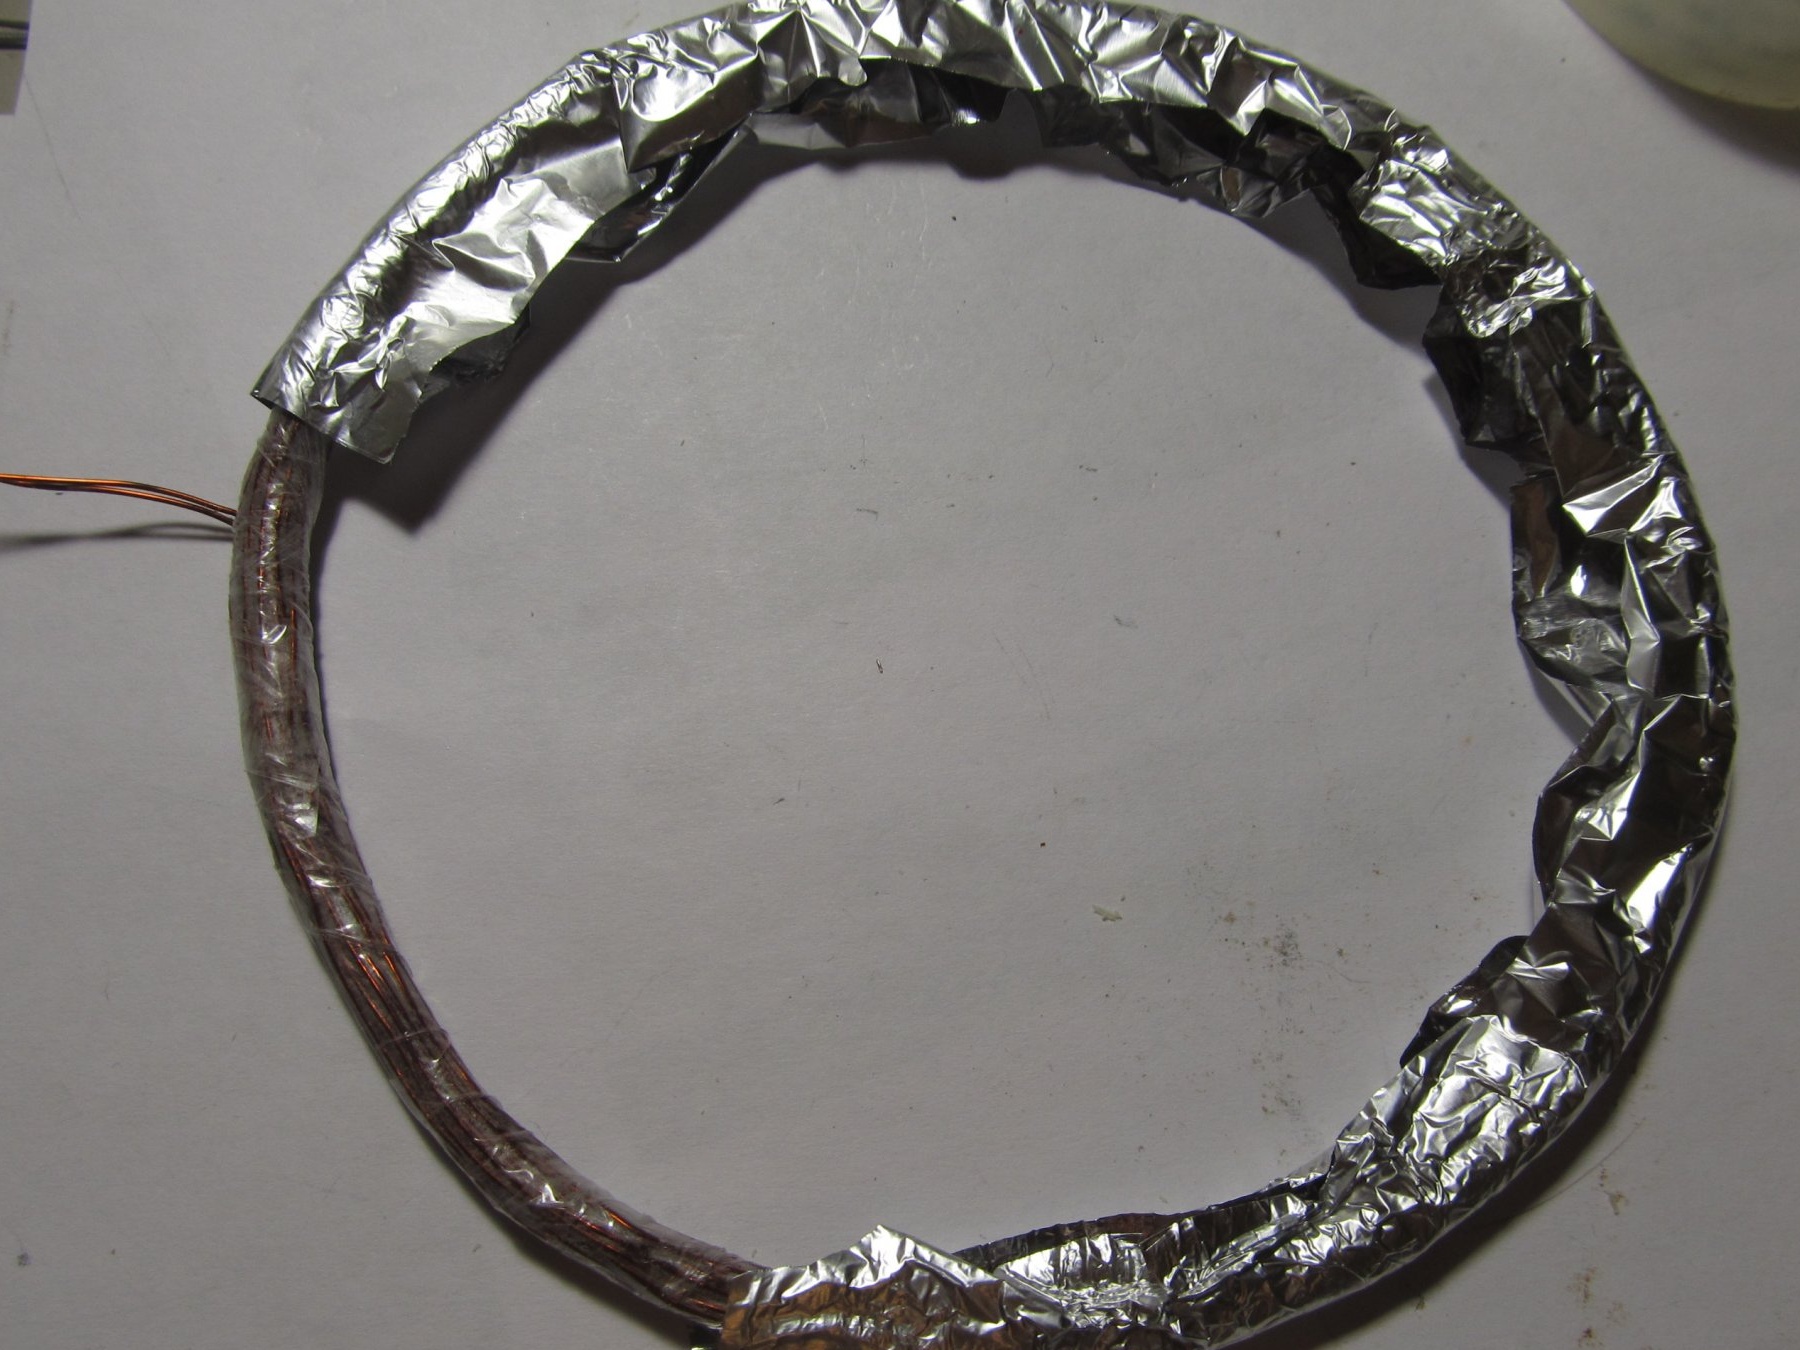
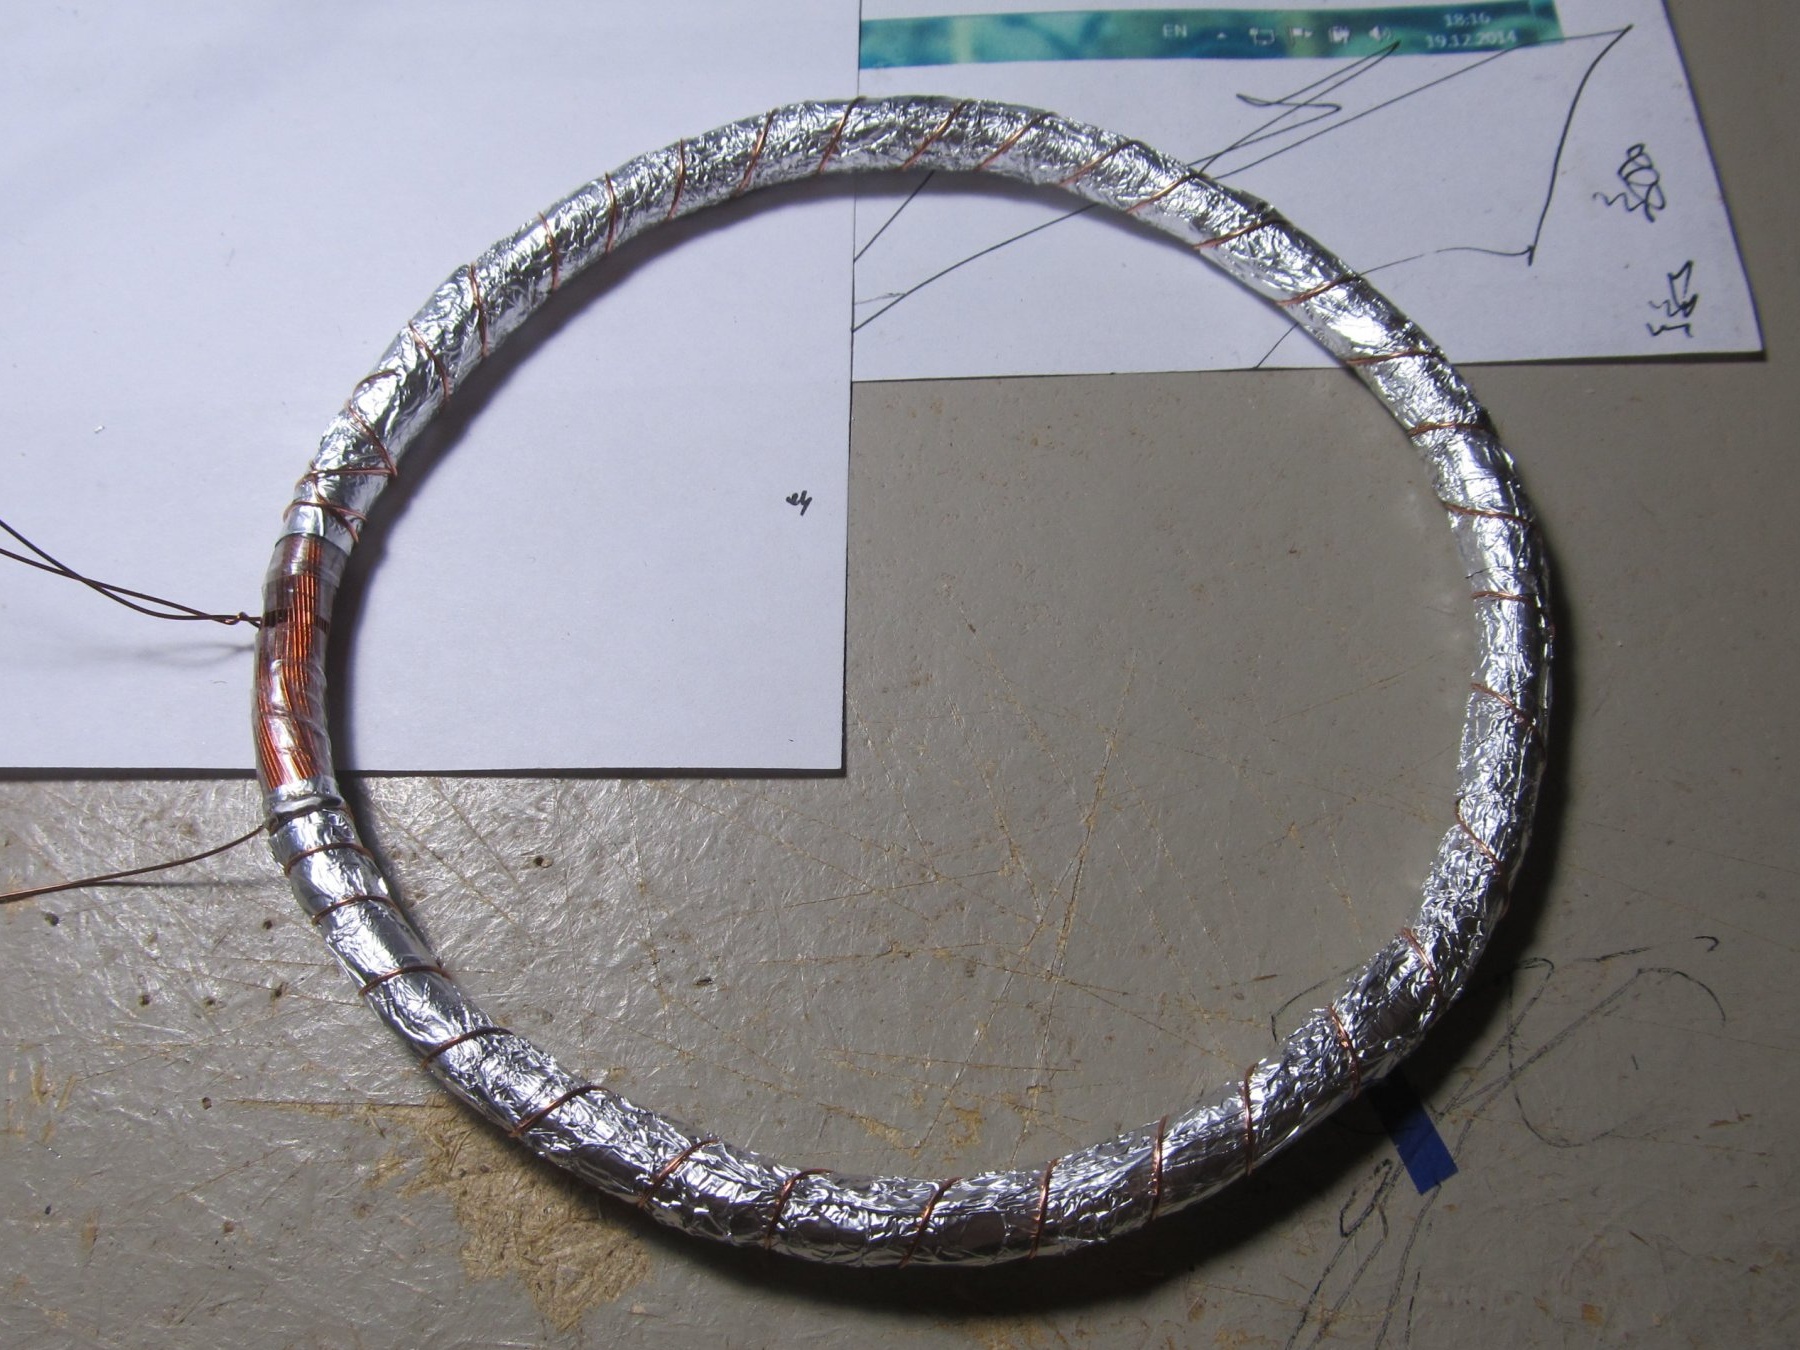
Coil as in first baby wrap with tape and screen.


Here is a photo of the entire device assembly

Next, you need to flash the microcontroller and you're done.

When you turn on the device should make a sound (peak-fute), if the Fute is, then the device turned on and started working. If at all, I didn’t pick it, then the error in the board or not working quartz.

If you pick it up, but there is no treasured Fute, then either the coil is not wound correctly or the wrong capacitor C2 is 22nF. It didn’t start for me for a very long time, everything was picking and picking, but there was no treasured Fute. It turned out that instead of a 22nF film capacitor, I put a simple ceramic one and did not tighten the coil tightly and did not shield it.

Basically, the device is not very difficult to assemble, the main thing is to flash the microcontroller, who does not have a programmer, please contact, I will help with the firmware

Below I posted a video of the metal detector, as well as firmware and board files in DIP.

VIDEO WORKS


FIRMWARE MetFM2_675.rar [1.99 Kb] (downloads: 7943)

PAY Plata-DIP.rar [7.13 Kb] (downloads: 7986)
9.7
10
8.3

Add a comment

    • smilesmilesxaxaokdontknowyahoonea
      bossscratchfoolyesyes-yesaggressivesecret
      sorrydancedance2dance3pardonhelpdrinks
      stopfriendsgoodgoodgoodwhistleswoontongue
      smokeclappingcraydeclarederisivedon-t_mentiondownload
      heatirefullaugh1mdameetingmoskingnegative
      not_ipopcornpunishreadscarescaressearch
      tauntthank_youthisto_clueumnikacuteagree
      badbeeeblack_eyeblum3blushboastboredom
      censoredpleasantrysecret2threatenvictoryyusun_bespectacled
      shokrespektlolprevedwelcomekrutoyya_za
      ya_dobryihelperne_huliganne_othodifludbanclose
155 comments
On the developer's site, the scheme is a little different. Have you redid your scheme?

5 leg is not connected.
Author
it happens, he sometimes needs to warm up, I on the beach with my min 3 waited until it starts, and immediately started at home
He began to run for a long time. Three short ones.
Author
Well, this Conder can be picked up, people picked up, experimented
In parallel to the coil on other schemes Conder 33 N.
Author
I generally only at 629 and did, for myself and on order, everything works the norm. And the fact that sometimes it works by itself is yes there is such a sin in it, but still the simplest one with discrimination (this affects)
It starts at 675 peak, at 629 does not want. I did not confuse the firmware. It happens by itself.
Author
Well, turn 103 and reel, it should start
The program showed 0.35 103 turns with a wire.
Author
130 turns a lot for a 15cm coil. Come here, it shows how to reel http://signalsam.blogspot.com/2015/05/blog-post_68.html
I wrapped 0.35 130 turns on a 15 cm frame with a wire. When turned on, 6 short and 1 long. There is no start. You have 3 more short packages between two packages.
Author
Yes, it’s suitable, it’s just food and I screened
Foil for the screen what thickness should be.? Is food suitable?
Author
make a small coil diameter, but with a wire of 0.35-0.4 and should see

Quote: walvorine
"I didn’t solder one jumper," is that how?
"Screen correctly" - it is possible in more detail.

that is, I inserted a jumper, but I forgot to solder one end of it, so he pickled me all day.
To shield _ we wrap the coil with foil, just so that the ends of the foil do not close, solder the wire to the foil or wind it and connect this wire to the mass (-)
walvorine
"I didn’t solder one jumper," is that how?
"Screen correctly" - it is possible in more detail.
node49
node49 wire 0.1 is too thin, a minimum of 0.35 is needed.

It’s a pity ... A large thick coil does not want to see small objects, for example a copper wire. And I want to see. Therefore, I wanted to make a small coil ... :(
Author
walvorine how shielded coil ?? maybe they didn’t disappear, somewhere they missed ??

node49 wire 0.1 is too thin, a minimum of 0.35 is needed. We screen correctly, wire from the screen to ground, we remove all metal from the coil (I didn’t want to calibrate the coil, the screws in the table were screwed in, and the second didn’t want to work — I didn’t solder one jumper — and he would pick me the whole day until I saw disappear)
node49
I tried to assemble with a small coil of 50mm 0.1mm wire - not calibrated - 6 short peaks and another 1 short different tone. I wound 3 coils - 135, 150 and 215 turns, the same thing. I don’t understand how to count the coil ...
walvorine
I counted the program, did it right, checked Conder 22, the same result - 6 pause pause and repeat 6 peak, and so on.
does not respond to closing the coil and turning it off completely
Author
the number of turns through the program selected ??? I have wires 0.4 to 11cm 134 turns.
Skin turns to 135
walvorine
left for about 20 minutes, did not turn on. Power after stabilizer 3.28
wire 0.35 - 140 turns shielded with foil
does not respond to the reset button

The diameter of the coil is approximately 11 cm, matal on 1 liter jar
Author
Well, if it picks, it’s earned, it can sometimes pick for a long time, and then it turns on. If it picks for a very long time, then the matter is in the coil, how it was wound and with which wire ???
walvorine
did not work. 6 short pic pause and again too. Tell me what to do
Author
yes, surely, not otherwise
Do you need to flash?
Author
I also did not match the program. Drew your own, put inductance 2290 in the program and, according to its data, wind

I got 134 turns of 0.4 wire for a diameter of 10-11 cm
node49
if you look at the circuit, then before LED1 I just added a 100 ohm resistor

I collected everything, it works! Only an unstable coil, poorly calibrated :( What should be the inductance of the coil so that you can calculate the number of turns yourself? 2290 µH, as the author recommends? Calculate as multi-layer?

I substituted the data in the Coil32 program, the couple does not match, apparently I misunderstood something :(
and peak firmware only hp?

But can I flash Windows 7 ??? I put a board with connectors, and the firewood, it seems, got up !!! but this programmer does not see! (((

guys and the file itself for the firmware of the programmer for the metal detector, they are not all suitable ?? and where can I find them ???
thanks in advance !

It looks like only this firmware is indicated? and others will not go? Do I understand correctly?
Author
if you look at the circuit, then before LED1 I just added a 100 ohm resistor
You can write it, but there is no time
node49
The resistors are different, it seemed to you (they differ in the color of one strip like)

Then I was completely confused with the strapping of the LEDs :( Is it possible to sign the values ​​and part numbers on the photo of the assembled board?
Author
the surest option is to go to the nearest radio market, there is always someone who can flash your microcontroller, in most cases it’s those who have programmers on sale, give it a USB flash drive with a file and a microcontroller (the price should not bite, it is being updated quickly)
Guys tell me 4 days tormented! (how to open and how do these firmware files?

people who are from St. Petersburg ??? so would you meet would ask for a chip, naturally with money! )
most likely will not work with the adapter
Thanks, we will look for a computer, and the adapter will work with a coma on yusb ???
semen-8181, will not work on usb.
the above diagram is only suitable for the COM port
or look for a computer with a COM port or look for a usb programmer
The firmware does not open by itself, but with a special program.
link to the program given (under the diagram)
the firmware file is given as an archive in WinRrar
the firmware file must first be unpacked, and then open it in the programmer
Author
I can’t help anything at the expense of home-made programmers (I use the factory program, less trouble and everything works)
here I do not want to open files with firmware (((

made a progromator, but I can’t get through it !!! (((

Yes, and according to this scheme, I do not have 9 pin sockets on my computer! (I made usb on pin 9 and I don’t know how to translate how to tell usb on usb! (((
Author
No, this is not a mistake, the conders should be film or metal-film (the author who developed the scheme insists on it), but I found this scheme on the Internet and converted it to DIP components to facilitate assembly. I don’t know how much the ceramic capacitor will affect the operation, try it.
You write that "C2-22nF and C6-100nF capacitors must be film"
with a capacitor C2, of course, but why C6? it's not a mistake?
I did not find this and soldered chip, ceramics at 220nf
so reluctance to go to the store))
if I leave it as it is, how much will it affect the stability of the device?
Author
9th resistor (100 Ohms) - I myself put it on the second LED additionally, although it may not be set

but you said that the denominations do not match. not quantity (so you decide first)
It’s a little incomprehensible in the diagram of 8 resistances, and in the photo of the board 9 where he explain please
Author
which ones do not converge ???

in the photo everything is as in the diagram, except for the diode (which I did not put)

maybe the lamp just shines and that's why not all strips on resistors can be disassembled
and the resistance values ​​in the photo and with the circuit do not agree for some reason: no:: fellow:: wink:

so how to do as in the scheme or as in the photo?
the easiest progromator

and pinout

and program
Author
but what does this file not suit you ??? works fine
good afternoon evening tell me how to flash a peak

But can I upload a normal file?
Author
this wire is so connected to the foil, it must be connected to (-)

The resistors are different, it seemed to you (they differ in the color of one strip like)
node49
Hello! Thanks for the information posted! It seemed to me, or R3 and R12 on the assembled board of the same denomination?
Jevgenij
Zdraste
Ja sobral vash pribor odnako on toko pikajet (bez ostanovki) k tomu ze sveto-diodi pri etom ne zagorajutsia.
Kondensatori plionochnije no v plastmasovoi beloi obalochke
Katushku vrode svezal plotno i ekraniroval
Tak vot hotel sprosit kakie esio mogut bit ne ispravnosti.
A esio vapros. Dlia chego vi obmatali katushku po verh folgi mednim provodom esio raz.
Spasibo,
Author
it is not there, I did not put it

We advise you to read:

Hand it for the smartphone ...