So, about what inspired me ... My daughter is a creative person. She comes up with a design for each holiday and decorates the apartment. On the eve of this New Year, she and I were at the supermarket, and she really liked the decorative “lantern”. (Unfortunately, I did not think to photograph it). My attention is given craft I wouldn’t even attract (I “love” more practical things). It was, you could say, a dummy of a lantern - a simple design, which is a rectangular box with glass walls ... You can’t put a candle in it either, because the frame is made of wood ... But my daughter said that it was not necessary, because inside you can put a fake candle - a candle made of paraffin, but running on batteries !!! As a "fire" acts a smoothly flashing yellow LED in a silicone shell that simulates the flame of a candle ...
... The construction cost was not very expensive - about 40 rubles (Belorussian). But for such a trifle, even this amount (about $ 20) seemed unreasonable to me, and I persuaded my daughter not to buy yet. He promised in the evening to try to make from the numerous remains of wood and glass wallowing in the basement. And if the result does not suit her, he promised to come to the supermarket tomorrow and buy ...
... It just so happened that I had to do from what was and was allotted for this one evening ... And that's what I got. (Looking ahead, I’ll say: I arranged a result for my daughter!)))))
Materials needed (as it turned out))) to me:
1. Glass.
2. Wooden corners 25 to 25 mm.
3. Wooden .... bar, probably)))). Section 10 by 10 mm. (Although, it is difficult to call it a bar. I call a square glazing bead).
4. Wooden block with a section of 15 by 15 mm.
5. Trimming OSB boards.
6. Trimming plywood.
7. Nails.
8. Glue PVad.
9. Foamed double-sided tape.
10. Insulating tape of white color.
11. The remains of white water-based paint.
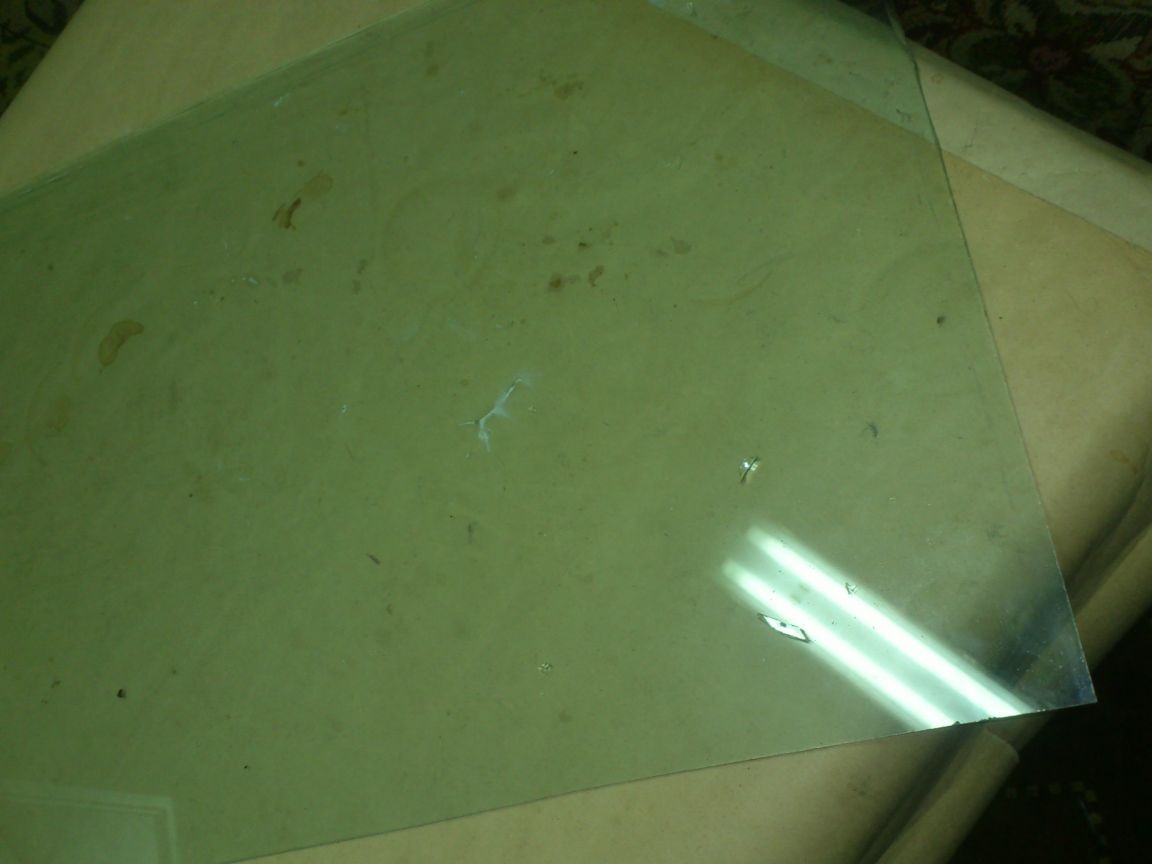
So, having come to the basement and brewing coffee, I began to think about what and how to make a structure, which is a vertical box with glass walls ... I decided to start with glass .... and we'll see.
... I had glass - I took it out of the old frame once, when my daughter asked me to cut glass for a picture. Then I cut off the desired piece, and the rest was in the basement. Remembering the approximate proportions and armed with the simplest "primitive" glass cutter, I cut out four glasses 200 to 300 mm in size.

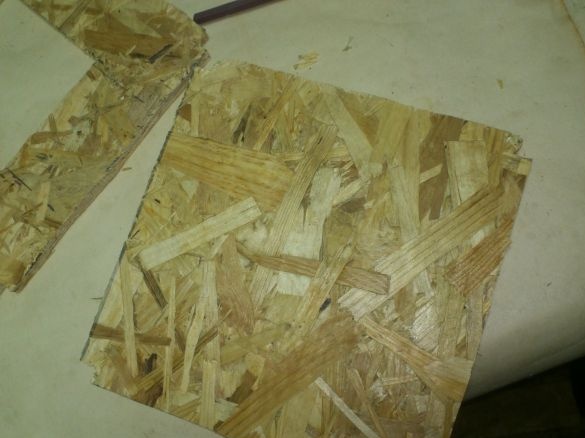
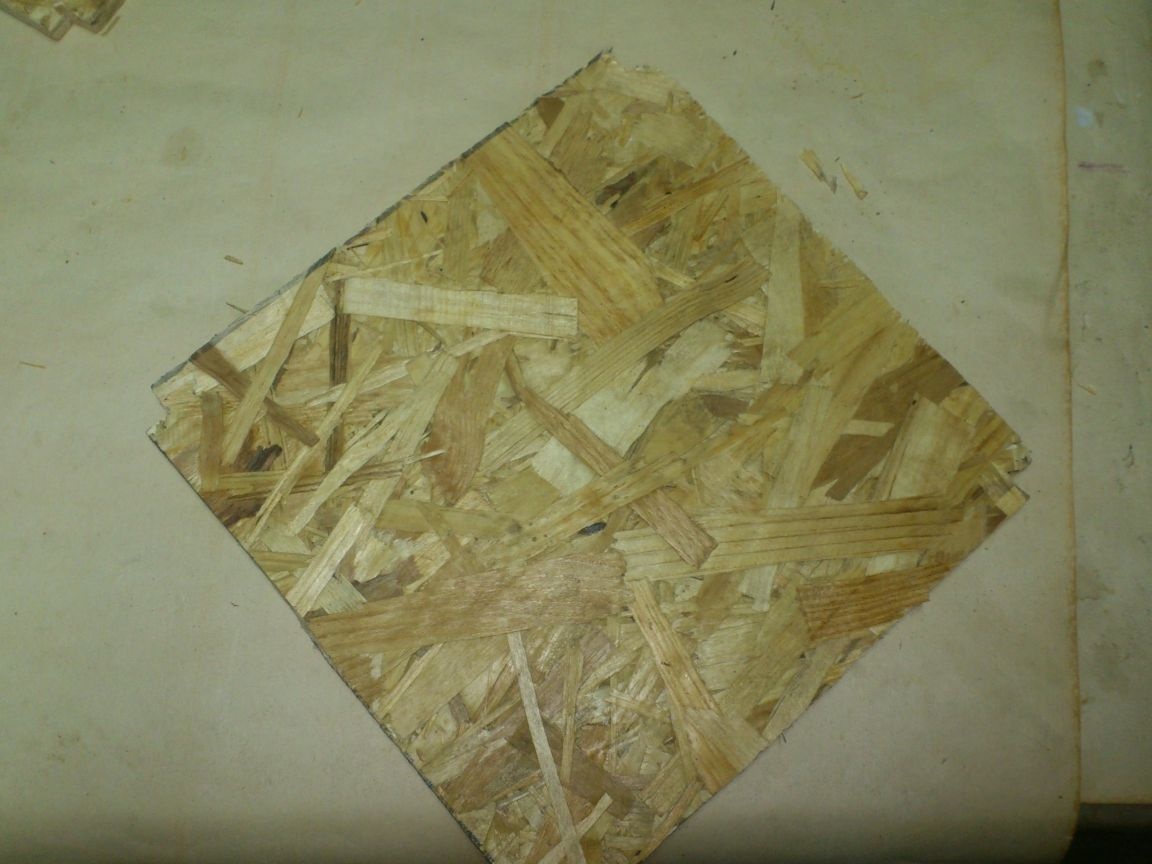
I decided to make the bottom and the roof from the OSB plate. Of course, it would be better to make them out of plywood, but .... I did not have plywood, and numerous OSB scraps stood against the wall. Therefore, I decided to make them, despite the fact that this material does not have such a strength as plywood.
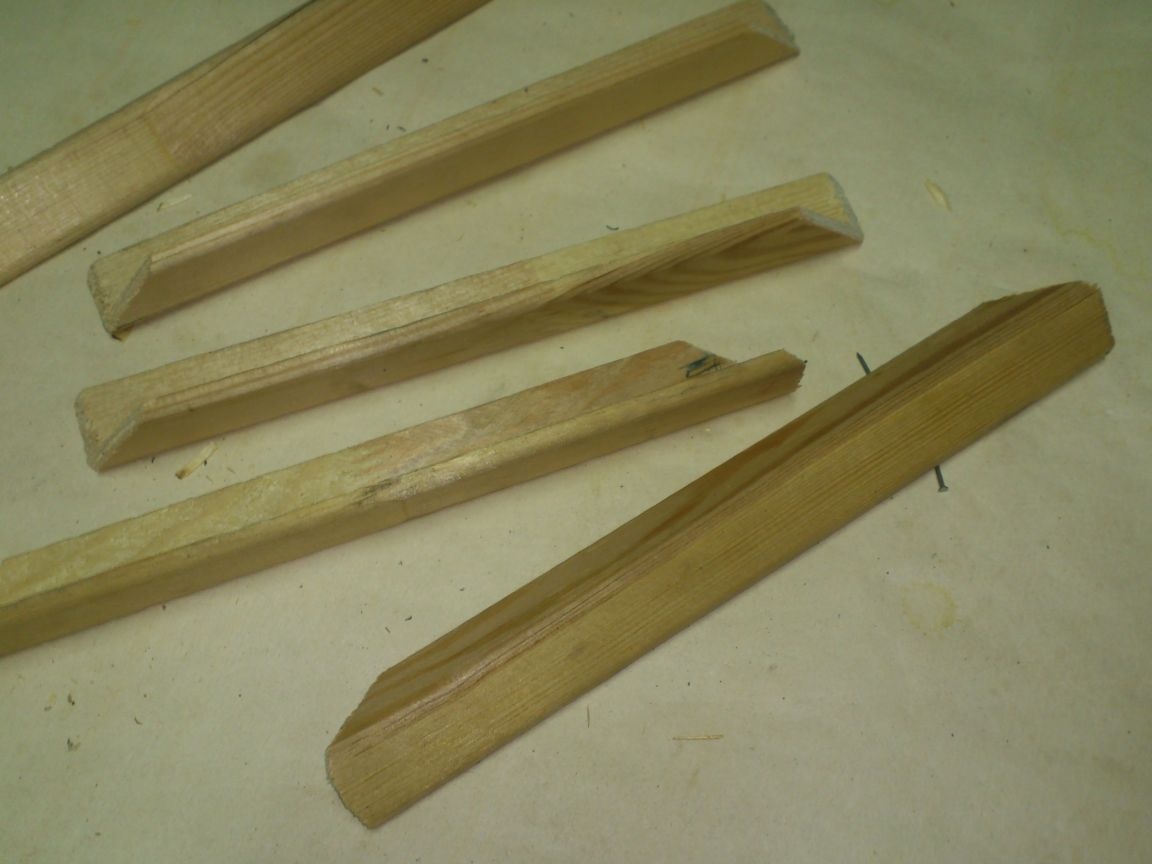
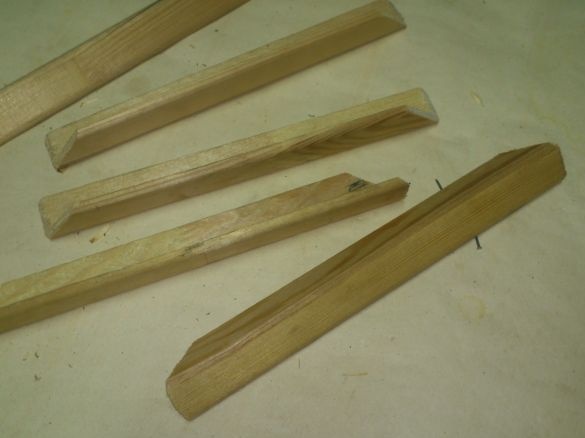
I decided to make the side “ribs” from a wooden corner with a cross section of 25 by 25 mm, the remains of which also stood in the corner. 
 Since it is weak enough, I decided to strengthen it with a wooden bar with a cross section of 10 by 10 mm, gluing it into a corner using a PVA dispersion, a half-bucket of which I always have in the basement ..
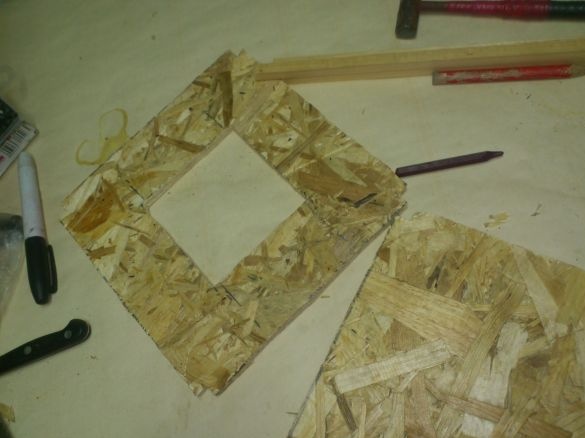
 Based on this, the dimensions of the bottom and top “loomed”. Using a jigsaw, I cut out two rectangles, 225 by 225 mm in size. (200 mm for glass, plus 10 mm on each side for bars, plus 5 mm for tolerance.)
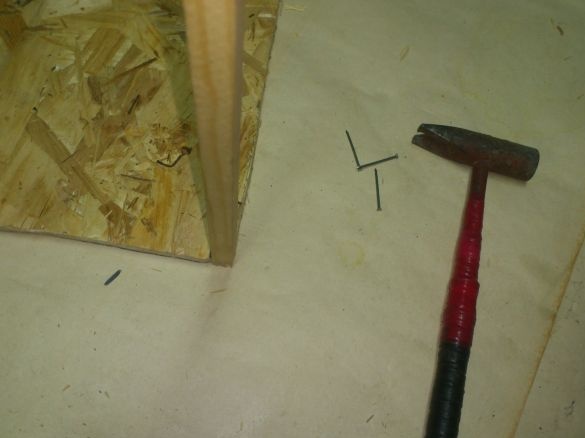
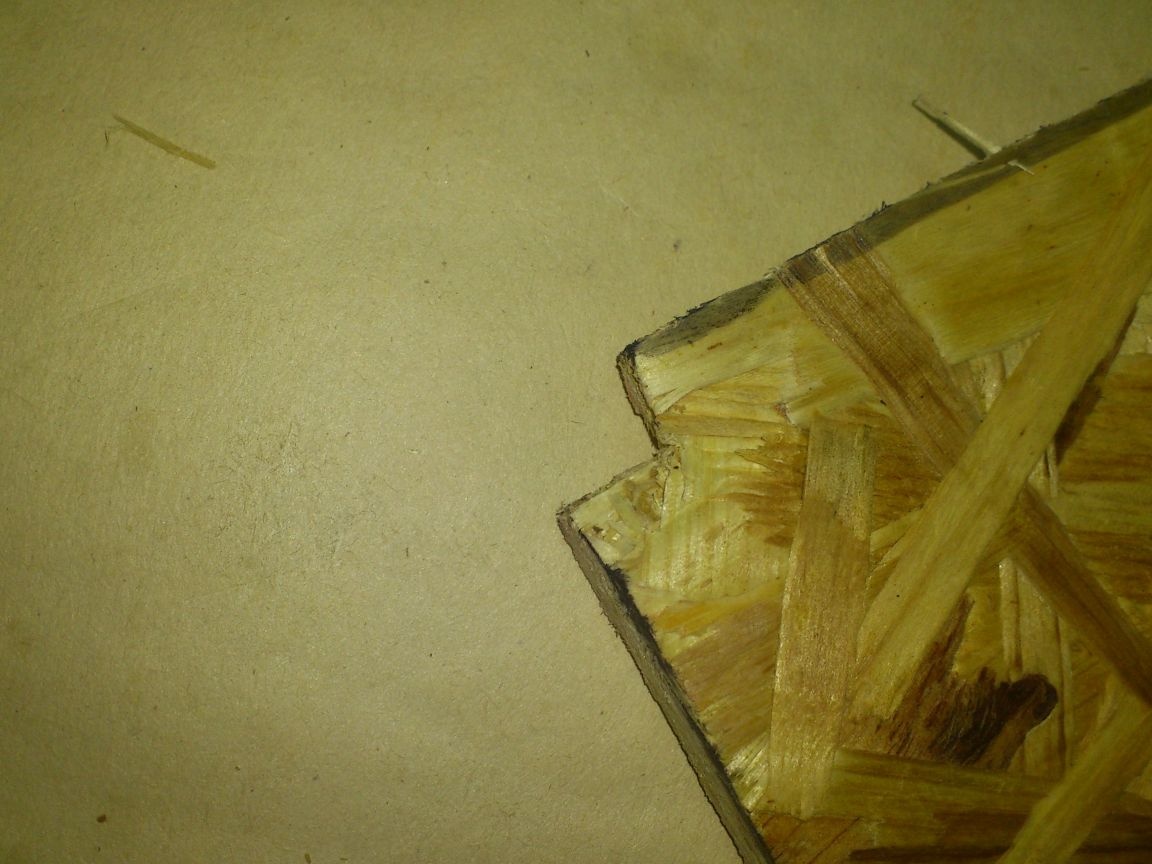
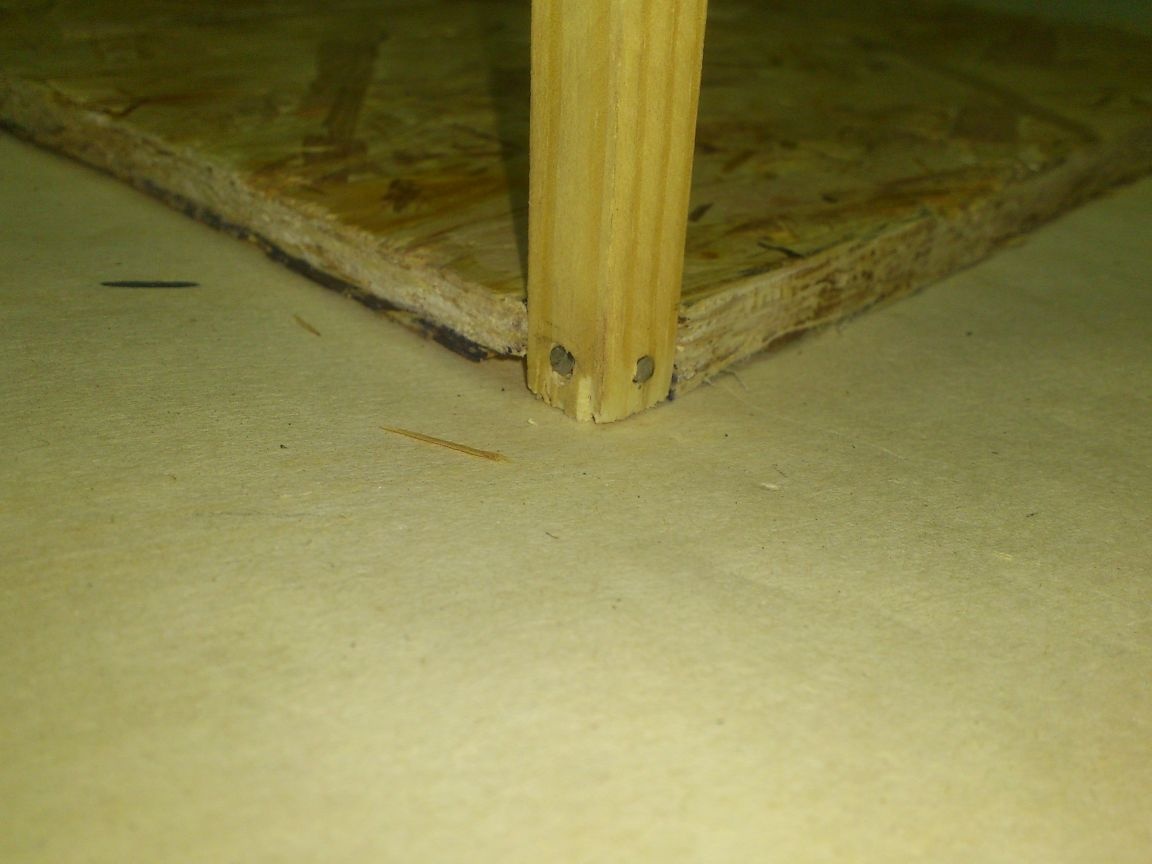
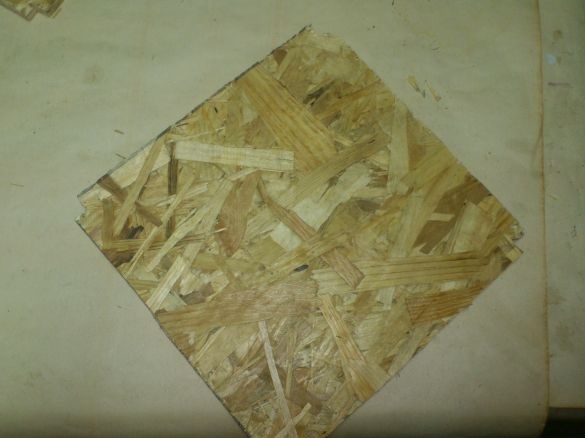 Since OSB, as I already said, is not particularly strong material, and the area of attachment of the corners to it turned out to be quite small (and the corners themselves are rather weak), I decided to nail reinforcing bars to the bottom, for which I saw places "measuring 10 by 10 mm:
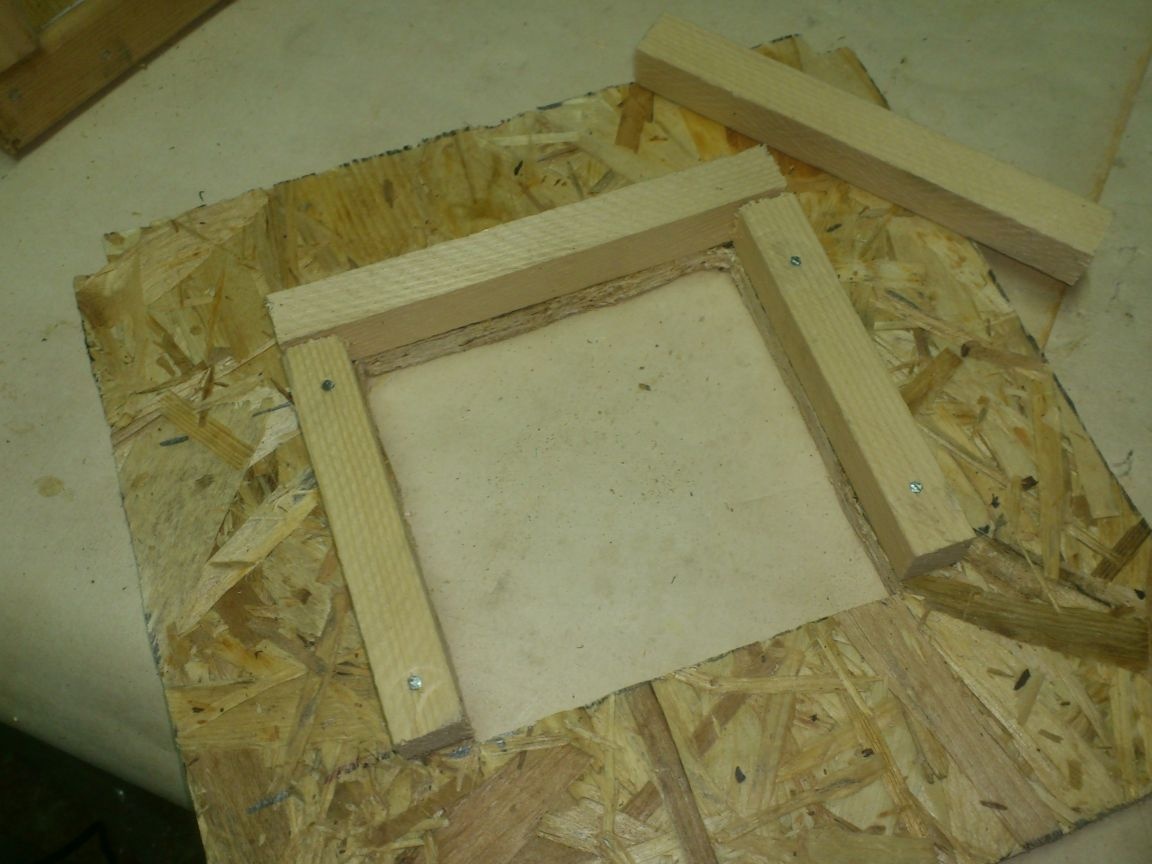
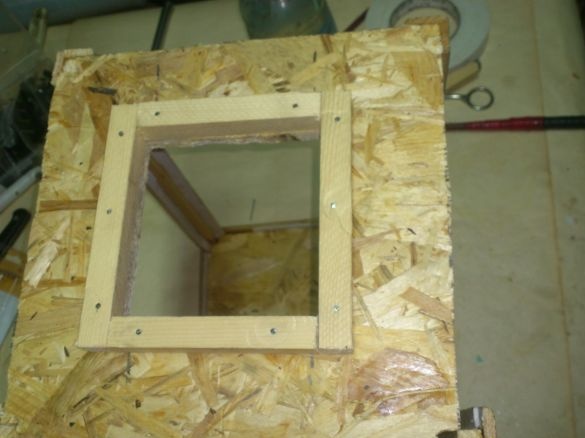
 At the top of the “lantern”, as I remembered from the “prototype”, there should be a “superstructure” imitating the ventilation openings of real lanterns. Moreover, having skeptically examined the material available to me, I realized that I could not make the door. And since access inside is needed to install and turn on / off the “candles”, I decided to make a hole on top and cover it with a removable “superstructure”. Therefore, in the "roof" I cut a hole of square section:
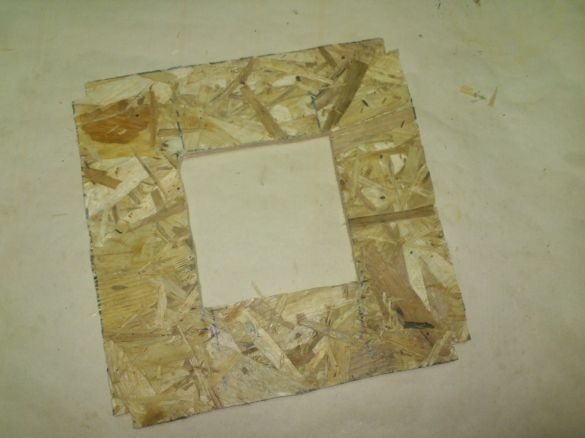
 From above, I “framed” the hole with bars, a section of 15 by 15 mm (Just because I had a 10 by 10 section!))))))
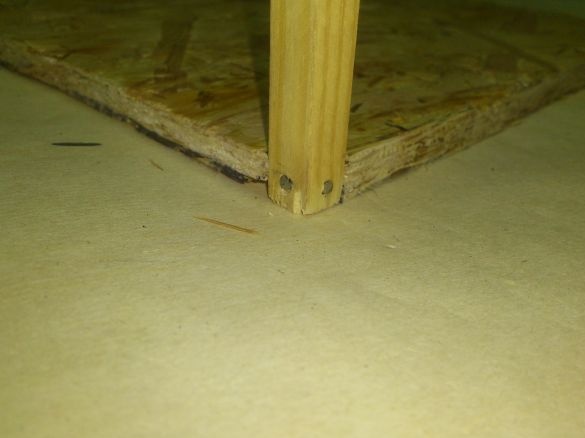
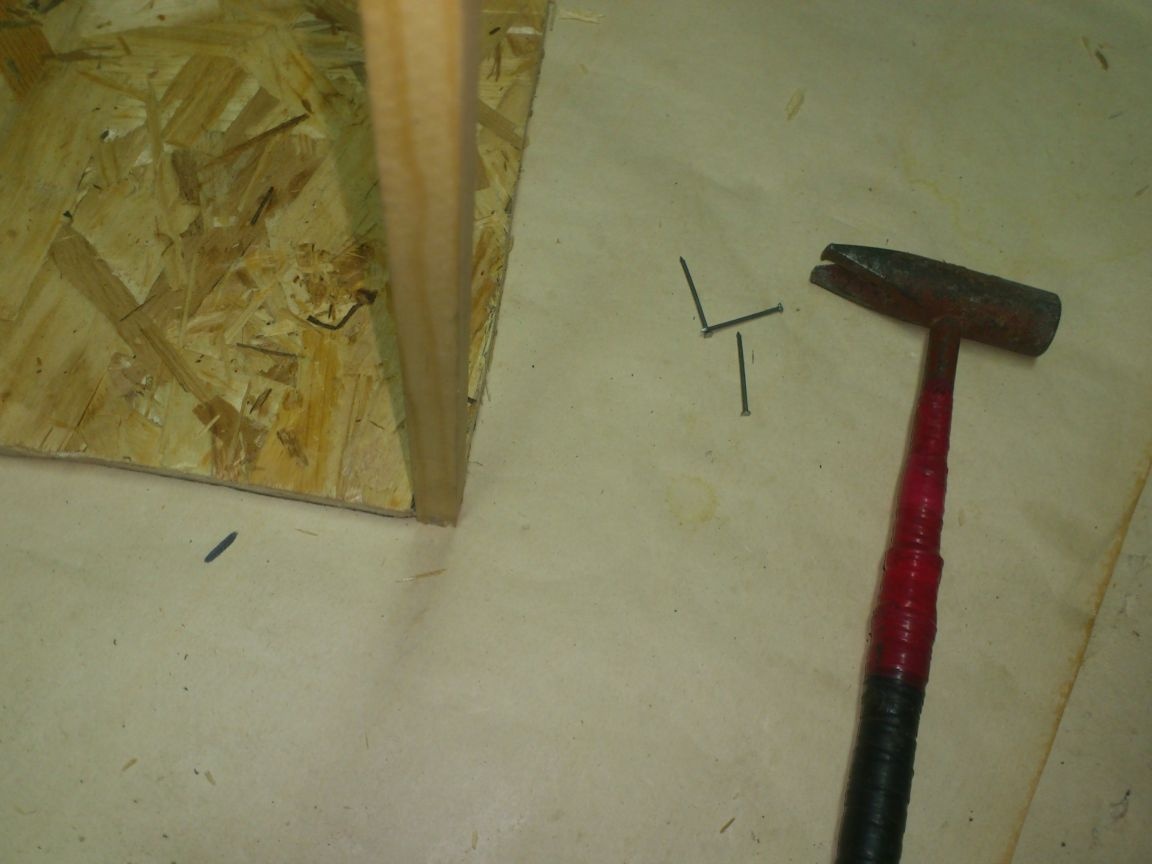
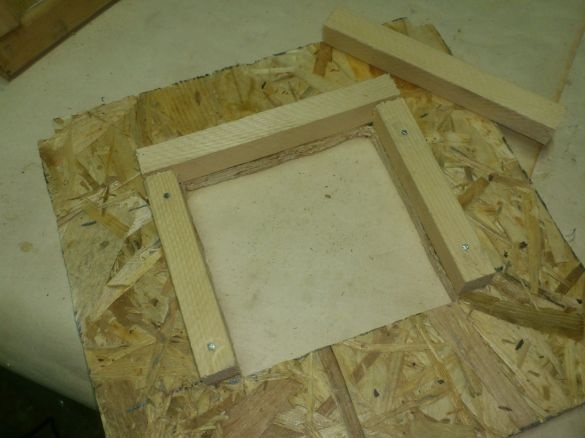 So, let's start the assembly. I glued the bars inside the corners and nailed it all with suitable studs to the base. (Do not forget to blunt the carnations !!!! A dull nail does not split the wood, as its end cuts and crushes the fibers of the tree, while the sharp one pushes them apart like a wedge, which leads to a crack!). The joints, in addition to nails, also missed the glue:


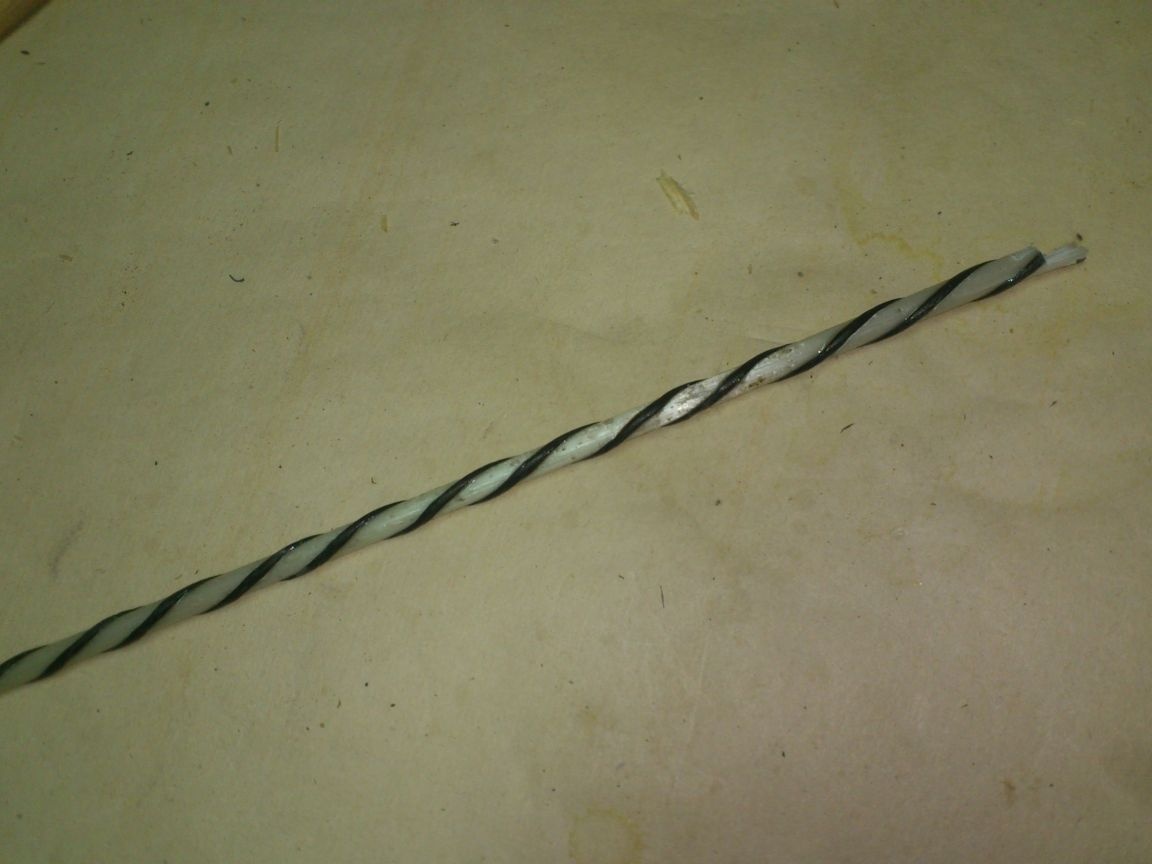
A small "lyrical digression", which, I think, will be useful to many masters.
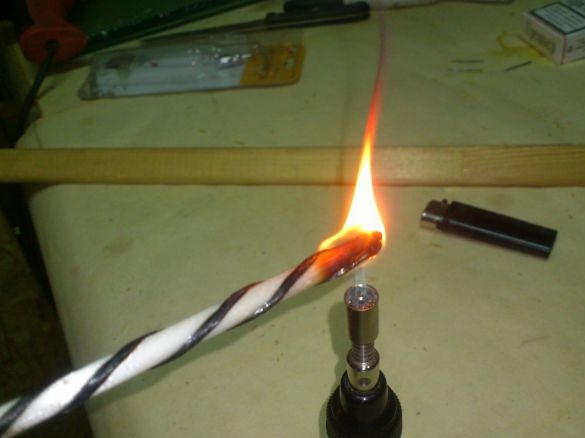
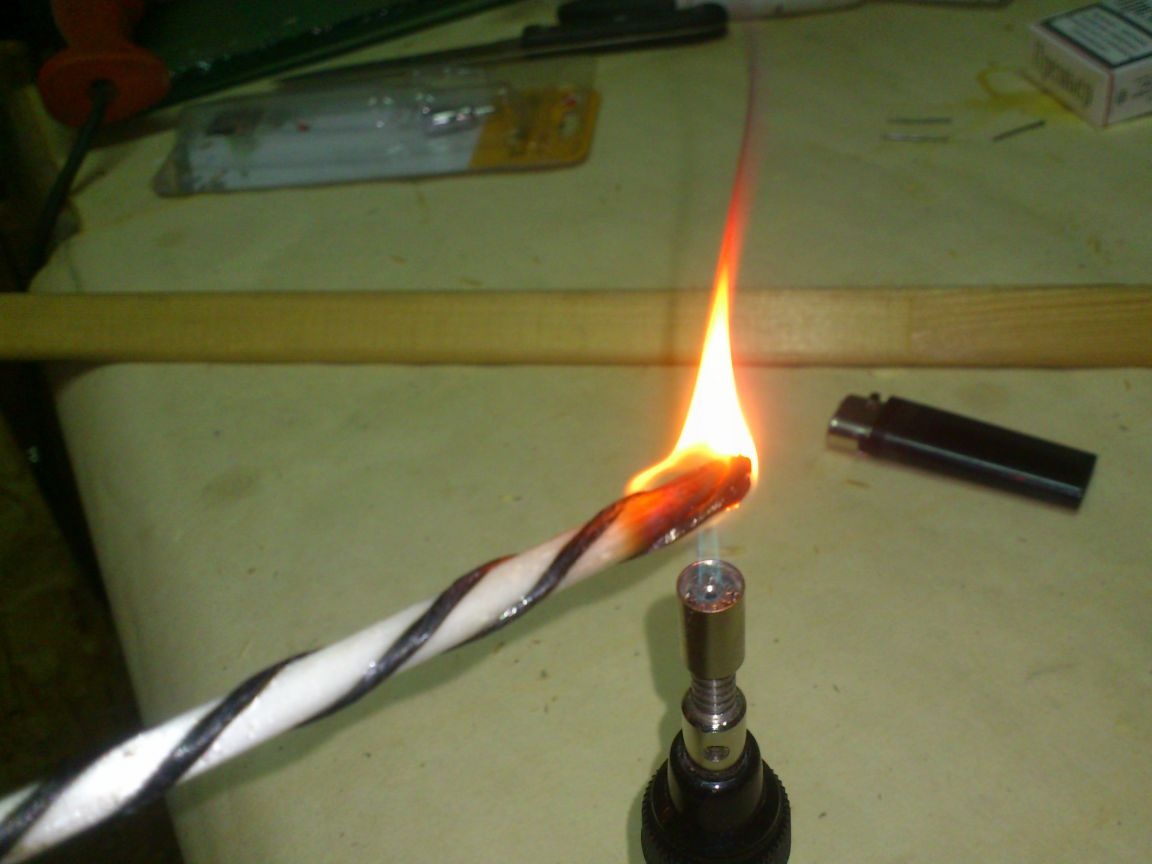
... In the process of work, it is often necessary to smear something with glue, or tint. At the same time, the used brush is often more difficult and longer to wash than it worked ... Therefore, I always use "disposable brushes" for such operations, which are very quickly and easily made from scraps of composite reinforcement. (I never throw away even short cuts, so I always have them.)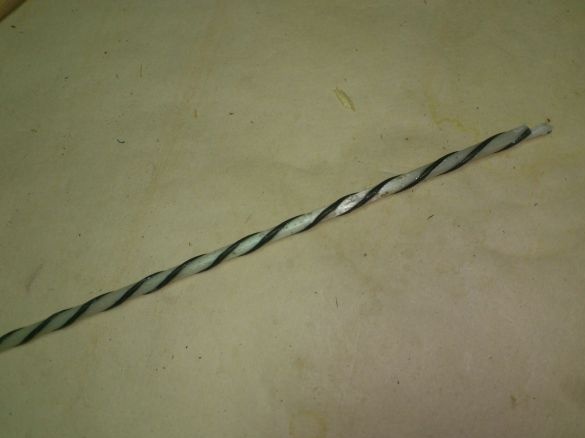 As you know, composite reinforcement, which has recently been increasingly replacing steel in concrete structures, is made of fiberglass impregnated with epoxy glue. Using a gas burner, we burn the end of the reinforcing trim, burning glue (fiber glass, as you know, does not burn):
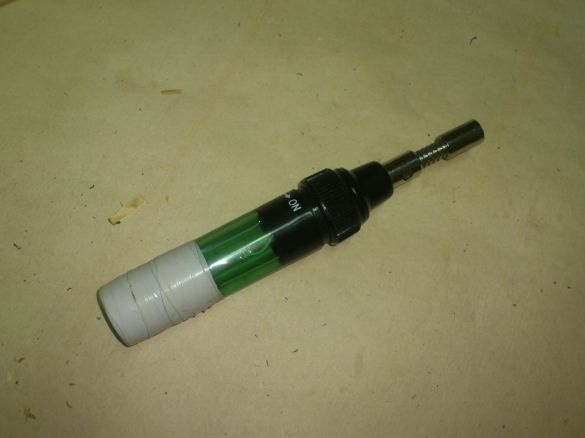
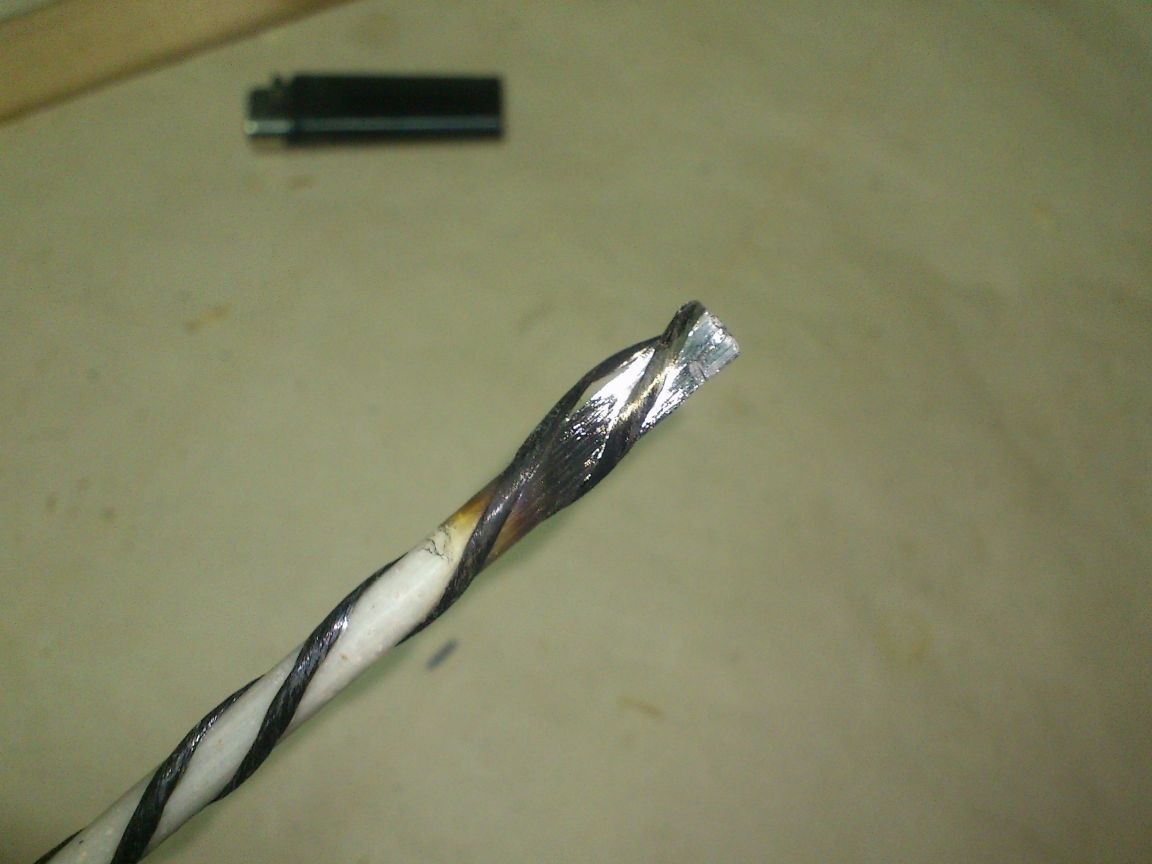
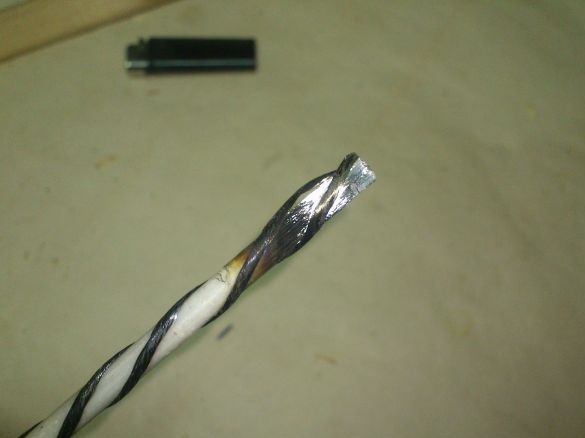 All. Our brush is almost ready. It is enough to cut off the side winding we do not need (it is not always present), and clean the brush itself by tapping with a hammer. All rubbish will be poured out, since fiberglass is very smooth - nothing dry keeps on them. After use, such a brush does not need to be washed - let it dry! )))). The next time, the dried end is simply cut off, and a new brush is burned. I always have different cross-sections, so there is no lack of disposable brushes! )))))
I hope someone did not know this "technology", and this advice will be useful to him. Moreover, the burner can be replaced with a simple lighter. It’s just a little longer ...
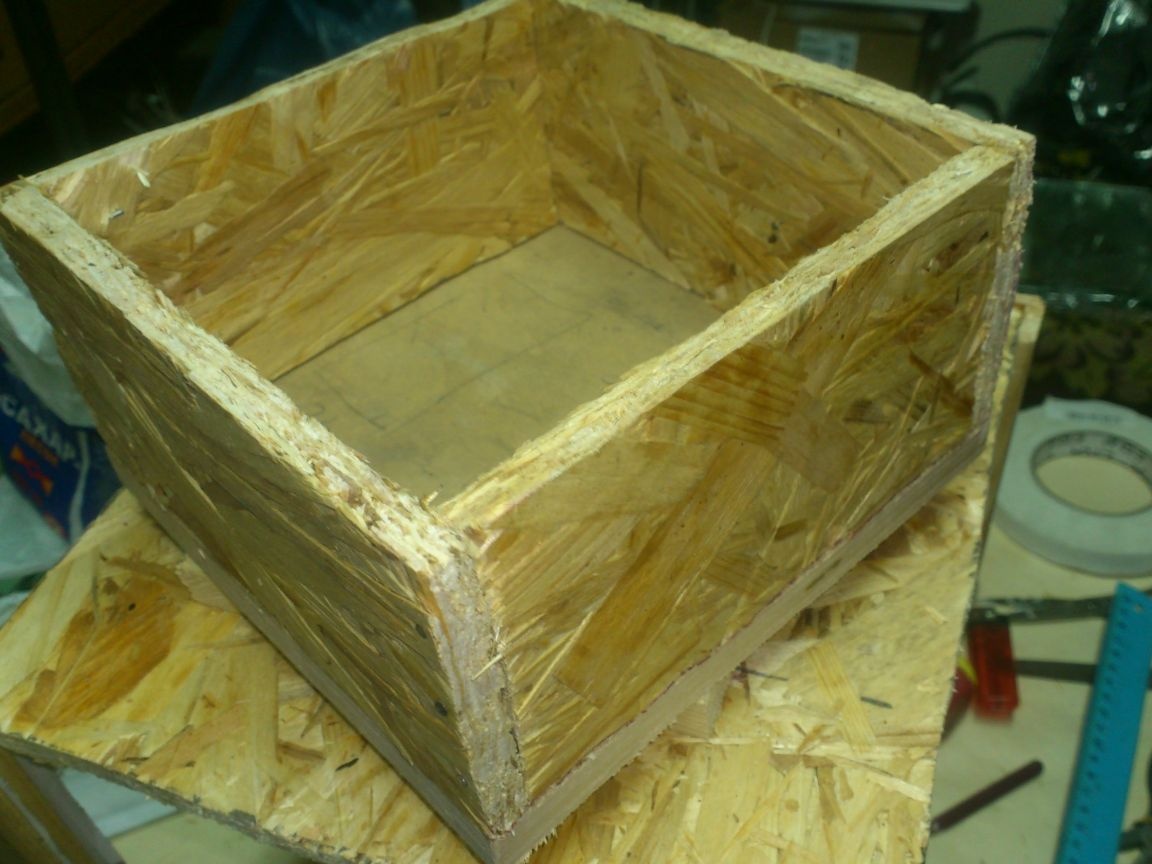
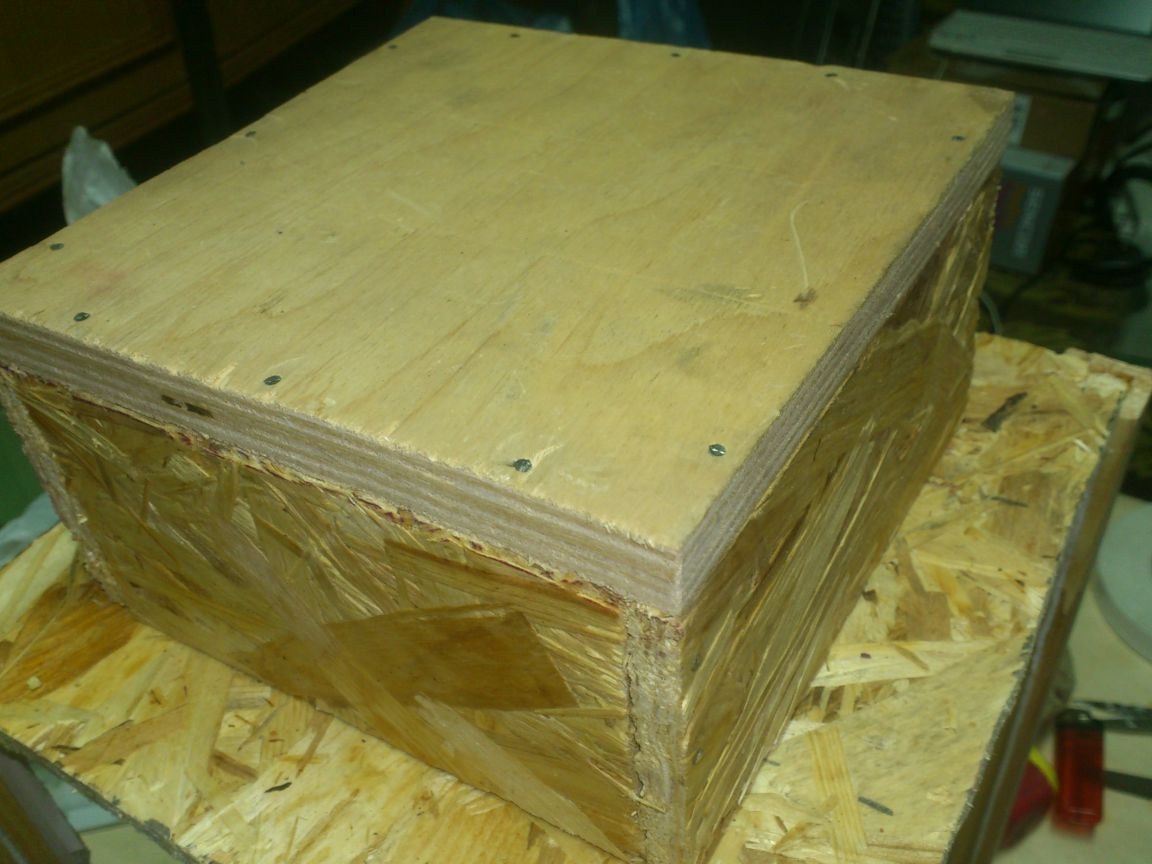
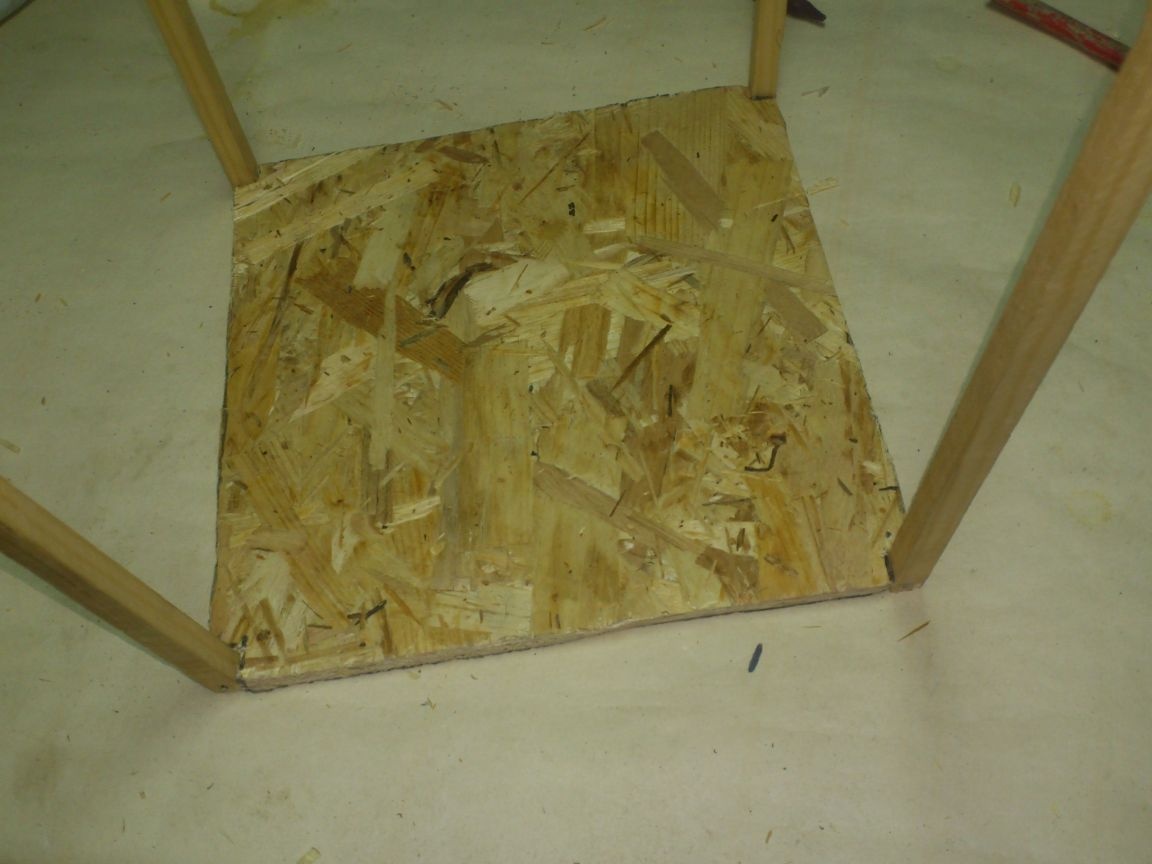
And we will continue. I assembled the frame. From above, also with the help of blunt cloves and glue, fixed the "roof":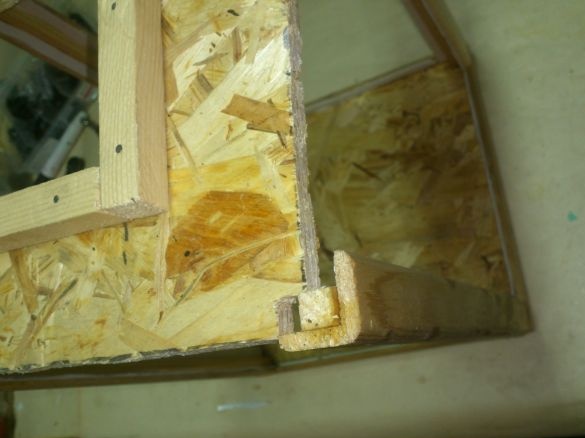
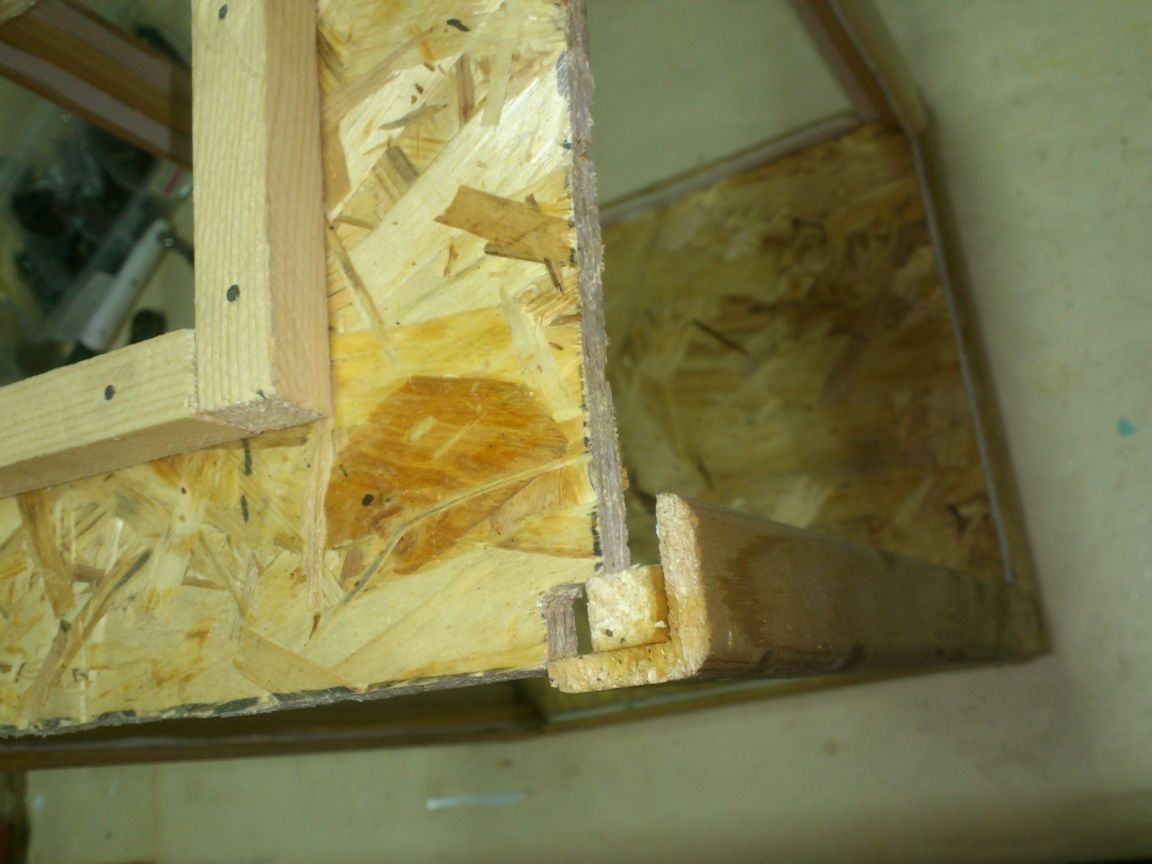
 Then he closed the perimeter of the top and bottom "in the patch" with the same corners with glue. This sealed the structure and created a “quarter” for the future insertion of glass.
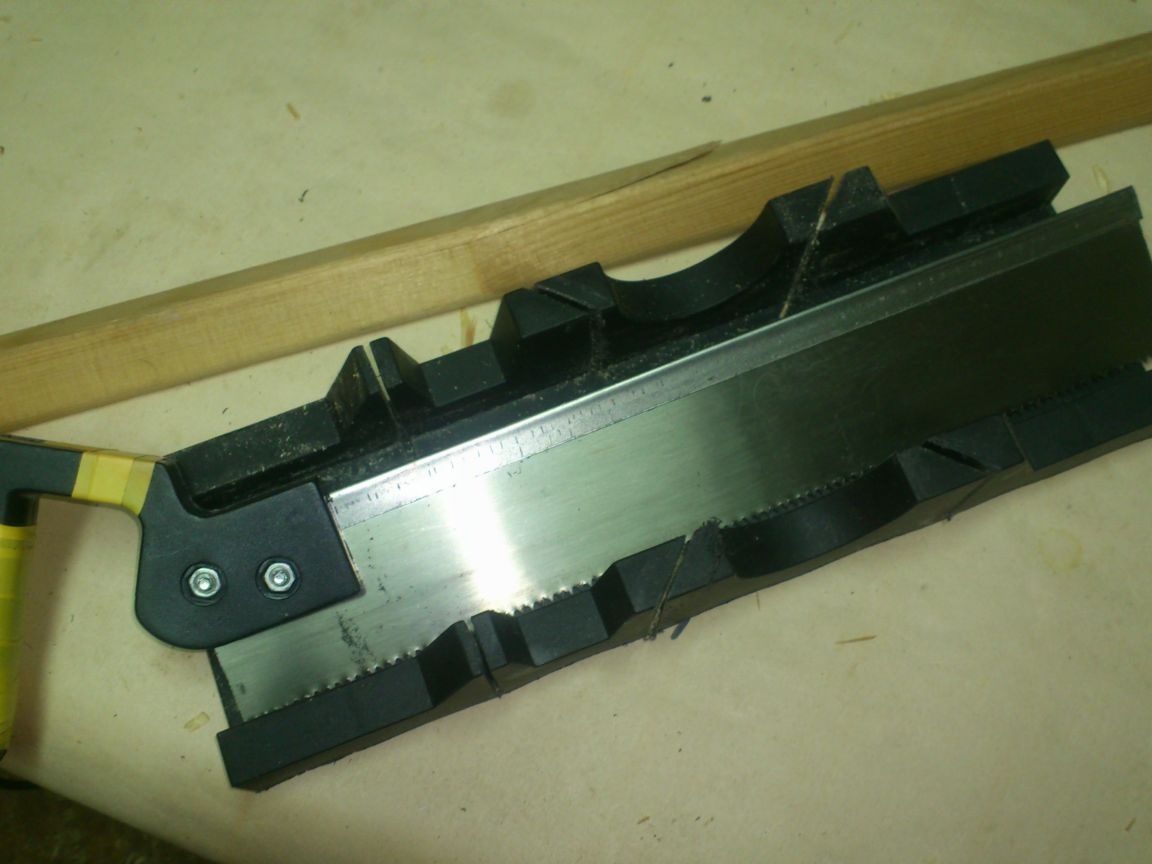
When cutting corners, I used a simple miter box:
 Next, I proceeded to fix the glass. I, without further ado, decided to stick them on the foam double-sided tape. (I also always have it ... Useful thing)). Since my tape was 20 mm wide, I initially, right on the roll, cut it halfway along:
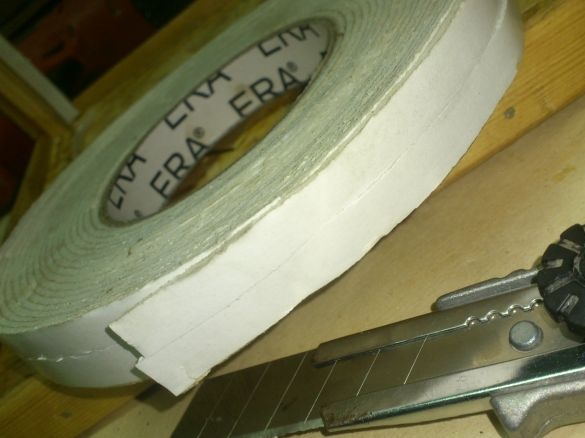 The field of which, I pasted strips of tape on the inner surface of the corners, took off the protective film, then inserted it and pressed the glass tightly inside. It was a little more difficult to carry out this operation with the last glass, but I managed it - I put it in, tilting it and turning it a little, the glass inside, after which I acted with my hand through the upper hole:
 Next, I began to manufacture a "ventilation superstructure." The top was made from a piece of thick plywood that came to hand, and the side walls from OSB. At the same time, he determined the sizes “along the way”, using, as I like to joke, the “applied method”. This is when you apply and mark with a pencil! )))))).
 I drilled the “ventilation holes” using a pen drill and a screwdriver:
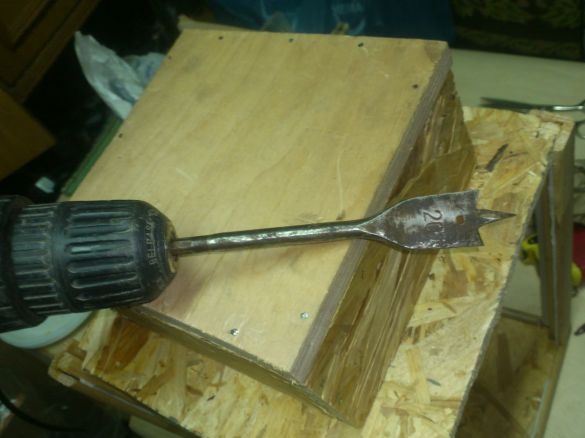 From above, I fixed here such an old furniture handle, also lying in my basement. Purely for decorative purposes.
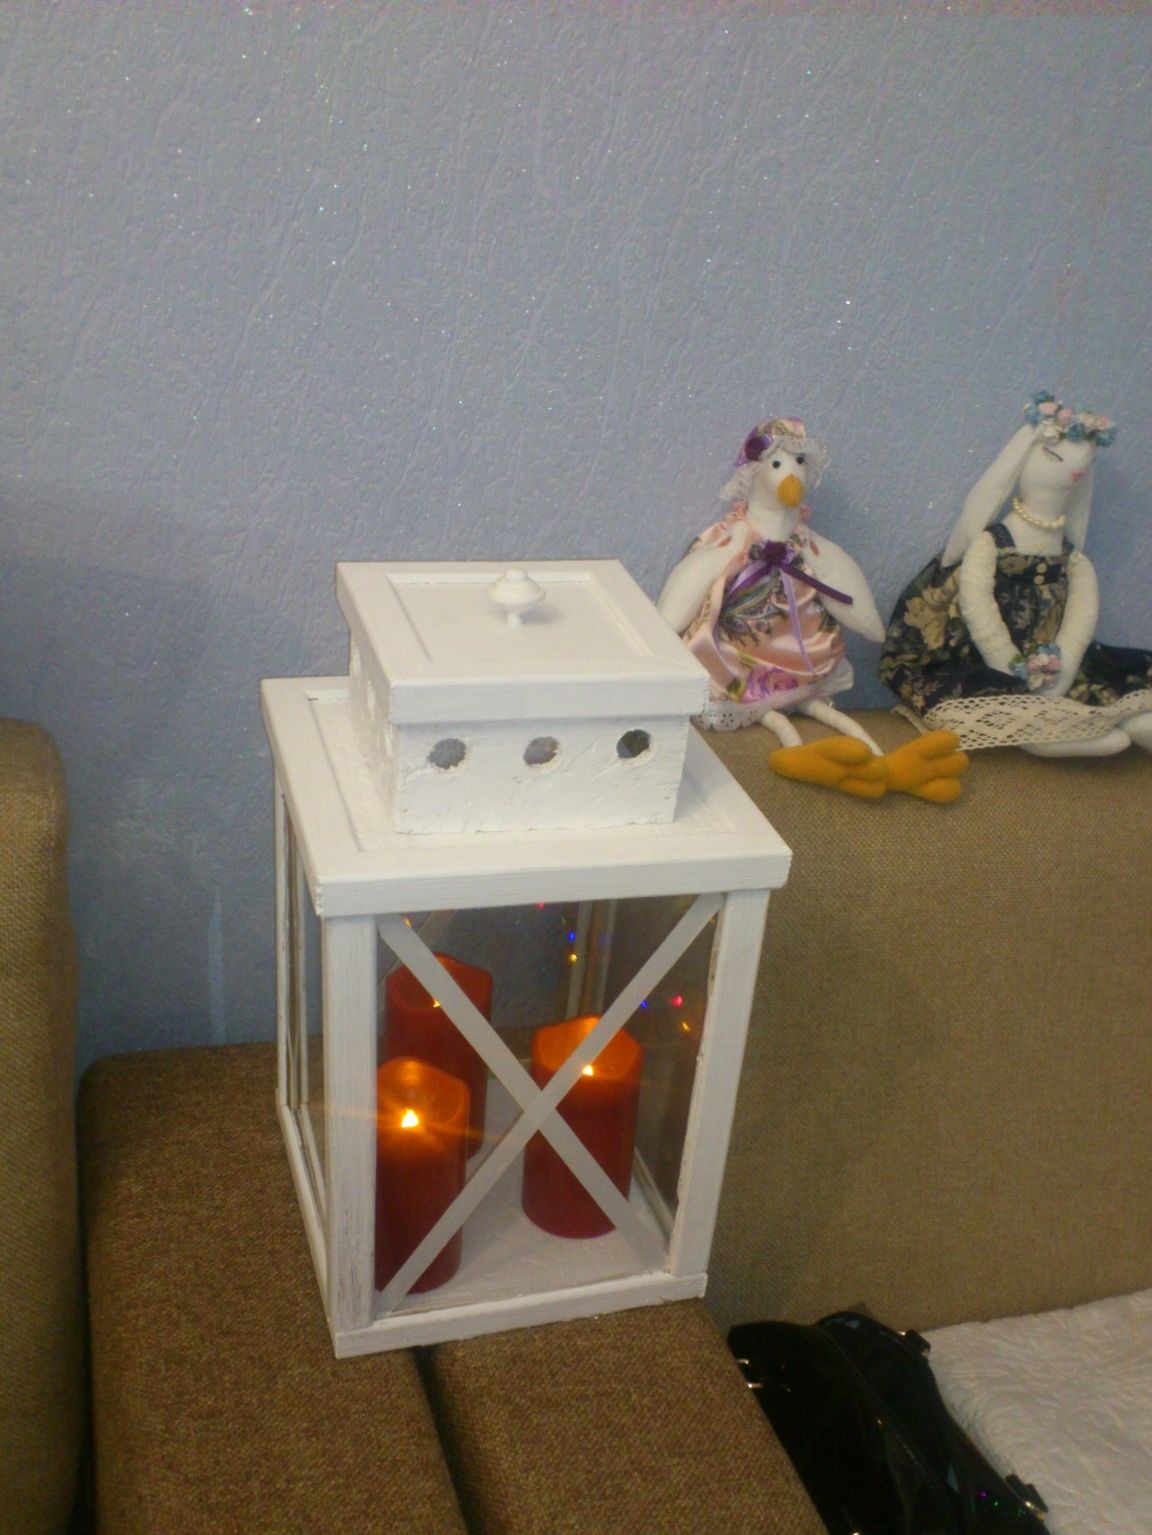
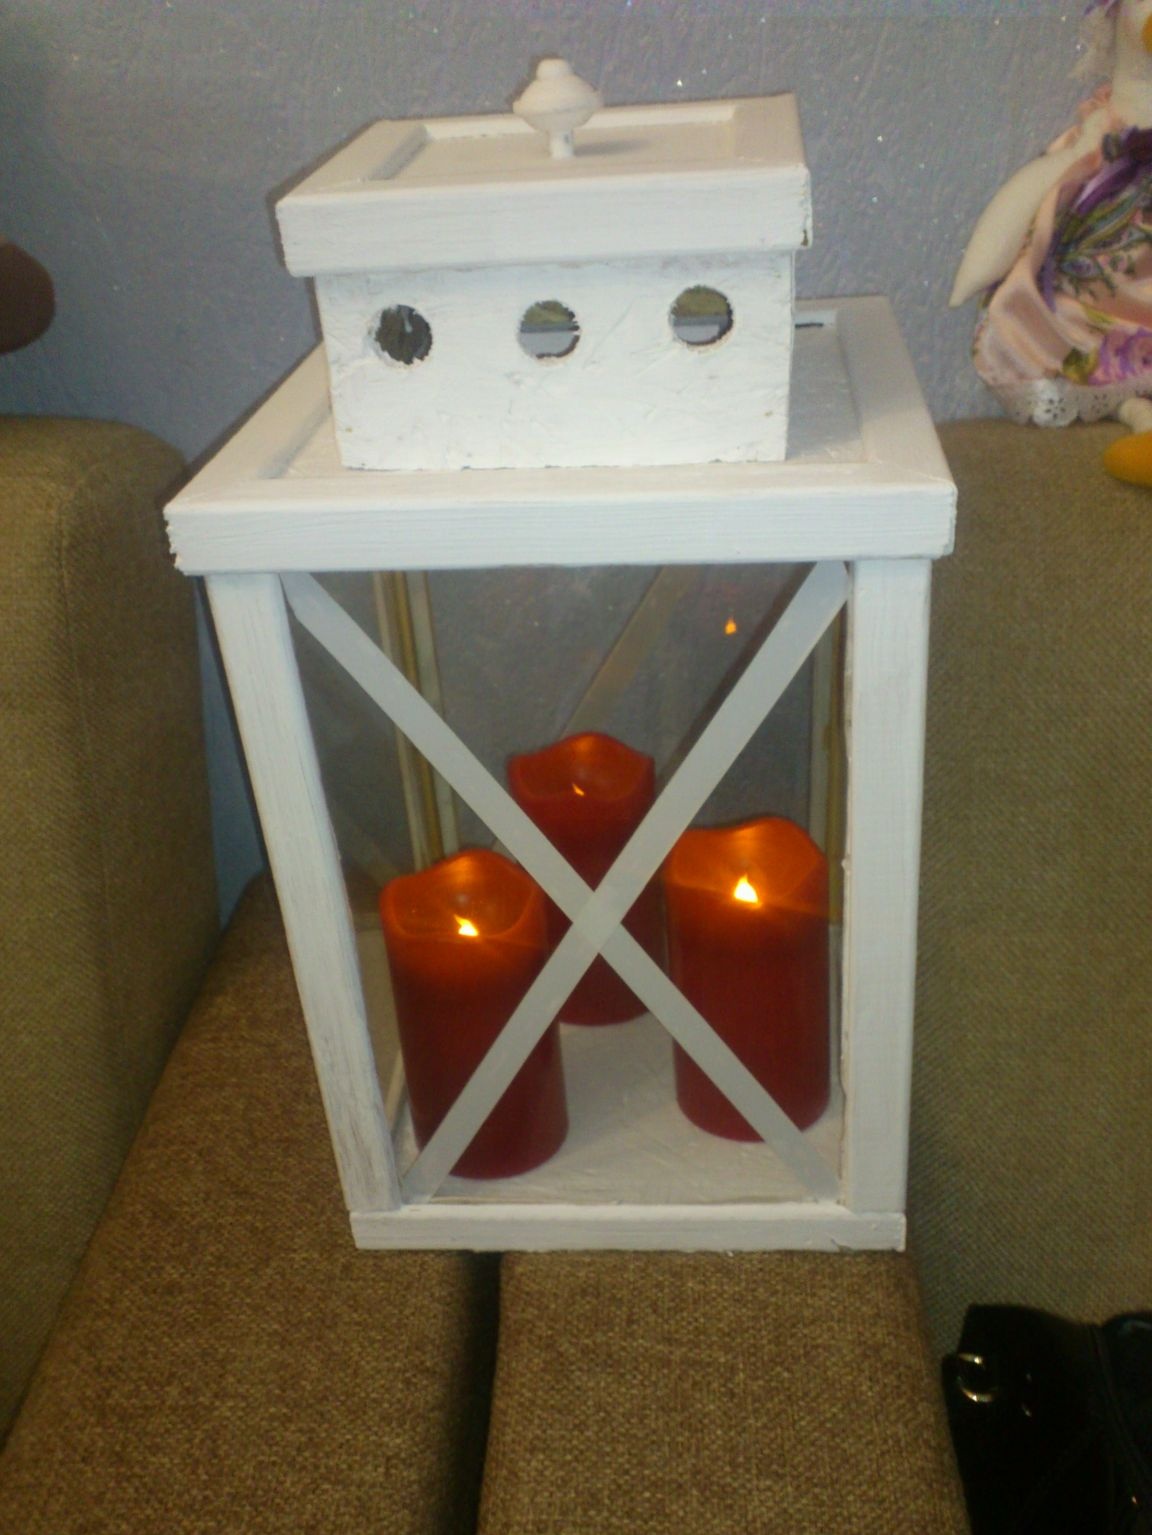
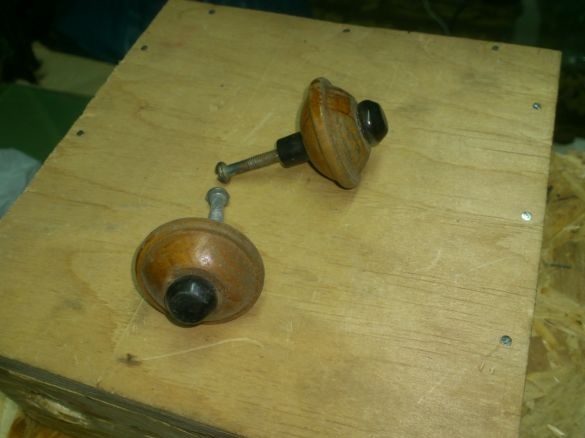 All! "Lantern" is ready! The painting was done by the “customer” using the remnants of water-based paint and another “disposable brush”. She sealed the glass crosswise with a white insulating tape and put it inside the “candle”:

 Here I gathered such a decorative “lantern” over the evening, without thinking through anything in advance, and being guided only by what I saw as a “prototype” and available materials. By the way, the daughter claims that he is no worse ....
... In the process of work, it is often necessary to smear something with glue, or tint. At the same time, the used brush is often more difficult and longer to wash than it worked ... Therefore, I always use "disposable brushes" for such operations, which are very quickly and easily made from scraps of composite reinforcement. (I never throw away even short cuts, so I always have them.)

I hope someone did not know this "technology", and this advice will be useful to him. Moreover, the burner can be replaced with a simple lighter. It’s just a little longer ...
And we will continue. I assembled the frame. From above, also with the help of blunt cloves and glue, fixed the "roof":

When cutting corners, I used a simple miter box: