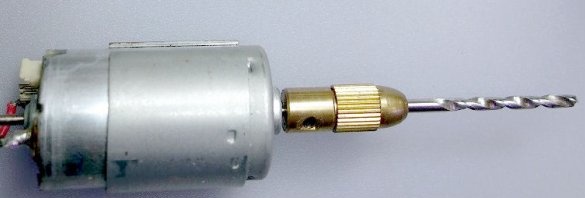
This mini power tool is very easy to make. He can drill, polish, cut, grind, etc. All that is needed is an engine, a drill chuck, various fixtures for operation, DC power supply and circuit breaker.
Step 1: Possible Tool Making Options
The author offers four options:
1. A simple option
2. The option is economical
3. Alternative cartridge
4. Option super economics
Step 2: Easy Option
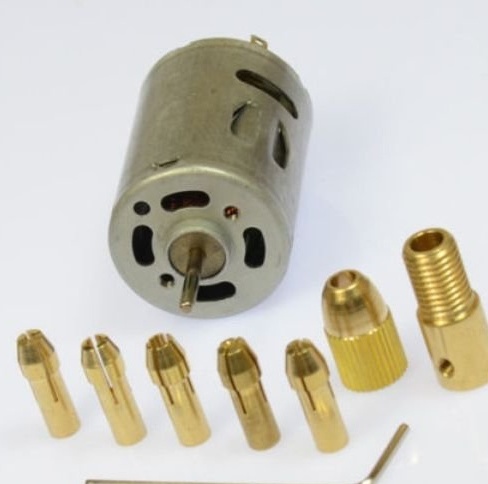
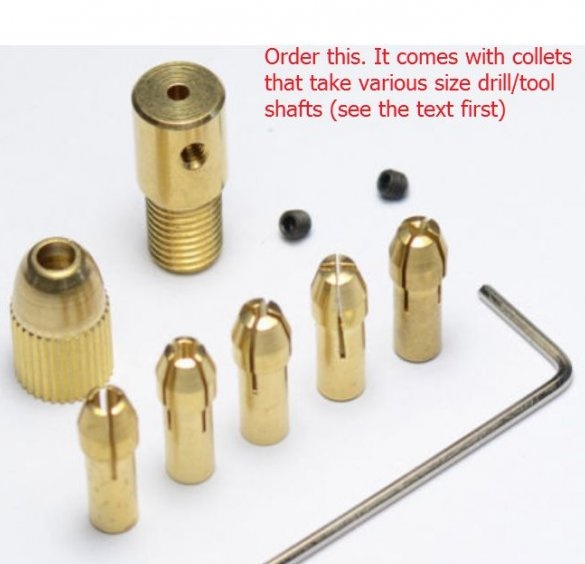
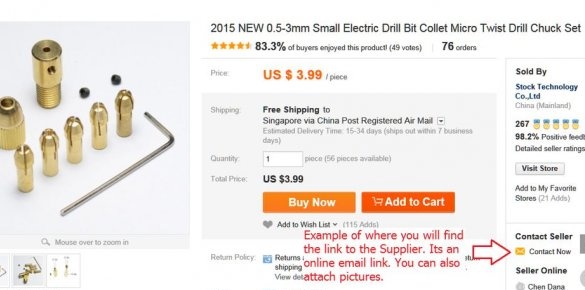
The full kit (see Figure) is available on Ebay, but it is preferable to buy on AliExpress because their specifications are more detailed and they include many product photos. In addition, there is an alternative to choice.
Kit c will contain the following:
1x 12V 500mA electric motor
1x axis (or connector for motor shaft)
1x brass cap
1x allen key
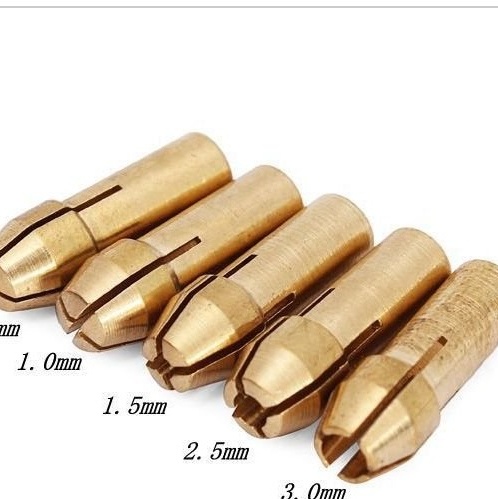
Drill Collet 1x 0.5 mm
Drill Collet 1x 1.0 mm
Drill Collet 1x 1.5 mm
Drill Collet 1x 2.5 mm
Drill Collet 1x 3.0 mm
Delivery will take from 15 to 20 days.
All you have to do is assemble it, connect the 12V 1A power supply, and you're ready to go.
The size of the drill collet (in mm.) Is the diameter of the drill shaft or the shaft of a rotating tool that the collet will receive.
Step 3: economical option
This option is suitable for people who want to save money or do not have enough money to buy the necessary components.
An economical approach is associated with the disposal of used products.
The author has a large collection of motors. All of them are removed from old appliances. Surprisingly, these engines are designed to last much longer than the product itself. In particular, this applies to printers.
A huge number of printers are thrown away every year for various reasons. For example, Wi-Fi does not turn on, it is no longer supported by the manufacturer, it’s cheaper to buy a new one than to repair an old one, ink is more expensive than for a later model, a repeated failure (it is quite possible a user problem), etc.
You can get at least three motors from one printer. Including at least one 12 V high torque motor and possibly a pair of stepper motors (which you can use for your next CNC project :)). The older the printer, the better the quality of the engine.
Note:
It is also recommended that the engine mounting screws be retained (screw them back to the engine screw holes). They will be useful when you want to reuse the engine.
Now you can order a cartridge of your choice on.
There are several details that you should remember when ordering a cartridge:
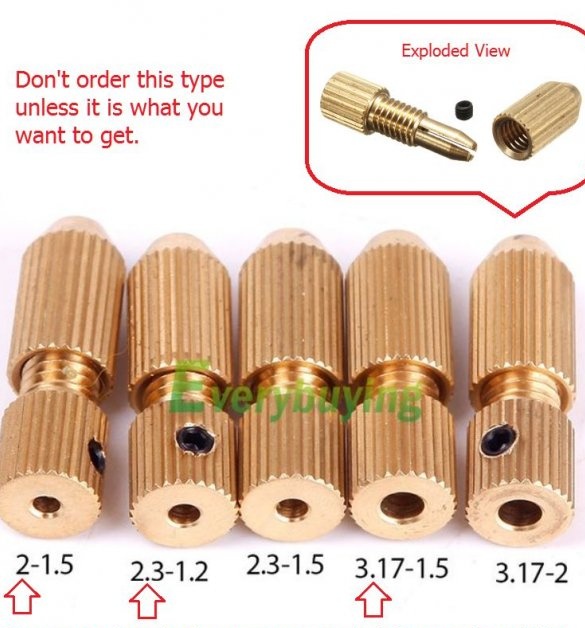
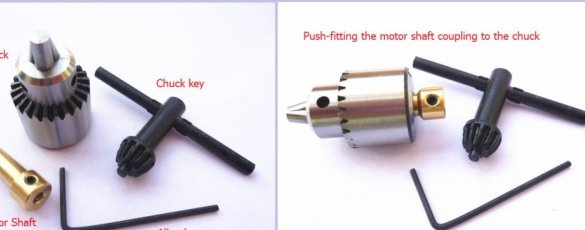
1. There are two types of brass cartridges. One with a fixed collet chuck (see first image above) ... This option does not suit us. What we need is a cartridge with interchangeable collets.
2. The holes in the bottom of the cartridges are made in accordance with the three common diameters of the motor shaft. As a guide, dimensions are shown in the first image above, i.e. 2.0 mm, 2.3 mm and 3.17 mm.
Step 4: Alternative Cartridge Option
If you managed to get a more powerful used engine and you prefer a cartridge from 0.3 mm to 4 mm with a key, as shown in the figure (more expensive), then this option is for you. This cartridge is suitable for shafts with a diameter of 2.3 mm and 3.17 mm. You can buy at.
You can also purchase a cartridge with a coupling for an engine with a shaft with a diameter of 5 mm. The price is much higher.
Step 5: Super Economy Option
In this embodiment, all used parts are used.
Assuming we already have a motor that we pulled out of the printer, all we need is a cartridge.
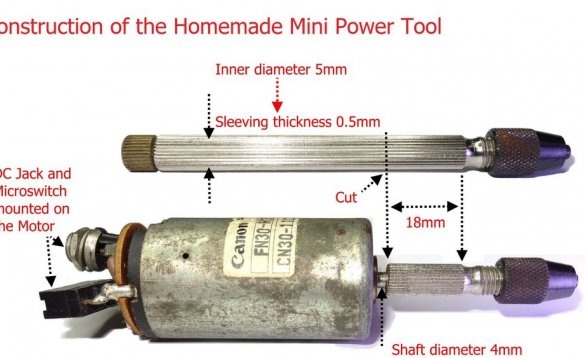
The chuck for the first mini-drill, which the author used for drilling on a printed circuit board, was made using a hand holder for a spiral drill.
The biggest problem was to drill the holder in the center so that there was no skew.
When you are happy with the drill holder mounting on the shaft, apply epoxy to the motor shaft before finally fitting the chuck.
If you have a 3D printer, you can make a more accurate clutch.
Step 6: Connect the motor
Motor power
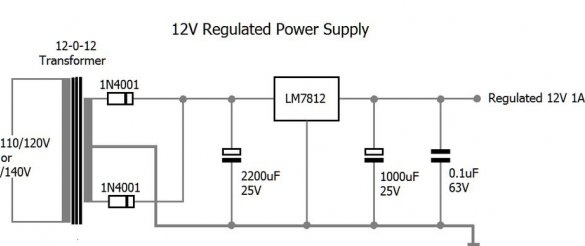
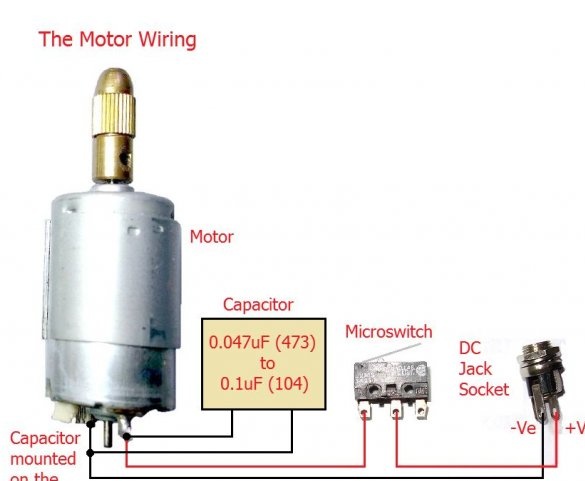
The power requirements of most engines of this type are 12 V and 500 mA. The author checked the current consumed by the engines under high load, that is, he stopped the engine manually during its operation. It was found that the maximum current consumption is about 800 mA. Therefore, for trouble-free operation of the engine, a regulated 12 V power supply capable of a current of 1 A or more is recommended.
A 3-pin 12 V regulator (LM7812) on the radiator can easily do this. An example power circuit is included. Components are not critical except for the transformer and voltage regulator. The voltage across the capacitor must not be lower than indicated.
Electrical installation
An electrical circuit for powering the motor is applied. It is recommended to install a capacitor (as shown in the figure) directly through the motor tips. This measure is mainly necessary to suppress sparks, to reduce radio frequency noise and to protect the power supply from power surges.
A micro switch is also recommended. It consumes much less current than other switches of the same size (shown in Figure 3A), and they are spring-loaded, which means faster switching, less arcing and therefore a longer service life. Wires go to C and NO tags.
As can be seen in the figure in the previous section, the author installed a DC connector and a microswitch on the tips of the engine. This was done because there was already a printed circuit board and it had only to be slightly changed.
Motor polarity
Some motors have a red mark on one of the protrusions. It is immediately assumed that this is a plus for connecting to a power source. This may be true for equipment in which the engine was used. However, with this connection, the motor may not rotate in the right direction. Therefore, before starting the connection, it is best to check the direction of movement of the motor by connecting it to a power source and making sure which tip should be connected to the positive power terminal.
Step 7: Additional notes and ideas for improvement
Tools that can be used with this drill other than drills
Since the author works mainly with plastic boxes and sheets for electronic hobbies, carving round and square holes, then a mini power tool is ideally suited for him.The image shows some of the tools that he uses:
Saw blade:
It is very thin (about 0.1 mm thick and 21.5 mm in diameter), which makes it ideal for cutting small square or rectangular holes for panel devices and displays.
Diamond blade:
This is a diamond coated blade. Ideal for cutting and grinding harder materials.
Grinding / cutting wheel:
Great for cutting unwanted racks in a plastic box and flattening them.
Precise grinding wheel:
Helps smooth the edges of a plastic sheet or round corners.

