There is no subject in this world of furniture more comfortable than a round kitchen table. After all, this is an embodiment of traditions, a symbol of a warm family dinner, love, friendship and delicious food.
It is no secret that a round table contributes to the unity of people and finding a compromise. Do not believe? And try to dine yourself on one of these and share your impressions.
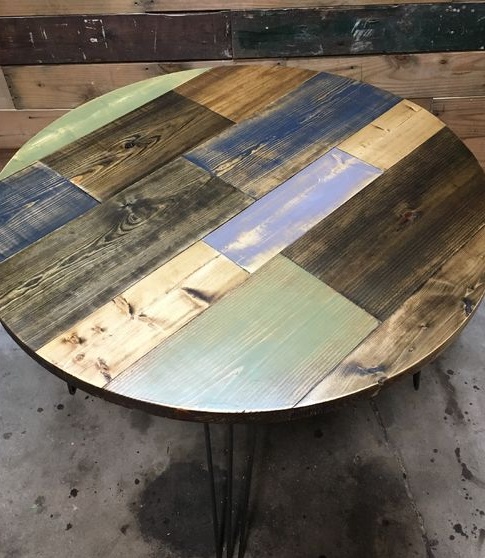
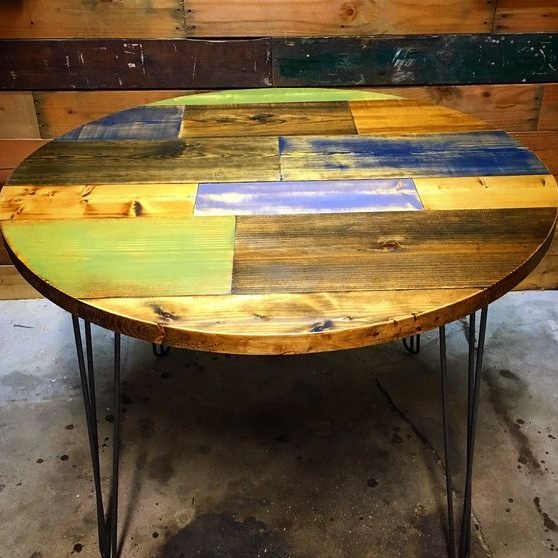
However, the author of this master class decided to slightly modernize the image of the classic round kitchen table, add colors to it and use modern fittings to get something original.
Thus was born the project of this multi-colored table, which the author referred to only as “Timothy”.
In this workshop you will learn how to assemble a round tabletop from scraps of wood and tint it in a very original way. Read about all this and much more below.
In the meantime, decide on a set of materials and tools, because today you will need:
1. Materials:
- trim boards, you can (and even need) of different widths and different types of wood;
- multi-colored paint for woodwork, preferably one type and one brand;
- wood varnish compatible with the type of paint;
- metal fittings in the form of table legs;
- furniture skins;
- glue on wood.
2. Tools:
- jigsaw;
- grinder;
- electric drill;
- planing machine if necessary;
- paint brushes, if you do not use paint in the form of an aerosol;
- sandpaper - coarse and fine;
- self-tapping screw and cord for making an impromptu compass;
- a pencil;
- building tape measure.
Step One: Gather Materials
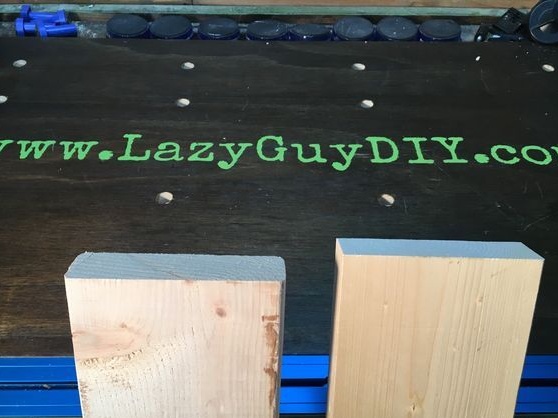
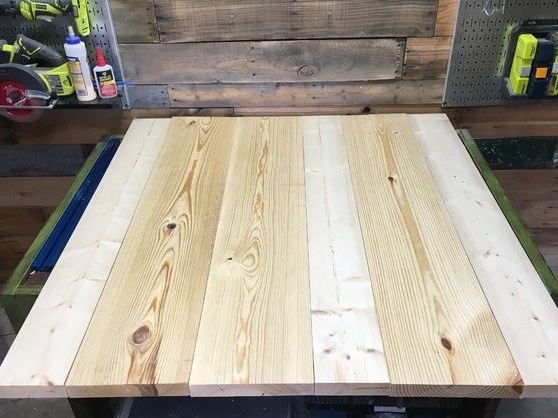
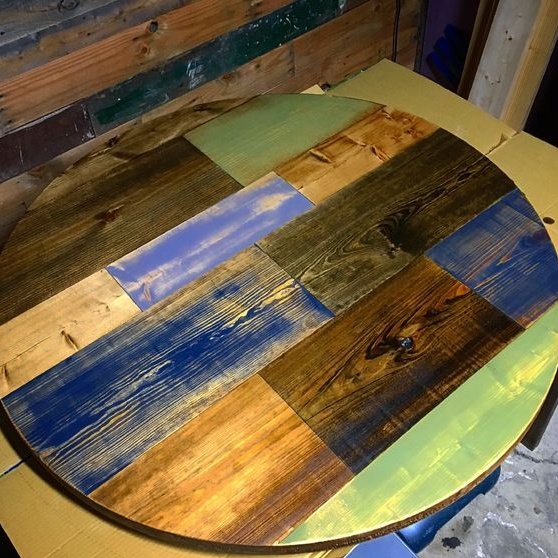
As a material for the top of the countertop, you can use trimmed boards left over from previous work. The author took new ones of different widths and sawed them into pieces of arbitrary length.
Choose the segments with the most interesting pattern, because the paint layer during the finishing treatment was not conceived as solid, but translucent. Therefore, a rich pattern of wood favorably shades the countertop in the overall interior composition.
Do not be afraid to use different types of wood, it is even welcome that you can not say about paint.
Use the same paint type, such as solvent based or acrylic. Even better if all of them will be a product of the same manufacturer. So you can avoid unpleasant surprises.
Choose a varnish for the type of paint.And in general, pay particular attention to the choice of varnish, because the life of the table depends on the degree of its reliability and strength.
The countertop is made by the author from two layers of boards laid across. If you are saving money or there is a sheet of thick plywood in your workshop, you can safely replace the second layer of boards with it. Moreover, it is easier to fix short pieces of wood to a whole sheet of plywood.

Step two: preparing material for the front side of the countertop
This is perhaps the most responsible and interesting stage of work. Start with it.
You need to tint the details of the countertop and cut a perfectly even circle using an impromptu compass. But let's start in order.
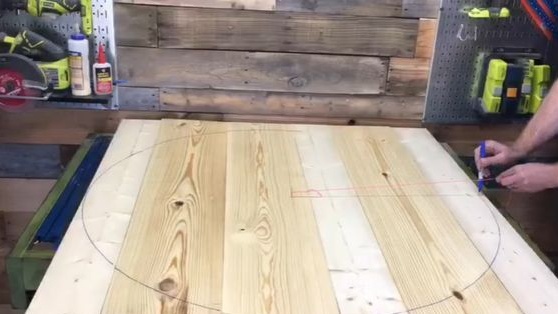
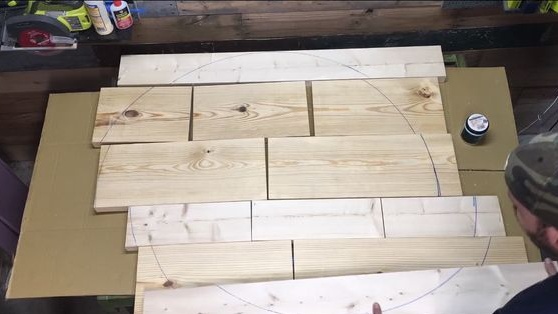
Decide on the diameter of the countertop. The author stopped at 42 inches, which is approximately 105 cm.
Pick the boards in width and lay them out in the right order with some margin for drawing and cropping. Use boards of exactly the same thickness. If the surface looks uneven, pass the boards through the planer.
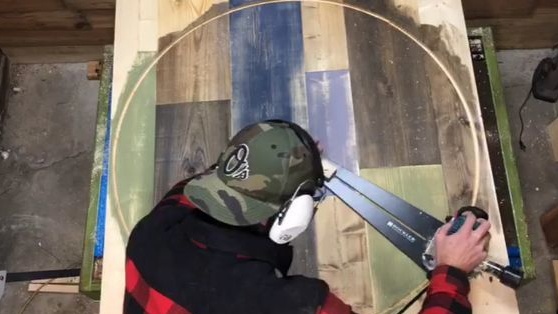
Draw a circle. To do this, measure where your center is and screw a small self-tapping screw in the middle. Tie a cord to it with a free loop so that it rotates around, but does not wrap around a screw. Attach a pencil or marker to the end of the cord at a distance equal to the radius of the countertop. Draw a circle in this way.
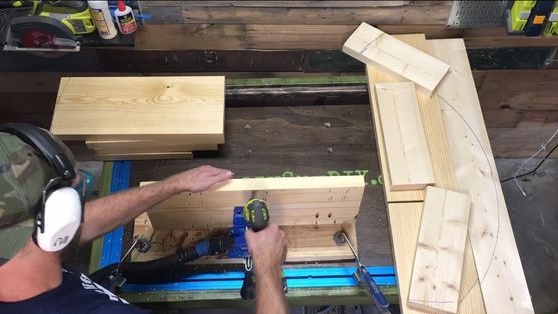
Make an arbitrary markup as shown in the photo and cut each board into two or three segments. The author advises to leave the extreme boards as they are for the stability of the structure.
Lay the boards in the correct order and carefully grind with a grinder or sandpaper, removing unevenness and preparing the surface for painting.
If you use the grinder at high speeds, do not overdo it, so as not to earn new bumps, which subsequently have to be polished for ages.
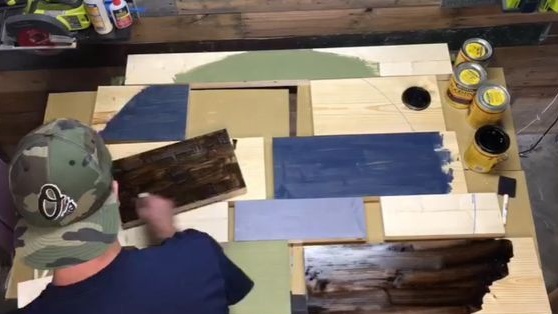
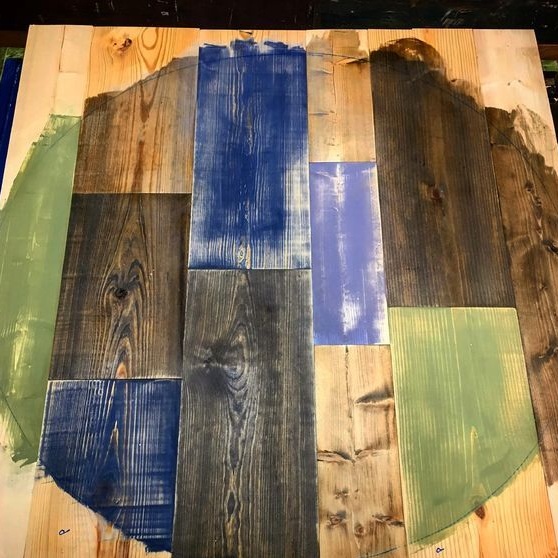
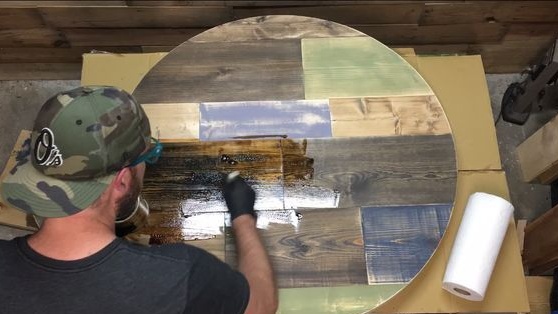
It's time to start painting. This is the final stage of preparation of the front surface.
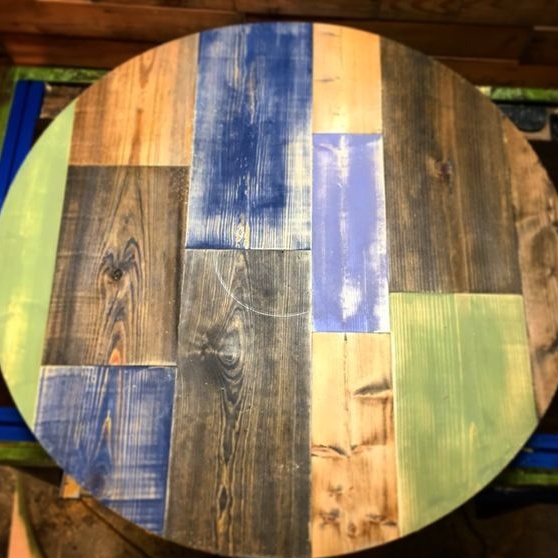
The author used paint in cans and a paint brush. You can take spray paint, which in this case is very convenient. Paint each board in its own special tone and do not be alarmed if a part of the paint from one part accidentally falls into the next. On the contrary, this will provide a more harmonious color transition. One coat of paint in your case will be enough.
Use tones that together give a harmonious range and do not look alien next to each other. For example, muted pastel shades, or, conversely, only bright, or the shades of the same color - experiment on health, then you are a master.
The author painted each board and took a break while the paint was drying. And now for the fun part. Take fine sandpaper and lightly sand the surface of each element in such a way as to turn a dense coating into a worn retro. Remember that after applying a layer of varnish, the shade will become a little deeper and darker than the original.
Step Three: Making the Wrong Side of the Countertop
Prepare boards for the wrong side of the countertop. If using plywood, first cut a square of the required size.
Sand the wood until a smooth surface is formed, because although it will not be visible, it will still have to be varnished. Therefore, you need such a simple preliminary preparation of the surface for painting.
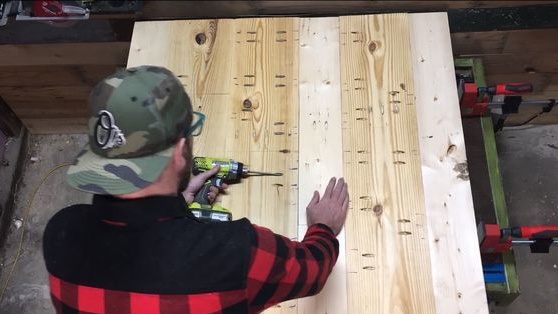
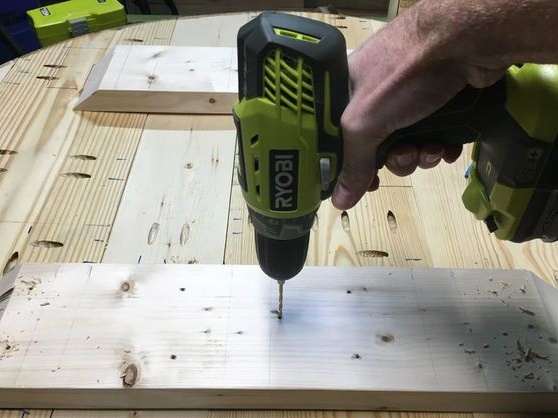
In each board, drill secret diagonal holes for fastening the boards with screws to the wrong layer. For this purpose, the author used a conventional drill.
To do this, apply colored embossments and determine the attachment points of each element of the front side.
Step Four: Assemble the Countertop
Dock two layers of boards together: front and back. Check again if everything is the same size.
Apply glue to the inside of the inside and proceed to gluing the front parts. Lubricate the joints of the front elements as well.
Place a piece of plywood or fiberboard on the countertop and leave it under pressure until the glue completely dries.
Or you can do something else. As soon as the glue begins to set, turn the countertop upside down and screw the furniture screws into the mounting holes. It is better to work with a screwdriver until the glue has time to dry.
Turn the tabletop over again and carefully remove any excess glue, as it will not be possible to grind them later.
Saw the countertop along the outline outlined earlier as soon as the glue is completely dry. For this purpose, the author used a special circular cutting tool. You can work simply with a jigsaw, although the cut will not be so accurate.
Sand the edge by slightly rounding the sharp edges. In this project, she does not need painting, so work as it should, because all the flaws will be visible.
Step Five: Strengthen the Countertop
The author insists that the table is still not as strong as it could be. All because the front throne of the countertop is assembled essentially from small details.
For this reason, he advises adding on the back of the crossbar-support, which will give the table strength.
Decide on the size and do not forget that you need to leave space for fixing the legs.
Cut off the supports and use a grinder to grind their edges as seen in the photo.
Screw the supports into place by pre-drilling the holes if you do not want the board to crack when screwing in the screws.
Step Six: Varnishing
Treat the countertop with varnish, including the edge and the back. Apply as many layers as possible, allowing each of them to dry. Grind each new layer to achieve a more durable coating. Everything except the finish.
Seventh step: installing the legs
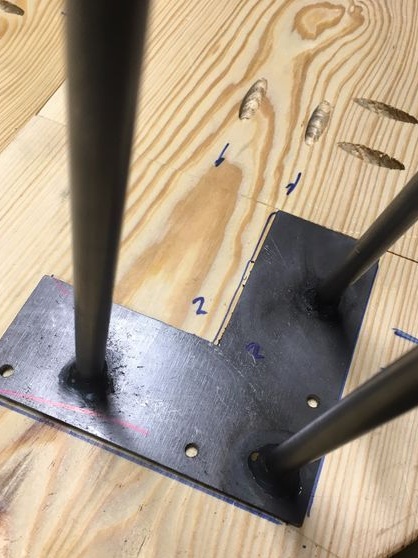
The author used ready-made metal fittings with reliable fastening on four screws.
Mark out all four legs at the same distance from the edge of the countertop. This task will have to tinker a bit.
Make sure that the attachment points do not fit into the pocket hole or screw.
The author additionally marked the legs for that. so that with a possible disassembly, they can be fixed in the same order as before.
Set the table on its legs and enjoy - the work is done!