

Today I want to talk about my old craft. It was made, as is now customary to say in the 90s of the last century. The daughter was small, for her he did. So many years have passed, but here you go.
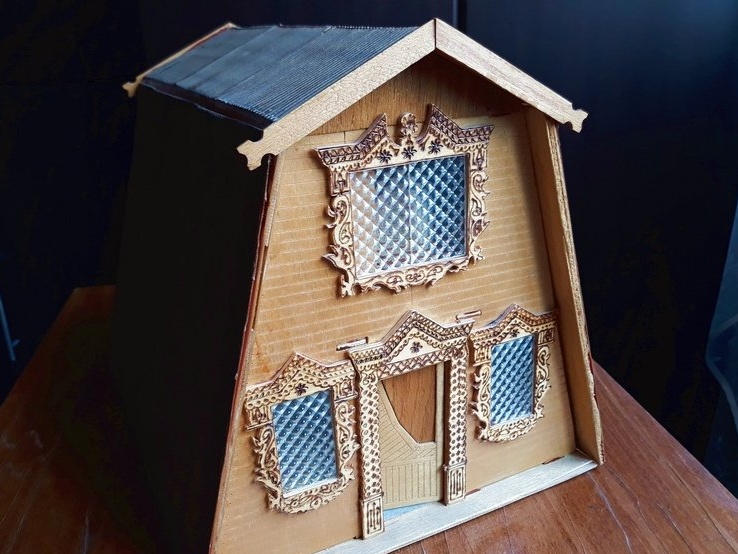
About her and will be discussed today.
1-step. A bit of history.
We were once a family visiting friends. We sharpen balances, and the children go about their business - play. A daughter runs up: "Dad, go look, Alyonke’s grandfather built a house." Went, looked, wow so little house, even there is light. And I tell my daughter: “Without light, I can do better for you.” Quite a lot of time has passed. The wife and says - Are you going to house for the doll, do or what? My daughter is waiting.
Pancake. Already, threw into the heat.
Well, that I had to urgently drop everything and get to home.
Think not, without sketches or how. I sat down to draw. The basis was a garden house. As I remember now, then in the magazine "Model Designer", the article was. The roof is from the earth and into the sky. It was fashionable like that.
2nd step. Blueprints.
I, I think, the administrator will not blame me if I give some surviving sketches with my notes. Maybe someone will decide to repeat.
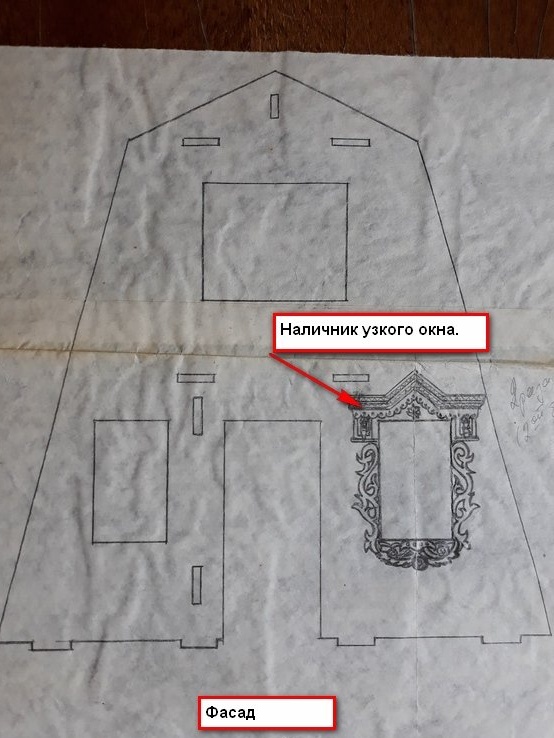
This is a front view.
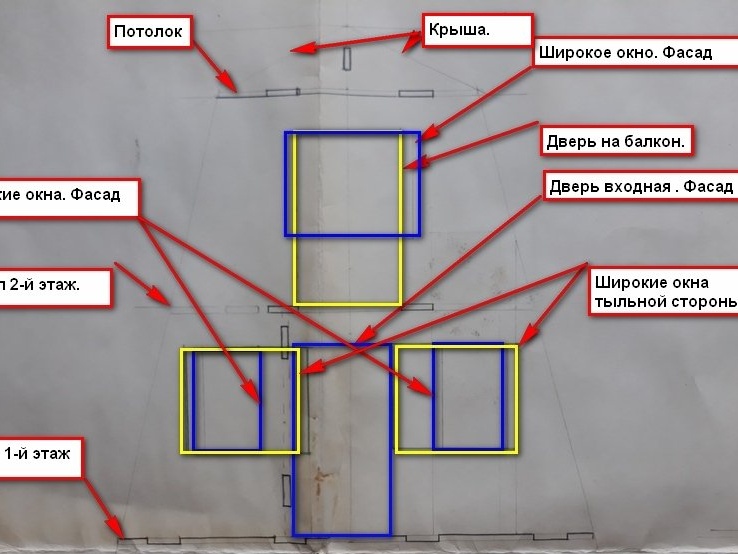
This is a side view.
Facade., Team, floor 2nd floor
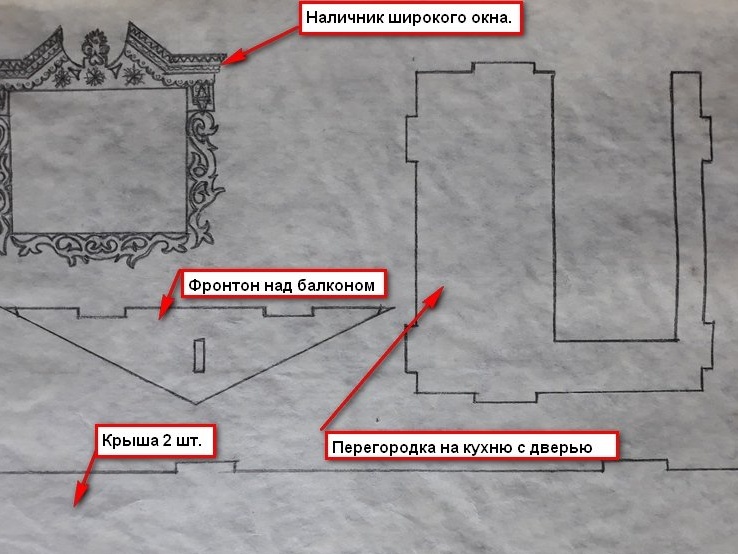
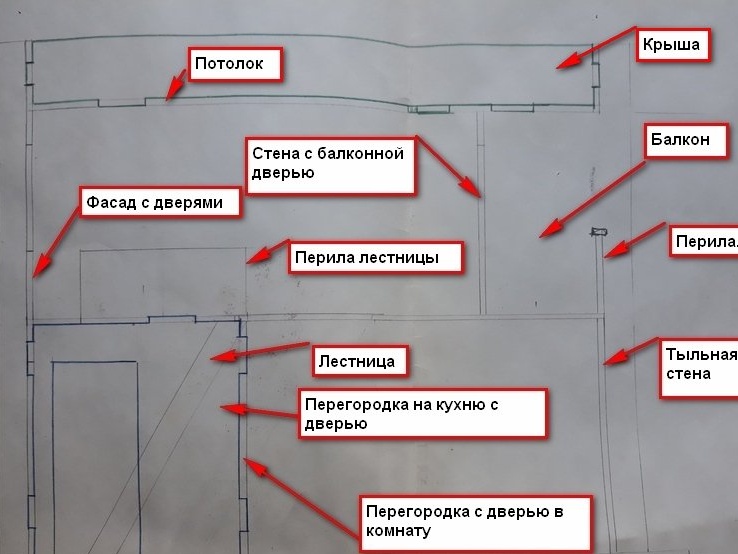
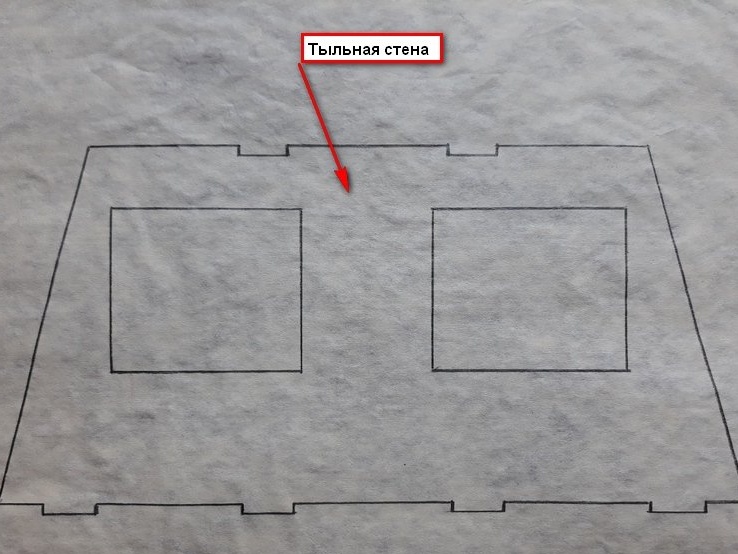
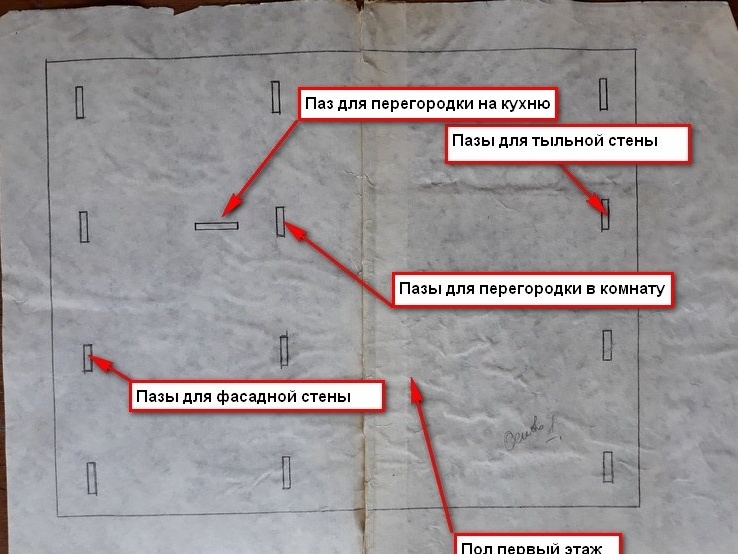
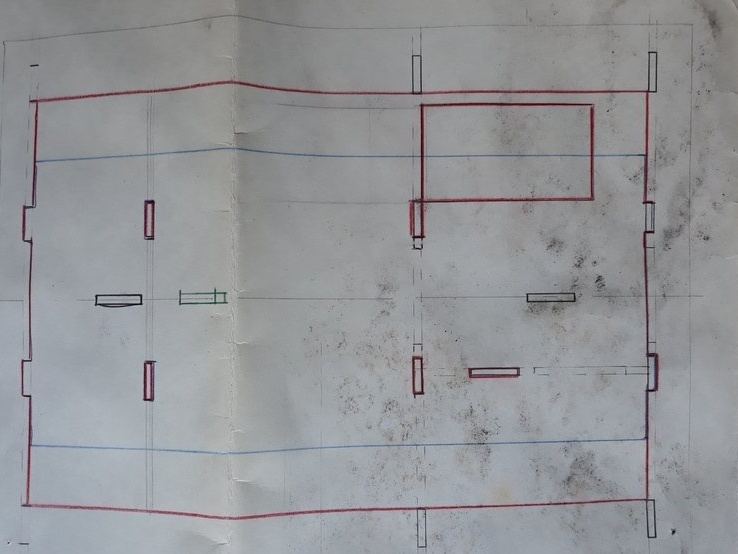
Back wall, partitions, ceiling
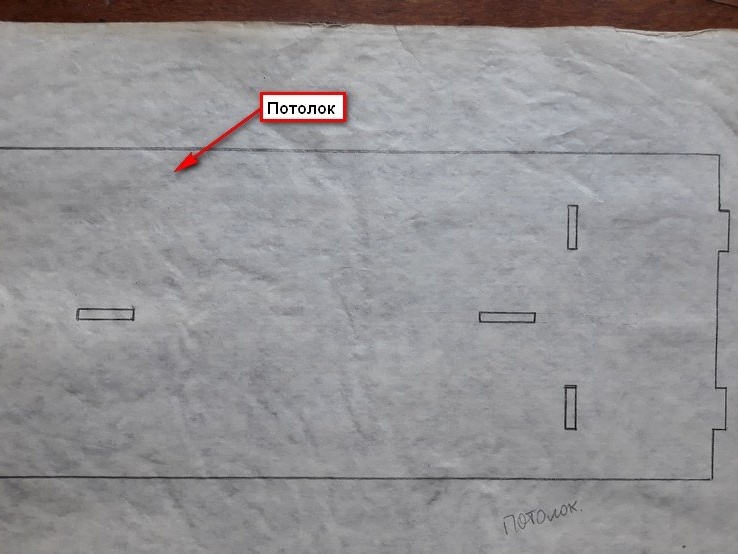
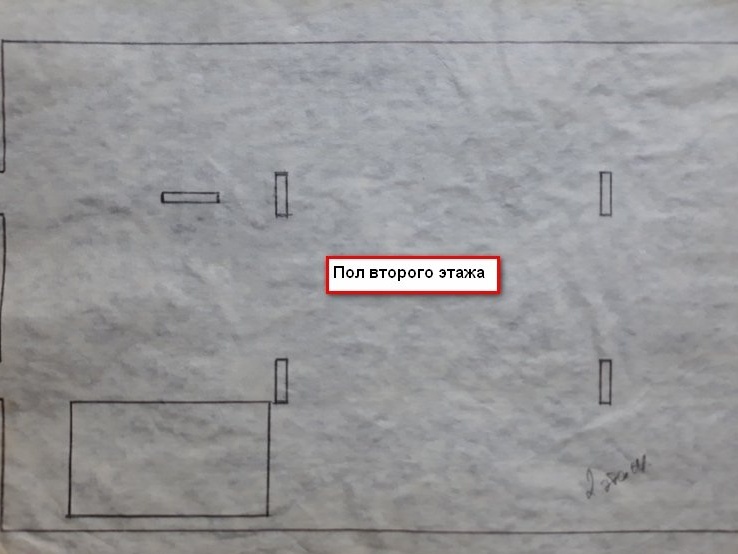
Floor 1st floor, floor 2nd floor.
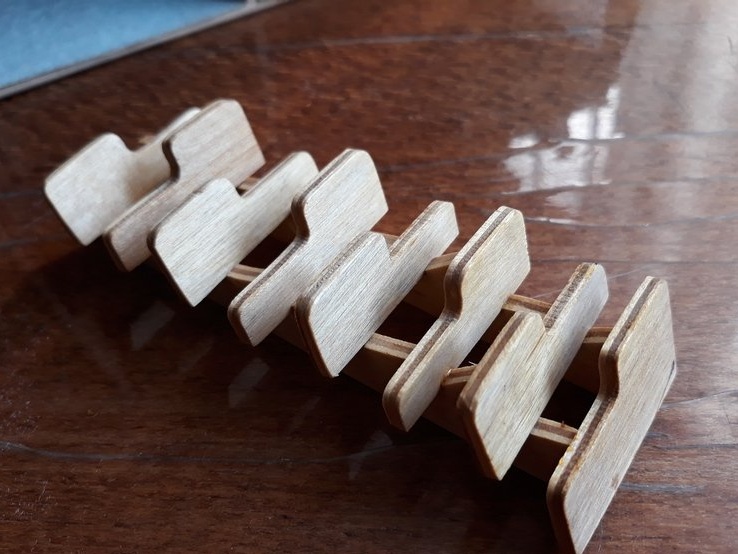
I don’t give drawings of the wings; they can be done independently. There were no sketches on the Goose Step staircase.
3rd step. Materials and tools.
We will need:
- plywood 3 mm,
- transfer paper,
- a manual jigsaw, but you can also use a mechanical one;
- a device for burning,
- PVA glue,
- pieces of wallpaper
- some plexiglass or polystyrene,
- veneer, any
4-step. Manufacturing and assembly.
We start by sawing out the parts of the product and fitting them to the installation site. Both spikes and holes for installing blanks of panels (walls), etc. are filed.
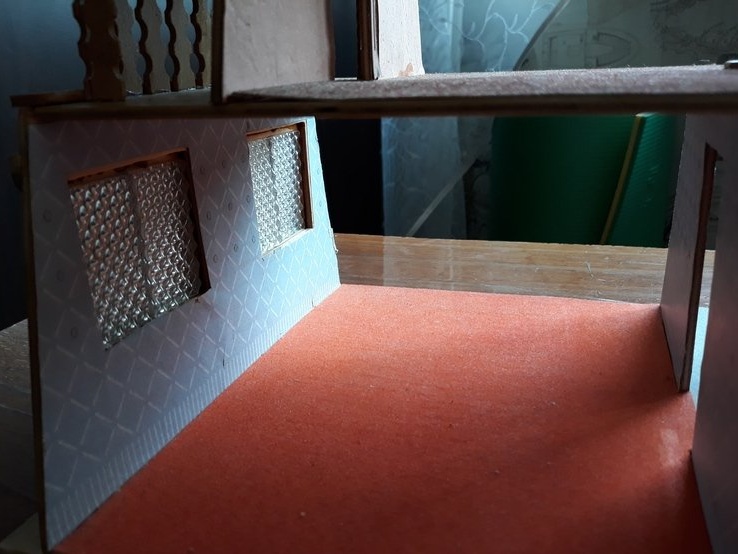
Details - a facade with doors, the rear wall and the wall with a balcony door, the best side oriented outward. On these sides, markings are made, stripes parallel to the base of the house, millimeters in 6-7. Whoever you like. Then, with a knife, cuts are made according to the marking, which imitate the wall sheathing from the boards.
The same marking is done on the details - Floor 2nd floor, in the place where it opens onto the balcony.
Here I want to note one nuance, but you need to be sure that the assembly is going right. Here's the thing: it’s better to open the sides of the parts coming out, with varnish before installation.Coverage will be better. But, at the same time, you should remember about the places of joining parts and spikes. They should not be varnished.
To get out of this position, you can as follows - open the already assembled product with varnish. But, this is how anyone likes it.
We continue assembly.
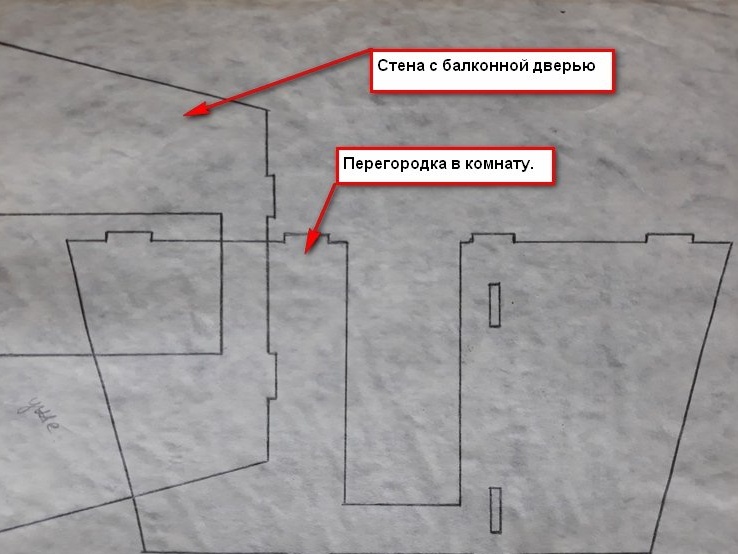
In the sawn detail - Partition with a door to the room, the part is installed - Partition in the kitchen.
In this case, the spikes and holes, as well as the joints at the ends of the parts, are lubricated with glue. After installation, excess glue is removed with a cloth dampened in water (wet).
Then, in the same way, a facade is installed in the kitchen partition.
Then, this entire structure is installed on the base (floor of the 1st floor). Performing the same procedure with the application of glue.
Then, the floor of the 2nd floor is installed on top. In this case, the facade should be slightly pulled outward, then returned to its place.
The next step is to install the back wall. The spikes and holes, as well as the joints at the ends of the parts, are lubricated with glue and the wall is put in place.
Next in line is a balcony wall with a door.
Then, applying glue to the part, the ceiling and part of the pediment are installed. Which must be installed in the corner. During installation, it is always necessary to use a corner to be sure of the correct position of the part.
And the roof tops are installed last - roof details.
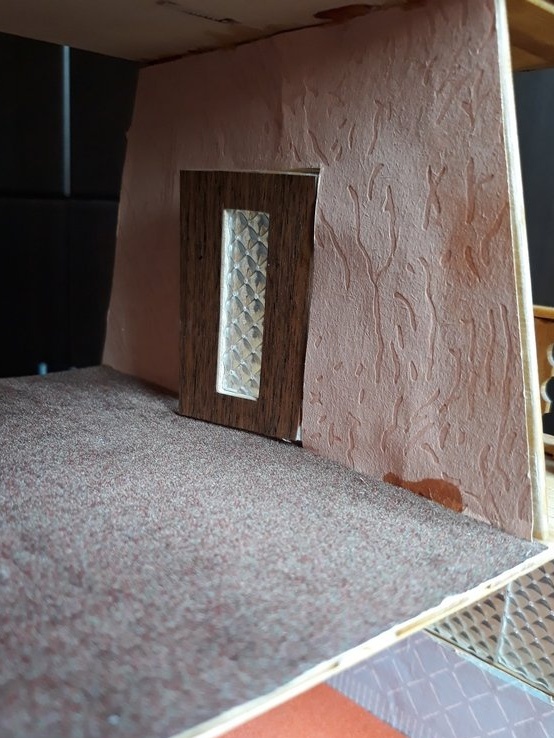
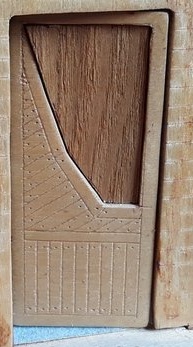
Further, it is advisable to give time so that the glue dries well. Then the design will receive the necessary rigidity. And, during this time, you can make and prepare for the installation of doors - entrance and balcony. Everything is given to the builder’s fantasy flight. I have done this: the front door
- balcony door

On the door from the inside, a strip of dense fabric is glued, which plays the role of hinges. It is not visible from the outside, but from the inside it is sealed with a strip of paper imitating a tree.

After the glue dries, the doors are installed on their own meta.
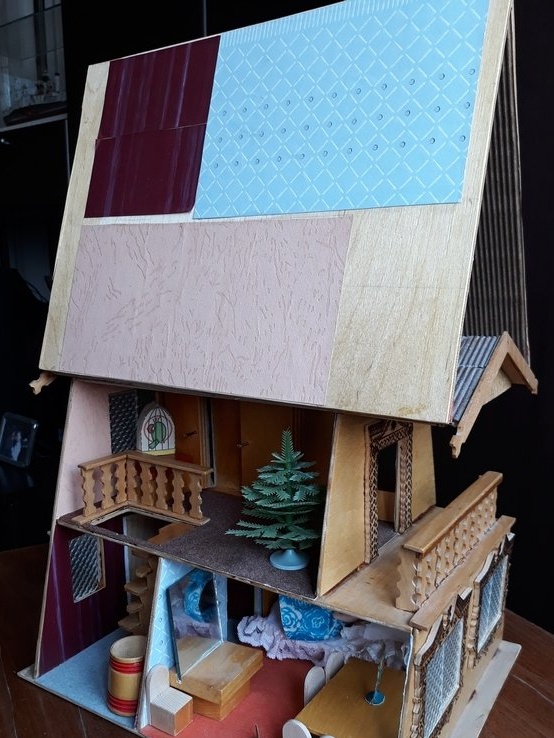
It's time to make the roof of our house. The upper part of it is already installed, and the side lifting wings are cut out of plywood according to the dimensions taken.
A strip of fabric is glued to them at the top, as on doors. It is necessary to allow the compound to dry. Then they are glued with the free end of the fabric strip to the already installed upper parts of the roof. Now about the roof on the roof. It can also be done in various ways. For example, by type of soft tile. I performed the type from slate (well, or corrugated board). For this I used corrugated cardboard, it is better to use imported. He also has a smaller corrugation, and the top layer of cardboard lags behind more easily. Separate, as you already understood the top cardboard, the bottom layer of cardboard remains and the middle layer is corrugation. All this is cut to size and glued to the roof.
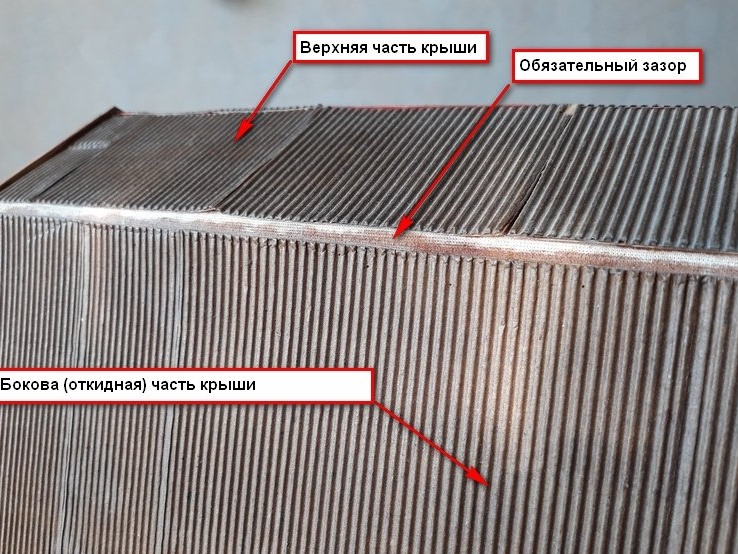
Just remember that you need to leave a gap between the top of the roof and the side parts so that it can freely open. Then the roof is painted in the desired color. Since I imitated slate, painted in gray.
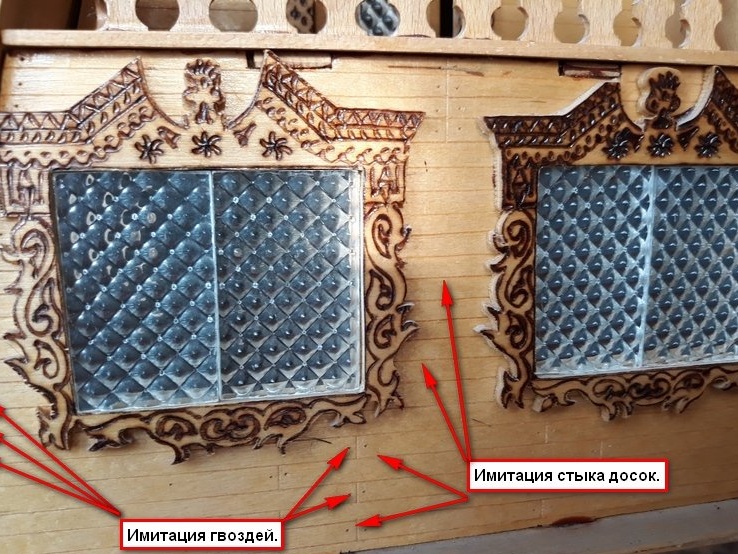
Next, we move on to the manufacture of glasses for windows. They can also be done in different ways. Make transparent or imitate curtains on windows. I settled on plexiglass from the ceiling of daylight. It had a smooth surface on one side and a relief surface on the other.
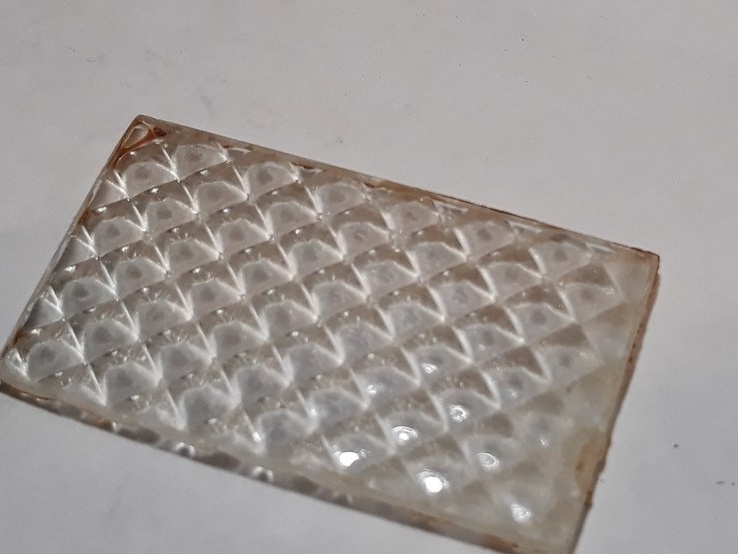
I decided to use this, because it created some kind of fairy tale in the guise of a dollhouse.
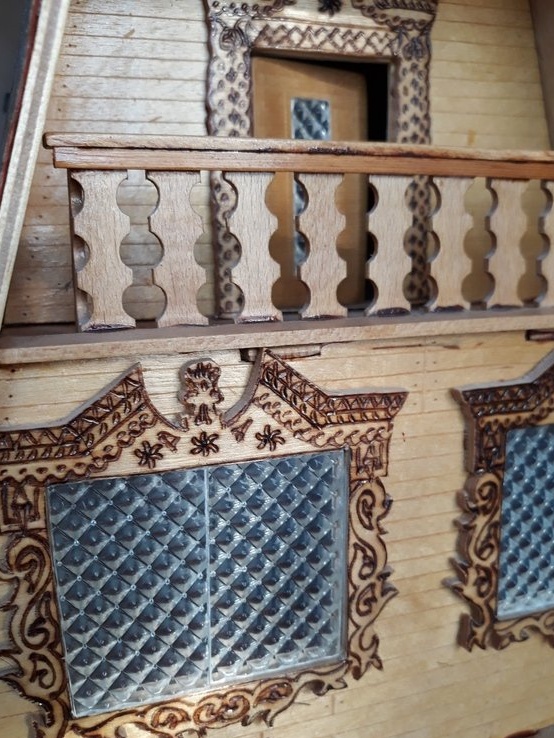
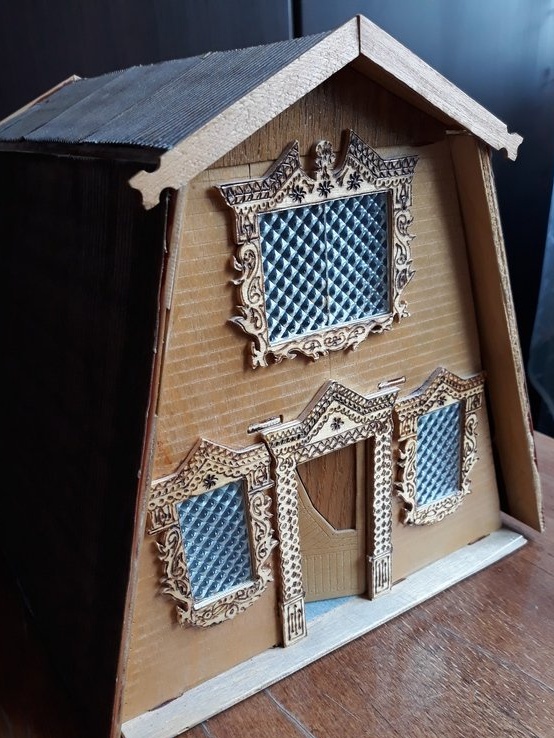
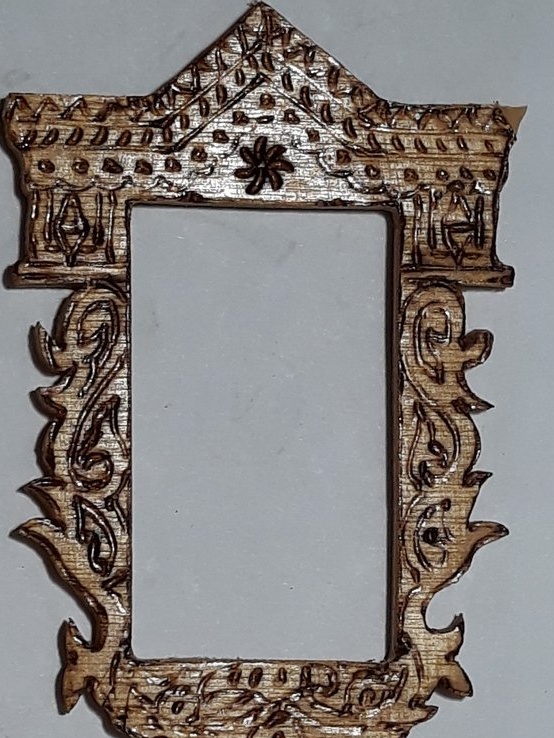
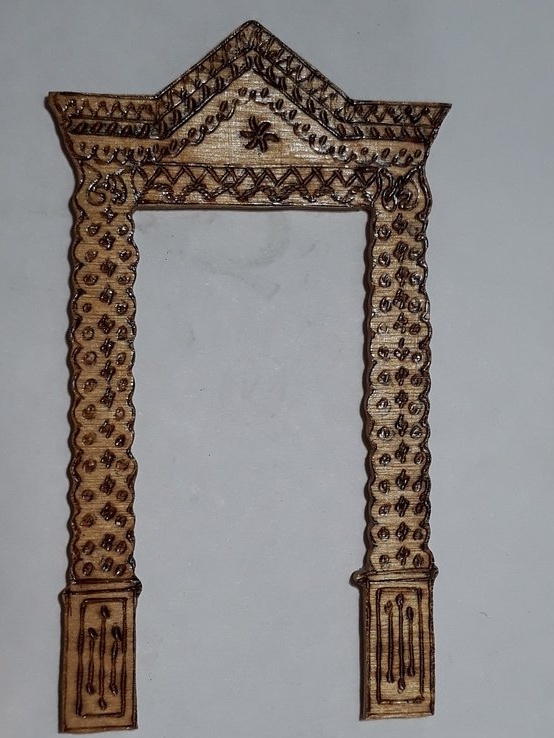
Of course, the platbands for windows and doors complemented the fabulous look. How door frames were performed on doors and windows, you probably already understood. Having created the drawings for the window and door trim, I transferred them to plywood and developed a pattern with a burner. Then he sawed it out with a jigsaw and opened it with varnish.
Glazing the windows, set the platbands in their places.
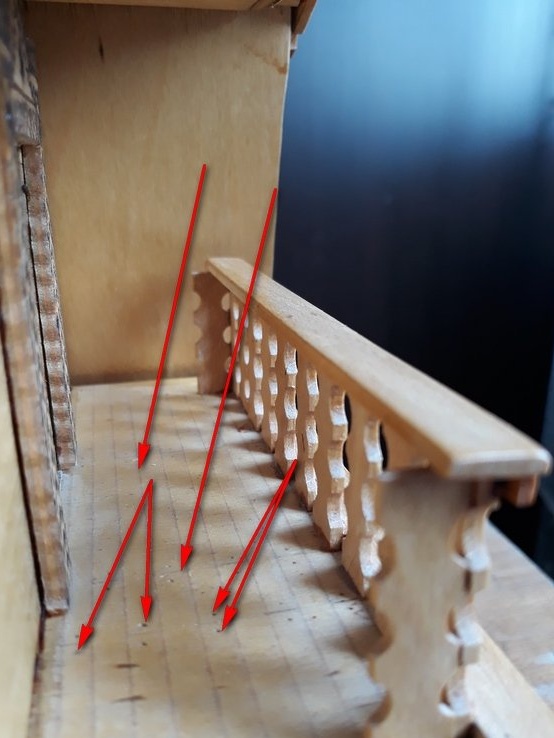
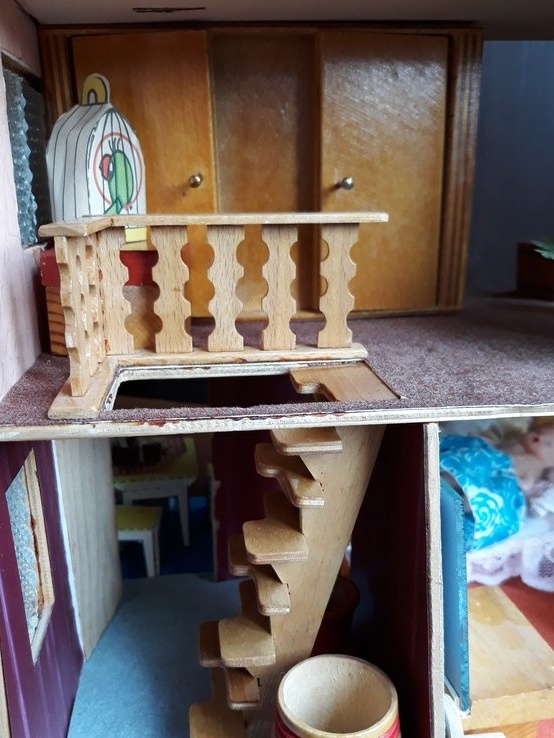
Next, a balcony. He is almost ready, you only need to make a railing and strengthen them. Railings are made from student rulers. Dimensions are taken into account the slope of the roof of the house. Therefore, at the bottom of the balcony, not large gaps are obtained. But, they do not spoil the appearance.
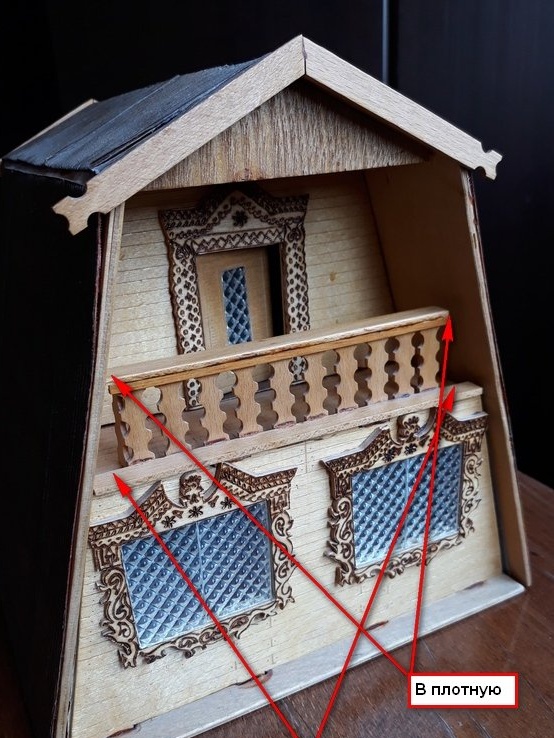
The cornice is the first to be installed; flat balusters are attached to it. Which, at the edges of the railing are duplicated by the same flat balusters, but installed at an angle of 90 degrees to the extreme balusters. Railings are installed from above, and from the facade they are closed by a bar.


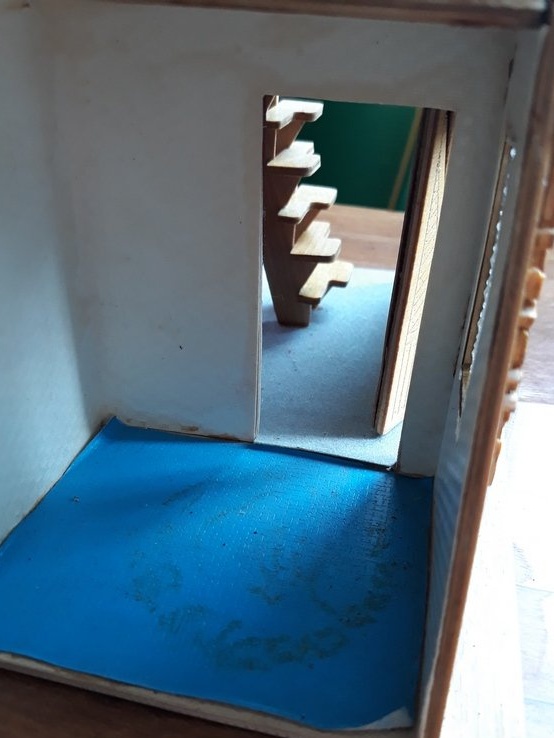
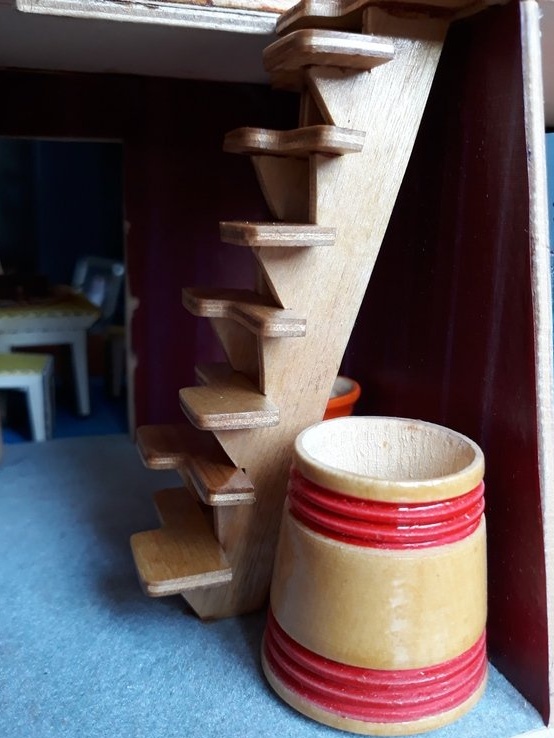
Inside the house, a similar railing is organized to fence the stairs to the second floor. The railings are angular, they are assembled separately. And then they are already put in place.

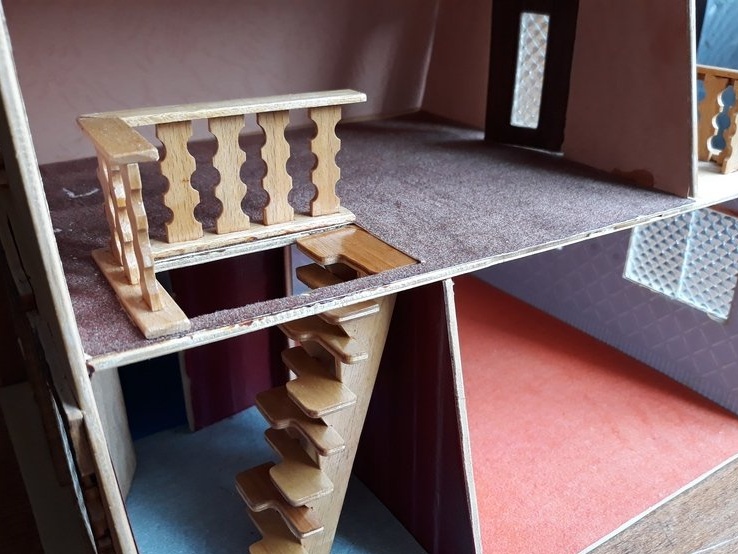
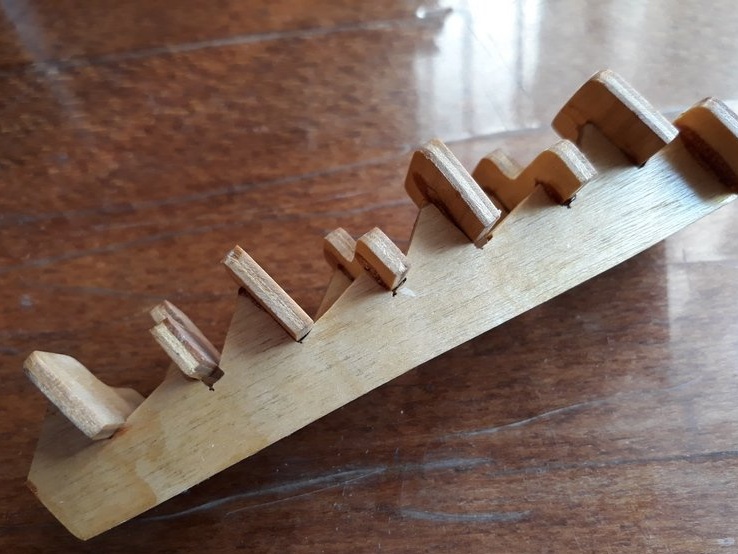
The staircase itself is made of plywood according to the type of stairs "goose step".
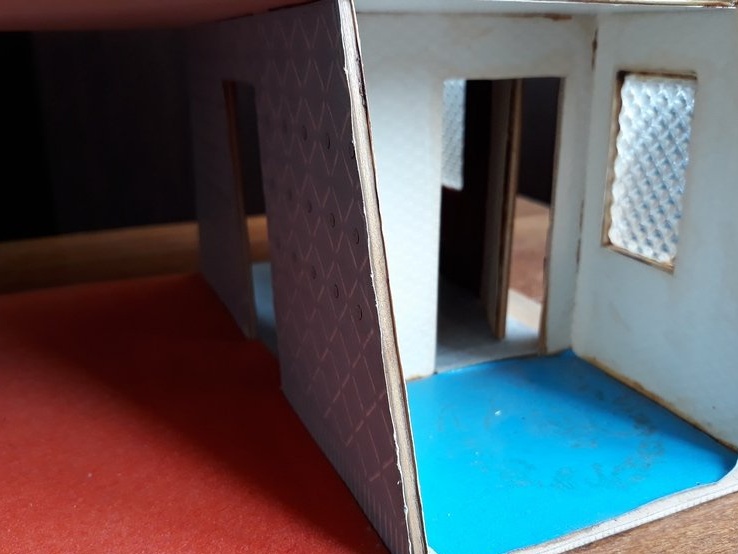
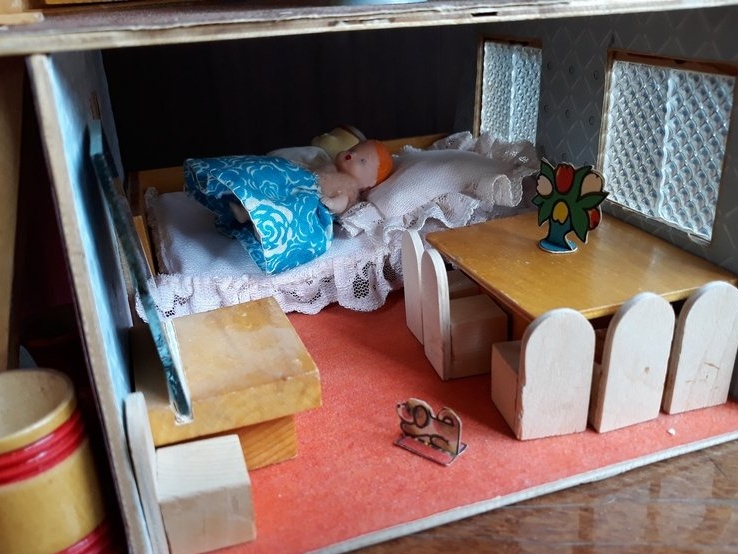
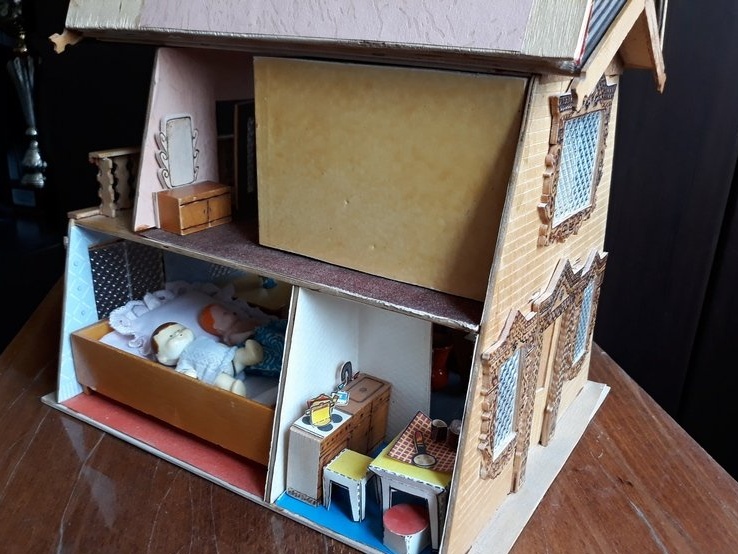
5th step. Interior decoration and housewarming.
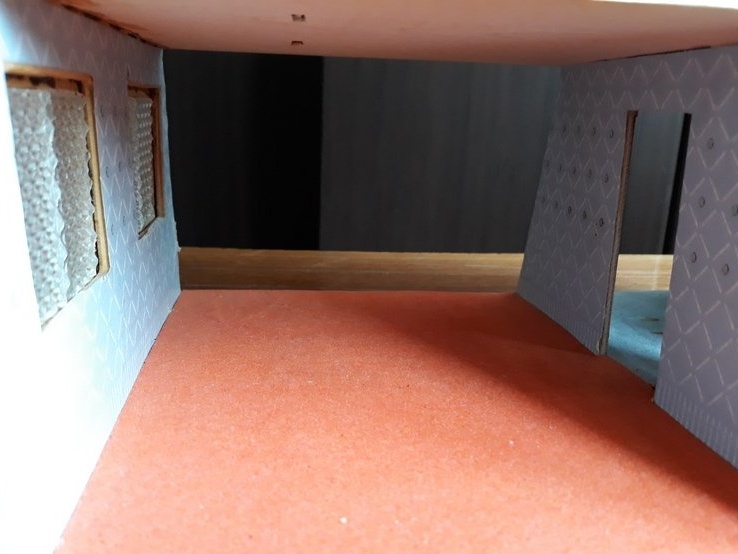
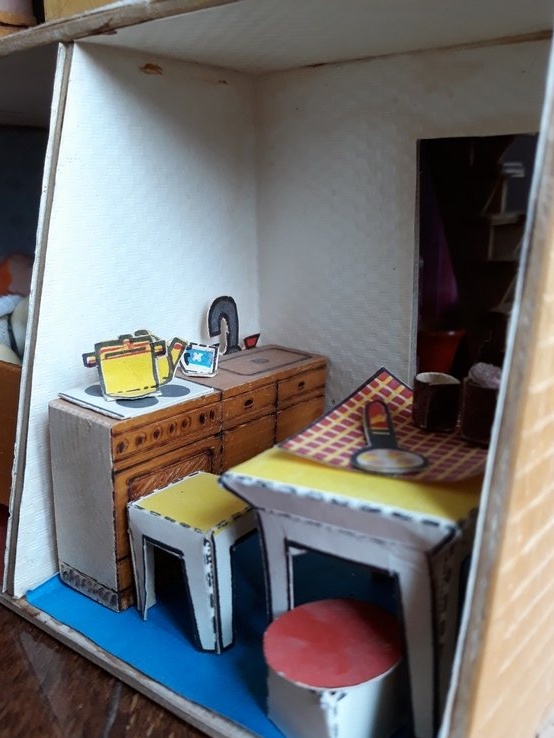
You have already paid attention to the interior decoration, as it is present in the photographs above. Well, do not disassemble the house to tell about its construction. For decoration, pieces of old wallpaper, colored paper for children's creativity were used. Particularly useful paper with fleecy spraying, well, just right for the rugs in the house. Everything was already agreed upon with the hostess. Somewhere furniture I helped to do, somewhere she (daughter) found and glued from paper. Not a big house tour.
That's it.
See, criticize, advise, ask.
Regards, Starp.