
Hello everybody! Today in this article we will consider a very interesting homemade. This homemade product is quite interesting and useful. Namely, we will consider how to make a machine for making popcorn from improvised means. Surely, many of us bought corn kernels for making popcorn and tried to cook them in a frying pan, and whoever did this would remember how not just to do this without scattering popcorn and staining the whole kitchen in oil. With this homemade cooking popcorn will be facilitated several times. Well, well, I think you should not delay with a long introduction, they drove.
To make a popcorn machine, you will need:
- Thick cardboard
- Nichrome wire (thread)
- switch
- Plaster or alabaster
- switch
- Battery (24v)
- Metal dish (in the form of a bulb)
- Skewers
- Plastic food container.
- Wooden spatulas.
From the tools you will also need:
- Compass
- Ruler
- marker
- Stationery knife
- Hot glue
- Drill with drills
Making a machine for popcorn.
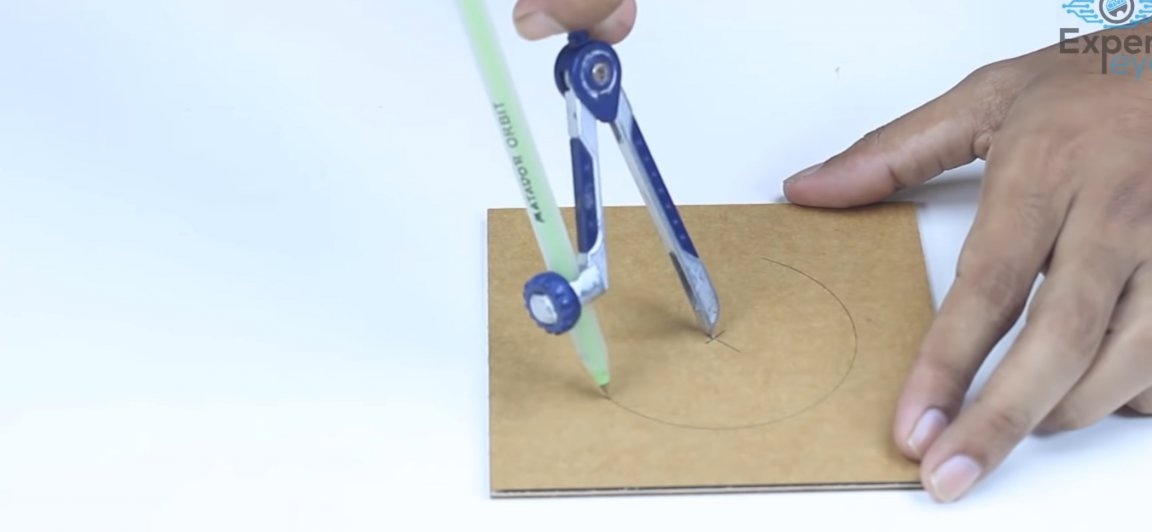
We begin the assembly with the most important part, namely with the heating. As a heating element we will use a nichrome wire. Let's start from the place to install this same wire. To do this, you need to draw a circle on a piece of cardboard with a compass with a diameter equal to the diameter of the bottom of the vessel you have chosen, in which corn grains will be poured.
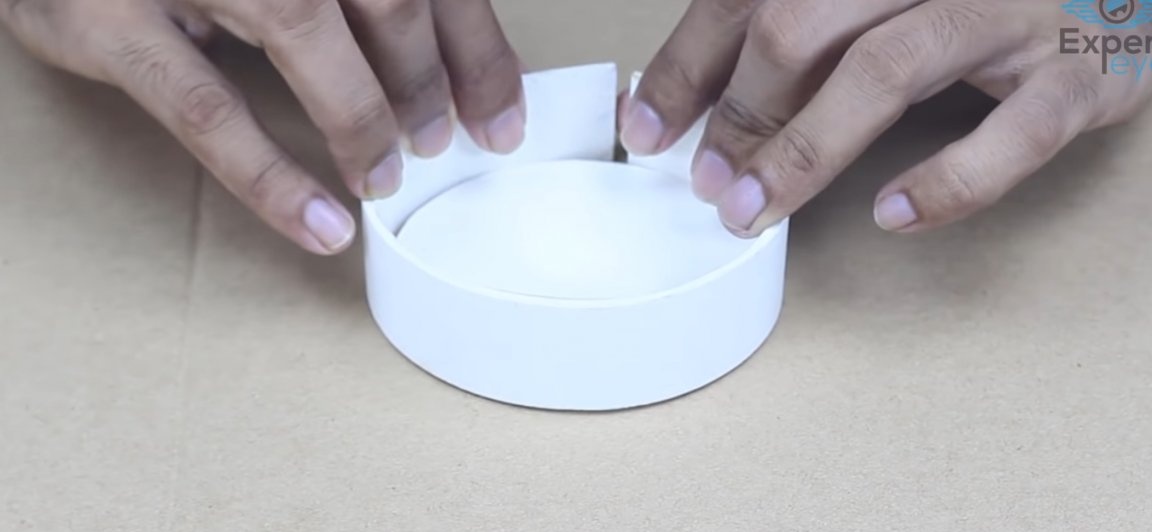
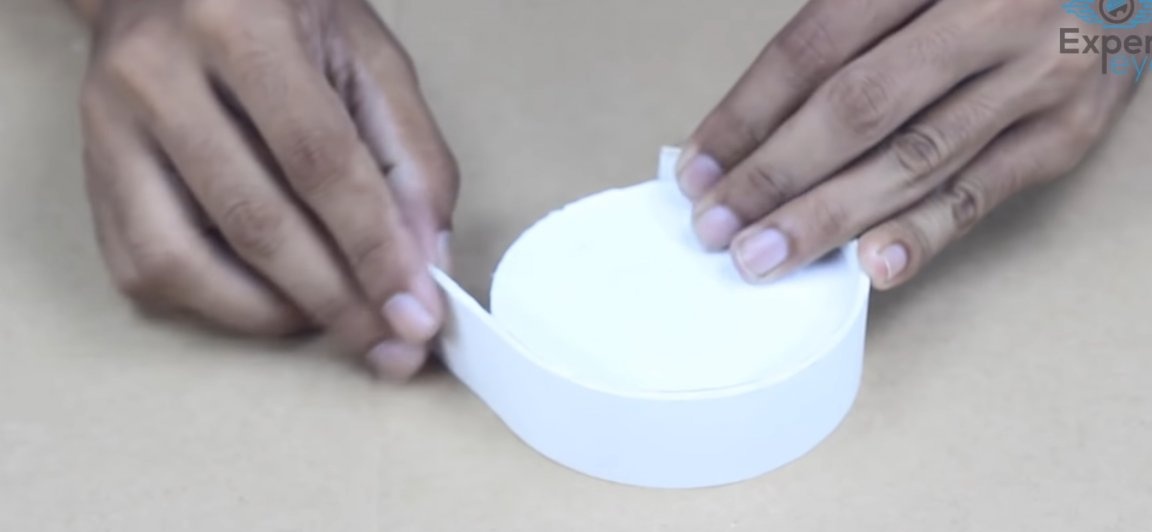
To this circle we glue the formwork from the same cardboard. Just cut out a strip of suitable length from the cardboard and glue it around the office using a heat gun.
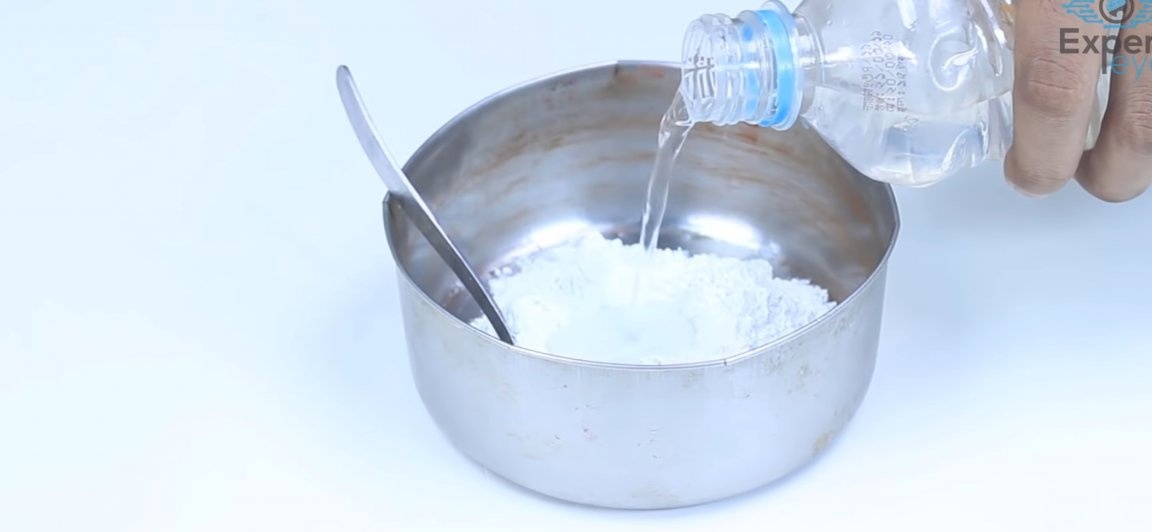
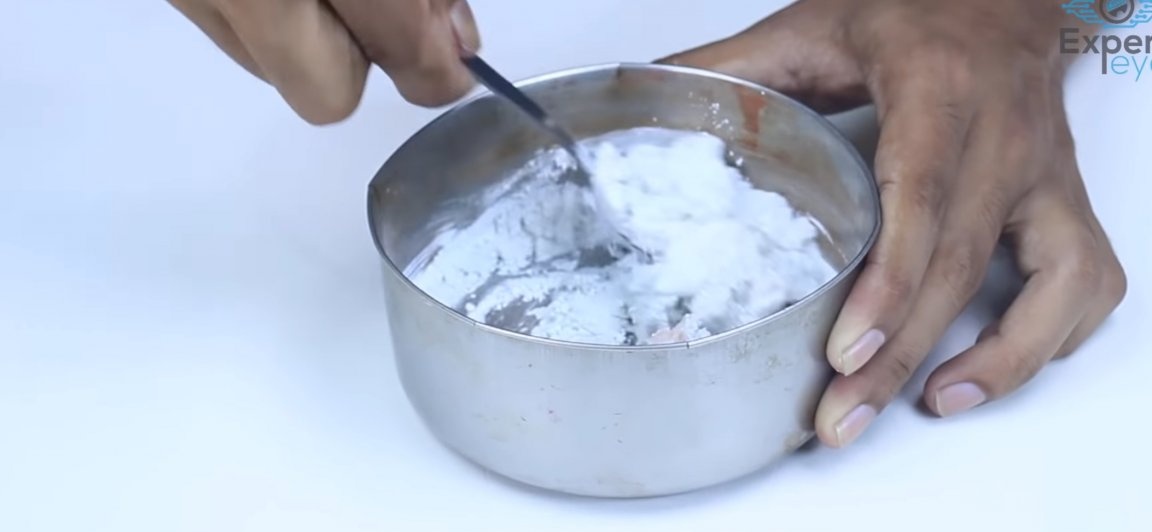
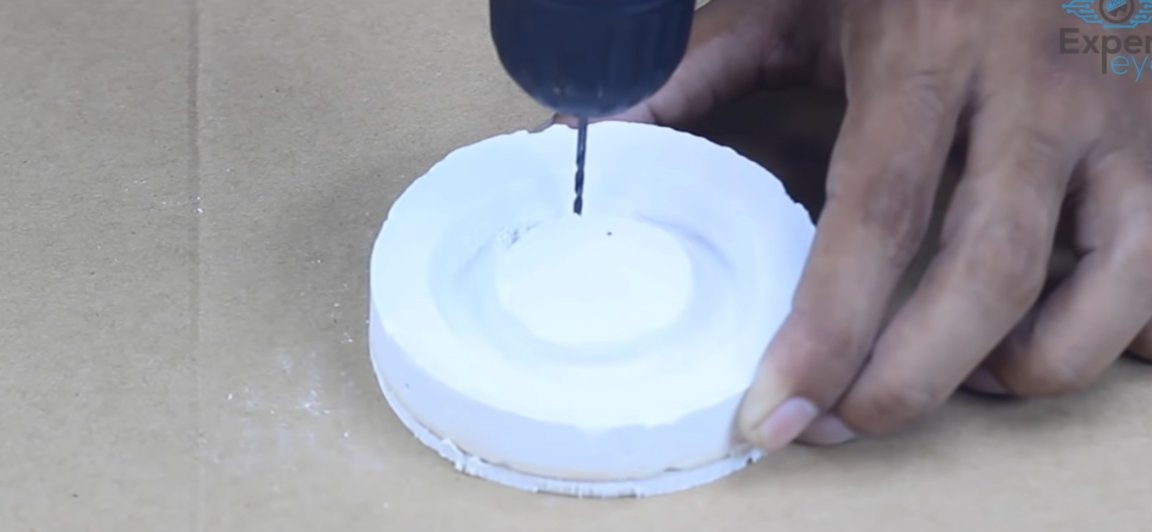
Next, you need to prepare a cast. It is worth noting that you can use alabaster, and also similar compositions. This is necessary in order to enclose a red-hot nichrome thread from a cardboard case. Take a saucepan and dilute the gypsum in it, mixing it with water until sour cream. Then quickly until the gypsum has solidified, pour it into a cardboard form made earlier. We are waiting for the gypsum to solidify completely.
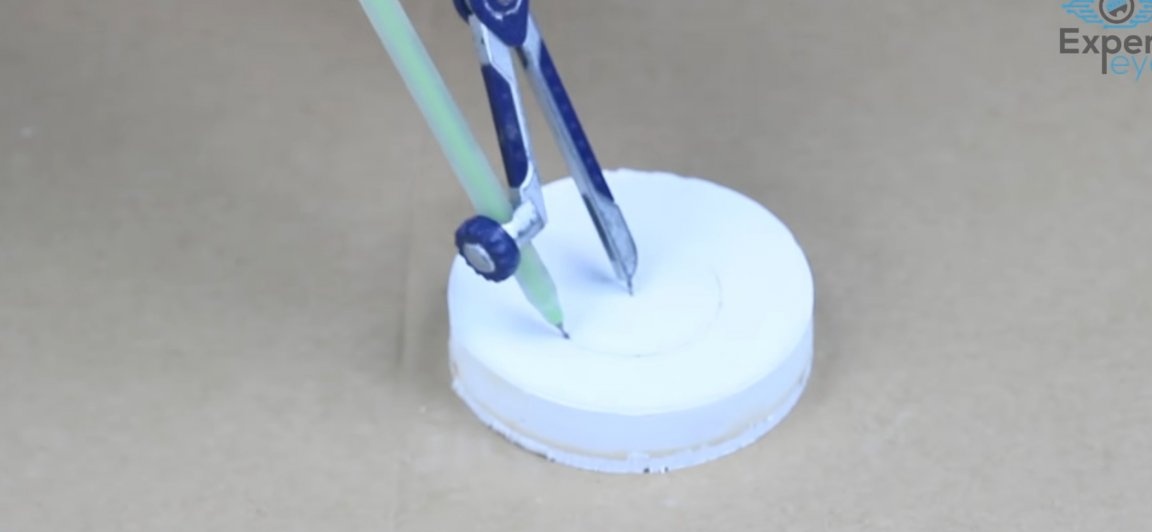
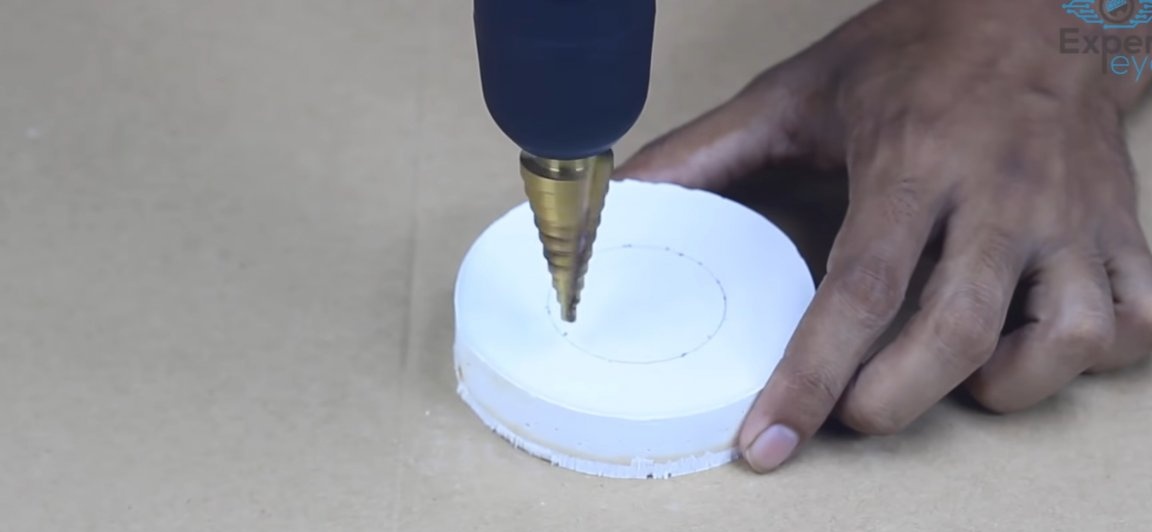
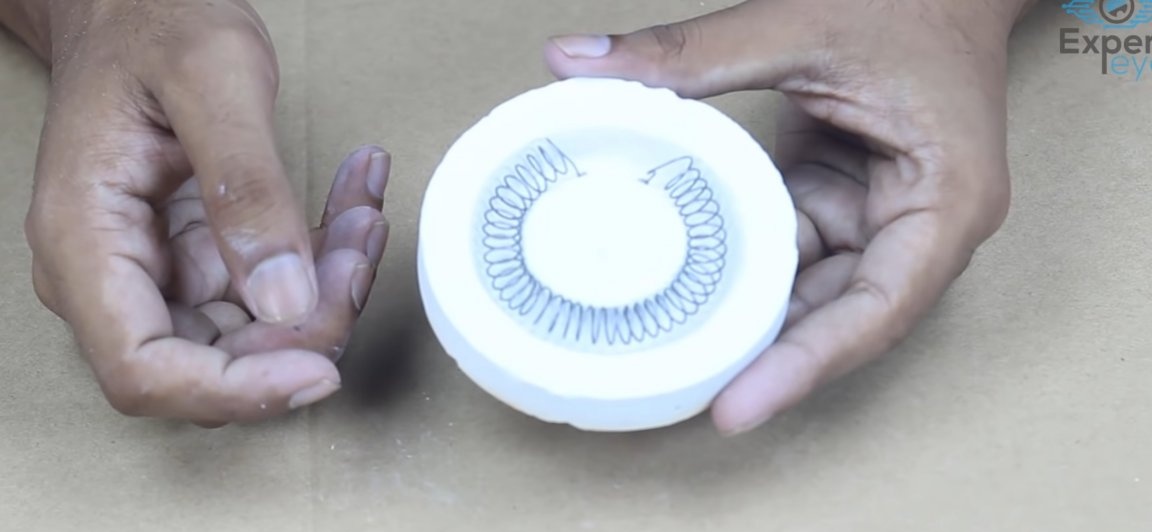
After complete solidification, we take out the workpiece. Of course, it would be better to wait for the complete drying and evaporation of moisture from the workpiece (this is about two days), but you can also remove it after a couple of hours. In this workpiece, it is necessary to cut a groove, inside of which we will place a nichrome wire.To do this, using the same compass, draw a circle. And in this circle with the help of a drill and a drill we begin to drill holes to about half. As a result, we should get exactly the same as in the photo below.
The next step is to directly wind the nichrome wire itself. Well, of course, everything is very individual here, since you may have a different wire with a different cross section and a different power source. Therefore, I recommend that you use a special calculator for this task. There are a lot of such wire calculation calculators, both in the form of a mobile application and in a browser. After winding the wire, we place it in a previously manufactured groove. But before that, a couple of very small through holes should be made in the gutter, the ends of the winding should be inserted through them.
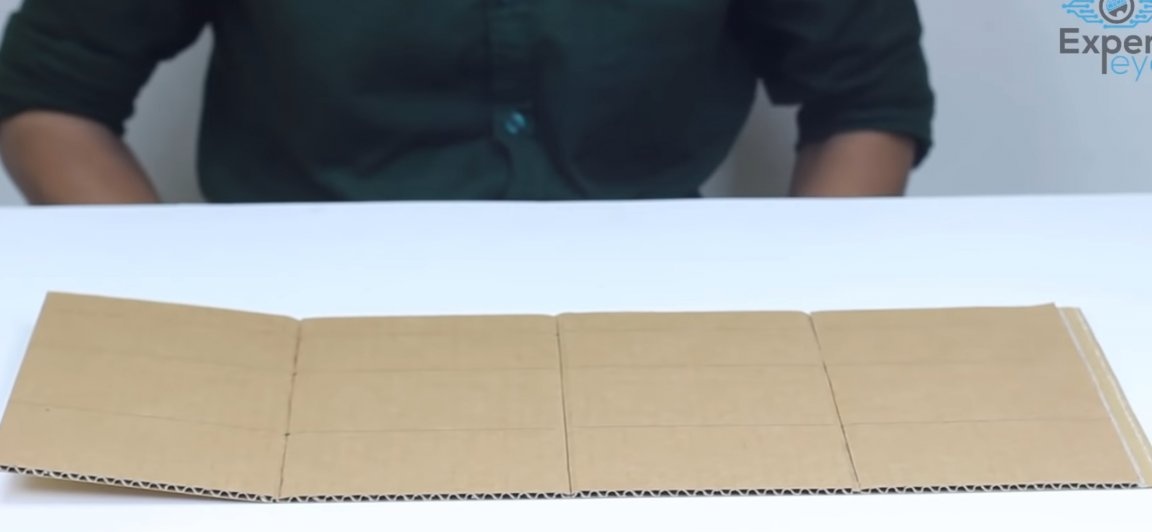
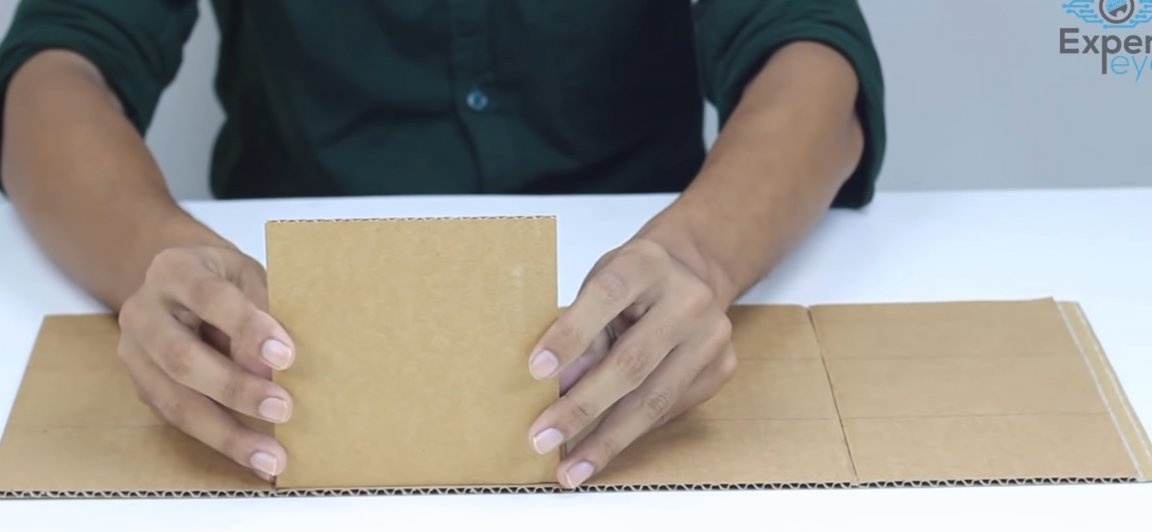
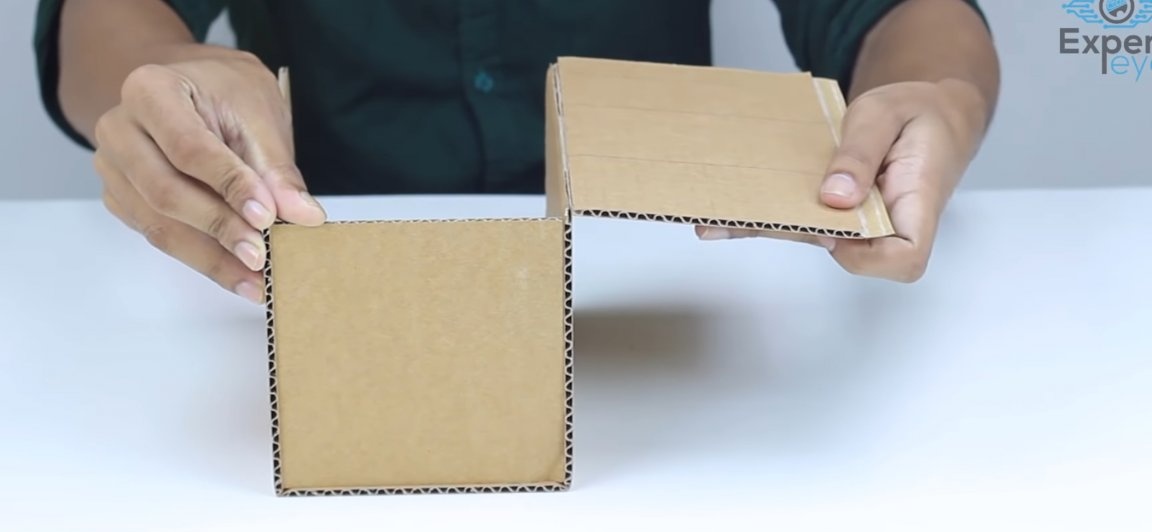
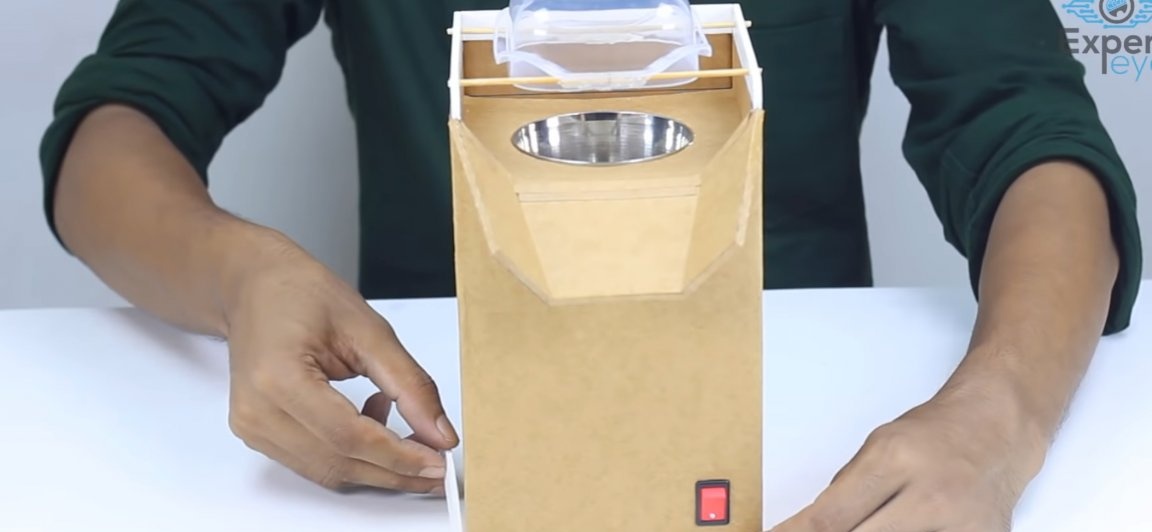
Now we will make the case. The case itself will be made of ordinary dense cardboard. The case will be in the form of a "tower". The most important thing is that both the heating element and the vessel fit in your case. We cut out the development of the “tower” from cardboard and make slots in the places of bending, they are needed so that they can be bent without difficulty and extra creases. Also cut out the bottom and begin to glue it all together with hot melt glue, but for now, leaving one wall not glued.
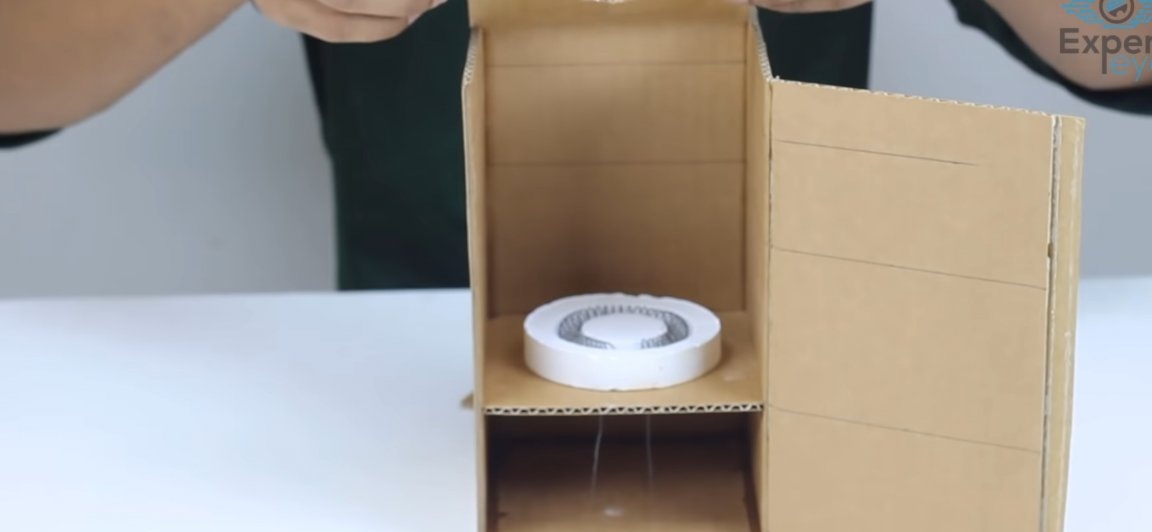
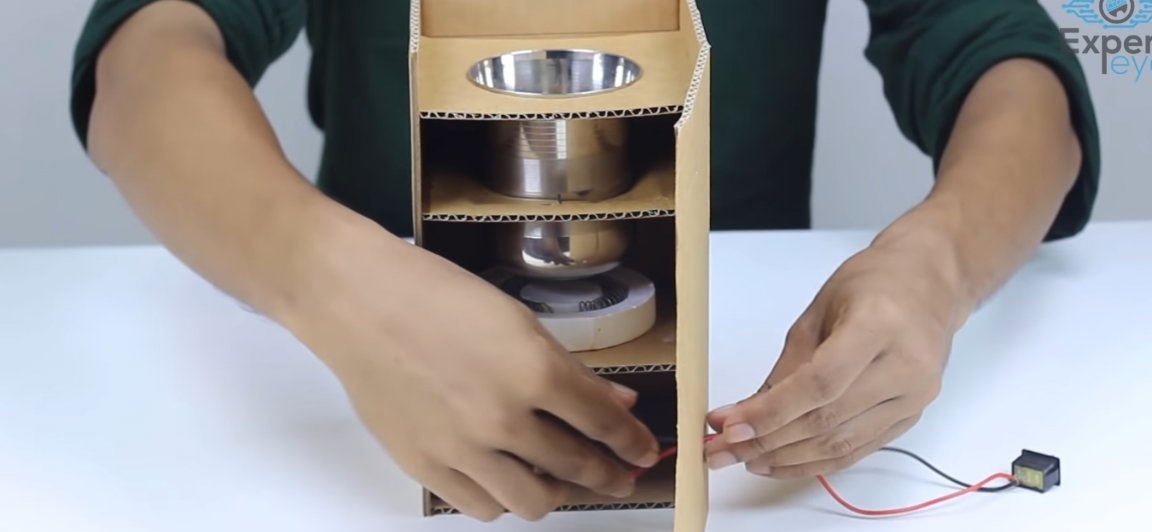
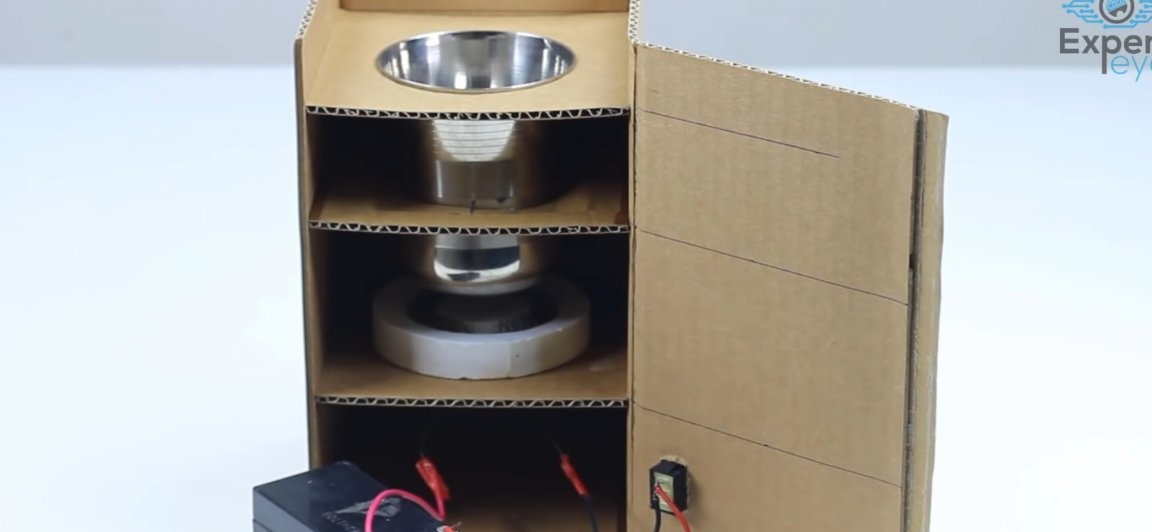
Glue a cardboard layer inside the tower building, on it we will place a heating element. It is worth noting that the battery is located at the bottom of this tier, and there will be a place under the vessel on top. That is, these points should be taken into account when designing the case in your case. Well, we install the heating element on the newly glued tier.

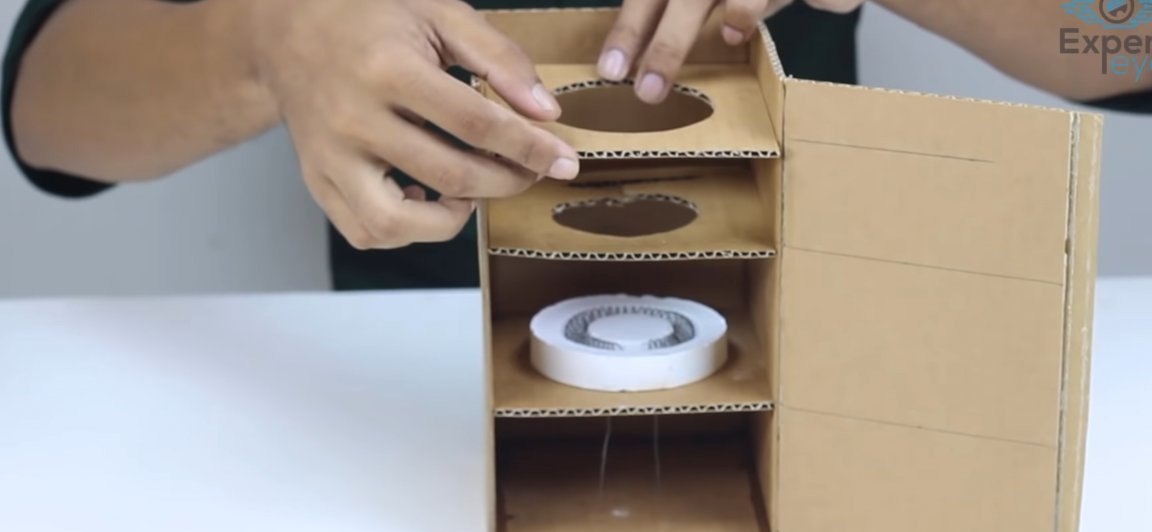
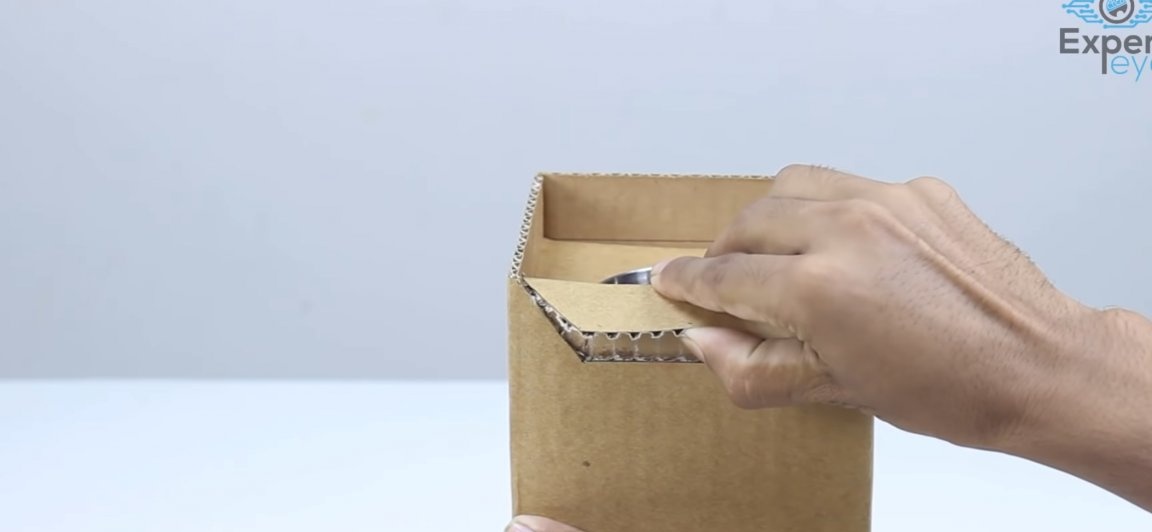
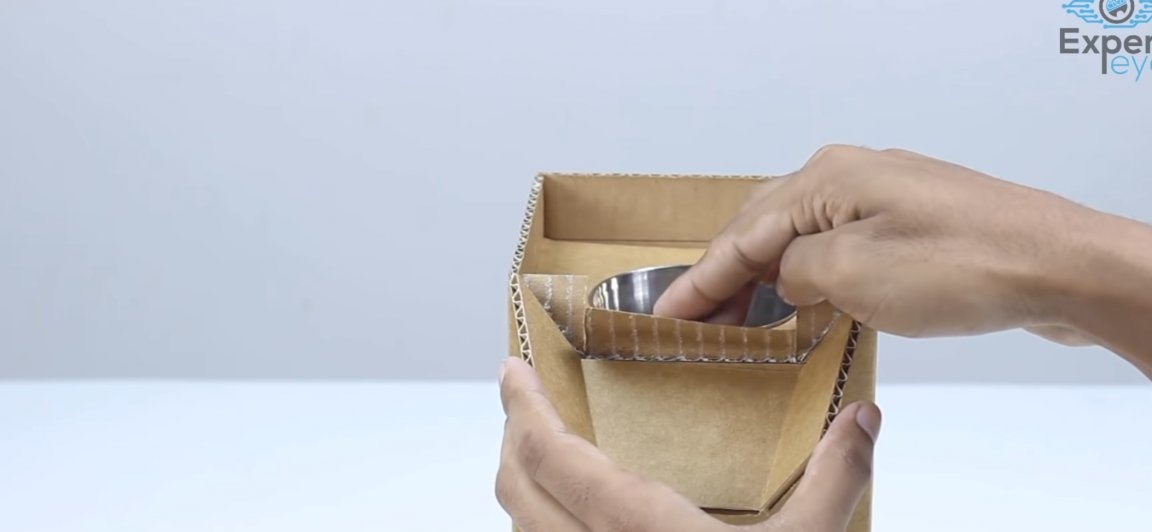
After that, two more tiers must be glued inside this tower, they will serve as fasteners for the metal vessel. That is, we cut out the appropriate size holes inside these squares, they must be such that this cup fits tightly in place and does not hang out. And finally, we place the cup itself.
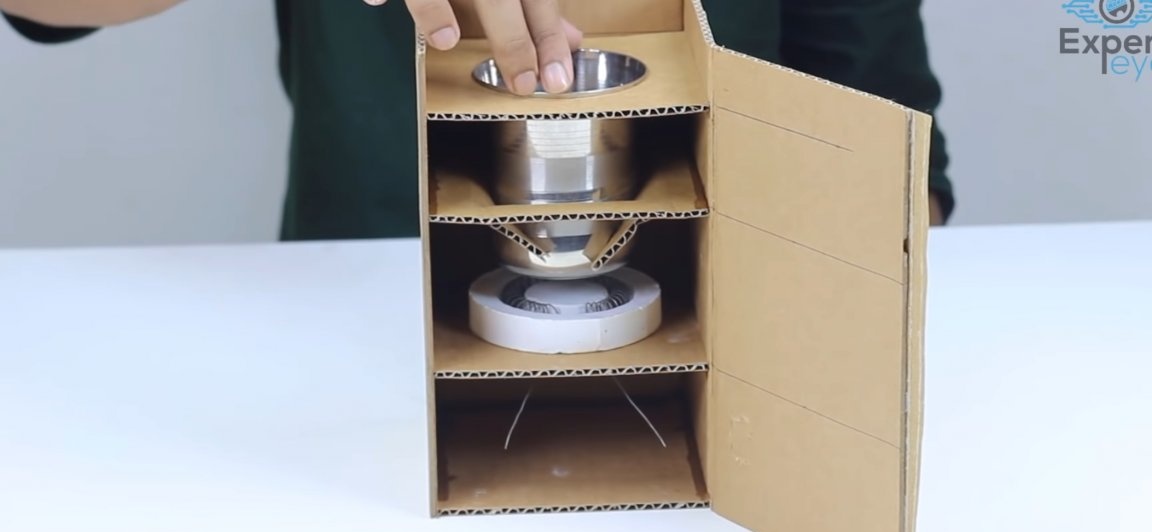
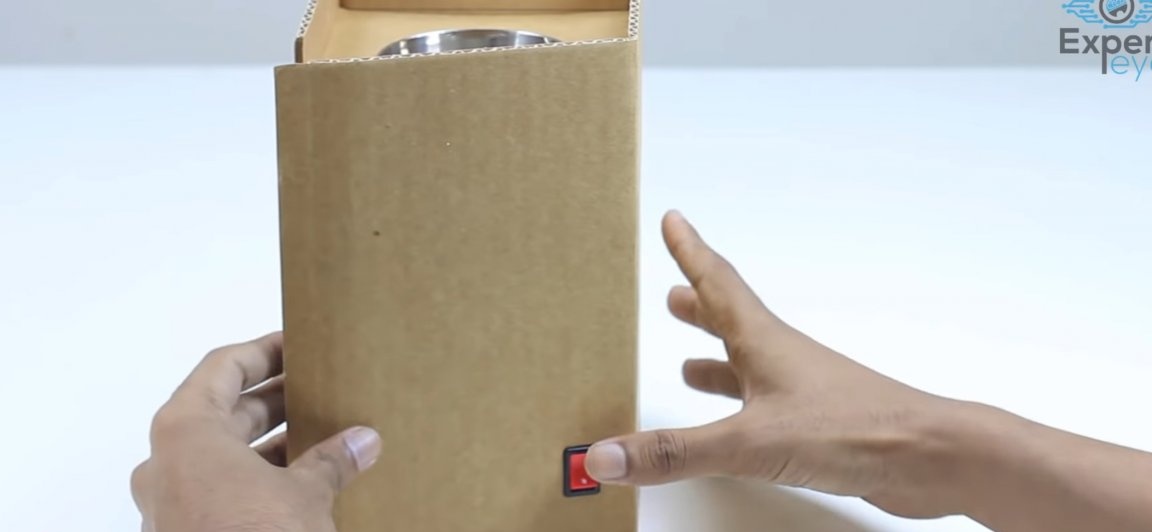
Next, you need to place the switch on the case. We will mount it in the lower part of the case next to the battery. To do this, with the help of an office knife in a place convenient for you, we make a landing hole for the installation of the switch itself. We insert the switch wires through the hole just made and install the switch.
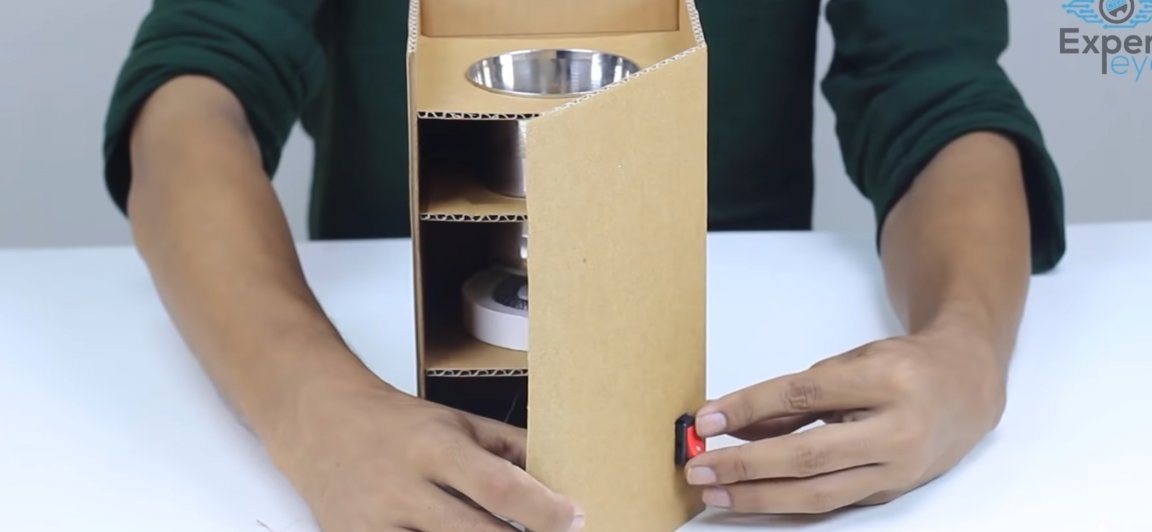
Then you need to take the battery. The author used a nickel-metal hydride battery, but I recommend that you use lithium-ion batteries, as they are able to give a high current for longer. But what I definitely do not recommend for you is to use the battery without a power controller, since disembarking the battery to zero will certainly not lead to anything good. We connect the battery to the nichrome wire through the switch and close the case.
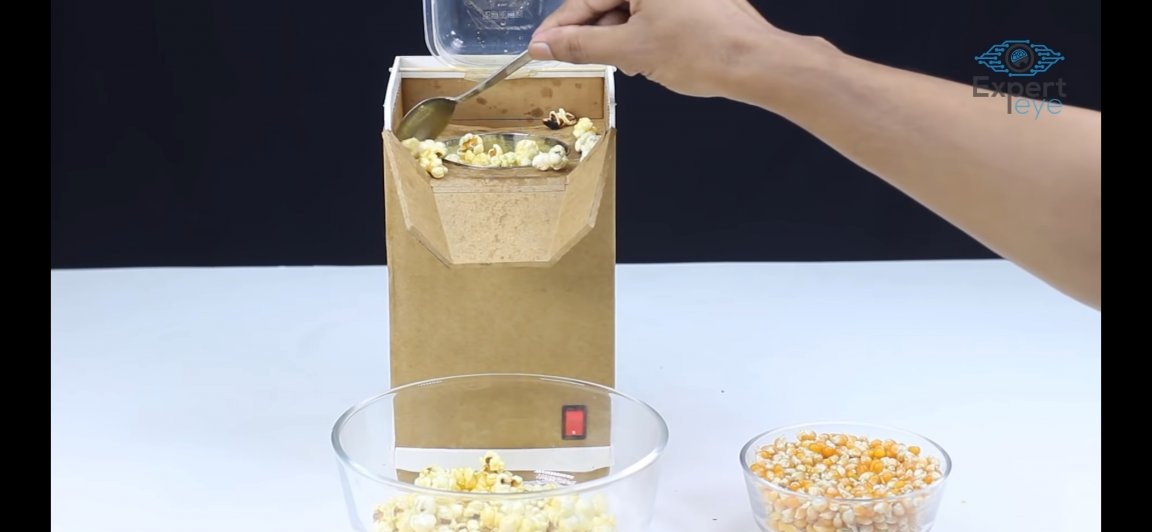
Then, in order to slightly automate the process of making popcorn, the following should be done. Namely, in one of the sides of the case we will make a trapezoidal cut (see photo), to this cutout with the help of hot glue we glue a pre-cut cardboard auger. Note that the auger should be tilted so that the popcorn flying out of it can get into the plate that you substitute.
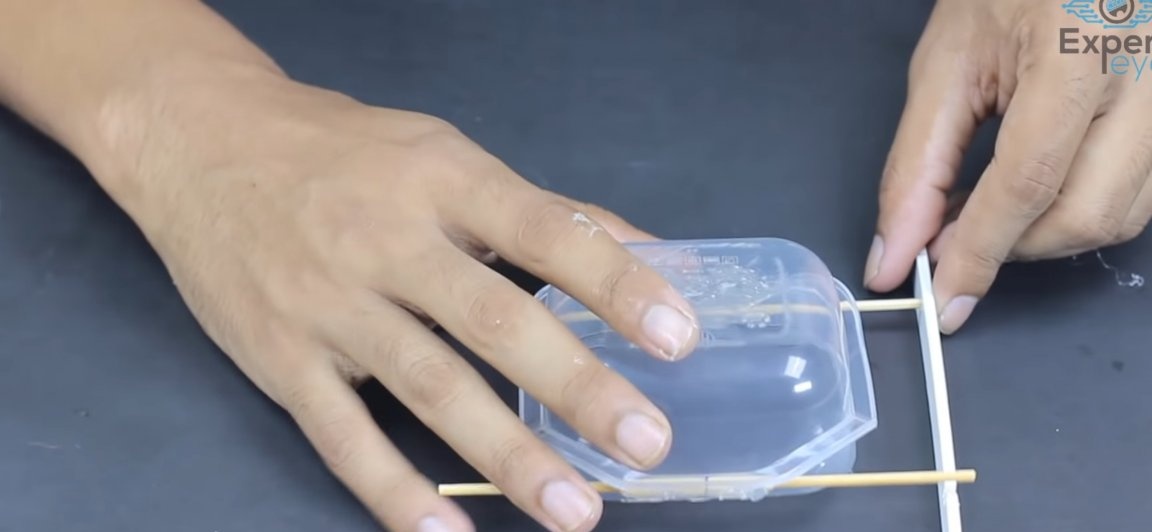
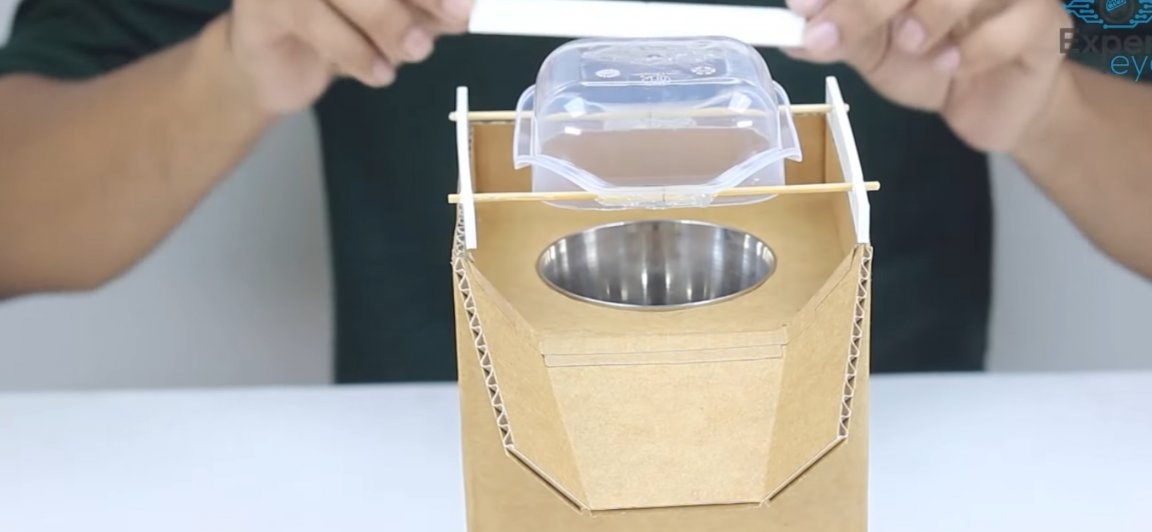
As you know, the exploding popcorn will scatter in different directions, and not gently hit the auger and slide into a plate, so to prevent this from happening, you should make a dome that will not only slow down the popcorn, but also ricochet it into the auger. To do this, you will need not a large plastic container for food, to which we will glue two bamboo skewers in parallel, as in the photo below. A container with skewers glued to it in parallel will be installed on wooden spatulas, so that the container is installed at a slight inclination.
Then we install this design on the body and fix it there with glue. The design should be fixed so that the popcorn reflects exactly towards the auger with a plate!
That's all done! You can decorate the structure a little and use it.
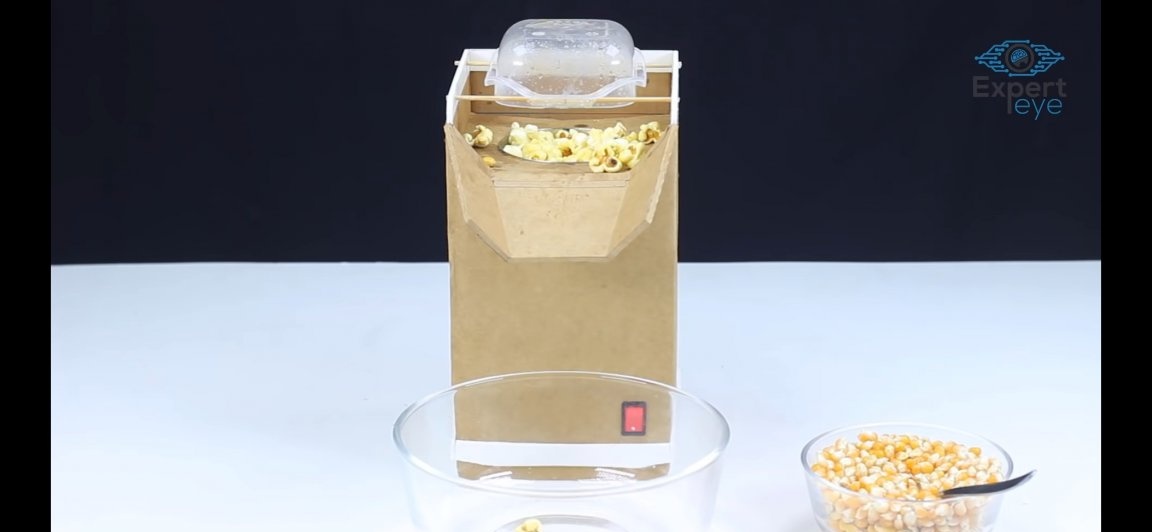
As a result, we got a very interesting homemade product, which remains to be tested. To do this, we fill in special-grade corn kernels, pour a little sunflower oil, and turn on the heat. After a while, the grains will begin to burst, and some of them will go straight to your plate. Of course, it is unlikely that it will be possible to fully automate the process using this primitive design, but we are not doing homework for industrial purposes. As a homemade product that will be used a couple of times a year to make a cup of popcorn, it will work perfectly.

Here is a video of the author of the homemade:
Well, thank you all for your attention and good luck in future projects, friends!