

We clean the nozzles (injector) ourselves
Advantages of the device (circuit):
1. Easy to assemble
2. No configuration needed
3. No scarce items
4. Can be assembled on a breadboard
While working at the service station as an injector, we often encountered the problem that car eats fuel, twitches, pulls poorly! Basically, the whole problem was low-quality fuel that they slip into us. Of course, not always, there were simply banal cases when the plug fell off or the candle refused. But this is not about that.
The quality of gasoline here leaves much to be desired, from temperature and time on the nozzles of nozzles and on their needles there is a build-up, pollution. At times, improvised means a tube and a spray can for cleaning carburetors do not always help. Turn to specialists.
I will now provide a circuit board that replaces the standard program for cleaning the injector (nozzles). Why did I do it, you ask? Due to the fact that we often turned off the lights in the winter, and our chef was a bit hungry for money to buy a normal generator, so that he pulled the entire station.
The circuit is powered by 12 volts, any battery. Doesn't need a computer. I did not invent bikeAt first I climbed through sites and forums, but something out there was too tricky or on ancient antediluvian elements. I decided to strain the gyrus a little and make something simpler. No sooner said than done. A day later, I drew a diagram and checked it!
I didn’t invent a bicycle, I took the long-known generator on the NE555 chip for everyone, picked up the ratings to get the signal that should go, took the end stages from the same program that I kindly provided and the result was a circuit that pulls me to the title “cheap but cheerful "!!!
 Well, let's not pull the cat for ahem ... hmmm I provide a diagram:
Scheme for cleaning the injector
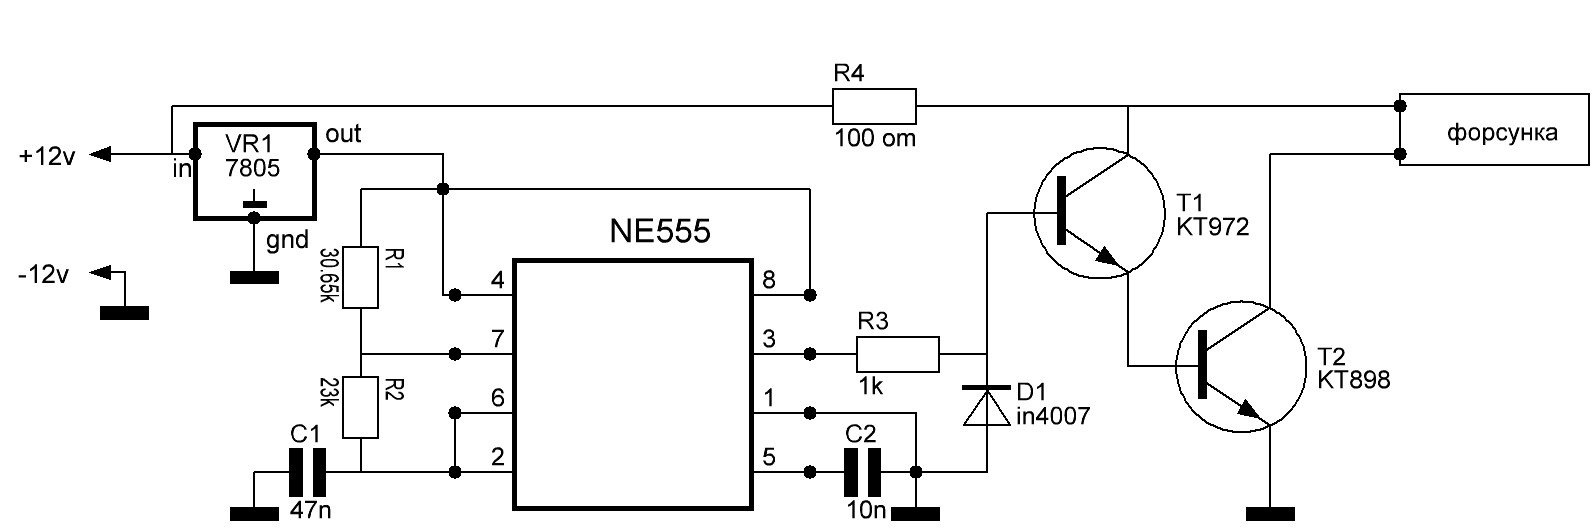
I must say right away that R1 and R2 are composite or you can apply variables that we select values with a multimeter. Ideally, R1 (30.7 kom), R2 (23.02 kom). These values are not from the ceiling, I took data from the program, I adjusted everything through the program for NE555. To whom it is interesting I can then give a link.It is advisable to take accurate resistors, since the generator signal directly depends on the deviation in these resistors. The same thing I can say about capacitors C1 and C2. I dropped them out of the radio. R3 and R4 are not critical in this regard. VR1 in the diagram is a heel or a voltage regulator of 5 volts, T1 is a amplifying transistor, T2 is a terminal (composite). The diode can be torn out of Chinese power supplies or buy a penny it costs.
Be sure to install KENK and Transistor T2 on radiators, a little will be enough for krenk, but KT898 needs somewhere around 8 to 8 cm radiator, it heats well !!!
Unfortunately I can’t provide a photo of the assembled device, but it worked for 3 years while I was at the service station, then I left it there, I hope it still works. It was assembled on a breadboard so that everyone has a place for imagination, and there are not many details.
There is one more remark, before connecting the nozzle, measure its resistance, if the resistance is less than 8 ohms, then do not drive them for a maximum of 30-60 seconds. The rest can be driven (just kidding) until you turn blue 5-8 minutes is enough.
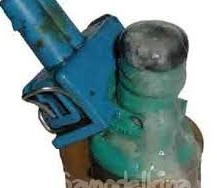
How to use this stray: immerse half the nozzle in a solution of acetone, solvent, or the same liquid for cleaning carburetors (I recommend it by the way). We connect the nozzle, and then apply power to the board (you can put the toggle switch =)). The nozzle starts to buzz, bubbles form at the base of its nozzle, this is the effect of cavitation for about a while, after a while it starts to drink, pump the solution from bottom to top. If this happens then all the rules.
ATTENTION: Do not use this option on machines over 2005, some nozzles that have already undergone corrosion can simply simply fail. This is mainly found on Korean cars. It is also not advisable to use this method where ceramics are present in the nozzles.
Write questions. About how to make a photo from below.
When the nozzle begins to drink or to drive liquid from the bottom up