
In the country, after a hard day, I want to freshen up. Our homemade, suitable for those people who do not have time to make an expensive soul. Such a shower is easy and simple. do it yourself using improvised materials.
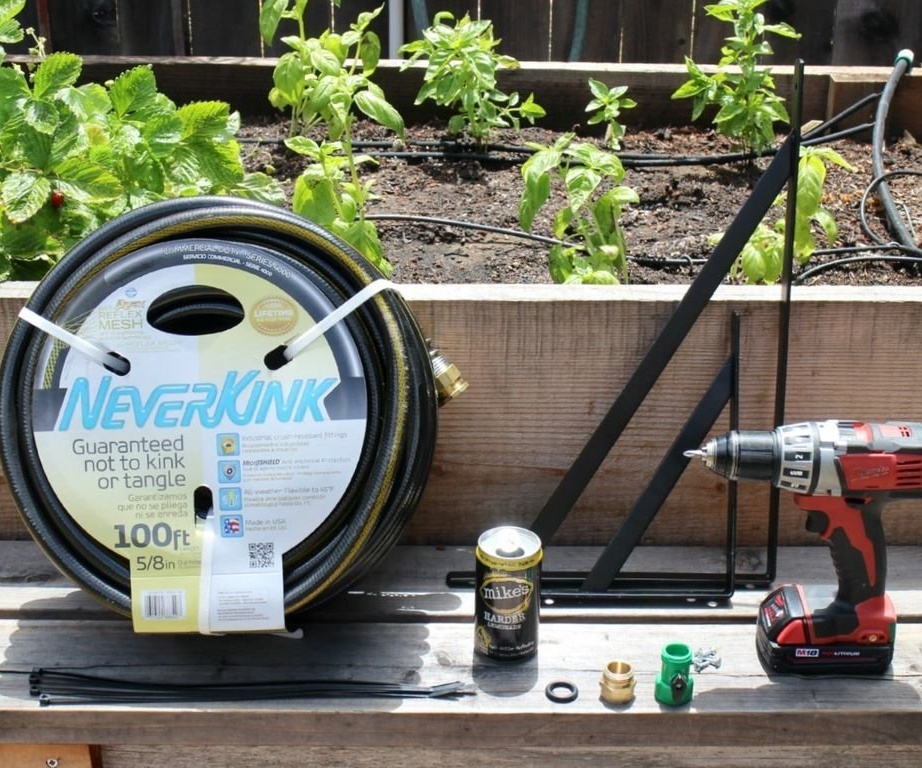
To get started, prepare the following materials.
• Hose required length
• Brackets of different sizes (large and small)
• Fitting
• hose holder
• Tin can of lemonade or beer
• Drill
• O-rings
• sharp knife
• Wooden spoon
• Pencil
• Large pebbles
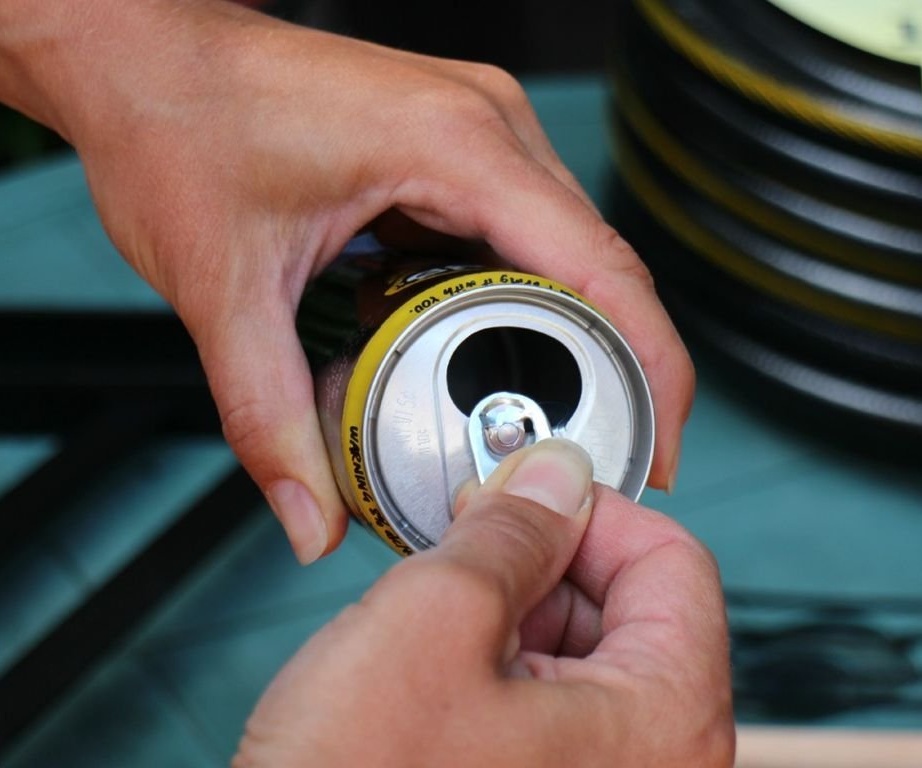
Step 1
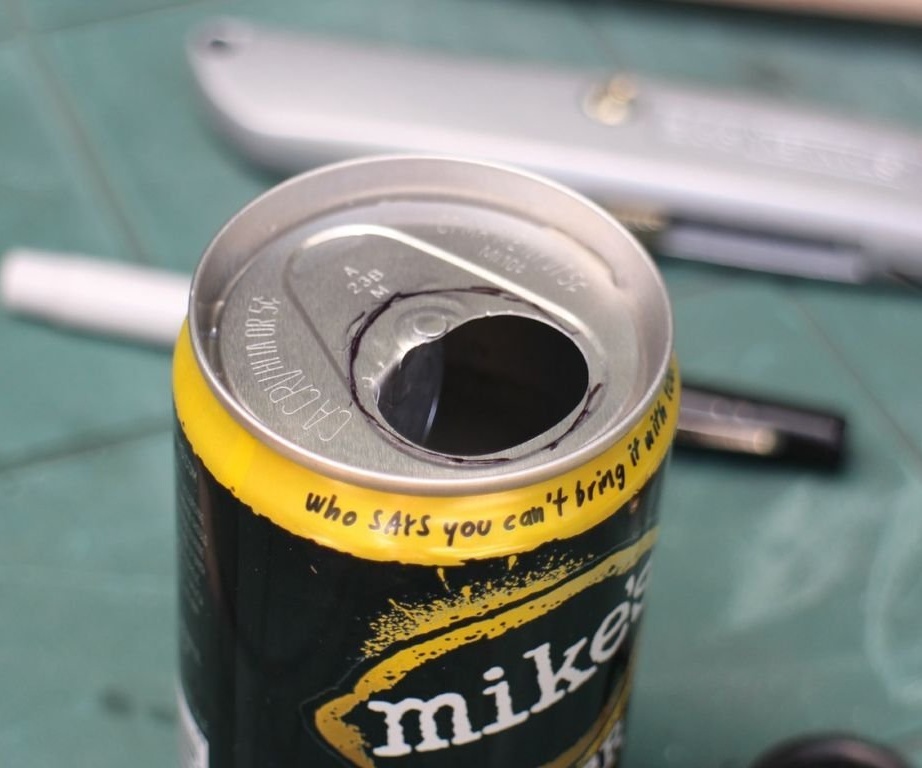
First, we need to remove the jumper from the can.
Step 2
The next step is to attach the fitting to the top of the can and outline it with a pencil.
Step 3
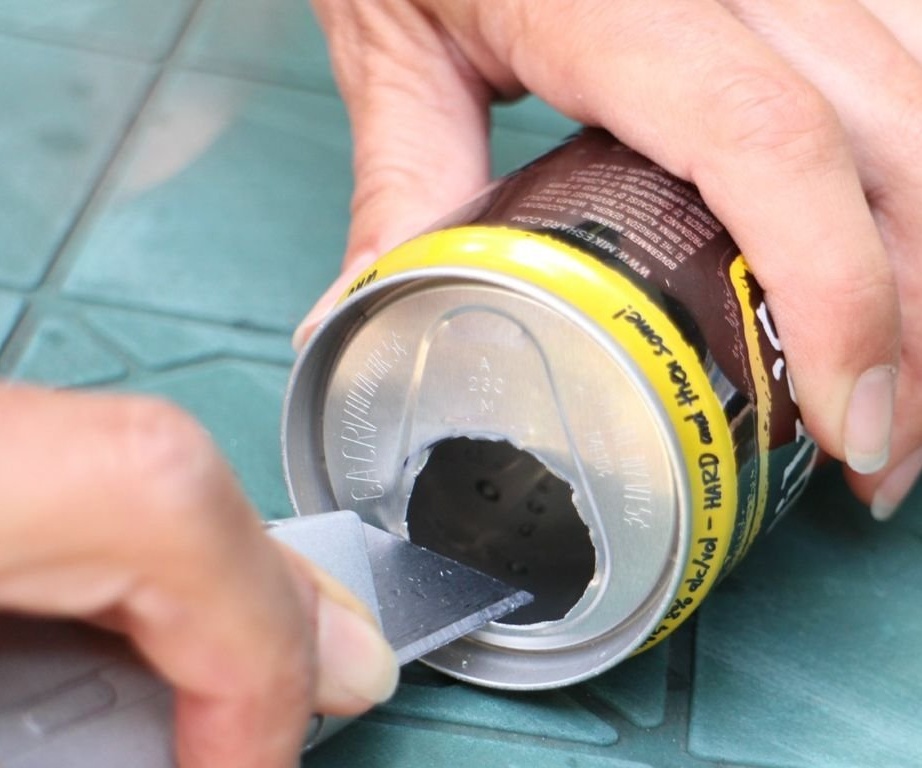
Take a sharp knife and very carefully cut a hole in the marked circle. This should be done very carefully, as you can get hurt.
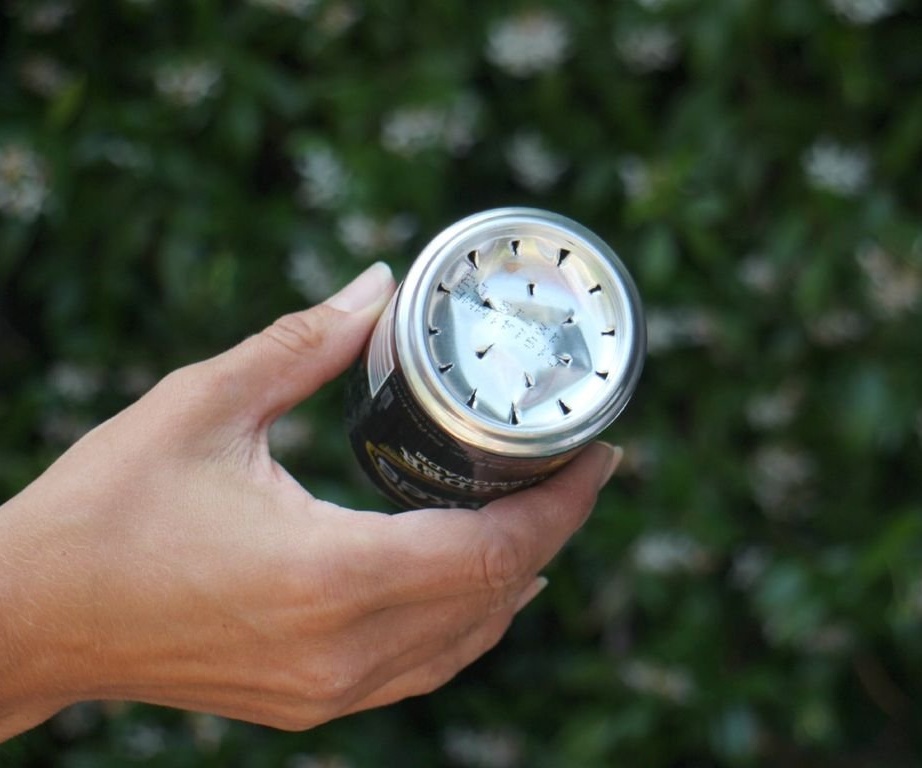
Step 4
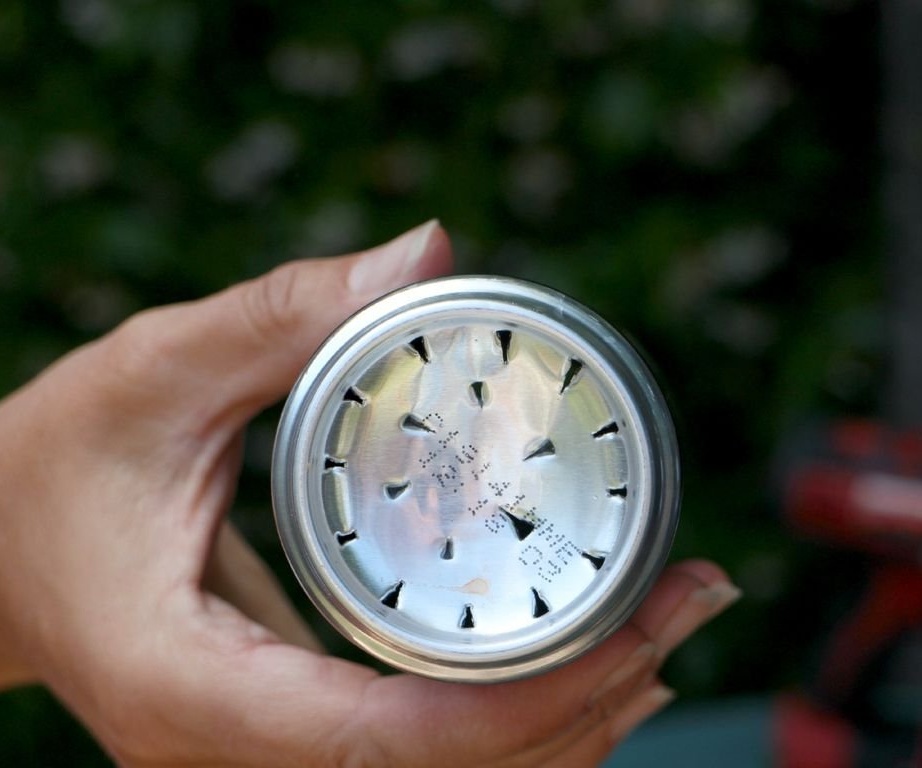
We turn the tin can, take our sharp knife, and evenly make holes in the lower part of the can. We recommend that you place them in rings so that visually our “perforated” jar resembles the usual head of a shower hose.
Step 5
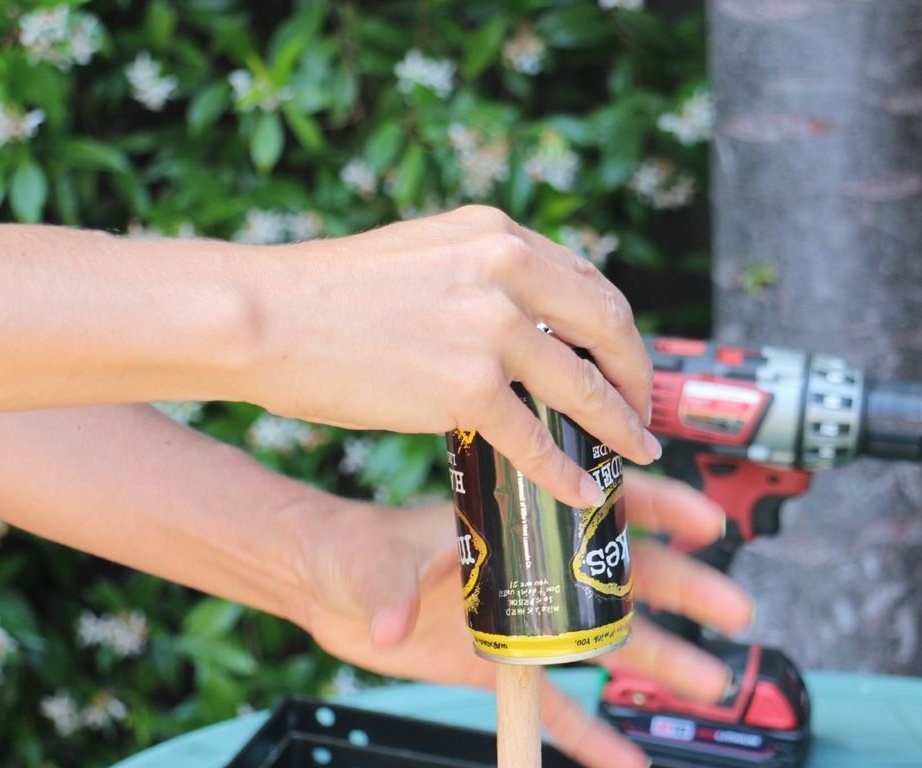
Now our shower head needs a bit of refinement. After all, if you leave it in this form, then it will turn out that the jets of water will be directed inward. When you turn on the water, they will not spray. They will gather in one big stream. To do this, they must be bent in the opposite direction. Here a wooden spoon will come to our aid. Take a spoon and press it firmly to the table. After that, insert the handle into the opening of the can and rest against the bottom. Press the handle into the bottom with gentle movements, shaping the palm of your hand from the back.
Step 6
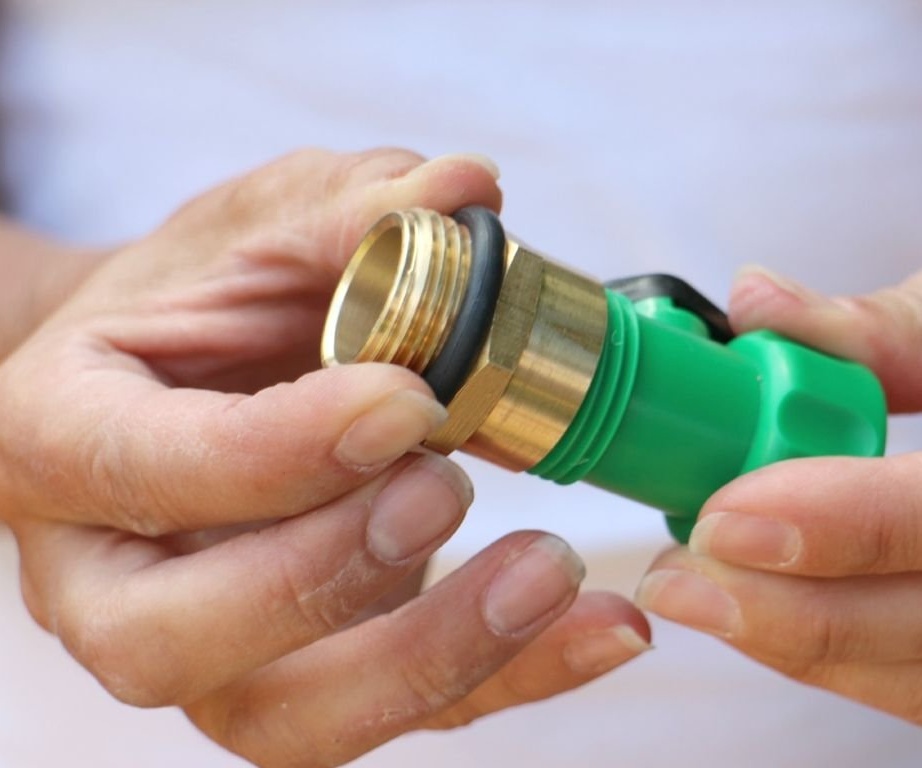
Take the valve for the hose and screw it into the fitting. It is also necessary to put the o-ring on the back of the fitting.
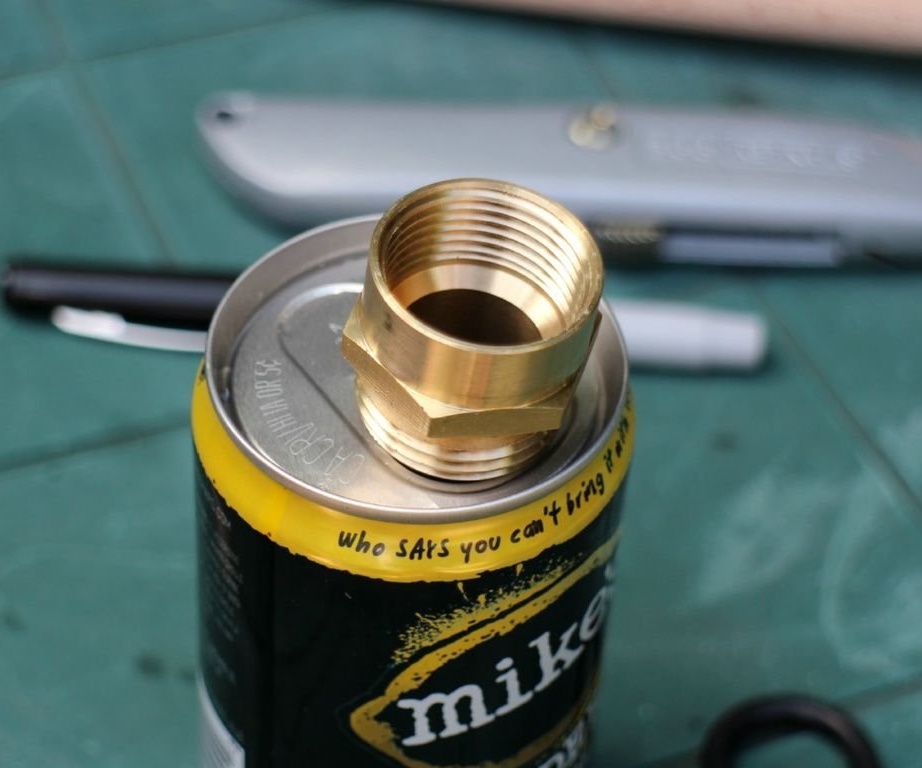
Step 7
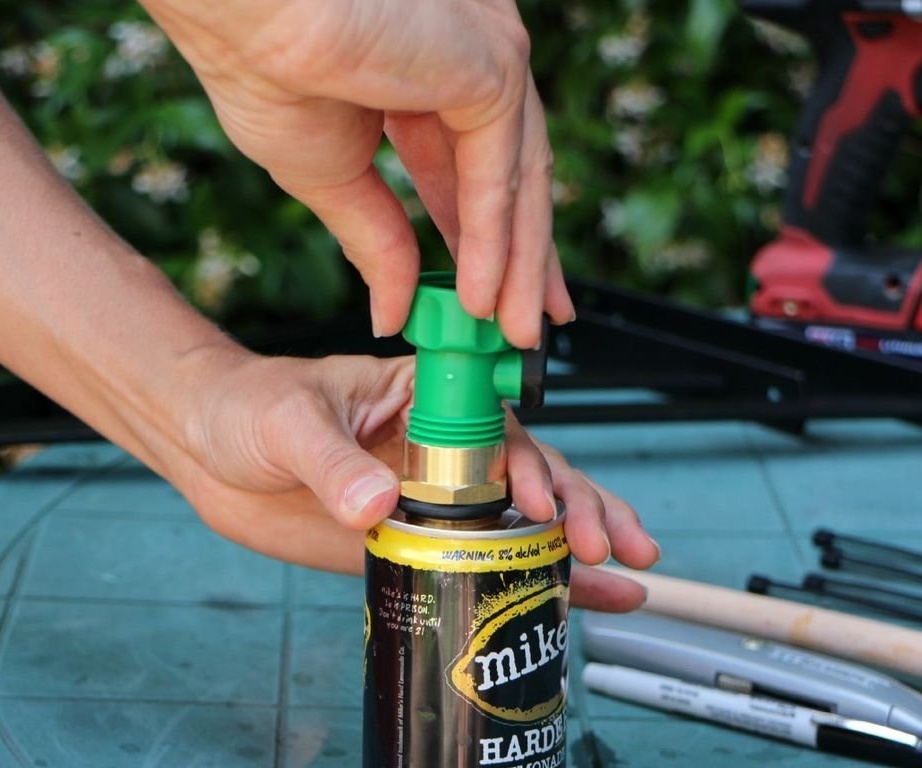
Screw the fitting into the opening of your can until the ring fits snugly into the upper part.
Step 8

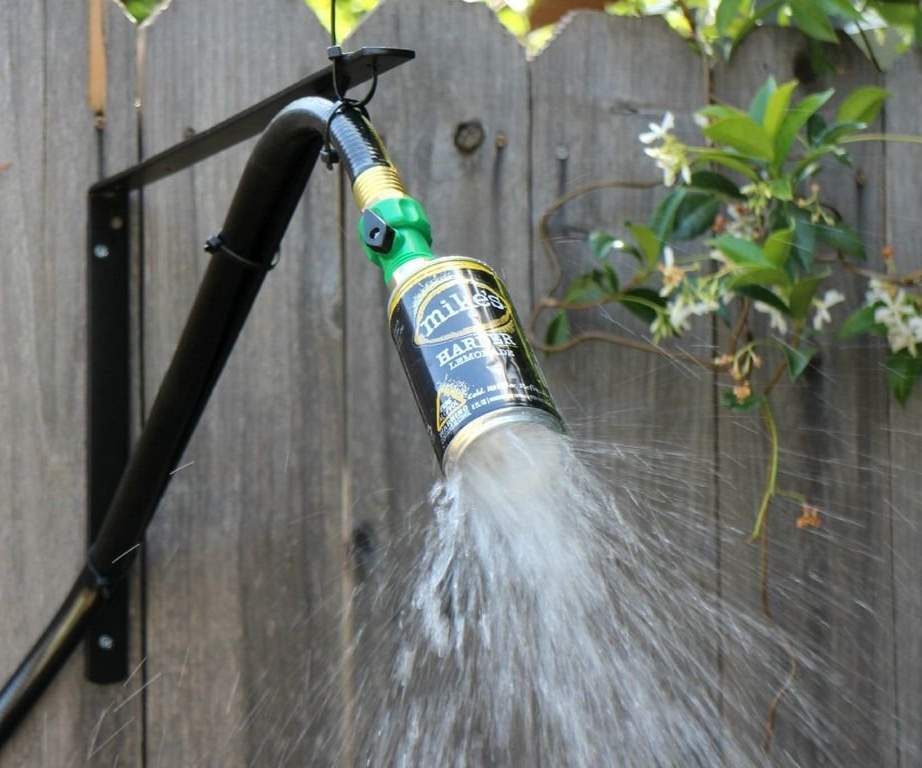
Now decide on the place where your shower will be located. We recommend that you allocate a sunny place for this. Where the sun's rays fall all day long. Attach pre-prepared brackets to the wall or fence. Fix one on top (for the shower head), and the second is needed from below in order to attach the hose rings to it.
Step 9
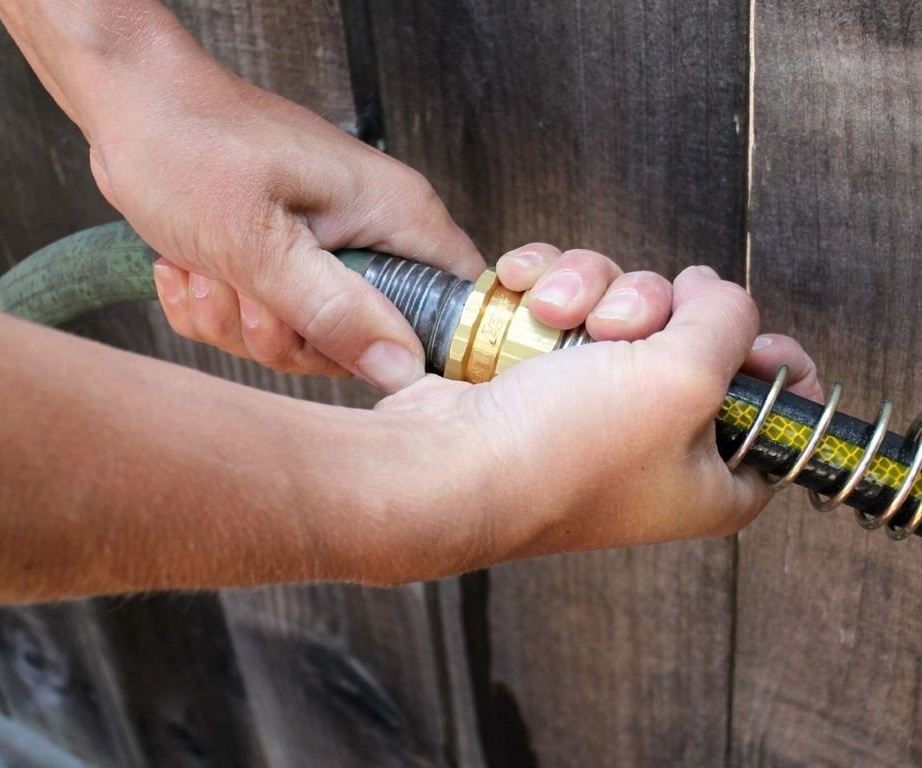
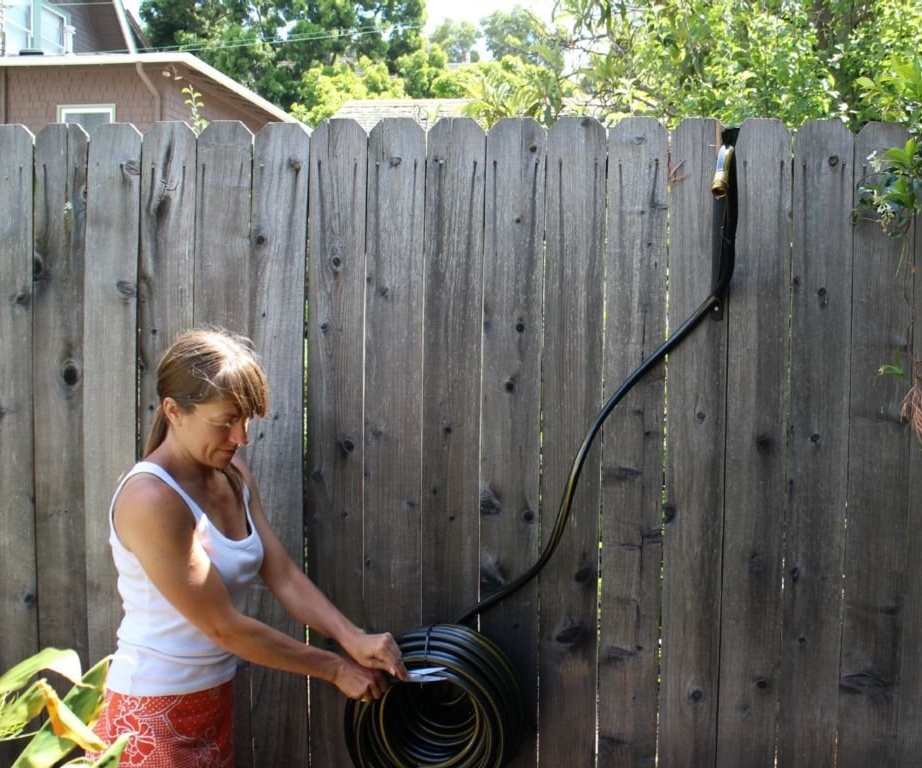
Attach a hose to the shower hose itself that supplies water.
Step 10
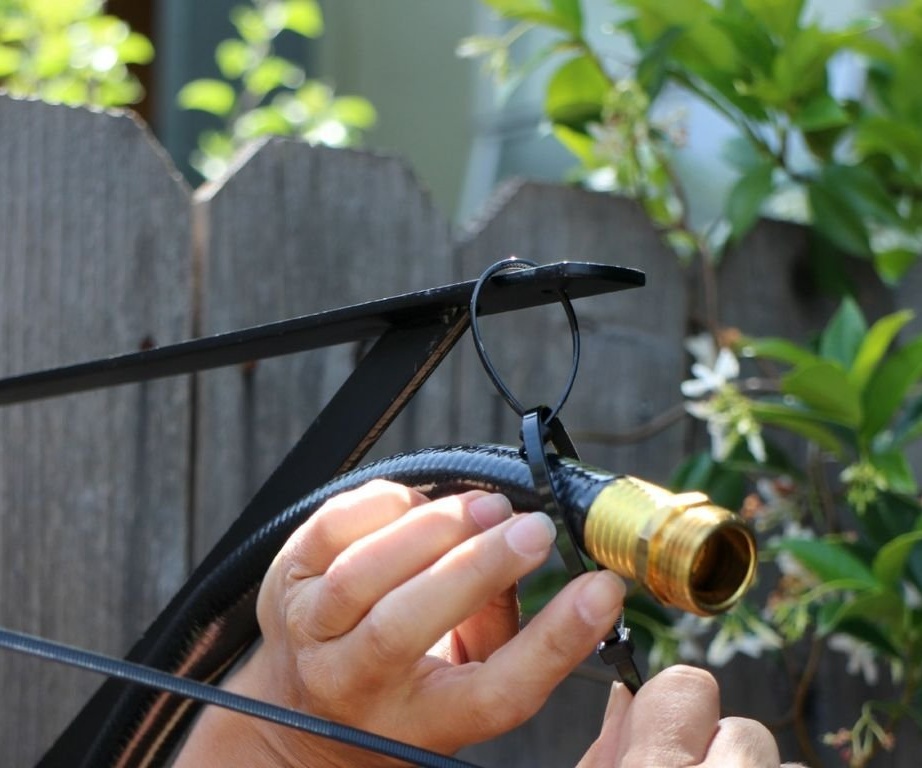
Pass the couplers into the holes of the upper mount and secure the hose. The hose must be secured along the entire length of the bracket.
Step 11
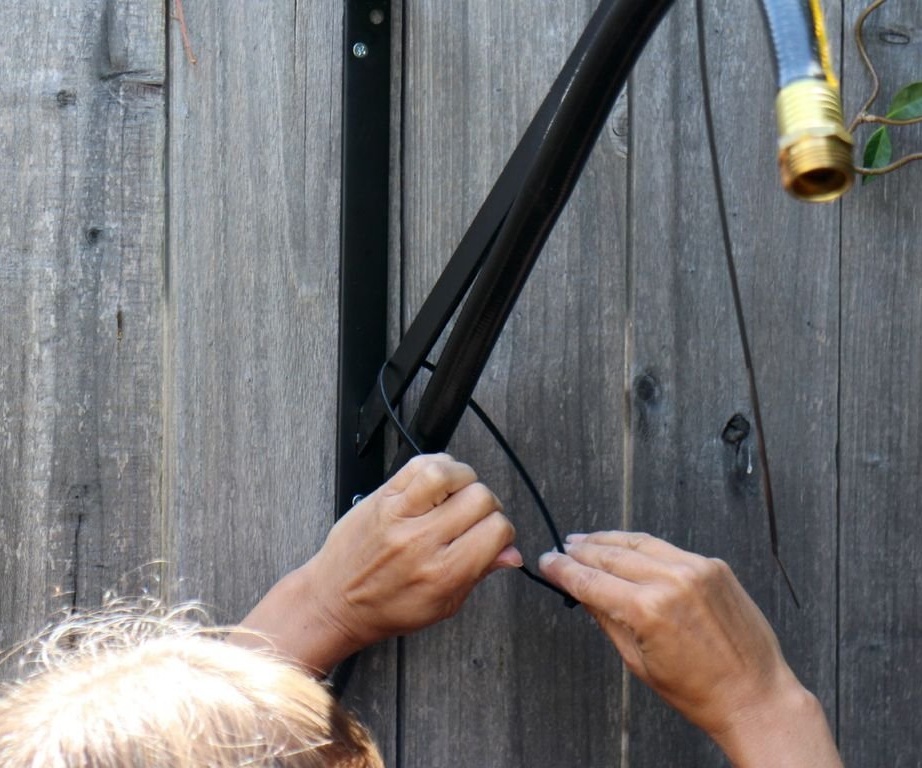
Fasten the hose rings to the bottom bracket using tie-wraps.
Step 12
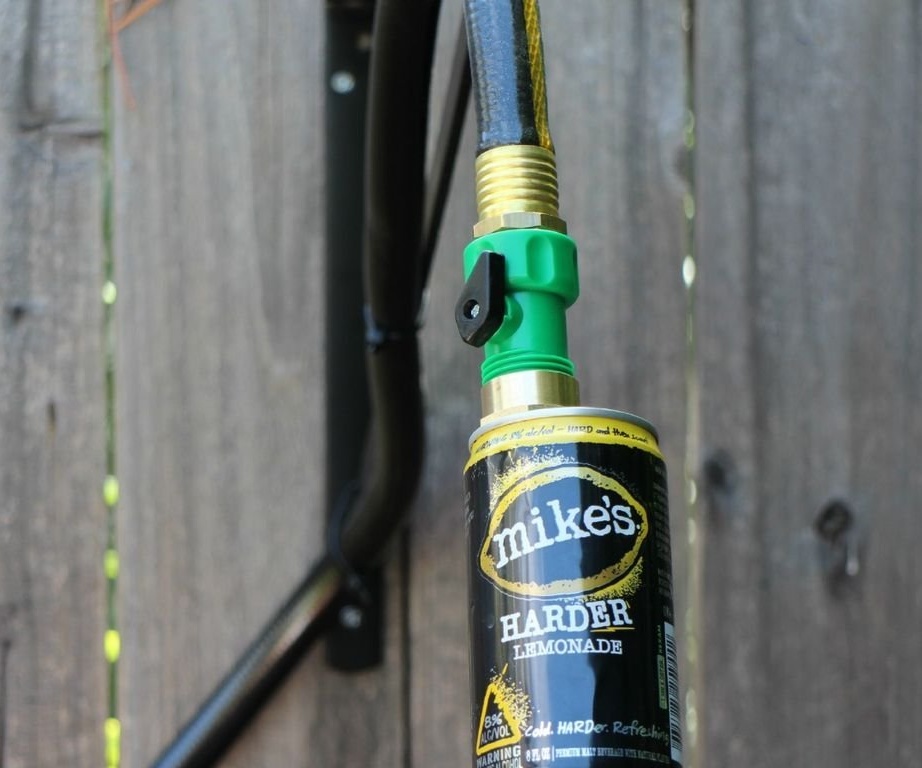
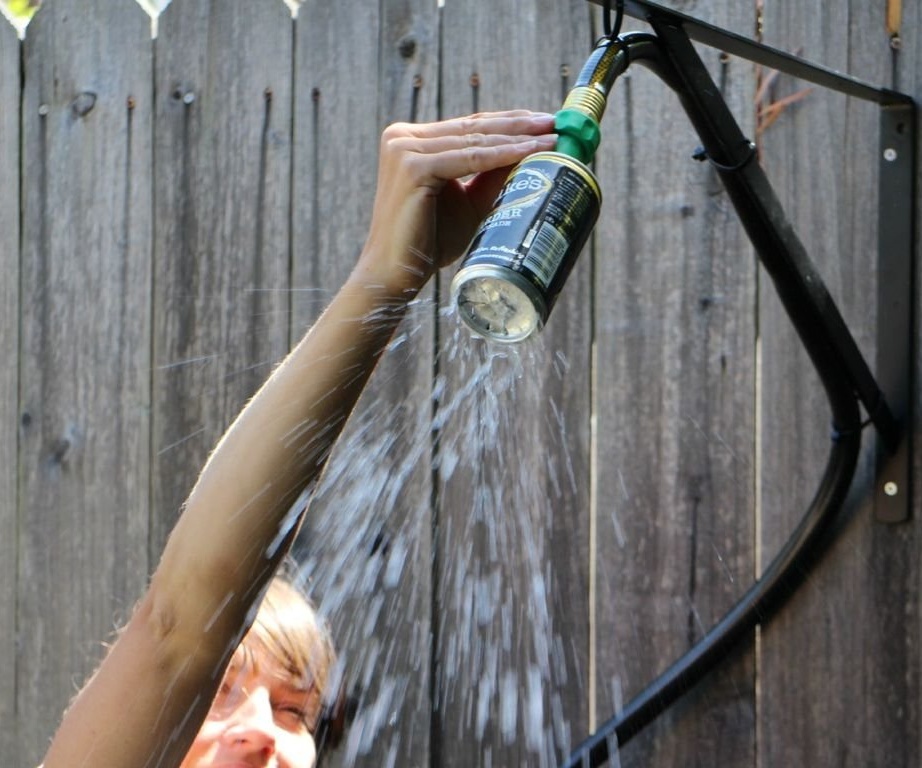
Attach our exclusive shower to the hose and test it in operation. We do not recommend immediately opening the water at full capacity, this can lead to a breakdown of the shower head. In order to test the shower for strength, add a pressure of water gradually.
Step 13
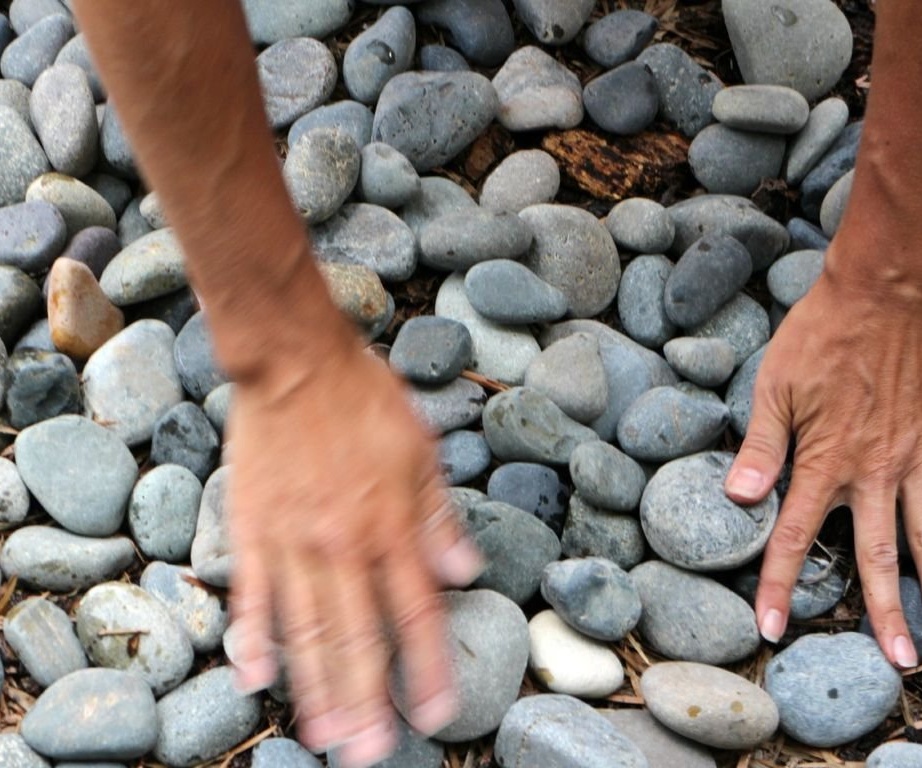
Take the prepared pebbles and pour it on the place where water will fall from the hose. This will protect your feet from splashing water and sand, they will remain clean on pebbles.
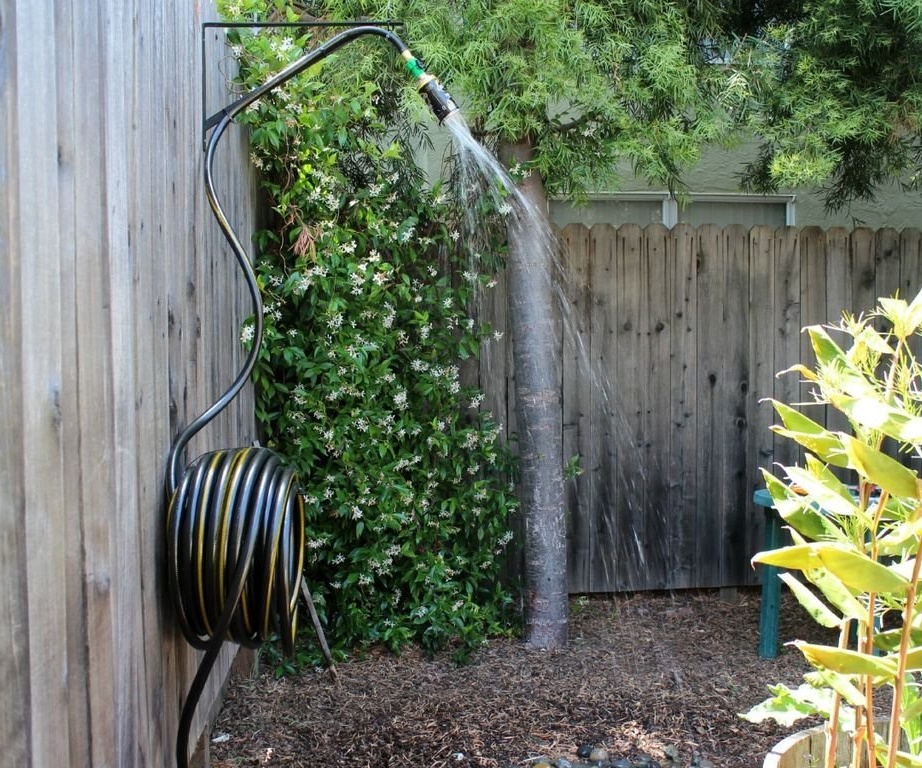
That's all, our summer shower is ready. Do not wait for a miracle, go it yourself!