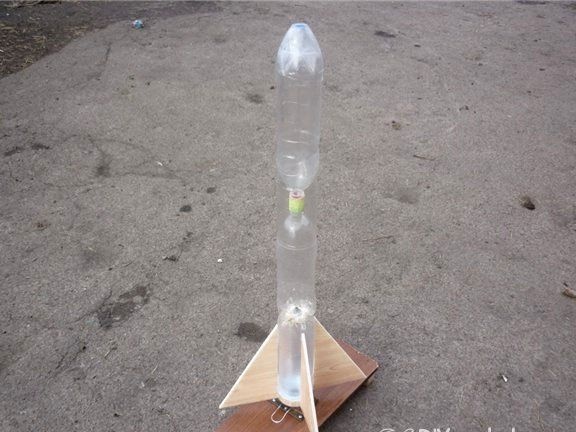
Surely each of us in childhood at least once made and launched a water rocket. Such homemade the good thing is that they are quickly assembled and do not require any fuel, such as gunpowder, gas and so on. The energy used to launch such a rocket is compressed air, which is pumped by an ordinary pump. As a result, water comes out of the bottle under pressure, creating jet propulsion.
The rocket discussed below consists of three bottles, each volume of 2 liters, that is, it is a fairly large and powerful rocket. In addition, the rocket has a simple rescue system that allows the rocket to land smoothly and not crash.
Materials and tools for homemade:
- plastic tube with thread;
- bottles;
- parachute;
- plywood;
- canned tin can;
- A small motor, gears and other little things (to create a rescue system);
- power source (batteries or accumulator from a mobile).
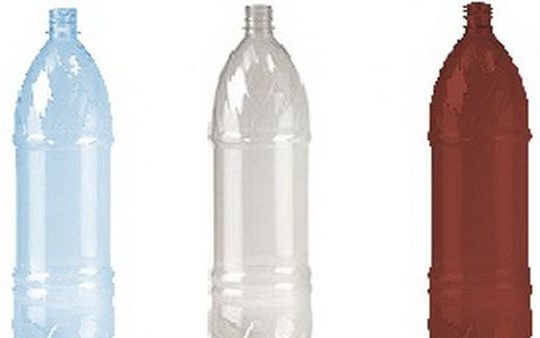
Tools for work: scissors, hacksaw, glue, screws and a screwdriver.
Getting to creating a rocket:
Step one. Rocket design
To create the rocket, three two-liter bottles were used. Two bottles in the construction are connected neck to neck; a cylinder made of an empty plastic gas canister was used as an adapter for the connection. Details sit on glue.
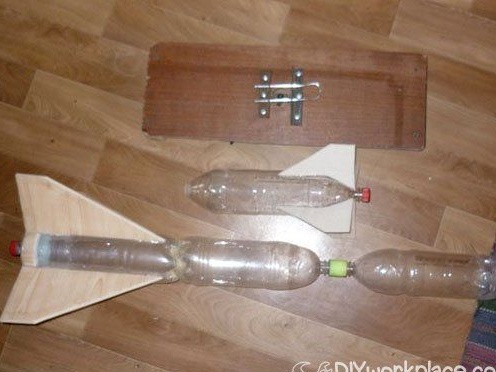
As for the second and third bottles, they are attached bottom to bottom. A threaded pipe and two nuts are used for connection. Mounting points are well sealed with glue. Still, to make the rocket more streamlined, pieces of a bottle are glued to the joints. The neck of a plastic bottle is used as a tip. As a result, the entire structure is a single smooth cylinder.
Step Two Rocket stabilizers
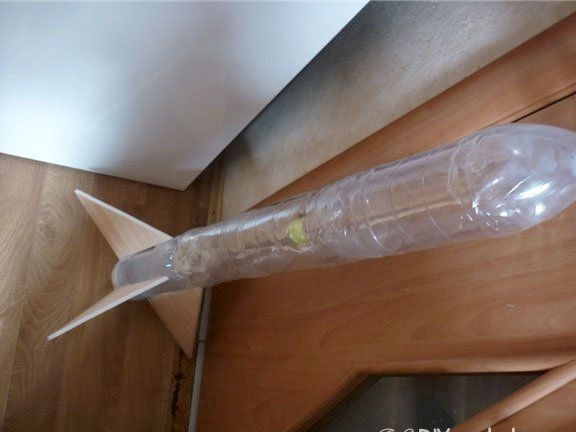
To rocket soared vertically, for it will need to make stabilizers. The author makes them from plywood.
Step Three Nozzle
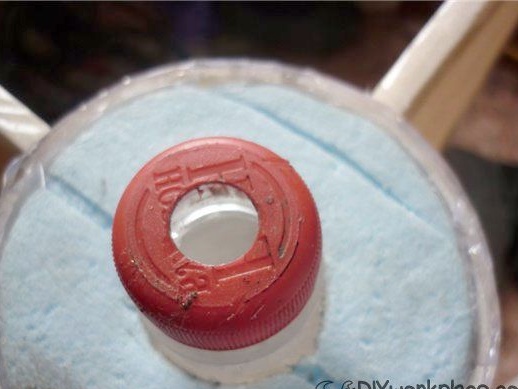
The nozzle is made a little smaller than usual when just the neck of the bottle is used as it.To make a nozzle, a bottle cap is taken and a hole is cut out in it. As a result, water does not come out so quickly.
Step Four Launch pad
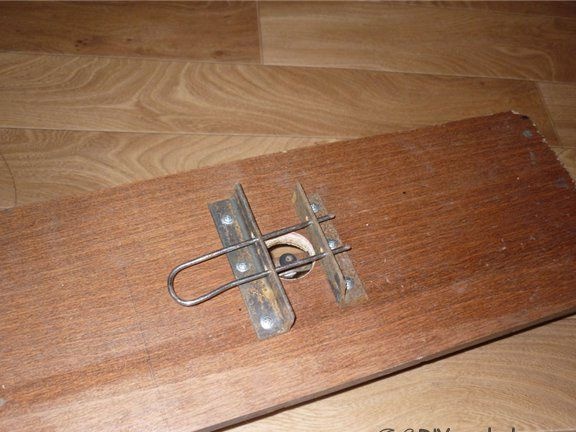
For the manufacture of the pad, you need a sheet of chipboard, as well as two metal corners. A metal bracket is used to hold the rocket; it holds the rocket by the neck of the bottle. When launched, the bracket is pulled out using a rope, while the neck is released, a pressure of water is formed and the rocket takes off.
Step Five The final stage. Parachute device
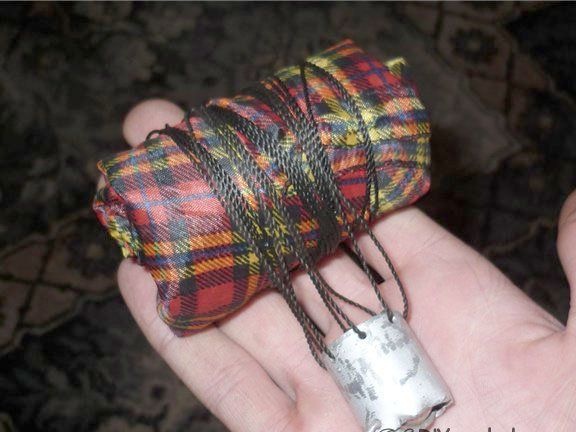
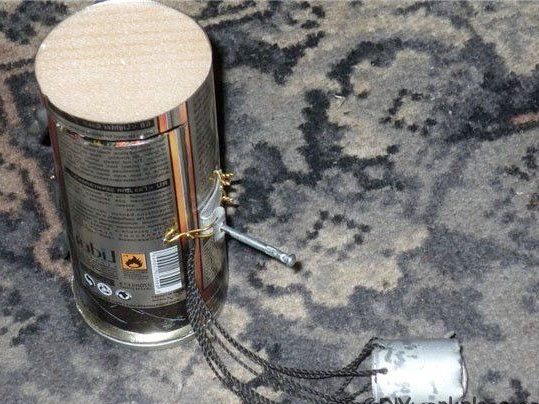
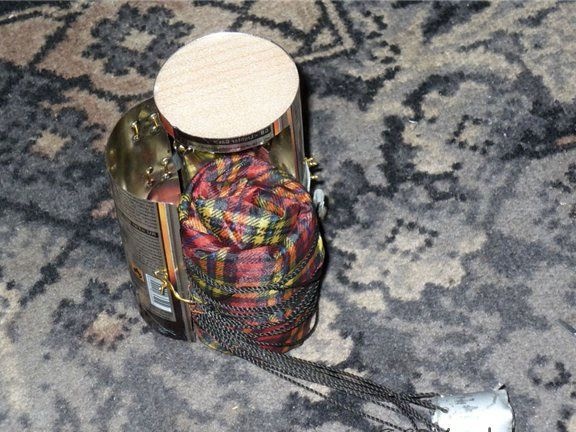
The parachute system is very simple, there is no electronics, everything is done by a mechanic based on a primitive timer. In the photo you can see how the parachute looks when it is folded.
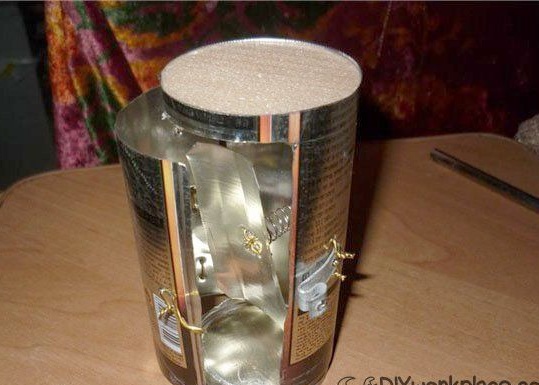
The parachute compartment is made from a can. When the parachute needs to be opened, a special spring forces it out through the door in the tin can. This door opens with a special timer. In the photo it is fashionable to see how the pusher with the spring is arranged.
When the parachute is folded and the rocket has not yet begun to fall, the door of the parachute compartment is closed. Further in the air a timer works, opens the door, the parachute is forced out and opened by a stream of air.
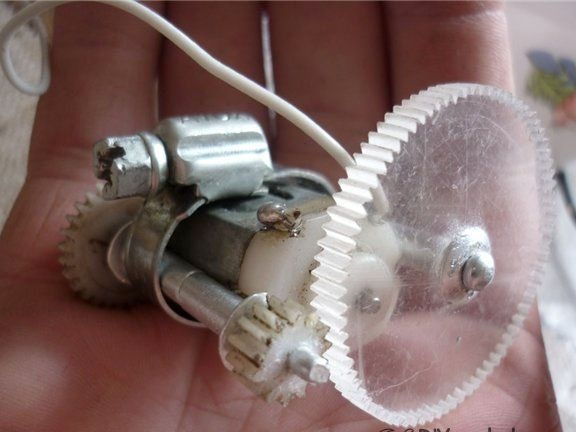
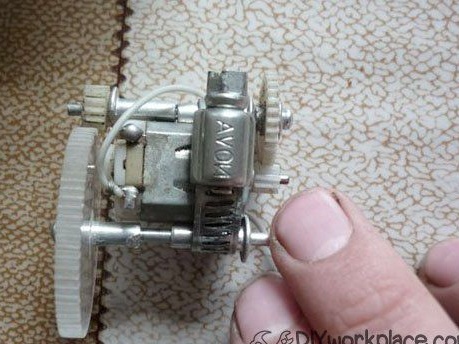
As for the device of the parachute timer, it is very primitive. The timer is a small gearbox with a shaft, in other words, it is a small winch based on an electric motor. When the rocket takes off, the motor immediately receives power, and it begins to rotate, while a thread is wound on the shaft. When the thread is fully wound, it will begin to pull the latch on the door and the parachute compartment will open. The gears in the photo were made manually using a file. But you can use ready-made from toys, watches and so on.
That's all, the homemade product is ready, on the video you can see how everything works. True, the launch without a parachute is shown here.
According to the author, the homemade product was not very productive, that is, the rocket takes off at about the same height as an ordinary bottle. But here you can experiment, for example, to increase air pressure in a rocket.
