In this manual, we will look at how you can make a simple installation to launch missiles. The installation works on compressed air, which can be pumped using a conventional automobile pump or compressor. Missiles are also made independently of paper or other available materials. To launch such missiles became more interesting, the author decided to equip them with a parachute system, which is activated with a small powder charge.
There is already no limit to fantasy, a parachute can be attached to the rocket itself, or you can install a man with a parachute in the rocket, which will jump out of the rocket at a certain height. Homemade safe because the missiles are light and cannot do serious harm. The only danger here is the powder charge on the rocket, which can lead to arson.
Materials and tools for homemade:
From the tools:
- a hacksaw;
- drill with drills;
- scissors;
- stationery knife;
- glue for PVC;
- electrical tape;
- pump.
From materials:
- PVC pipe and other elements (1x2 inch pipe, 1 x 2 "cap, 2 x 1" threaded connector, 1 pipe 1 inch in diameter (approximately 24 "long));
- pieces of plywood, boards and other materials to create a rack;
- sprinkler valve;
- Schrader valve (internal tubular valve);
- trigger for compressed air;
- cable ties, cardboard and more.
Homemade manufacturing process:
Step one. How it works
All such devices operate on the same principle. They have a chamber in which compressed air is located, and they are also equipped with a special valve for instant release of this air. The faster the air comes out and the more pressure it blows, the higher the rocket will take off. In this regard, it is very important to take care of the tightness, as well as the throughput of the valve.
For ease of injection of a compressed air system into the chamber, it is equipped with the same output as on a bicycle wheel (slide valve). You just need to connect the pump and pump the right amount of air into the system. For everything to work as it should, the valve must open instantly; a special system has been developed for this.
Step Two Assembling the starting part
For the manufacture of the camera you will need a piece of PVC pipe, as well as a cap. First you need to drill a hole in the cap and install there bicycle spool.It must be firmly secured with a nut and a good rubber gasket.
Further, this cap is glued to the PVC pipe, and it is best to choose such parts so that they fit onto the thread. For even greater reliability, the covers can be screwed on and glued.
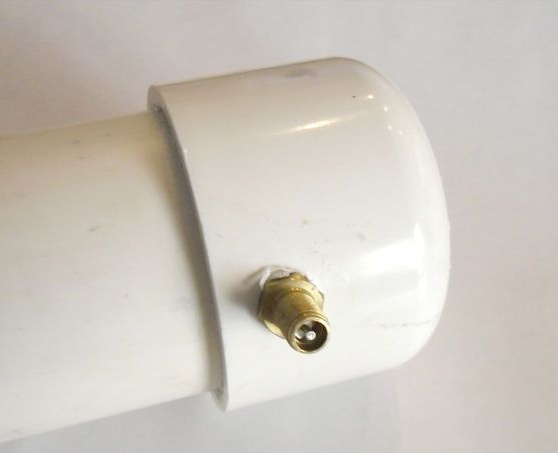
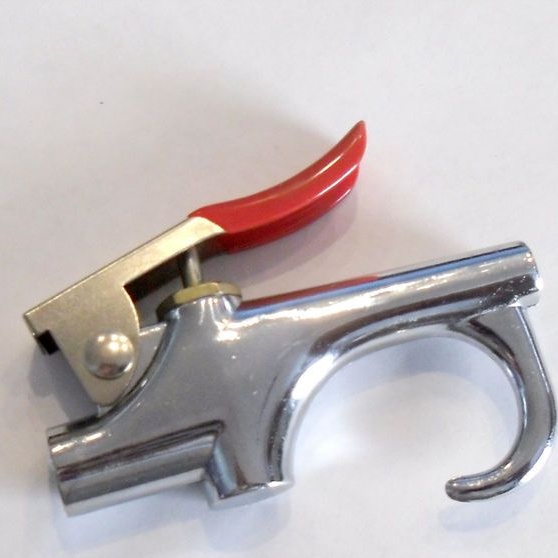
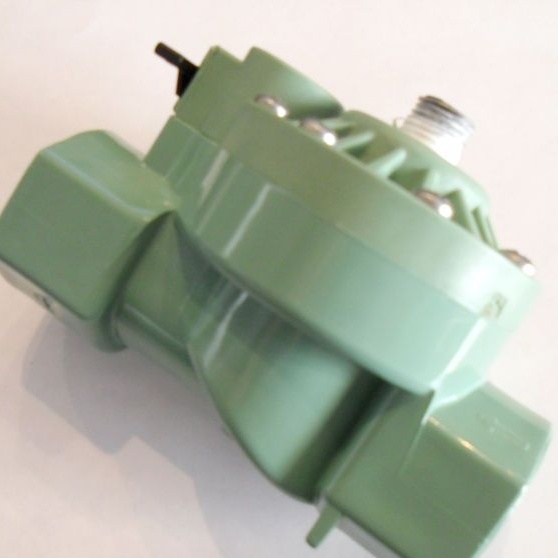
On the other hand, a PVC cap is also glued; a hole for a schrader valve is drilled in it. Next, the valve thread is wrapped with Teflon tape and it is screwed into this hole. The valve itself can be converted from electrical to mechanical by removing the solenoid from it. A trigger is set instead. But it is best to use an electric valve, since it opens instantly when current is applied. In addition, it will allow you to launch a rocket remotely, even by radio.
Also at this stage is going to "barrel" or "exhaust" of the system. It is made of 1 "PCV pipe, a threaded pair is glued to one end with glue.
Step Three Build a rocket
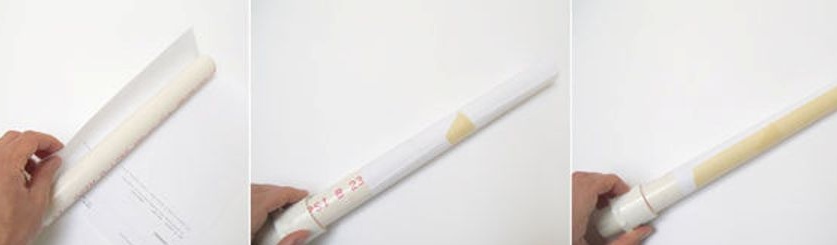
To make a rocket, you will need a template, you can use a piece of pipe as it. On a pipe you need to wind a sheet of A4 paper, and then wrap it with several layers of masking tape, tape and so on. This is done so that the rocket body can withstand high pressure and does not burst. A cardboard plug is installed in the upper part of the pipe, it can be glued with hot glue or fixed in other ways. In addition to holding pressure, this cardboard circle will also hold the payload that will be sent with the rocket.
Step Four Making a parachute launch system
To launch a parachute system or bail out a man with a parachute in the upper part, you need to make a cylinder of cardboard. It must be properly strengthened with tape, electrical tape or other materials, since it must withstand high pressure from the operation of the powder charge. Another cylinder, in which the charge is installed, can be finished with foil, so that the unit lasts longer.

Then another cylinder is made, a soldier with a parachute will be in it. This cylinder is mounted above the launch chamber. It is hinged using tape, camouflage tape and so on. The top of the cylinder is covered with cardboard. Well, then for the top part a paper cone is made.
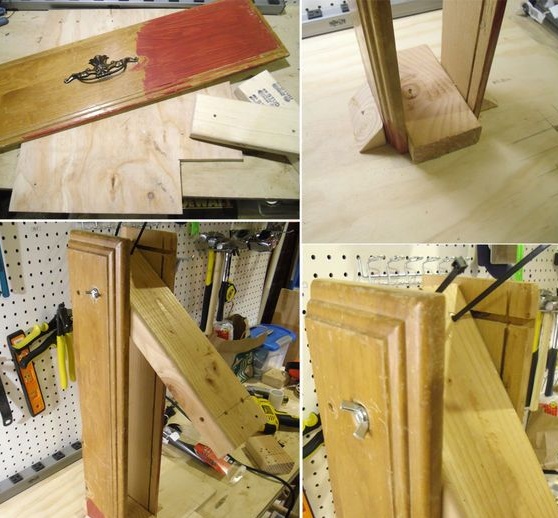
Step Five Making a launch platform
The launch platform holds the gun and allows you to direct the rocket in the right direction. As materials here you can use elements of the old of furniture, boxes and stuff. The author used plywood for such purposes. In the upper part of the assembled structure, a piece of the board is hinged with a bolt, then the whole installation is attached to this board. The whole thing is attached with the help of plastic ties. Now the rocket can be tilted, thereby firing in the right direction, for example, on the territory of neighbors.
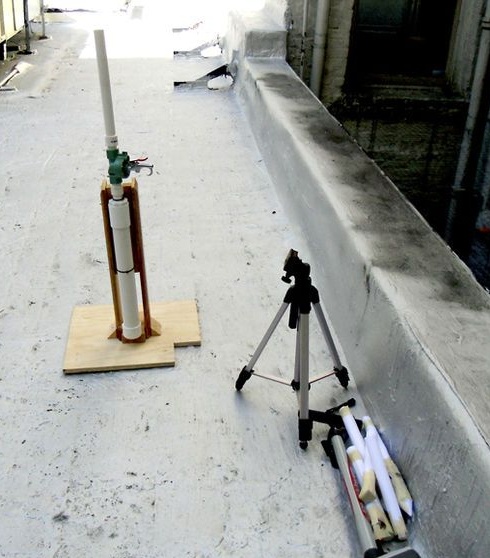
Step Six Installation testing
To test the installation, it is best to choose an open area, since at the first launch the rocket can fly anywhere. It is also better not to use a powder charge for the first time, as this can easily lead to arson of objects around. Before starting the installation, you need to pump up the air pump. How much it should be, everything is already selected experimentally, the question is what pressure the manufactured chamber can withstand. The greater the pressure, the higher the rocket will fly. It is best to install a pressure gauge on the pump, this will accurately monitor the pressure.
The author decided to launch a rocket from the roof of the Instructables.com laboratory in downtown San Francisco, neglecting safety rules.
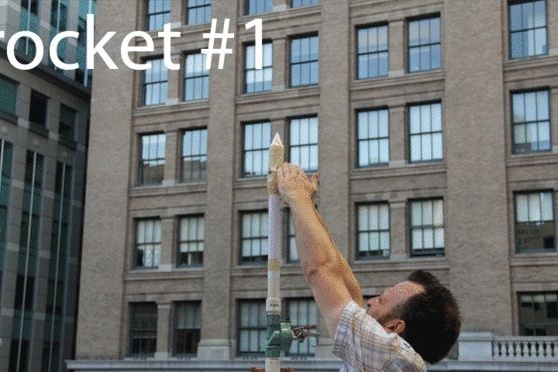
Seventh step. Rocket Test Results
Homemade tests have shown that the launch machine itself works well, but the ejection system of the paratrooper needs to be further developed. Often the reason for the unsuccessful bailout was the entanglement of the parachute on the rocket.Also quite often the camera did not open well, and the powder charge substantially burned the rocket itself.
A small firework was used as a powder charge. According to the author, it needs to be finalized in order to obtain the desired ejection force.