
Greetings the inhabitants of our site!
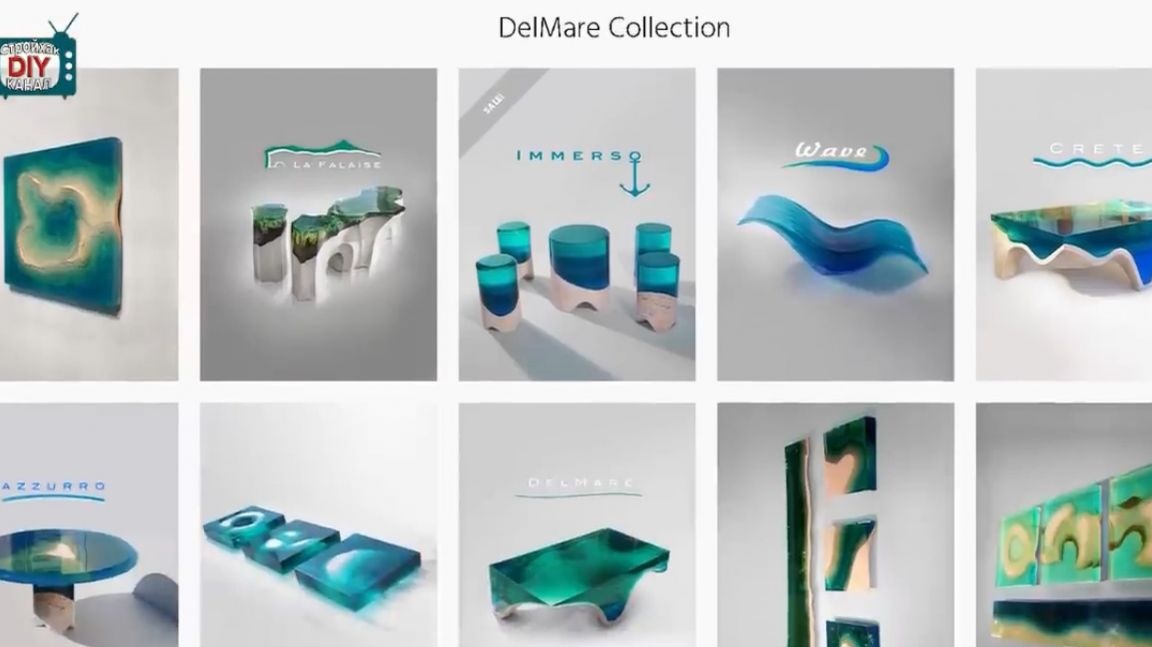
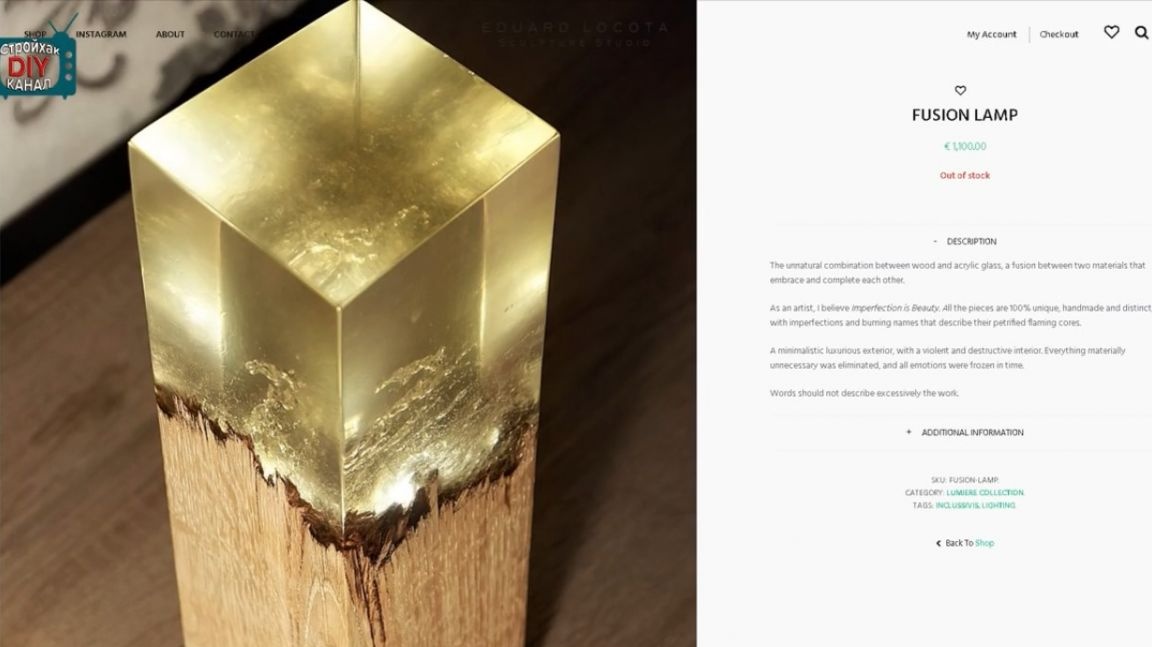
Romanian sculptor and designer Eduard Lokota founded his original design studio in order to decorate the homes of a modern person. The studio's collections are inspired by nature in general and seascapes in particular. Eduard Lokota makes each sculpture by hand. As a result, objects are truly one of a kind. They captivate with their idea of the initial relationship between rock hardness and water flow. The designer combines sculptural elements with artistic features, blurring the line between art and function.
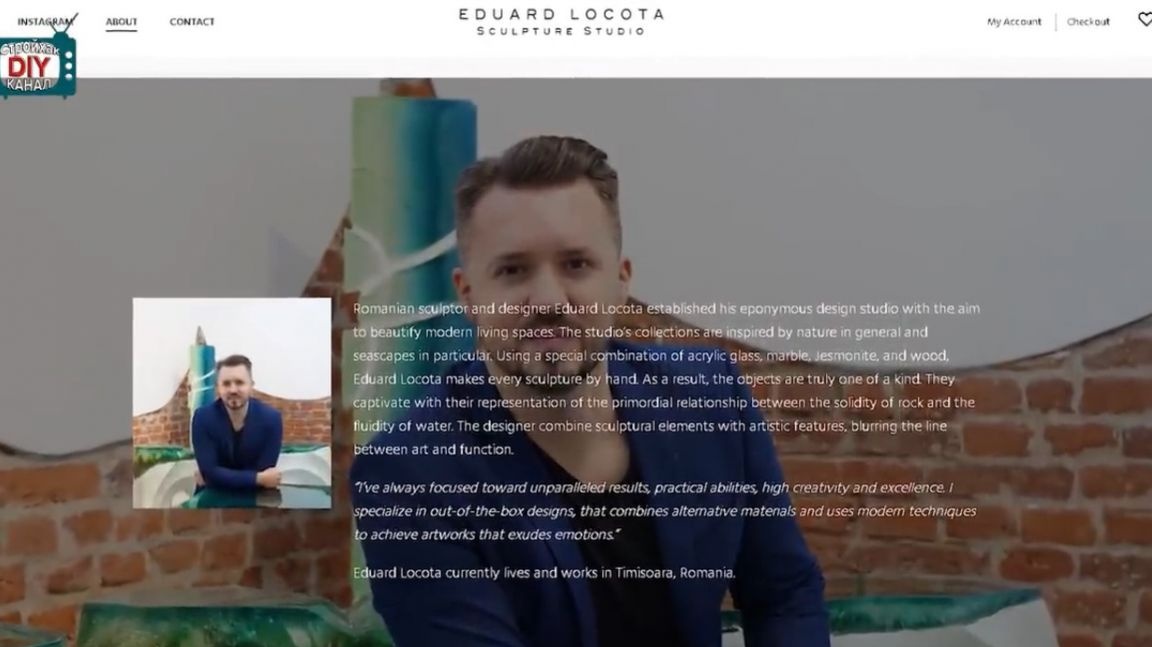
“Eduard Lokota currently lives and works in Timisoara, Romania.
He creates unique sculptures using, among other materials, epoxy resin for a relatively long time.
Some of his works are sold at 1,100 euros.
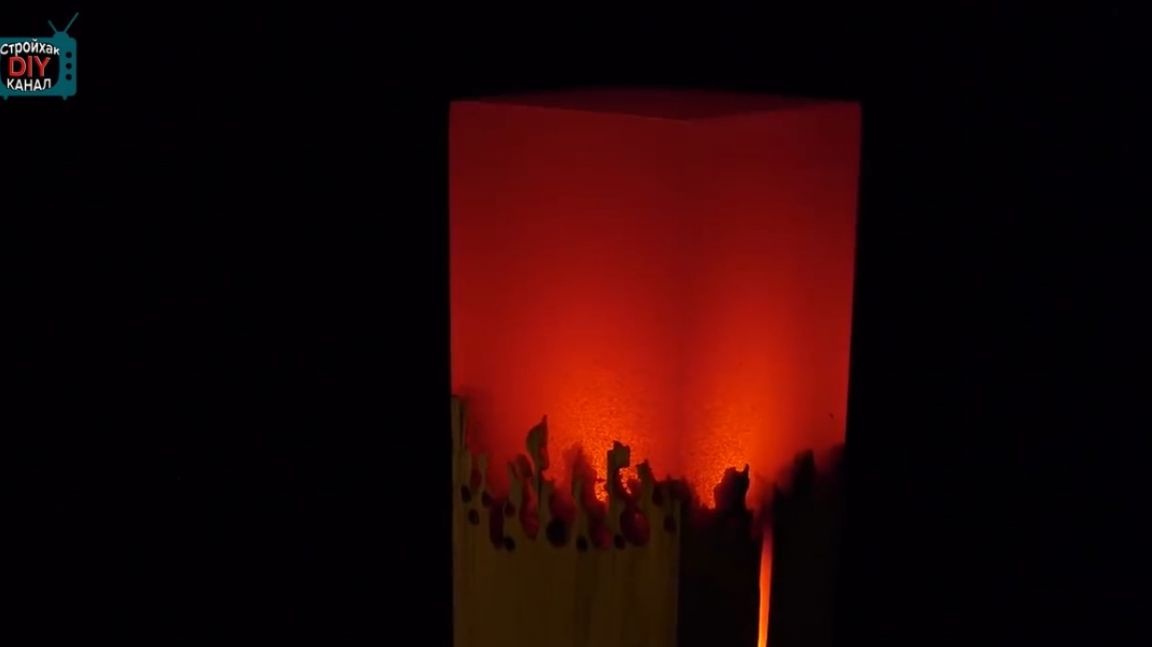
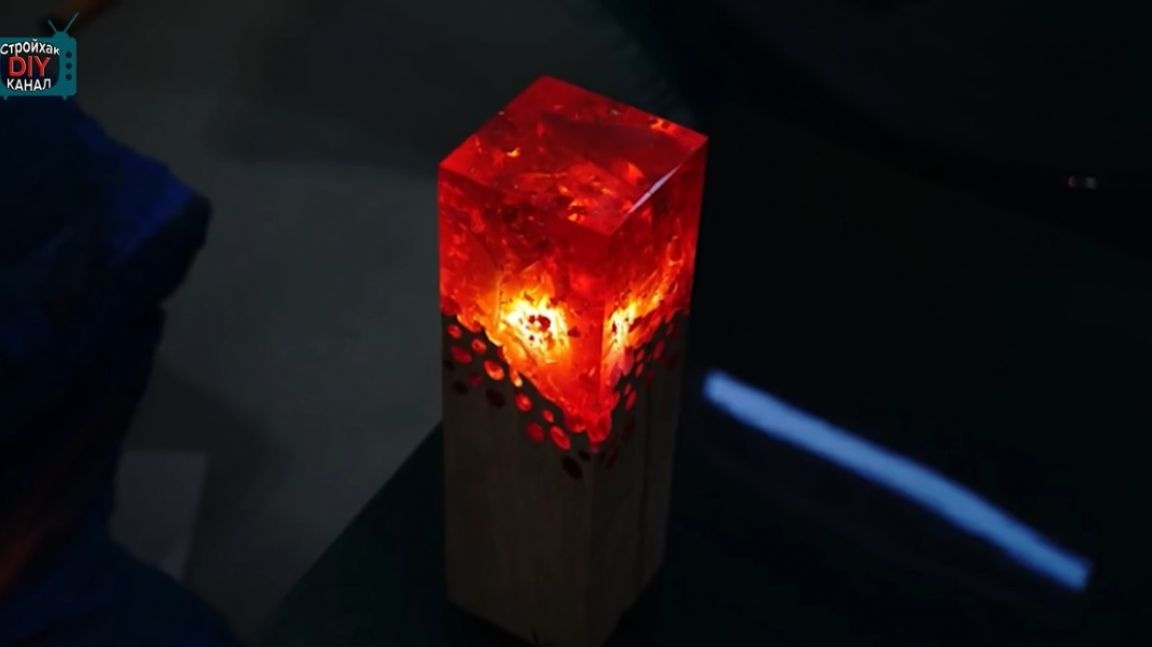
Let’s try and we will make a lamp similar to one of the designer’s works.
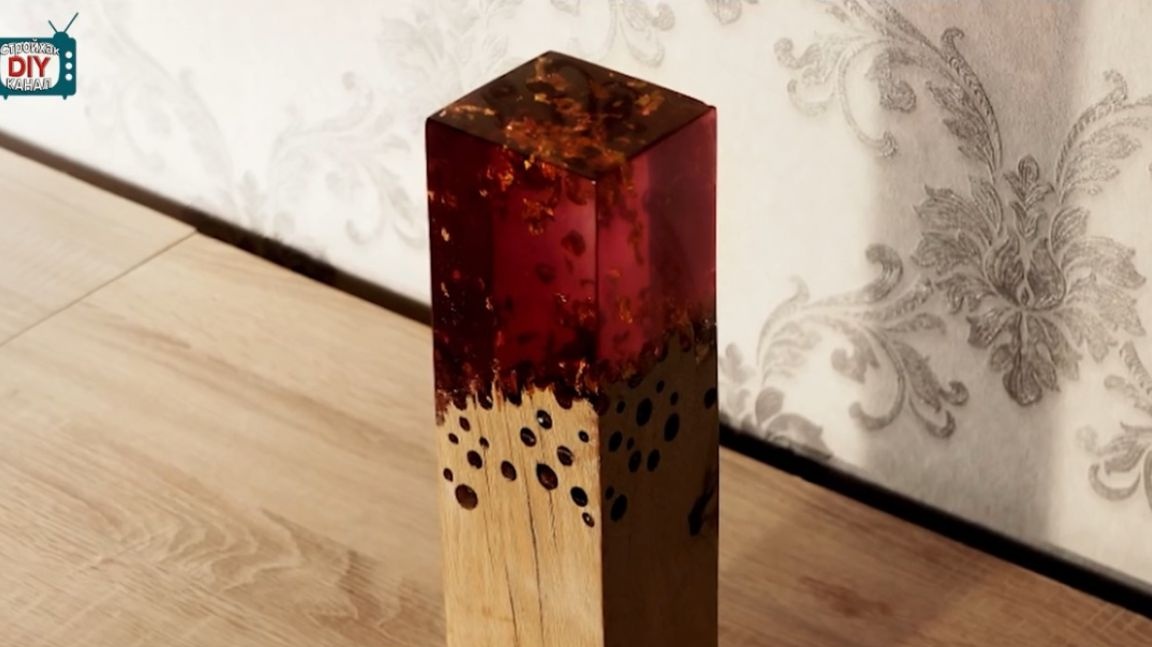
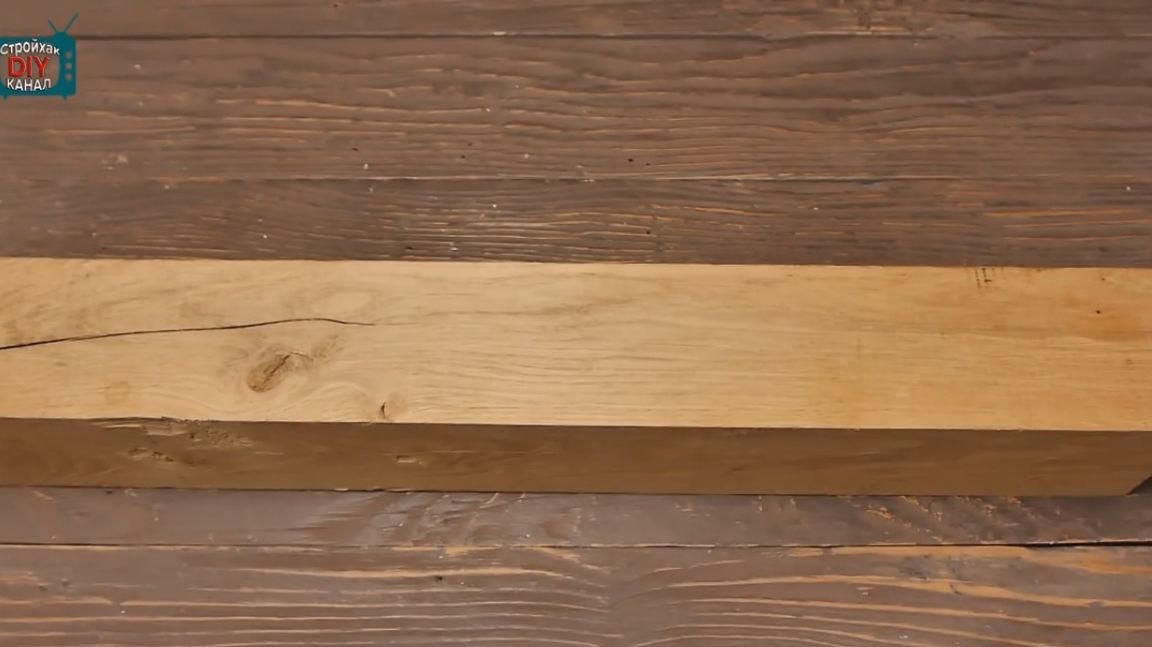
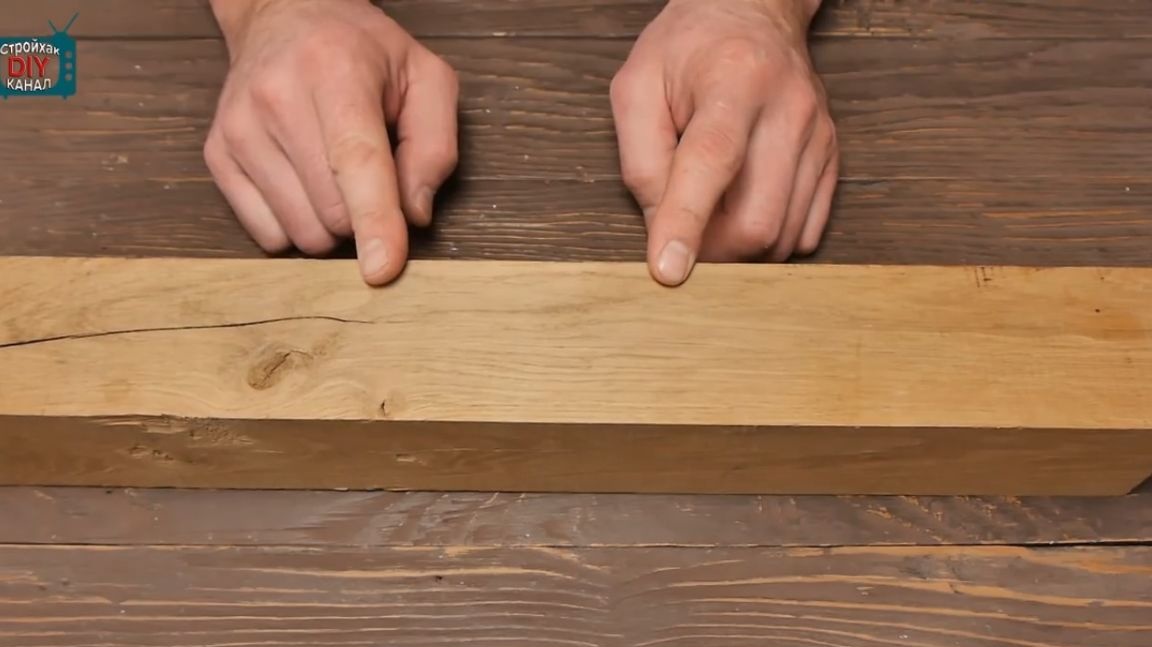
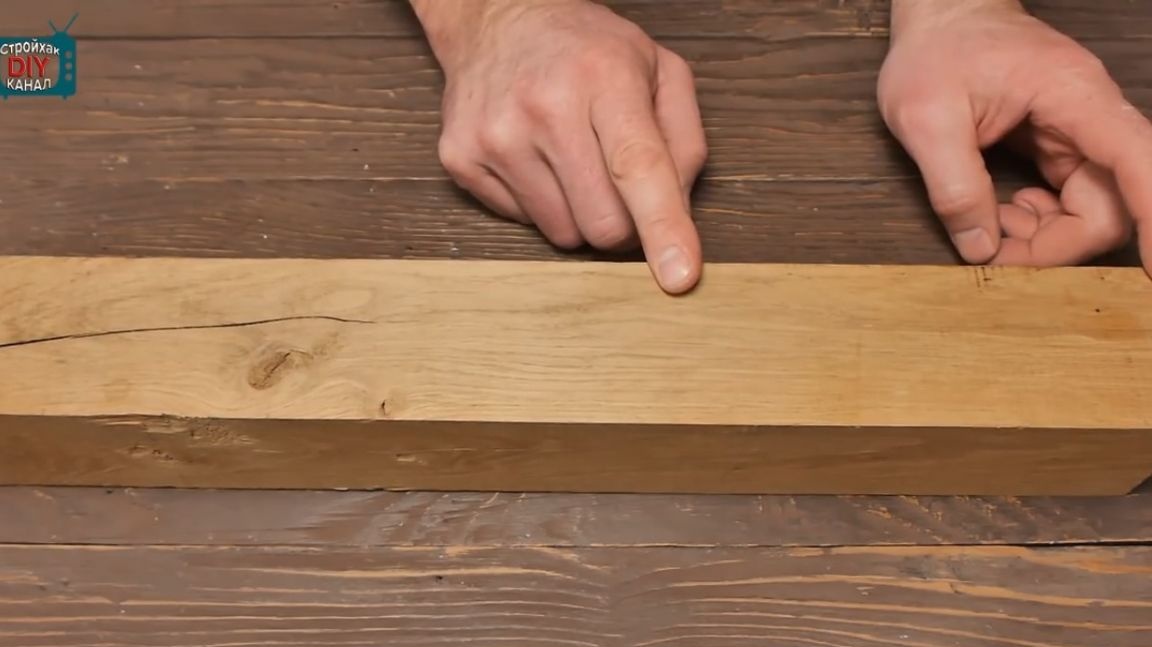
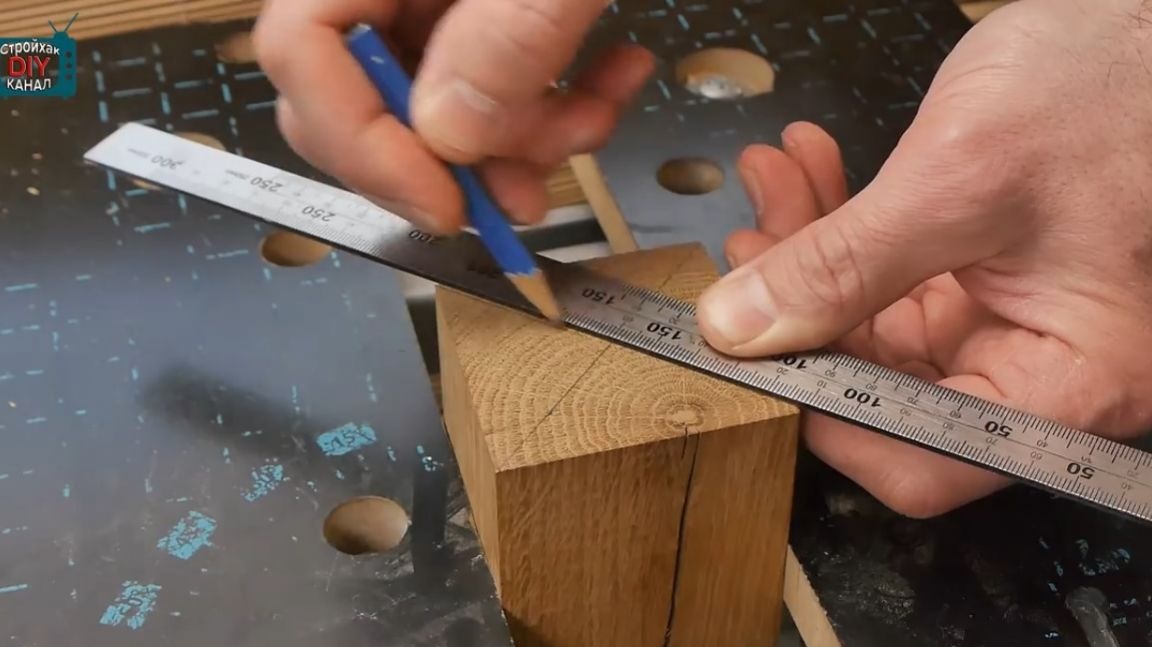
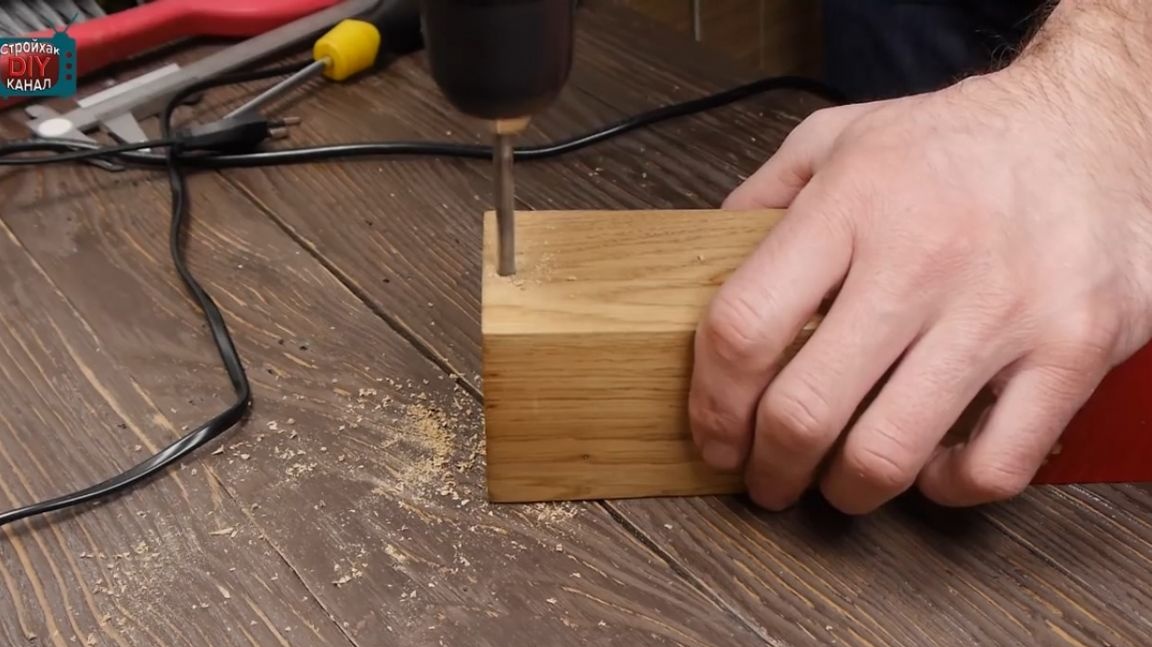
The author took as a basis an oak block measuring 65 by 65 mm.
Then you need to decide which part of the lamp will be epoxy, and which will remain in its original form (well, almost pristine).
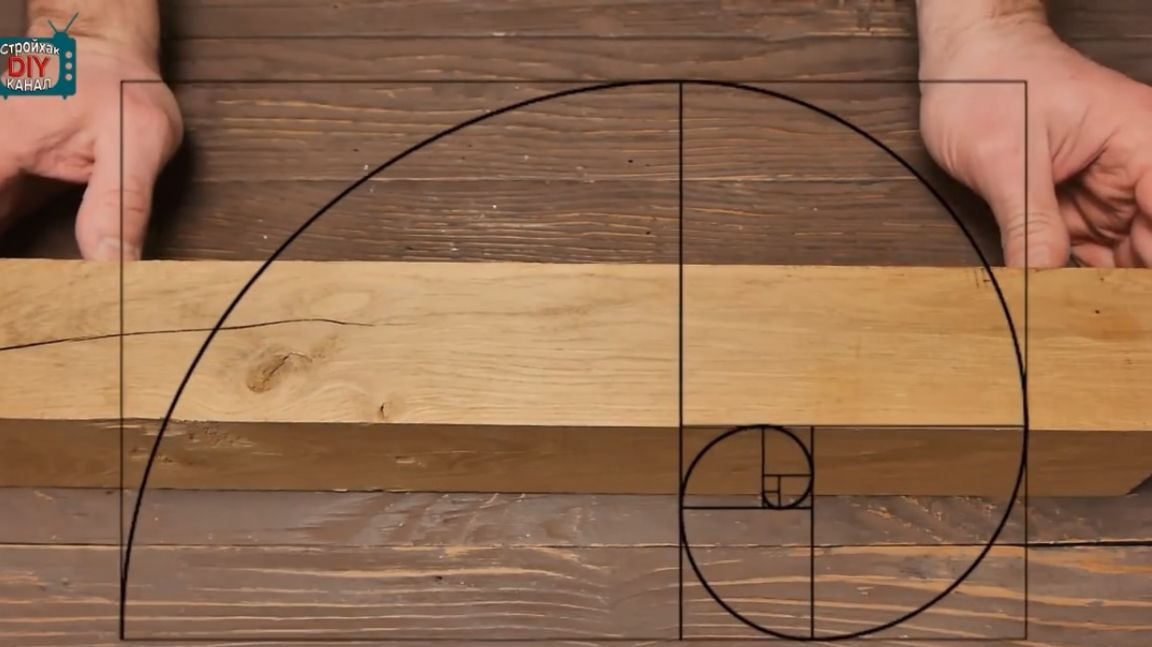
To solve this dilemma, the master used the rule of harmonious proportion, or as it is also called the golden ratio rule. This is the rule in which the majority refers to the smaller as the length of the whole object to the larger part. If by numbers, then this ratio is about 1.62 and in order not to break his brain with long calculations, the author decided to leave the wooden part 162 mm long and the epoxy one 100 mm long.
If you divide these two sections simply by a straight line it will be trite and not comme il faut at all. But if you include fantasy, you can come up with something like this.
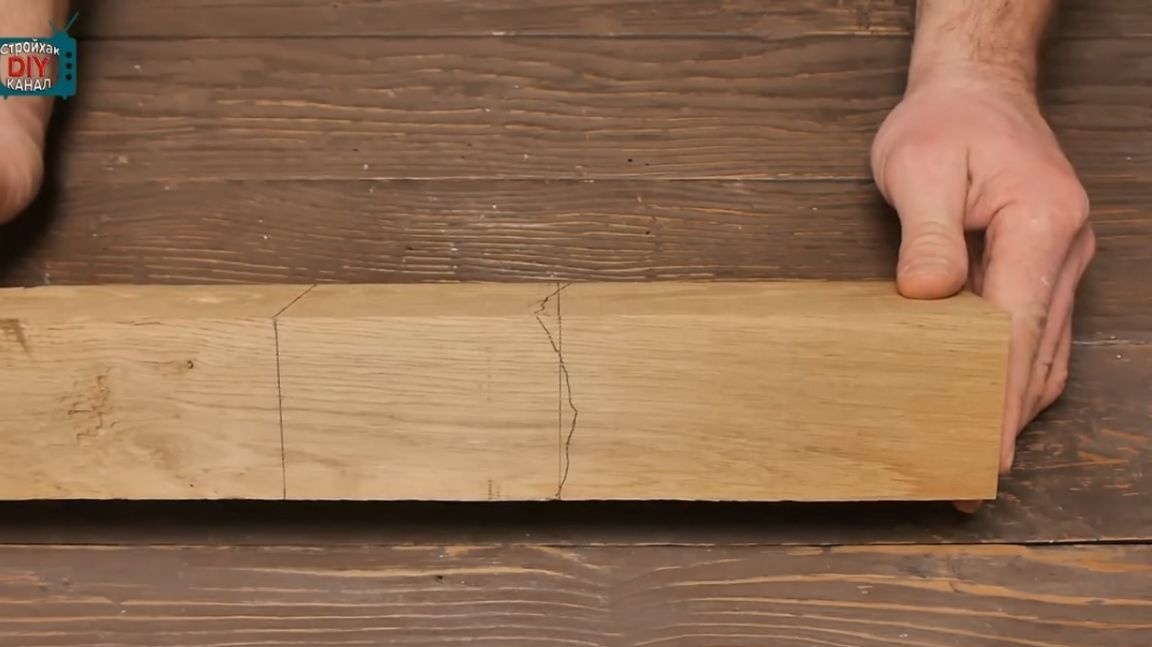
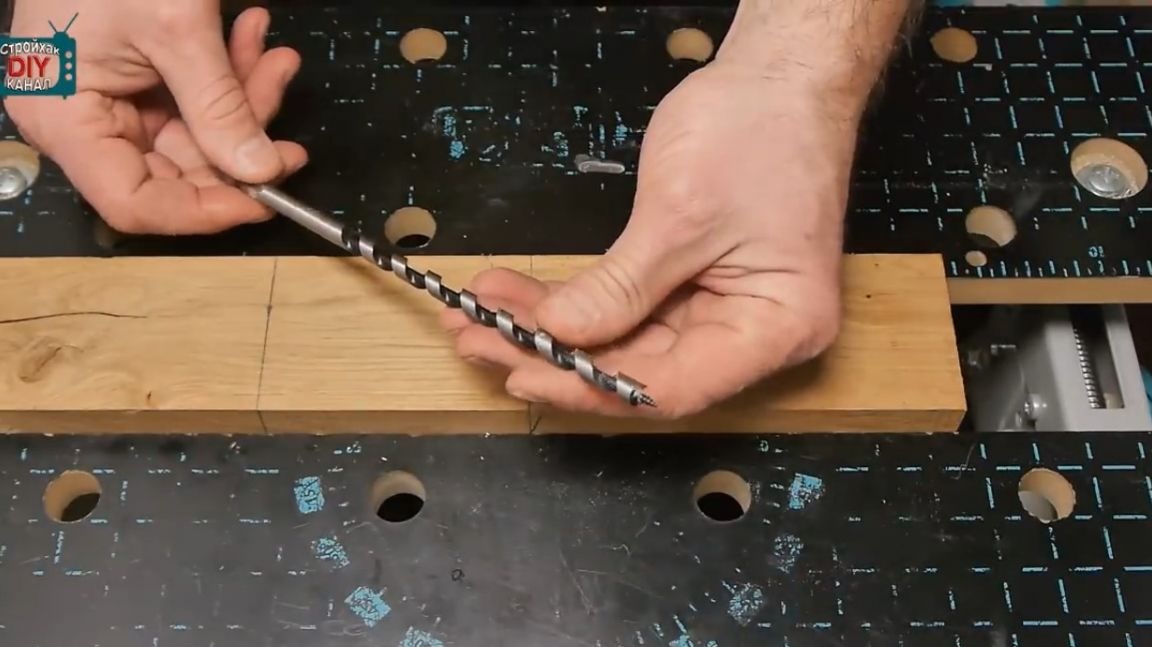
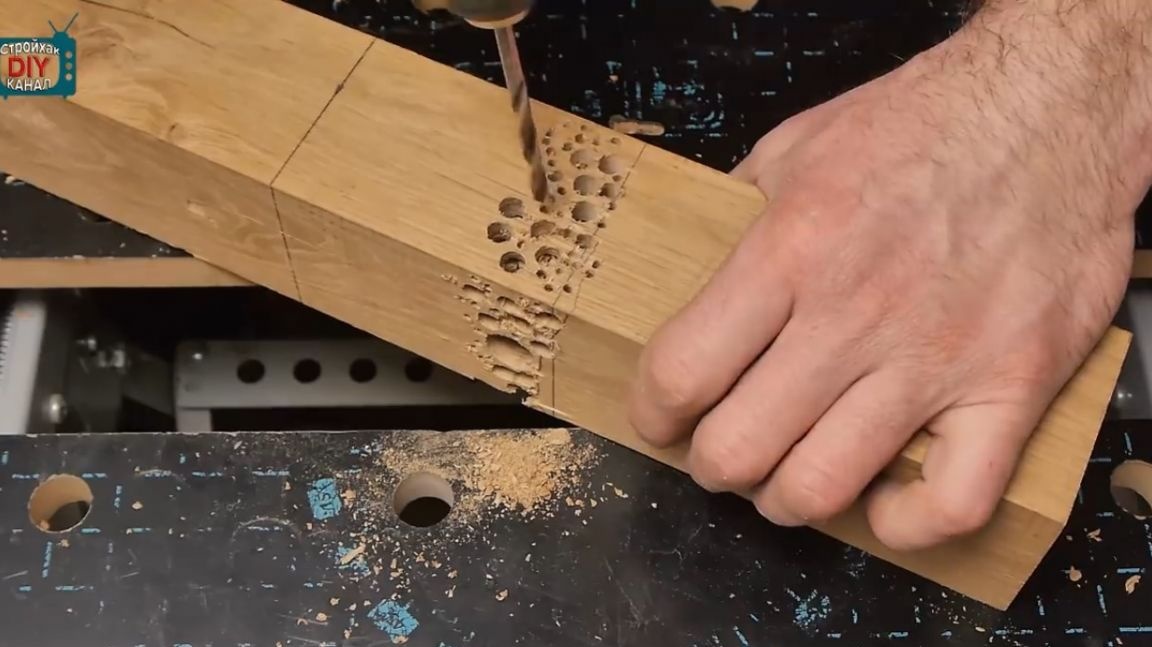
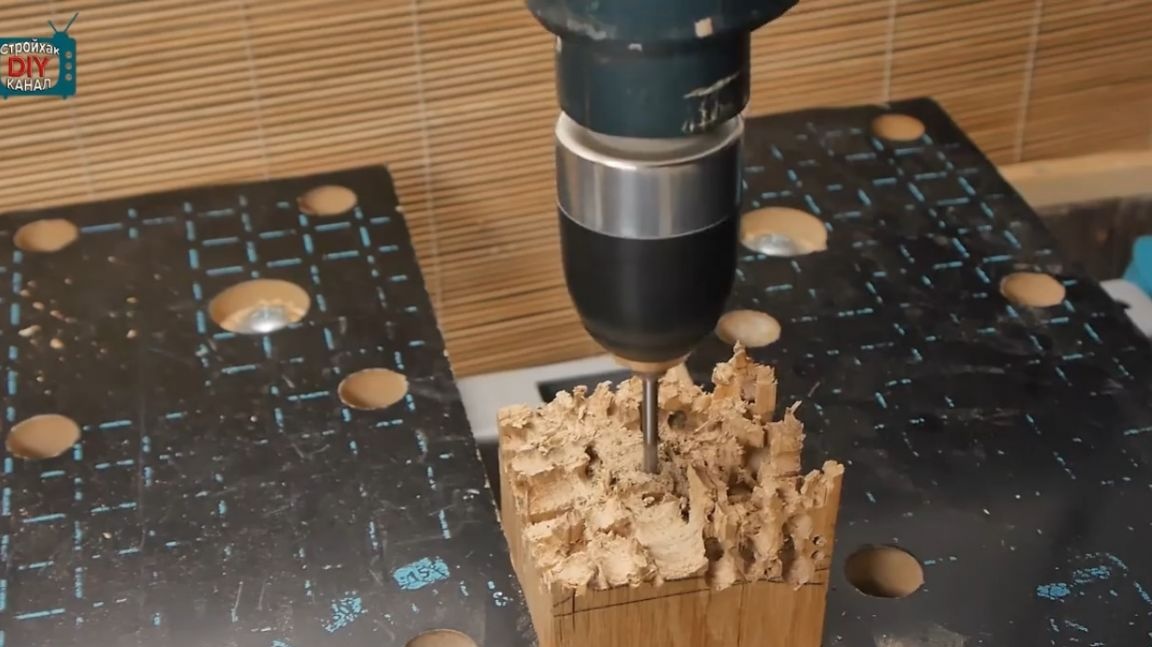
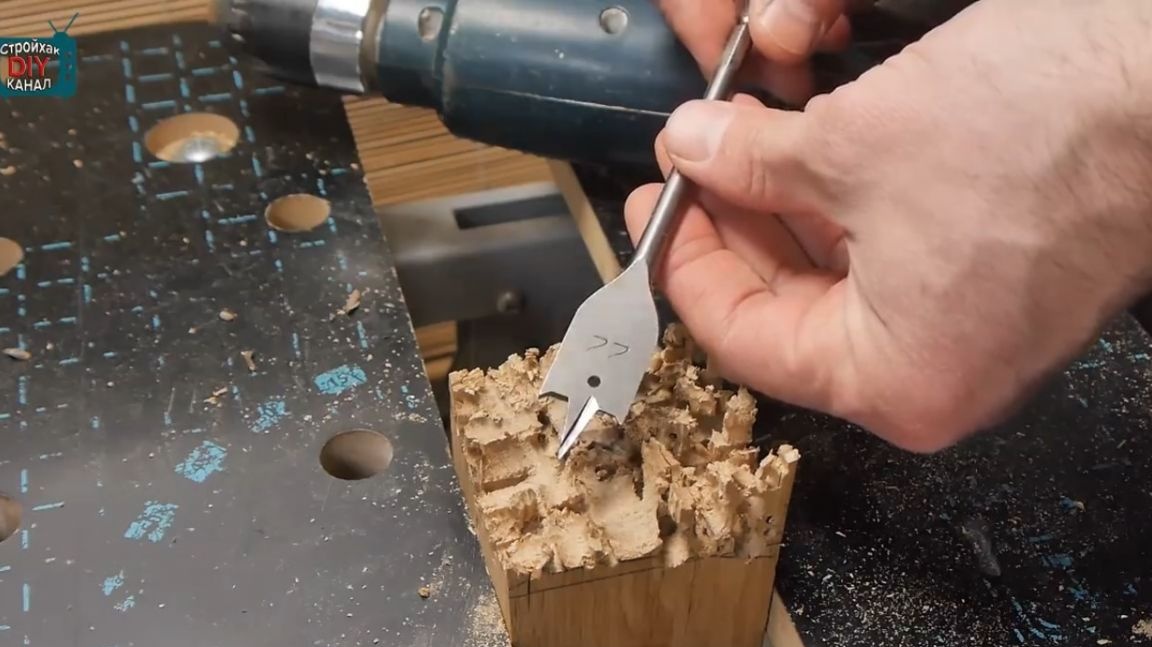
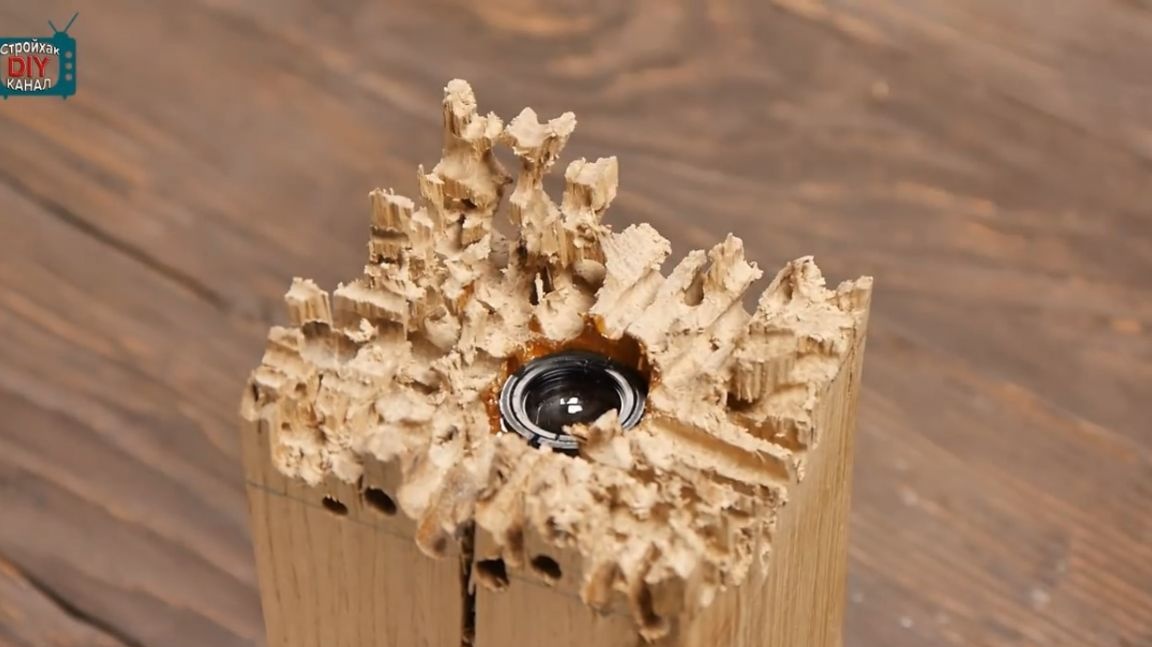
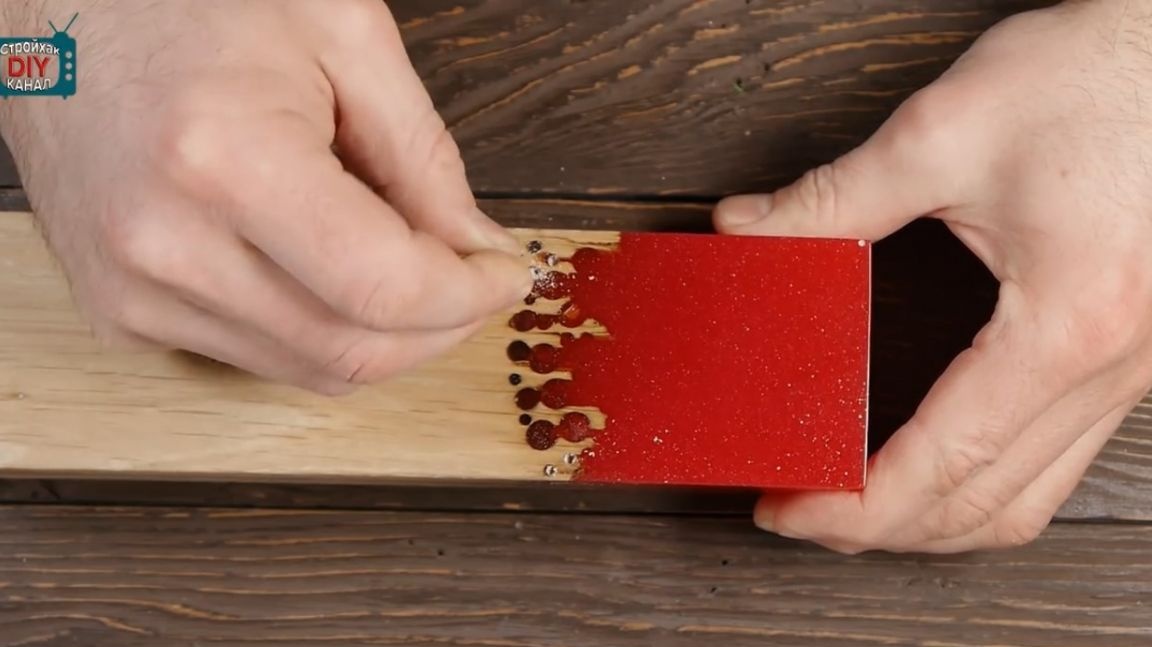
Nobody thinks breaking the wood block in this way is anyone's strength, so the author uses the so-called hollow-hole drilling method.
The essence of the method is that the author of the homemade product using screw (ordinary ones were also used) drills on a tree drills a bar at different angles with drills of different diameters as necessary. In this case, the worse it gets, the better, he says. Actually this is the method of hollow-hole drilling. He also warns everyone who decides to repeat such a method that the drills cut into the wood with sufficient speed. This is a definite inconvenience. The author recommends using a screwdriver, and not a drill at a fairly low speed.
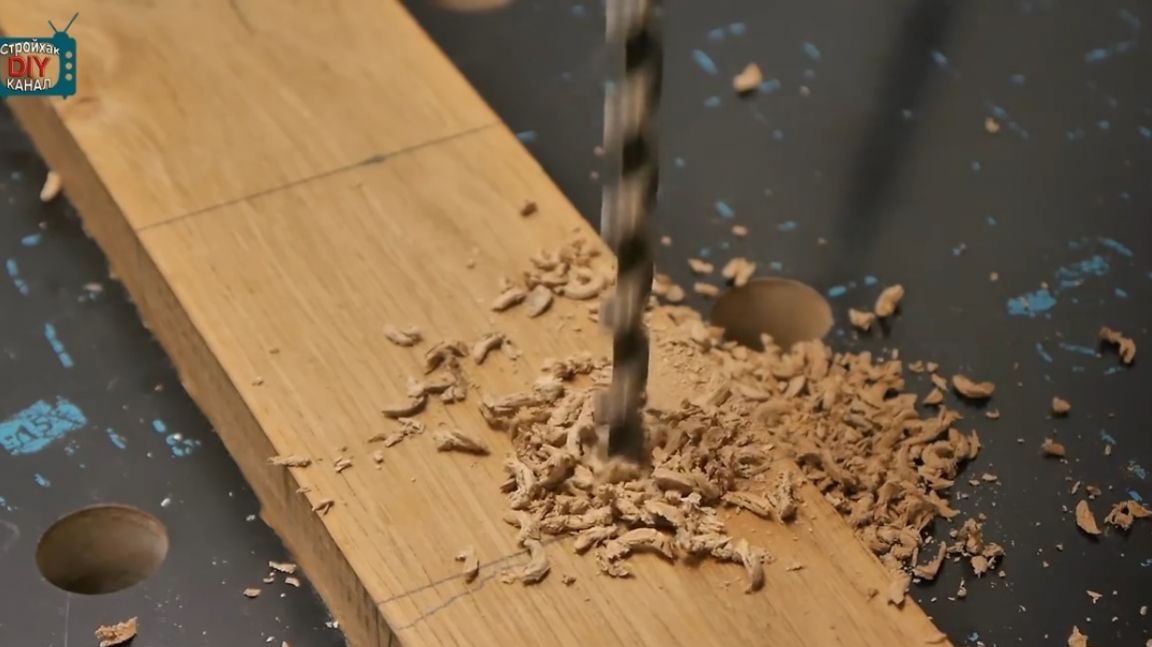

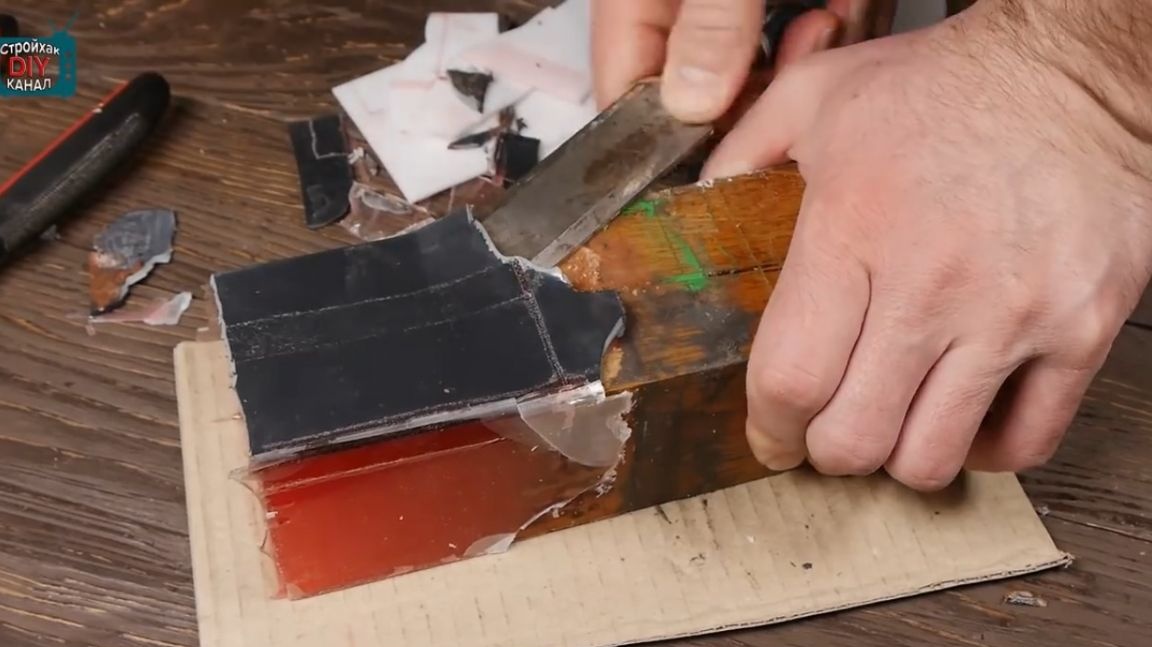
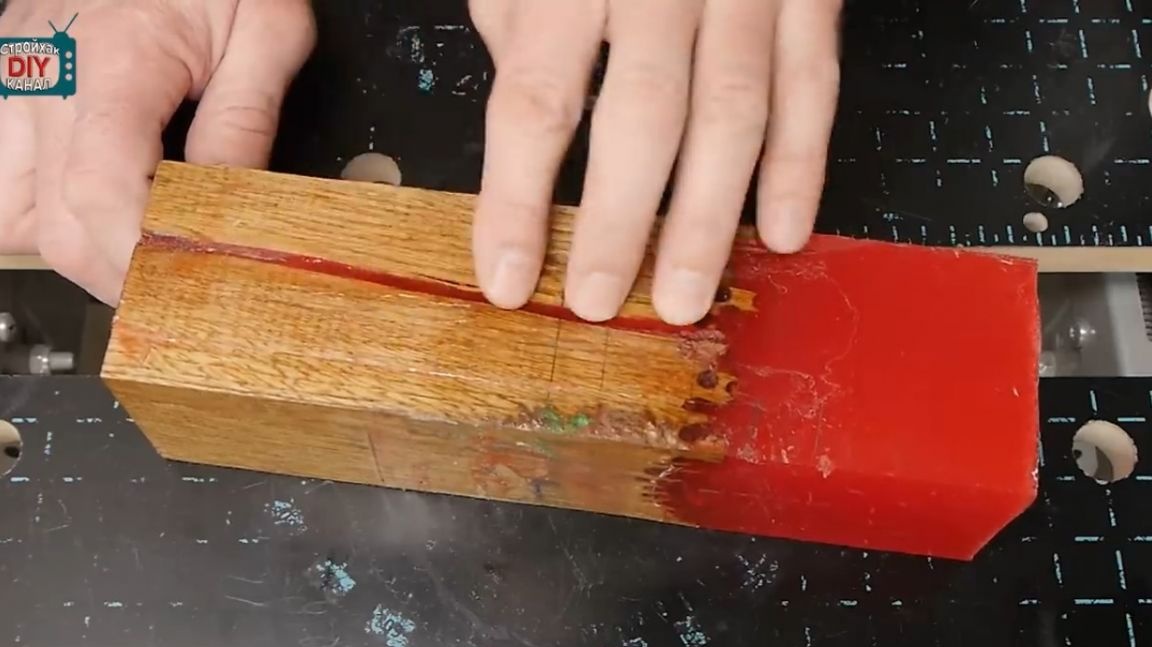
After that, enough chisels and woo a la - the bar is divided into 2 parts.
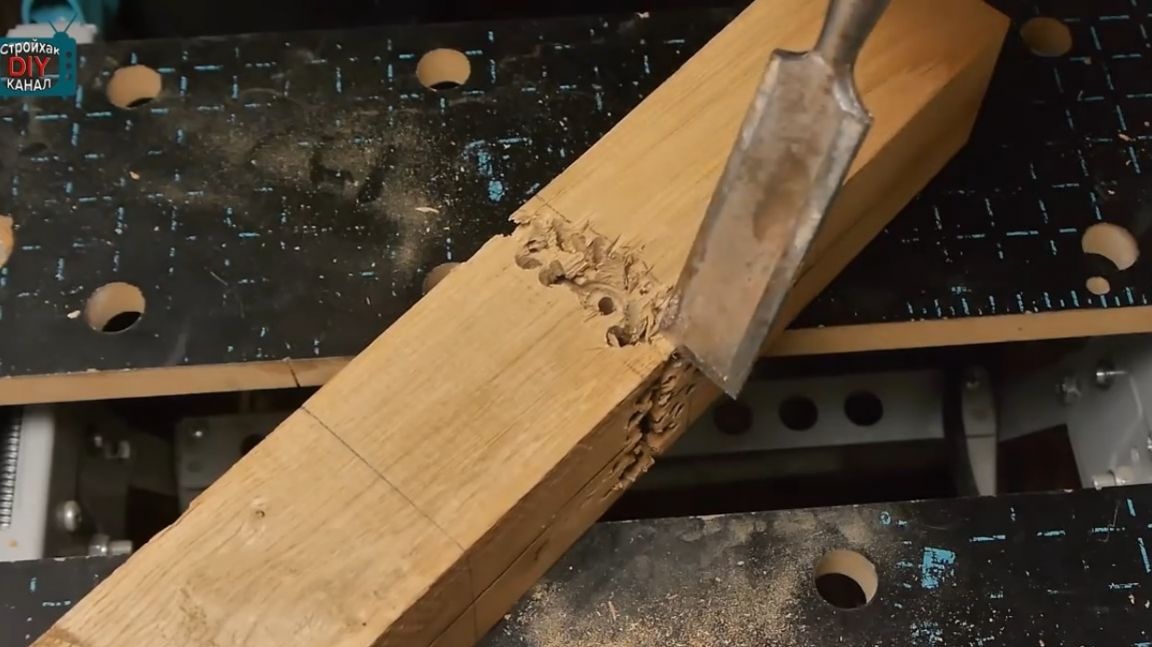
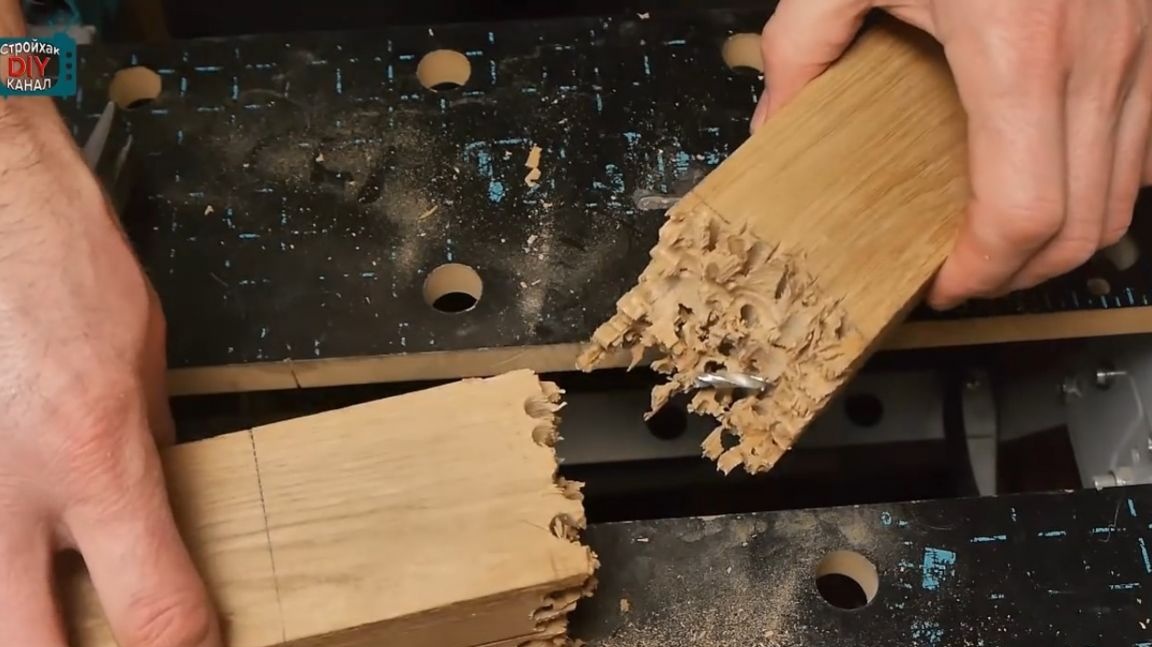
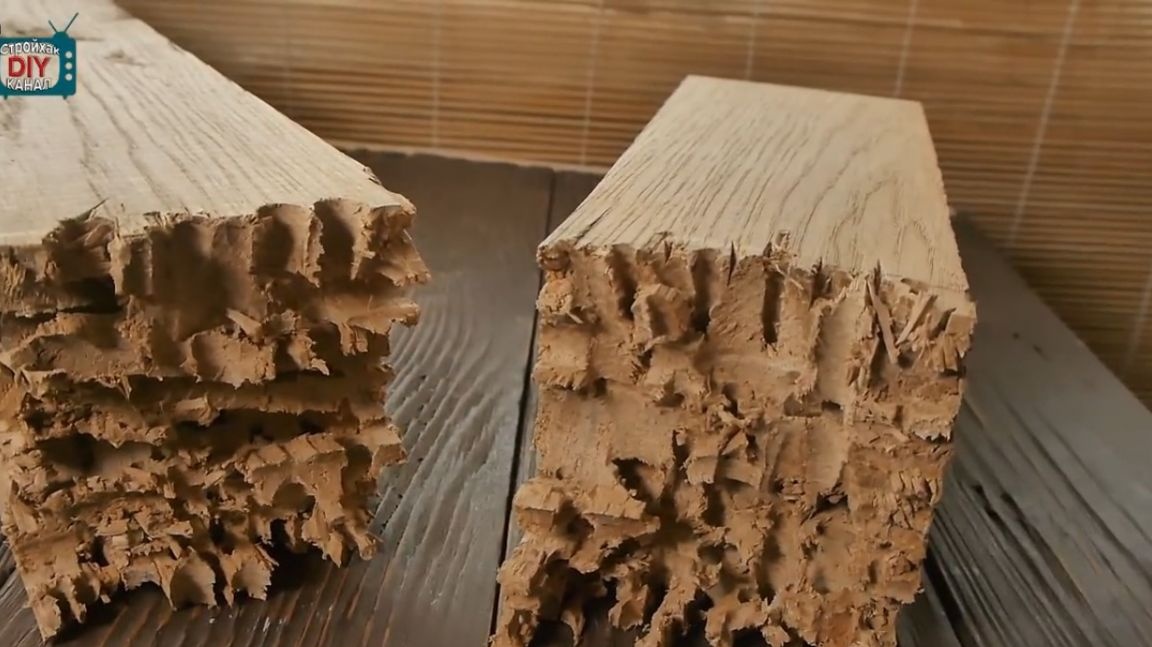
True, such beauty looks as if the dogs were chewing. But in other ways it is impossible to achieve such a figured separation of an oak (and quite thick and very durable) bar.
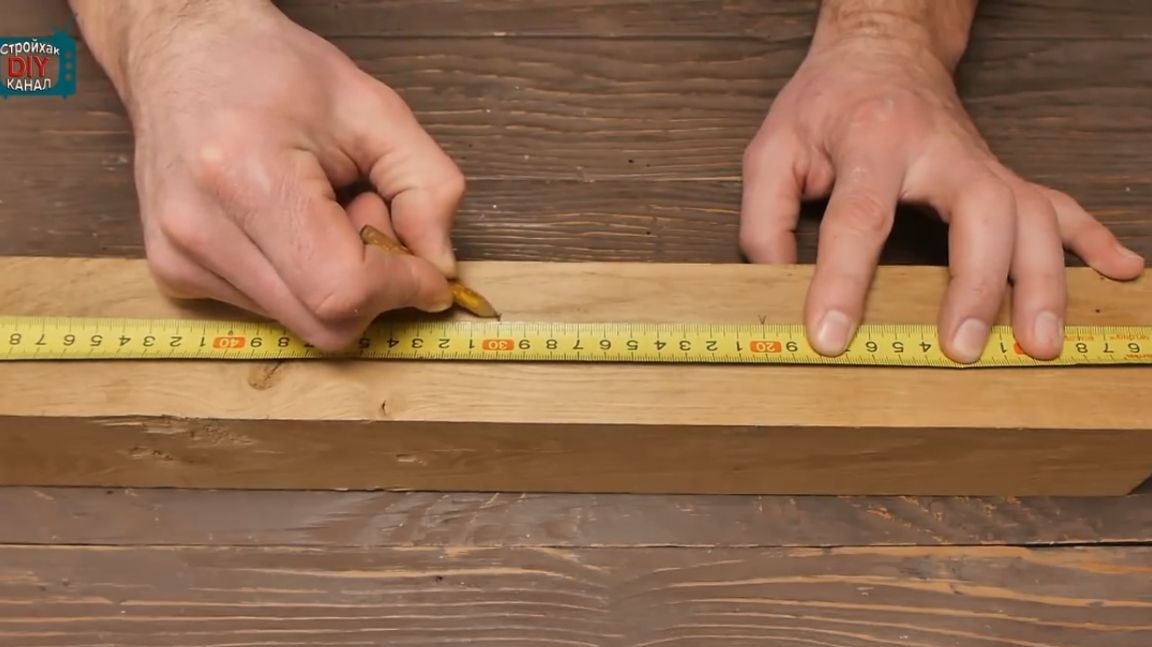
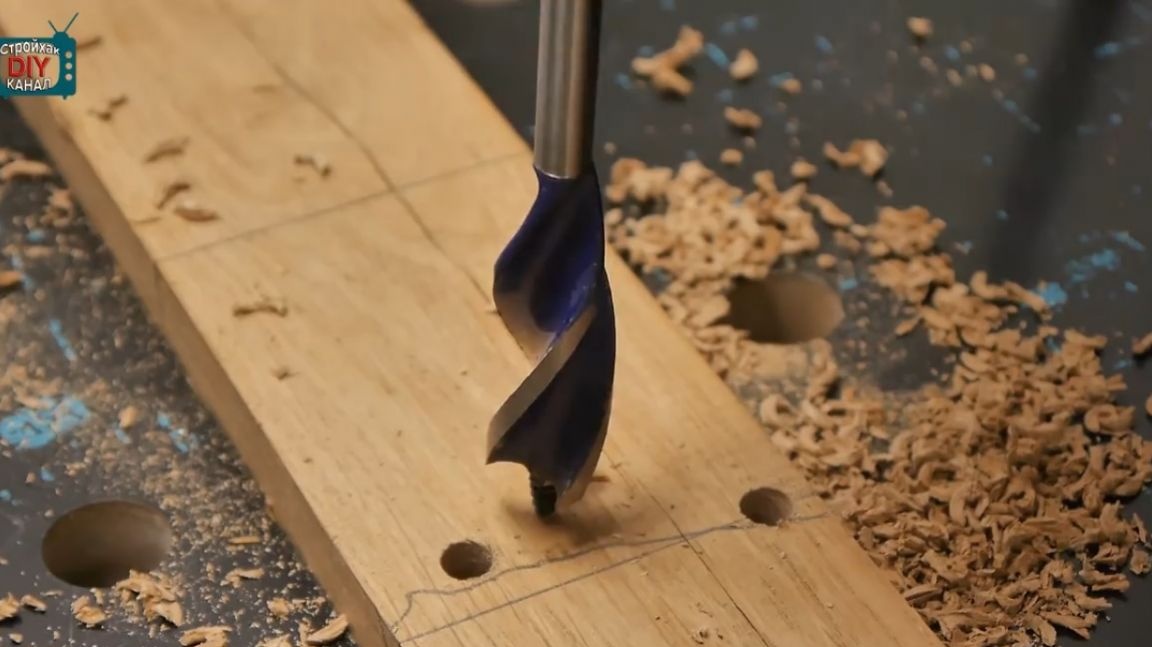
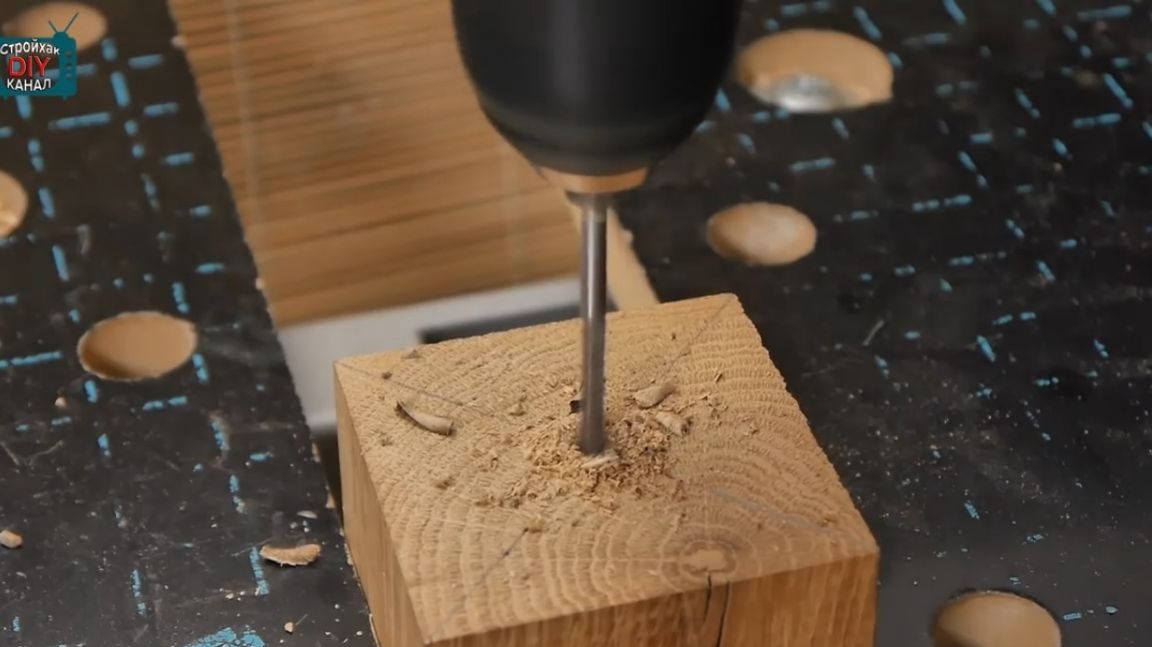
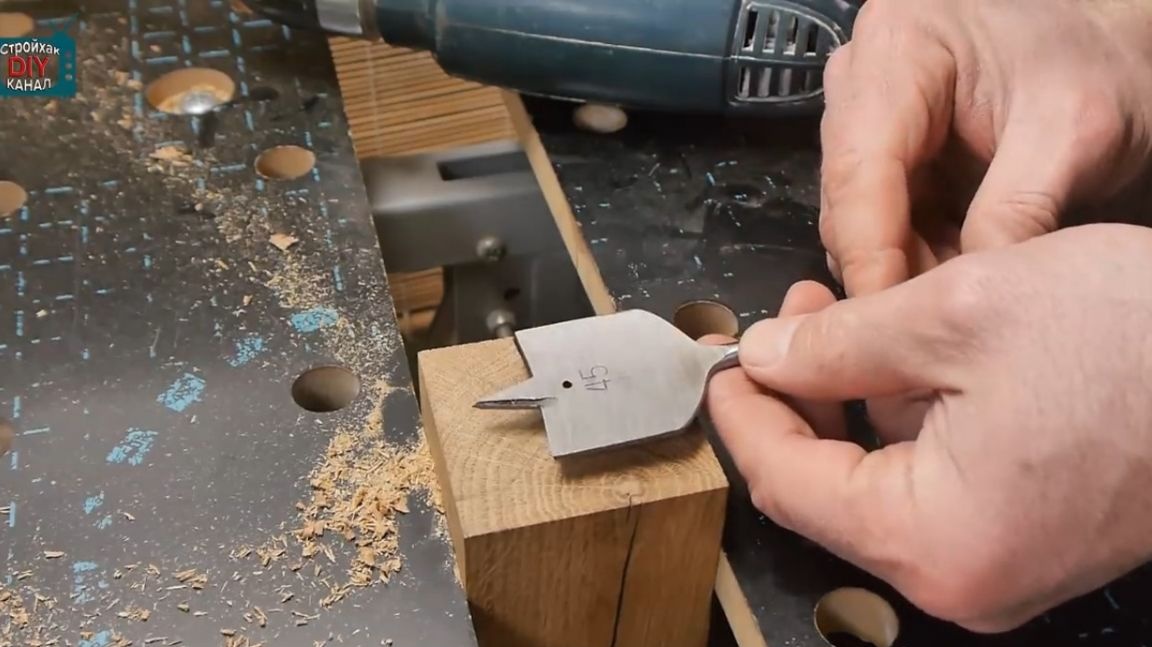
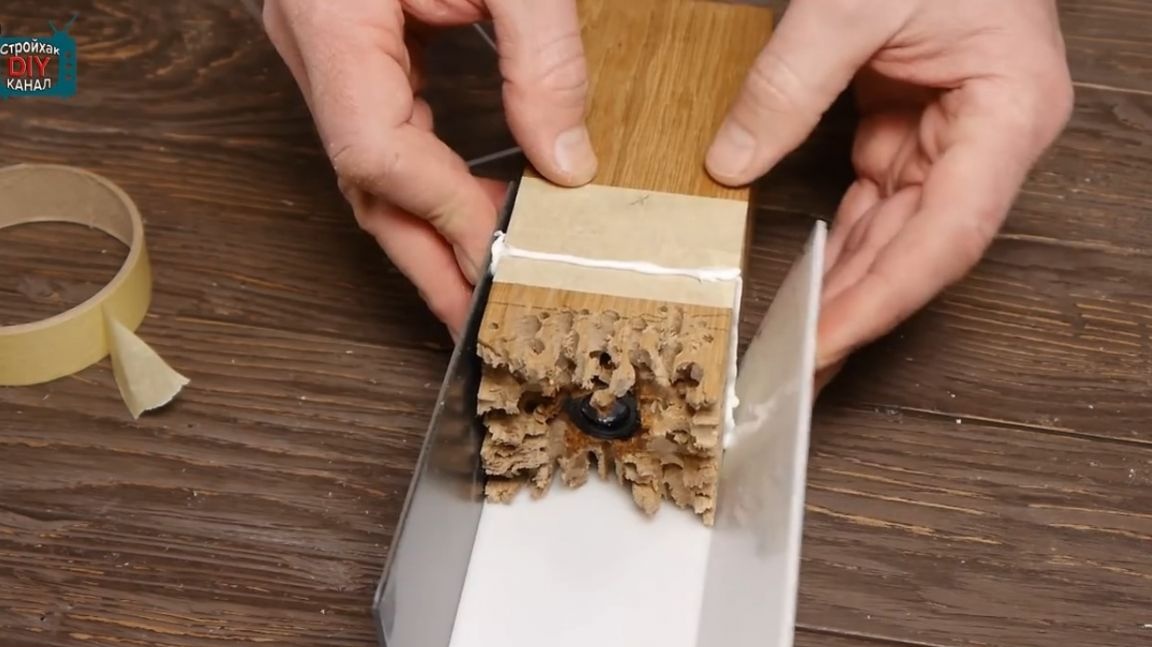
Then the author, using a ruler and a pencil, marks the center on both sides and drills with a thin drill in the same way on both sides. This is necessary for accuracy. The resulting hole will be a guide for a large diameter drill.
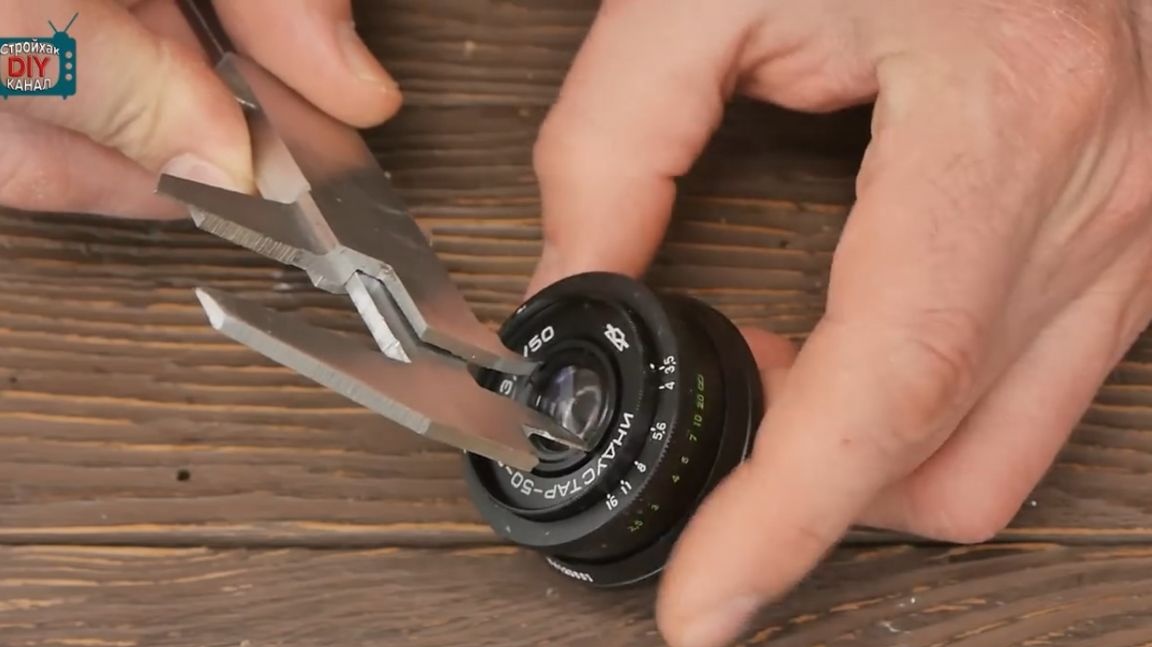
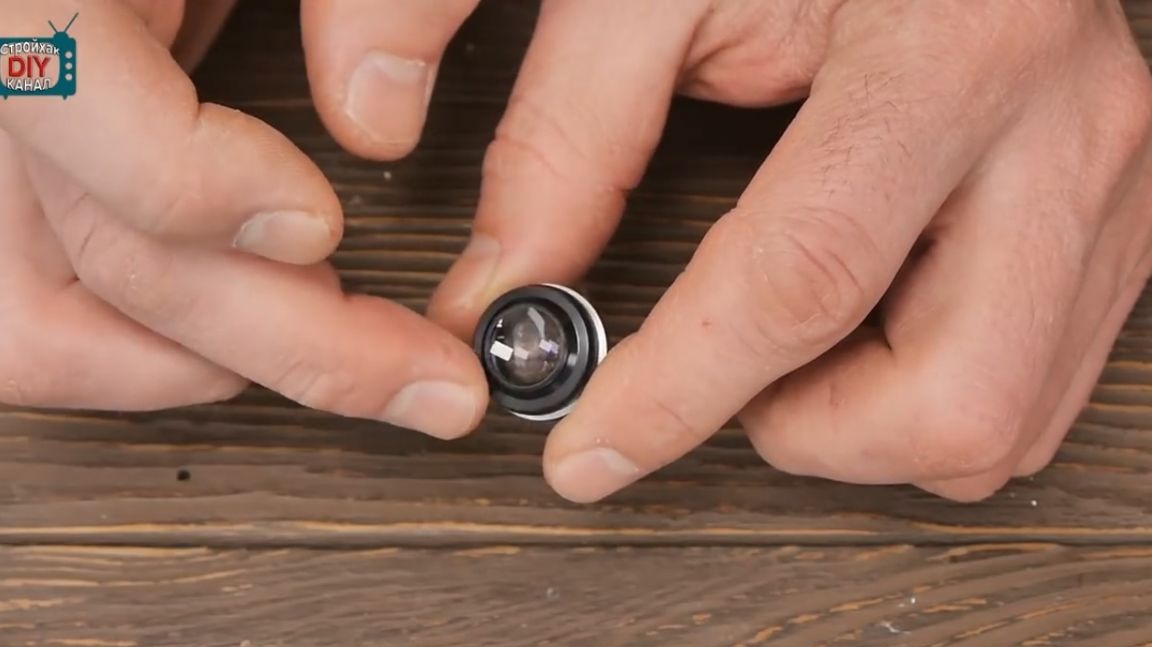
The boundary between the light source and the resin will be separated by the lens from the old lens. the diameter of the lens in the frame is 22 mm. To install it, you need to drill a small recess using a drill of the appropriate diameter.

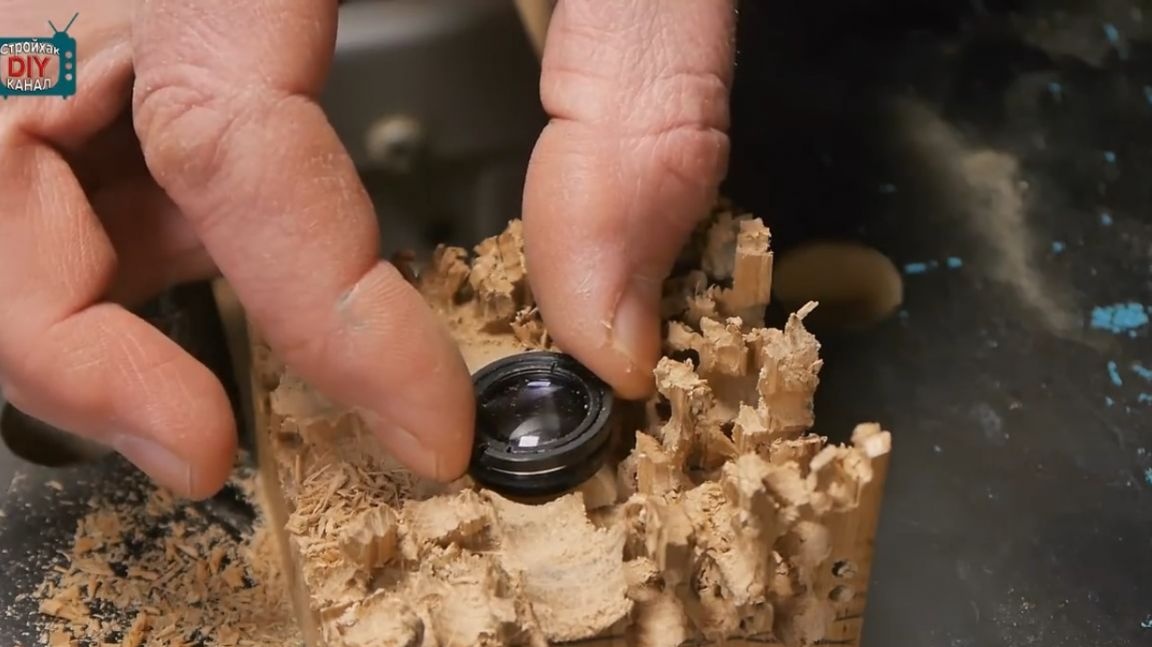
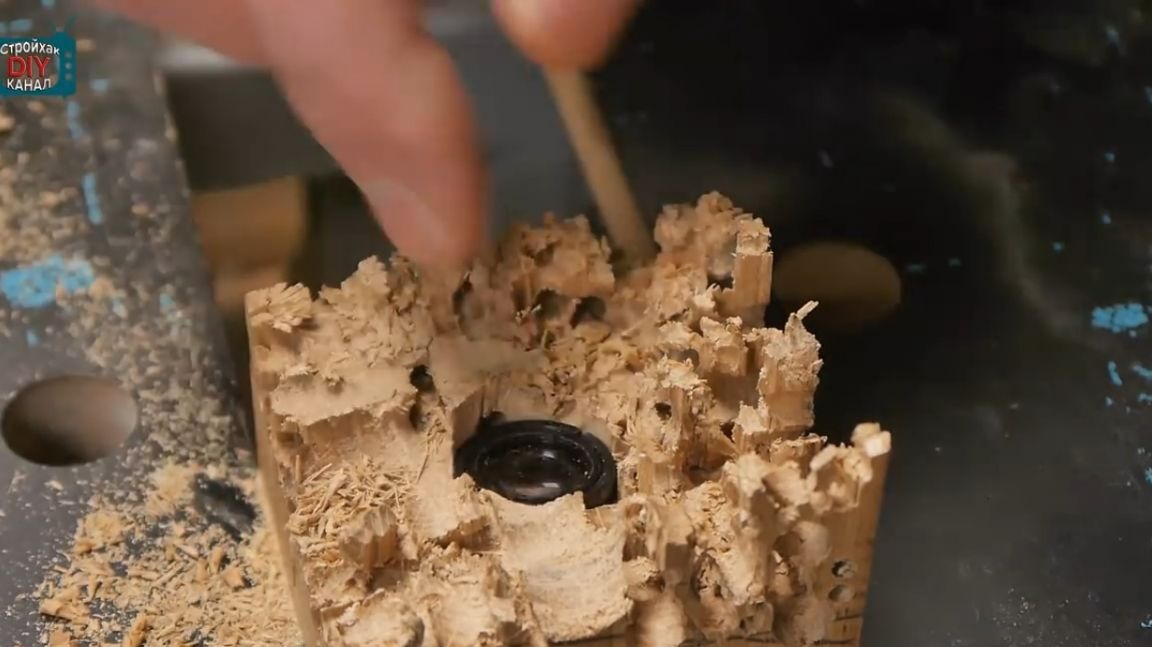
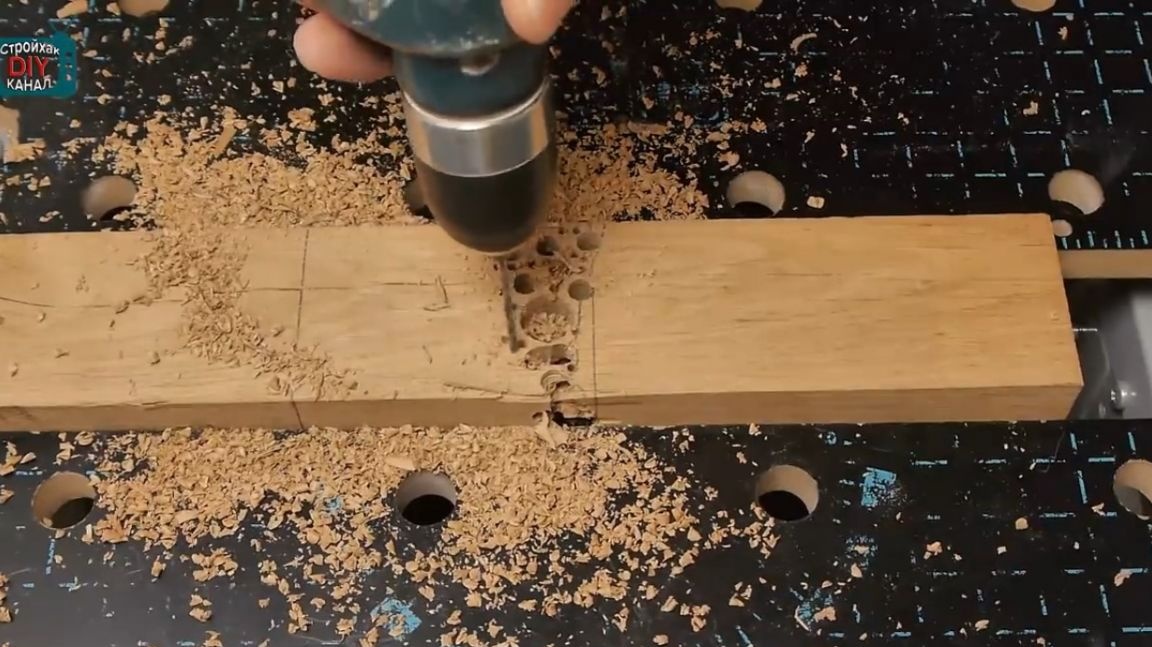
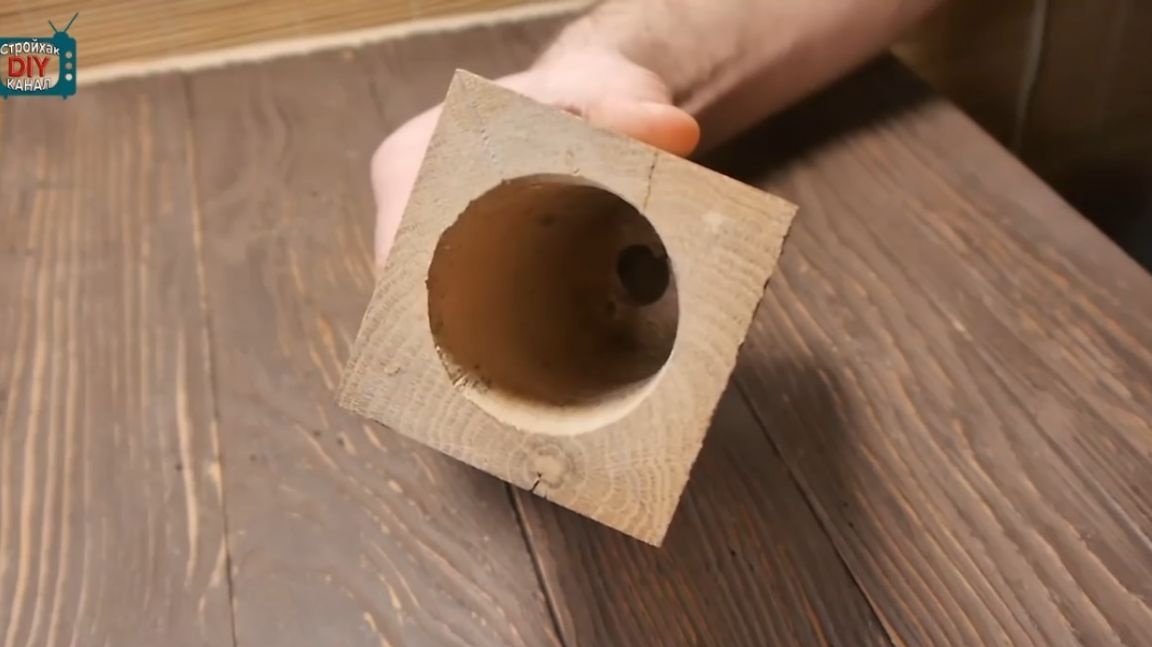
On the reverse side, the author drills the workpiece with a real feather monster. The diameter of the drill is as much as 45 mm and, at the very least, the drill gnaws through such a huge hole in the oak timber.
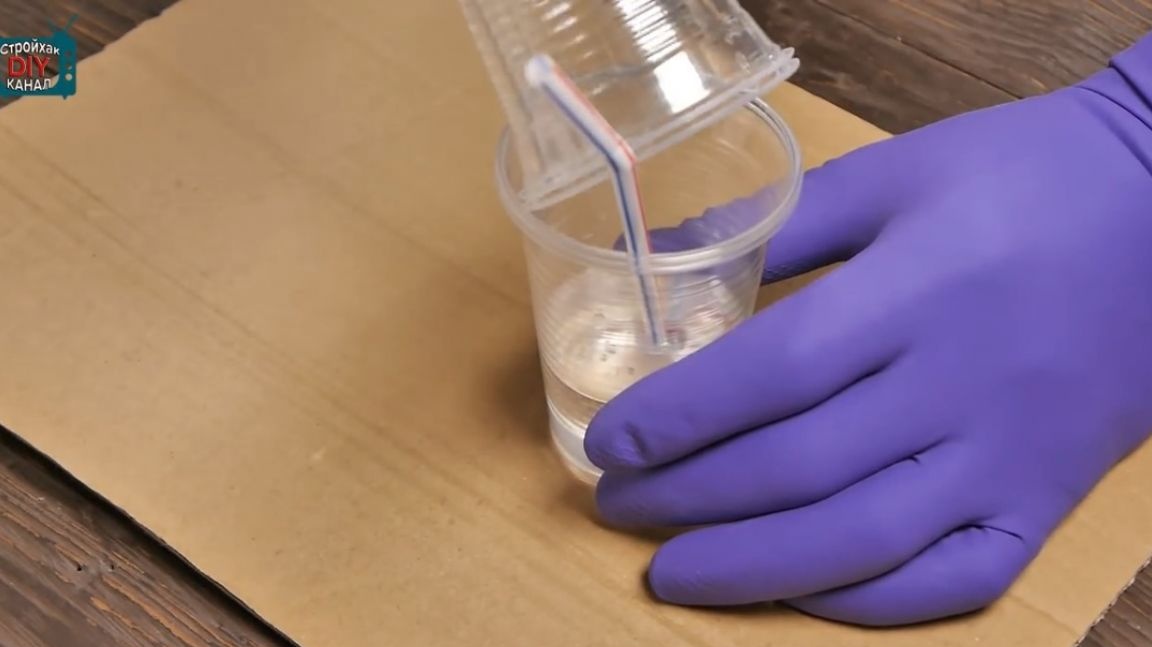
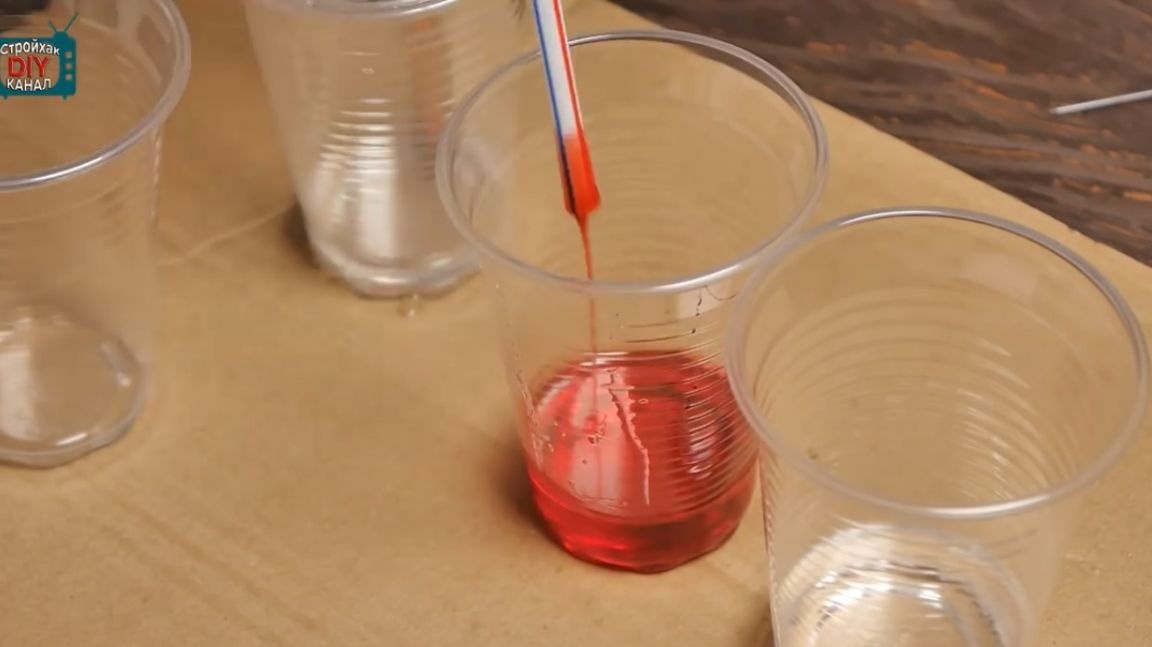
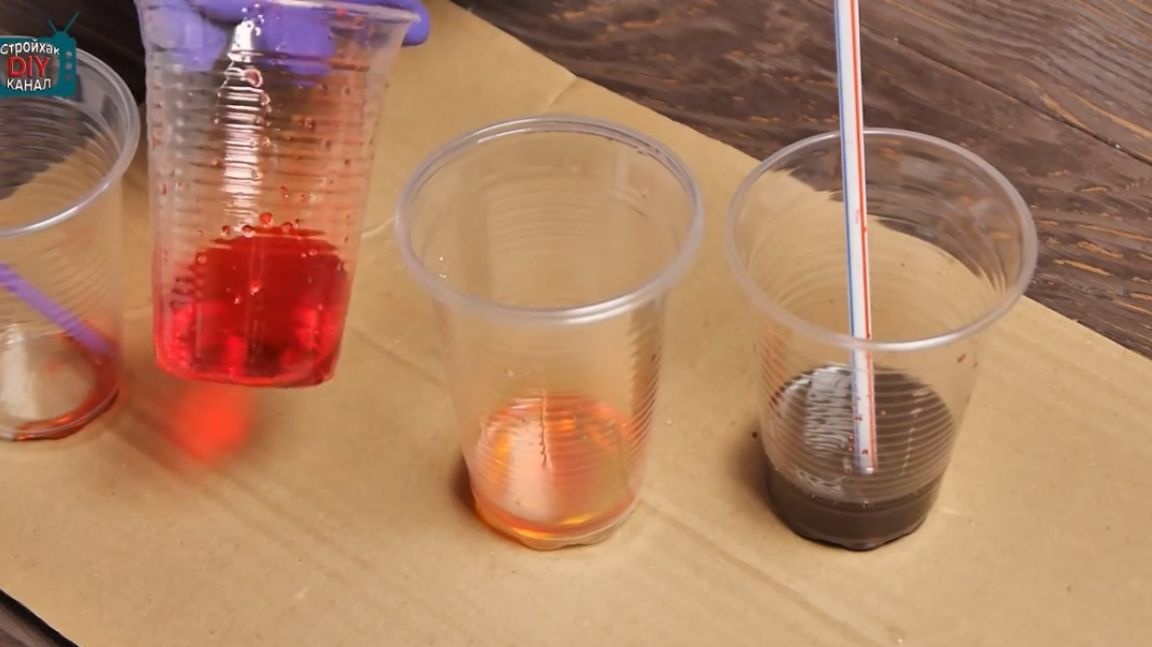
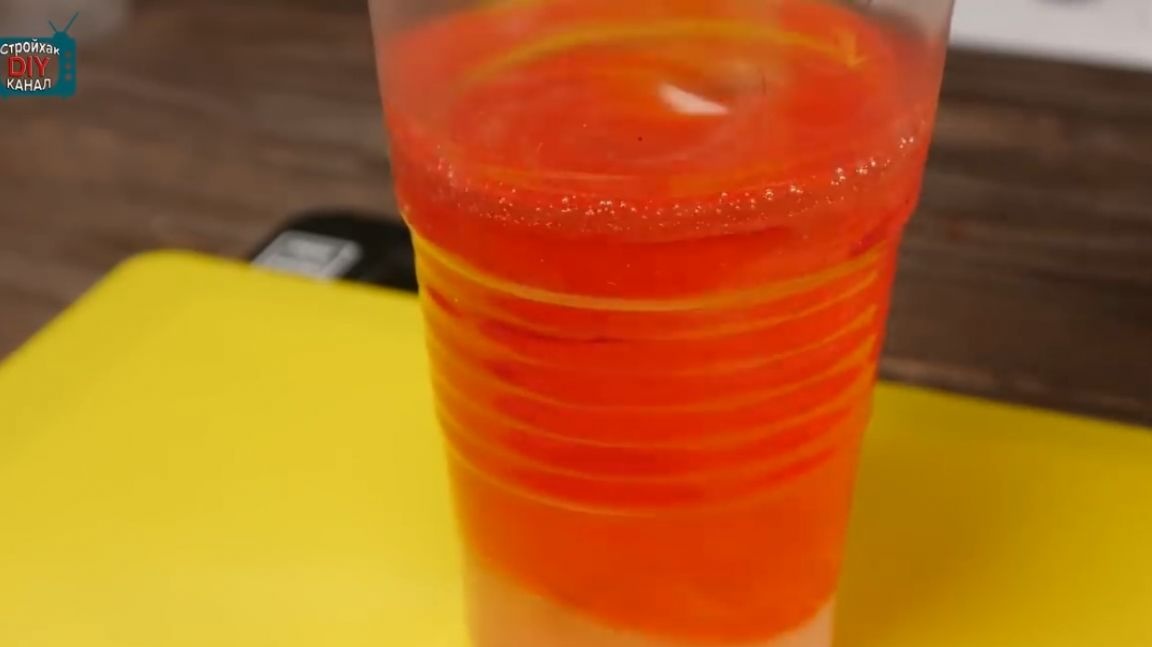
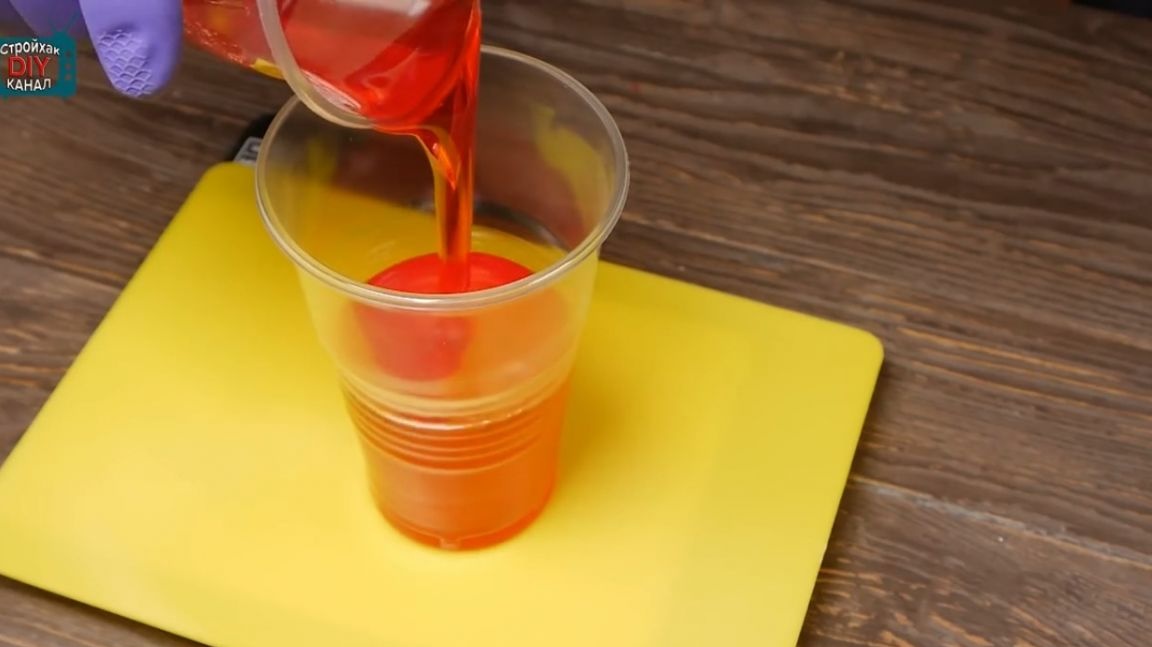
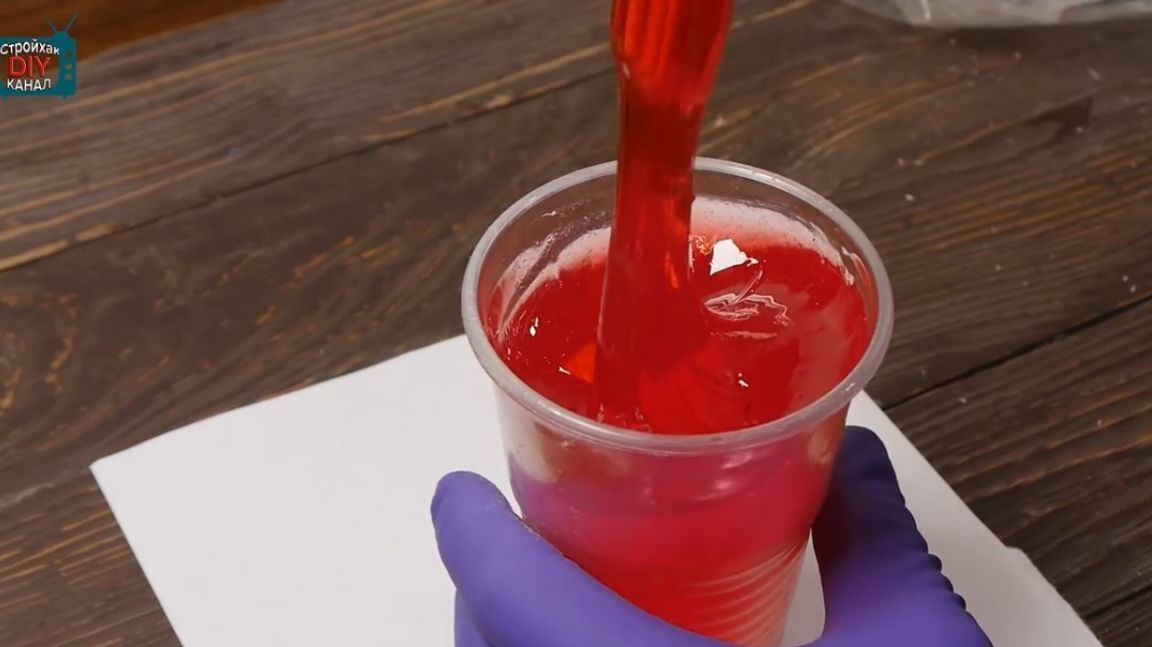
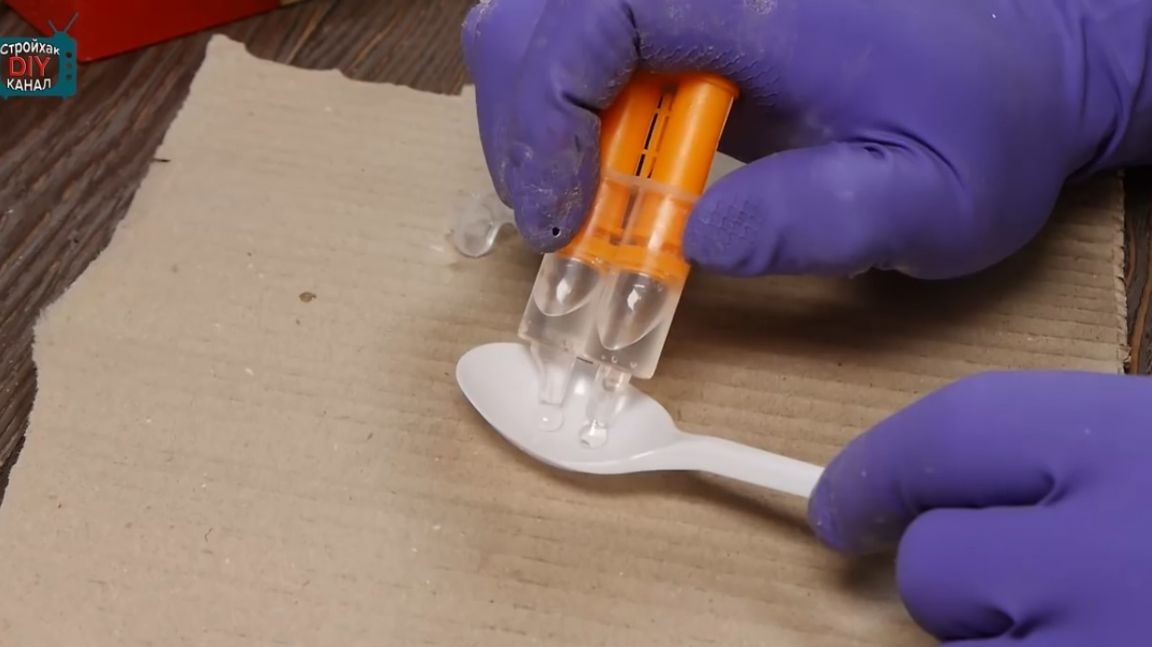
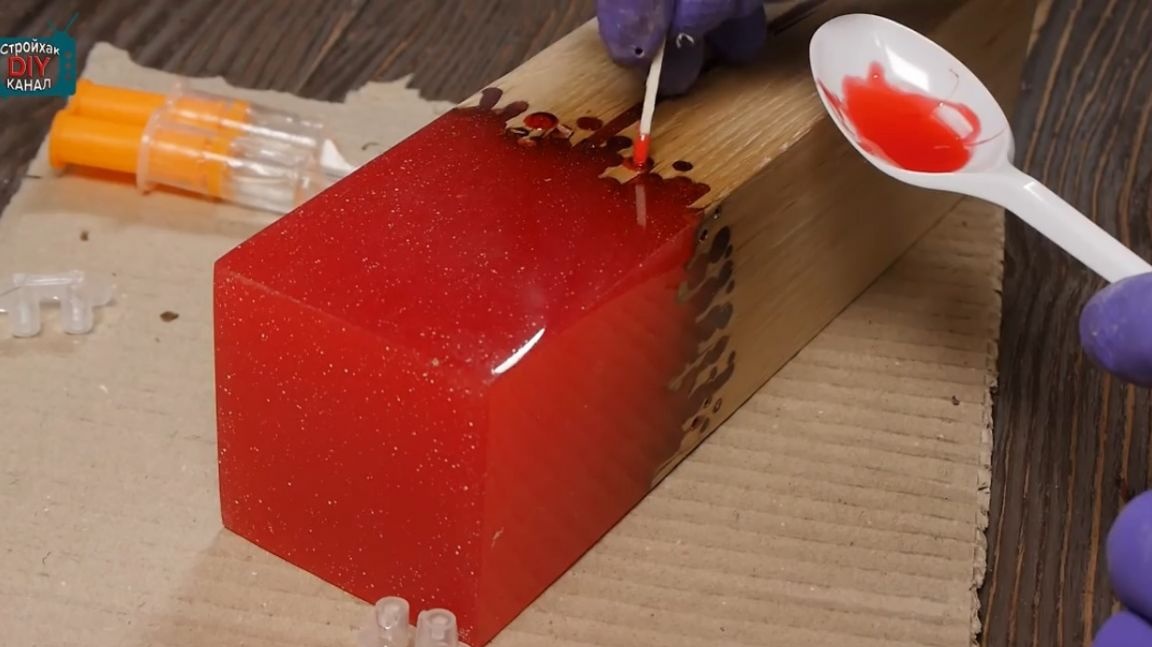
Further, the author begins to experimentally select the concentration of the dye for resins by choosing an interesting shade.

He also fastens the lens with resin.
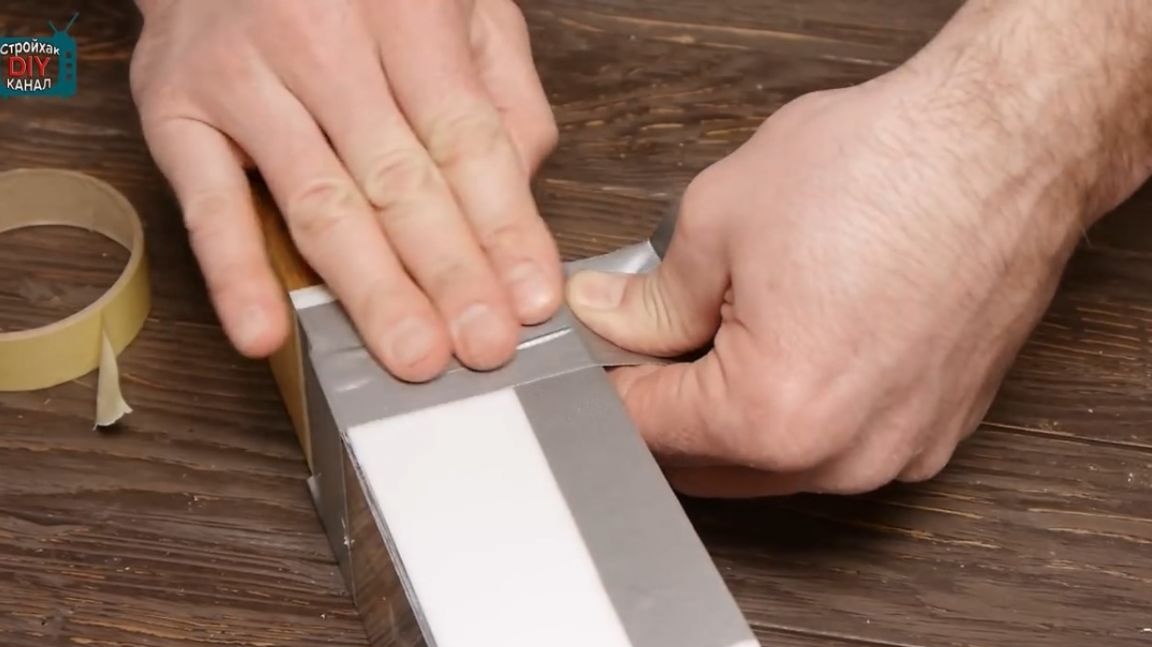
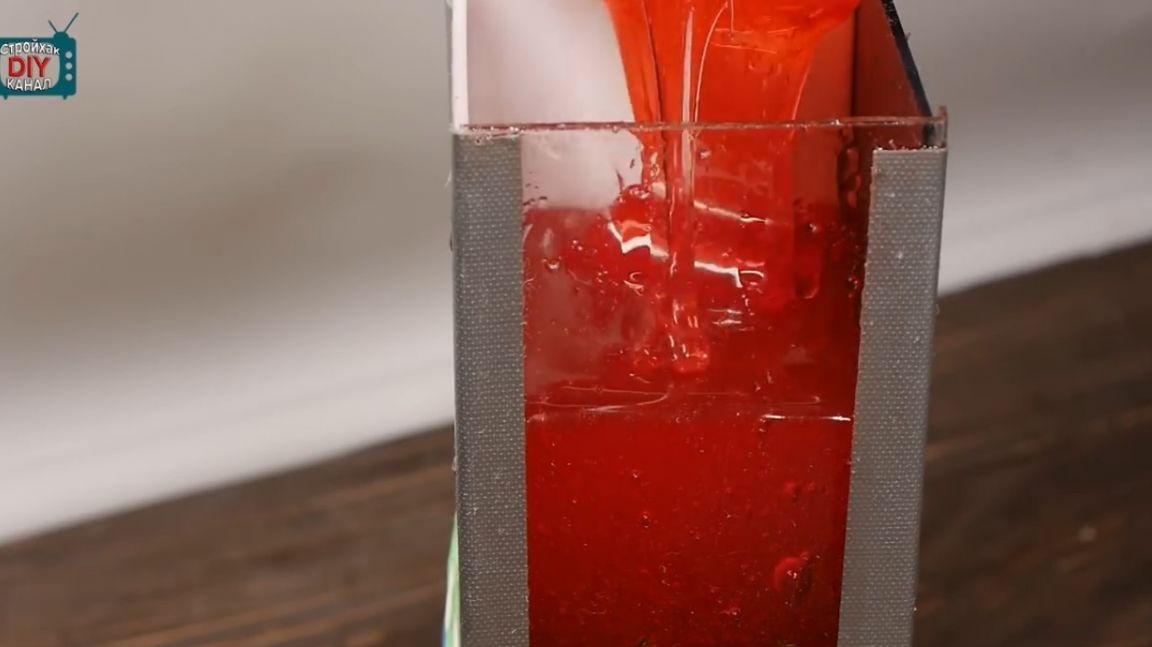
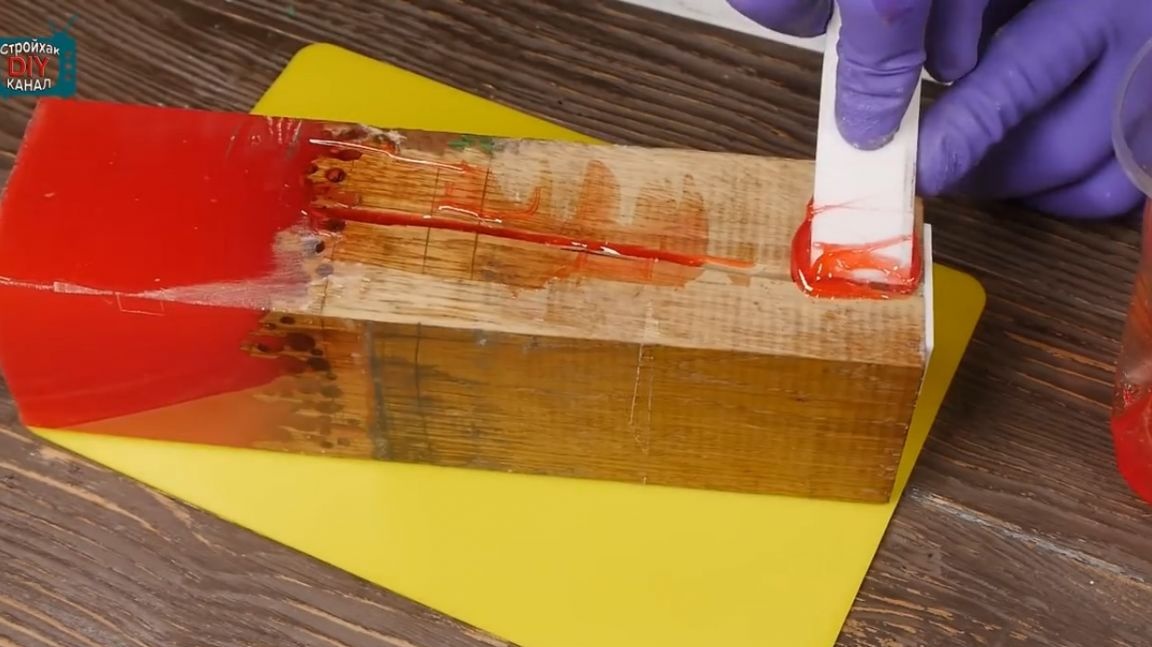
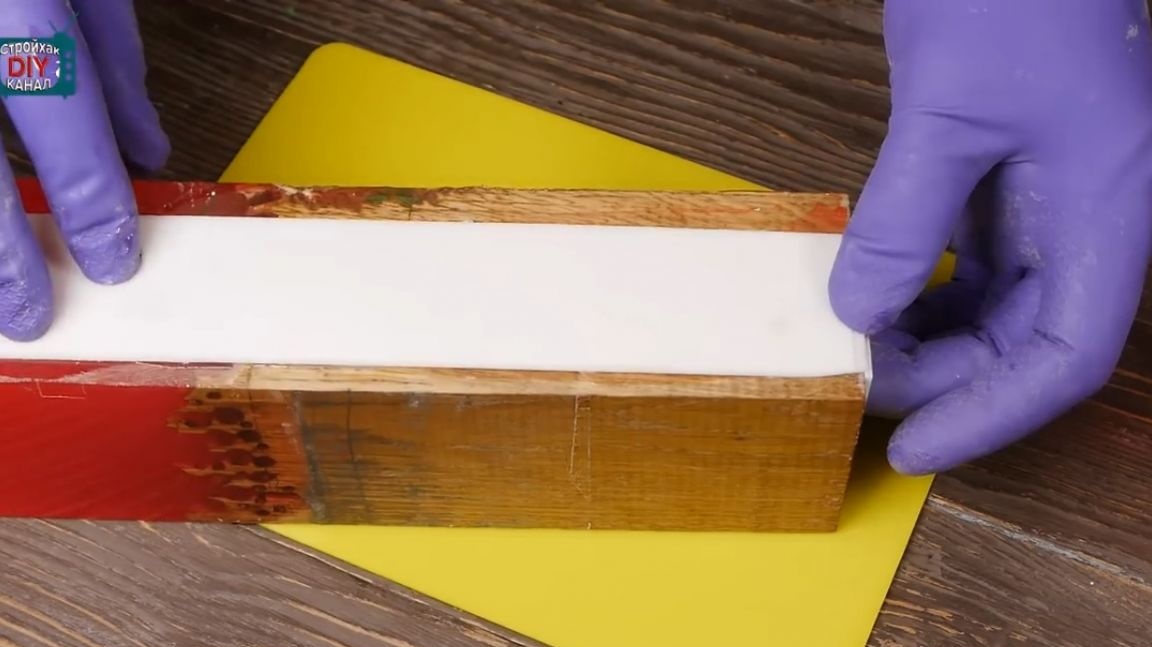
Next, you need to prepare a form for filling. The author cut off several pieces of acrylic by the size of the bar and connected them together with a household tape. This is necessary for waterproofing at the joints.
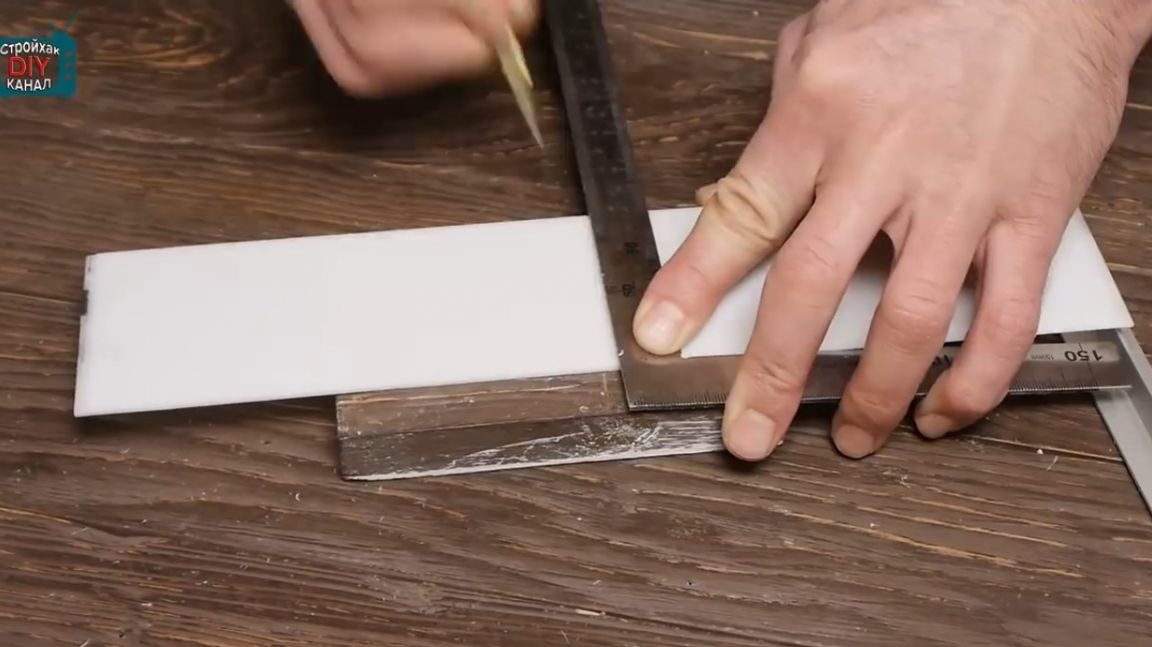
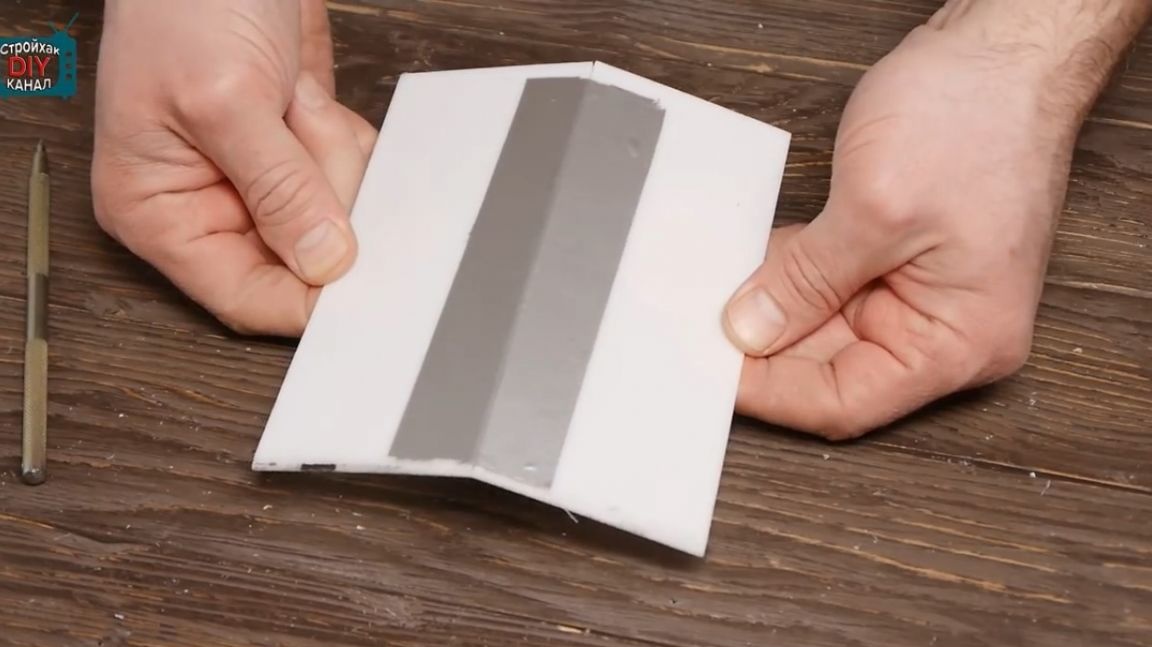
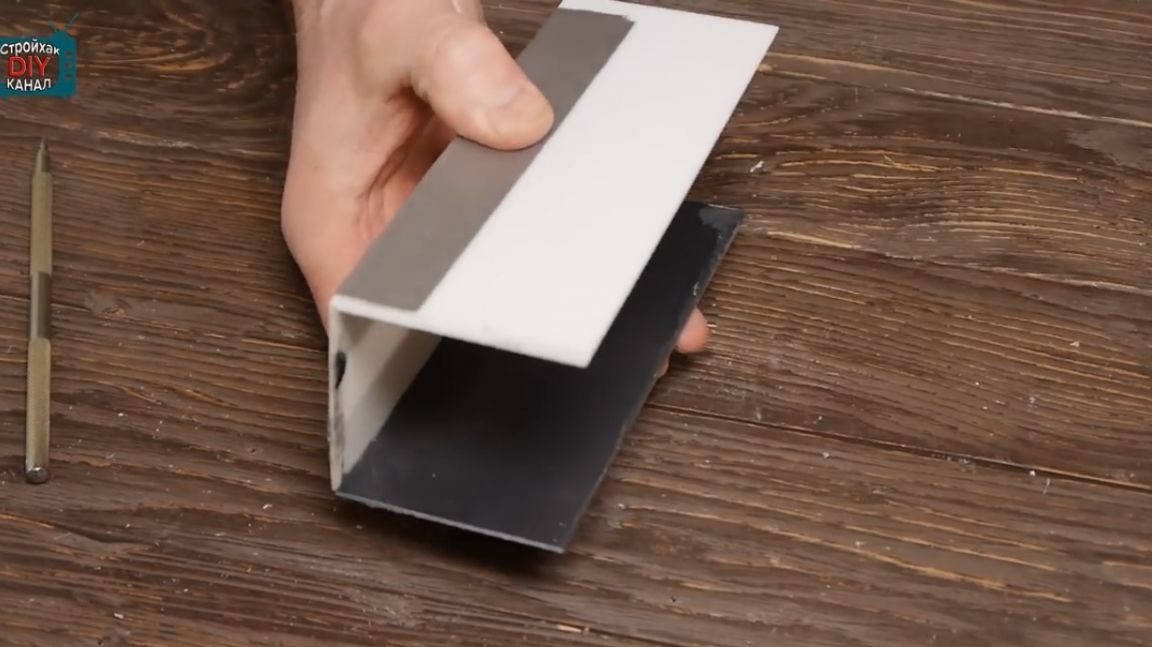
Here is a kind of formwork.

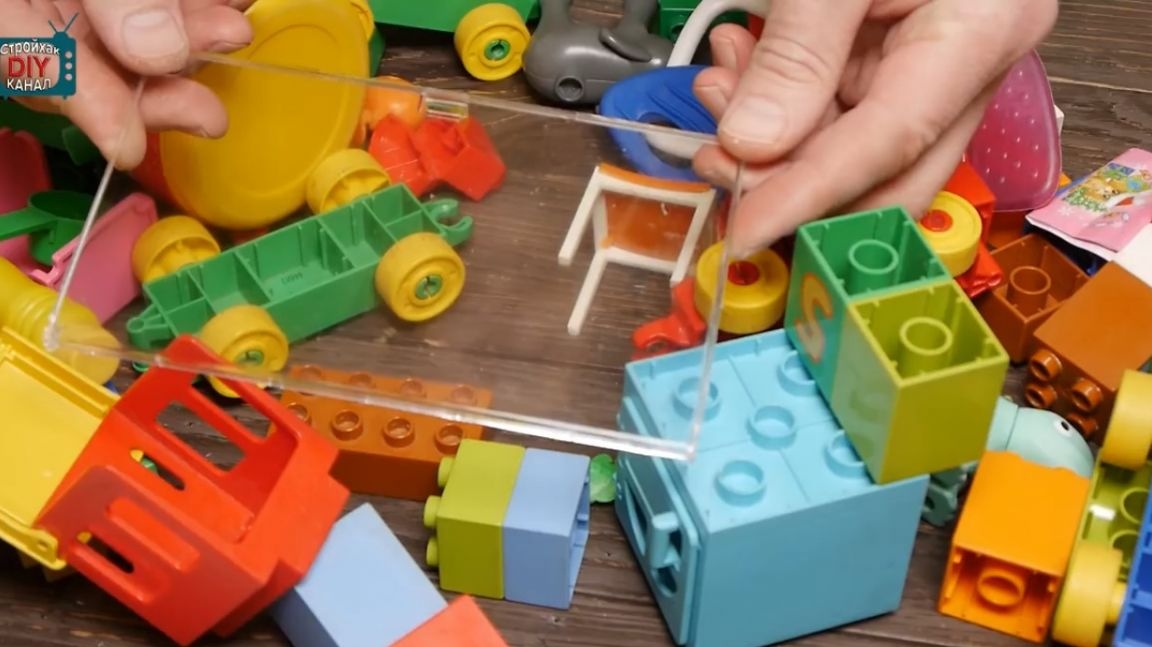
To control the filling process, the author makes a transparent screen. He decided to make a kind of screen from transparent plastic covers from children's paints.
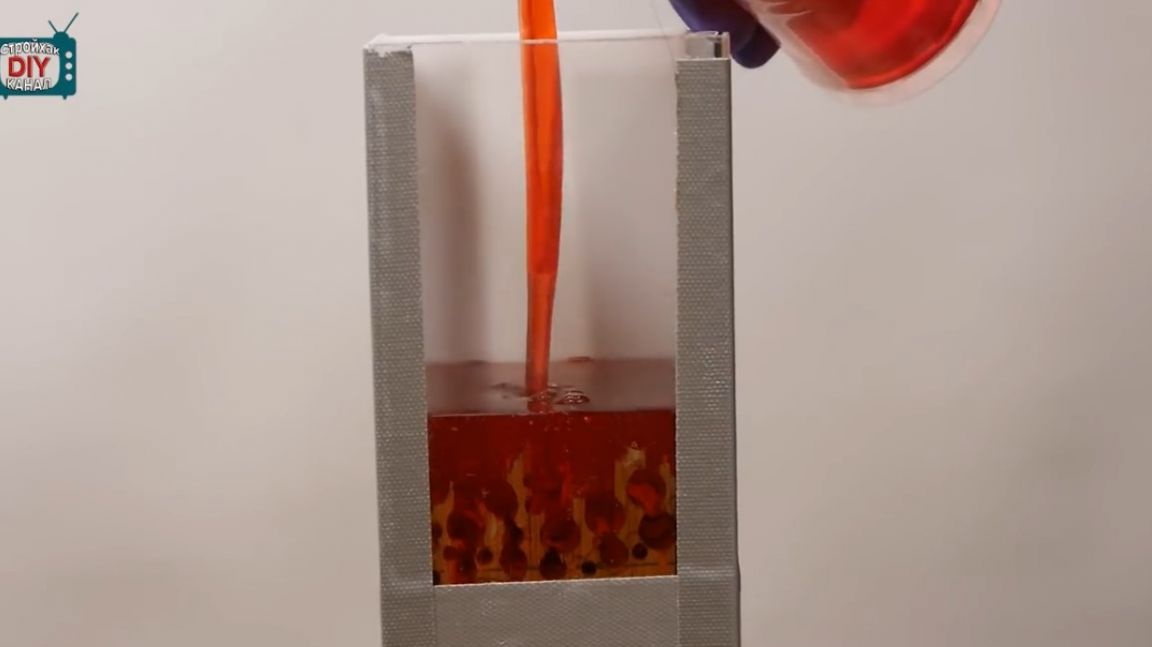
While everyone is trying to get rid of the small bubbles that form during the mixing and pouring of the resin in order to get a clear fill, the author decides to air the whole mixture in full and vice versa to get a bunch of bubbles. Therefore, in violation of the instructions, he began to actively mix the fill.
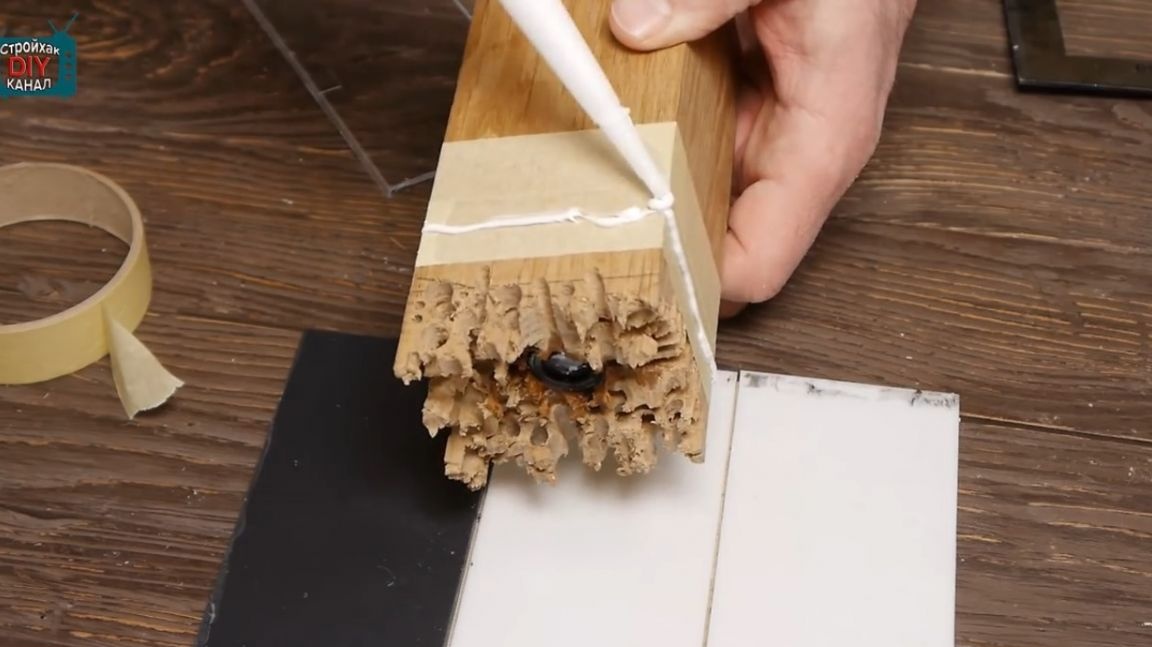
Further, the author pasted the masking tape and applied silicone for sealing. The density of the resin is not much higher than the density of water, so if you have poorly sealed joints, the resin will simply leak out.
It's time to fill.
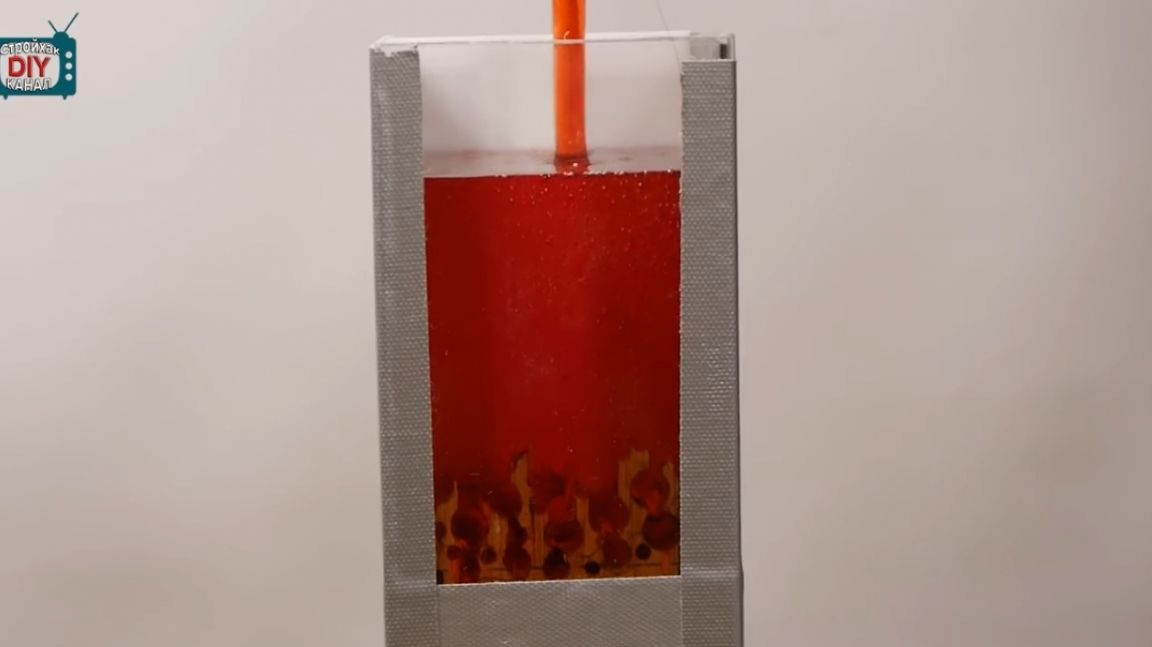
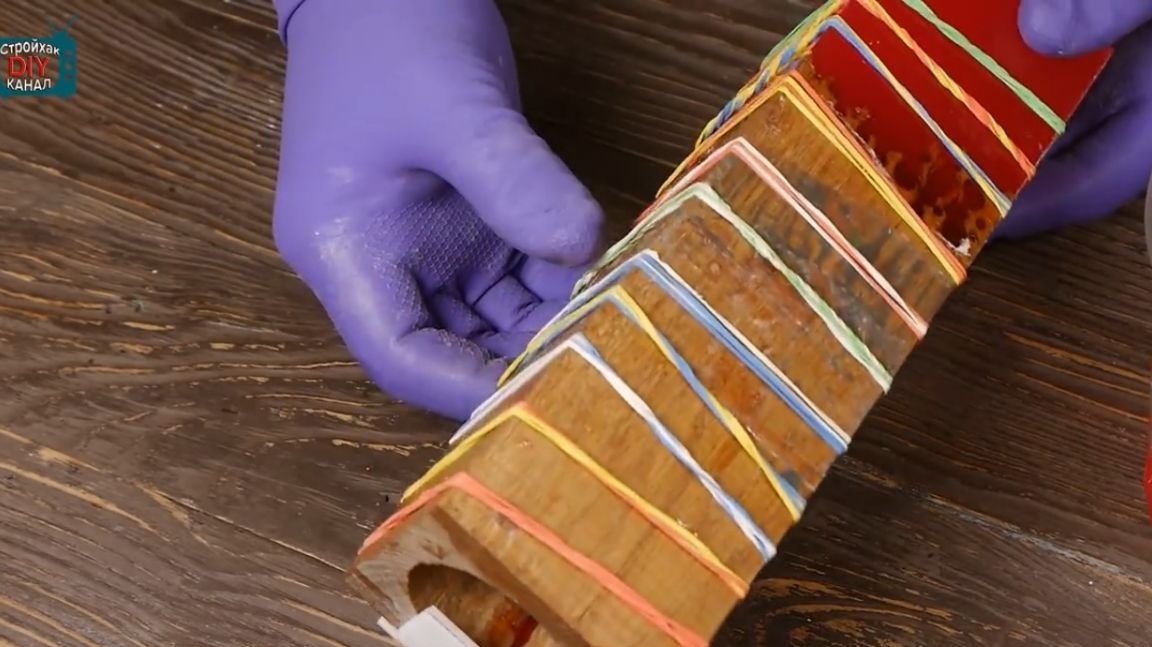
But all the bubbles began to leave the resin. But the most unpleasant thing is that the form began to leak. Even a bunch of rubber bands did not help, so it was decided to separate the fill and the mold and put the resin on the balcony. The author left the form saturated with resin warm. The plan came true. The resin started up in the cold. The mold was glued and became completely sealed. Moreover, in the thick resin, the bubbles no longer floated. Having mixed well, it became possible to keep them there forever.
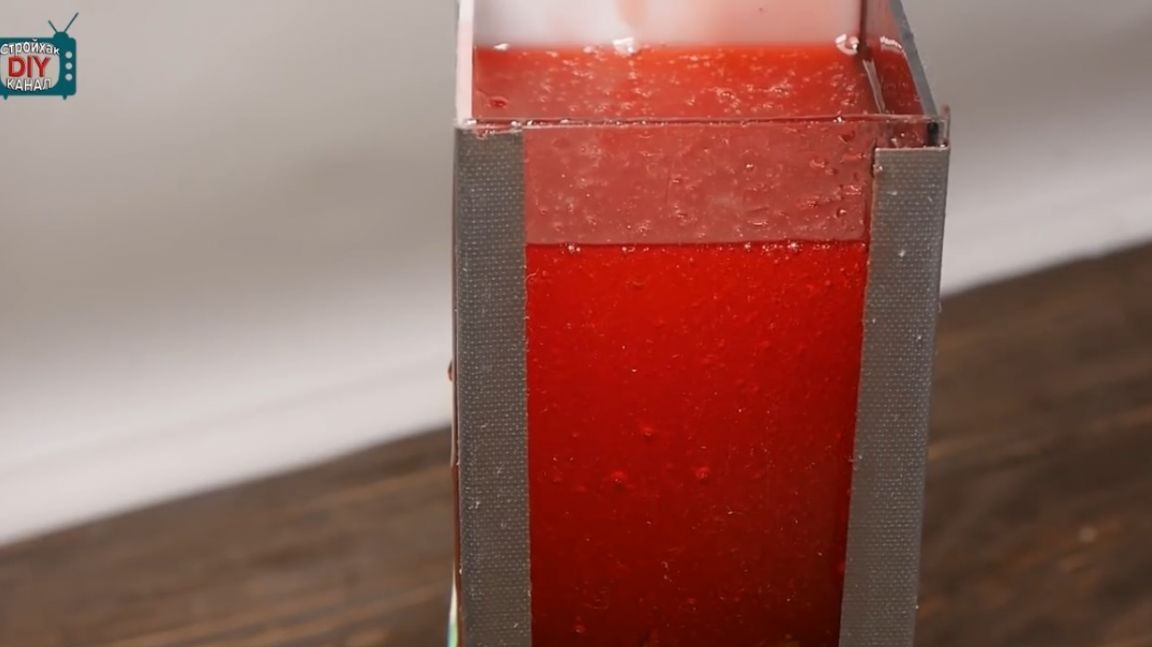
After 12 hours, the resin froze and became hard as a stone.
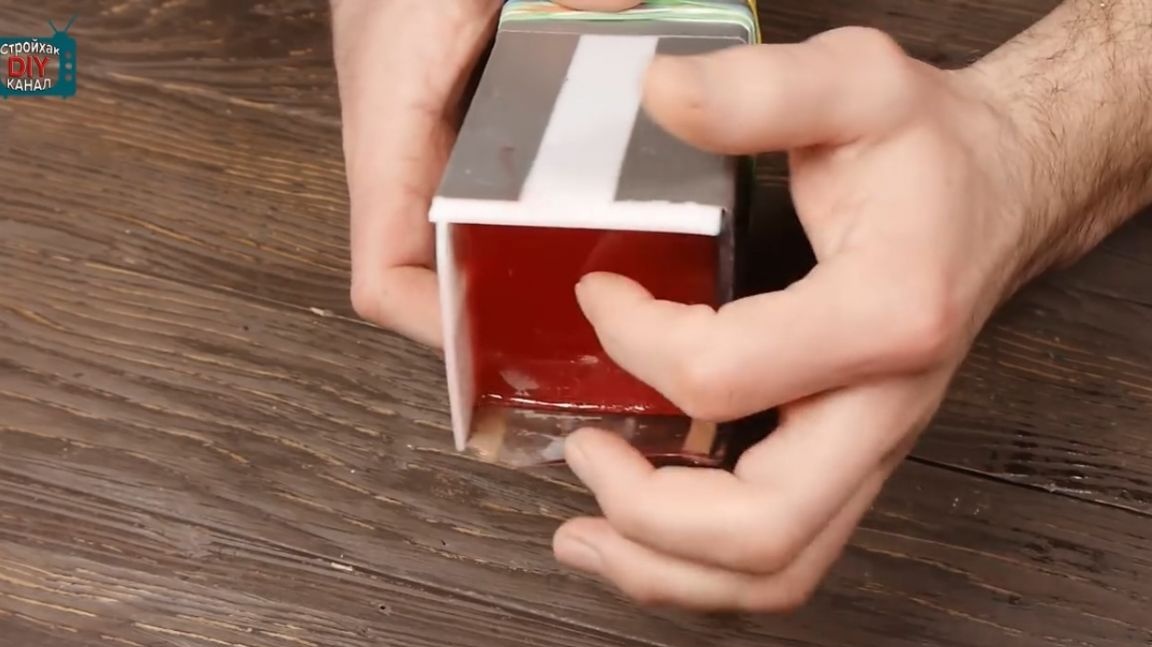
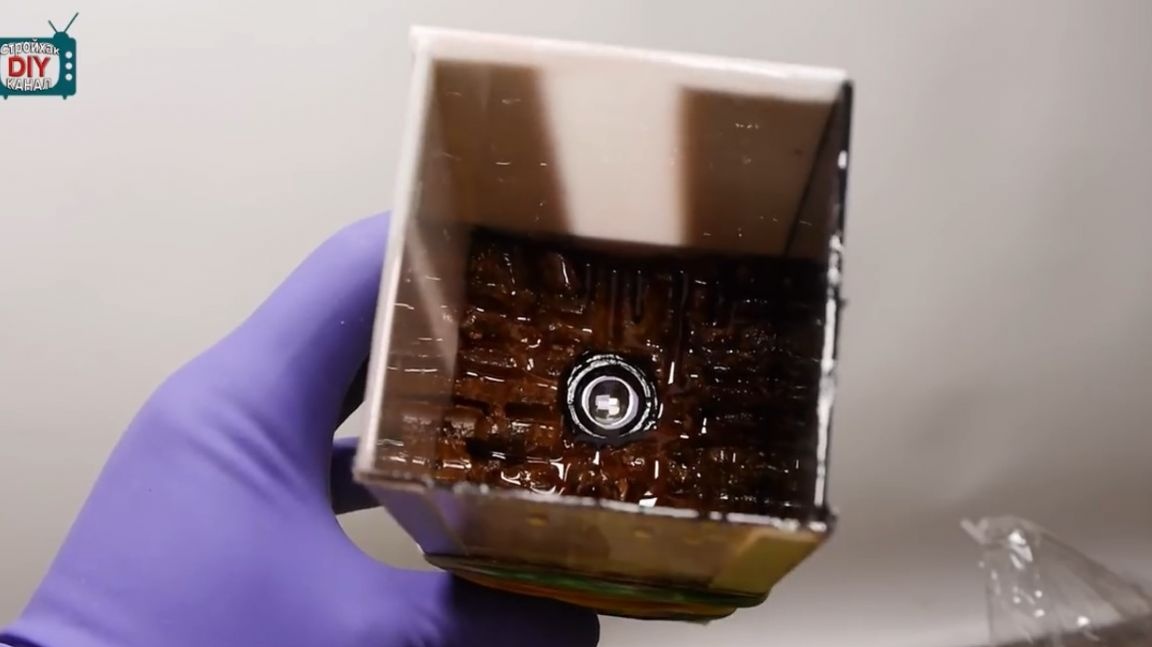
Now you need to separate the pieces of acrylic and transparent plastic.
The author decided to add home-made grace and a unique feature, a little zest so to speak.
It remains to fill the resulting pattern with resin.


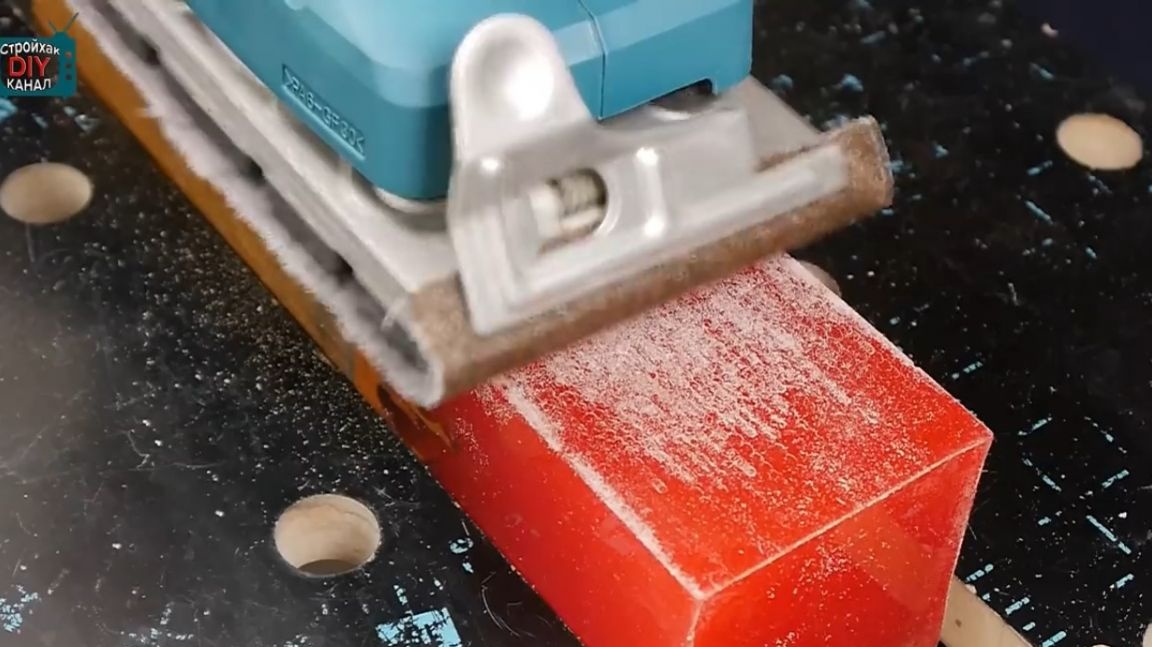
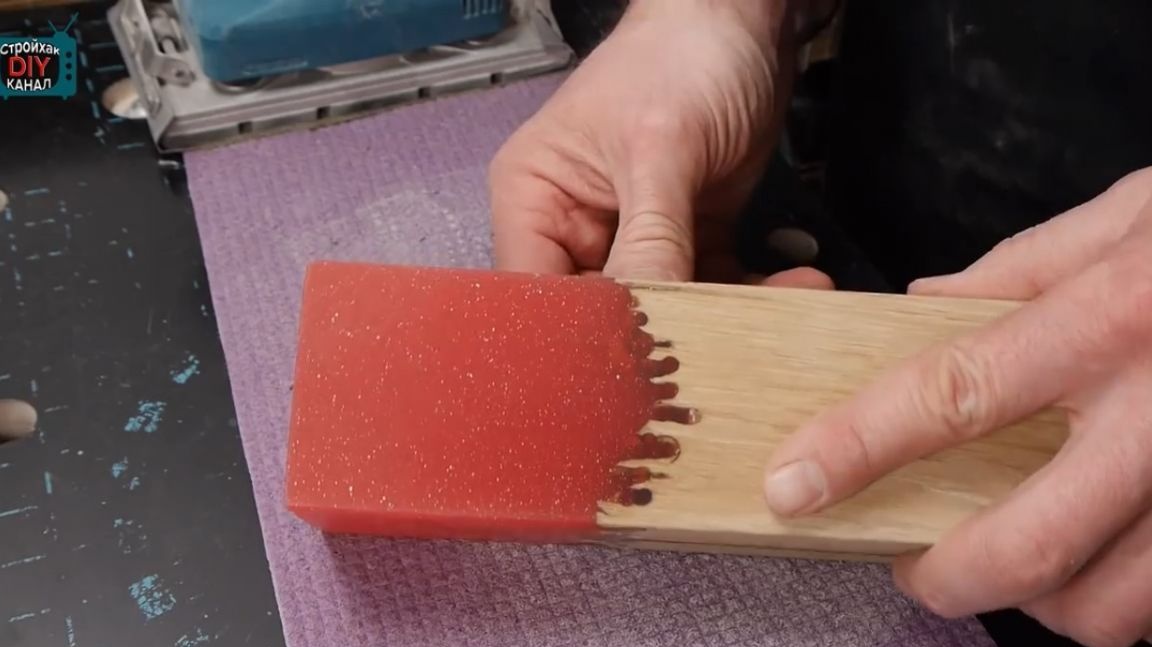
It's time to start the grinding process.
To grind the workpiece, the author uses a grinding machine. He started sanding with tape with grain 60, then 150, 240 and 320. He finished it with paper with grain 500 and 1000.
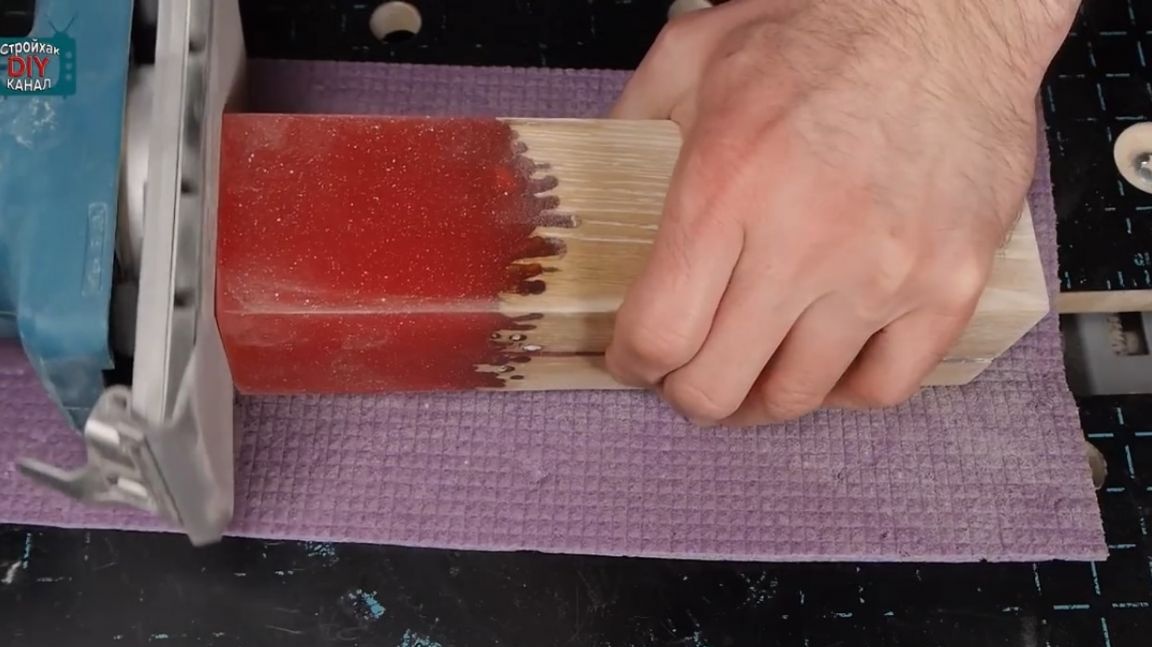
This is how the surface looks after polishing with 1000 grain.
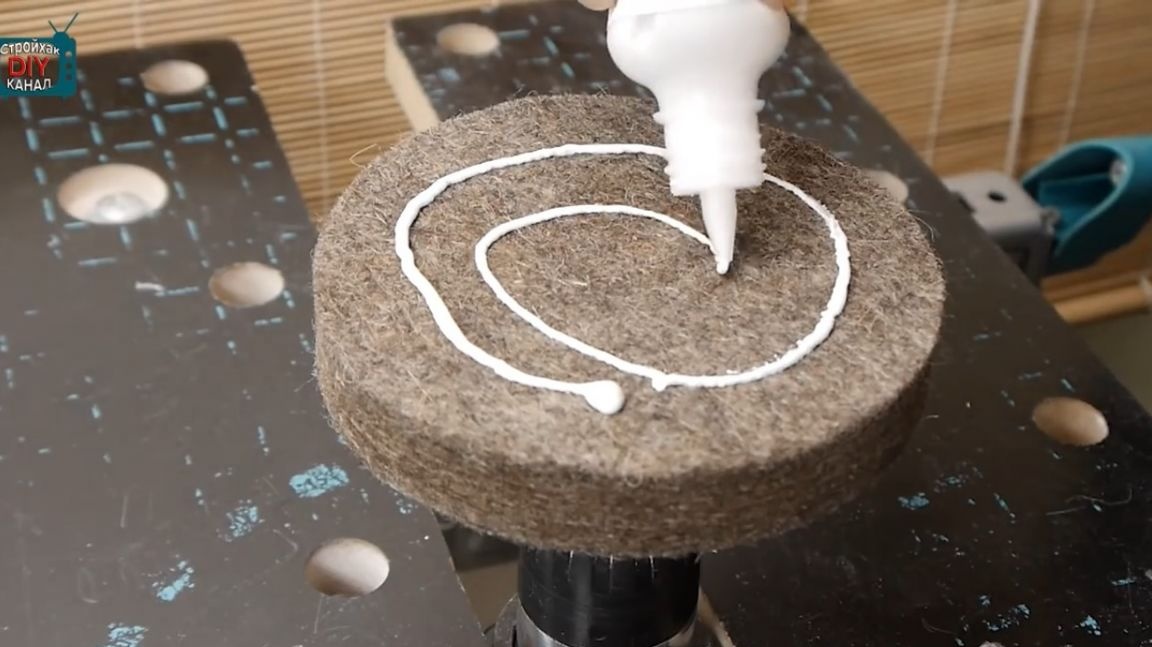
Further polishing. Using a felt wheel coated with a special polishing paste for plastic, it starts polishing.
After grinding in some recesses, the resin collapsed. It will require a little redecoration. For this, a regular quick-drying epoxy smog for repair from a tube is suitable. It must be tinted in the fill color and within 5 minutes the glue hardens.
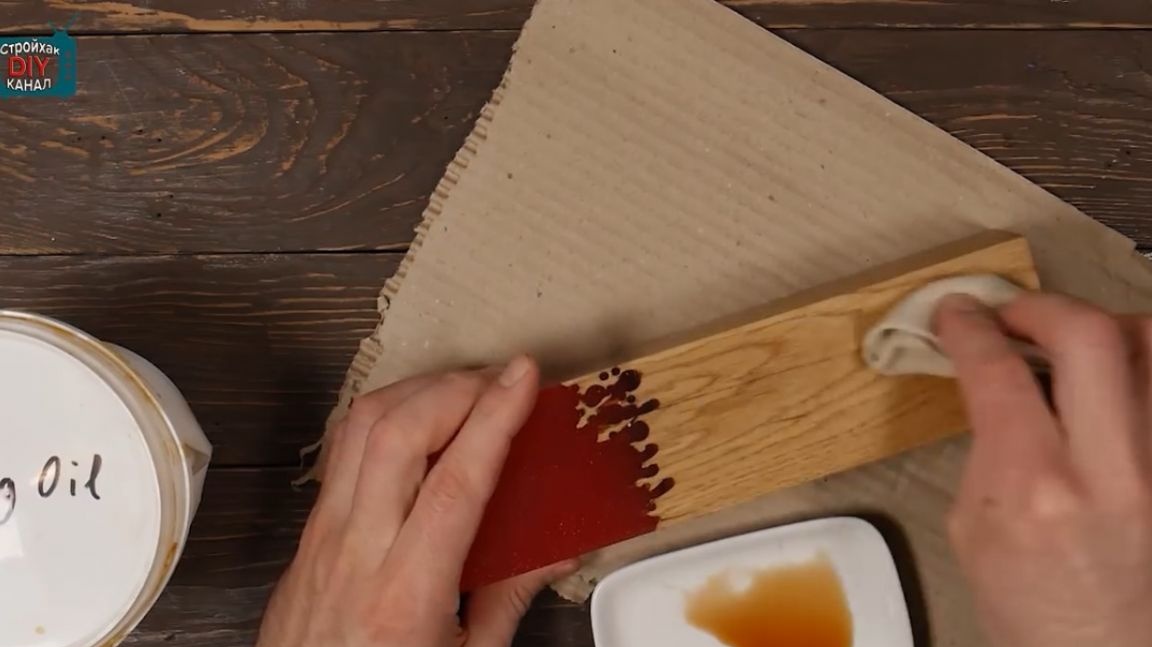
To make the wood texture more expressive, the author treats the surface with tung oil. It is poorly absorbed since the tree is polished almost to a shine, but still a slight shade appears.
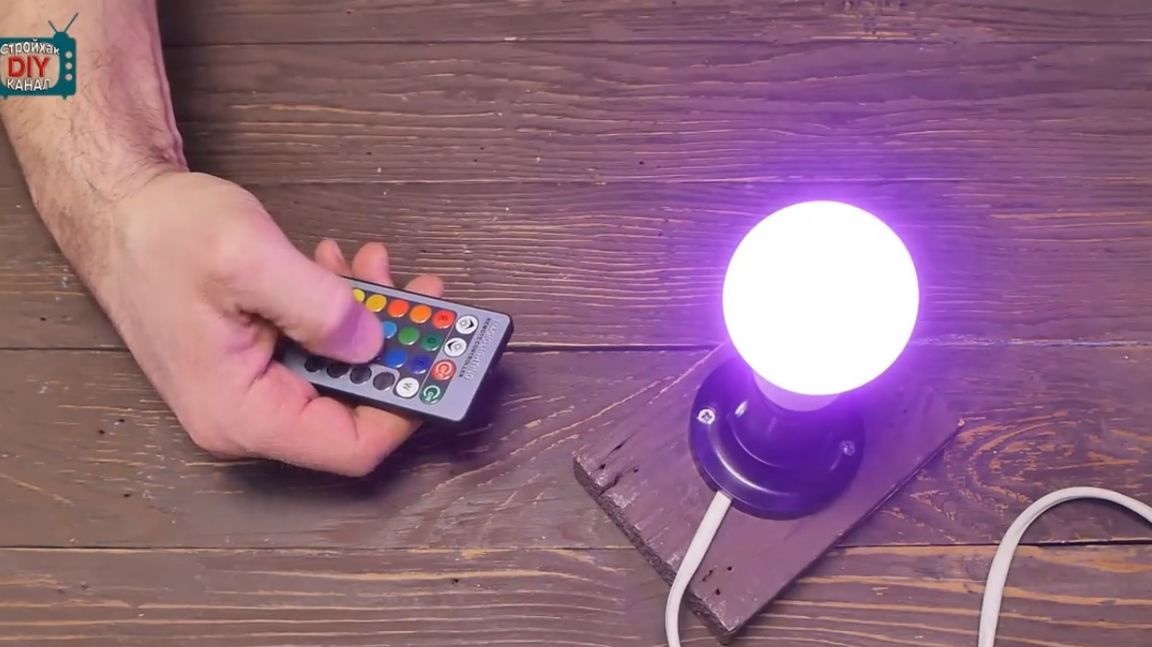
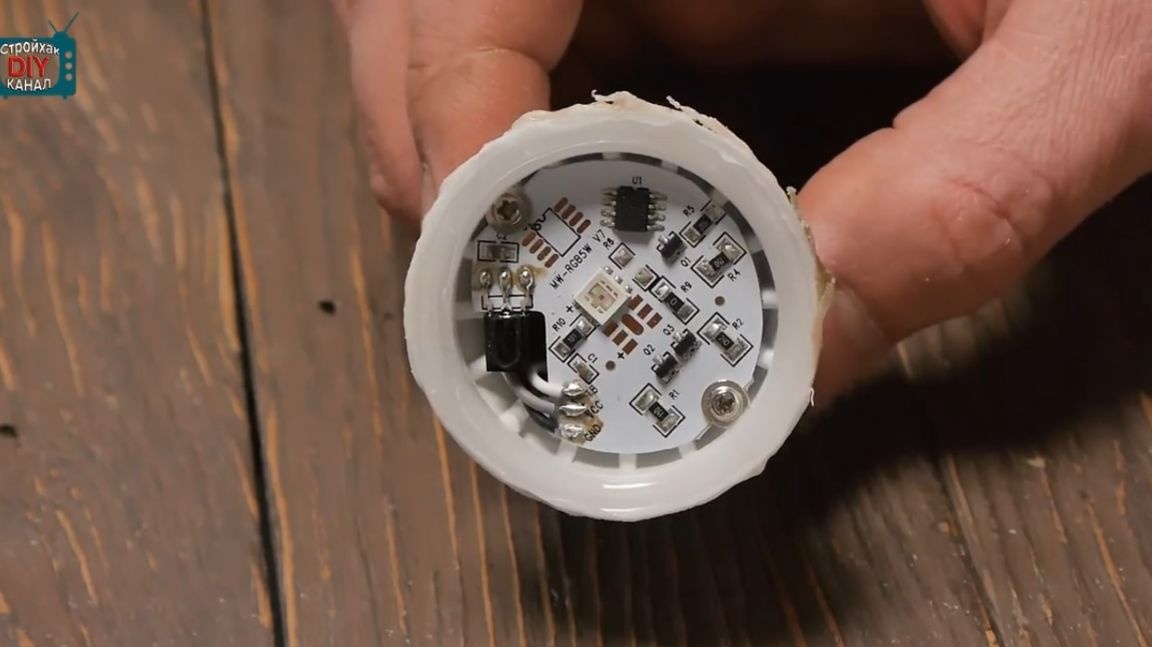
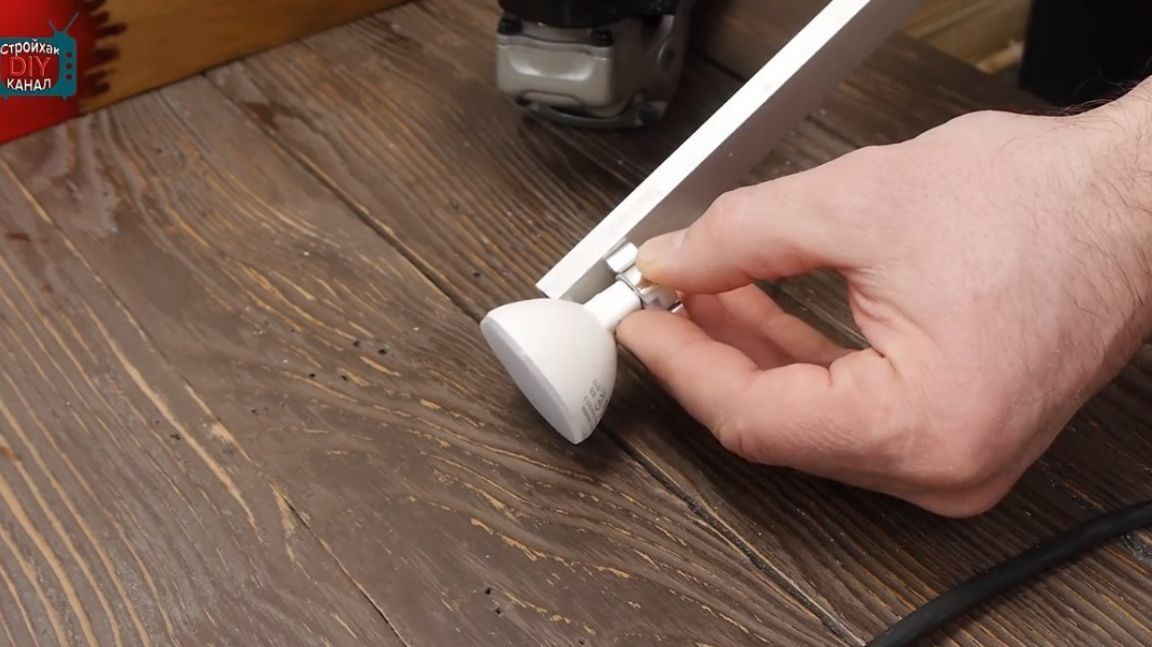
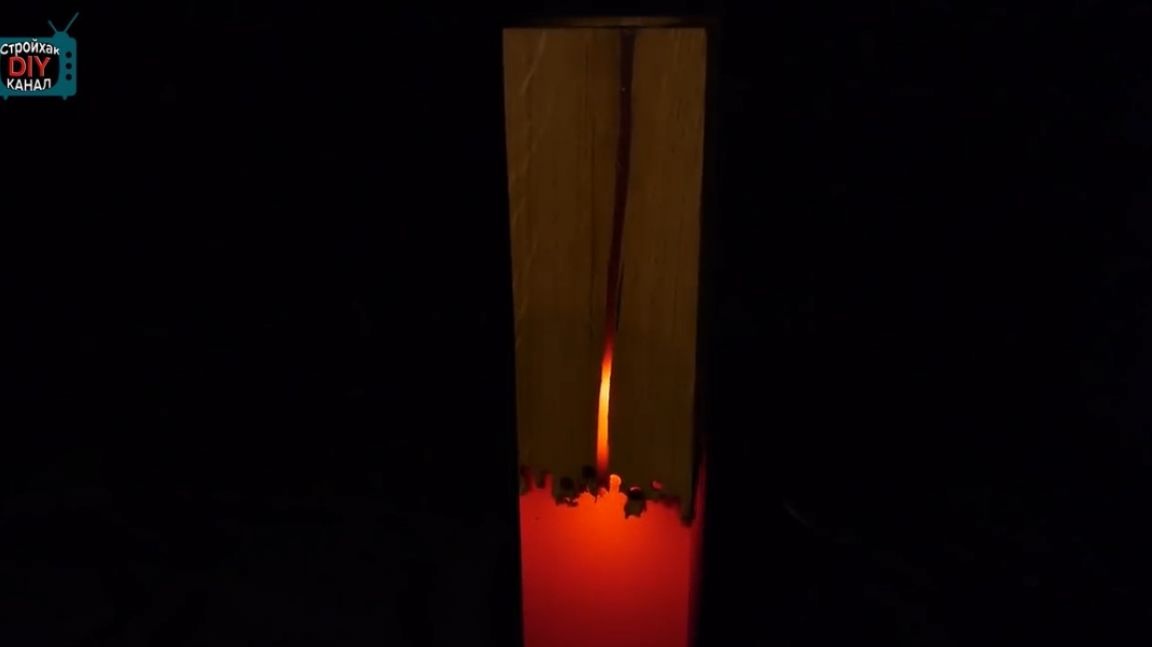
Next is an electrician. Initially, it was planned to use a Chinese light bulb with an infrared remote control. But after opening, there was one RGB LED.An opaque resin layer nullified all these manipulations with the panel on color change.
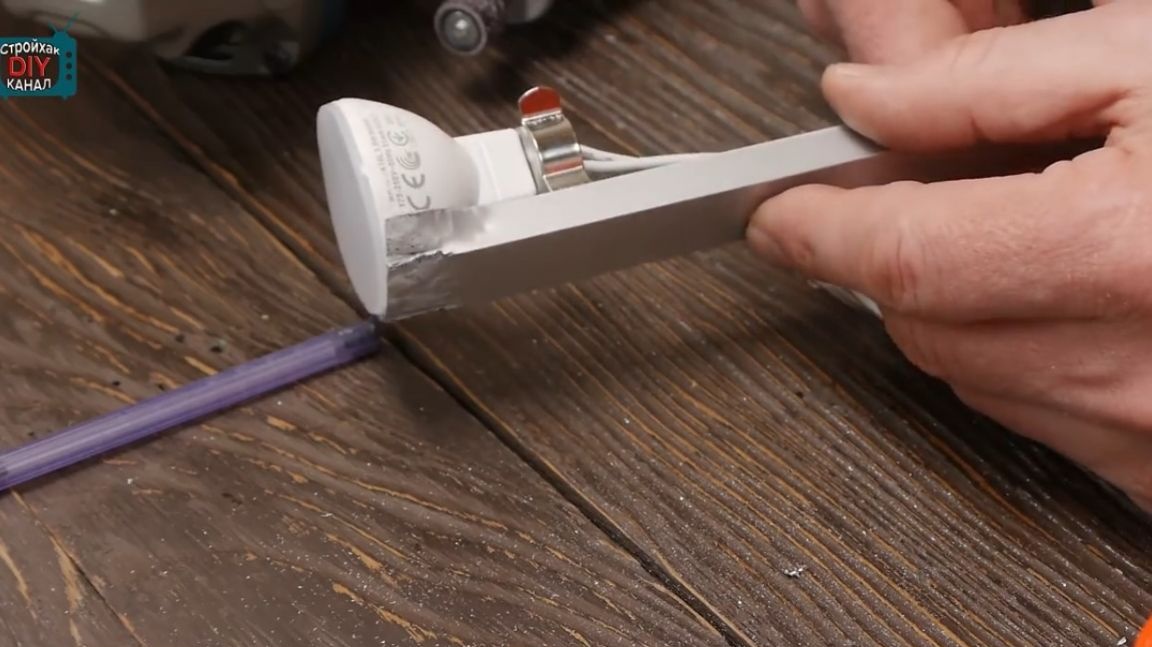
Throwing this venture and going through other options, the author first settled on a 7-watt LED lamp. But with continuous operation, a lamp of such power was heated up quite strongly, and its operation in a closed wooden case aroused certain concerns. Therefore, the final choice fell on a 3-watt LED lamp. It is heated much less. But since the system is closed, an aluminum radiator will not be out of place.
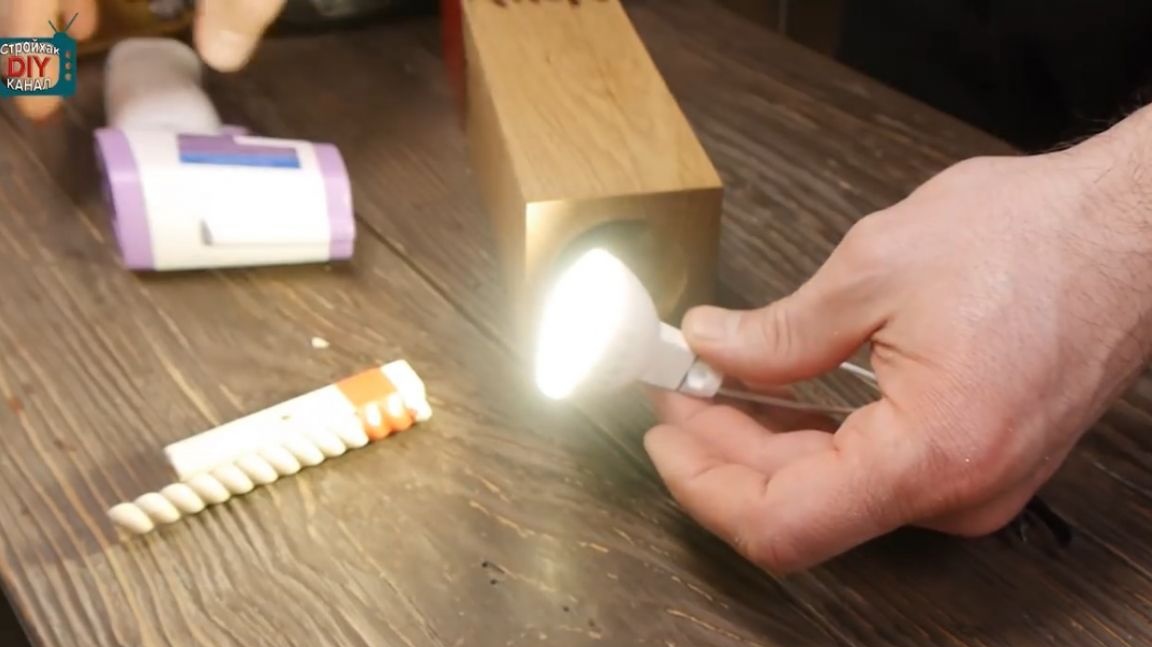
Using a clip, I attached the lamp to an aluminum radiator. The radiator bent in the shape of a lamp for better heat transfer and removal of excess heat.
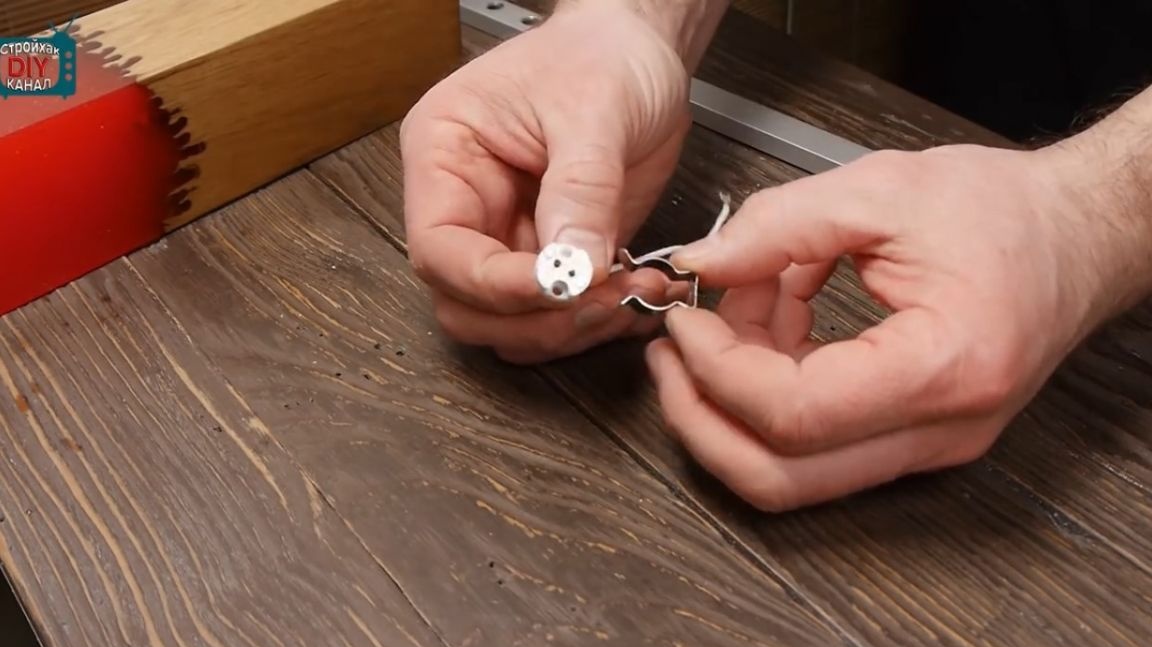
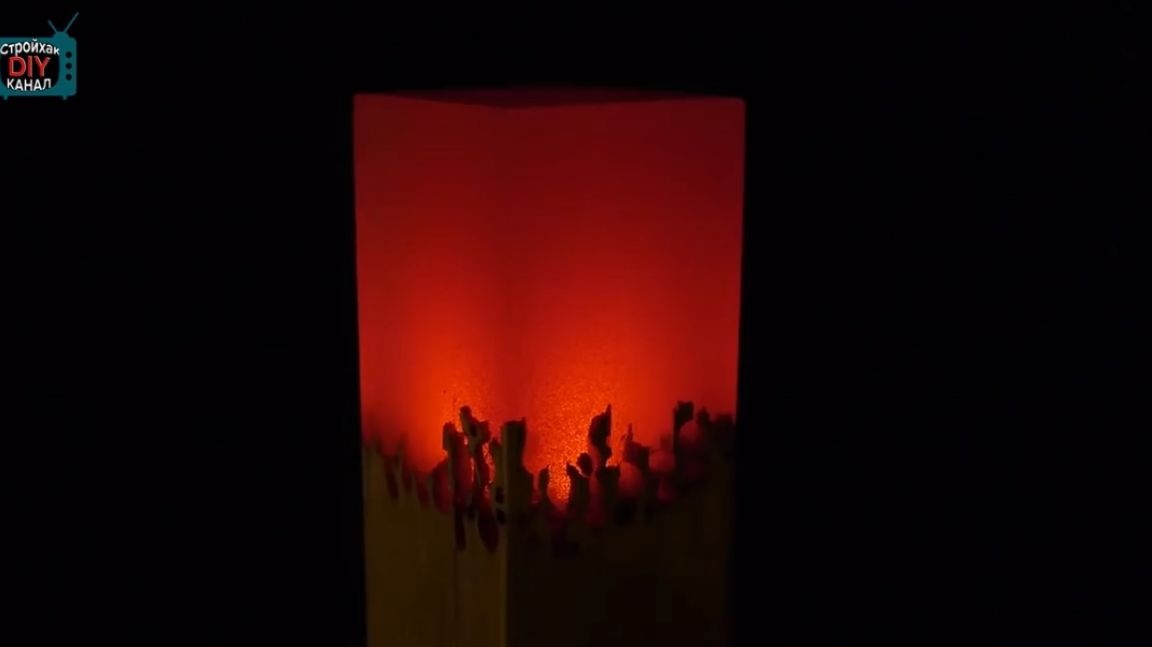
The final stage. The assembled electrical part is fixed by the master inside.
See you soon!