

And so, for the stun gun we need
-corrugated cardboard
-spring
-high-voltage module (you can buy)
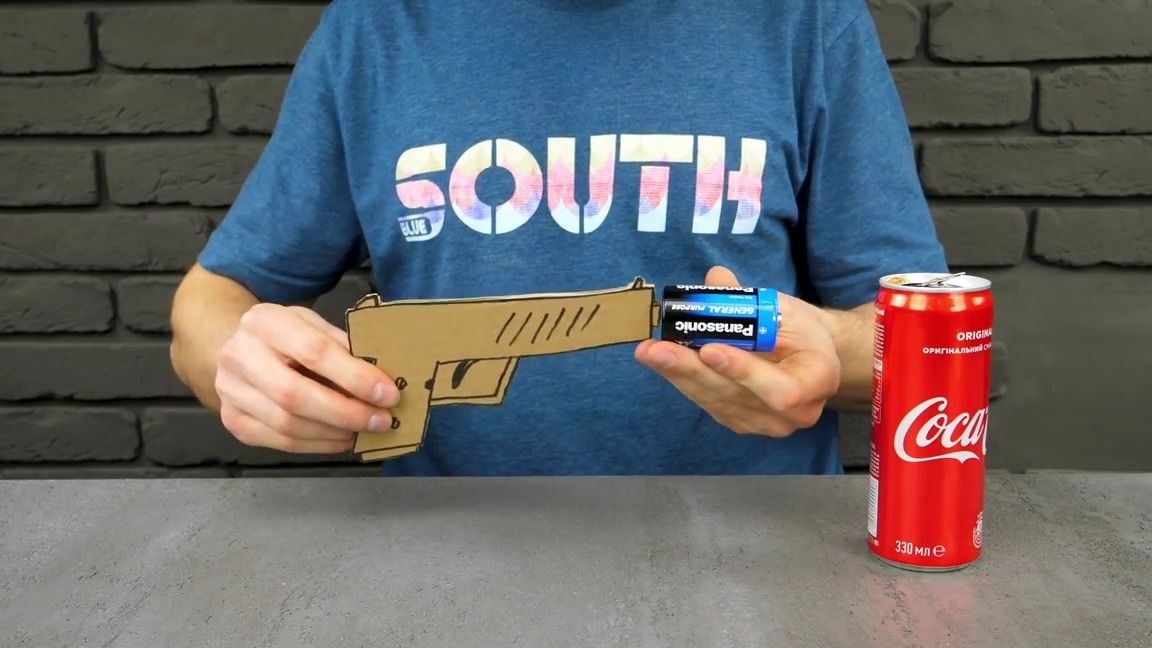
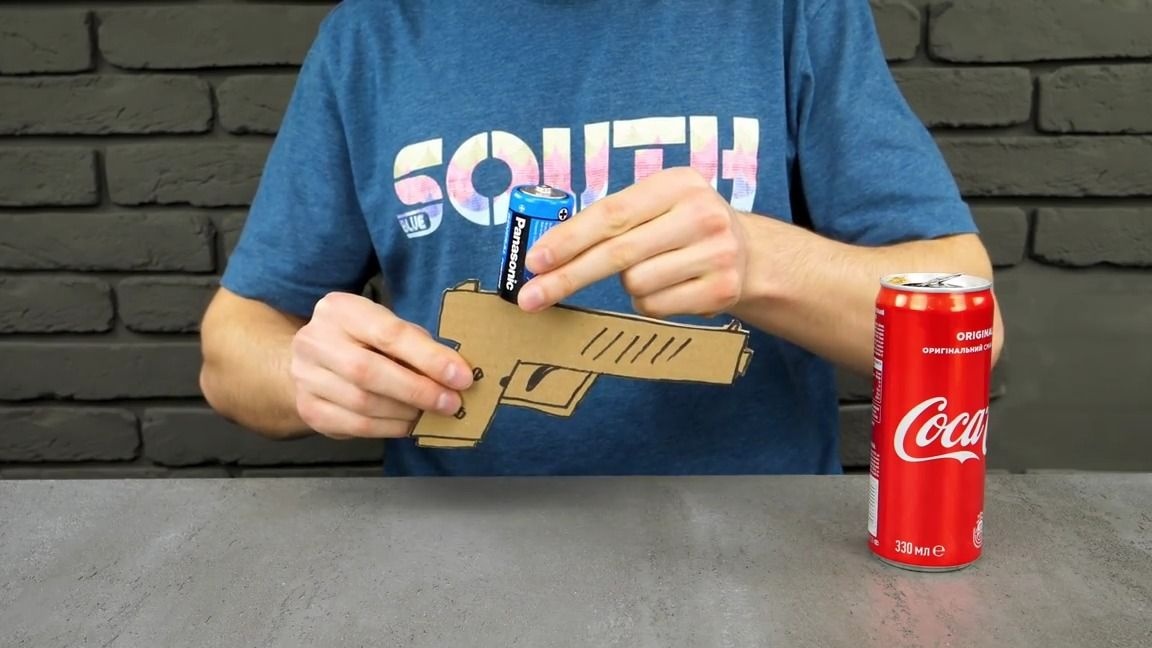
- a power source (the author uses a battery of type 18650, but I would not recommend using it for such modules, as practice has shown that the winding of the module does not withstand such current, it is better to use finger batteries)
metal rod
wire
-switch without latch
- two syringes
ice cream sticks
barbecue skewers
-wooden block
office gum
heat shrink
-paint
Of the tools we will also need:
-stationery knife
- brush
-mini electric drill or screwdriver
nippers
thermal glue
soldering iron
-pencil
-scissors
CAUTION! HIGH VOLTAGE!
Before starting production, I would like to say that this homemade product uses high voltage, which can be dangerous to life or health!

We proceed to the manufacture of:
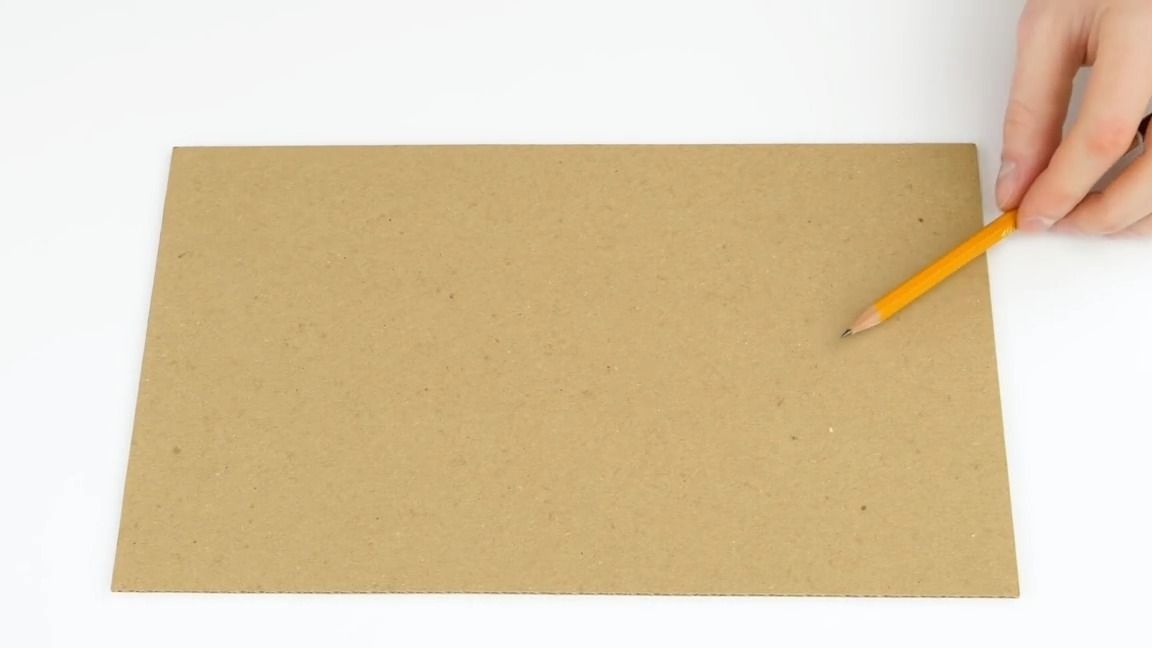
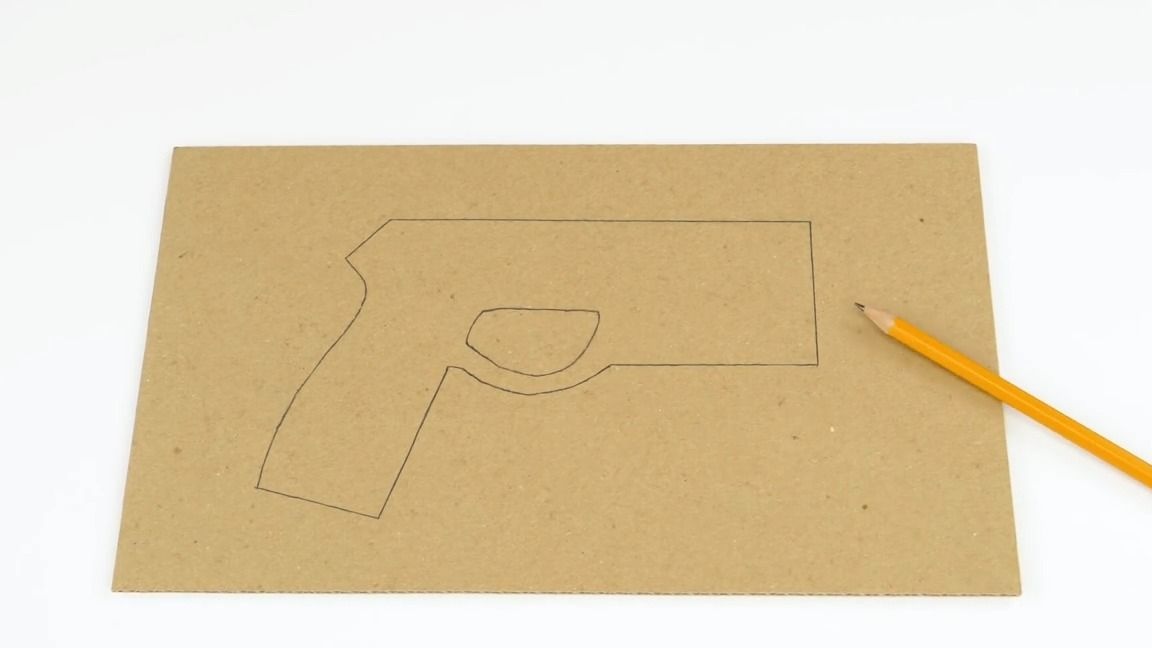
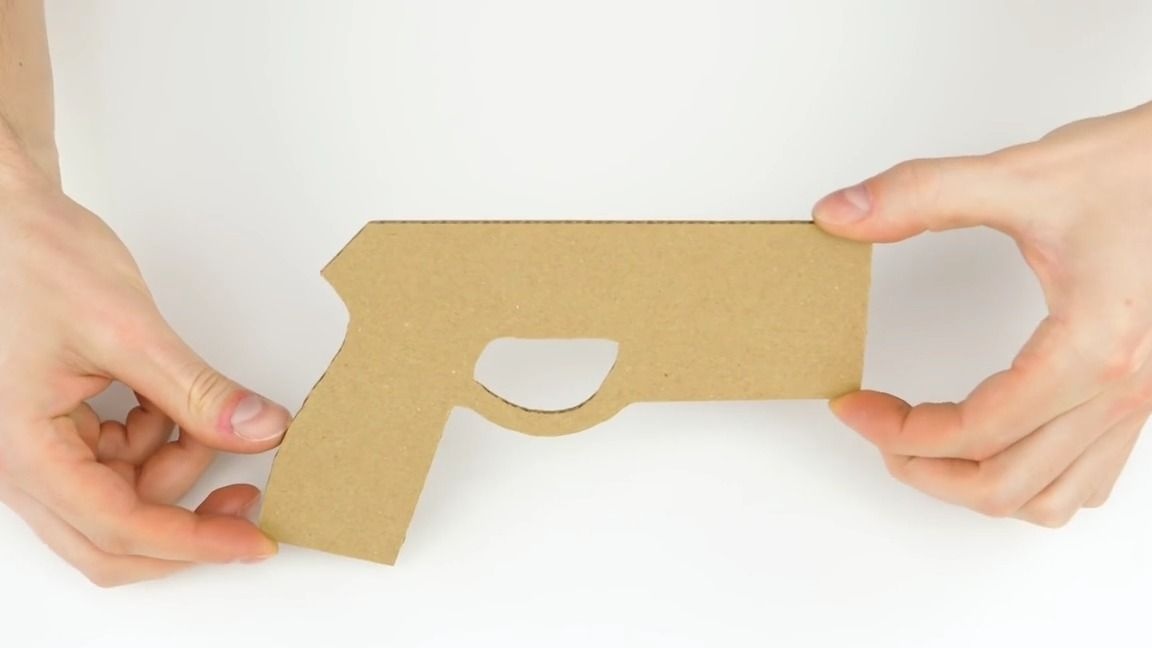
To begin with, it is necessary to draw the art of a future pistol on a sheet of corrugated cardboard, take a pencil and draw, it should turn out approximately as shown in the photo:
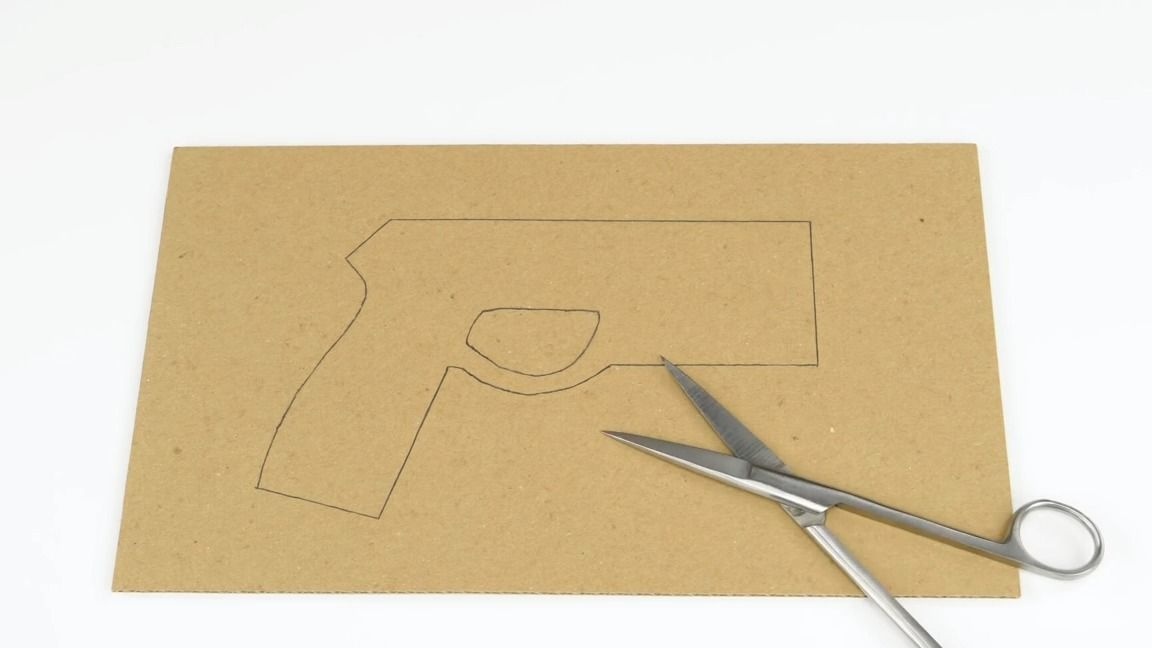
Cut out what we got:
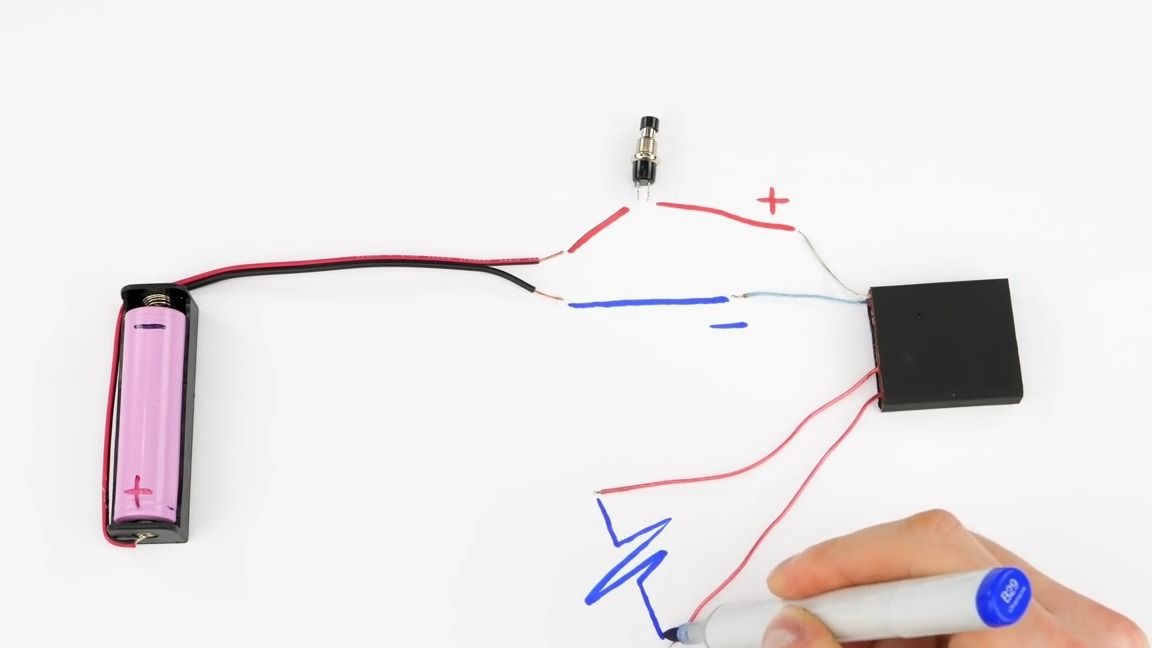
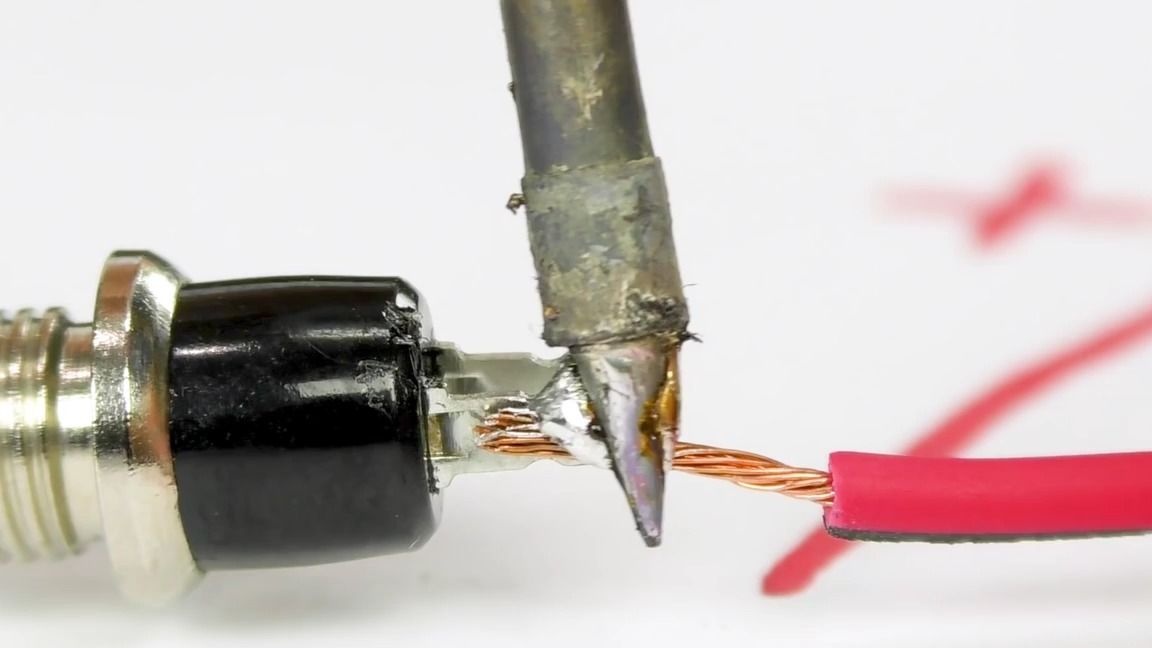
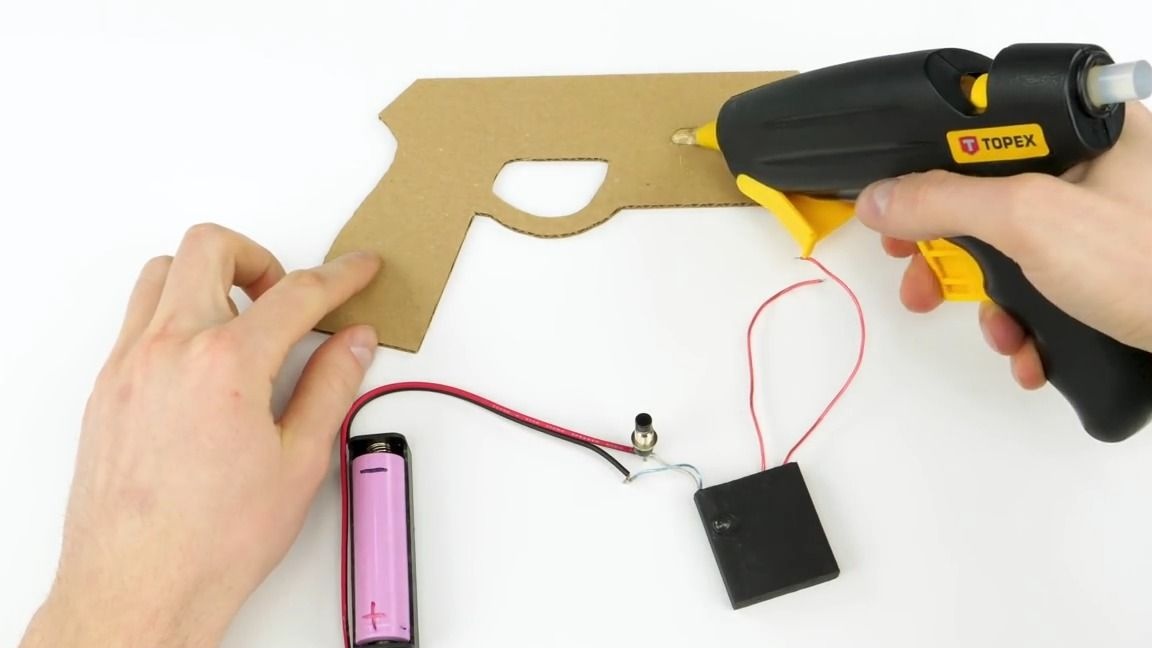
Now we need a 3-6 V power supply, a switch without a latch, wires and a high-voltage module. From it is necessary to solder as shown in the photo, preferably isolating the soldering places with electrical tape or thermal shrinkage:

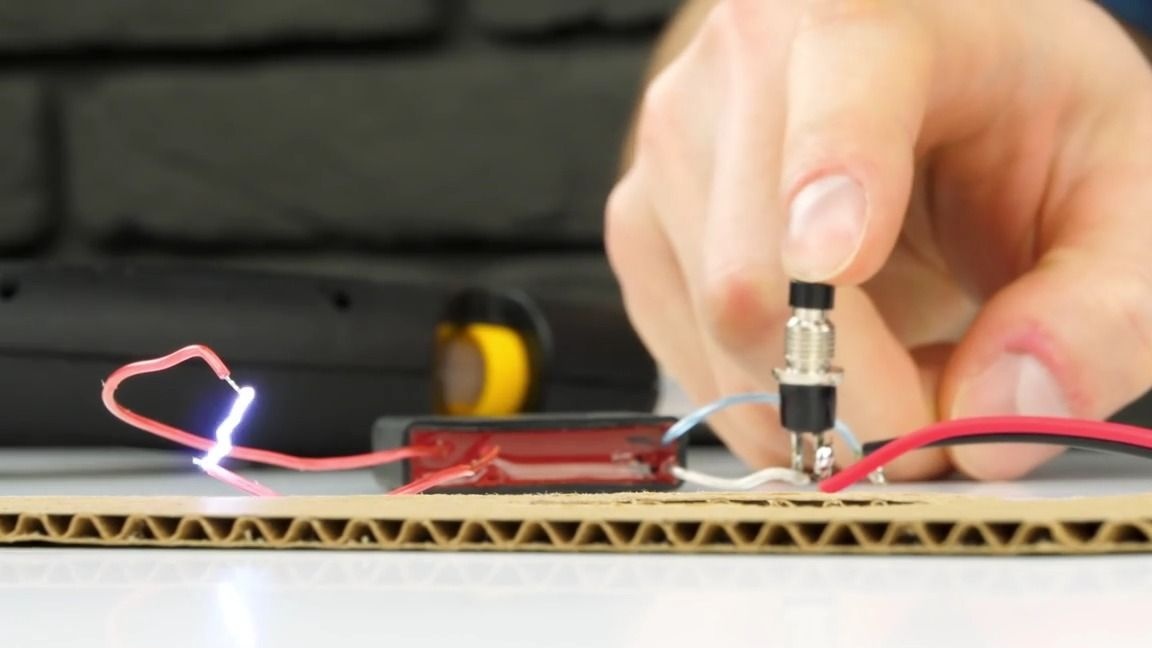
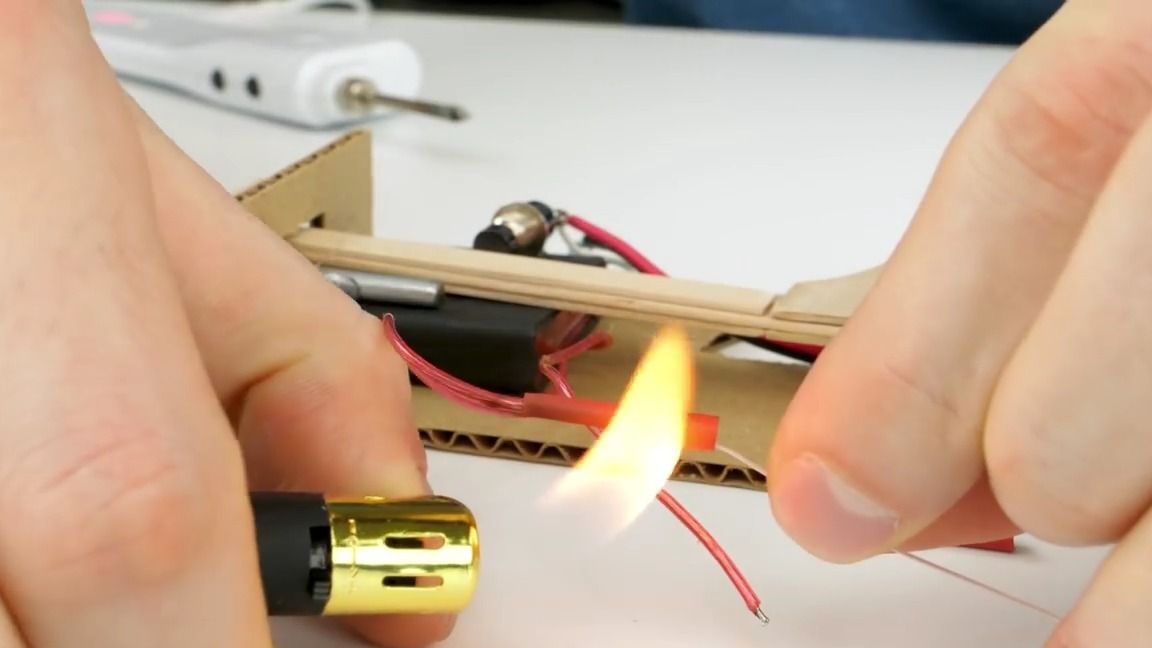
We test, at the output of the module a powerful spark should slip:
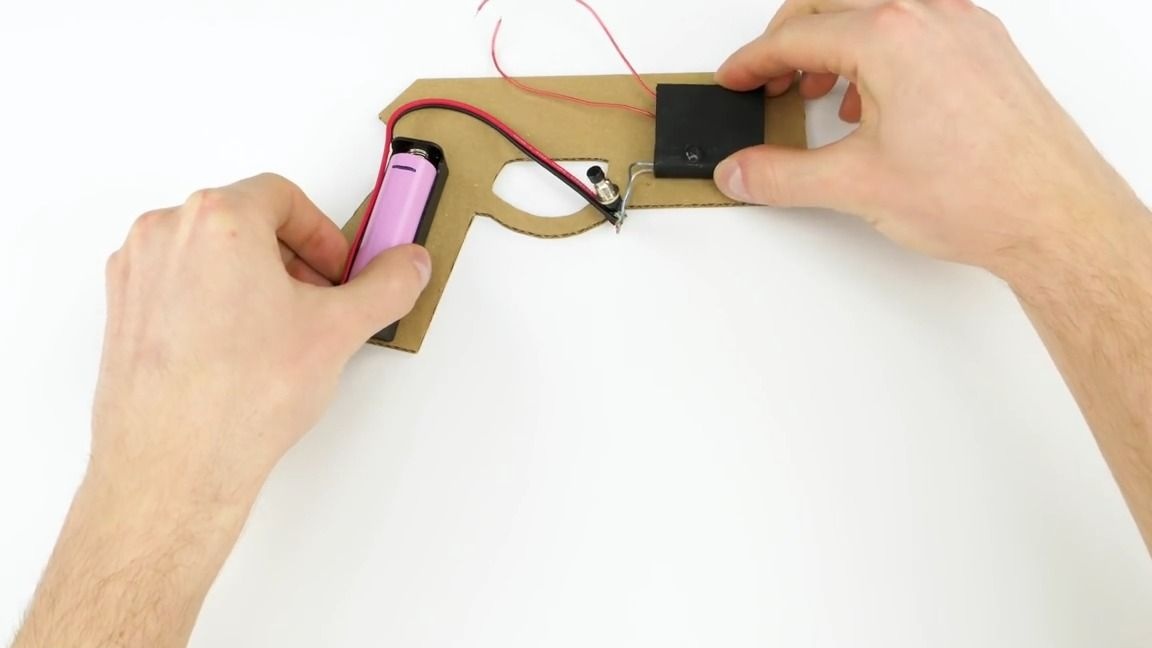
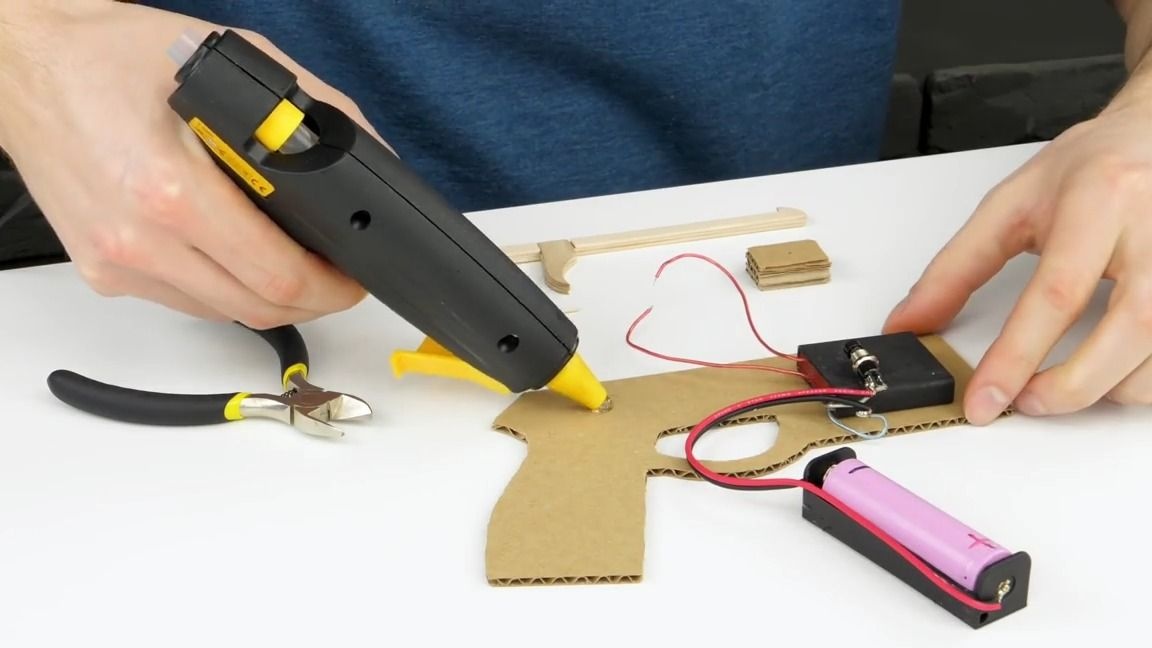
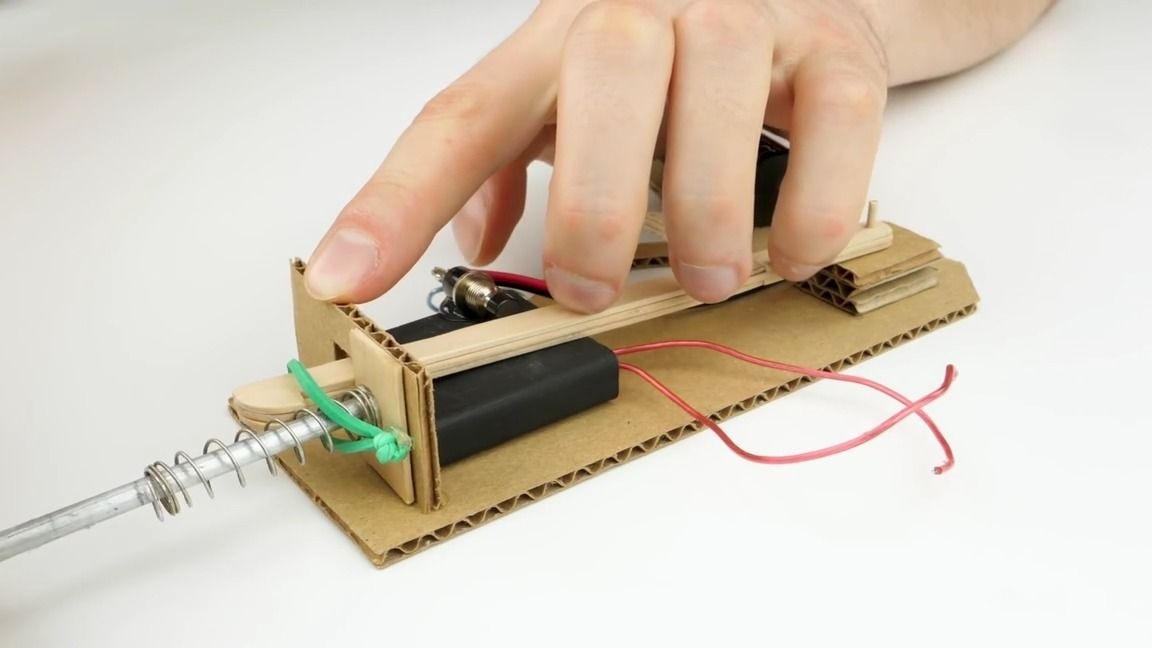
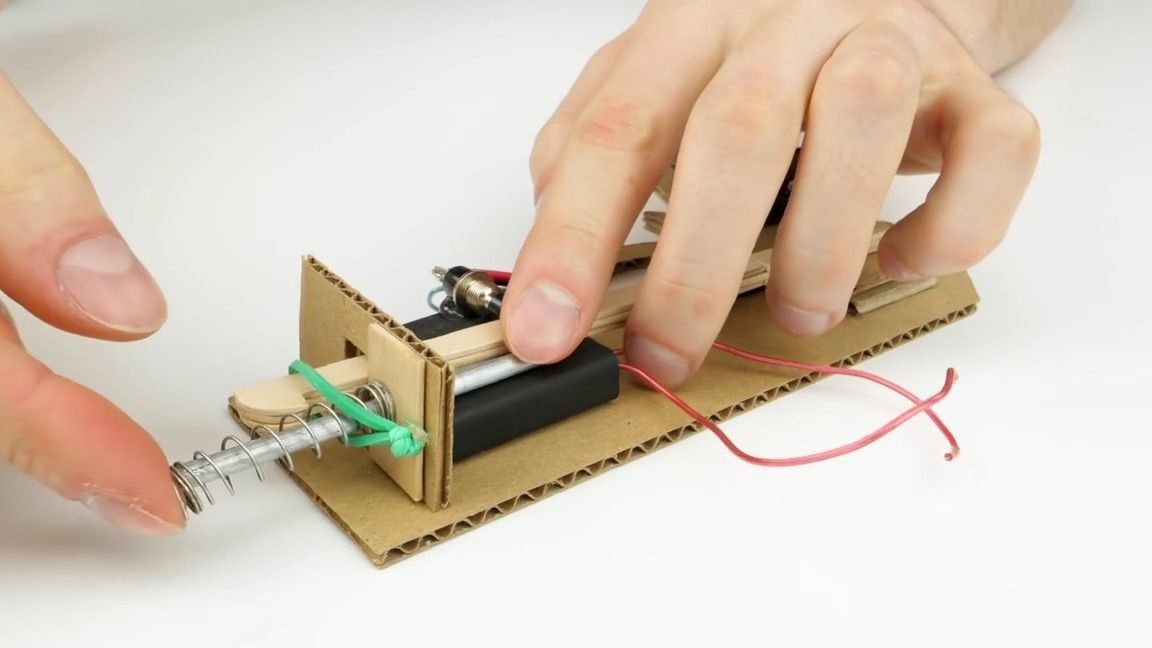
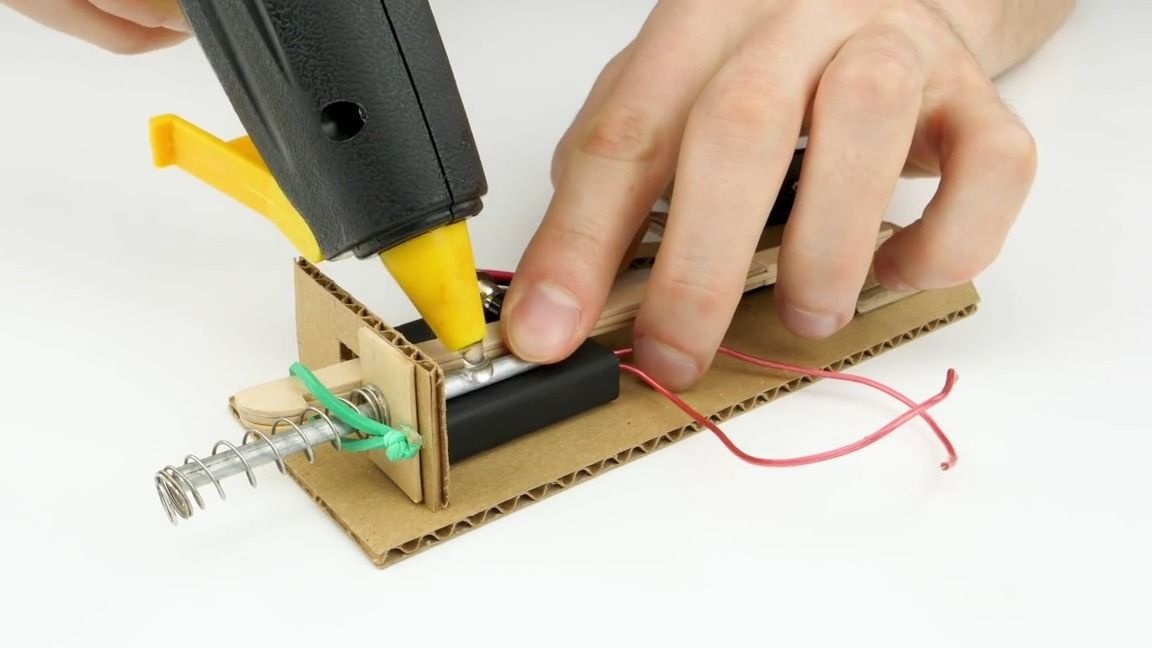
First we put a little hot glue on the high-voltage module, then on the cardboard blank and glue them together as shown in the photo, we simply install the power source in the place of the “store” but do not glue it:
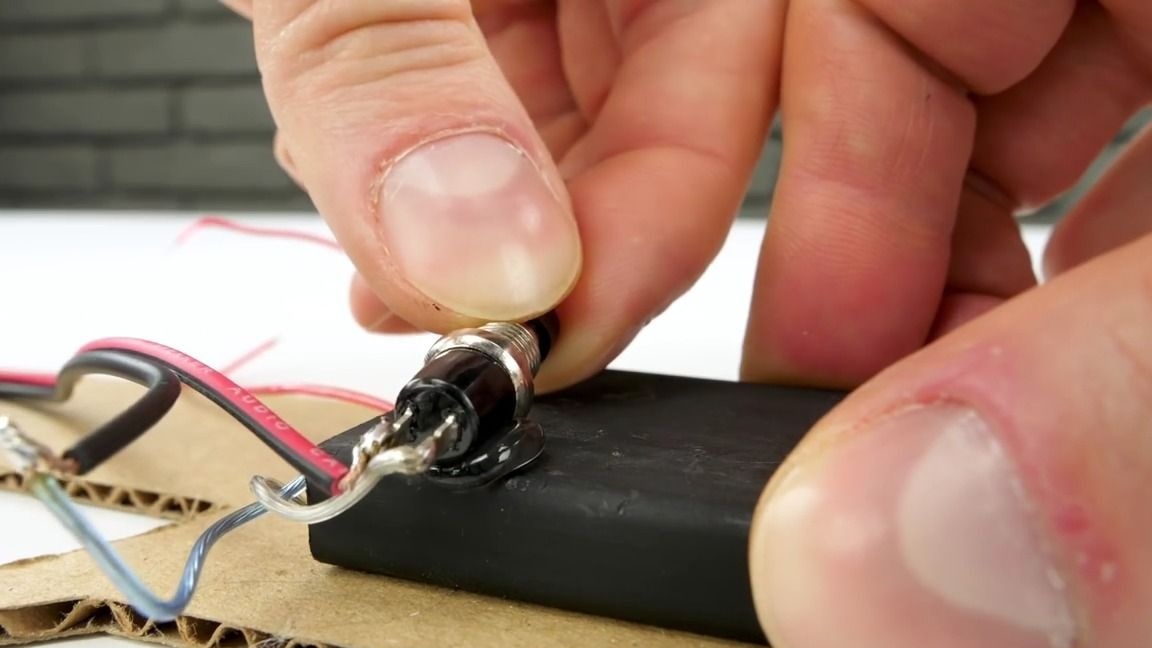
Glue the button on the high-voltage module as follows:
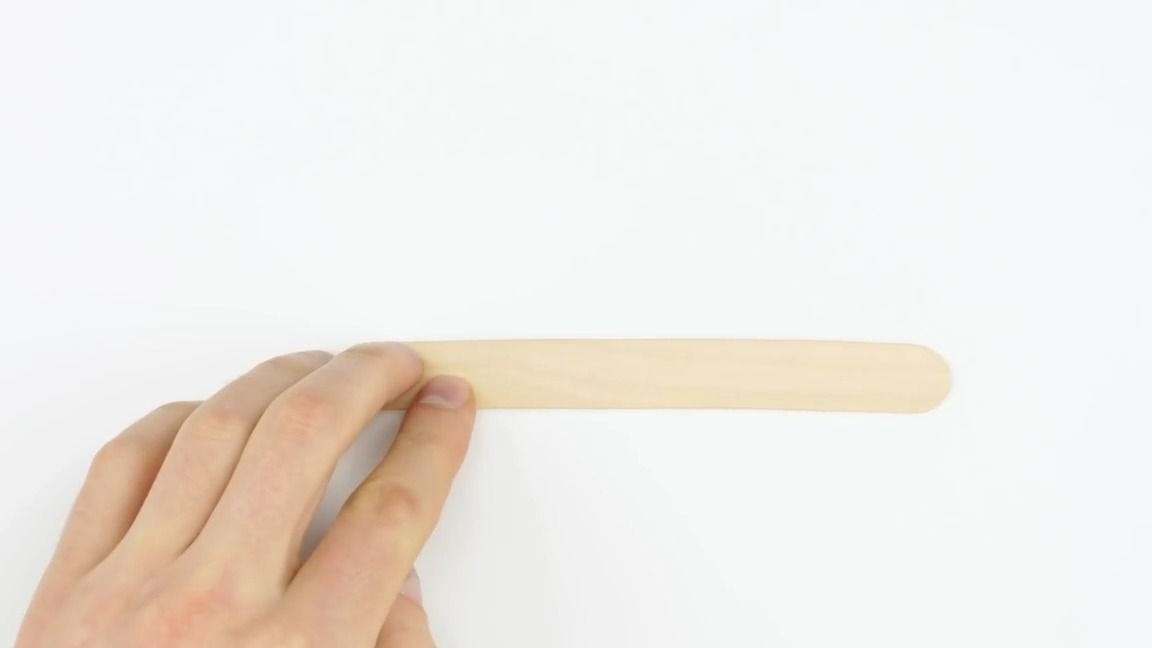
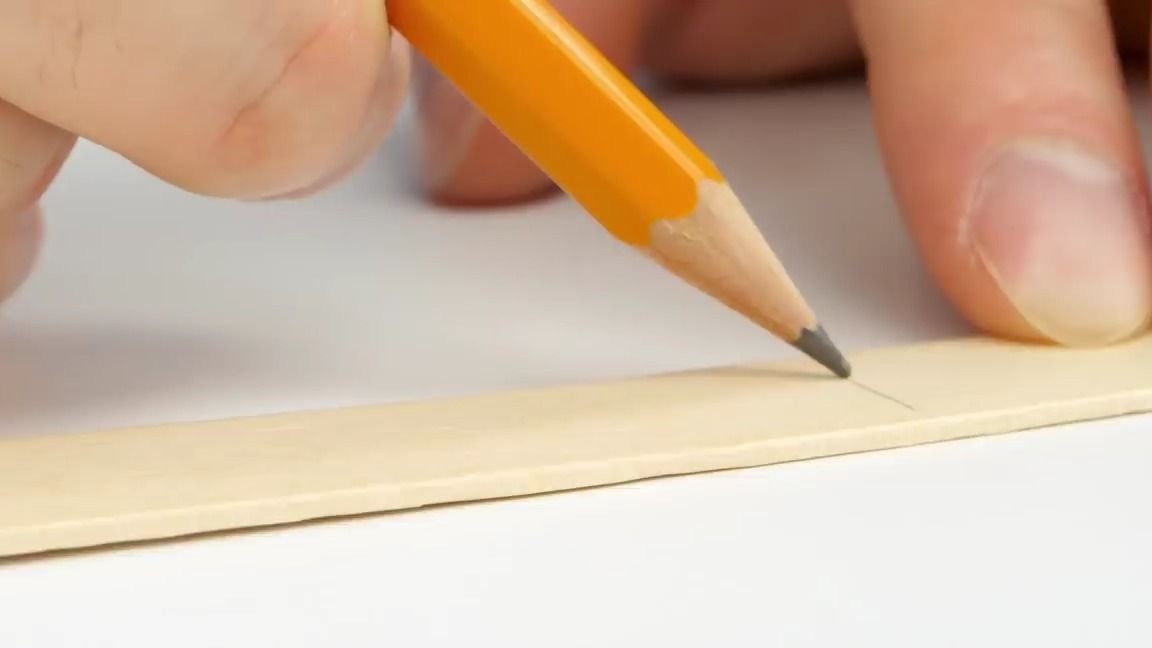
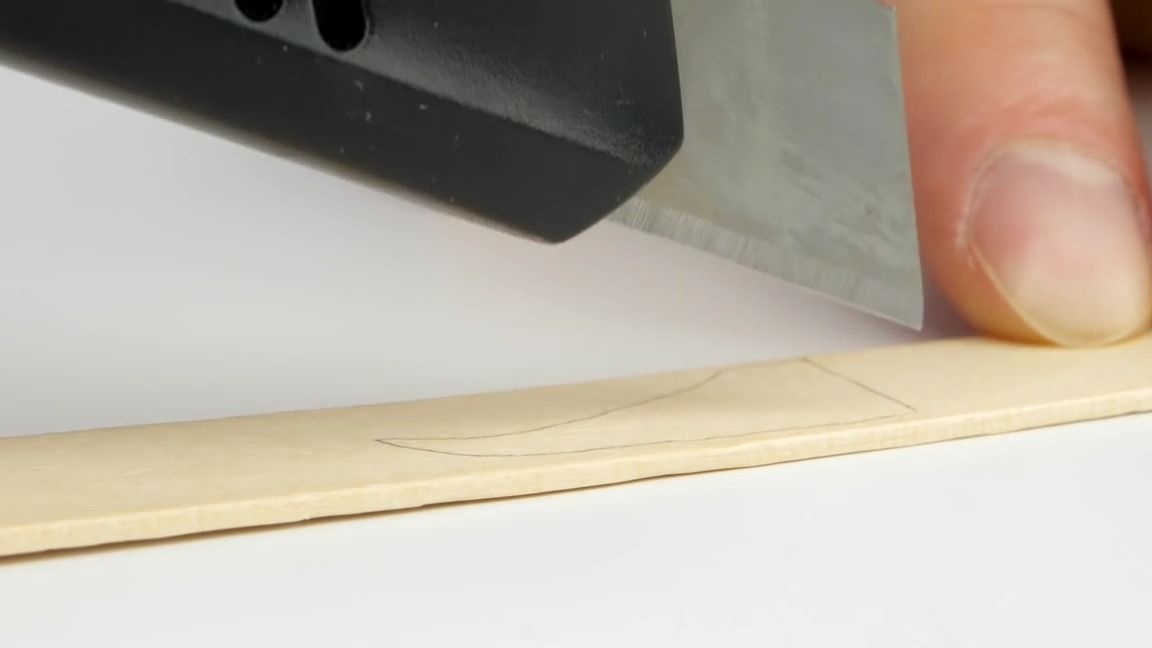
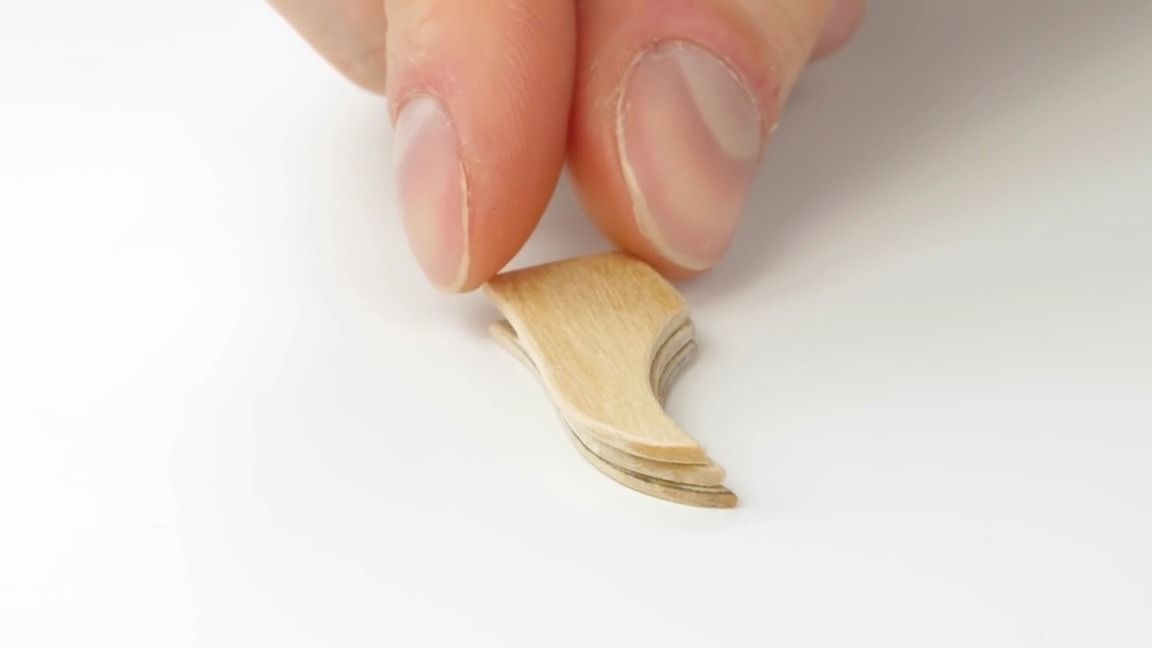
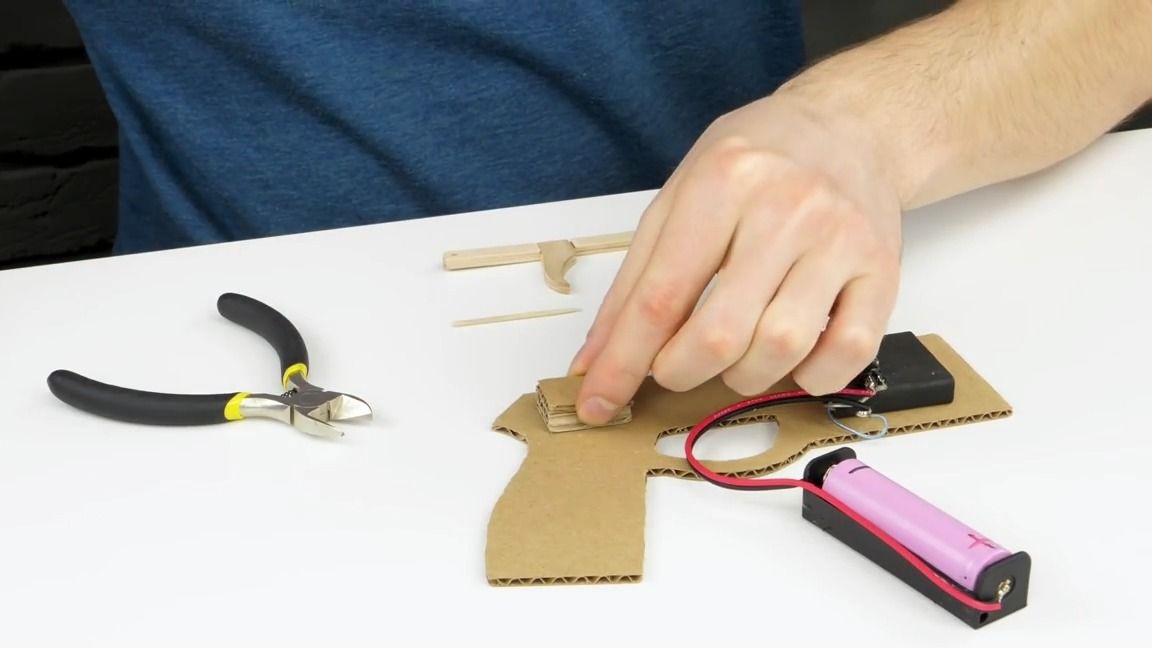
Take a wooden spatula and use a pencil to draw a figure that looks like a trigger on it, then cut it out.In total, we will need 3 such details, but it is very important that one of them is a little shorter.
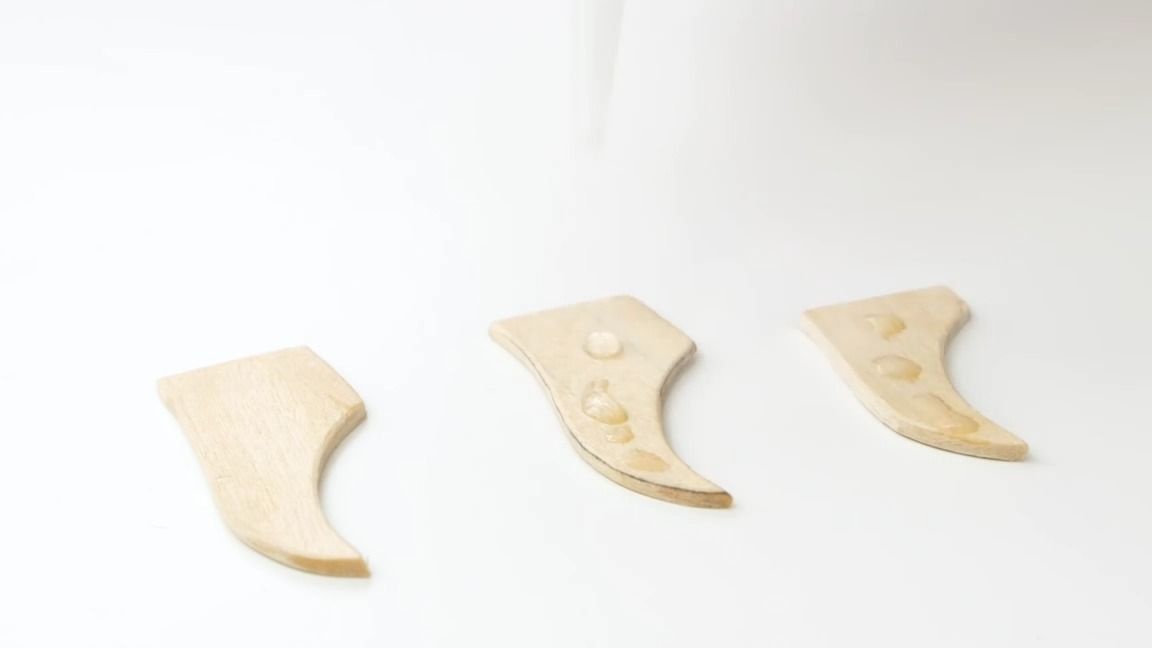
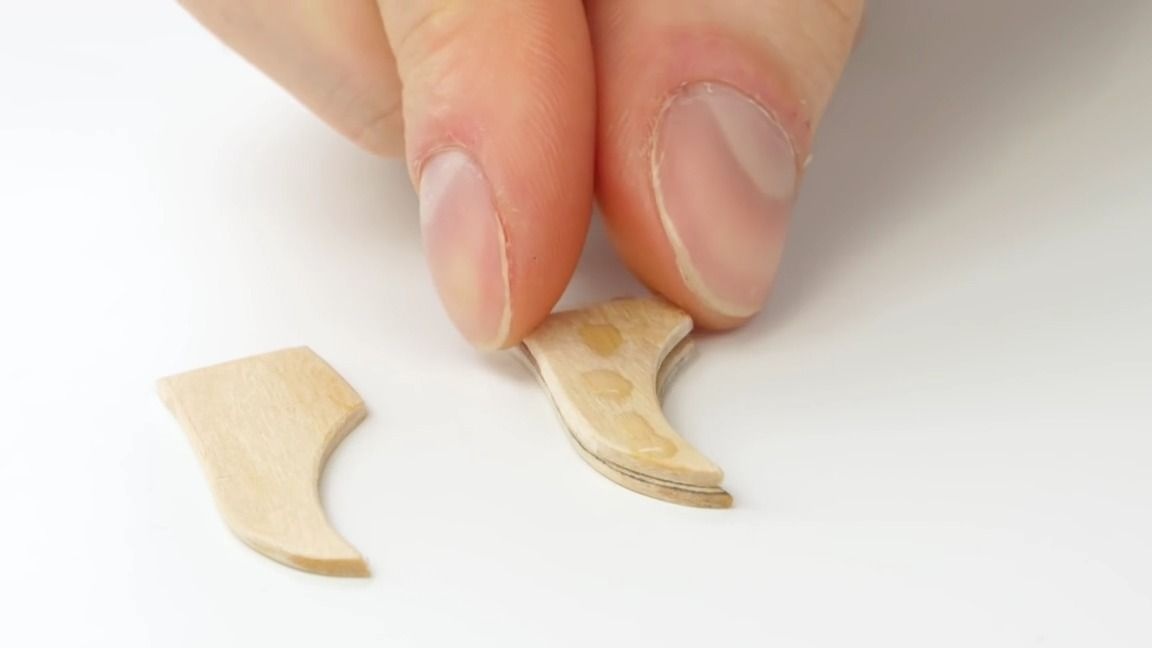
Now they need to be glued together as follows using super glue (the part that is shorter must be placed in the center of this workpiece):

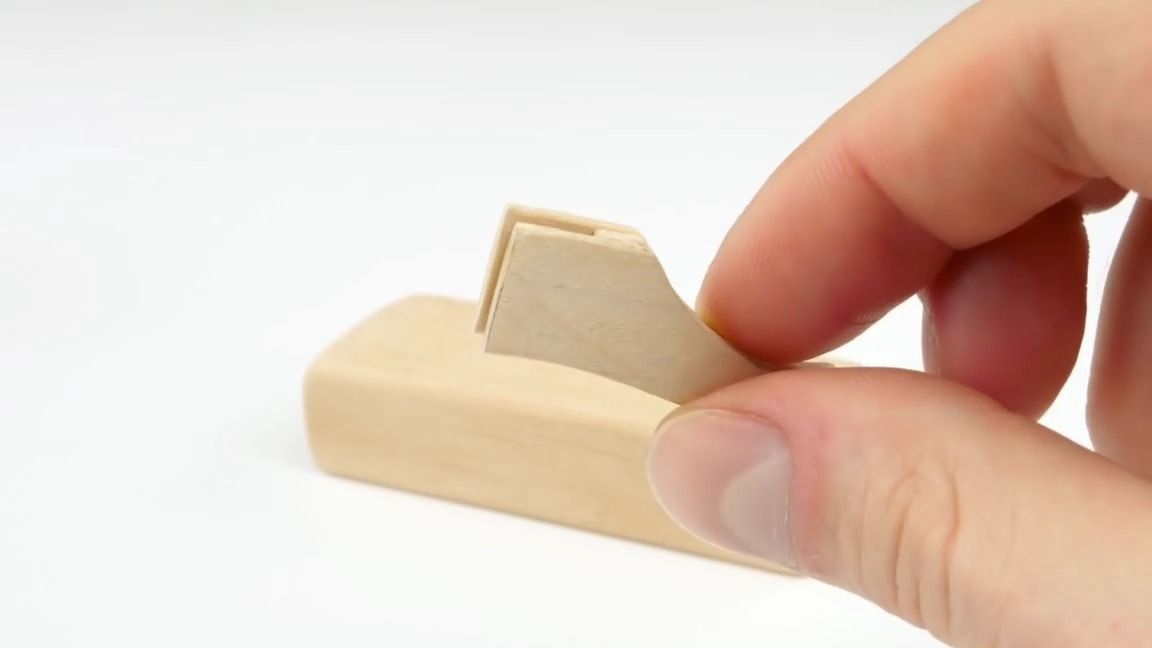
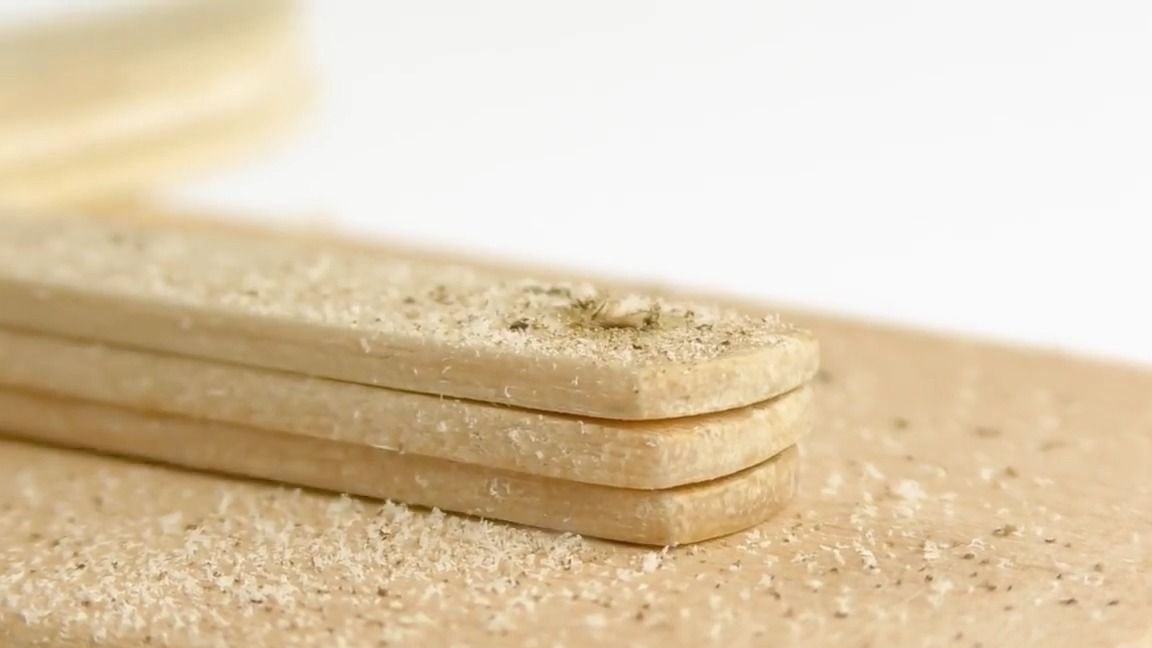
From the ice cream sticks we make another detail in the same way, there should be a groove under the hole of the previous workpiece. Connect them:
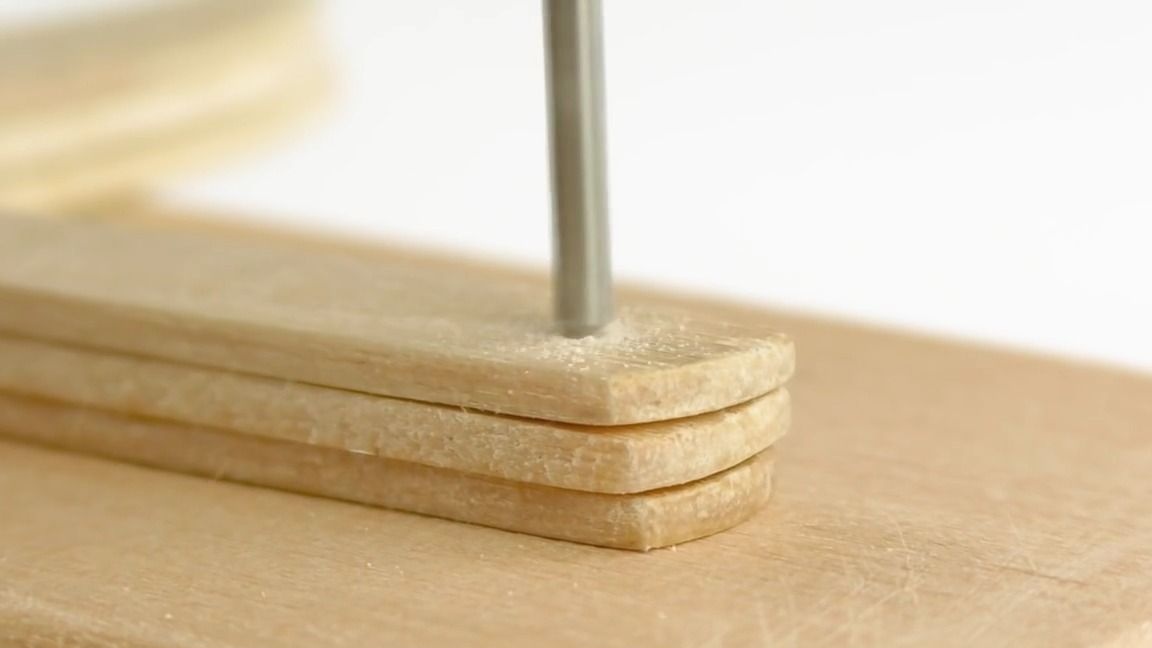
With a screwdriver or a mini drill, you need to make a small through hole at the end of the workpiece:
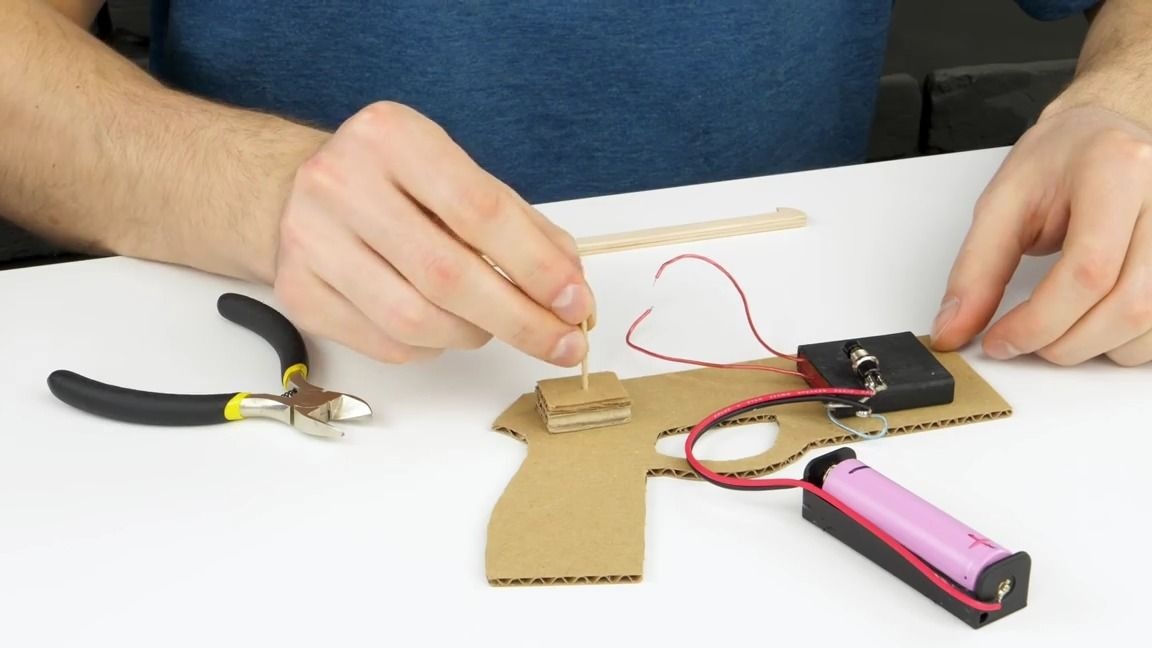
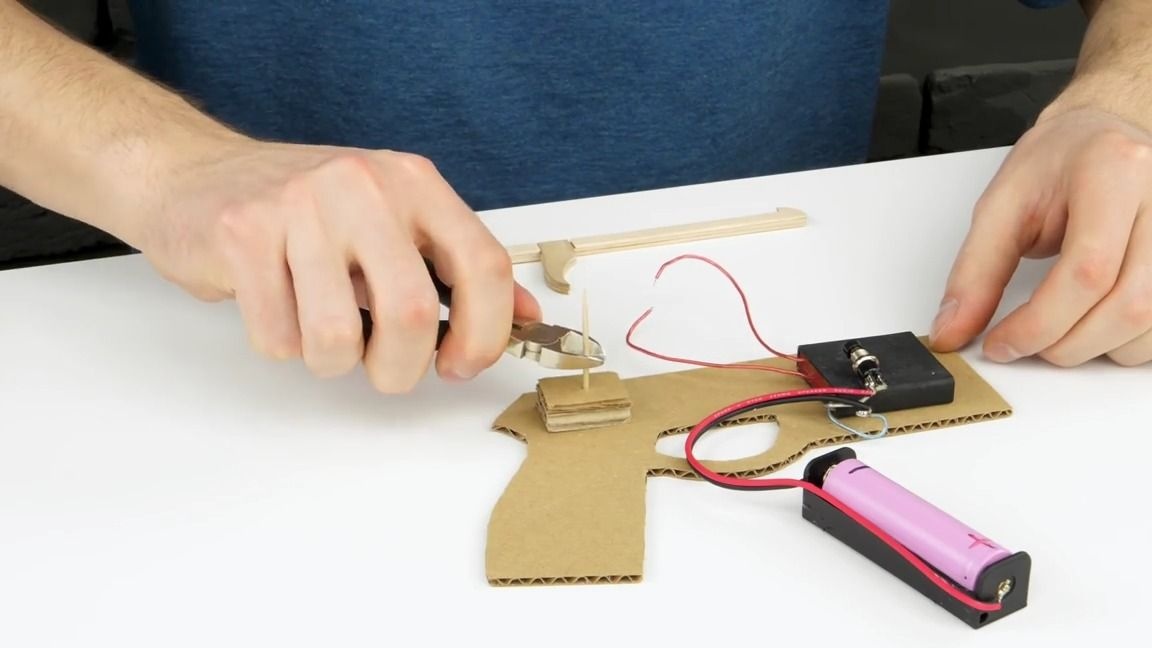
We put a little thermal glue on the junction of the “store” and the “barrel” of the gun and glue there a small rectangle made of several layers of corrugated cardboard, then we put a barbecue skewer in its center, or a toothpick and bite off with the help of cutters:
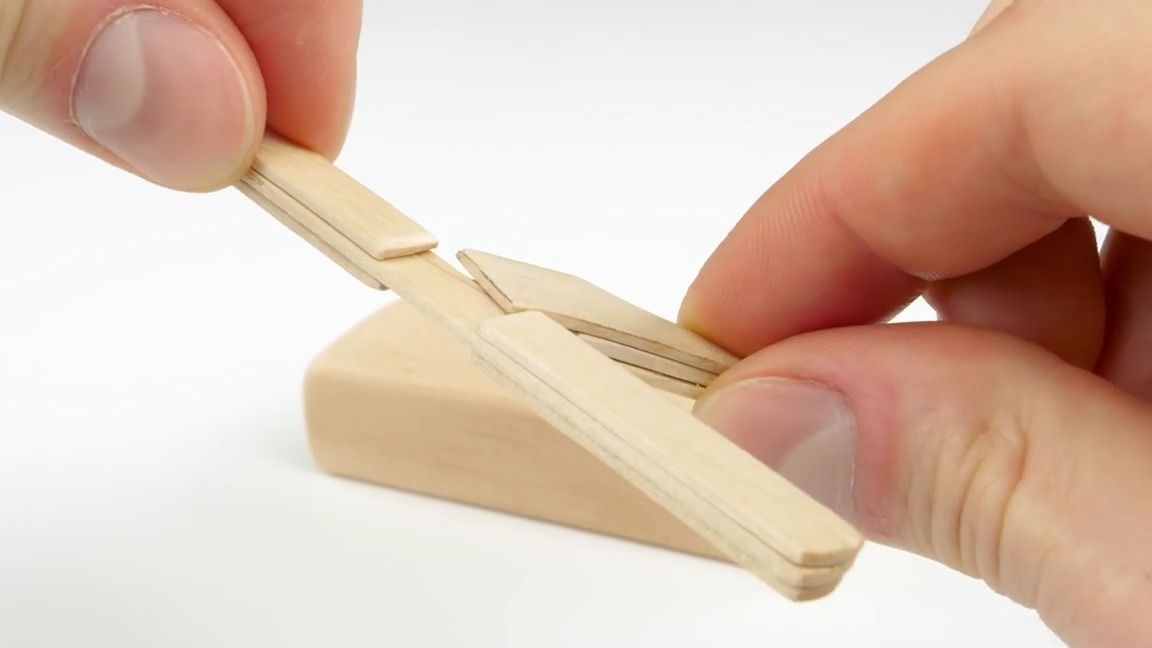
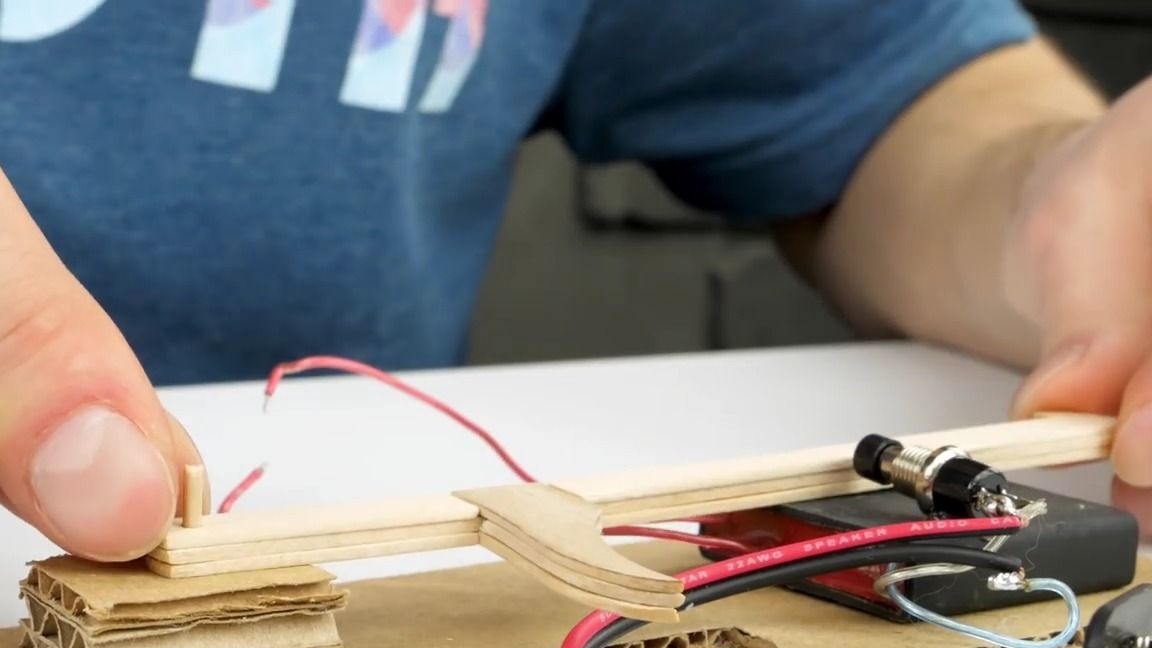
Now you need to install the trigger.
We put the trigger on the segment of the skewer, threading the skewer through the previously made hole. All this must be done in such a way that when you pull the trigger, the trigger pulls the button and a spark jumps between the output terminals of the high-voltage module (be careful, remove the output wires in advance, or disconnect the circuit from the power supply when assembling the structure) battery):

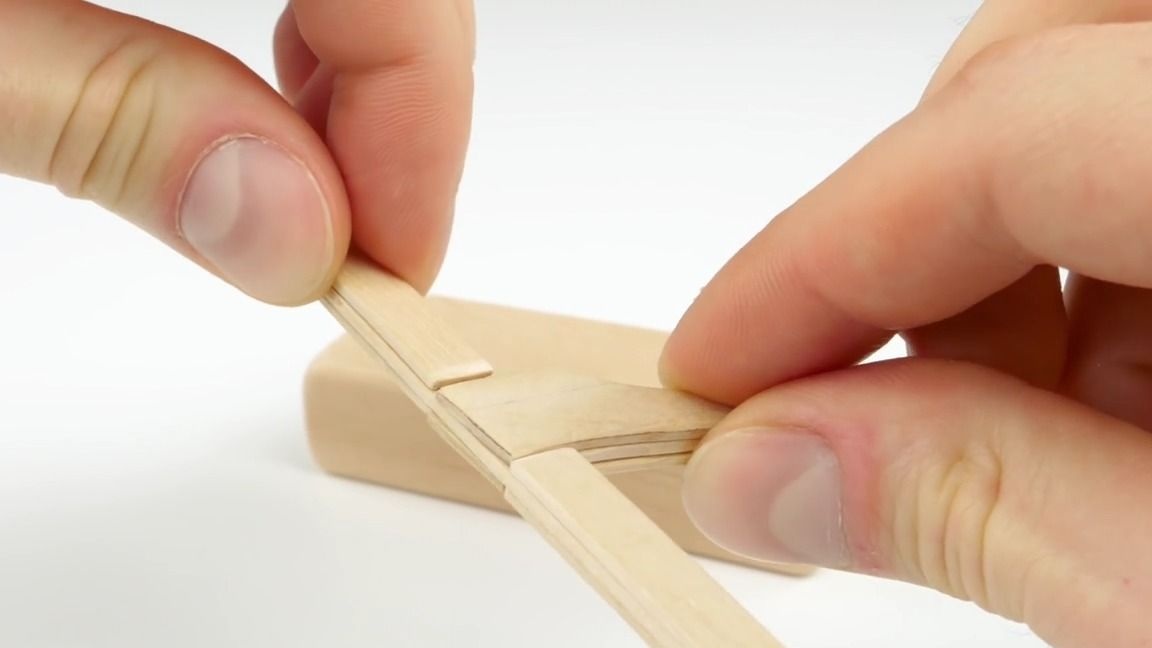
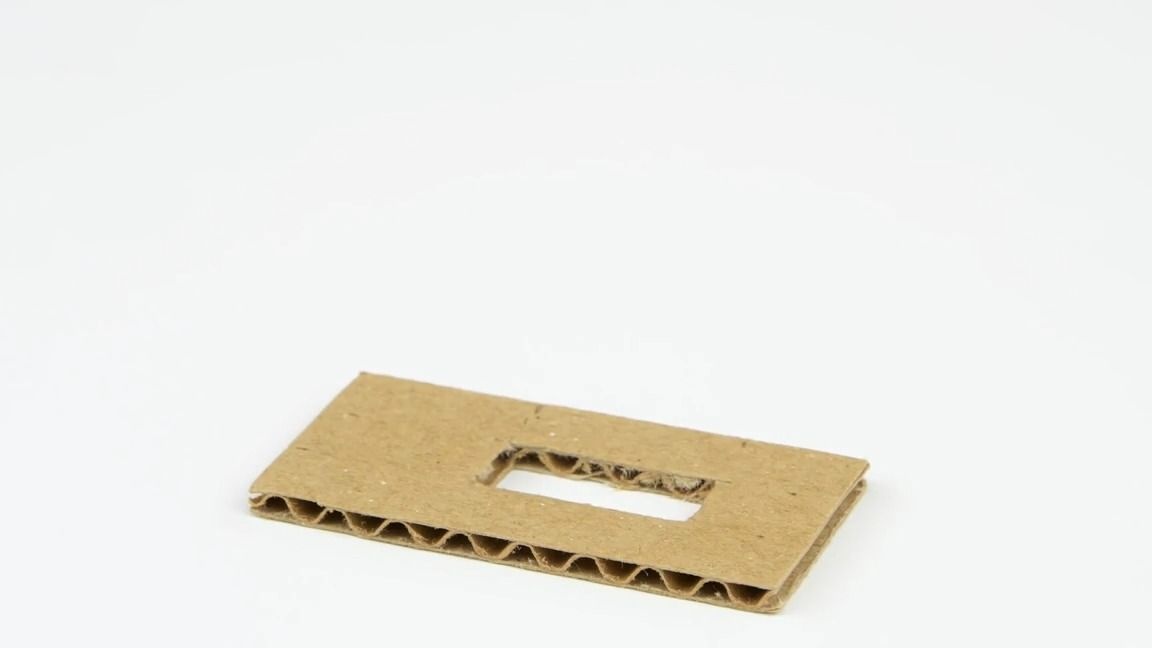
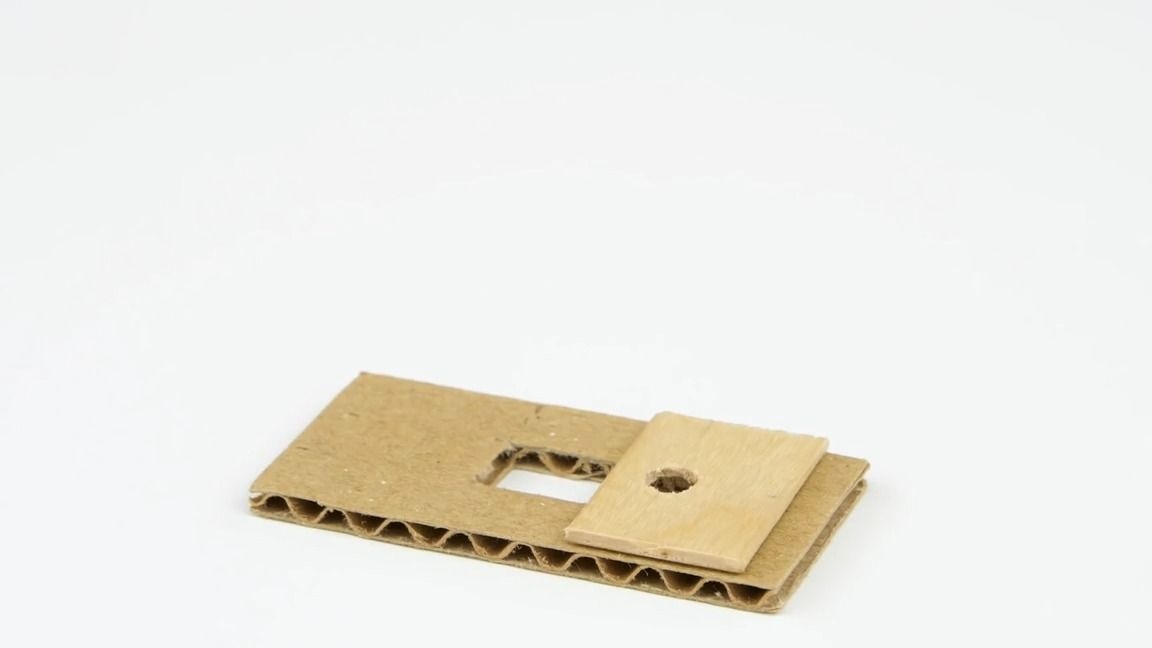
From the corrugated cardboard we cut out a small rectangle, after which we make a small rectangular hole in it:
We also cut a small piece from the spatula, glue it to the cardboard part and drill a hole in it as shown in the photo:
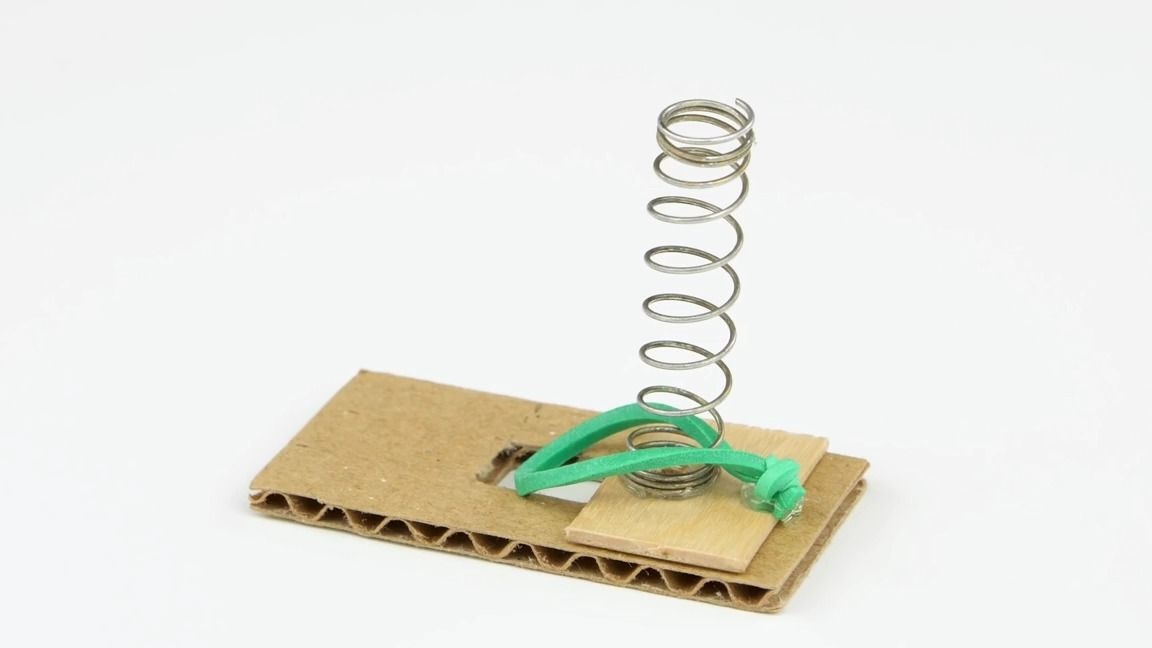
We take an ordinary spring and glue it to the workpiece in such a way that the hole enlightened in a piece of the spatula is in the middle of the spring diameter, after which we glue a small clerical gum:
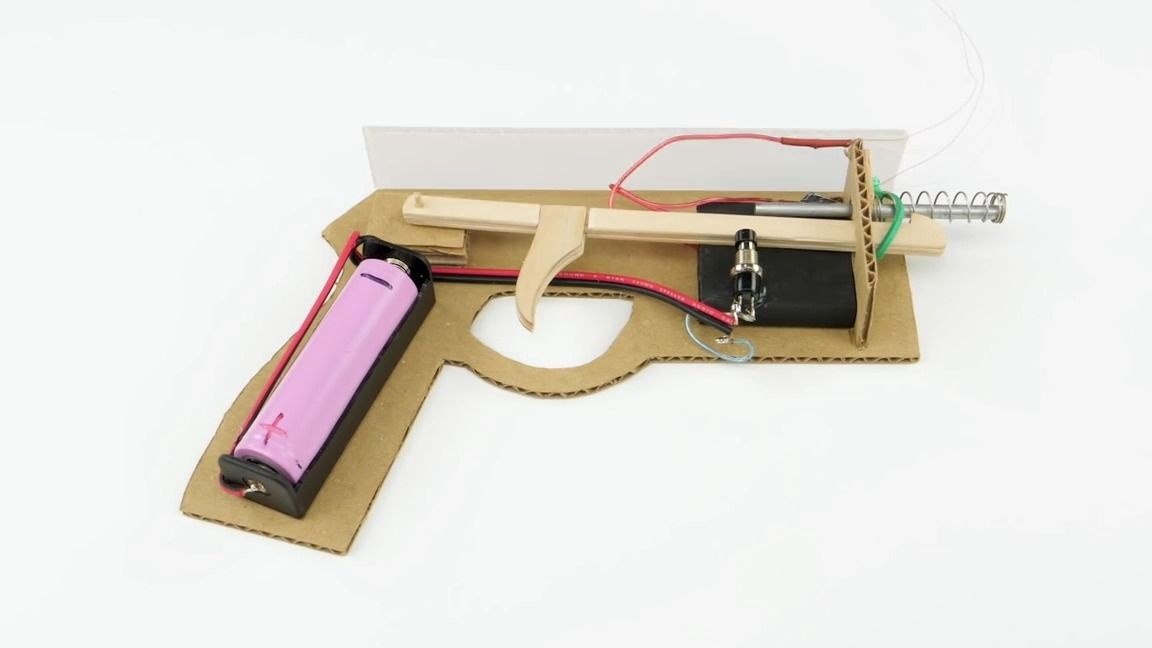
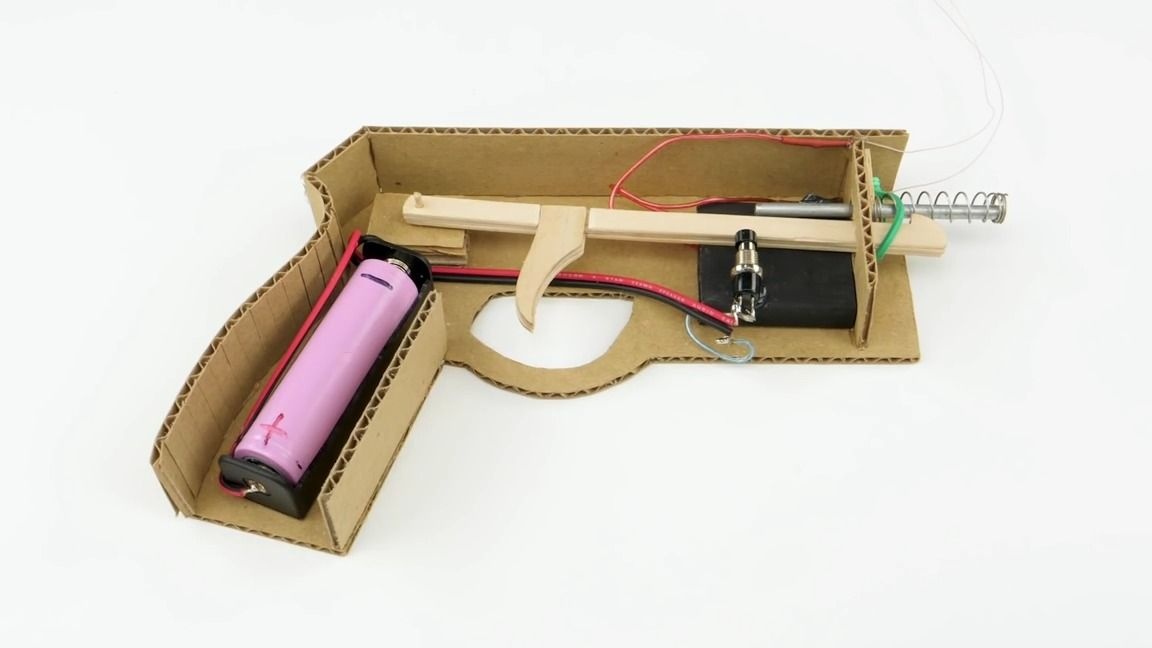
Now you need to install our blank on the structure. There is nothing particularly complicated here, so I won’t comment, it’s enough to just do everything as shown in the photo:
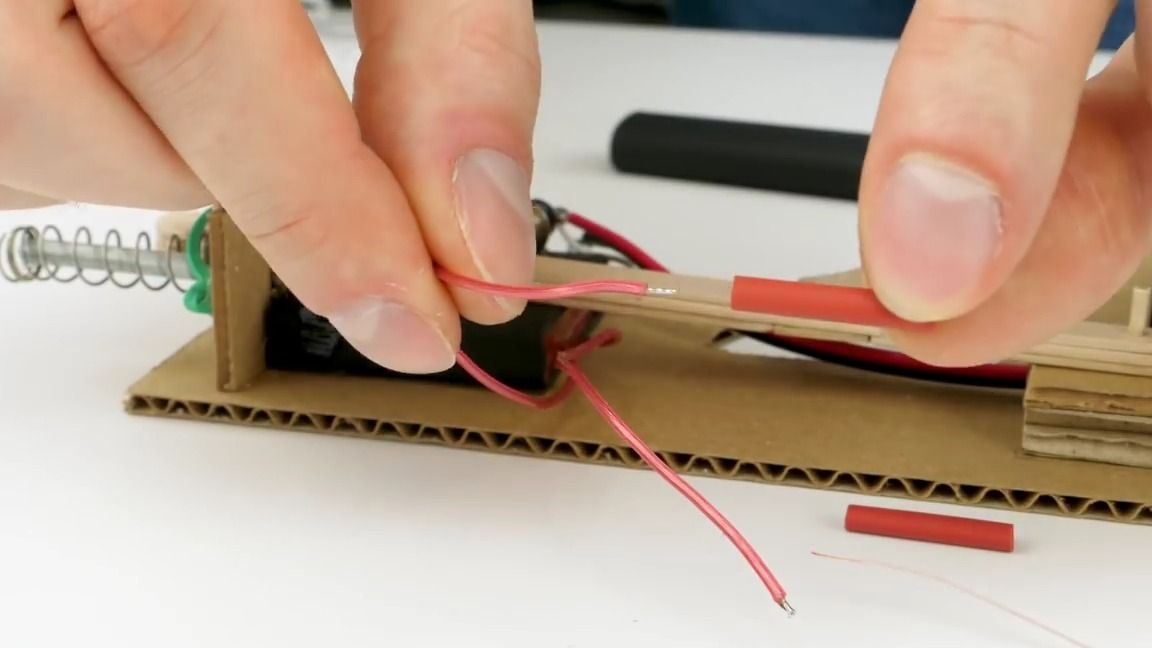
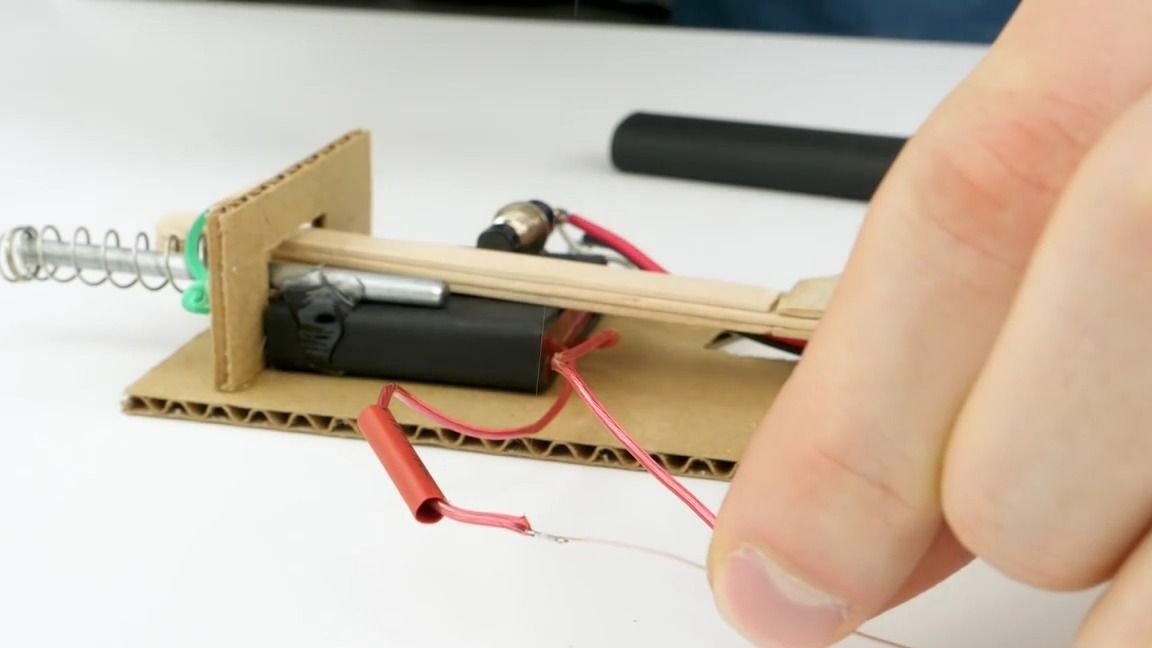
We take thermal shrinkage and put it on the output wires of the high-voltage transformer, then solder to each contact along a long thin wire and finally fix the thermal shrinkage, in principle, for reliability, you can rewind with tape or electrical tape:
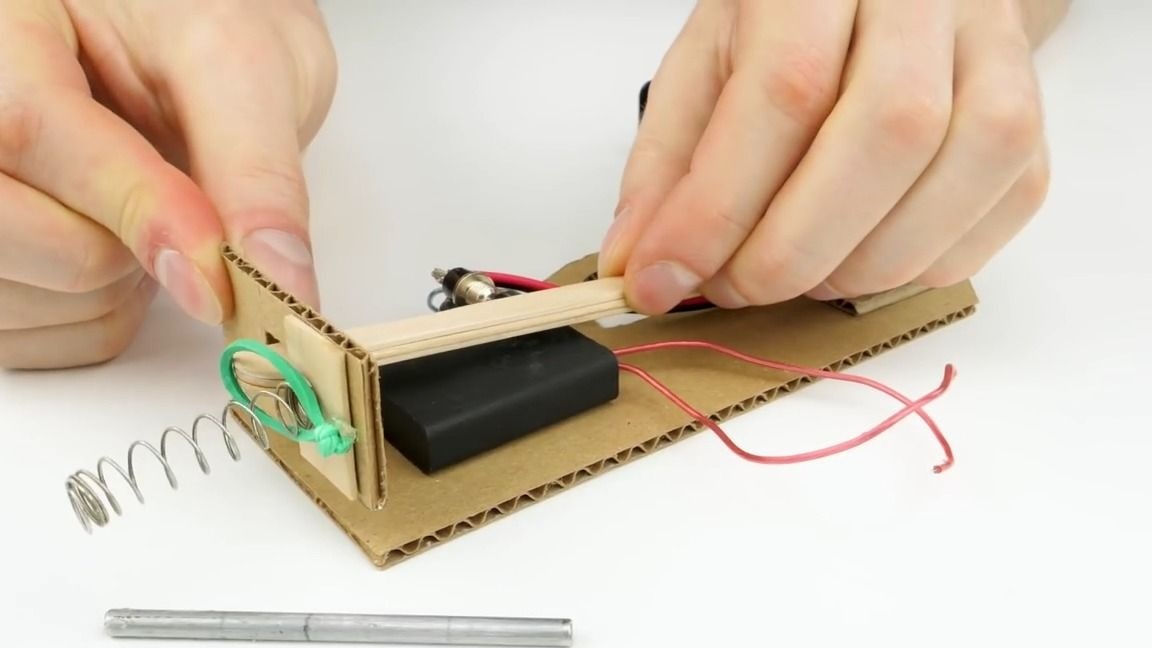
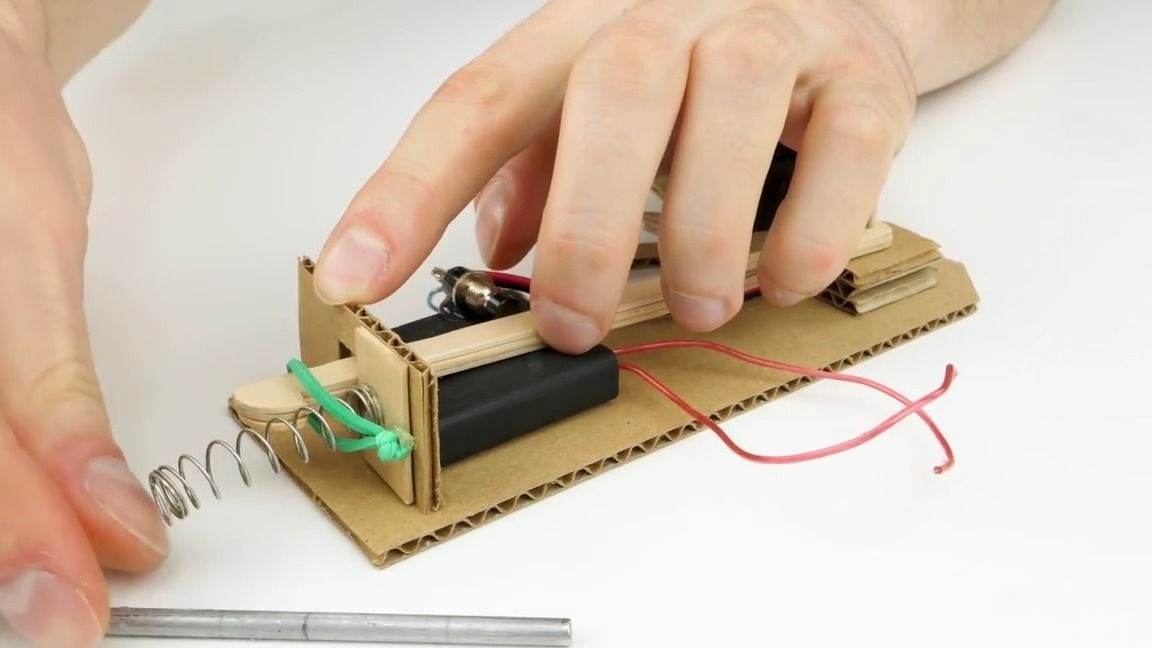
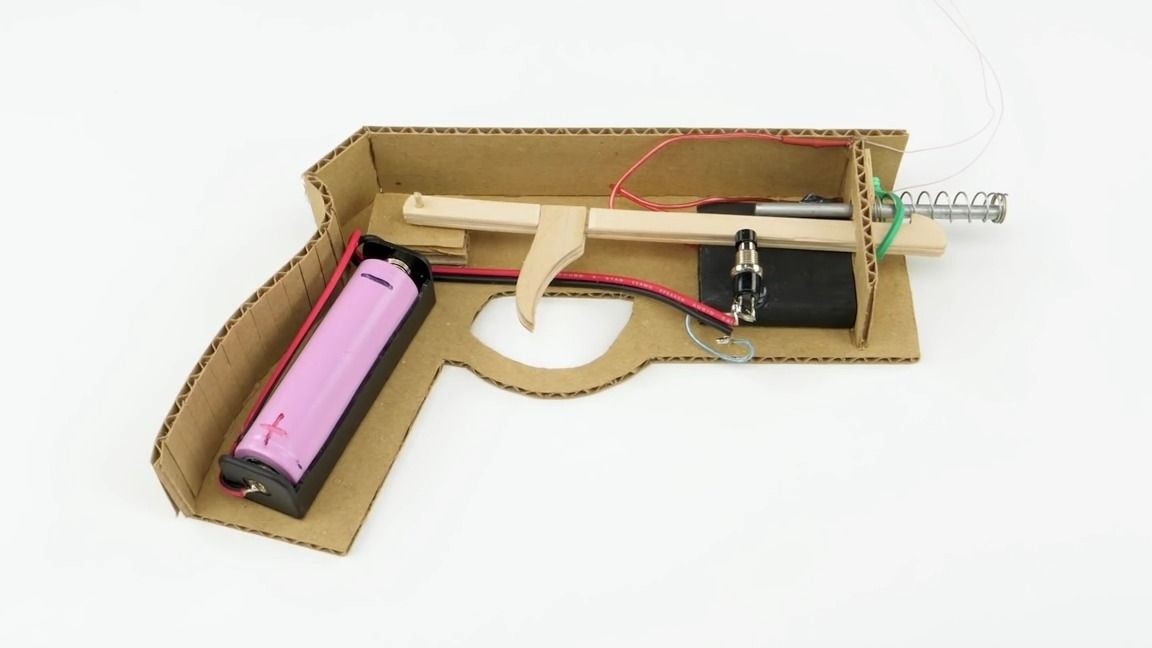
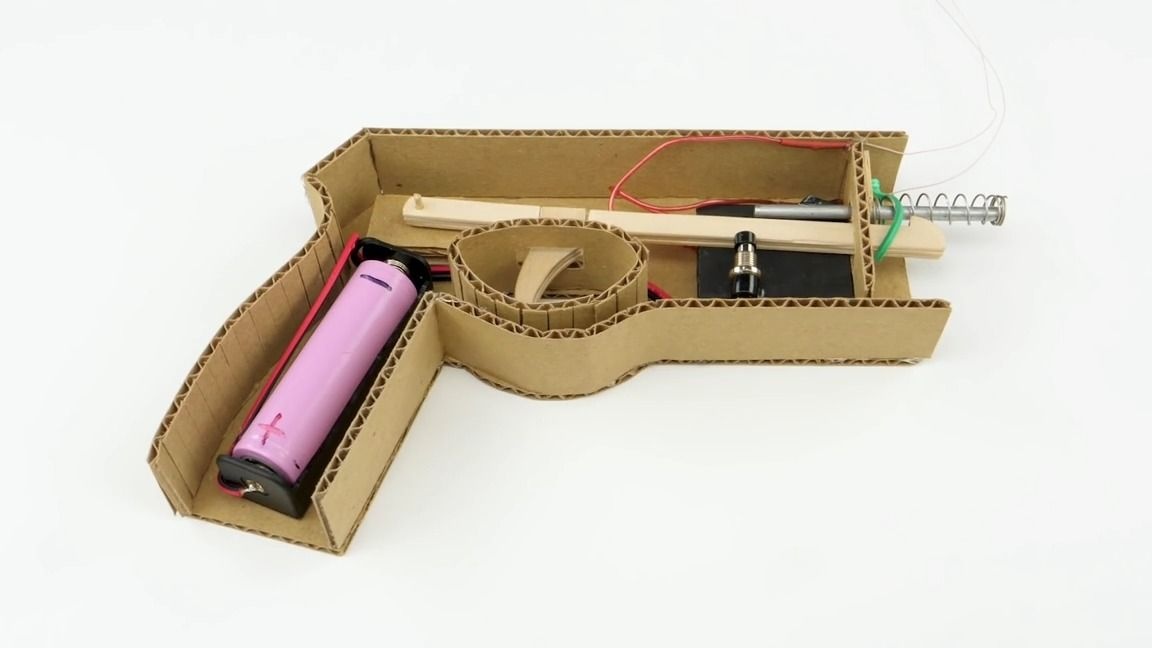
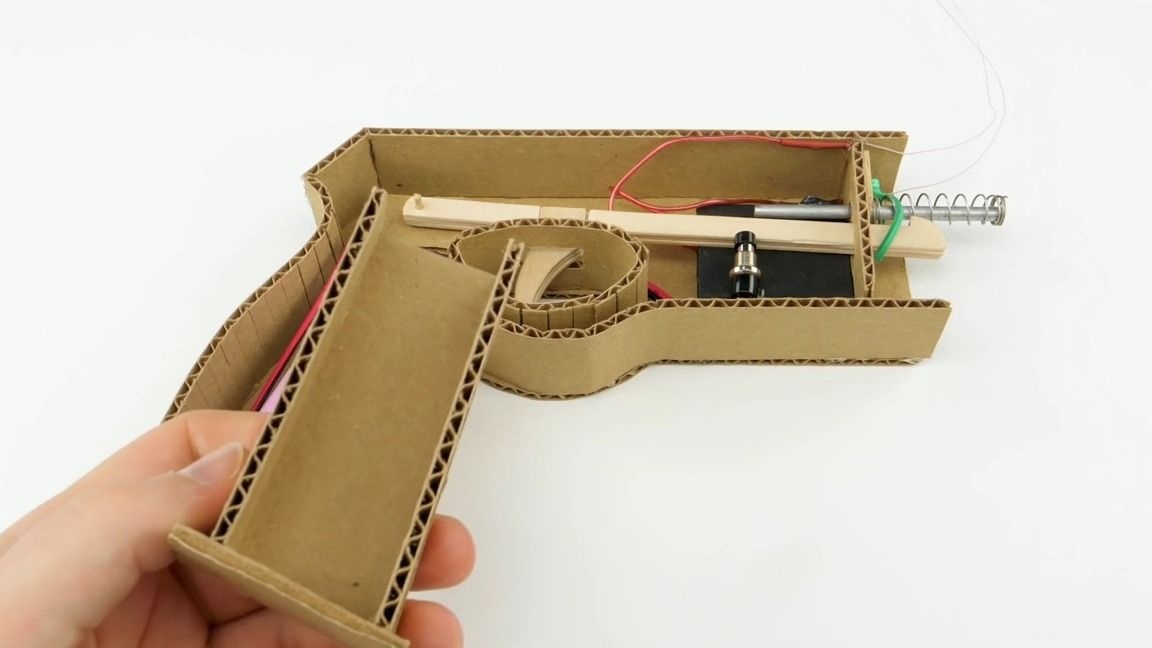
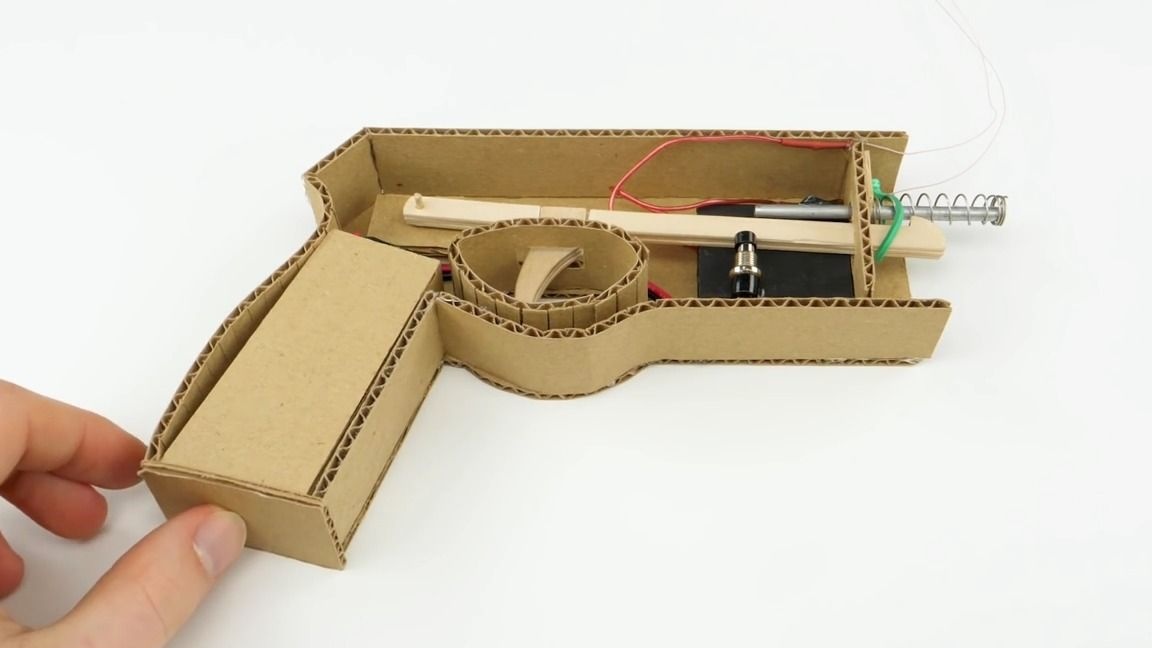
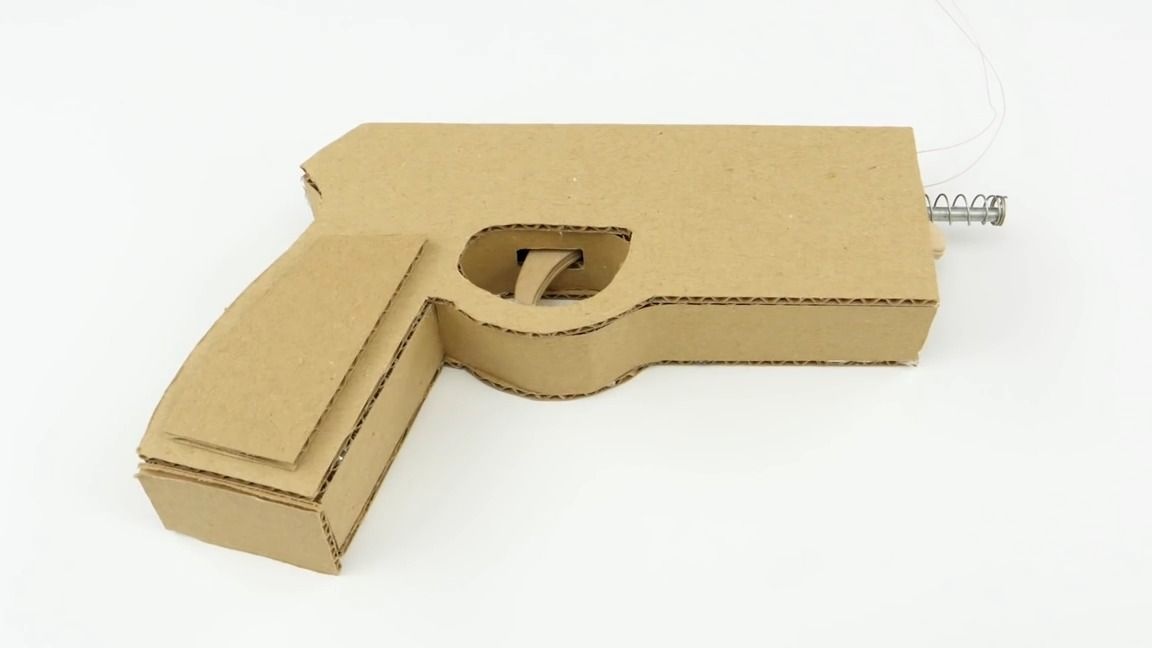
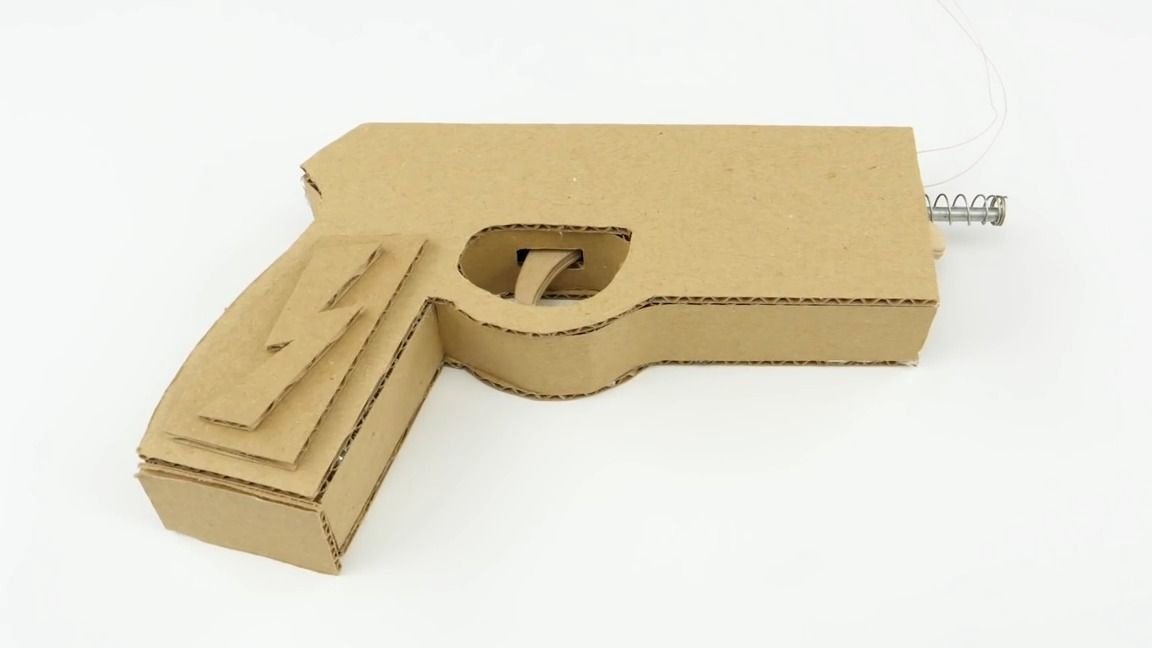
We begin to make the frame of the entire structure, there is also nothing complicated here, the only thing that can cause difficulties is the time it takes to draw and cut out all the cardboard parts. The "magazine" of the gun must be made retractable, so we do not glue it:

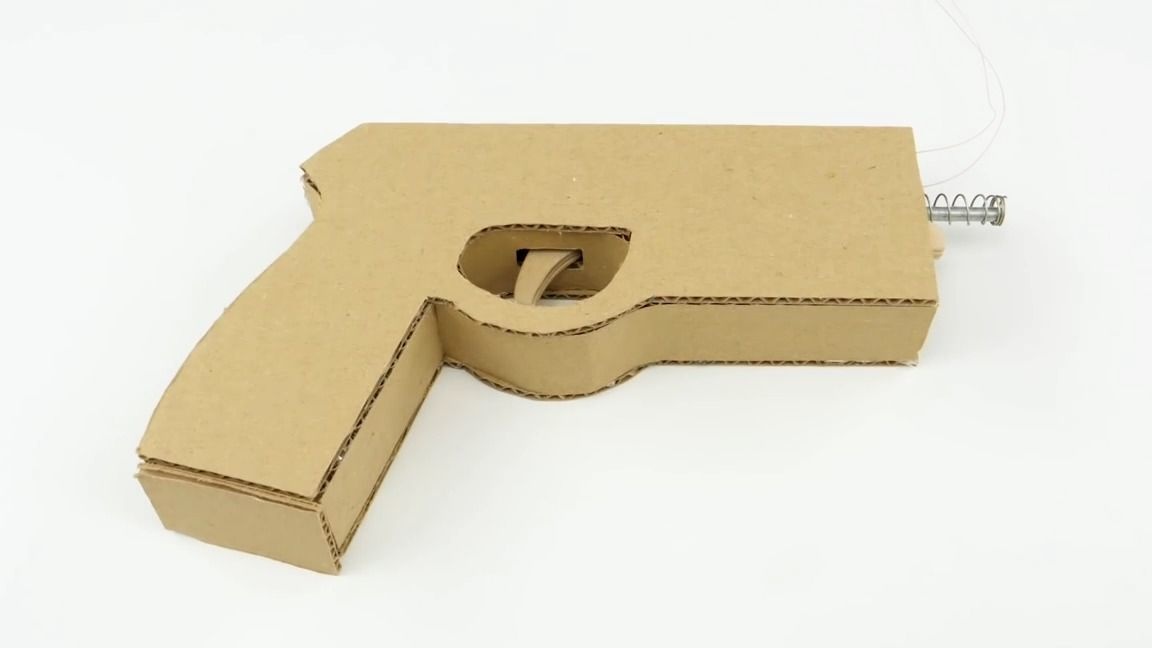

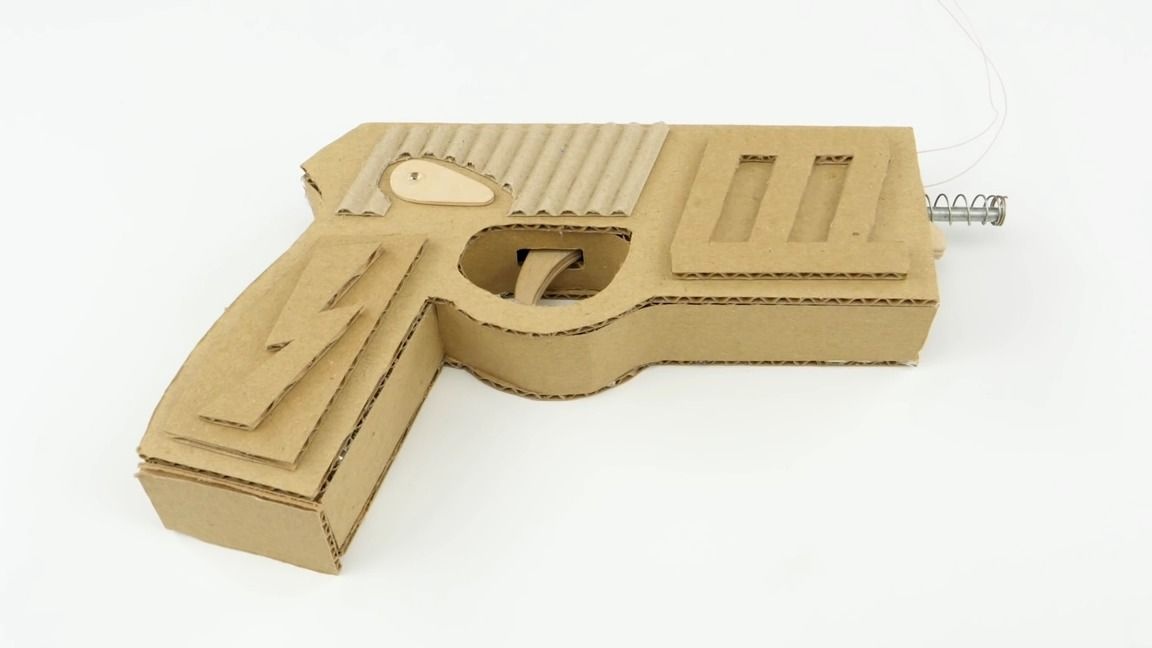
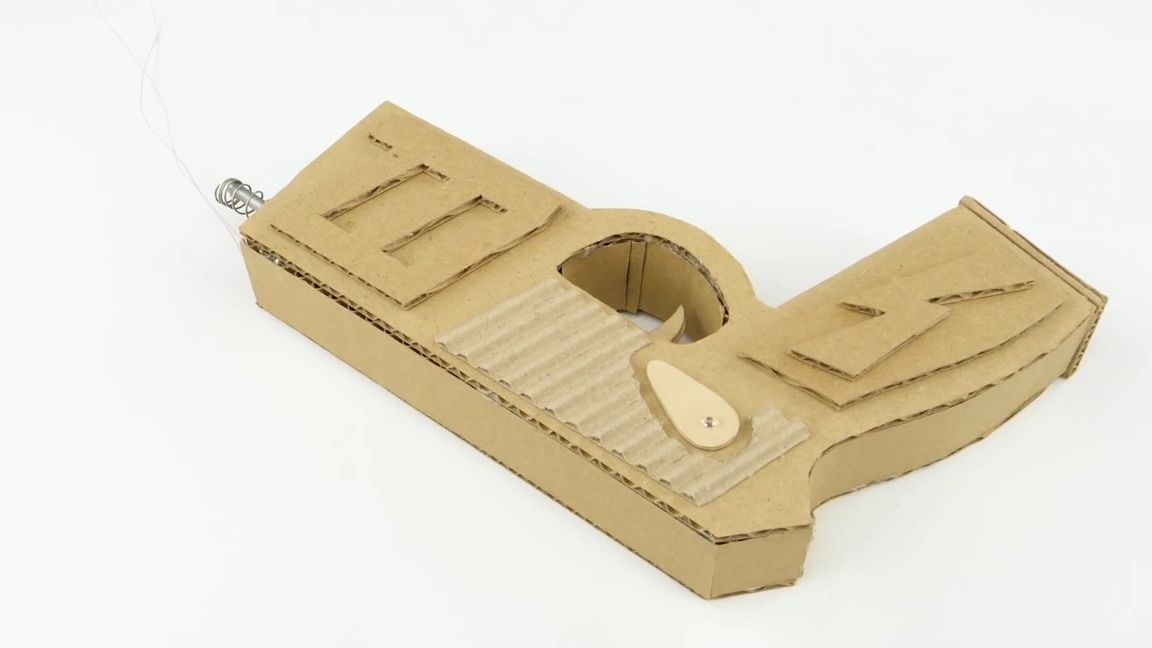
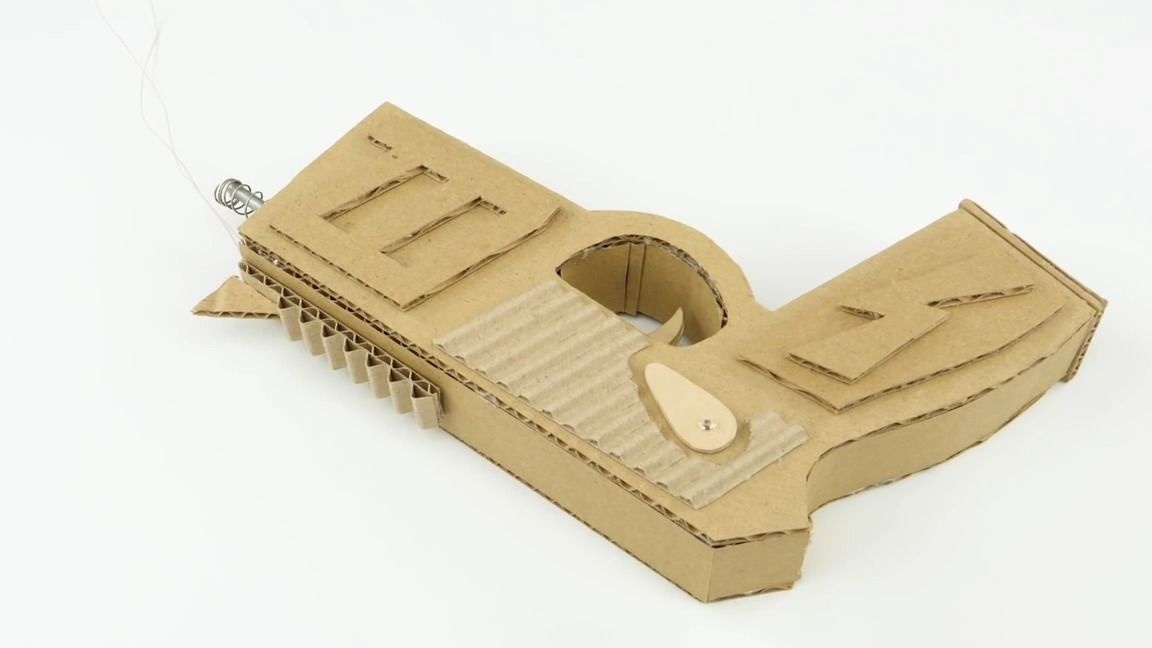
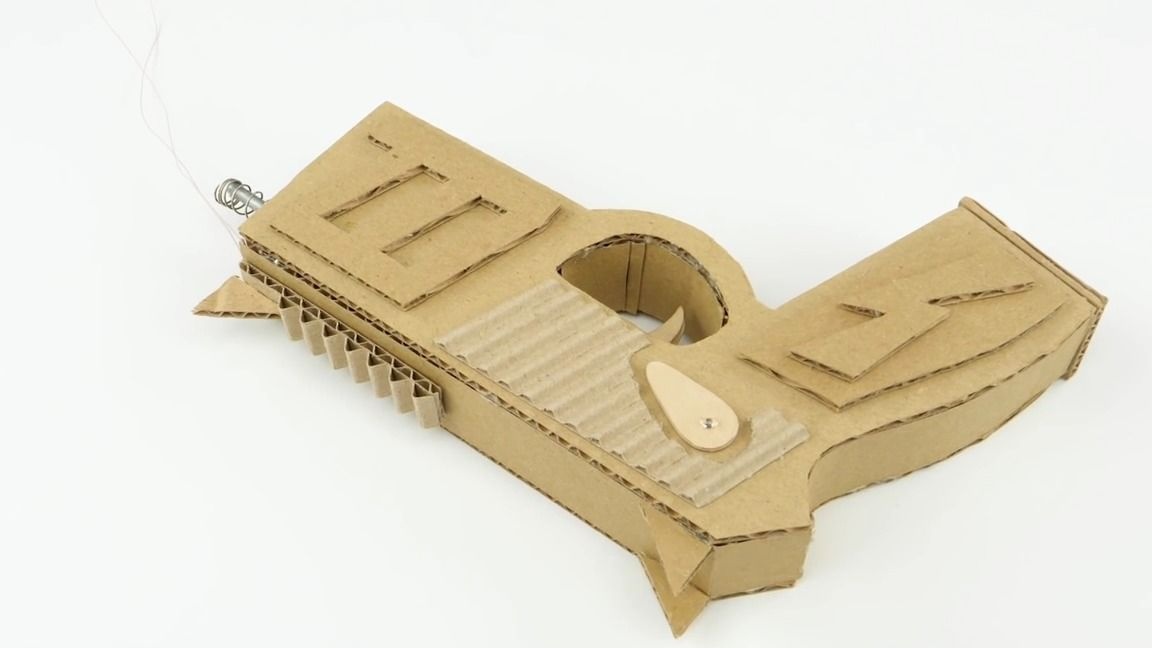
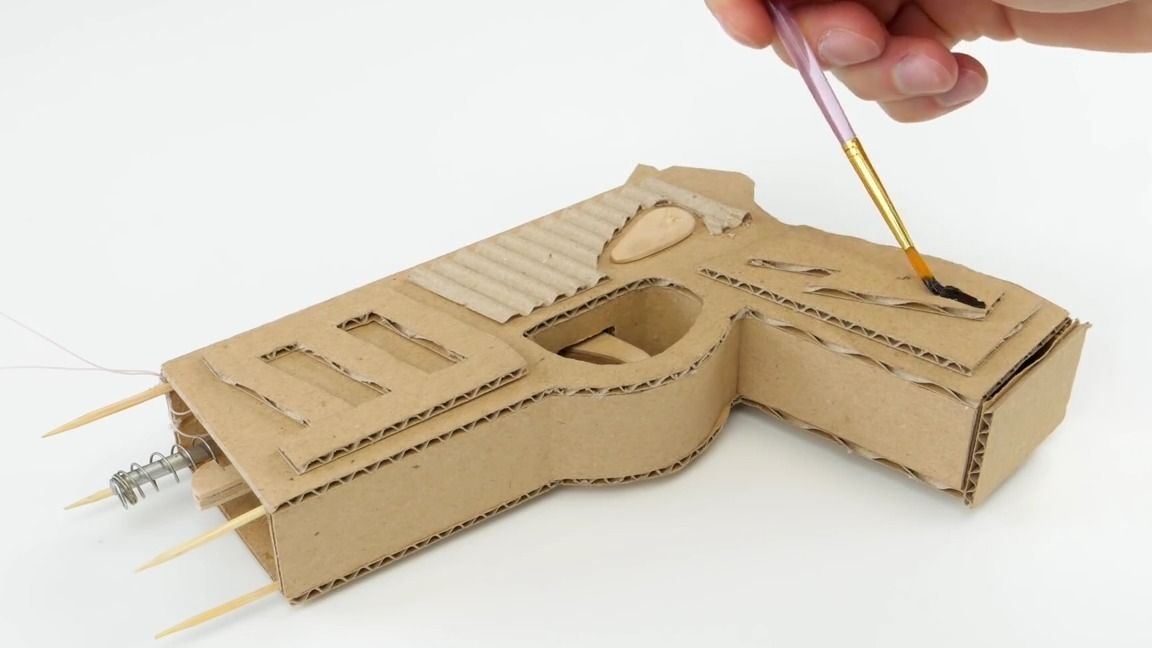
At the end of the “barrel” of the gun you need to glue 4 pieces of a barbecue skewer, well, paint for a better look:
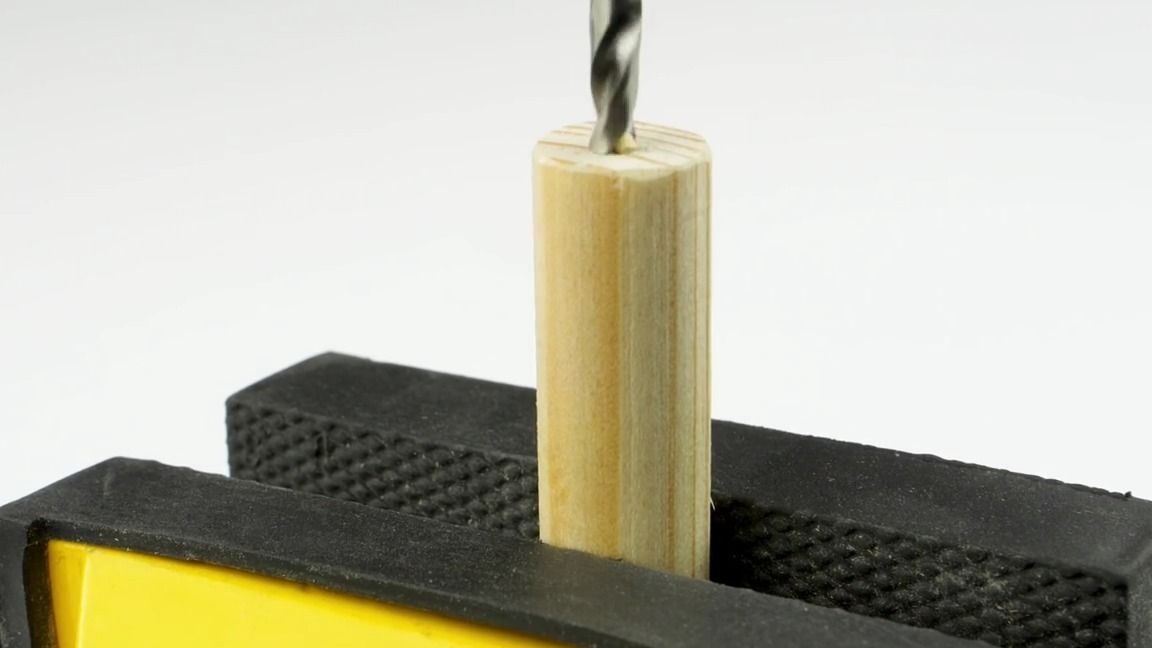
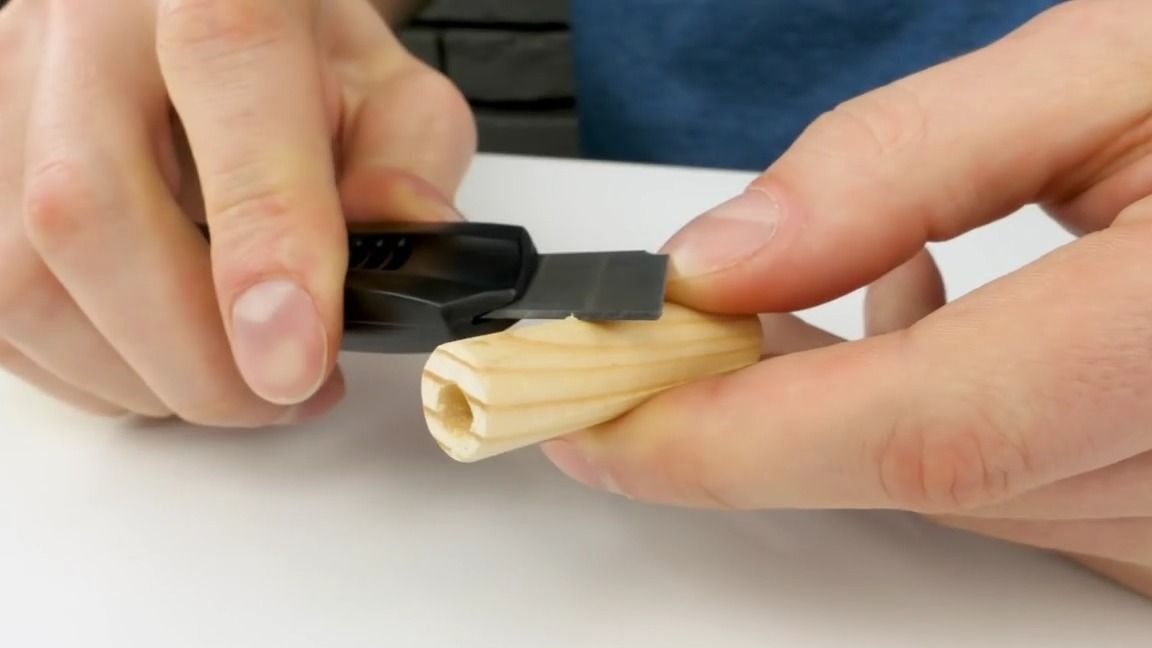
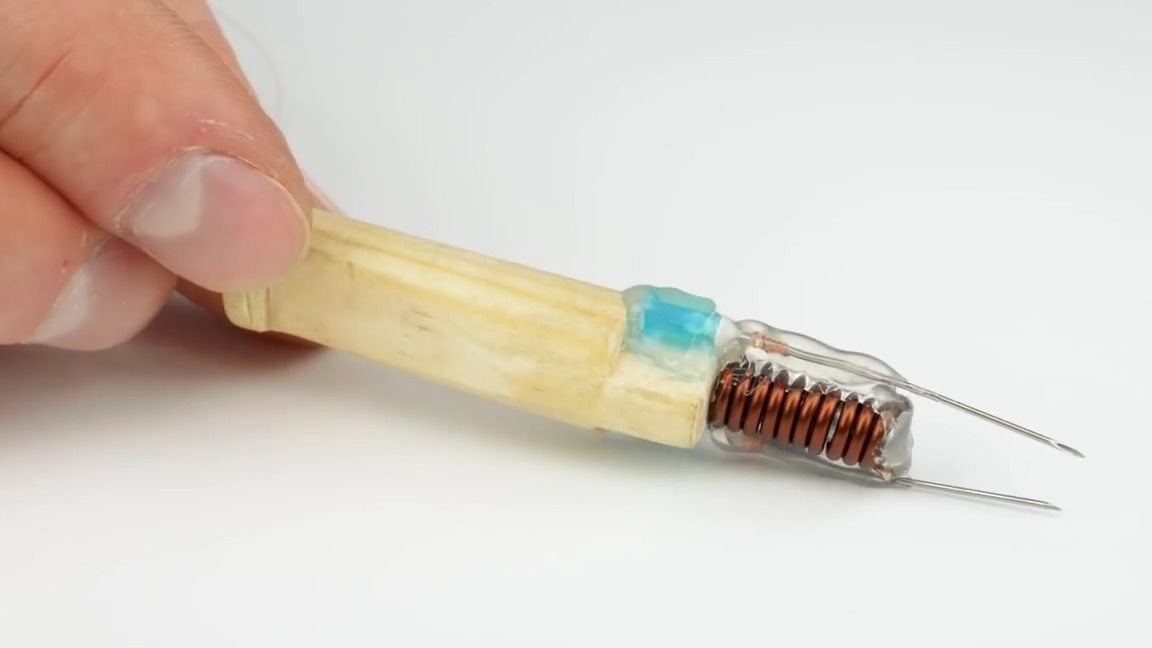
Now you need to make a "cartridge", for this we take a small wooden block of cylindrical shape and drill a hole in it, after which you need to give it the desired shape, then what shape you need will see a little later:
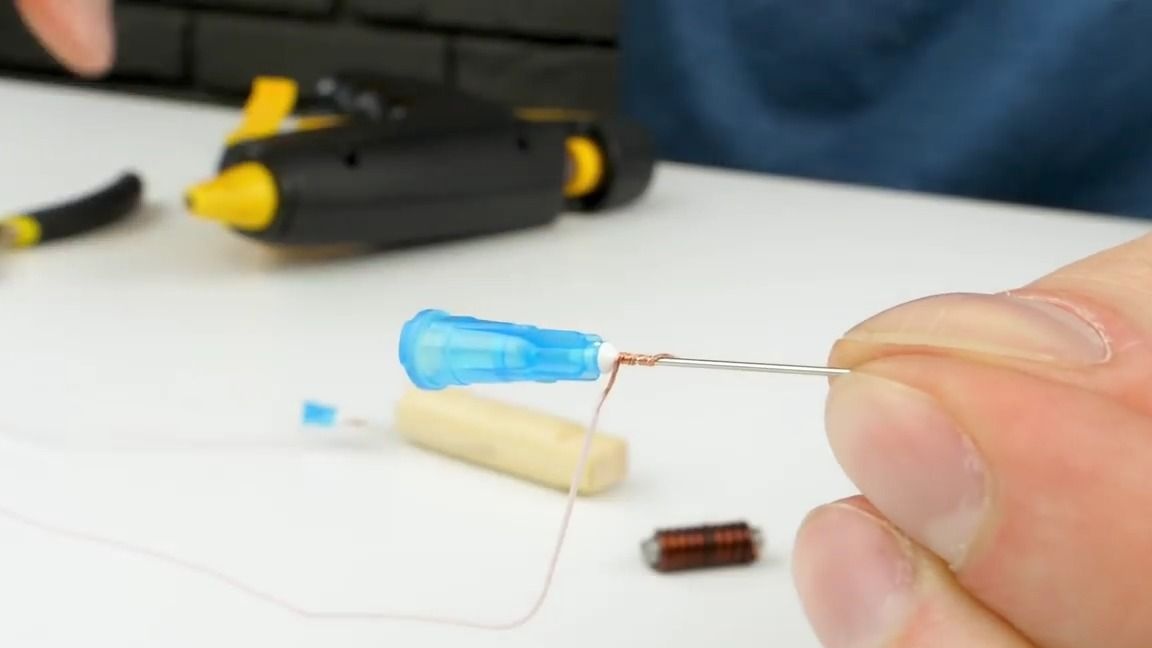
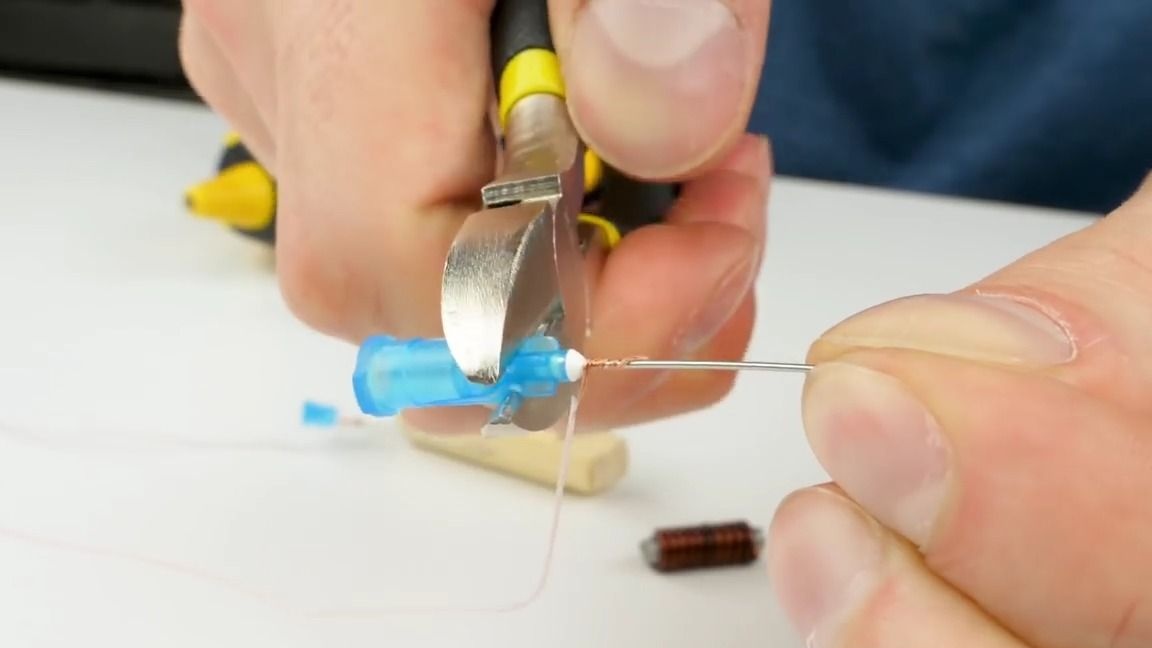
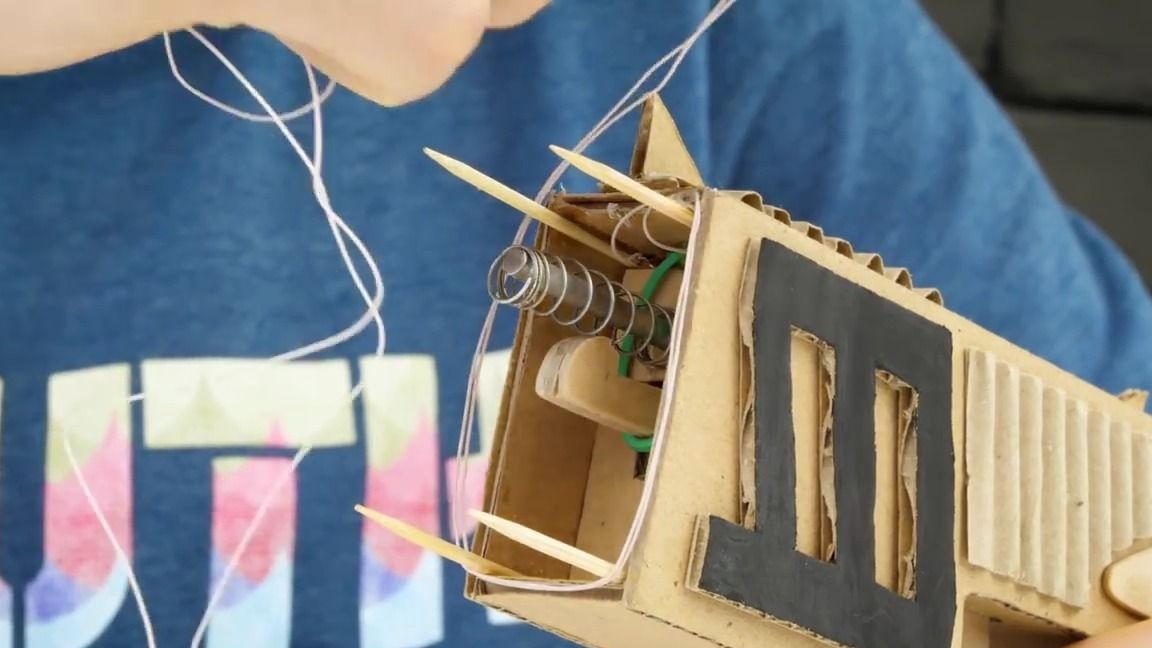
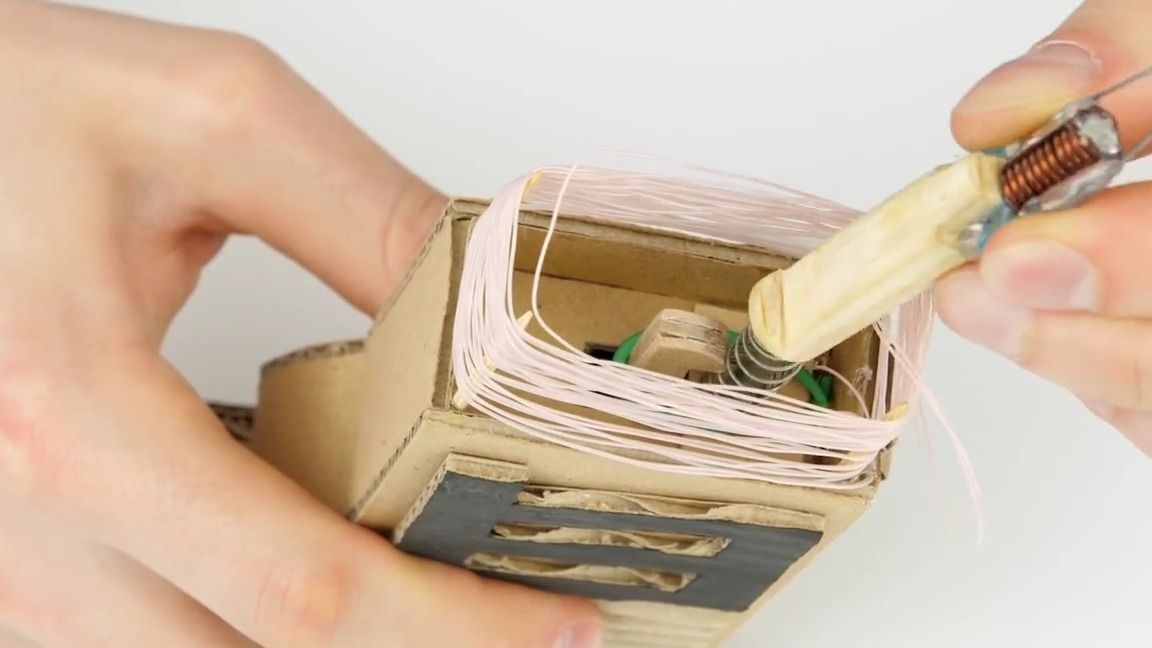
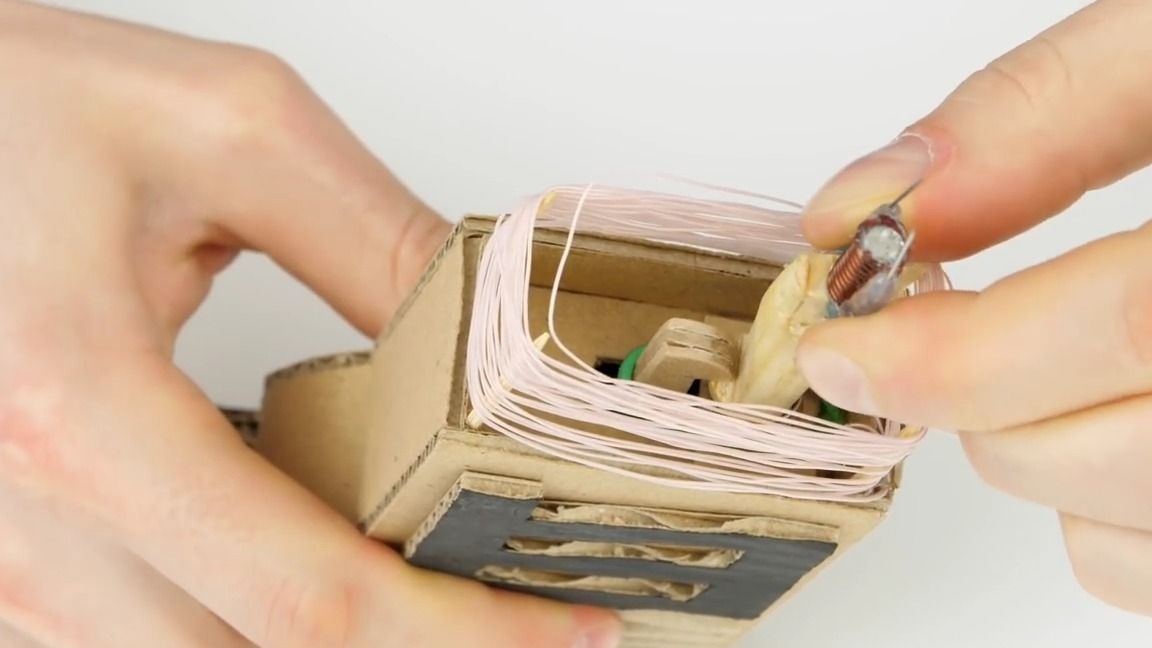
Take two needles from the syringes and fasten to them the bare ends of the wires that we previously soldered to the high-voltage module, then use the wire cutters to bite off the excess plastic:

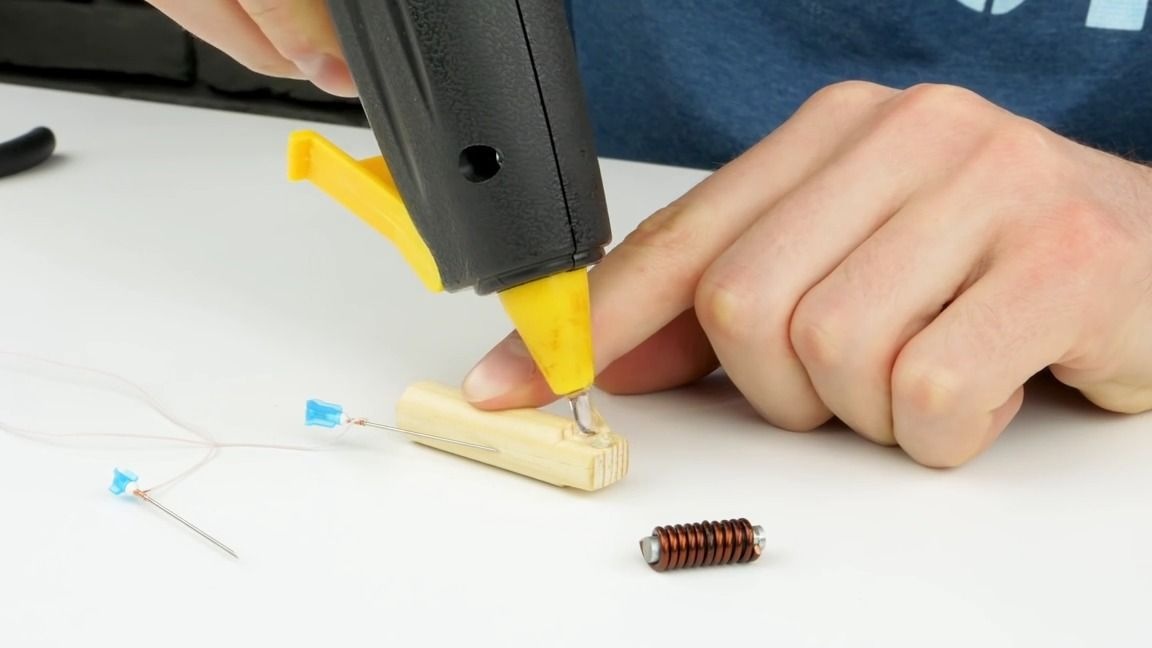
Now they need to be glued to the wooden block, passing the wires carefully along the side of the block, and between them we glue here such a coil, it is important that it is isolated from the needles:
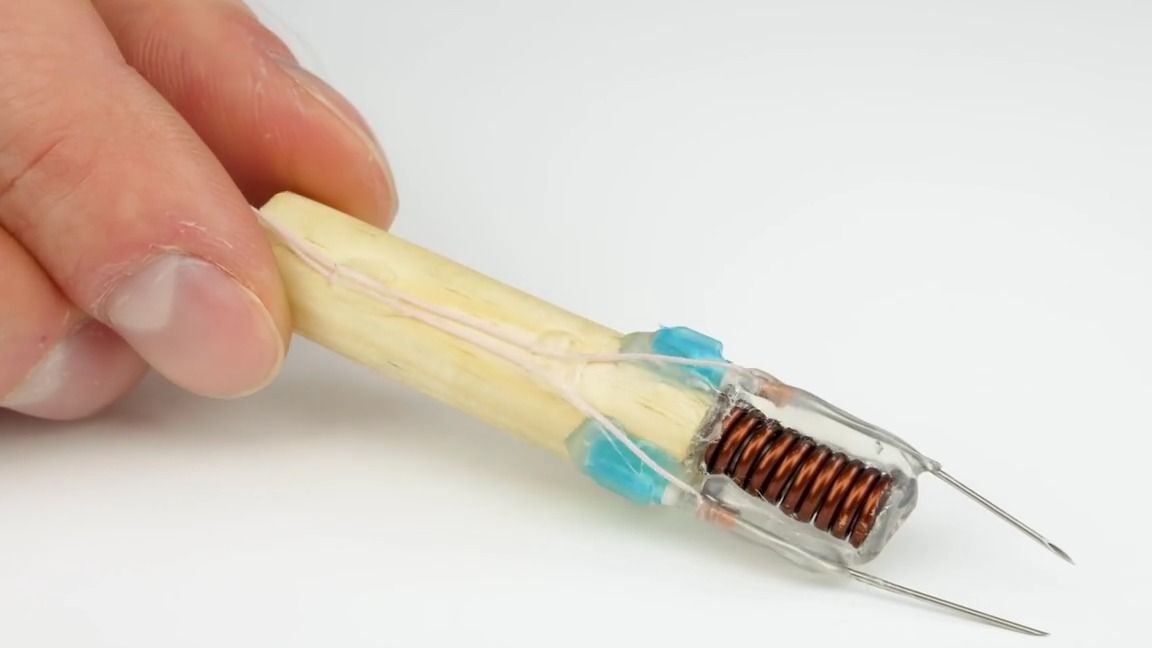
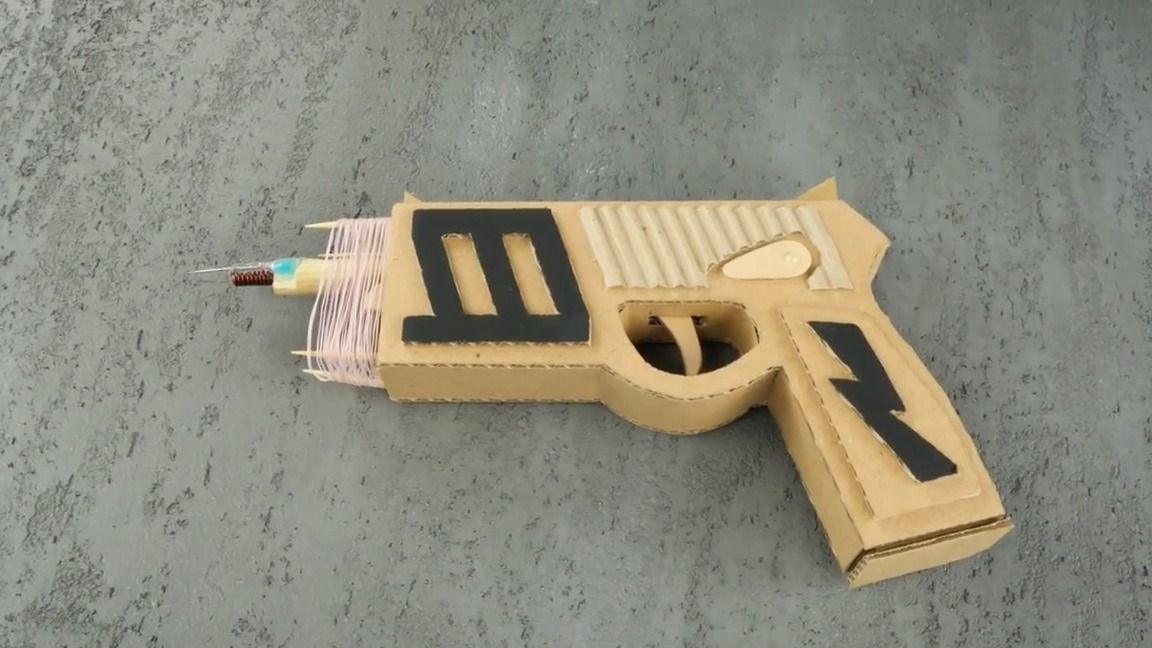
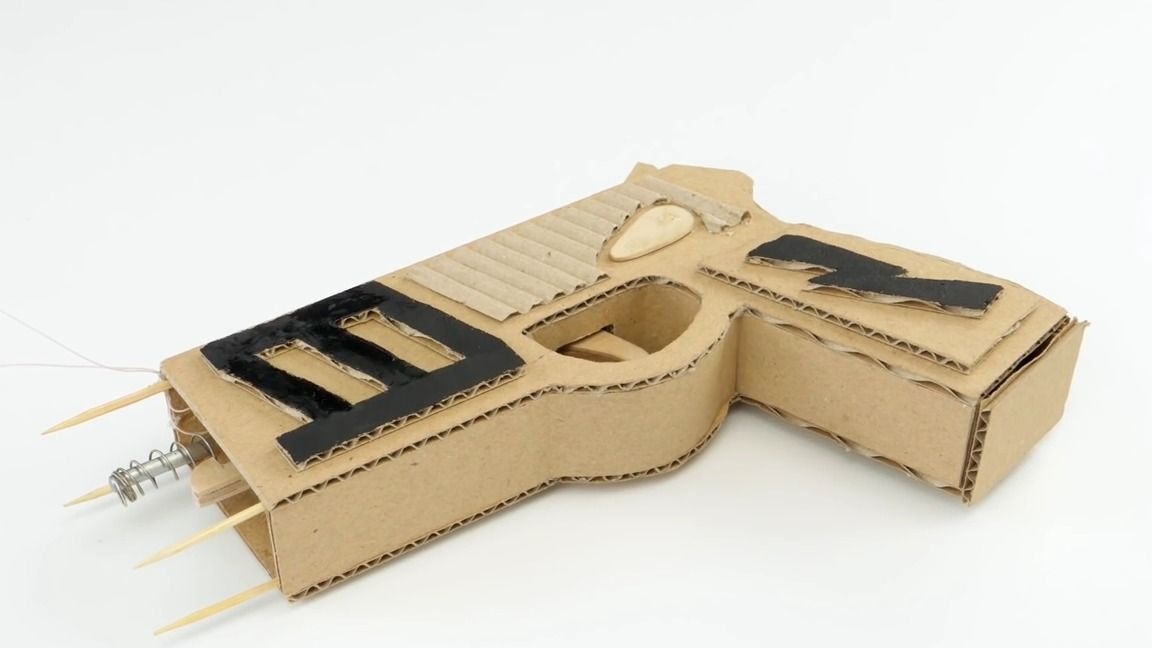
We wind the wires on pieces of sticks from the barbecue, and fix the “cartridge” in the muzzle as follows:
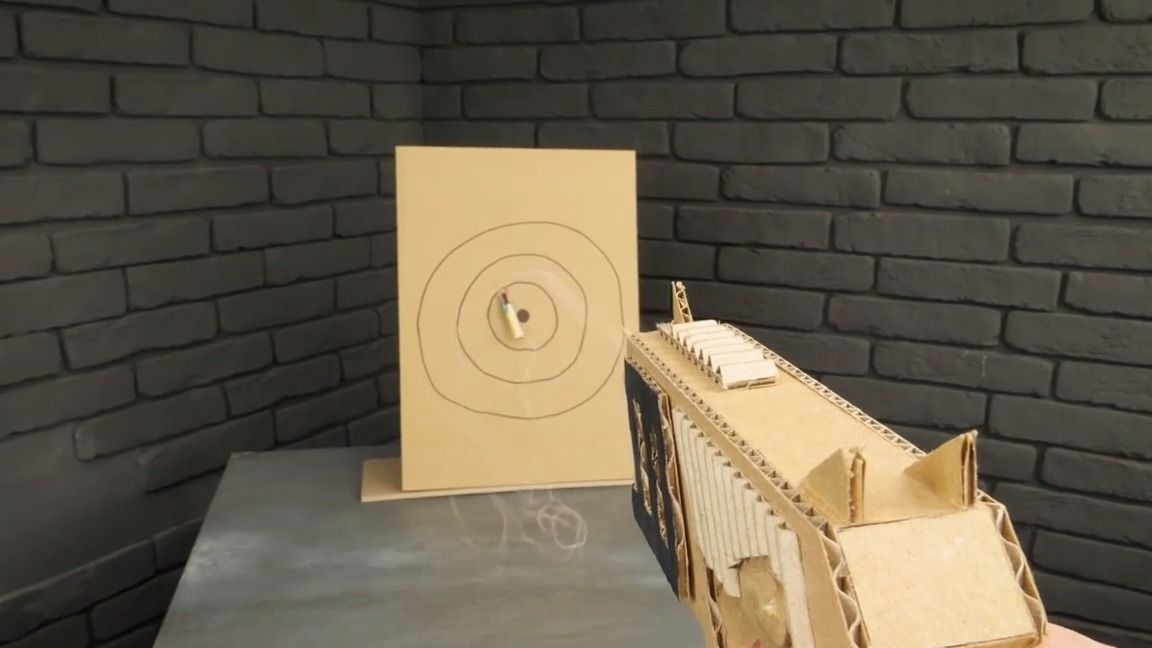
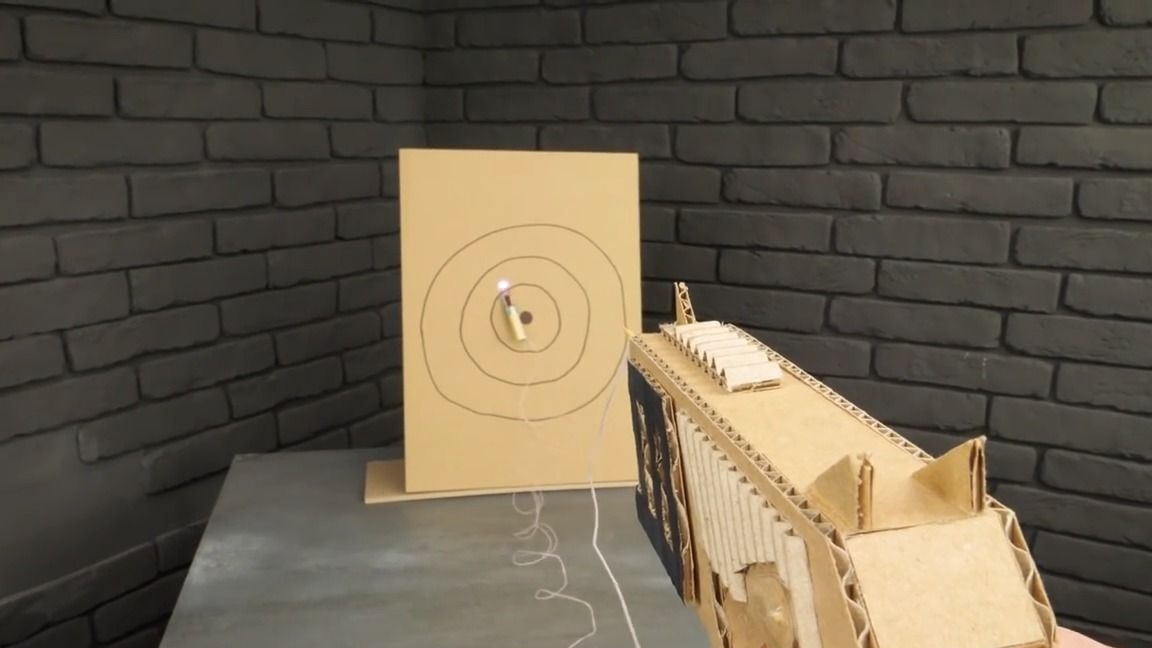
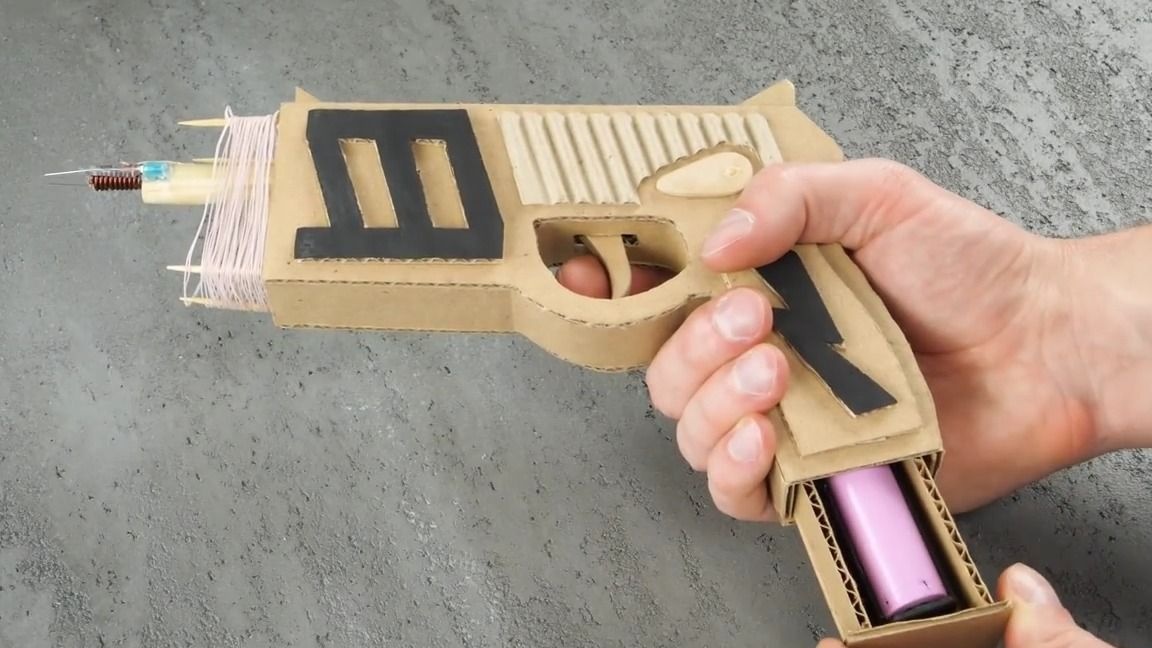
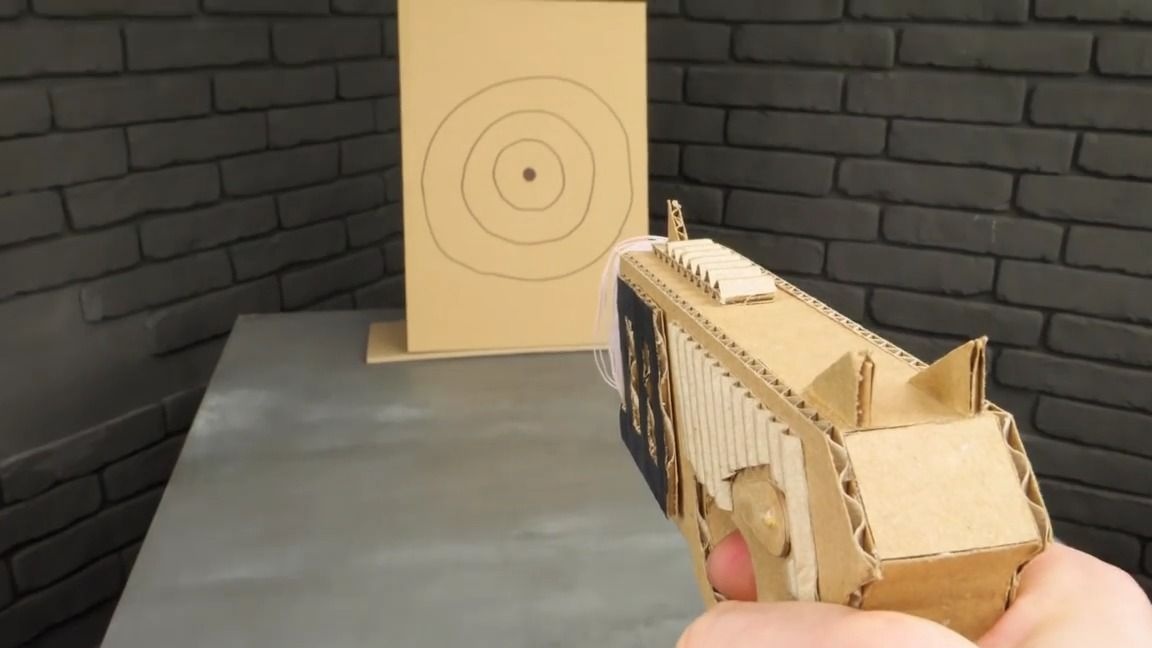
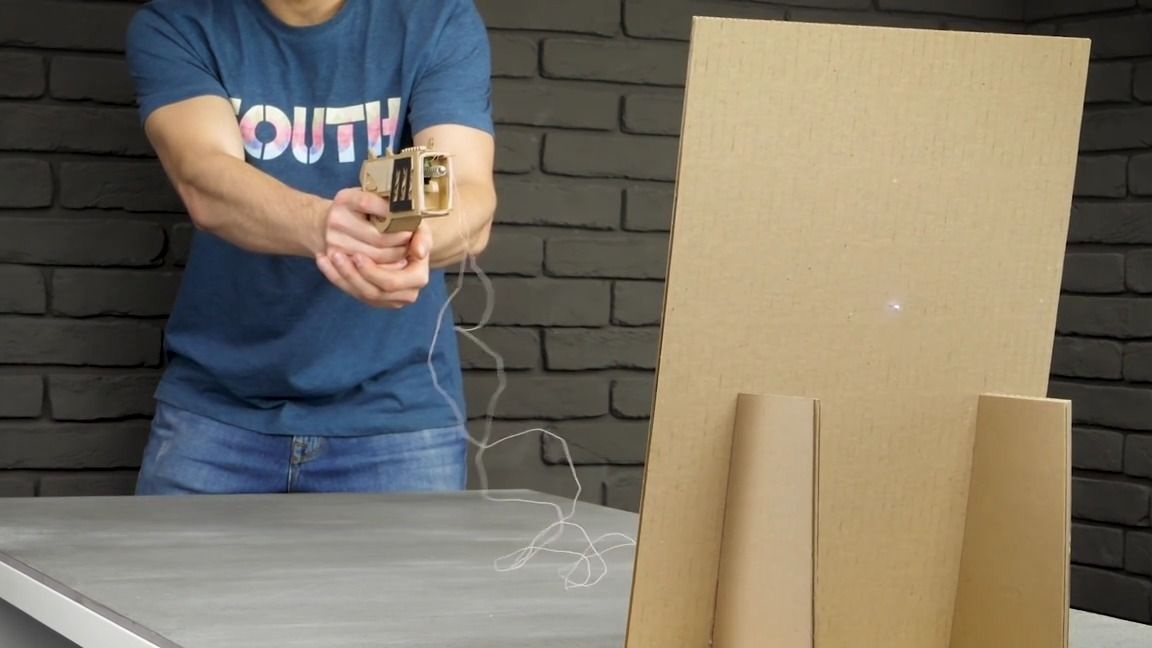
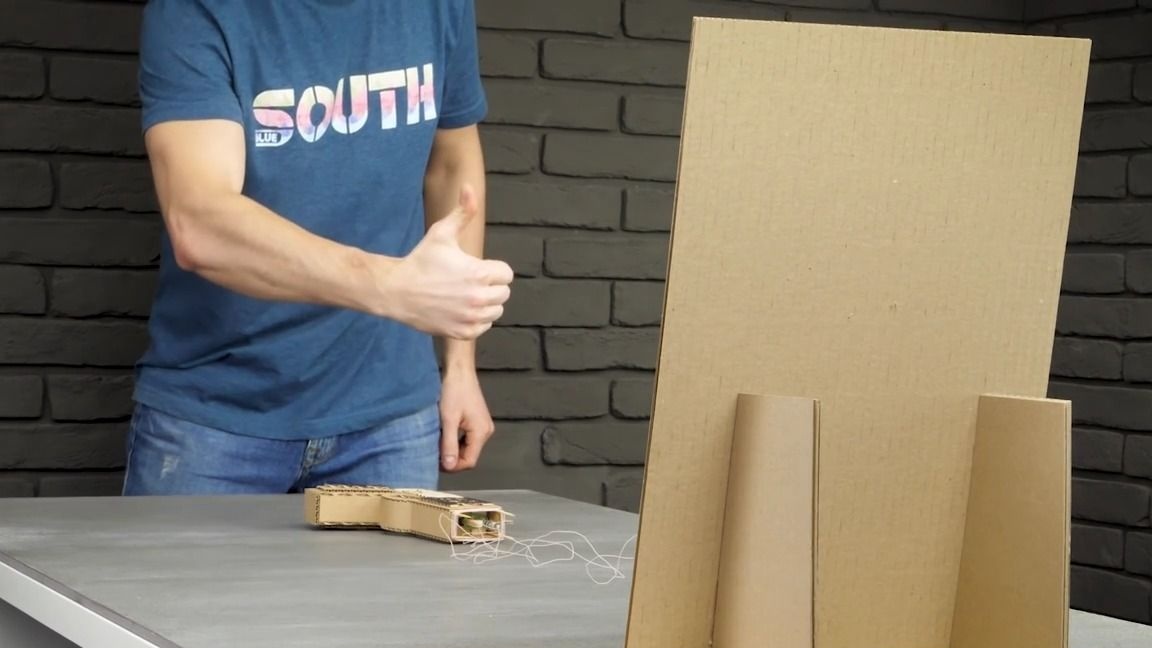
That's it! A simple shooting stun gun is ready and it remains only to test it! ONCE AGAIN I WILL REPEAT THAT IN NO EVENT SHOULD NOT SHOOT IN A PERSON! THIS MAY RESULT IN BAD CONSEQUENCES! IT IS ALSO BETTER TO TEST THIS DIY Homemade product FAR FROM ELECTRONIC DEVICES!
We set the power source in accordance with the polarity, set the target (it can be either cardboard, or something from fruits or vegetables, it is better just cardboard), aim and shoot, in order for the shocker to turn on, just keep holding the trigger, and for that To stop the discharge, naturally you just need to release the "trigger". The main thing to observe safety precautions.

Here is a detailed video from the author with a complete assembly and tests:
(unfortunately, the author either deleted or hid this video, but just in case, I’ll leave another video of him here)
[media = https: //www.youtube.com/watch? v = gduZkGzVRlY]
Well, thank you all for your attention!