

Humanity does not get tired of inventing a stool.
And this time, the struggle with triviality and banality gave a positive effect. There was a little imagination and material available, but a lot of simple tool. This allowed the author to create an original design without a single nail and a screw.
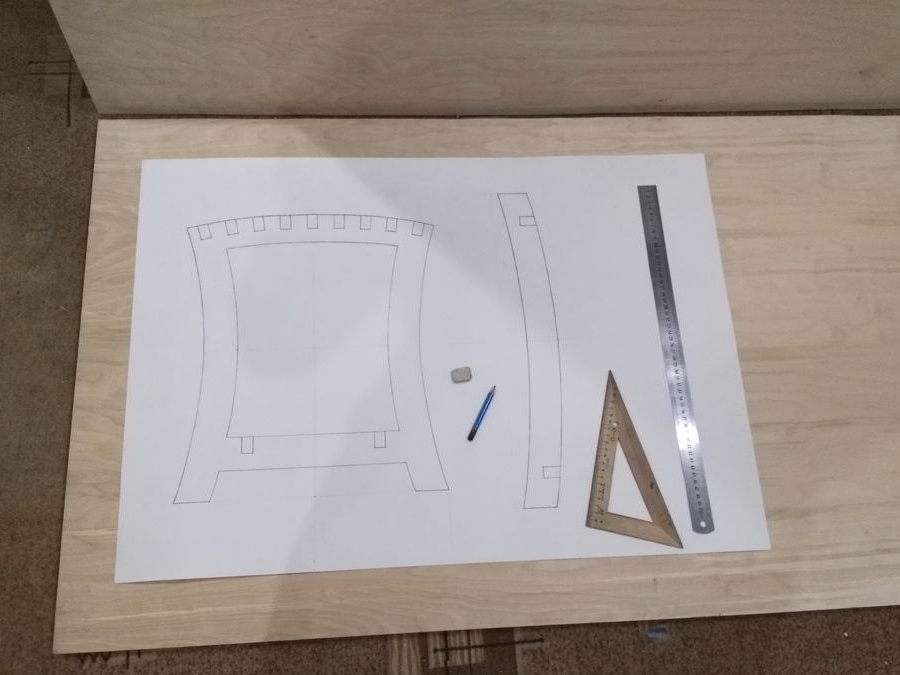
Tools used:
1) a pencil;
2) eraser;
3) ruler;
4) a triangle;
5) stationery knife;
6) a hammer;
7) electric jigsaw;
8) manual jigsaw;
9) a screwdriver;
10) two clamps;
11) a file for a tree;
12) sandpaper of coarse and fine grain;
13) pattern.
Materials needed:
1) Whatman paper;
2) a sheet of plywood with a thickness of 15 mm of the 2nd grade.
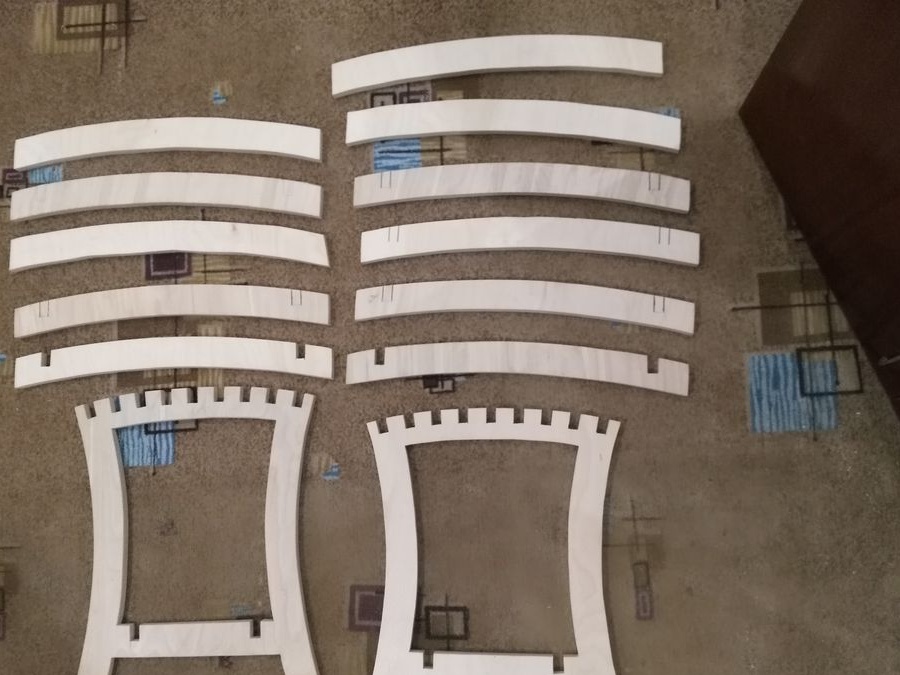
Step one. Template preparation.
On a white sheet of whatman paper with the help of a ruler, triangle and pattern we draw sketches of the two parts of which the stool will consist. The one on the left is the sidewall of the structure, on the right is part of the seat; such parts will connect the sidewalls. The first detail is obtained as follows: a rectangle 42 cm * 36 cm in size is drawn, inside it are the contours of the sidewall, the width of the upper parts of which is 4.5 cm, and eleven grooves with a width slightly smaller than the thickness of the plywood, i.e. 1, 5 cm. Their depth is 2.2 cm. The length and width of the second part are 48 cm and 4.5 cm, respectively.
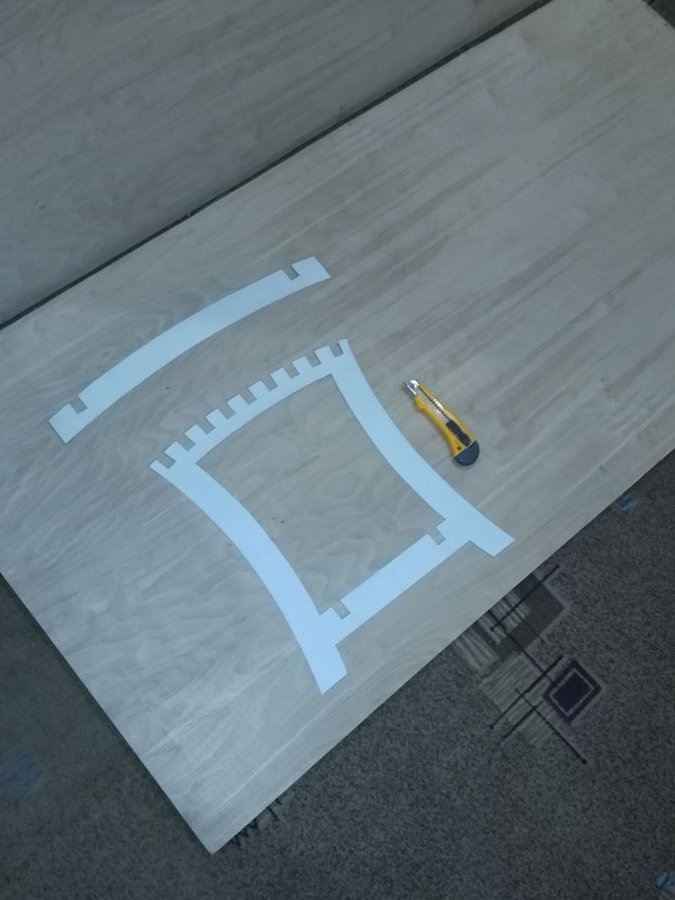
Step Two Cutting pattern.
After drawing, we cut out the details with a clerical knife with great accuracy.
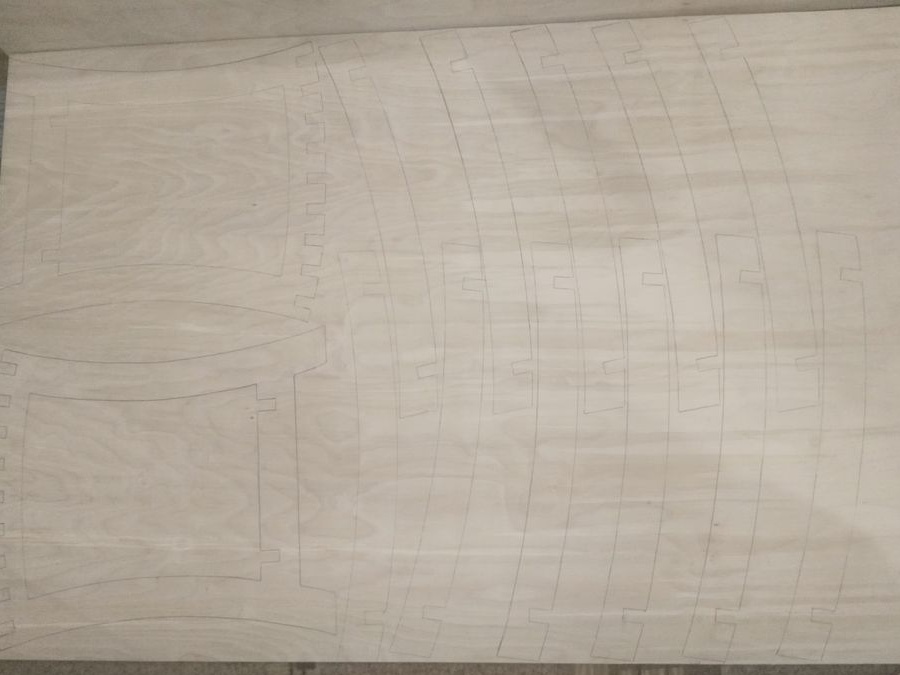
Step Three Drawing on plywood.
The resulting patterns are placed on a plywood sheet with a thickness of 15 mm and circle them: large - twice, small - eleven times. The lines were not bright, but quite pronounced.
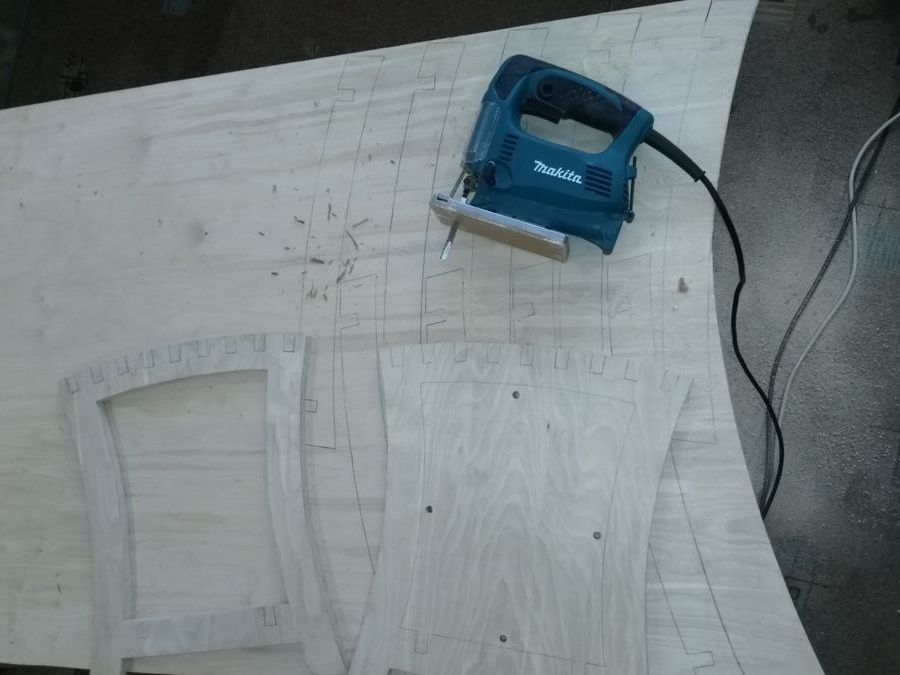
Step Four Sawing parts.
Now comes the central moment in the entire manufacturing process: it is necessary to obtain the details of the design conceived. To do this, we cut them out with electric jigsaw along the outlined contours. But the author cut out the lower boundaries of the grooves with a hand jigsaw, since it is much more difficult to do the same with electric.
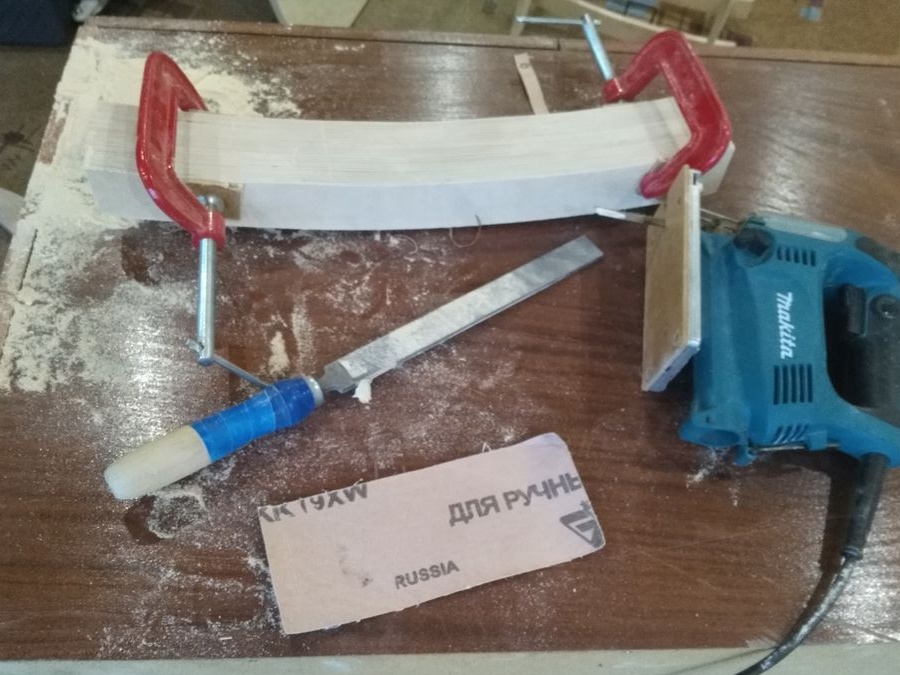
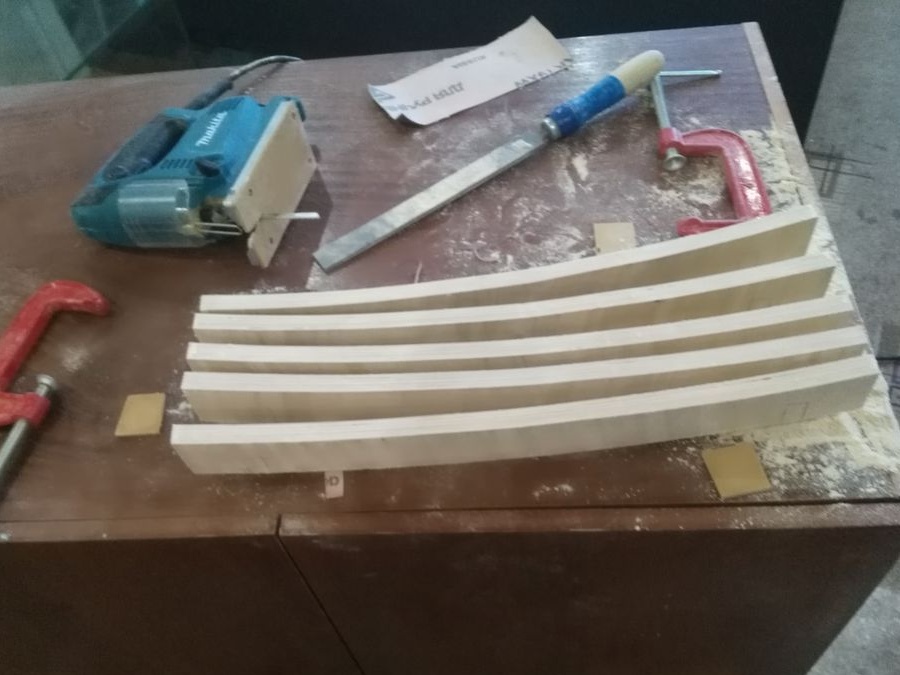
Step Five Grinding.
Sawed parts should lead to a pleasant and aesthetic appearance. Clamping the crossbeams with two clamps, we first align them with a file, and then we process sandpaper with large and fine grains.
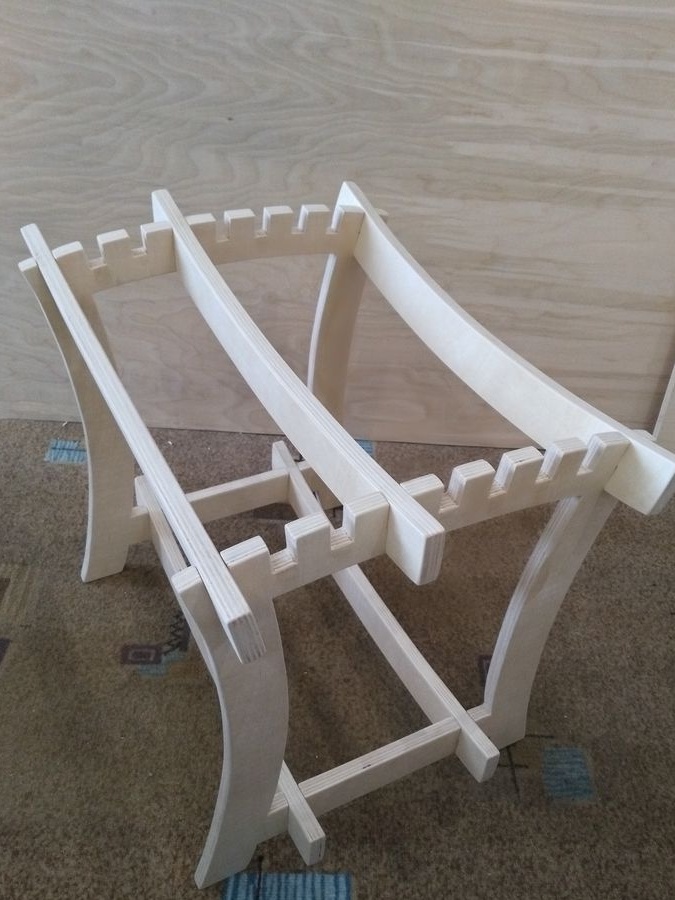
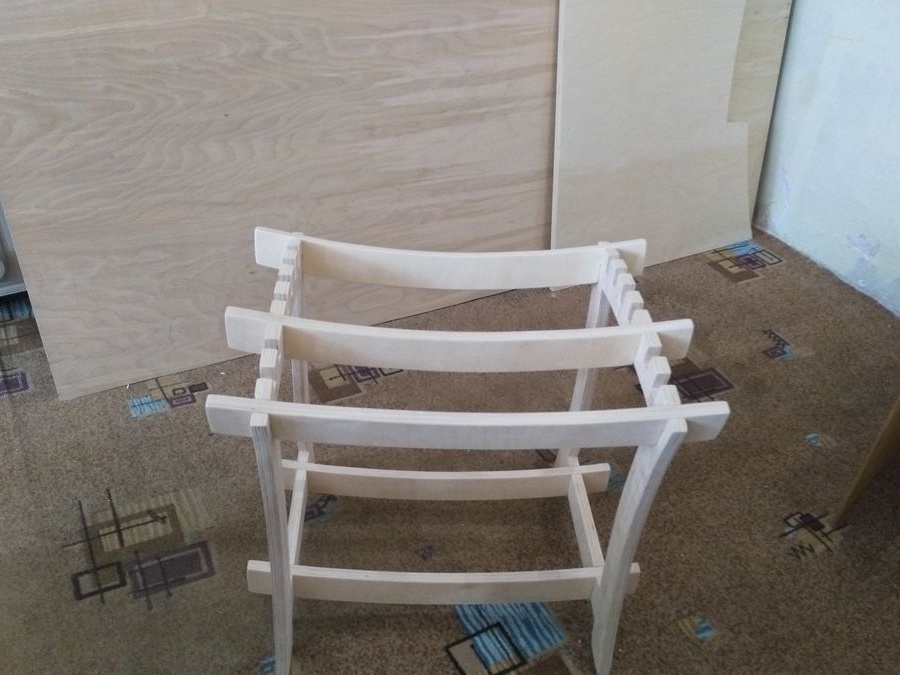
Step Six Picking up a stool.
Now all the parts are ready for assembly. Therefore, first we hammer with the help of a hammer and a wooden bar the two lower crossbars, then the remaining upper ones. Since the grooves are cut to a width slightly smaller than the thickness of the plywood, then the crossbars will go into them very tightly. The stool is ready.
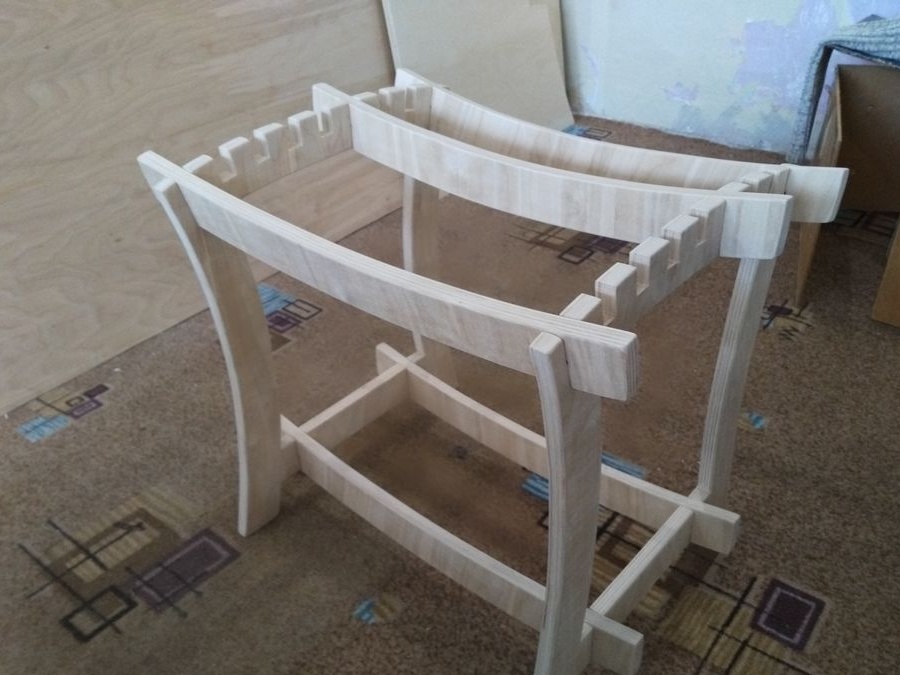
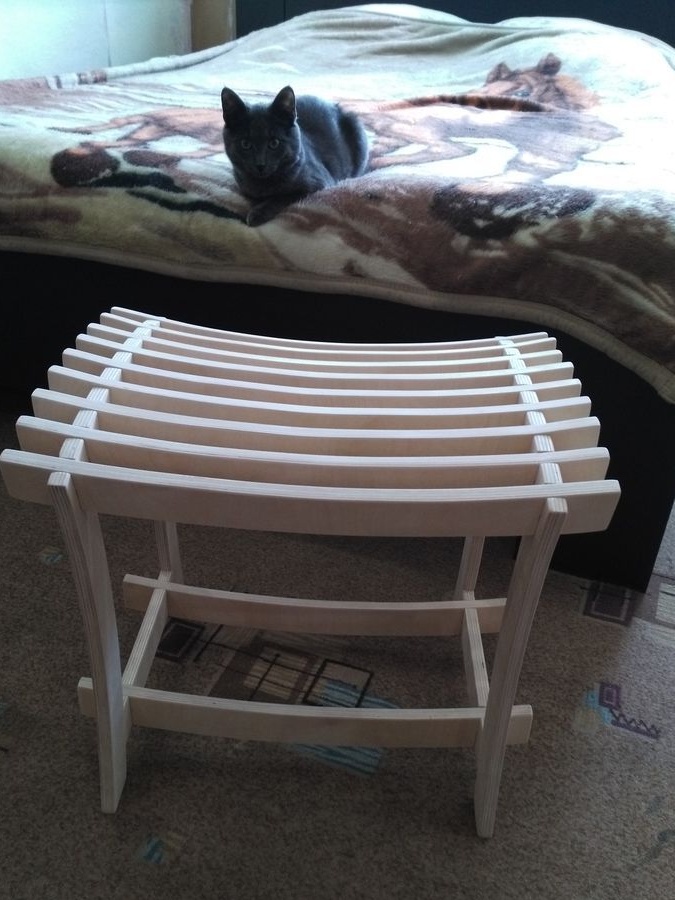
Conclusion
The result was a rather original beautiful stool.The lower bars allow you to use it as a coffee table or bed for a cat, if you put a sheet of plywood on them. Disassembled stools are a plus for the time being. With the increase in the number of assemblies - disassemblies of such a constructor, a decrease in stability and, as a result, the stool itself. Also, the need to take it by the upper crossbars and rearrange it leads to loosening of the stool. For greater reliability, when assembling the product, parts can be planted on carpentry glue.