

Hello to all lovers homemade. In this article I will talk about how to make rolling for brake pipes do it yourself. Given device will be useful to those who serve their car independently and will help in repairing the brake system.
Before reading the article, I suggest watching a video where the assembly process of this device is clearly shown, as well as a check in real conditions.
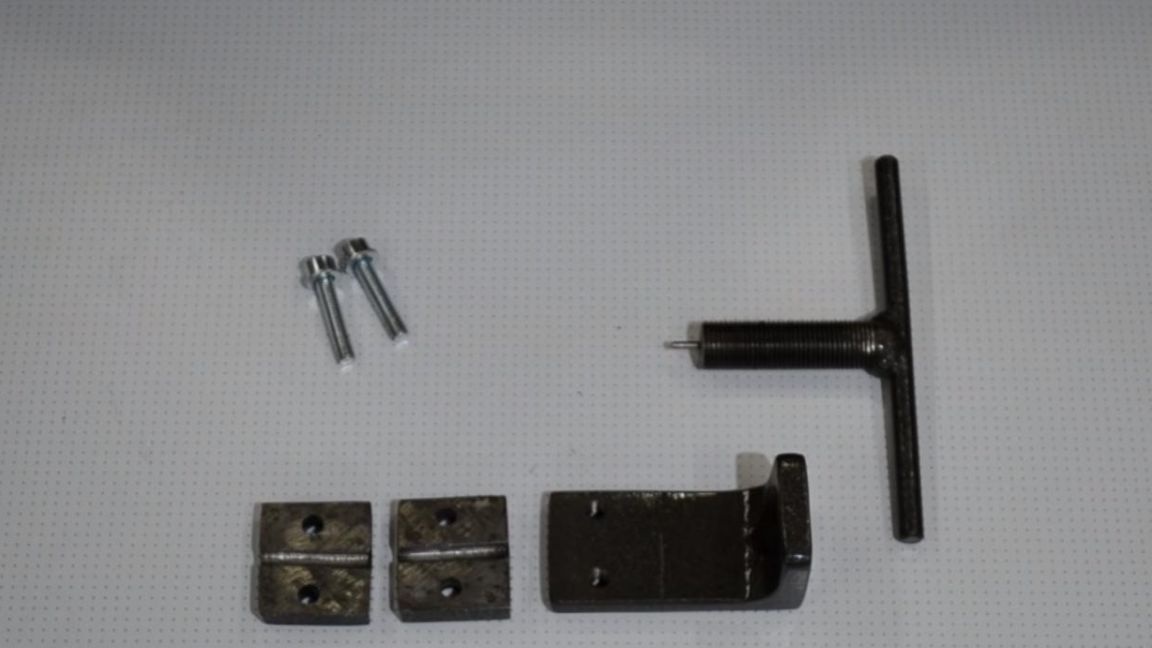
In order to make rolling for brake pipes with your own hands, you will need:
* Bench vise
* Angle grinder, cutting wheel and grinding wheel
* Metal corner size 100 mm
* 6 mm thick metal plate
* Drill for metal with a diameter of 4.5 mm, 6 mm, 10 mm
* Bolt from the hub of the car
* Welding machine, gaiters, welding mask
* Safety glasses, gloves, earphones
* Copper tube with a diameter of 5 mm
* Metal lathe, accessories
* Tap with M6 and M12 thread
* Spray paint
* Electric drill
Step one.
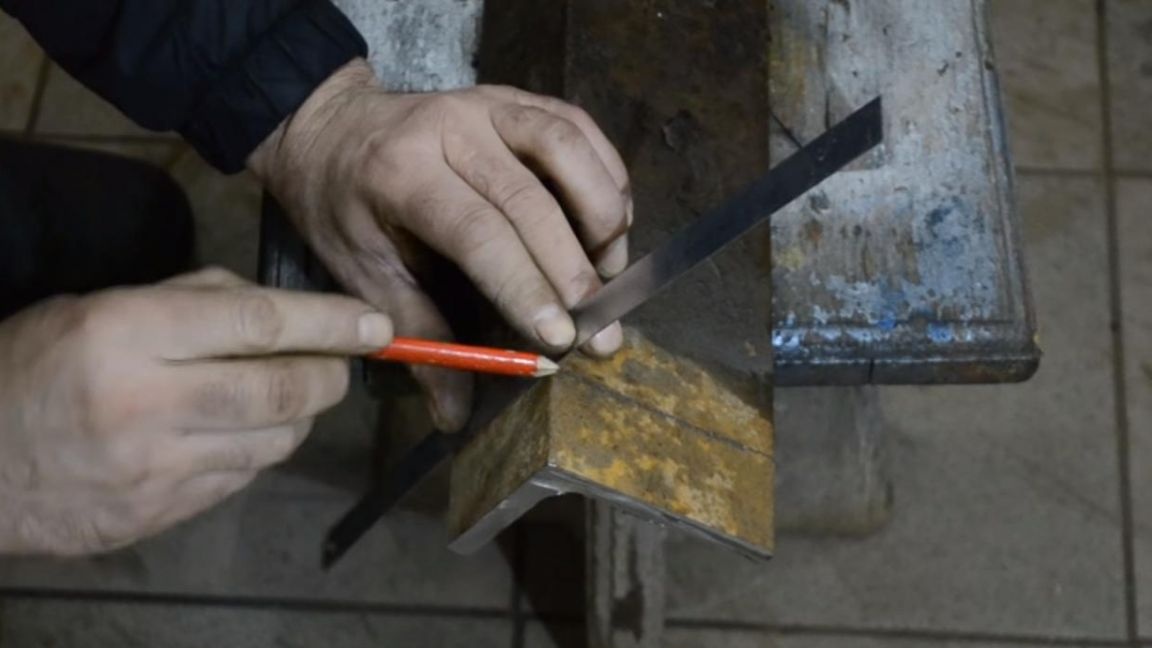
Clamps a metal corner with a size of 100 mm in a vice and with the help of a ruler and a pencil we make a marking, according to which it will be necessary to saw off the workpiece.
We mark about 30 mm from the edge of the corner and saw off using an angle grinder with a cutting wheel installed in it. When working with an angle grinder, observe safety measures, wear safety glasses, earphones and gloves, and do not forget that the power tool can be pulled out of your hands at any time, so you need to hold it tightly.

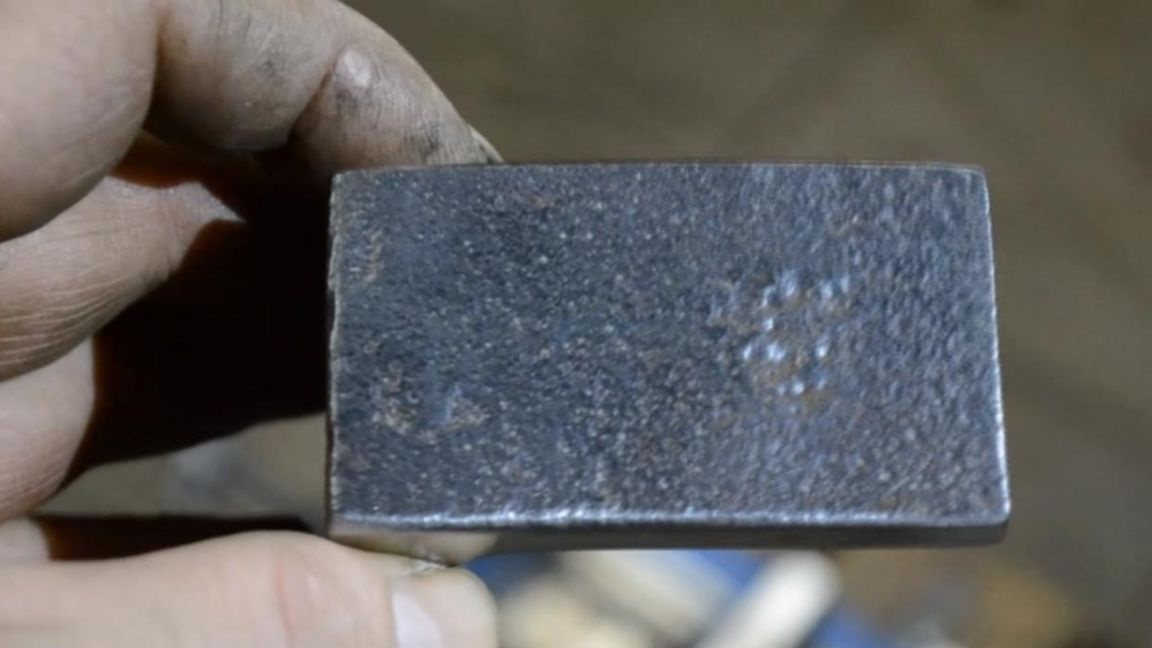
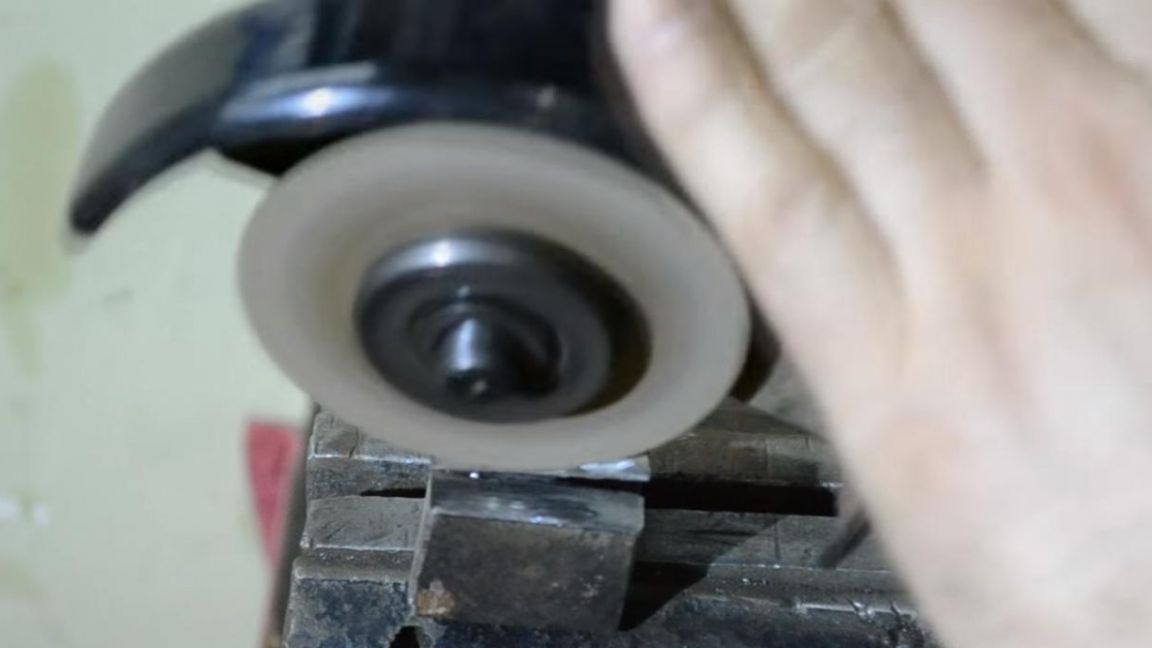
Next, we fix the corner in a vice and align the ends with a angle grinder with an emery wheel for grinding, we also round the edges a bit so as not to get injured when working with the tool.
After that, we change the position of the workpiece in a vice and also grind it, removing rust and other external defects of the part.
The result is such a surface.
Step Two
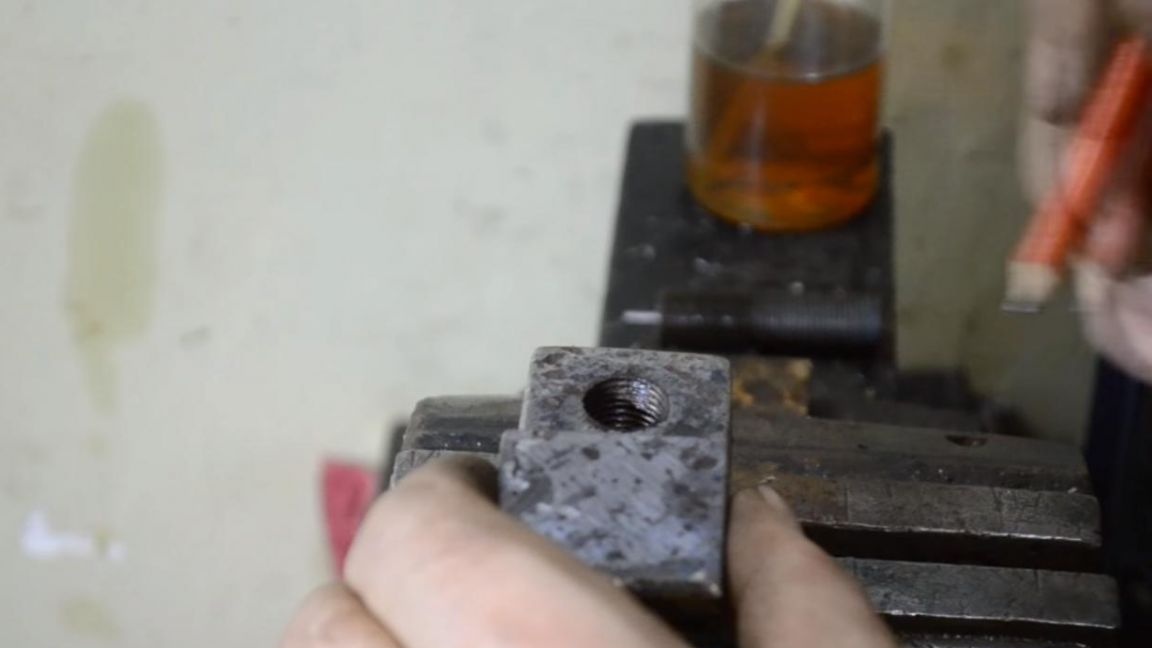
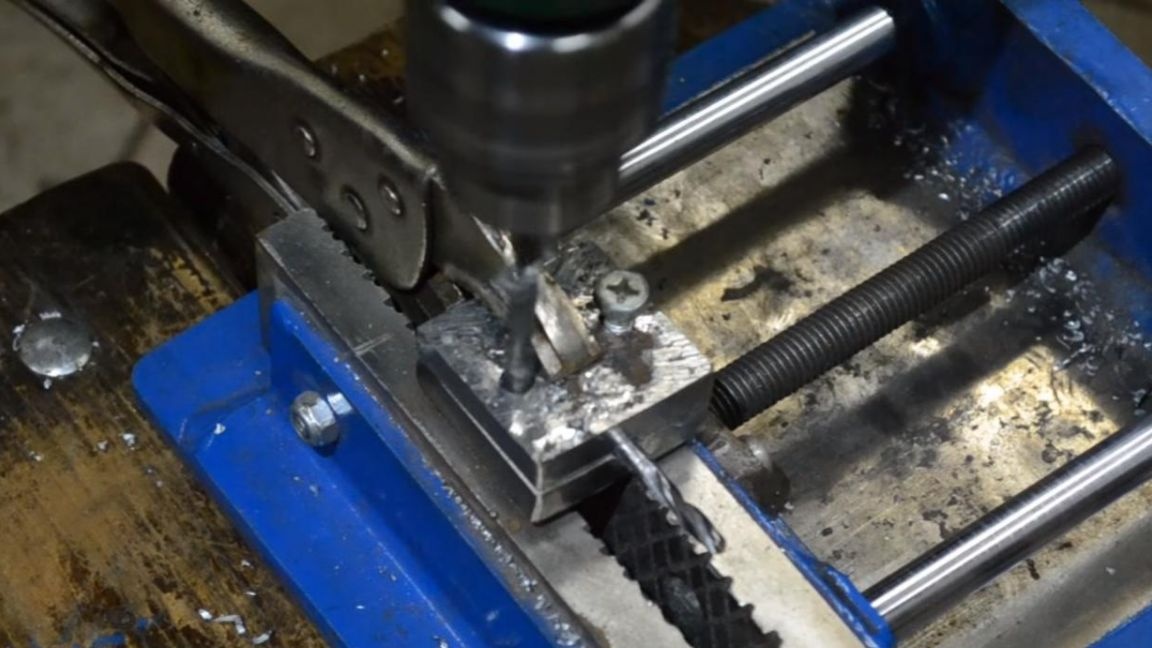
We install the part on the anvil or vice and make the center punch in the middle with a light blow of the hammer on the core.
At this point, drip a little technical oil and drill a hole using an electric drill, in the chuck of which a drill bit for metal with a diameter of 5 mm is installed, after that we change the drill bit by 10 mm.

In the process of drilling, do not forget to add technical oil, as this will reduce the degree of wear of the cutting edge of the drill, which will extend its service life.In the finished hole, we cut the thread with a tap, the thread in this case is selected depending on the diameter of the bolt, here we use the M12 bolt from the hub of the car. When threading, it is also important to add grease.
Step Three
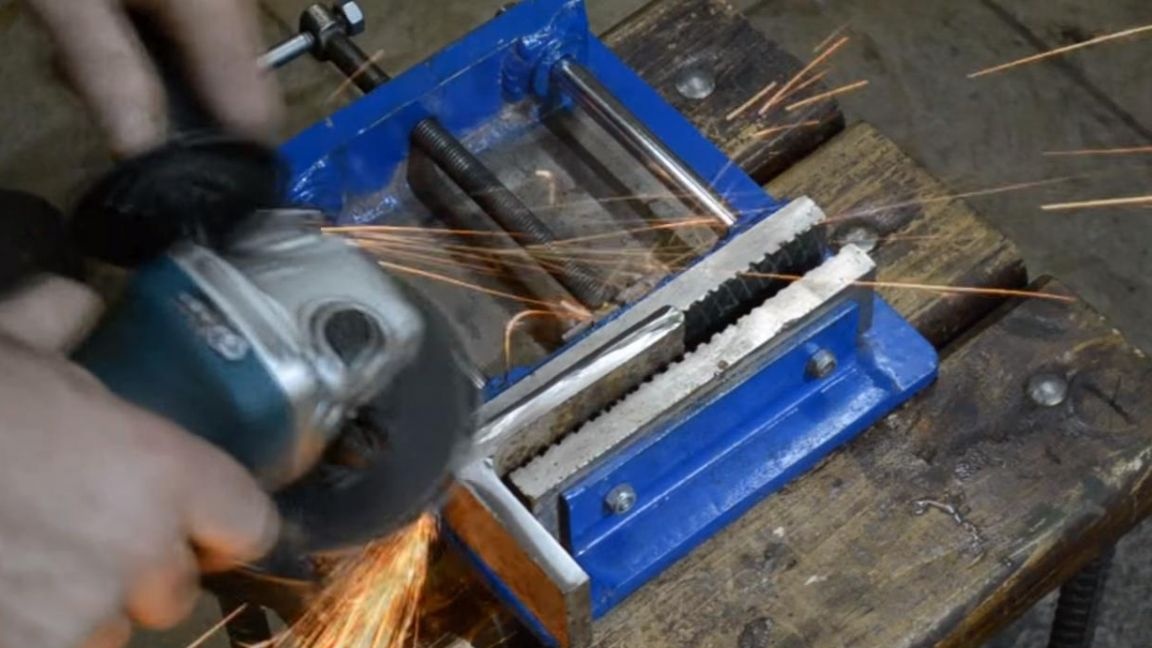
We measure out the necessary segment for fastening the tube and saw off part from the corner with the help of an angle grinder.
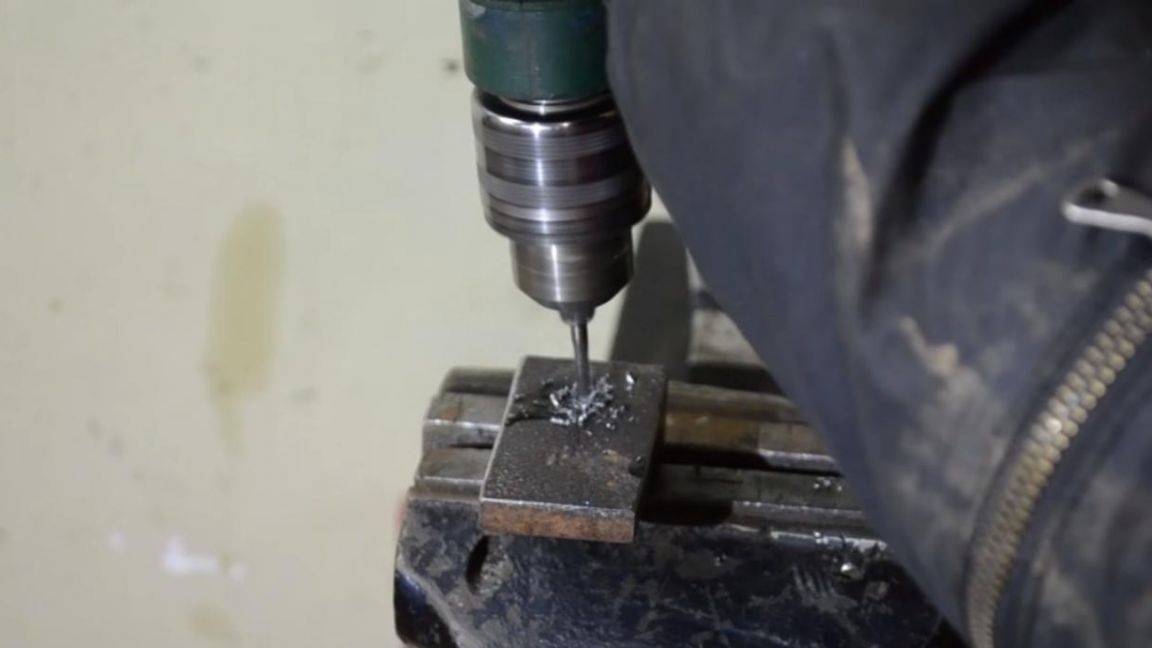
Next, we clamp two metal billets that need to be made of a sheet of metal 6 mm thick, in them you need to make a hole in the middle so that half the diameter falls on one billet, and the rest on the other. In this case, we take a drill with a diameter of 4.5 mm, in the future we can make various plates with the necessary grooves for any diameter of the tubes.
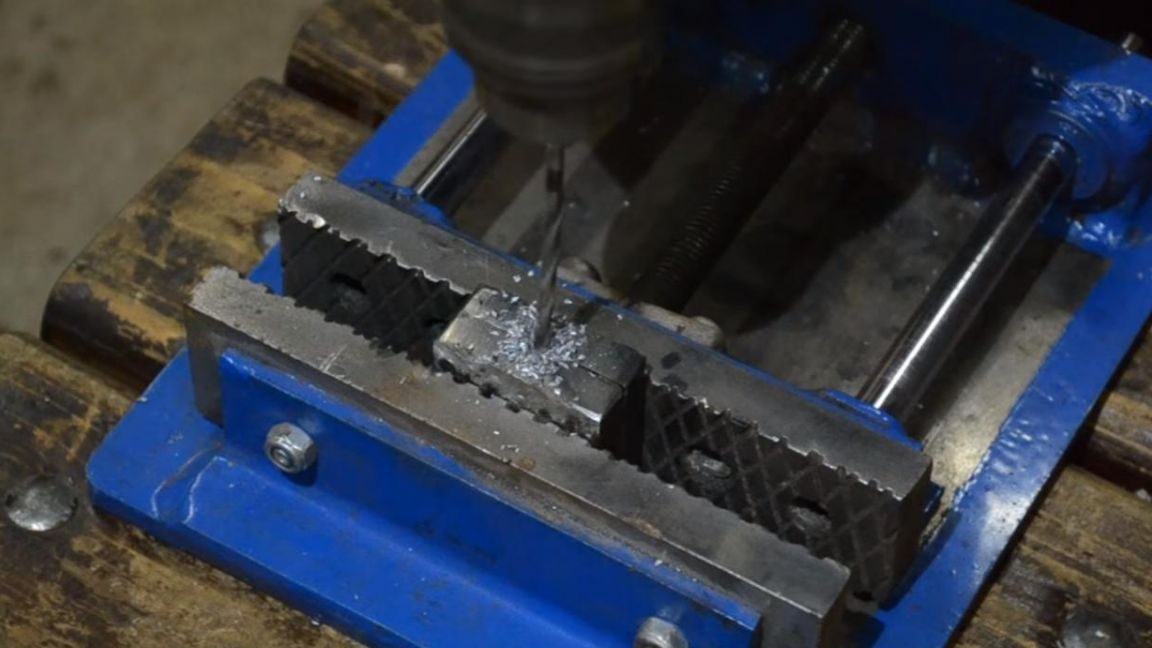
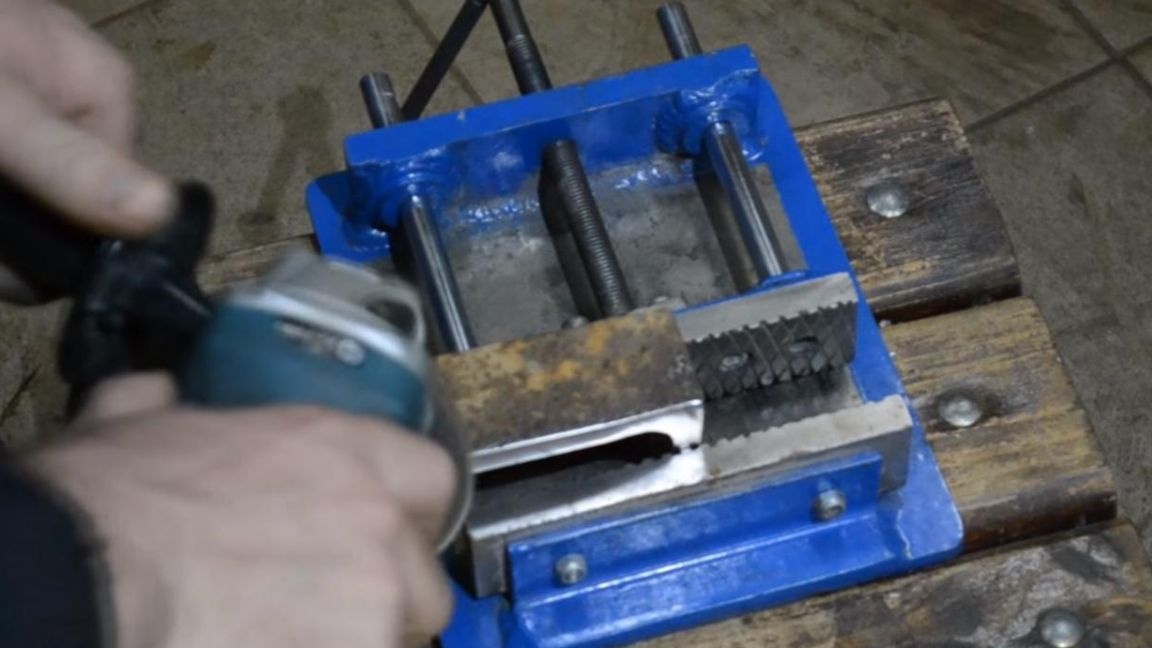
After that, you need to drill holes in two workpieces at once for mounting on the corner, for this we clamp them together using a manual vise, and only then we drill holes, first 4.5 mm, and then 6 mm with a metal drill.
Step Four
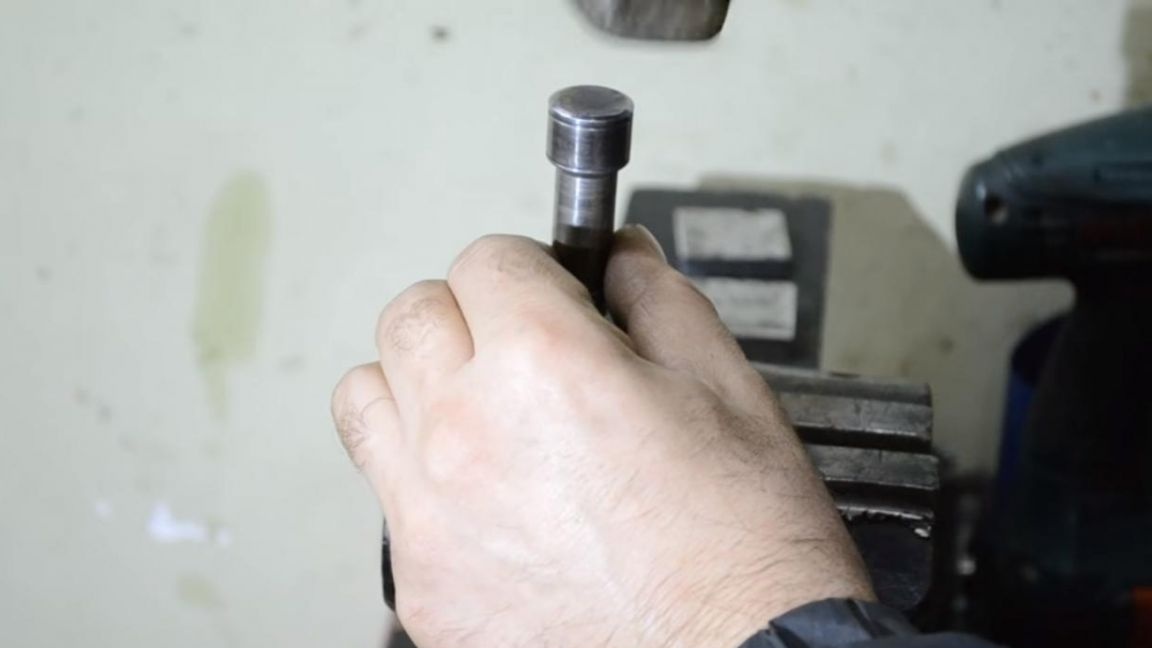
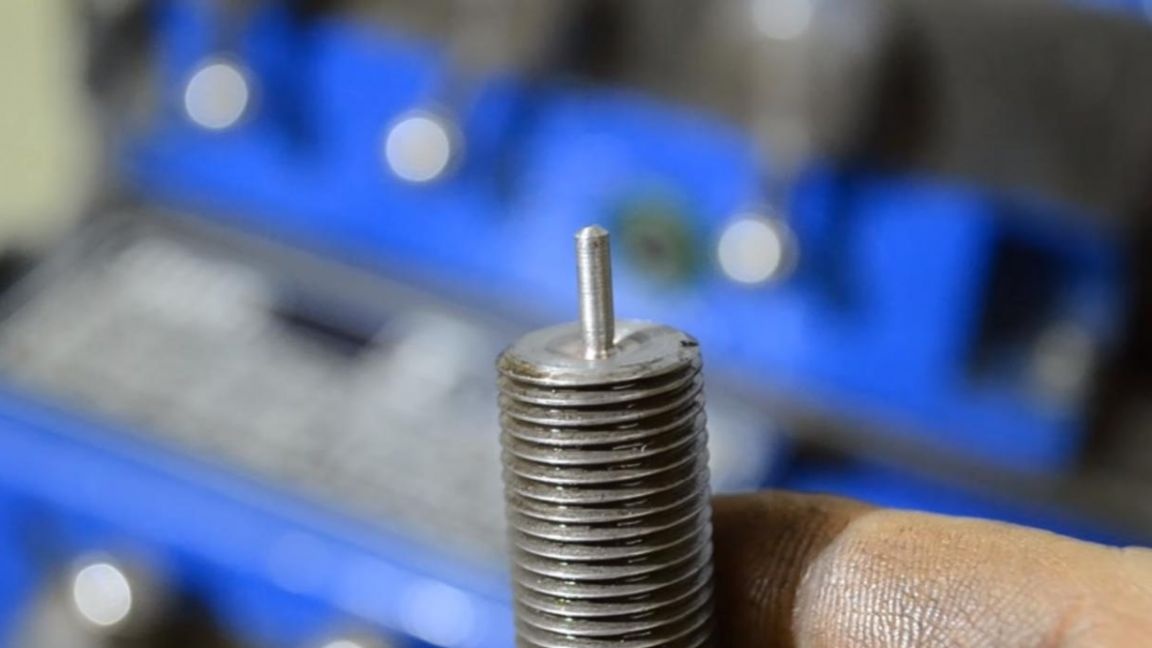
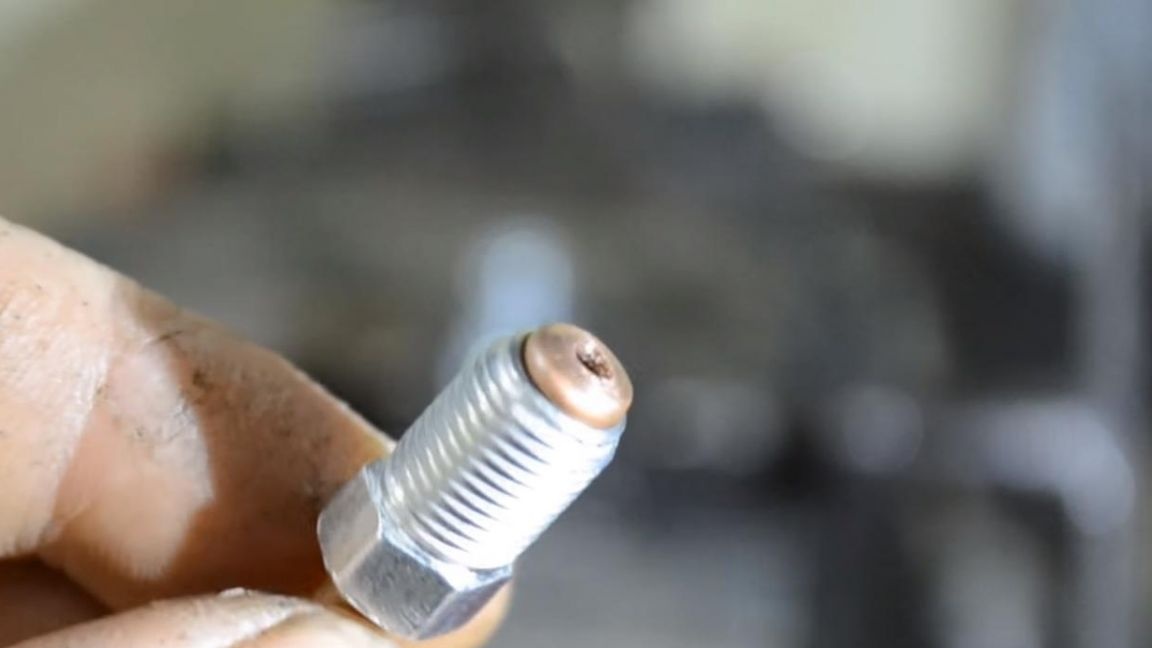
In order to be able to roll the tubes, you need to do the treatment of the hub bolt. To do this, first we shorten it with an angle grinder, and then clamp the bolt in the three-jaw chuck of the lathe for metal and make a groove to a diameter of 2.5 mm, by the way it is equal to the inner diameter of the copper tube.

For rolling, we grind a small recess under the hat. In the end, the bolt should look like this.
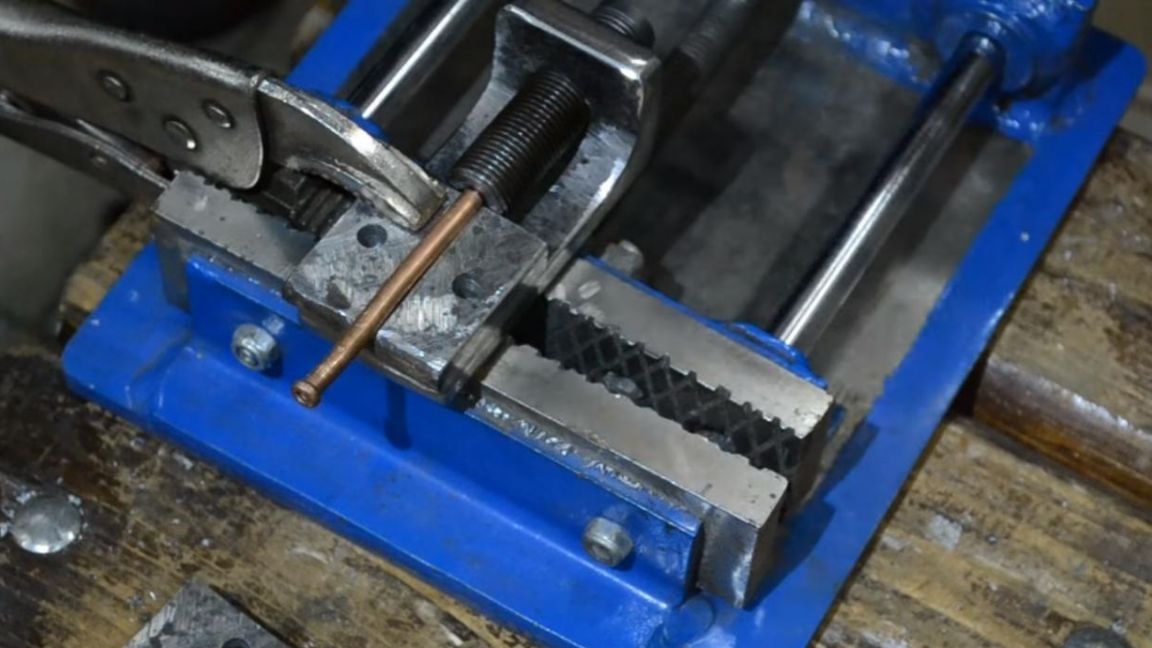
You need to weld a bar to it, for this you need a welding machine. When working with the welding machine, be careful and also use personal protective equipment, a welding mask and gaiters.
In order for the tube to not bend and roll evenly during rolling, alignment is necessary.
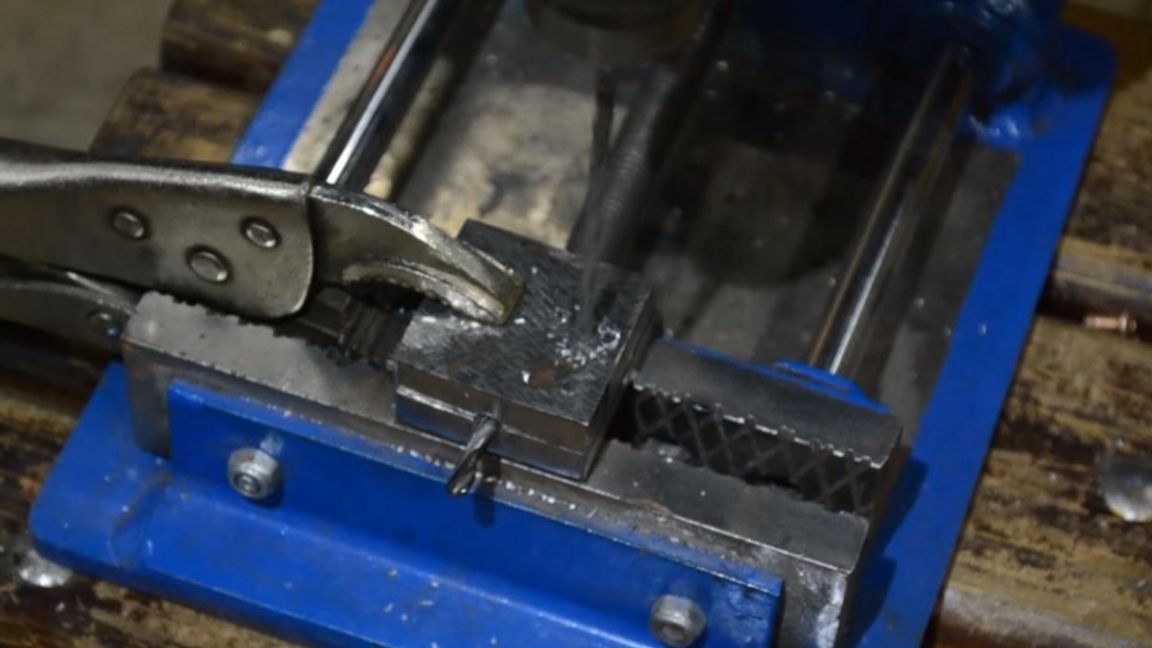
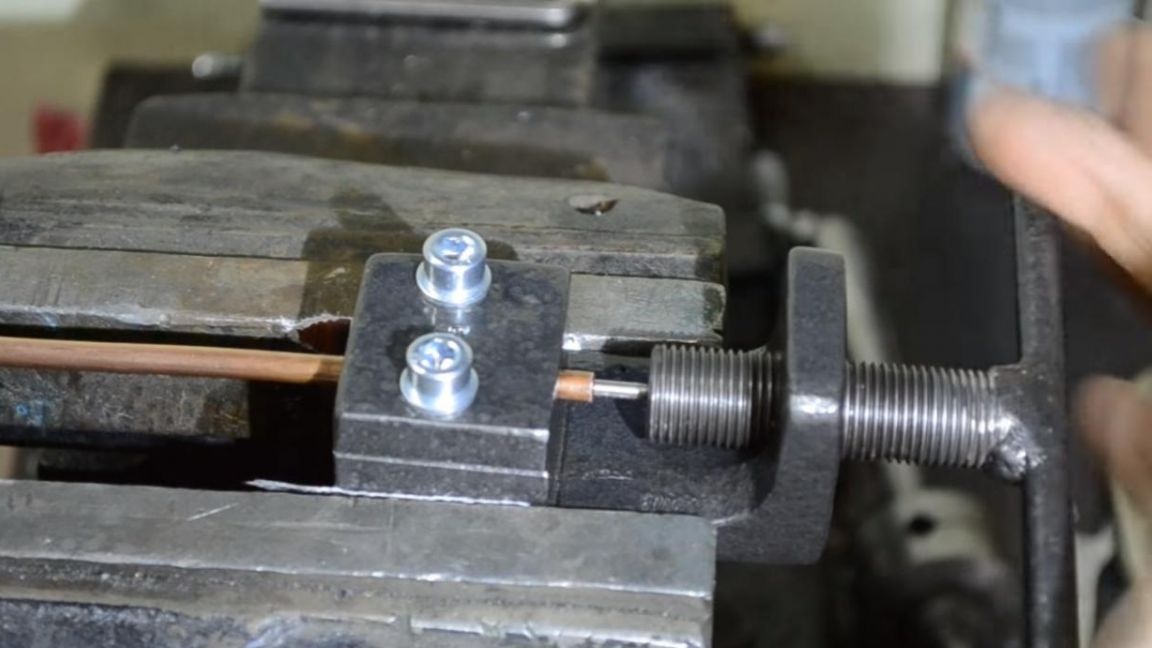
We take the brake tube and put it on the tip of the bolt, then install a workpiece under it with a groove under the tube, and then fix it with a manual vise and begin to mark the drilling sites.


After that, we expand the manual vise and drill holes to the end with a drill whose diameter is 5 mm, and then in these holes we cut the M6 thread using a tap.
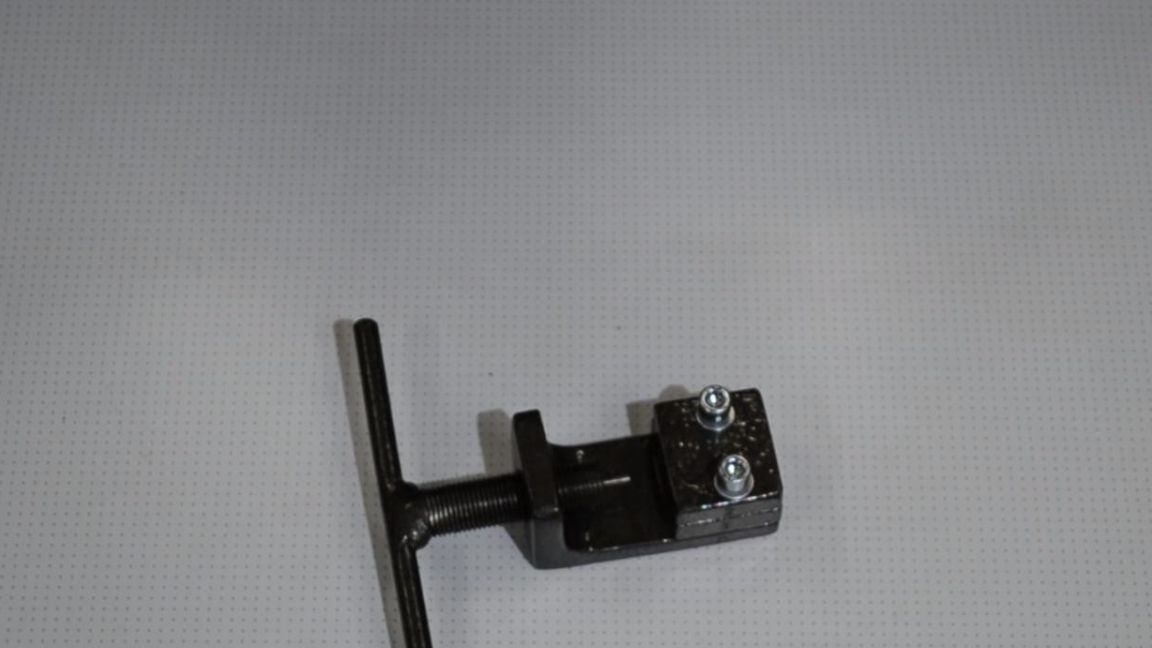
Step Five
Now the instrument has to be given a beautiful look, for this we paint the parts with a spray can of hammer paint, protecting the threads in advance with masking tape.

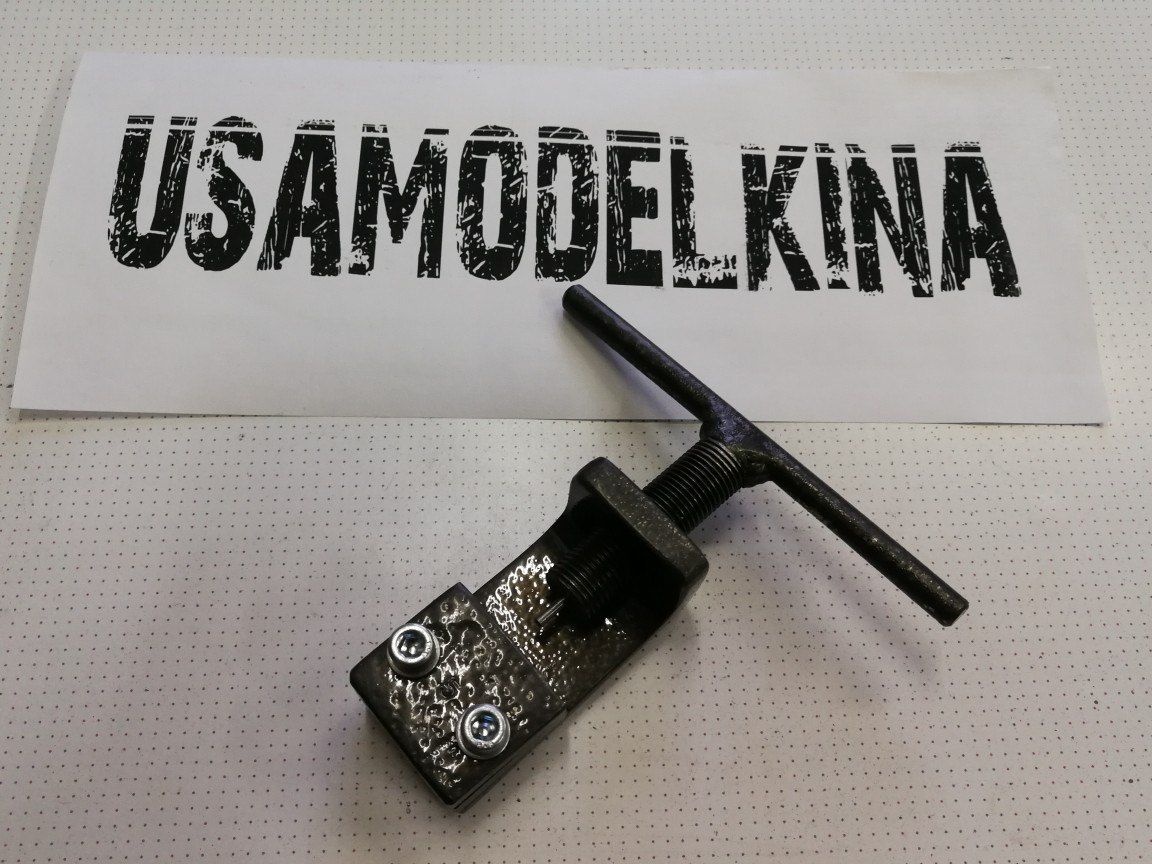
The tool is completely ready, which means it's time to test it in action.
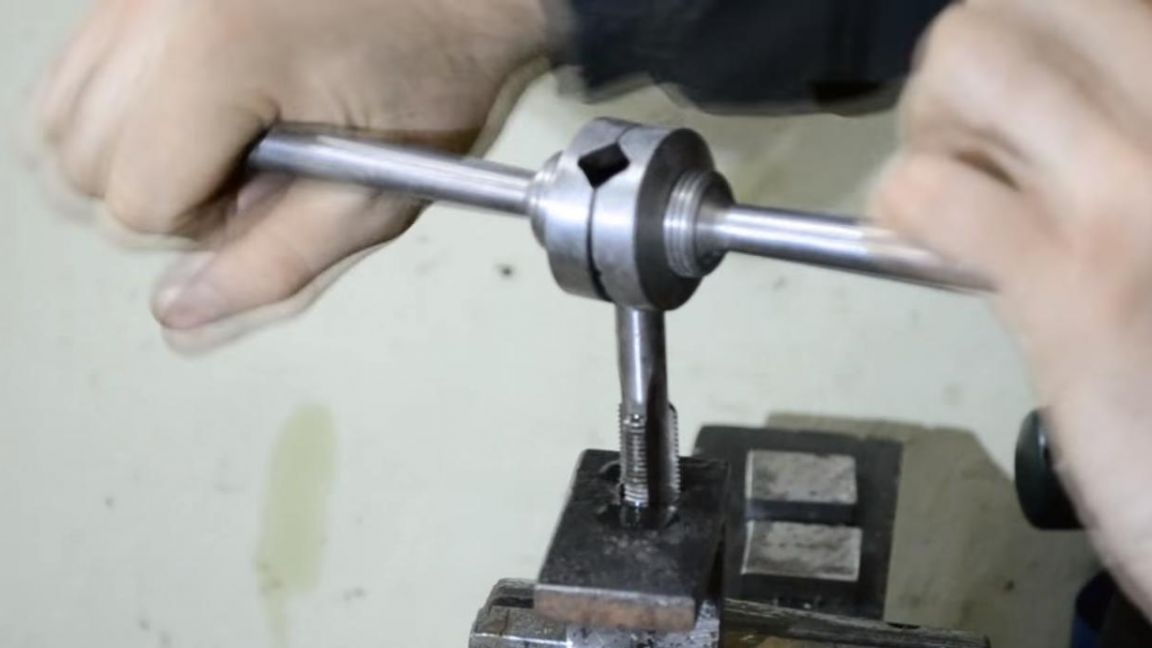
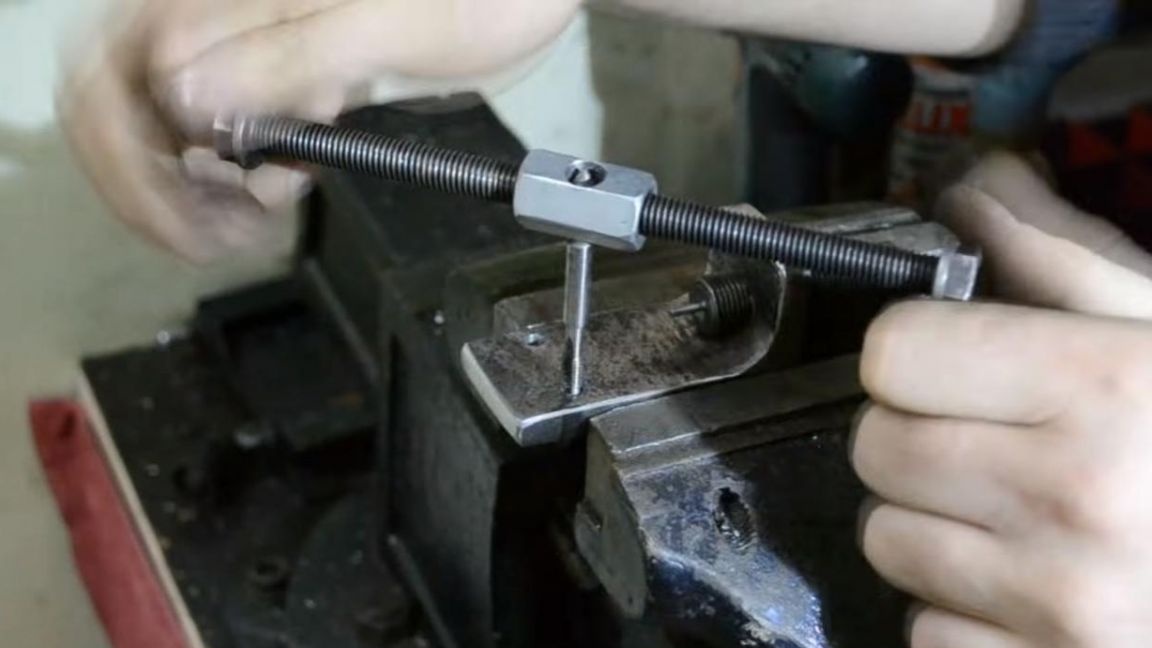
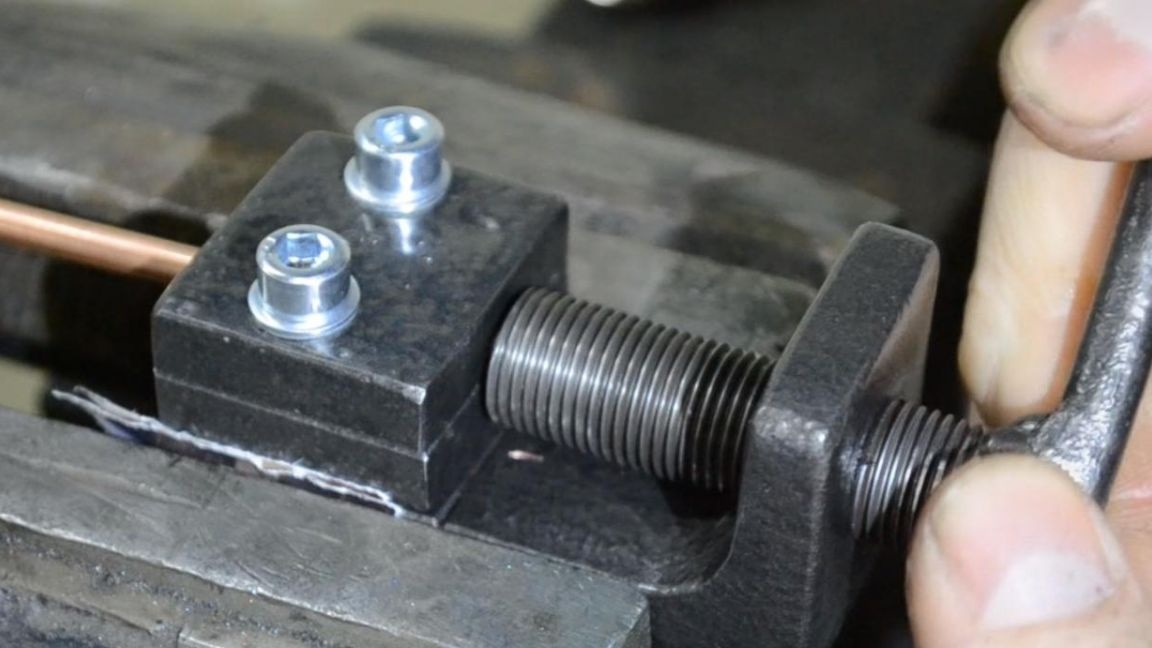
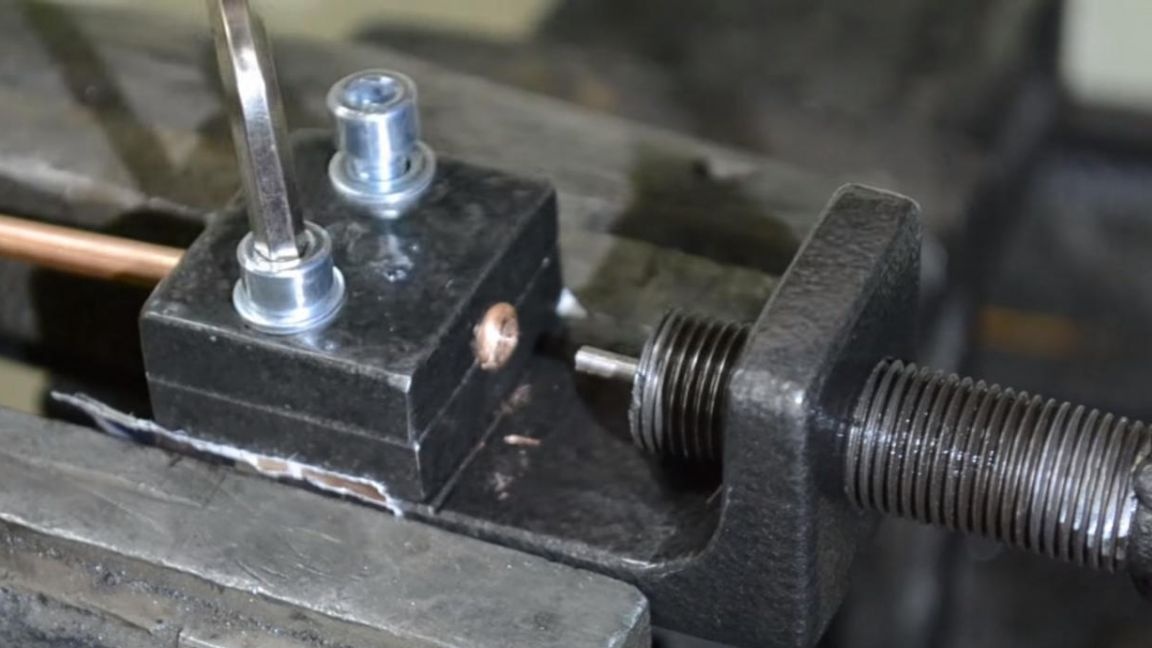
We clamp the tool in a vice, take a copper tube with a diameter of 5 mm and put it into the groove, leaving about 5 mm outside, then tighten the bolts with a hexagon.
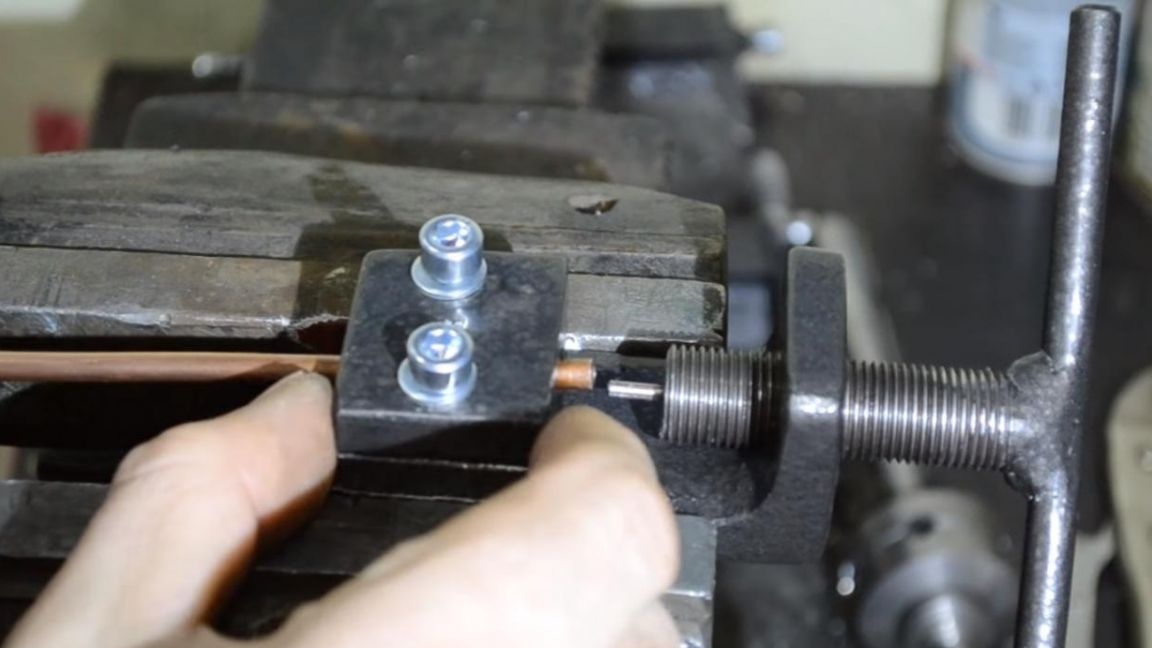
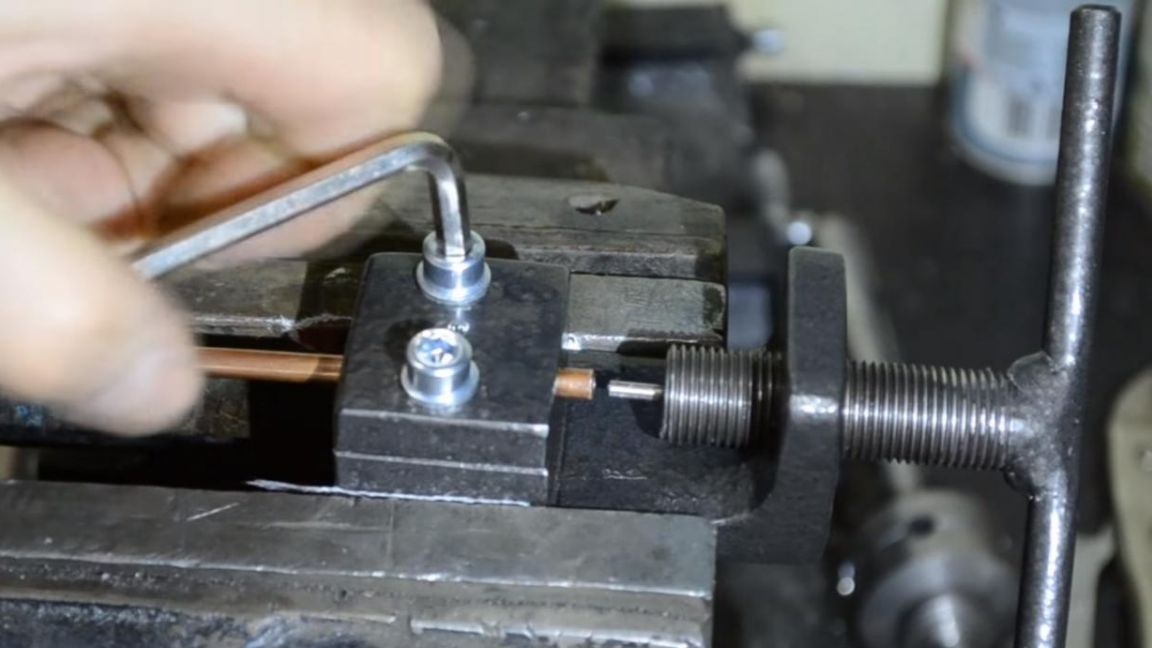
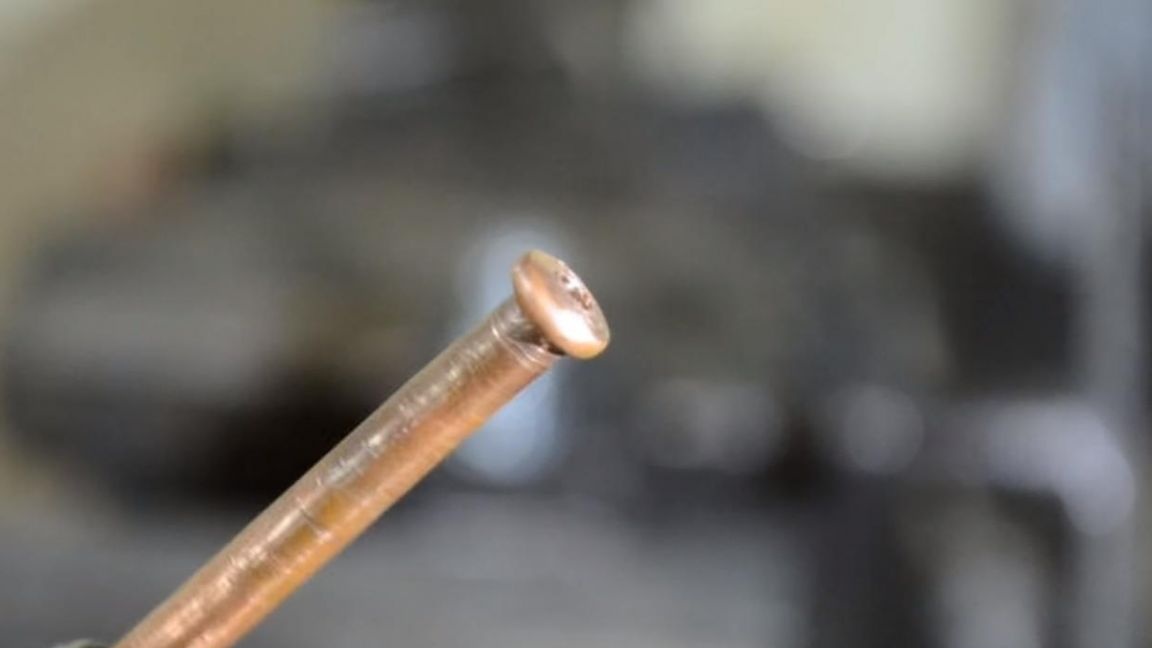
Next, we rotate the bolt with the pin all the way into the tube mount, then weaken the tension of the bolt and unscrew it back, we also loosen the mounting bolts and pull out the tube with a flared circle.
After installing this tube, brake fluid will not leak.
That's all for me, thank you all for your attention and creative success.