
In this article, Robert - DaWanda will show how to make a playground for a children's room from particleboard and plywood.

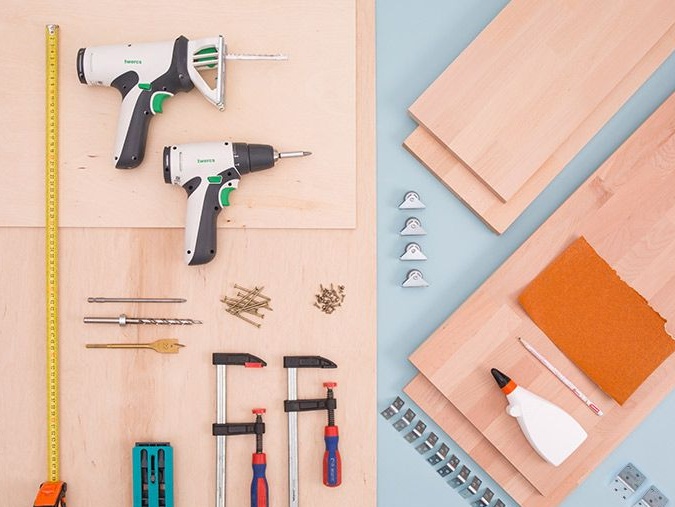
Materials and tools.
• 2 sheets of chipboard 900 mm x 300 mm x18 mm (platform).
• 4 sheets of chipboard 1182 mm x 300 mm x 18 mm (platform).
• 2 sheets of chipboard 582 mm x 300 mm x 18 mm (platform).
• 2 sheets of chipboard 614 mm x 300 mm x 18 mm (platform).
• 2 sheets of chipboard 1208mm x 300mm x 18mm (platform.)
• 2 sheets of chipboard 600 mm x 290 mm x 18 mm (drawer).
• 4 sheets of chipboard 530 mm x 200 mm x 18 mm (drawer).
• 2 sheets of chipboard 600 mm x 200 mm x 18 mm (drawer).
• plywood sheet, 1200 mm x 600 mm x 12 mm.
• multilayer plywood board, 2000 mm x 1300 mm x 12 mm.
• 2x large corners.
• 20x small corners.
• 8x furniture roller 25 mm.
• pencil.
• sandpaper.
• glue.
• roulette.
• drill or screwdriver.
• jigsaw.
• hacksaw.
• set for angular drilling.
• step drill (20 mm).
• a set of drills on wood.
• a set of bits for a screwdriver.
• 4 x 30 mm screws.
• 3 x 8 mm screws.
• a set of clamps.
• white water-based primer.
Description.
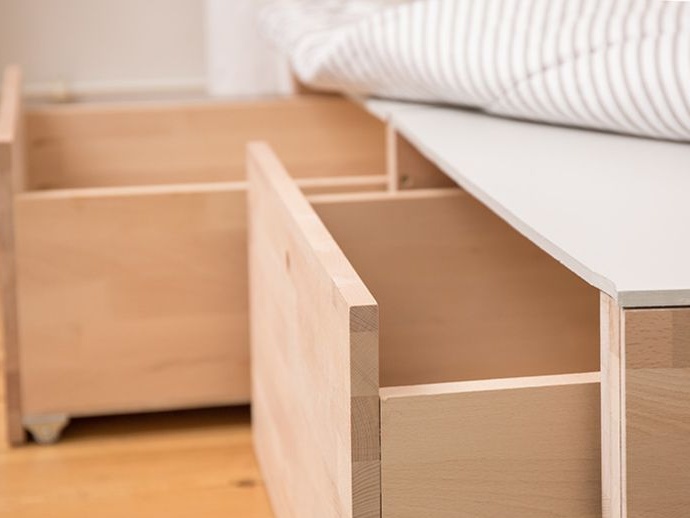
This cozy "pedestal" in the children's room can be used not only as a place for sitting or as a playground, but also as a potential space for storing toys or children's things. Great space saving! And such a platform looks very stylish. How to build such an exclusive furnitureRobert will tell you step by step.
1. Preparation of the material.
The task is to build a wooden structure of a given size, which, moreover, could also be moved. Therefore, the site will consist of two absolutely identical blocks, which can then be joined together already at the final assembly site.
To simplify the task, you can order boards and panels of the required size in the hardware store. You can also choose a tree variety yourself. When buying the top panel, you should make sure that it is quite thick, because the weight and load on it will be large. Select the length of the screws so that the screw goes through it. So, check everything twice!
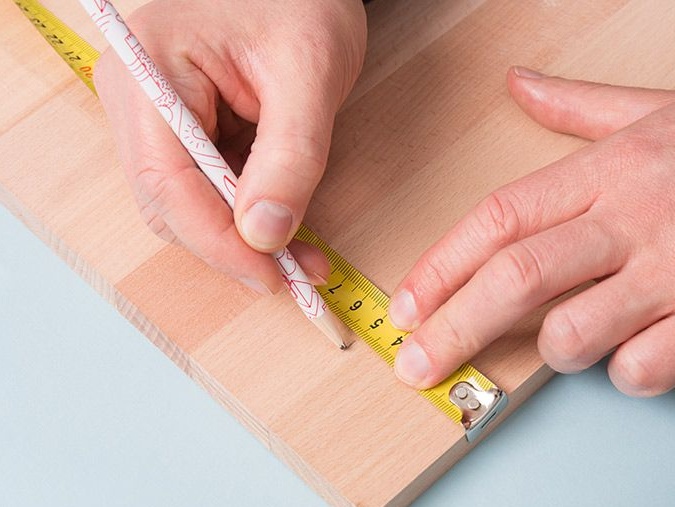
2. Builds a support frame: marking.
Before connecting the panels to each other, Robert first makes marks on each of the boards in the places where they will be subsequently drilled.
Robert made the following notes:
• Board 2 + 5 (1182 mm x 300 mm x 18 mm) on one side, three marks at an equal distance from each other.
• Board 3 (582 mm x 300 mm x 18 mm) on both sides with three marks at the same distance from each other.
• Board 4 (614 mm x 300 mm x 18 mm) on both sides with three marks at the same distance from each other.
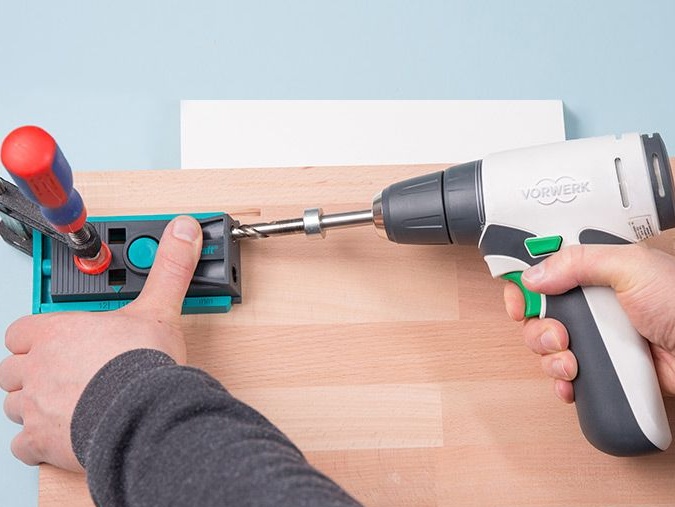
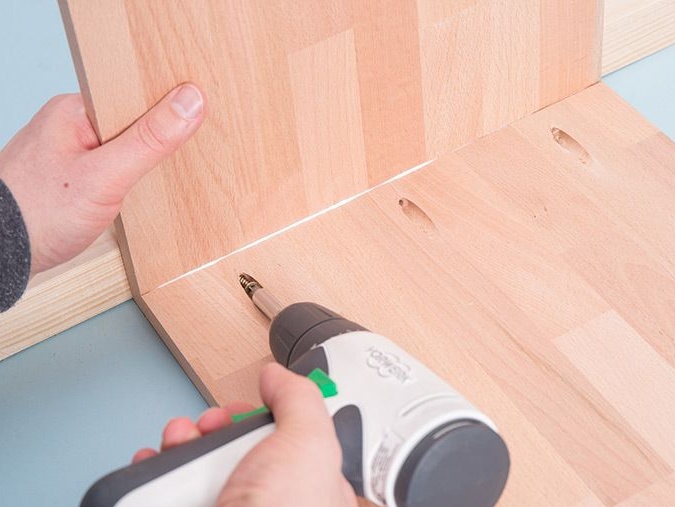
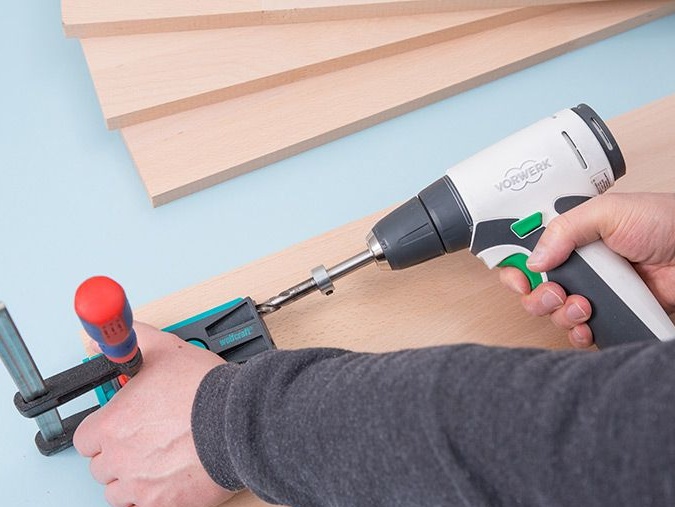
3. Support frame: drill holes.
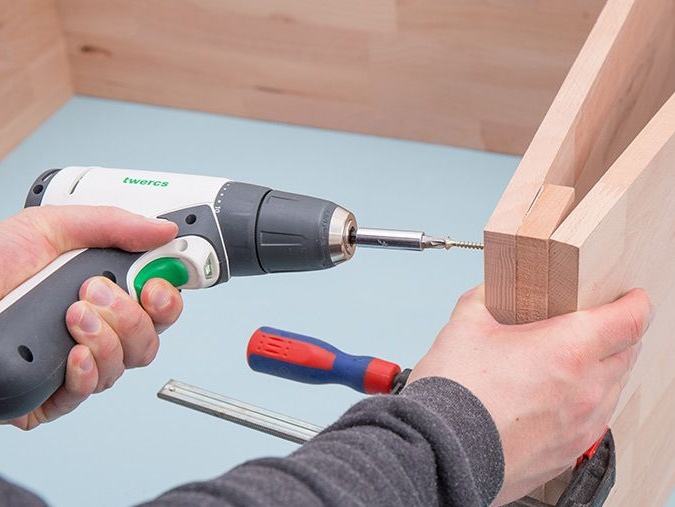
A convenient way to connect wooden elements is the so-called "pocket drilling" or the connection "on a slanting screw". This is one of the carpentry tricks, based on drilling wells at a very flat angle to the surface of the tree. On each label previously marked by the author, he imposes a special template, makes a hole. Carries out this operation on all boards in the places of markings.
Attention: the template must be placed on each board so that the hole is fully aligned with the board. During the drilling process itself, Robert fixes the template to the wood using a screw clamp.
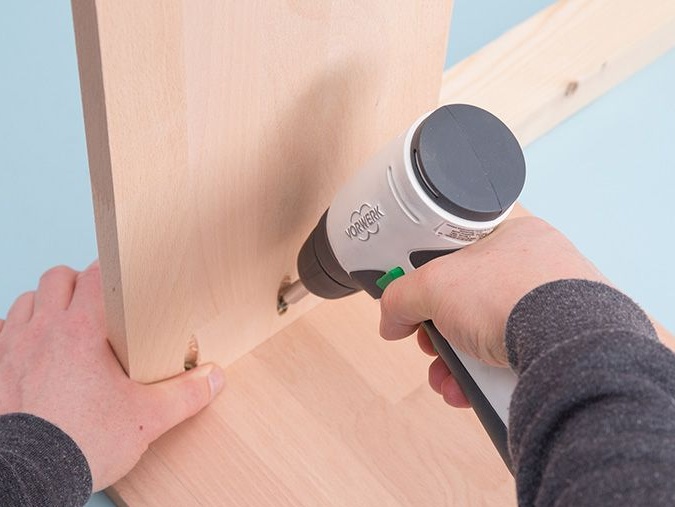
4. Support frame: twists the elements.
Combines panels, having previously glued the places of their connection, and then screws the wooden elements together. Whenever possible, it uses some kind of solid support in order to eliminate the displacement of the boards during assembly.
When assembling, it starts from two external sides (1 + 2), then adds short sides (3 and 4), and then the long side (5).
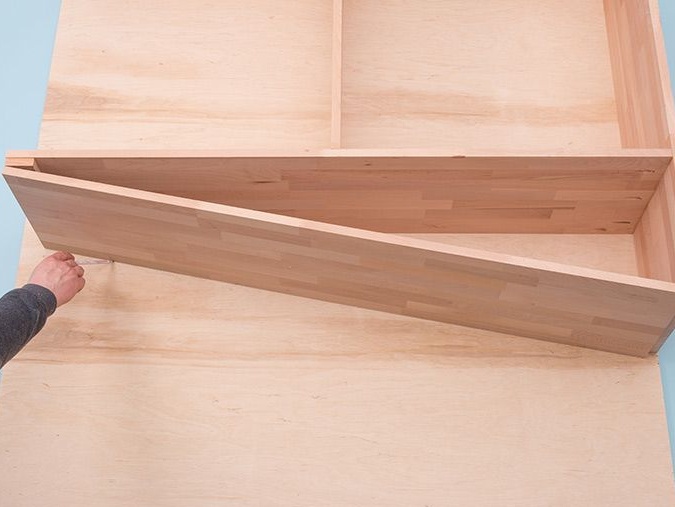
5. Support frame: attaches the bevel (diagonal) 1.
To attach a diagonal to the structure, he takes the longest board (6) and twists a large corner at one of its ends.
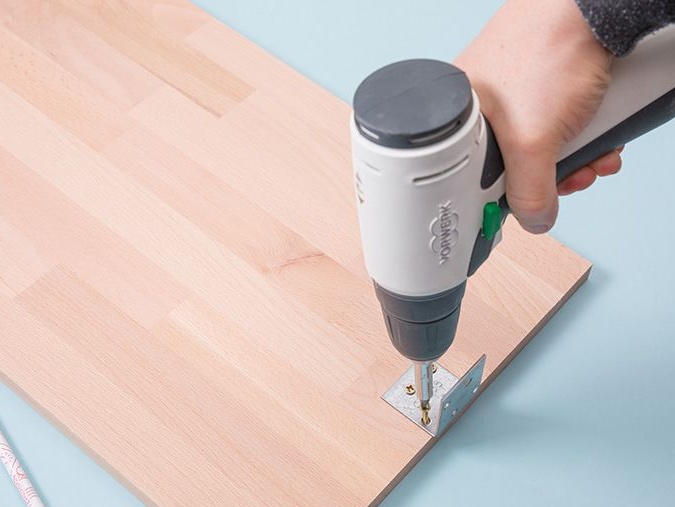
6. Support frame: attaches the bevel (diagonal) 2.
Screws the board diagonally to the main structure and bends it until it touches the board of the body.
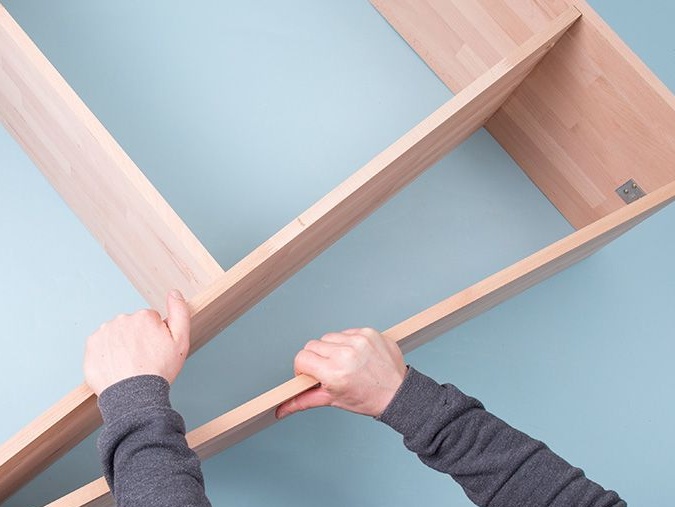
7. Support frame: attaches the bevel (diagonal) 3.
Since the diagonal board often does not fit butt to butt to the board, Robert cuts another block of 5 cm wide from the remaining wood material and glues it to the case.
8. Support frame: attaches the bevel (diagonal) 4.
Now twists both parts of the body and the bevel (diagonal board) together.
9. Marks the dimensions of the top panel.
Lays a multilayer plywood plate on the floor, on top - a prepared support frame. Places the frame on the slab so that two, perpendicular to each other, the outer sides completely fill one corner of the plywood board. Now outlines the remaining external dimensions of the frame with a pencil on plywood.
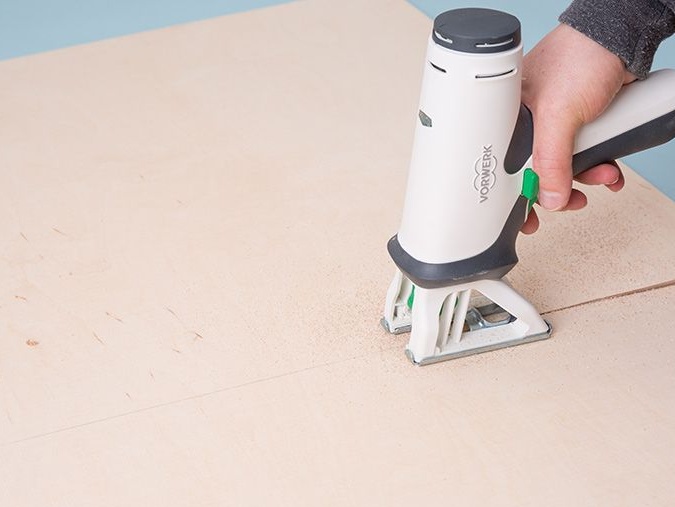
10. Cuts the top panel.
Removes the frame from the plywood board and cuts out the top panel of the future site according to the layout.

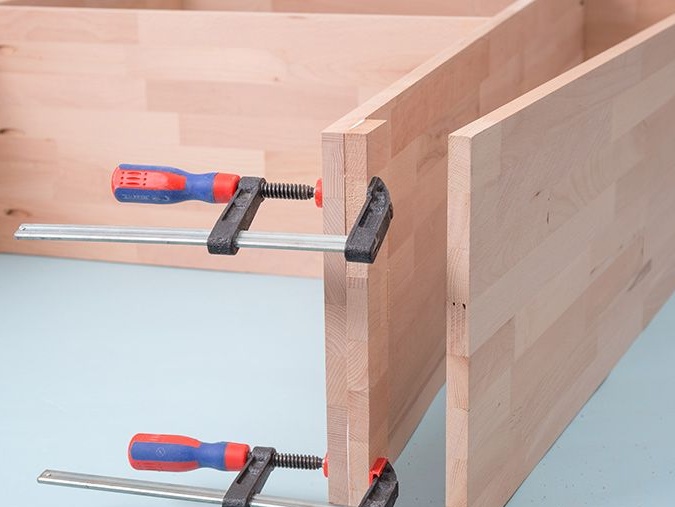
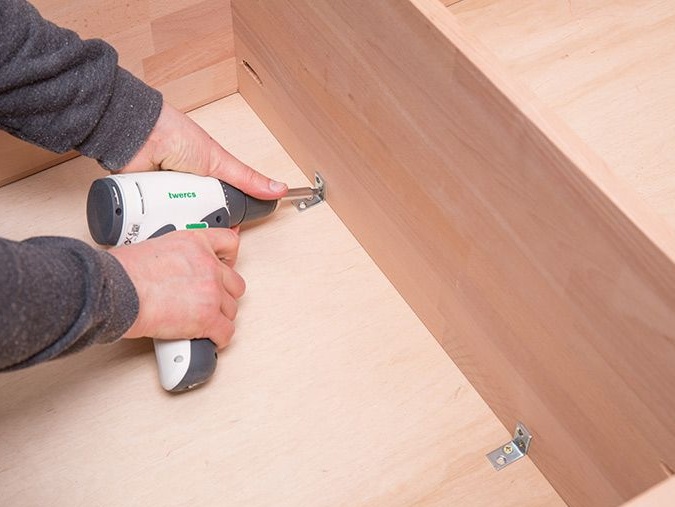
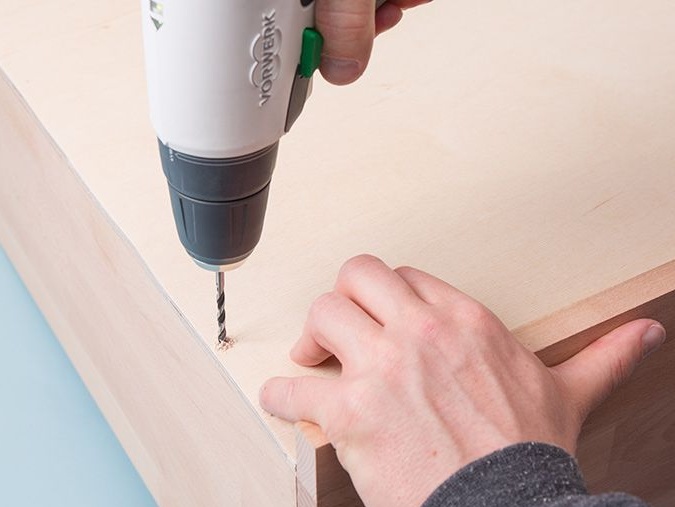
11. Screws on the top panel and frame.
Now it places small corners at the junction between the frame and the plywood board at the same distance from each other and from the edges of the panels and marks the points at which they should be screwed. Using a screwdriver, fasten small corners so that at least one screw falls on each shoulder of the corner.
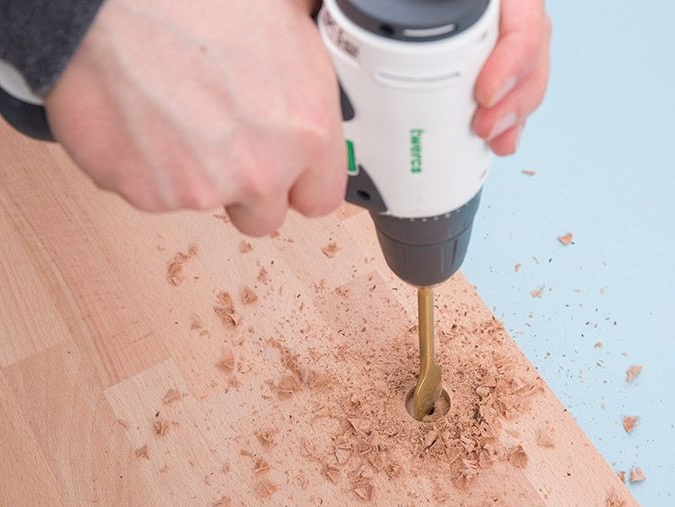
12. Drawer: drills a hole for the fingers.
Using a marker, marks at the required height the place where there will be a hole for the fingers and drills it with a spiral drill. Robert necessarily puts something under the board in which he will drill, so as not to damage the table itself and clean all the walls of the hole as it should.
13. Drawer: makes holes for the rollers.
Now, as in the construction of the frame, it makes two holes on each side of the box.
14. Drawer: measures distances for mounting rollers.
On the finished box, the rollers are offset so that they are not visible in front. To achieve this effect, marks on the front of the box the distances that the rollers need to be deepened.
He takes the front panel and measures the height of the roller from the bottom edge, as well as the thickness of the bottom panel of the box. Both heights together form a point at which Robert will then secure the sides of the drawer. Repeats the entire process on both sides.
He draws attention: for the box to move on the rollers, he will have to take about 1-2 mm from the height of the roller itself, before he finally tightens it!

15. Drawer: screw the sides and back of the drawer.
Now it attaches the already prepared side panels to the front of the box, after gluing all the seams with adhesive at the junction. Then fastens the entire structure with screws.
Now all that remains is to attach the back panel to the side parts of the box.
16.Box: chases the bottom.
Now Robert will put the box on the bottom sheet and transfer the outer edges of the box to the plywood.

17. Drawer: now cuts the bottom along the marking line.
18. Box: first drills the required holes.
To fix the bottom panel, it places a plywood board cut to the size of the box on the bottom side of the drawer frame and drills several holes for subsequent fastening. At the same stage, Robert can place 4 rollers, respectively, in each corner of the structure and, putting marks, drills holes there.
Robert pays attention to the holes in the middle of the side panels. For reliability, it takes half the thickness of the board (in our case 9 mm) and lays it off the edge.
19. Drawer: Fastens the bottom.
Now screws all the rollers to the plywood panel and drawer. The box is ready and should easily stand in the designated area of the site. Repeats the same steps with the second drawer.

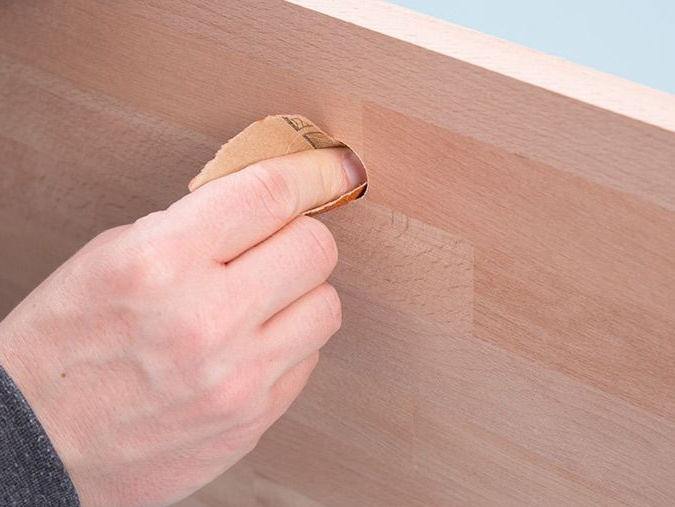
20. Cleans the edges.
Robert takes sandpaper and smoothes out all the edges of the finger holes, as well as sharp burrs and bumps.
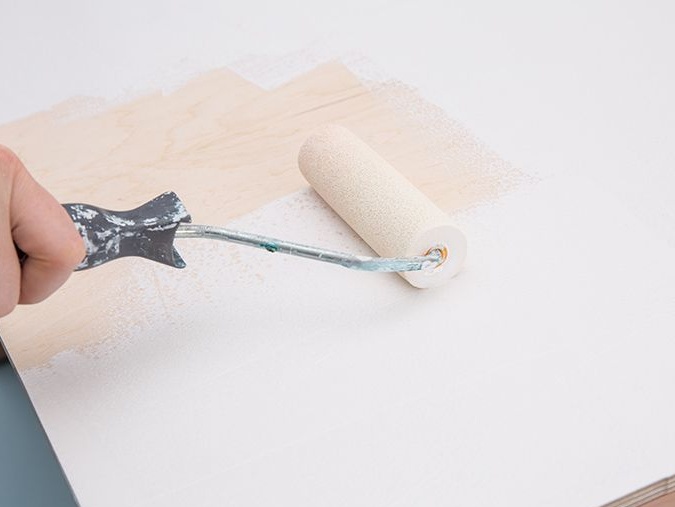
21. Painting the site.
To give the site some color, Robert first peels the surface of the plywood with a sandpaper to remove burrs and roughness. Next, the author paints the seating surface in white. After the board has dried, the first part of its site is ready. It remains only to repeat all the same steps for the construction of the second half of the site. Only this time, the author needs to build it in a mirror projection.
Then it installs both parts of the "pedestal" next to each other and connects them together, securely fastening them with screws.
Robert`a site is ready!
And you just have to come up with a dense bedding like a carpet or carpet for the game. Or a soft mattress to sleep your children.
All successful homemade!