

Fairly easy to manufacture, manual milling cutter made of electric drill. For the operation of such a milling cutter, any standard electric drill is suitable, which can be quickly installed and also quickly removed from this device.
Greetings to all my colleagues the inhabitants of our sites!
Today I want to talk about how you can make a fairly simple manual router from a conventional electric drill. More precisely, it would be more correct to say that we are talking about creating fixtures, in which any standard electric drill is inserted and as a result a simple manual milling cutter is obtained.
And I want to note right away that this milling cutter, of course, does not reach either the standard manual milling cutter in terms of power or functionality. Accordingly, it can in no case be a full-fledged alternative to the purchased router.
But I just didn’t count on this, because this device was created exclusively for cutting shallow grooves, with a depth of 5-6 mm, using end milling cylindrical mills on wood.
And actually, I made this device not for myself, but for my father. The fact is that my father, on his own site, is building a two-story summer house on his own. And now he just reached the installation of windows and doors. At the same time, he was faced with the need to cut through shallow, but even and neat grooves for hinge plates in the jambs and ends of window frames and doors.
In general, to be honest, initially for these purposes, I advised him to buy a regular inexpensive router. But his father refused, saying that he would not need this router at all later, and there wasn’t any sense in buying it for one time, even to make several tens of grooves.
As a result, I decided to make him a special device for an electric drill, which allows cutting shallow grooves in wood.
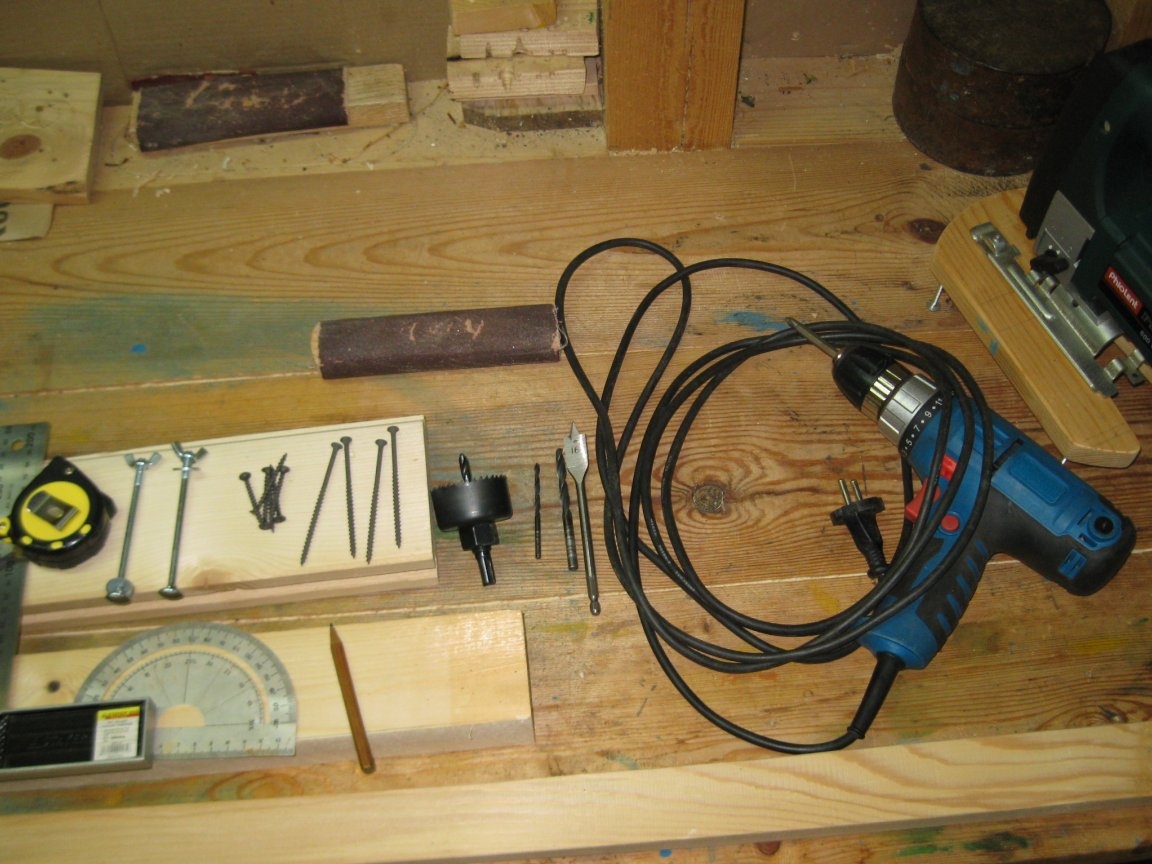
To make such a device, I needed the following accessories:
Materials and fasteners:
• Cutting of wooden boards, bars and planks, that is, actually waste from building materials
• Eight wood screws 4x45 mm
• Four wood screws 4x80 mm
• Two furniture bolts M6, 100 mm long, with washers and wing nuts.
Instruments:
• Drawing and measuring tools (pencil, tape measure, square and protractor)
• awl
• Electric jigsaw with wood file
• Electric drill / screwdriver
• Drill for metal with a diameter of 6 mm
• Drill for metal with a diameter of 4 mm
• Feather drill on a tree with a diameter of 16 mm
• Hole saw on a tree with a diameter of 51 mm
• Spherical wood milling cutter
• Hand saw with a small tooth
• Chisel 30-40 mm wide
• Hammer
• Screwdriver bit PH2, for screwdriving
• Sandpaper.
The manufacture of the device.
Before describing the stages of manufacturing this device, I will talk about its design features.
This device will consist of three main parts made of wood.
It will be based on a piece of a thick board, 35 cm long, 12 cm wide, and 4 cm thick. From the bottom to this base, with the help of four long wood screws, two legs will be fastened in the form of bars 14 cm long, 5 cm wide, and 4 cm thick. From above to the base, one of the two slats of the clamping device will be fastened 4.5 cm wide, and 2 cm thick, with rectangular cutouts for installing and clamping the neck of the electric drill. The second bar will be connected to the first using two M6 furniture bolts equipped with wing nuts for fixing the electric drill.
By the way, it should be noted that I will make all the wooden parts of this device from scraps of wooden planks and bars, that is, practically from construction waste.
Another point is that in this device I did not do any adjustment of the depth of cut, that is, the milling cutter. This is due to the fact that since with this device mainly shallow grooves will be cut, the cutting depth can be adjusted simply by changing the reach of the cutter shank from the drill chuck.
I also note that for greater simplicity and speed of manufacturing of this device, I broke all the steps, not in the order of manufacture of individual parts, but in the same technological operations. That is, let’s say, if the operation of drilling holes is performed, then at this stage all the necessary holes are drilled for all parts and parts. If sawing is carried out, then all details that are possible, etc., are also cut.
Well, now, in fact, we will consider all stages of the manufacture of the product.
Stage 1. Marking all the details.
At this stage, with the help of a drawing and measuring tool, we mark out all future parts and details, as well as the centers of future holes.
Step 2. Drilling holes.
Step 1. Drilling and countersinking holes for screws in the base and blanks for the clamping device.
First, a drill with a diameter of 4 mm, drill holes for the screws in these blanks, and then, using a spherical milling cutter on a tree, countersink the ends of the holes for countersunk screws in our blanks.
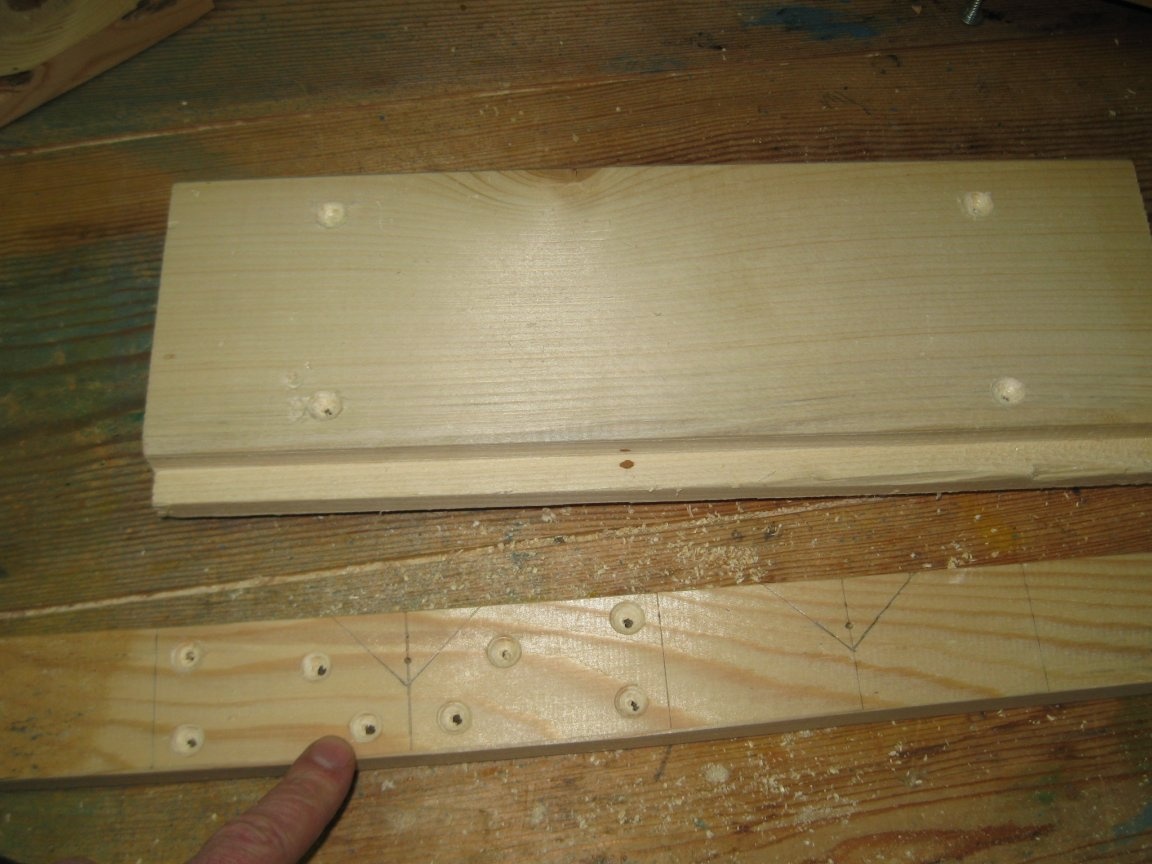
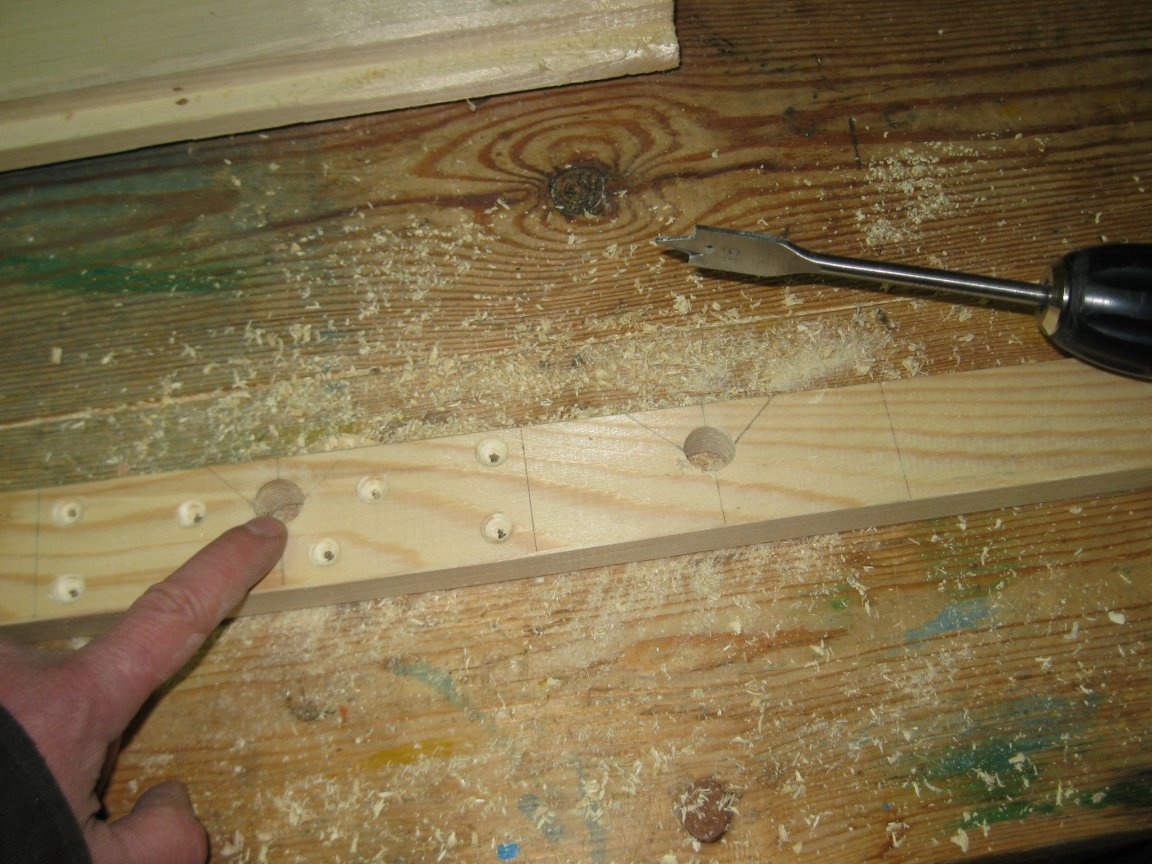
Step 2. Drilling holes in the corners of rectangular cutouts.
In the corners of future rectangular cut-outs of blanks for the clamping device, for their greater rigidity and strength, we drill holes with a diameter of 16 mm with a feather drill on a tree.
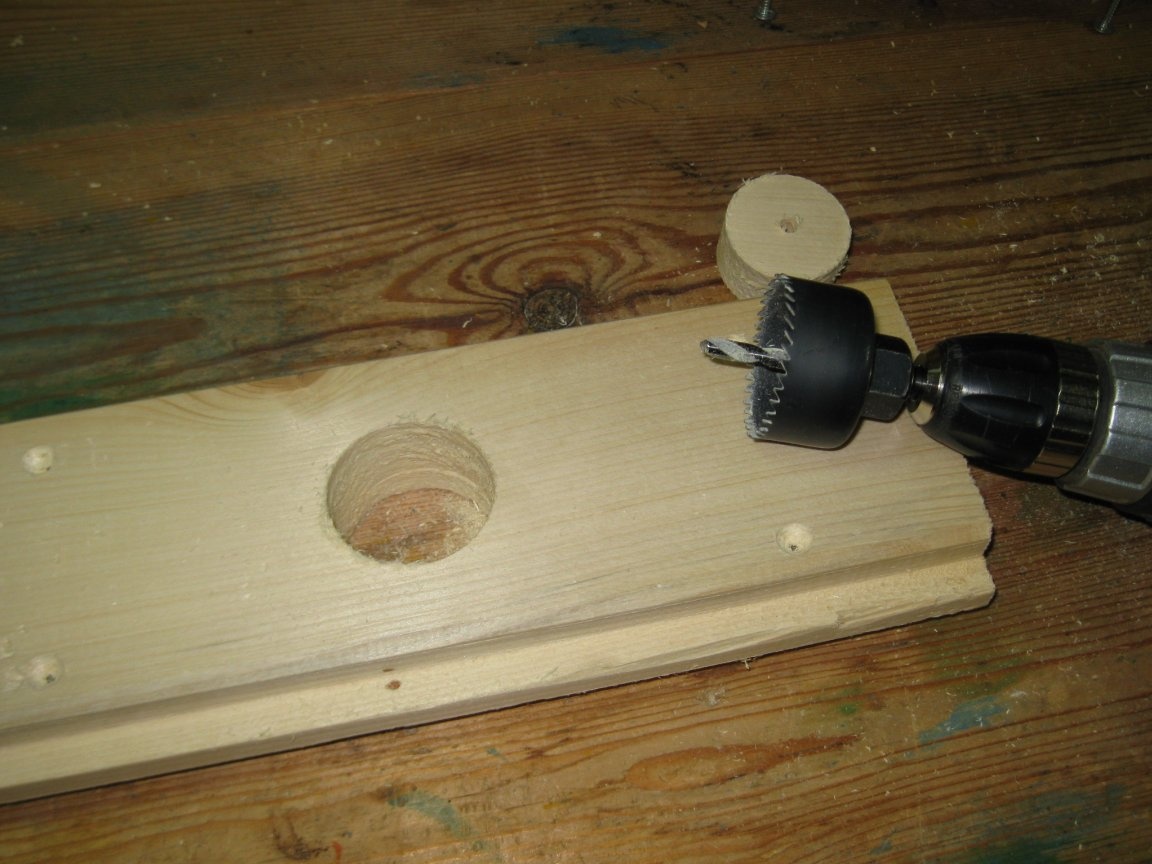
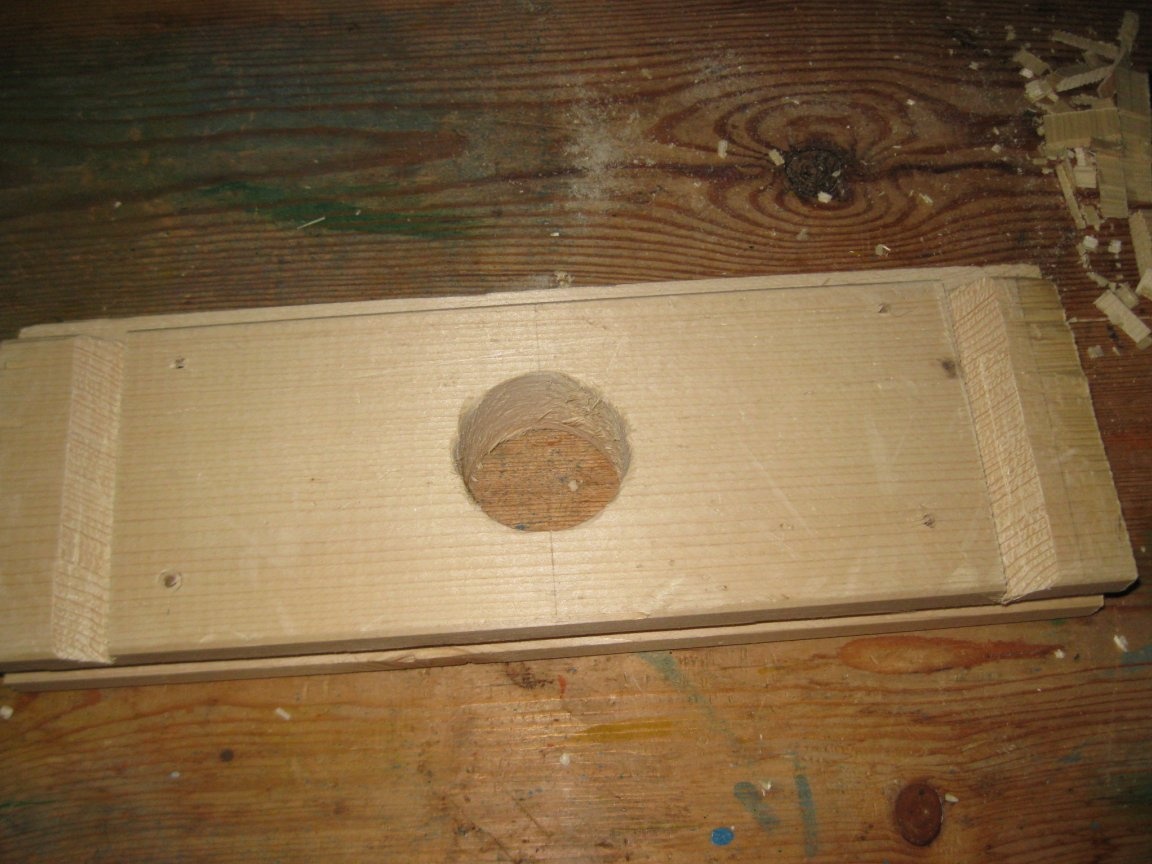
Step 3. Drilling a hole in the center of the base.
In the very center of our base, using a hole saw on a tree with a diameter of 51 mm, we cut a hole for an electric drill chuck.
Step 4. Drilling holes for furniture bolts in the blanks of the clamping device.
In the sides of both blanks of the clamping device, we drill two holes with a diameter of 6 mm, under furniture bolts.
Stage 3. Sawing all the details.
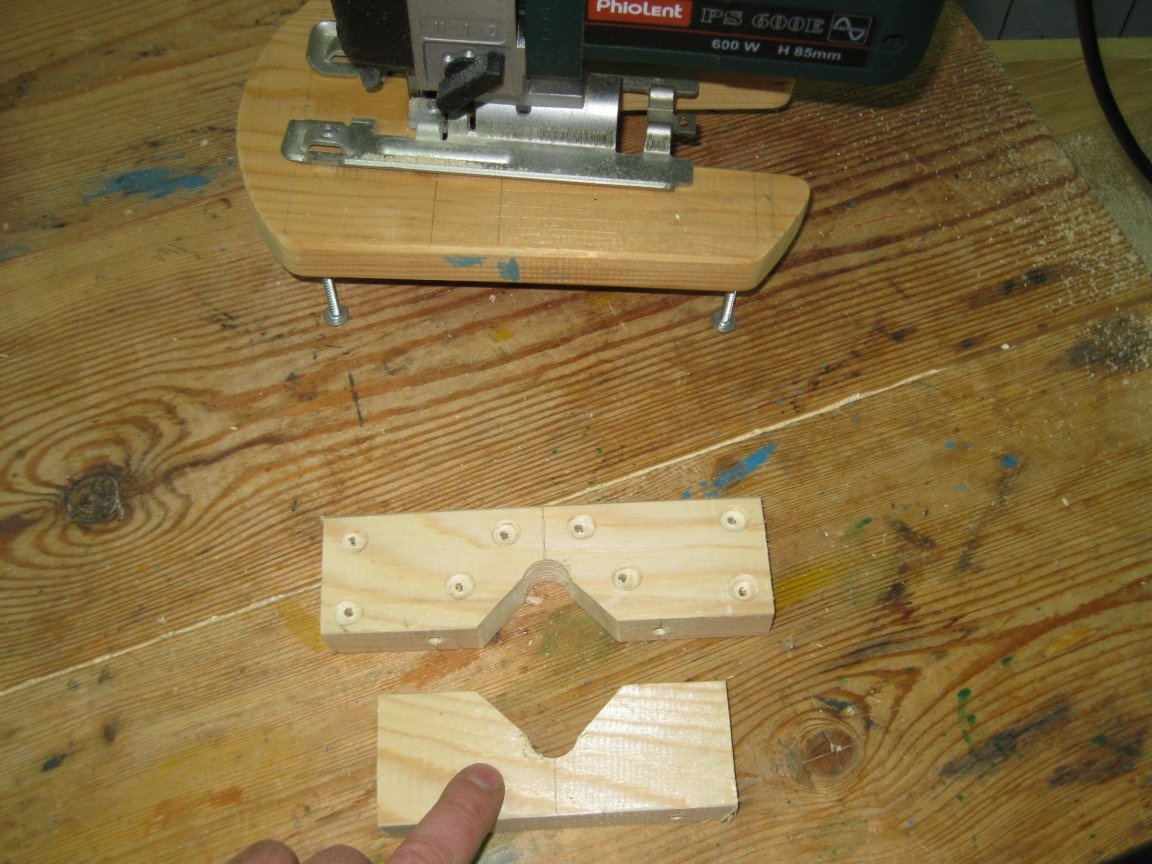
Step 1. Sawing out rectangular grooves and sawing off parts of the clamping device.
Using a jigsaw, we cut out rectangular grooves in both parts of the clamping device, and then saw off these parts from the workpiece.
Step 2. Sawing off the legs.
We saw off from the workpiece two legs of our device.

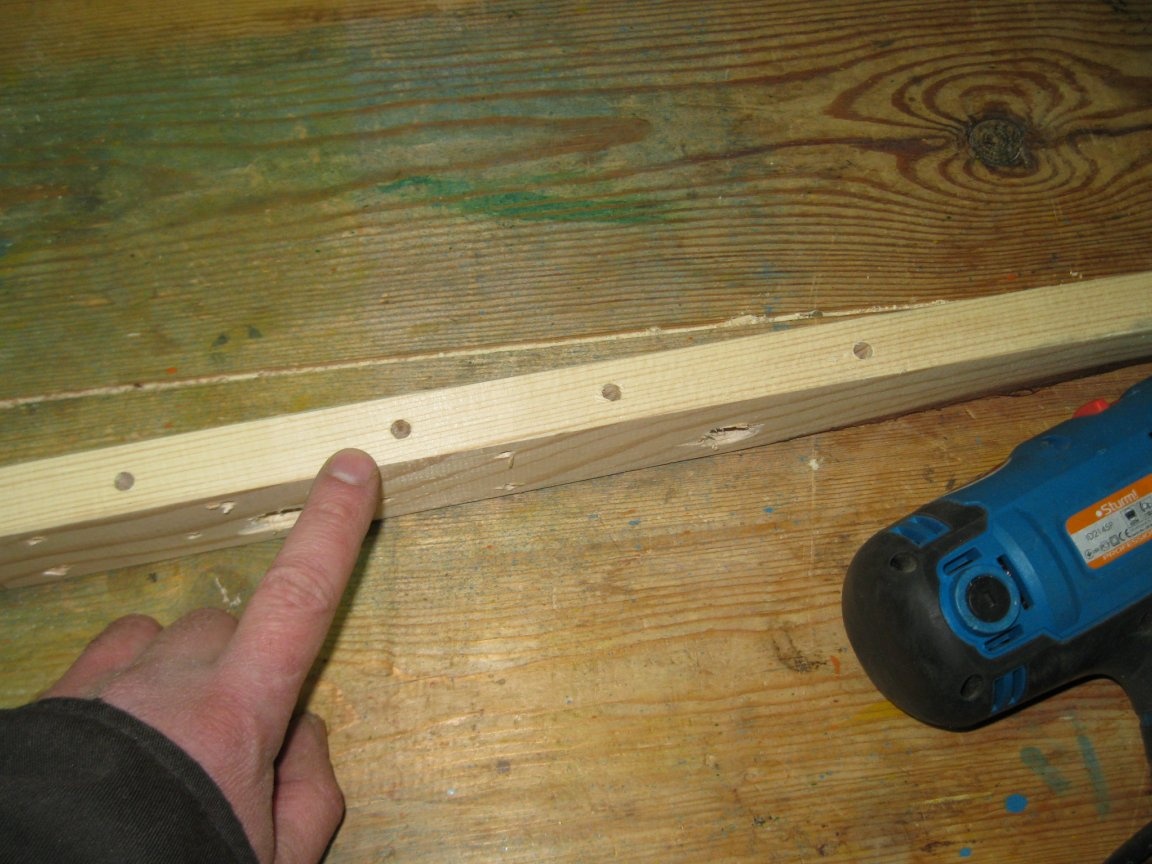
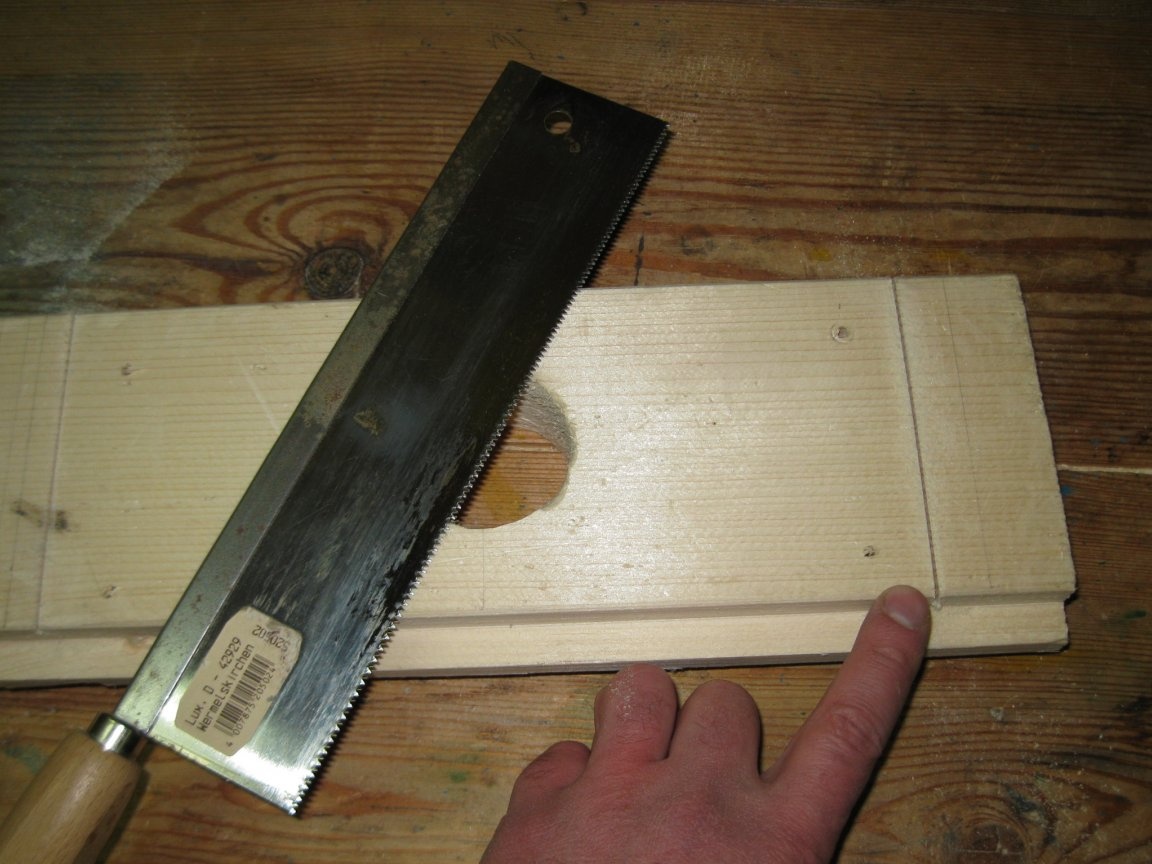
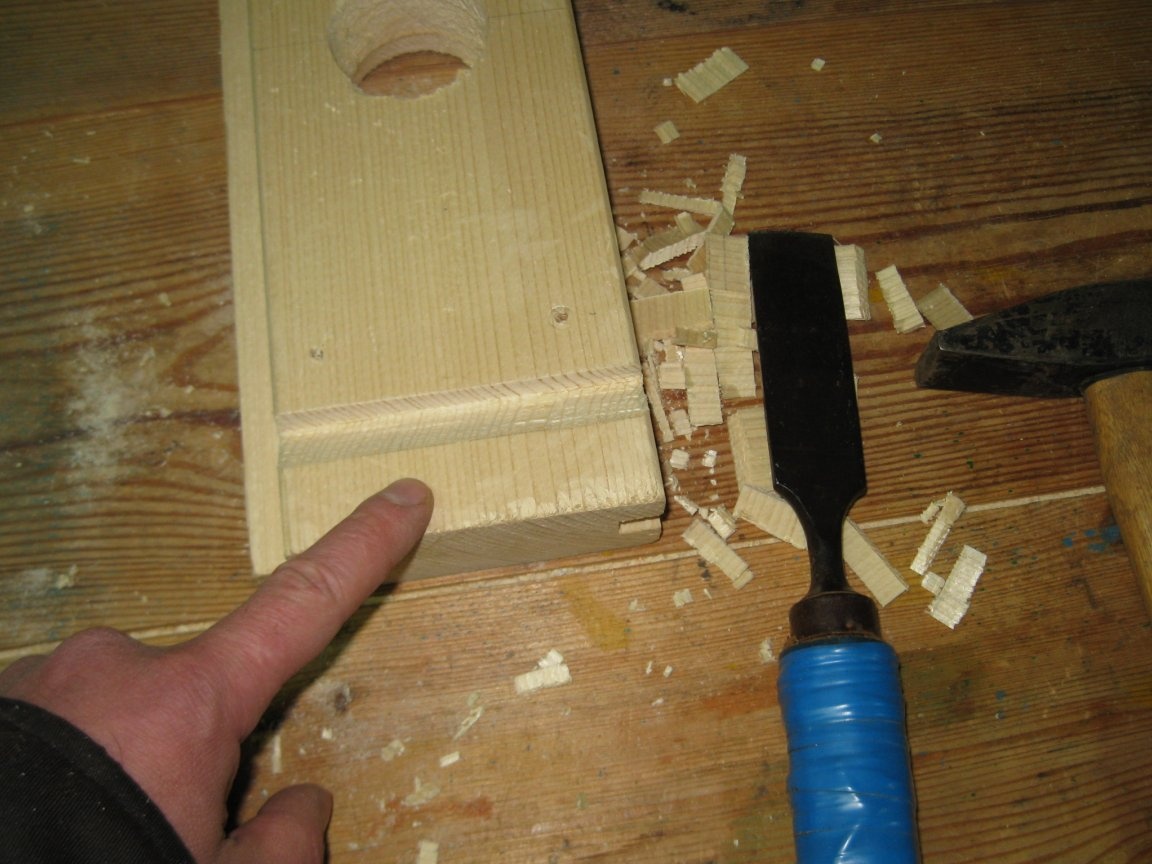
Step 3. Cutting out the grooves in the base.
In order to make it easier to hold this device with my hands, while cutting grooves, I decided to cut a small triangular recess from the bottom of each side of the base.
To do this, on each side of the base, I first made shallow perpendicular cuts using a saw with a fine tooth.
And then with the help of a wide chisel and a hammer, I cut out triangular recesses.
Step 4. Finishing of finished parts.
We process all finished parts with sandpaper, paying particular attention to corners and sharp edges.
Stage 4. Assembly of the device.
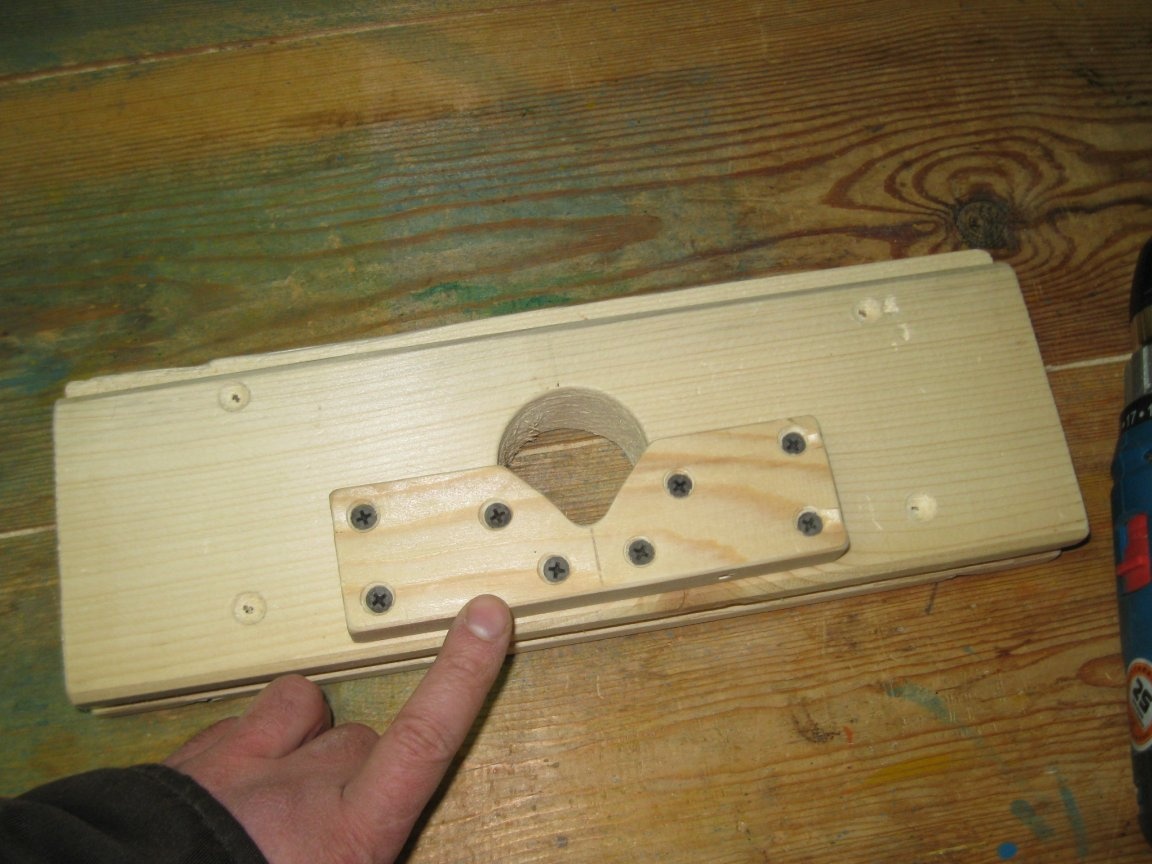
Step 1. Screwing the base.
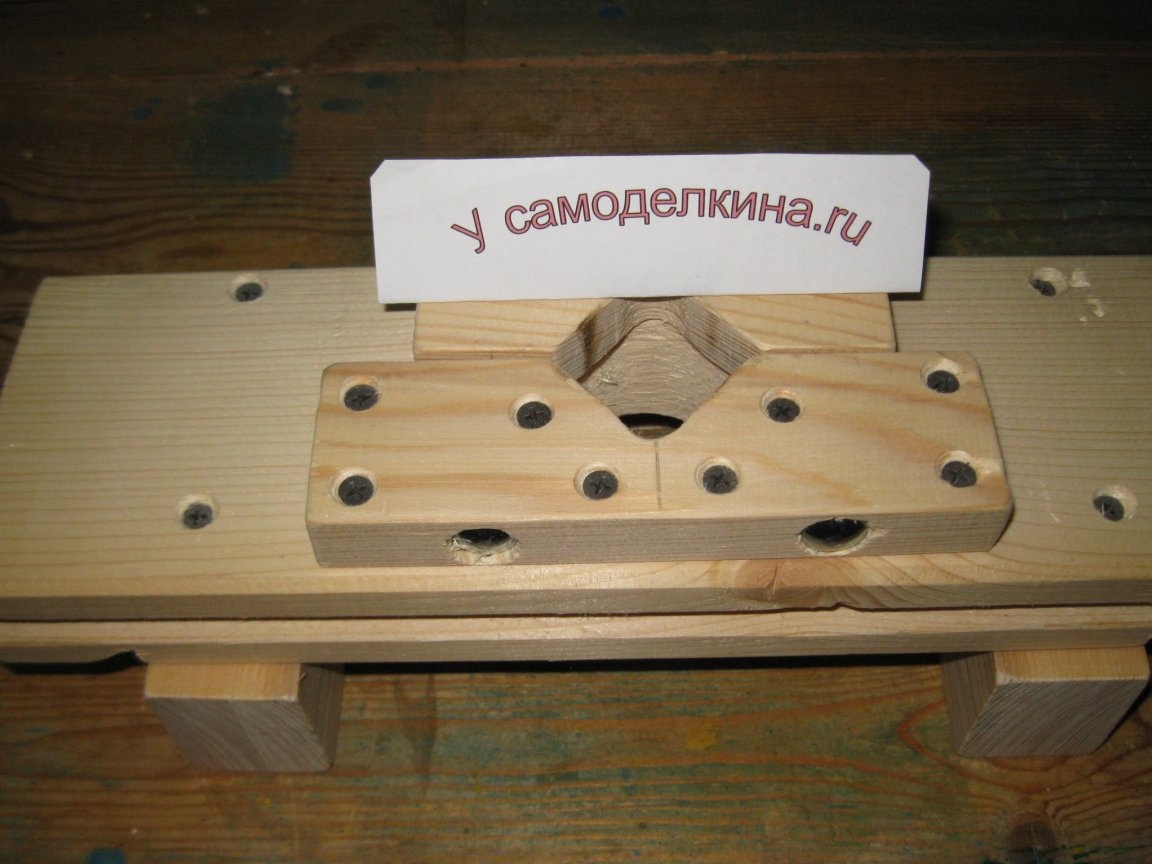
Using eight wood screws (for greater reliability), we fasten one of the parts of the clamping device to the upper part of the base.
Step 2. Screwing the legs.
Using four long wood screws, we fasten two legs to the base from the bottom.
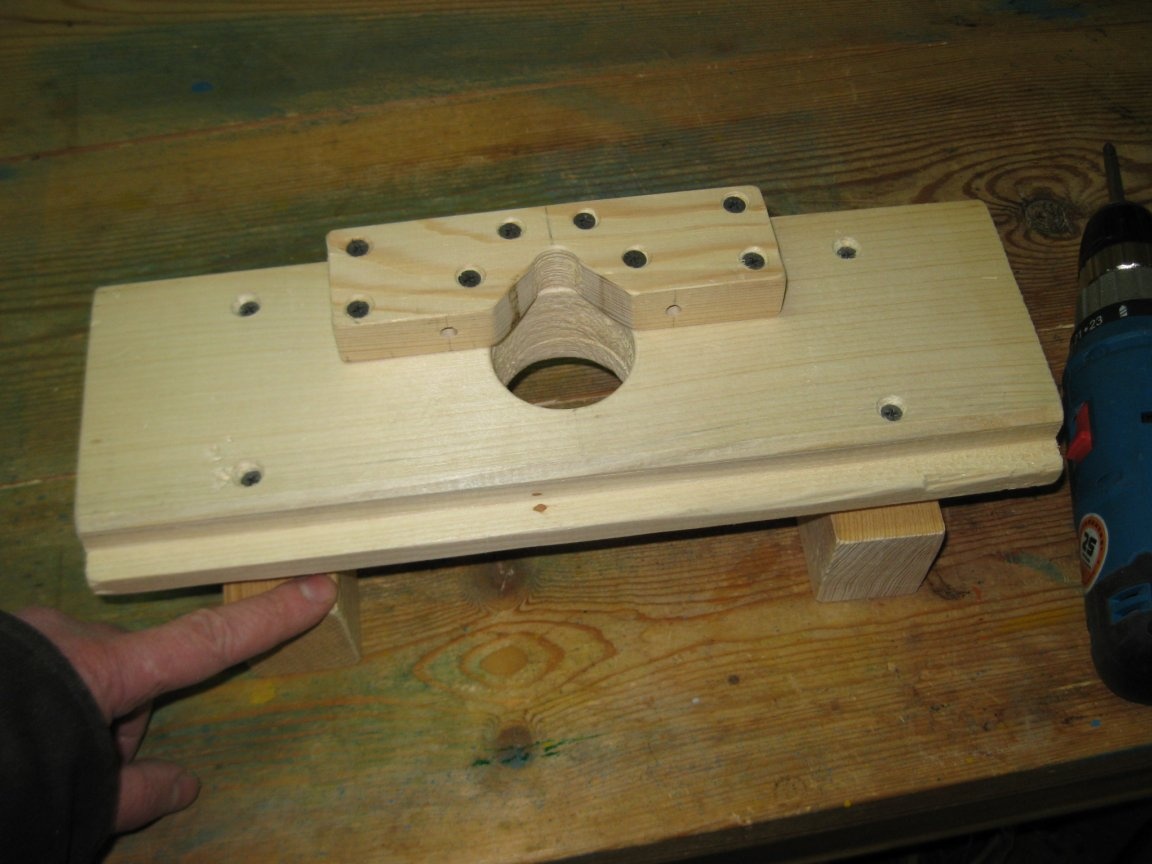
Step 3. Assembling the clamping device.
I must note that before assembling the clamping device, I had to additionally drill two blind holes 16 mm in diameter and approximately 20 mm deep with a feather drill in the wood, on the sides of the clamping device bracket screwed to the base.
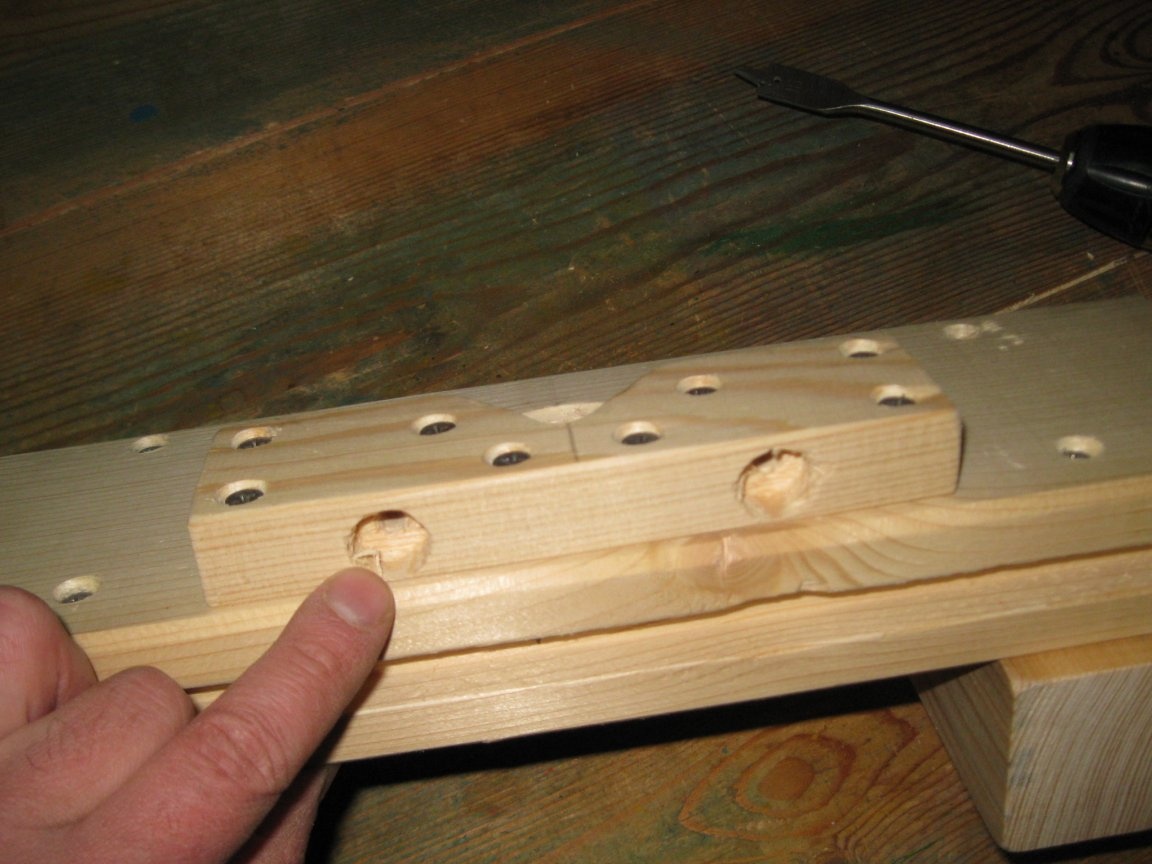
This had to be done in order to drown the heads of furniture bolts due to the fact that they turned out to be somewhat short.
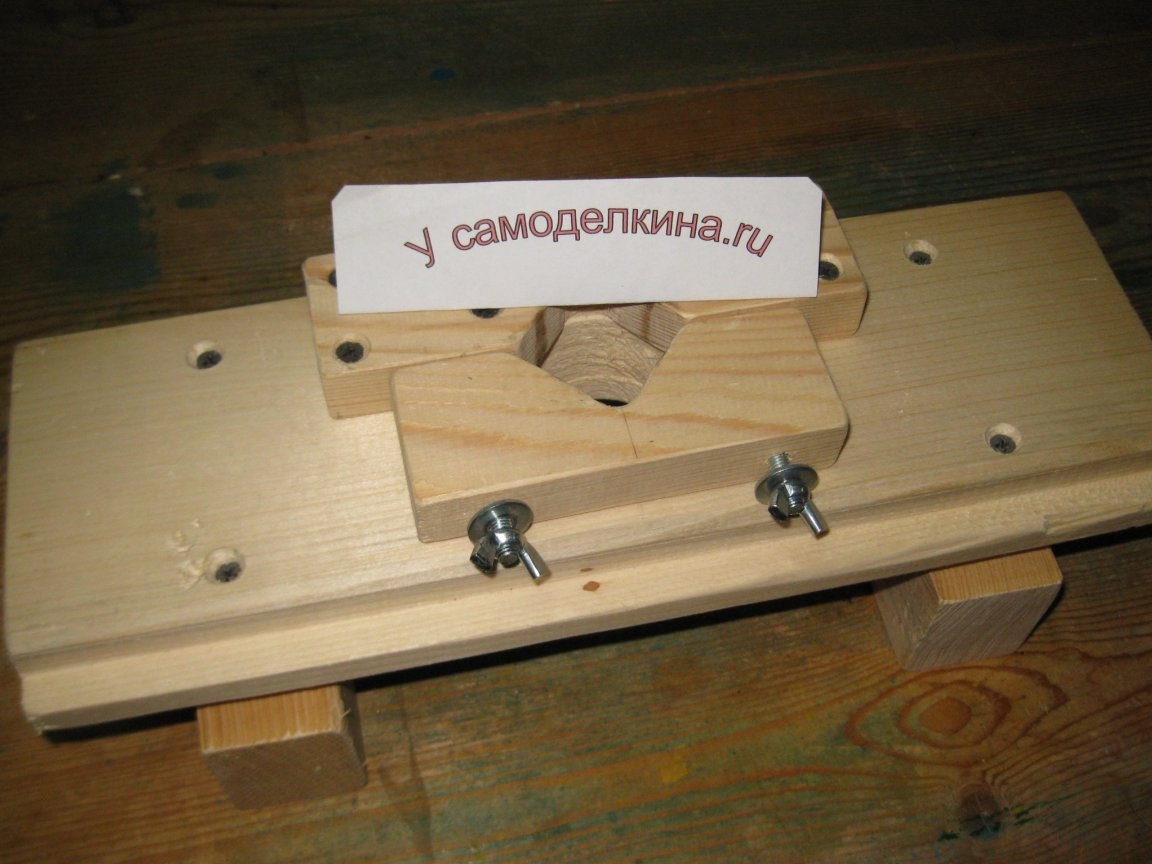
Well, after that, I already assembled the clamping device completely by inserting furniture bolts into the fixed part, and at their ends, putting on the second part of the clamping device and screwing the wing nuts with washers.
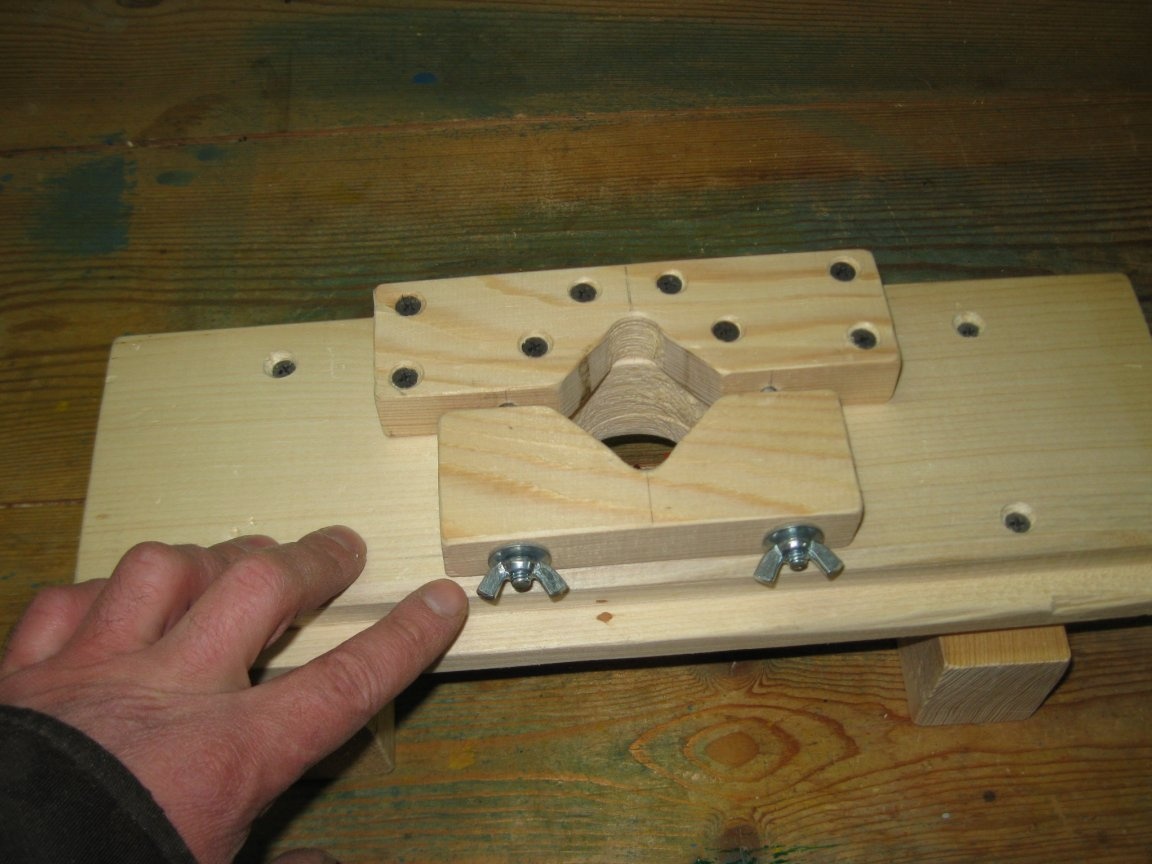
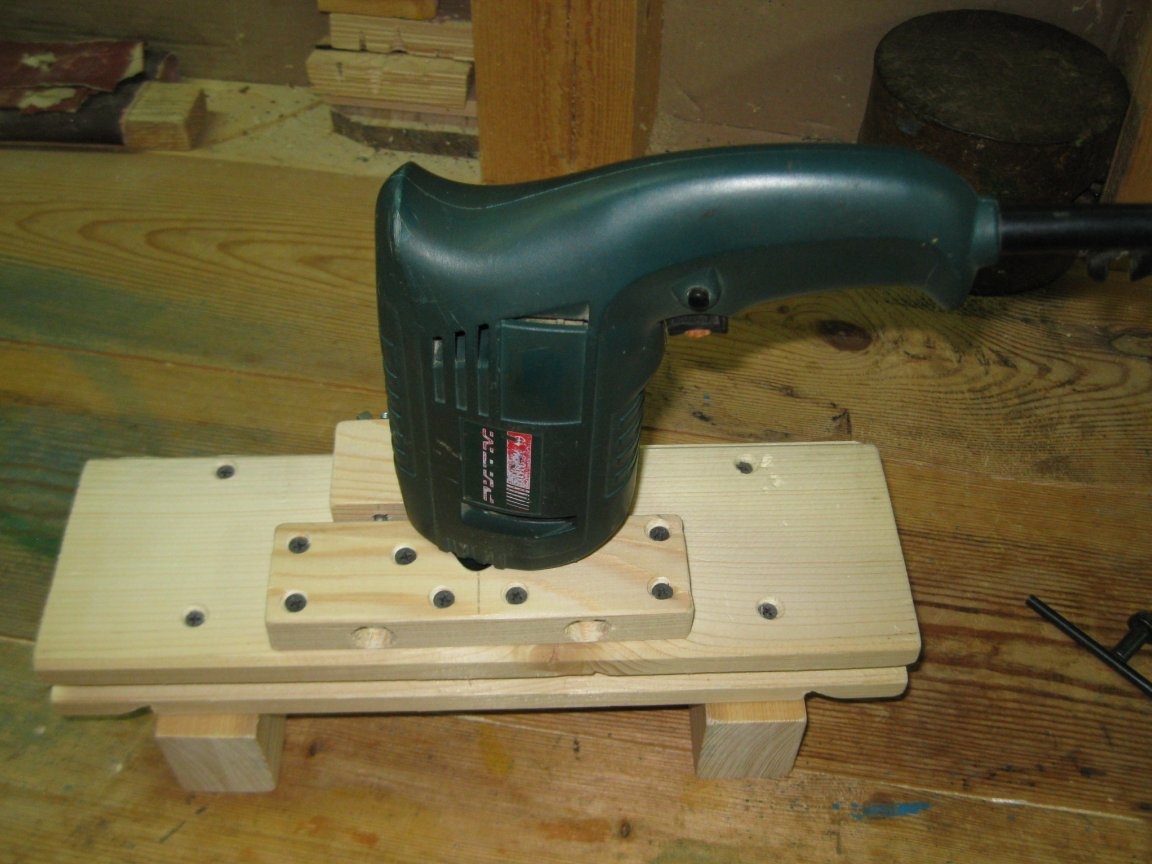
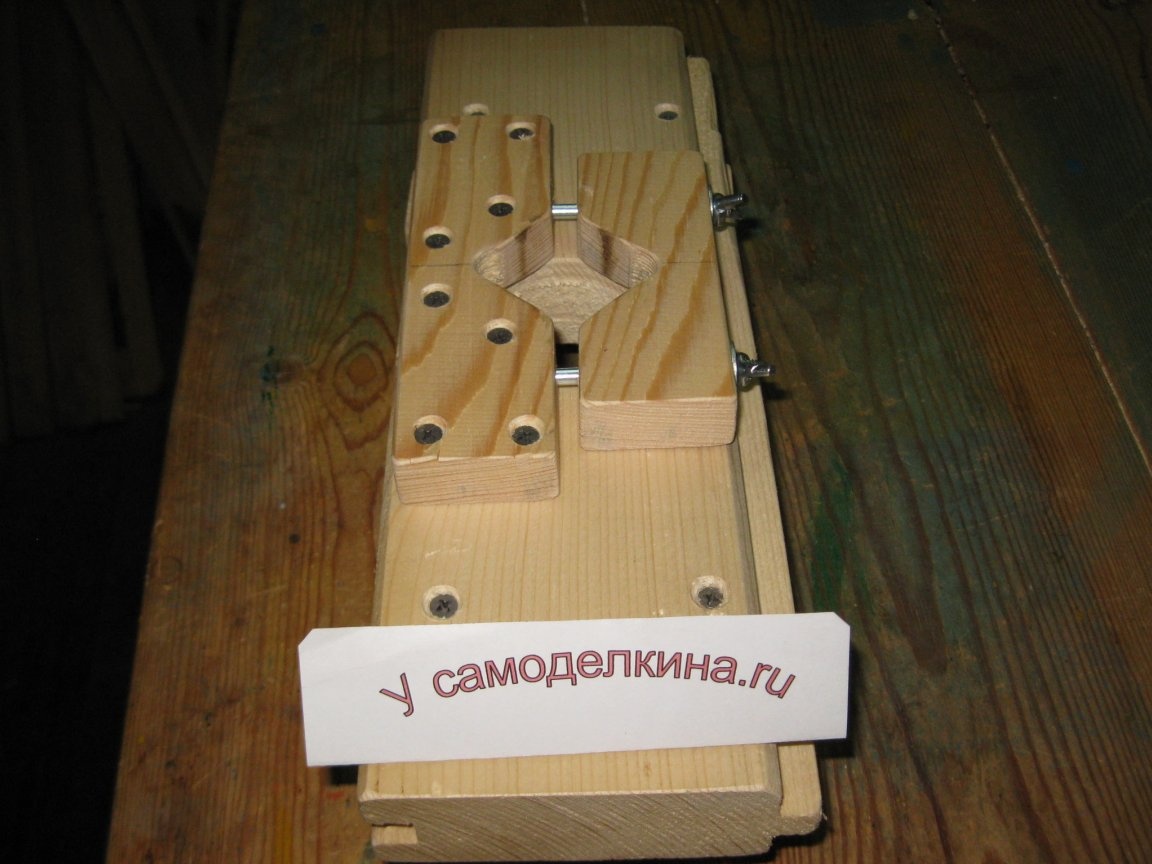
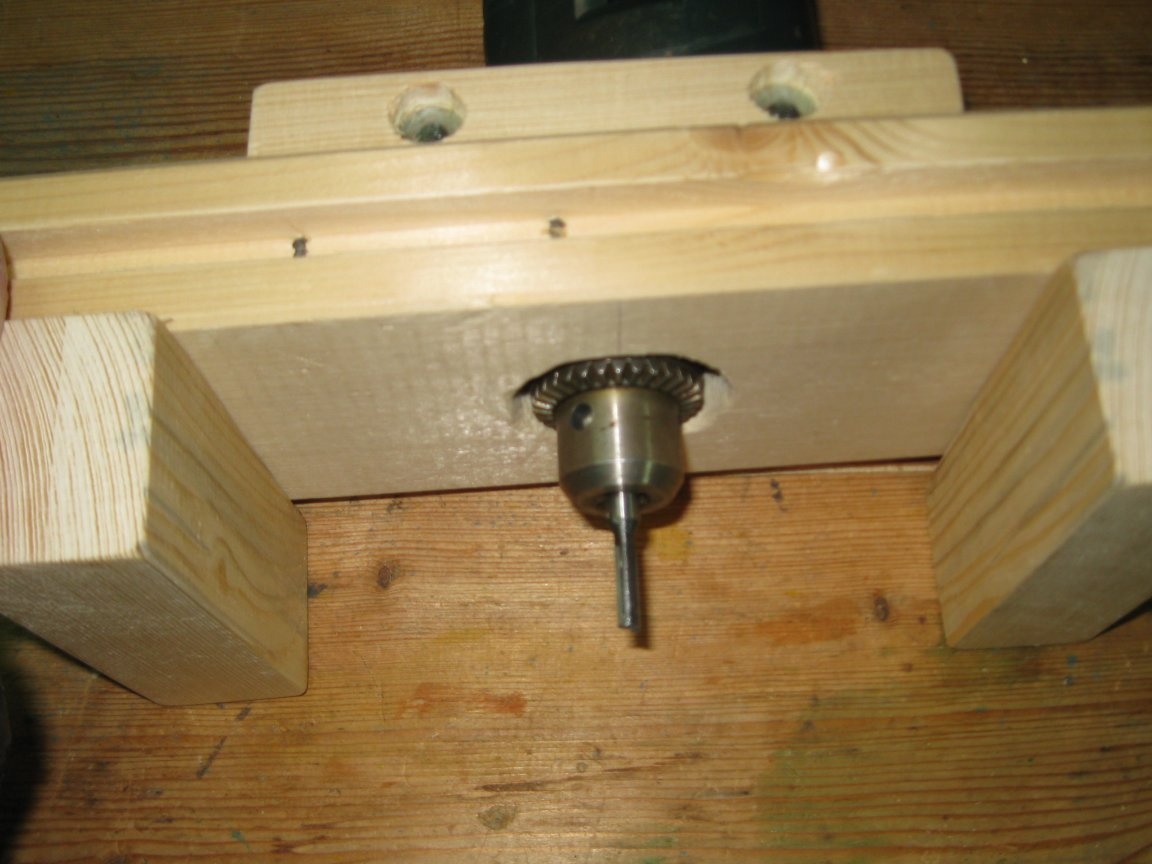
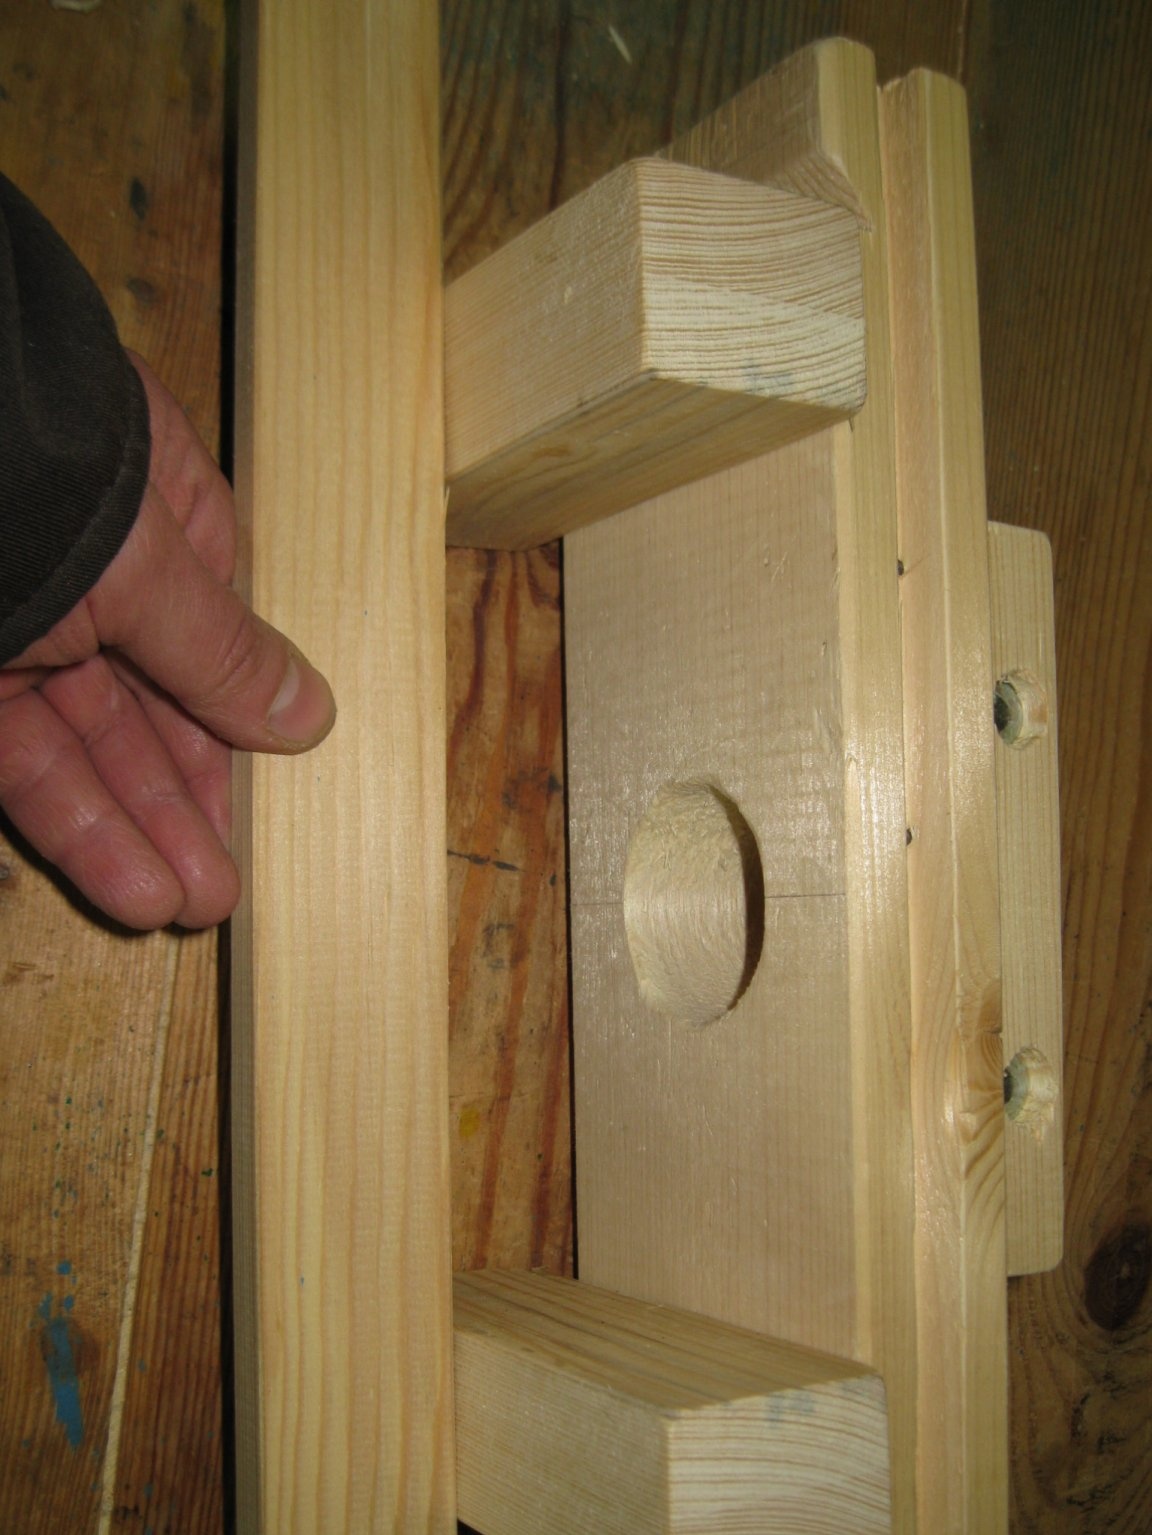
And now our device is ready!
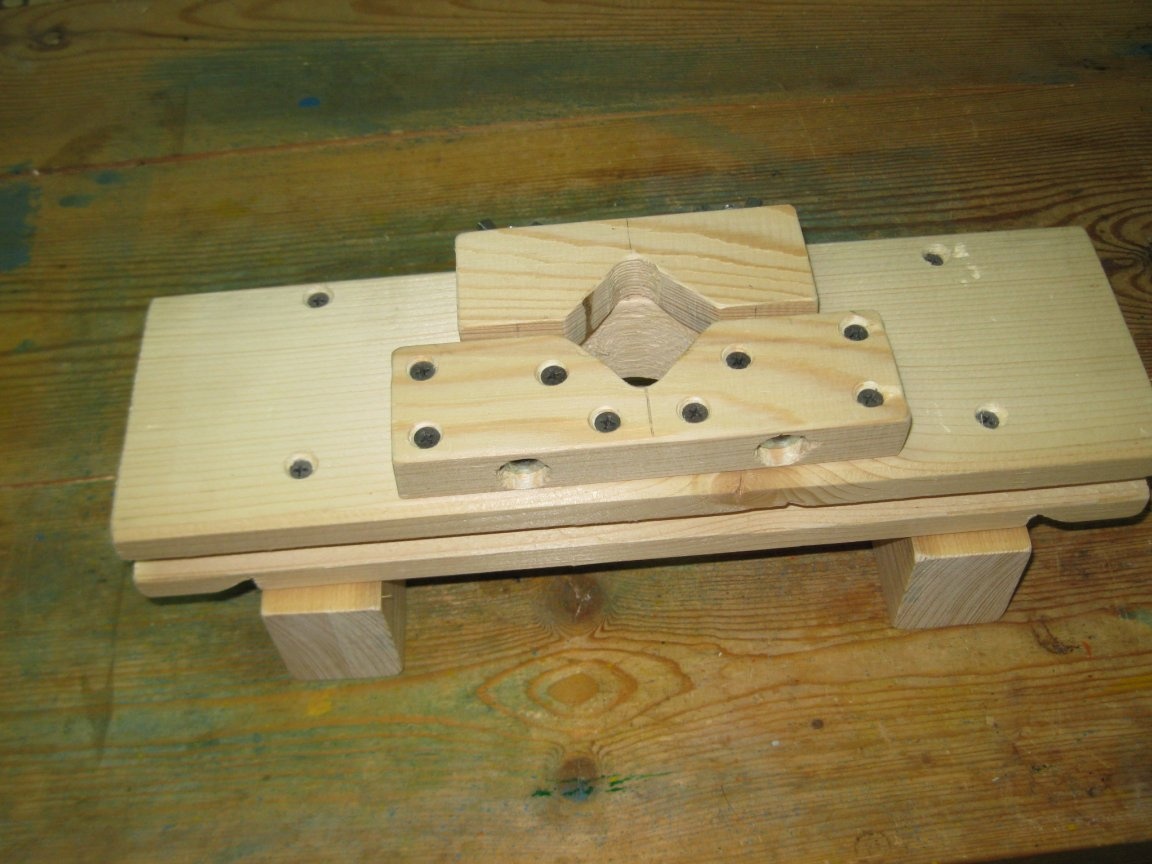
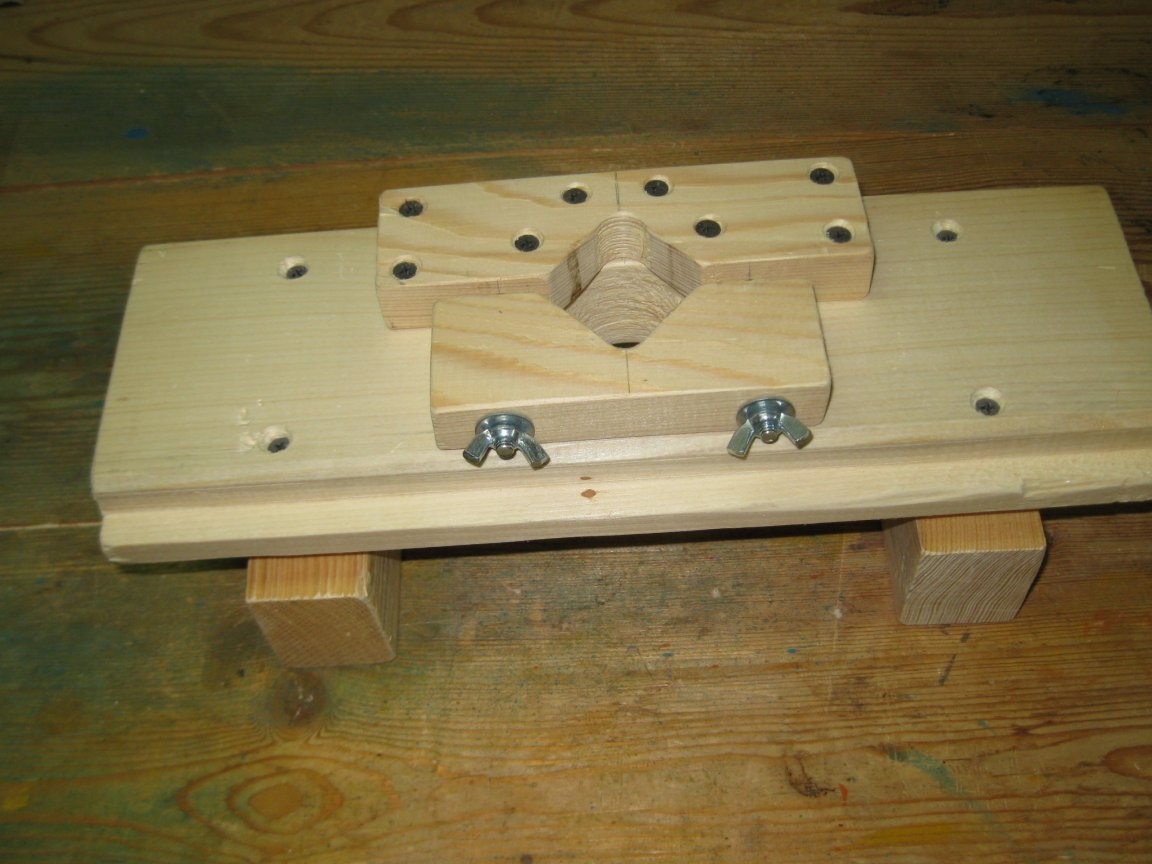
And here is his view from different angles.

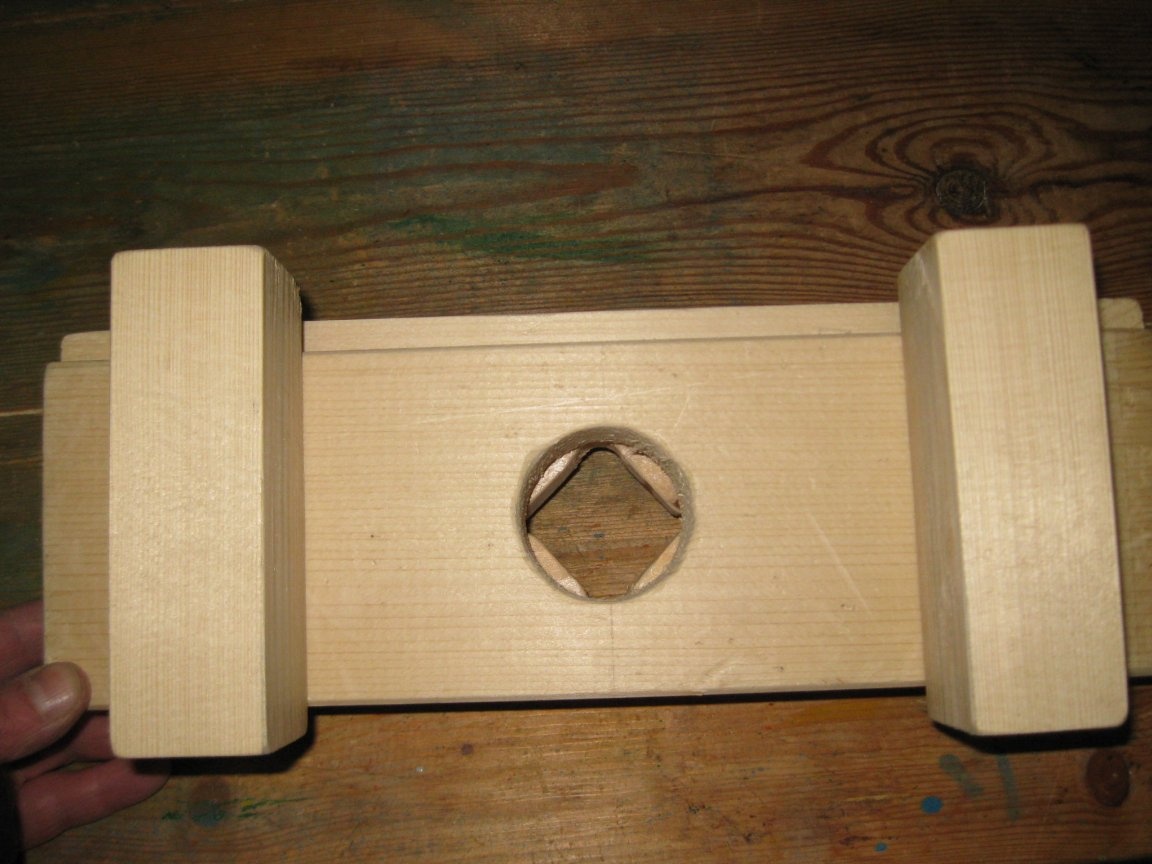
But in this way, this device can be held by hands during operation.
Well, now let's try how this device works.
Testing fixtures.
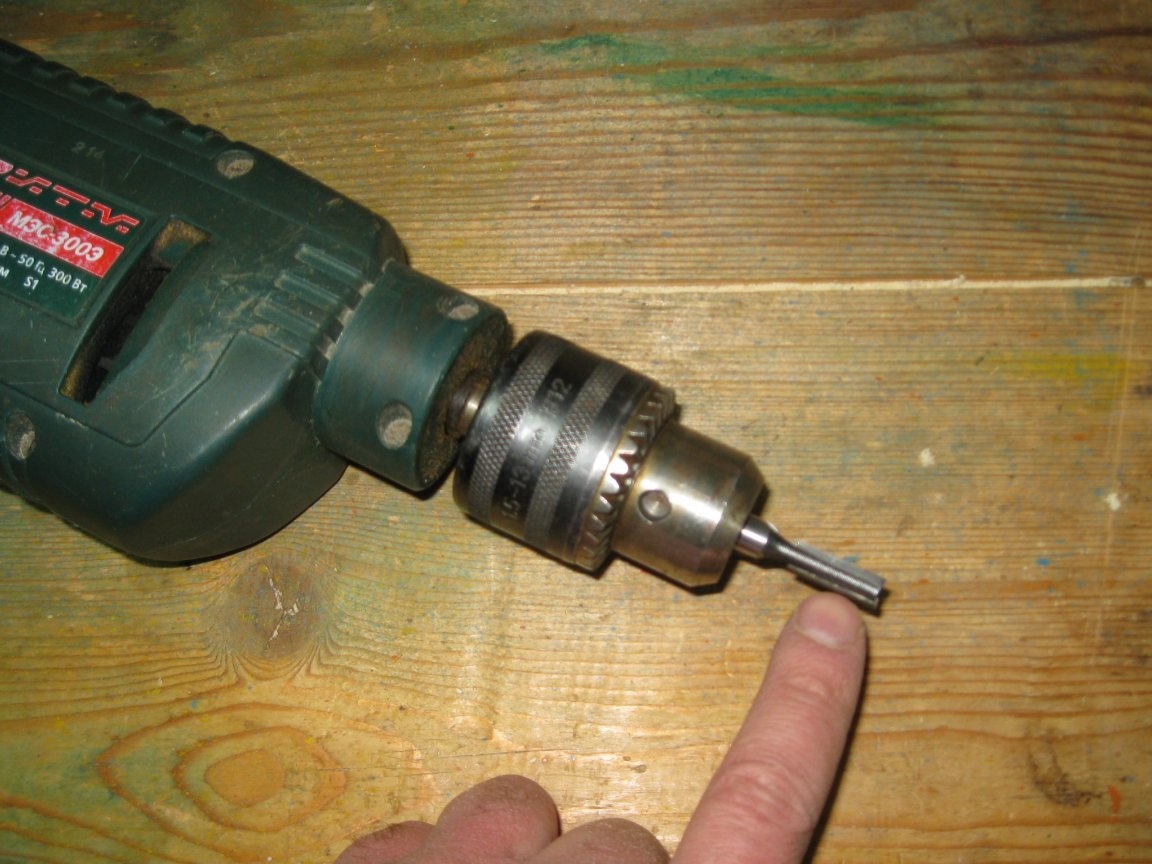
First, we clamp the end cylindrical cutter in the electric drill chuck, with the necessary overhang, in order to obtain the desired cutting depth.
Then we insert the electric drill into our device and clamp the electric drill neck in the clamping device with the wing nuts.
Thus, we get a homemade hand drill from an electric drill.
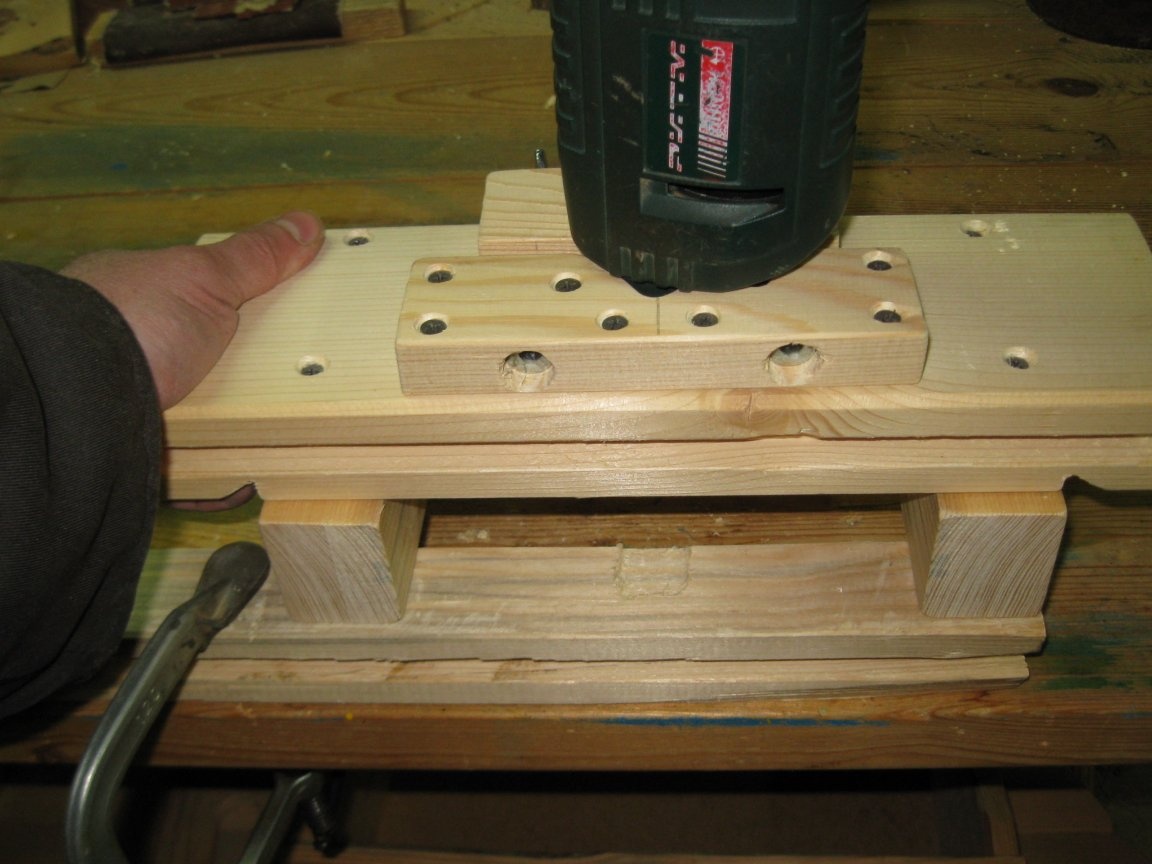
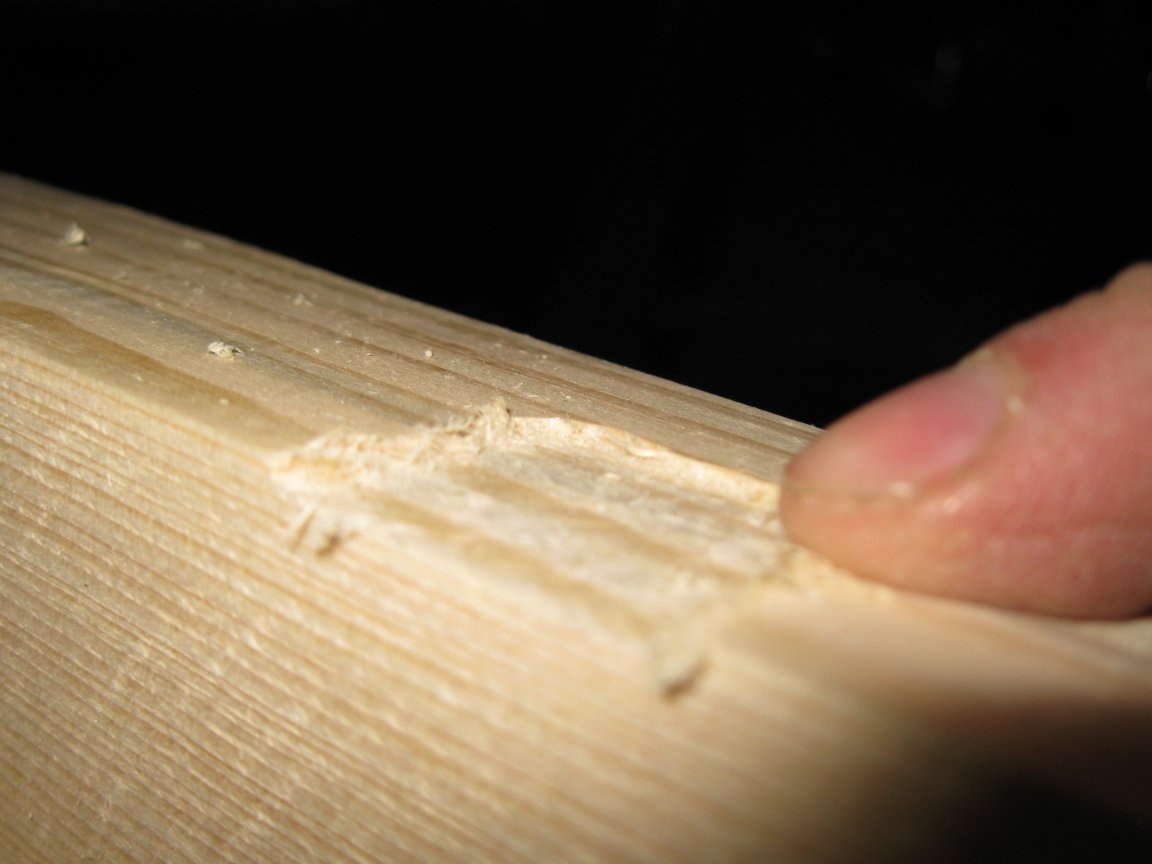
Well, now we are trying to mill the grooves in the wooden blank.
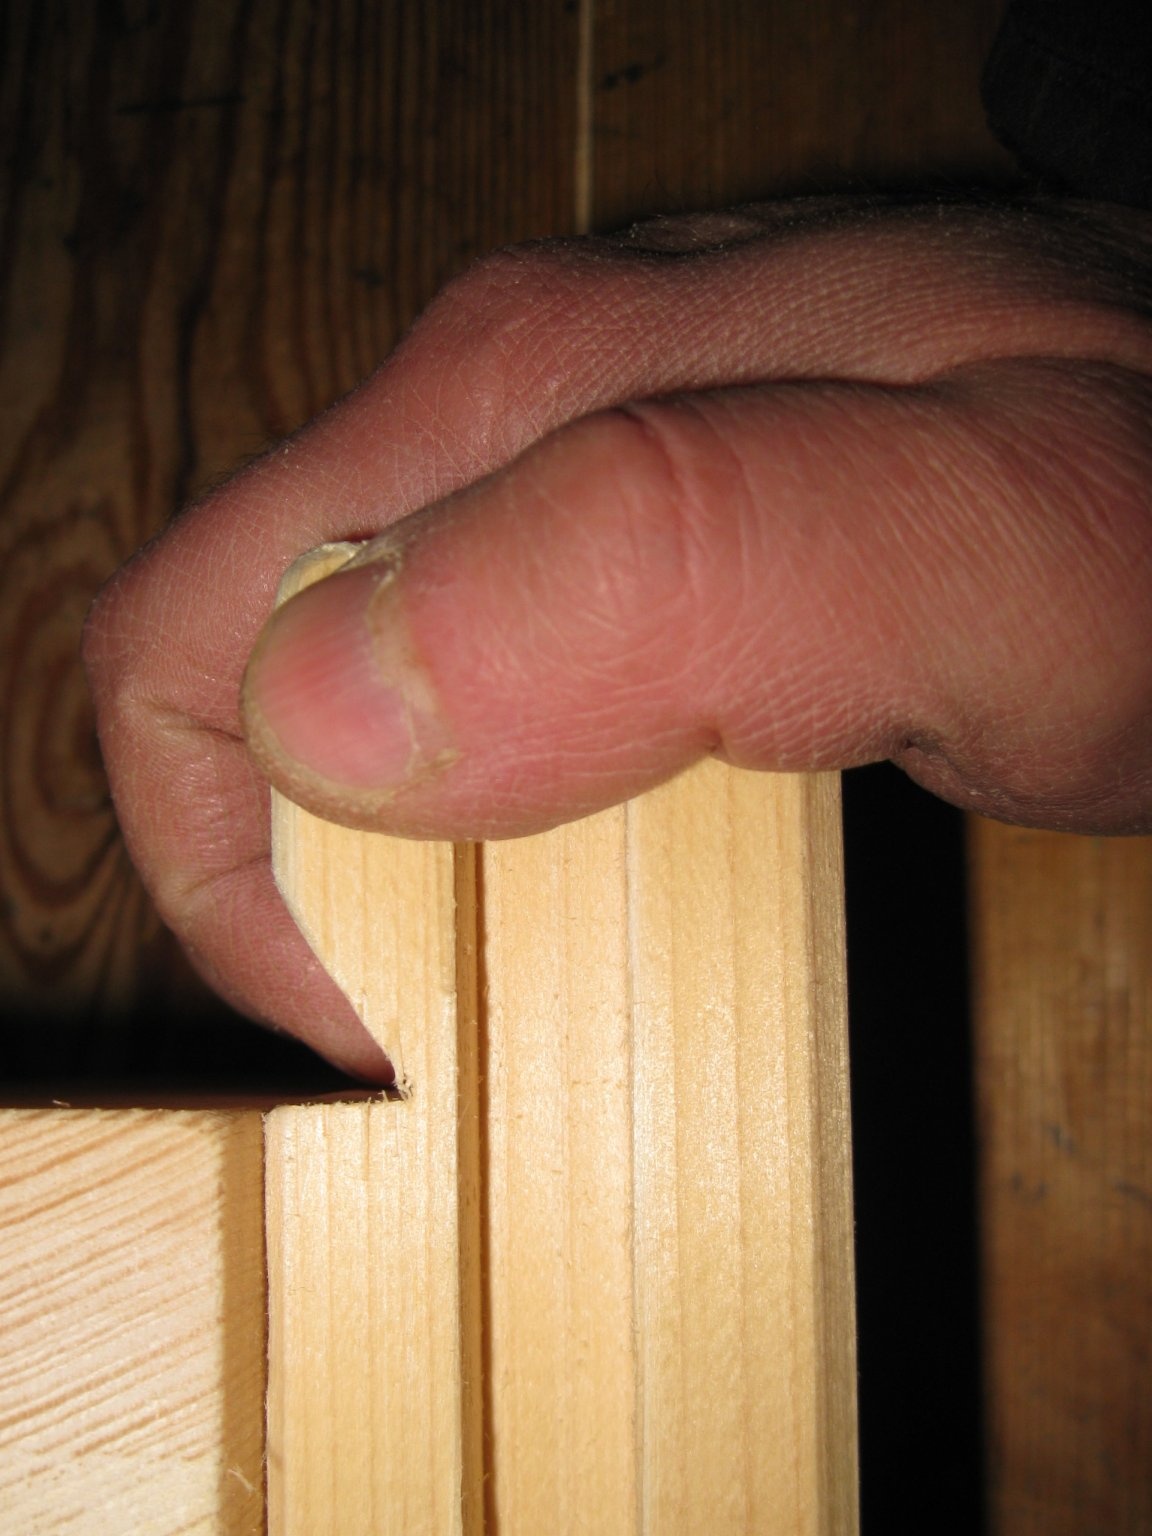
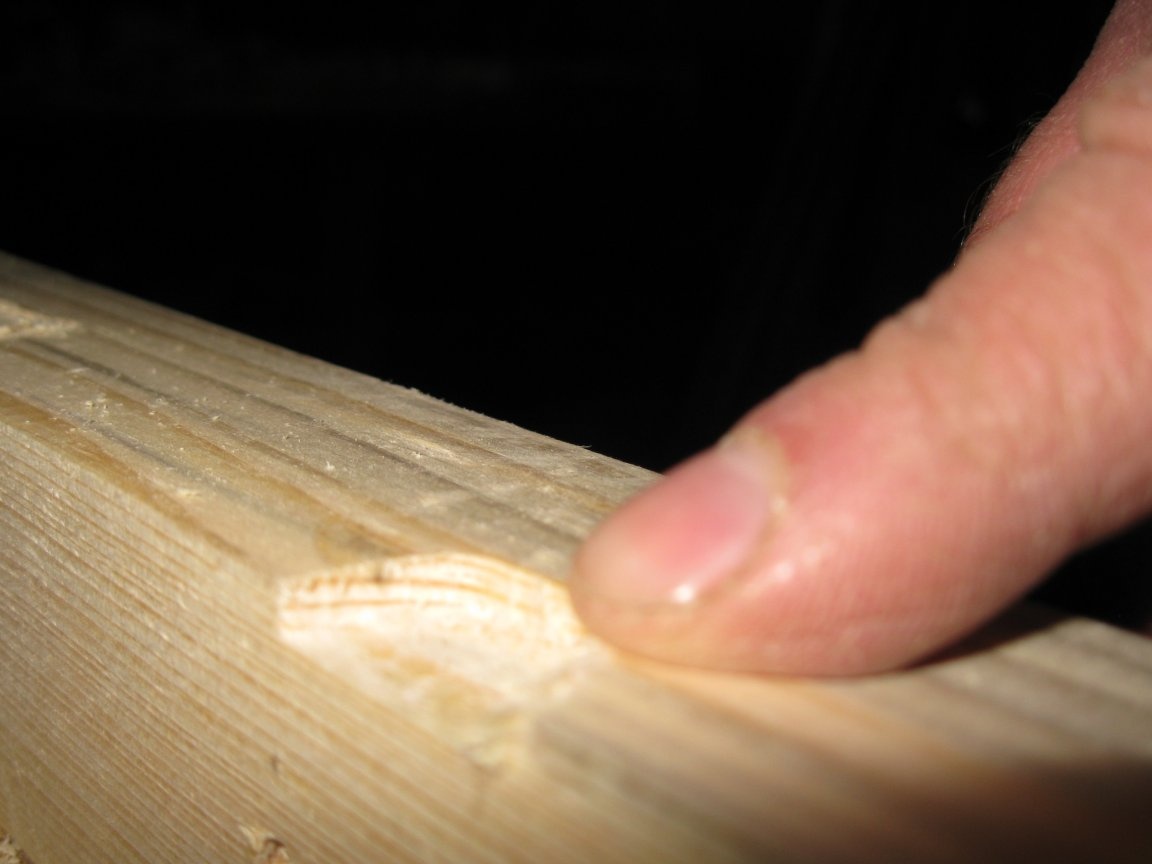
Here is an example of a groove approximately 2 mm deep.
But the groove is 5 mm deep.
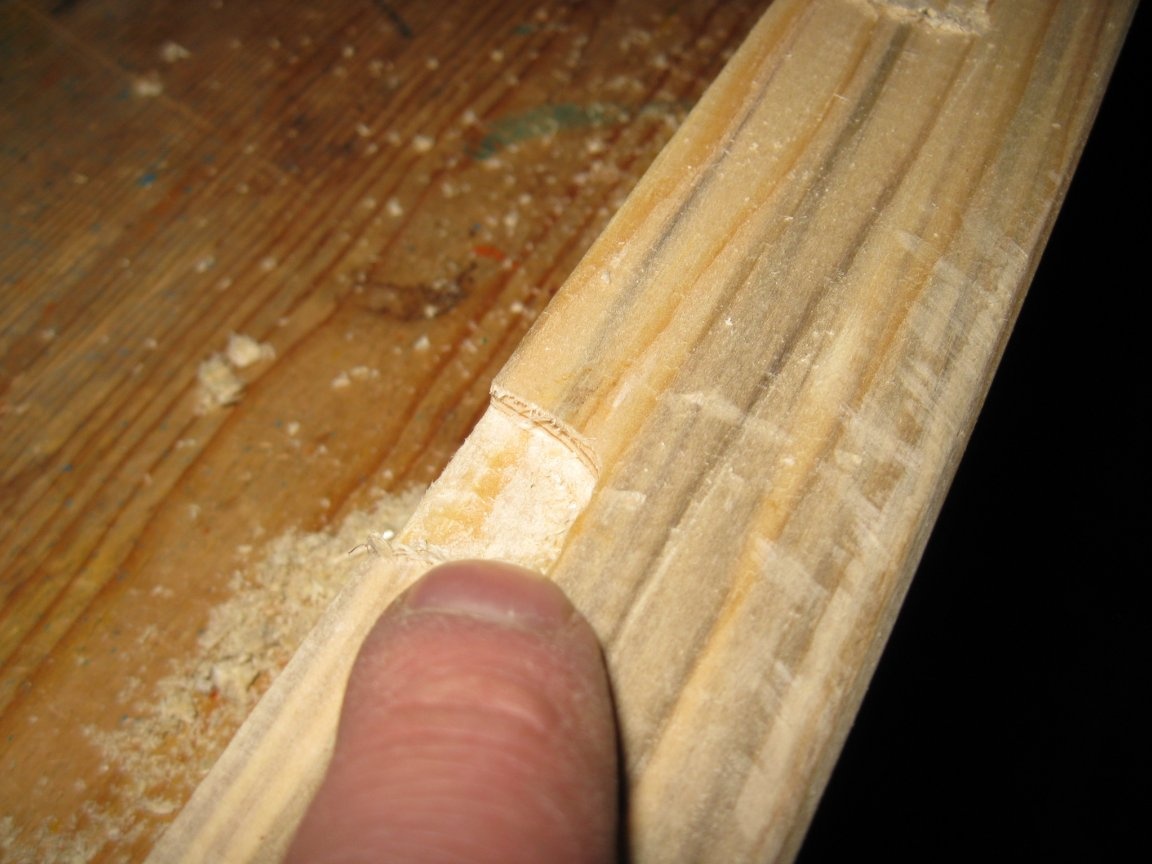
In general, I must say that this device is quite coping with its task of milling shallow grooves.
True, it is worth noting that, of course, when working with such a home-made milling cutter, there is a lack of power and a lack of rotational speed of the cutter, due to which, incidentally, the surface of the bottom of the groove is not very clean, and its edges are somewhat “broken up” " view.
However, this is not critical, since in this case, the cleanliness of the surface of the groove and its edges is not very important to us. Most importantly, it should be flat in terms of geometry. It is especially important that the bottom surface of the groove is even and so that the groove has a constant depth at different points. And this is a requirement, this device just completely provides.
Therefore, it may well be used for the manufacture of shallow grooves for loops and other small parts.
Well, in conclusion, I want to note that in the future this milling cutter can be slightly modified and made more convenient and functional. For this, in particular, it will be possible to make some additional devices.
So, for example, it will be possible to make a guide ruler for this milling cutter from a wooden plank of approximately this kind.
Moreover, it can be made both stationary and adjustable. It will also be possible to make other devices, for example, a ruler for cutting radial grooves.
But until I began to make these devices, because, as I mentioned at the beginning, I made this device for my father and, in the end, everything will depend on his needs. But in any case, if necessary in the future, it will always be possible to make the necessary device for this device.
Well, this is where I end and wish all the inhabitants of our sites successful and functional home-made products!