

Hello everybody! If you have encountered such a problem as installing plasterboard sheets on the ceiling, and since this procedure is very difficult without an assistant, then you may be interested in this topic. So I had to solve such a problem. The solution is quite simple - a homemade plasterboard lift. This lift is easy to manufacture, easy to disassemble for transportation, weight less than 20 kg. This homemade can be made by almost anyone with a minimum of tools and available material.
For manufacturing you will need:
Welding machine
Bulgarian
Drill or screwdriver
Drill
The keys
Hand tool
Sandpaper
Paint brush
Profile pipe (20 * 20, 20 * 40, 25 * 50)
Power window drive VAZ “classic”
Bolts and nuts - M10 and M6
Furniture castors
Steel wire 4 mm
A half-inch piece of pipe and a steel bar along the inside diameter of the pipe
Iron sheet 2 mm
At the initial stage, the question arose of what to make a lifting mechanism. On the Internet there were many options with various winches, ratchets, etc. but they are all bulky and complicated to perform or expensive.
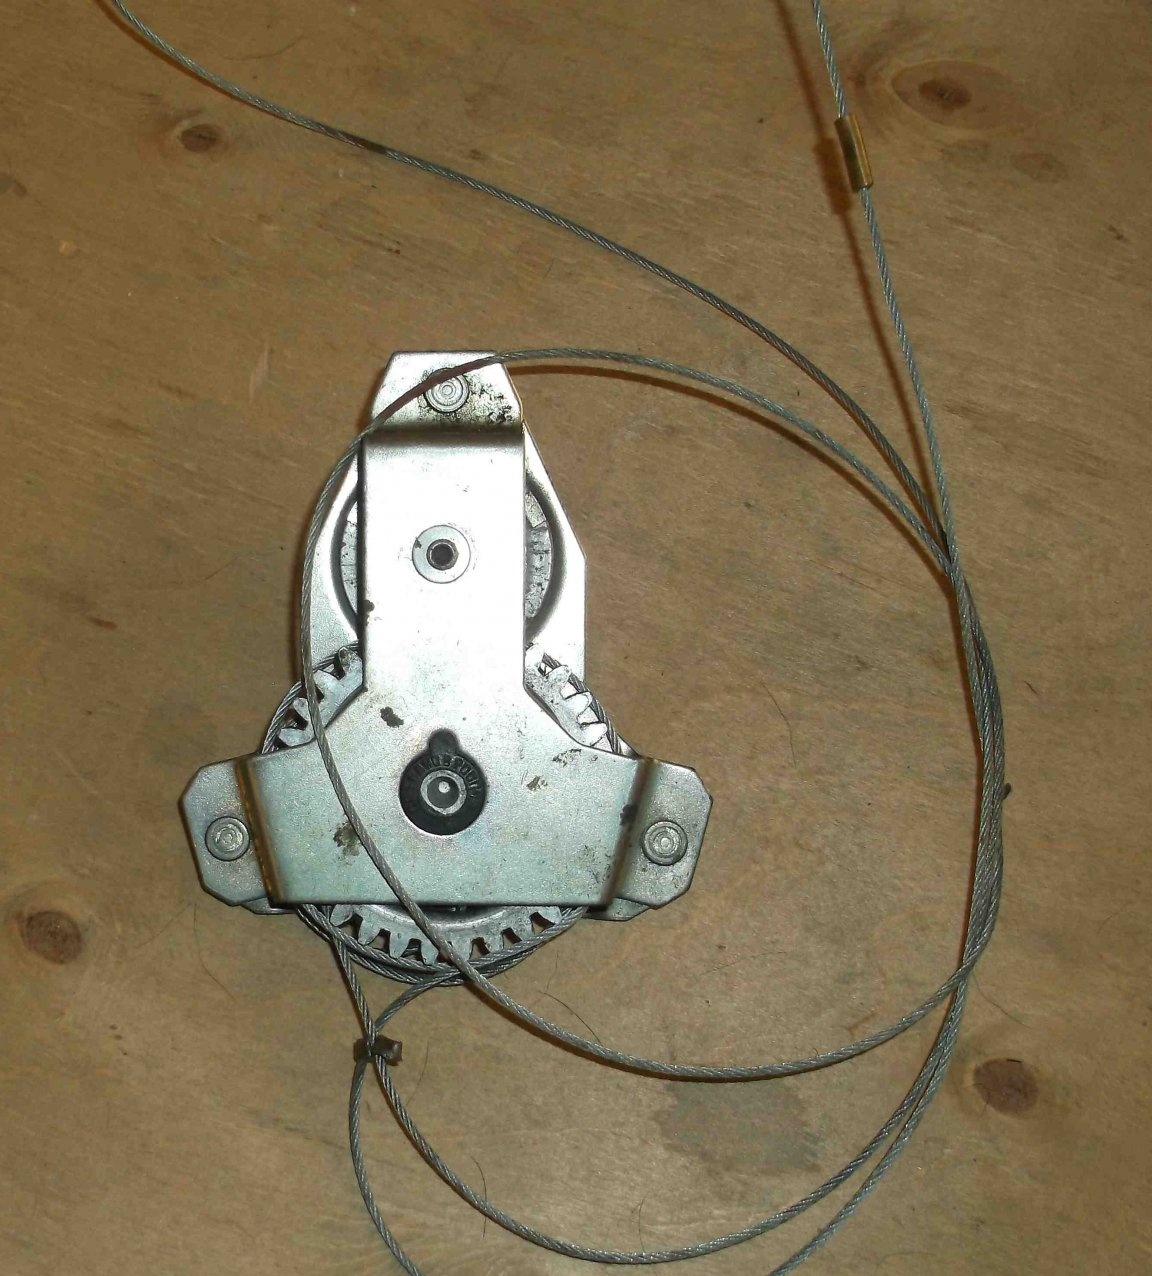
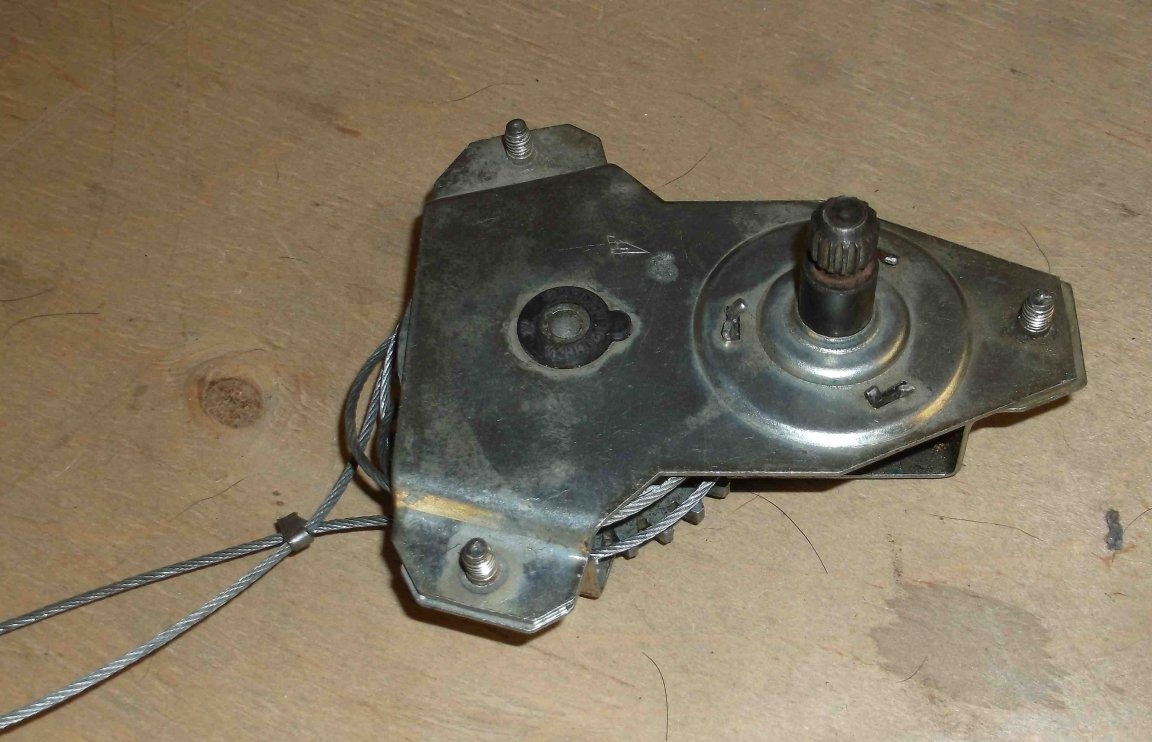
Quite by chance, at hand was a mechanism from a manual window regulator of a domestic VAZ “classic” car. This mechanism is compact, inexpensive and most importantly has an automatic lock, namely, if you do not rotate the gear knob, the shaft with the cable remains locked, and when turned in any direction, the lock is disabled - this is just what you need. But a small alteration was still required. The essence of the alteration is that the standard mounting bolts are very short and unreliable.
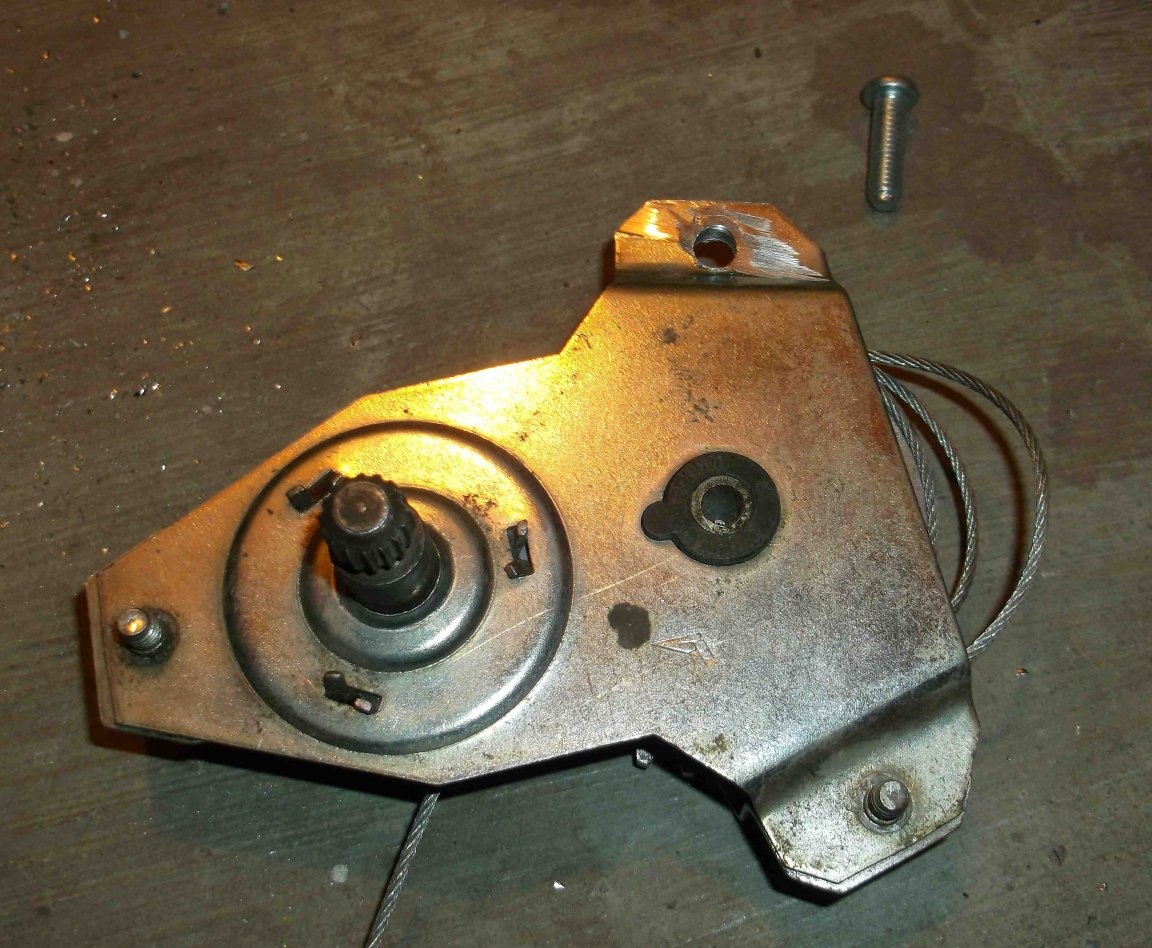
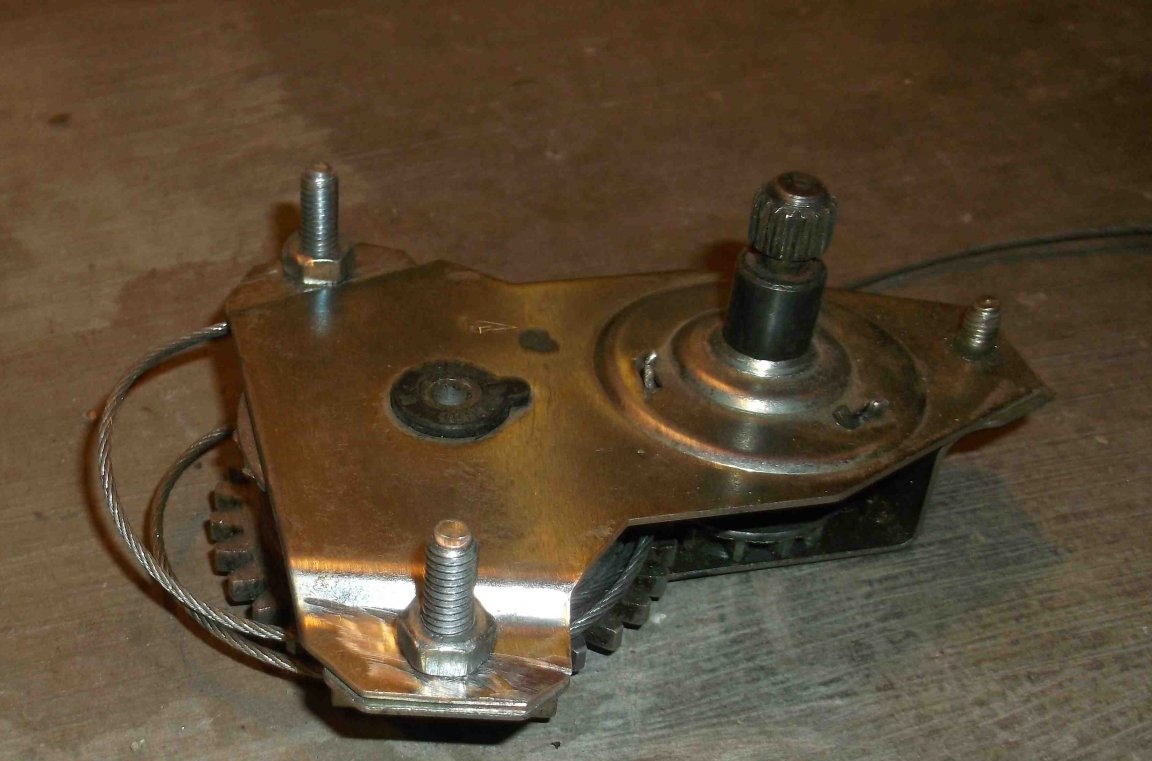
For alteration, it was necessary to drill two fasteners and install bolts with a diameter of 6 mm of the required length and fix with nuts to maintain the integrity of the mechanism case.
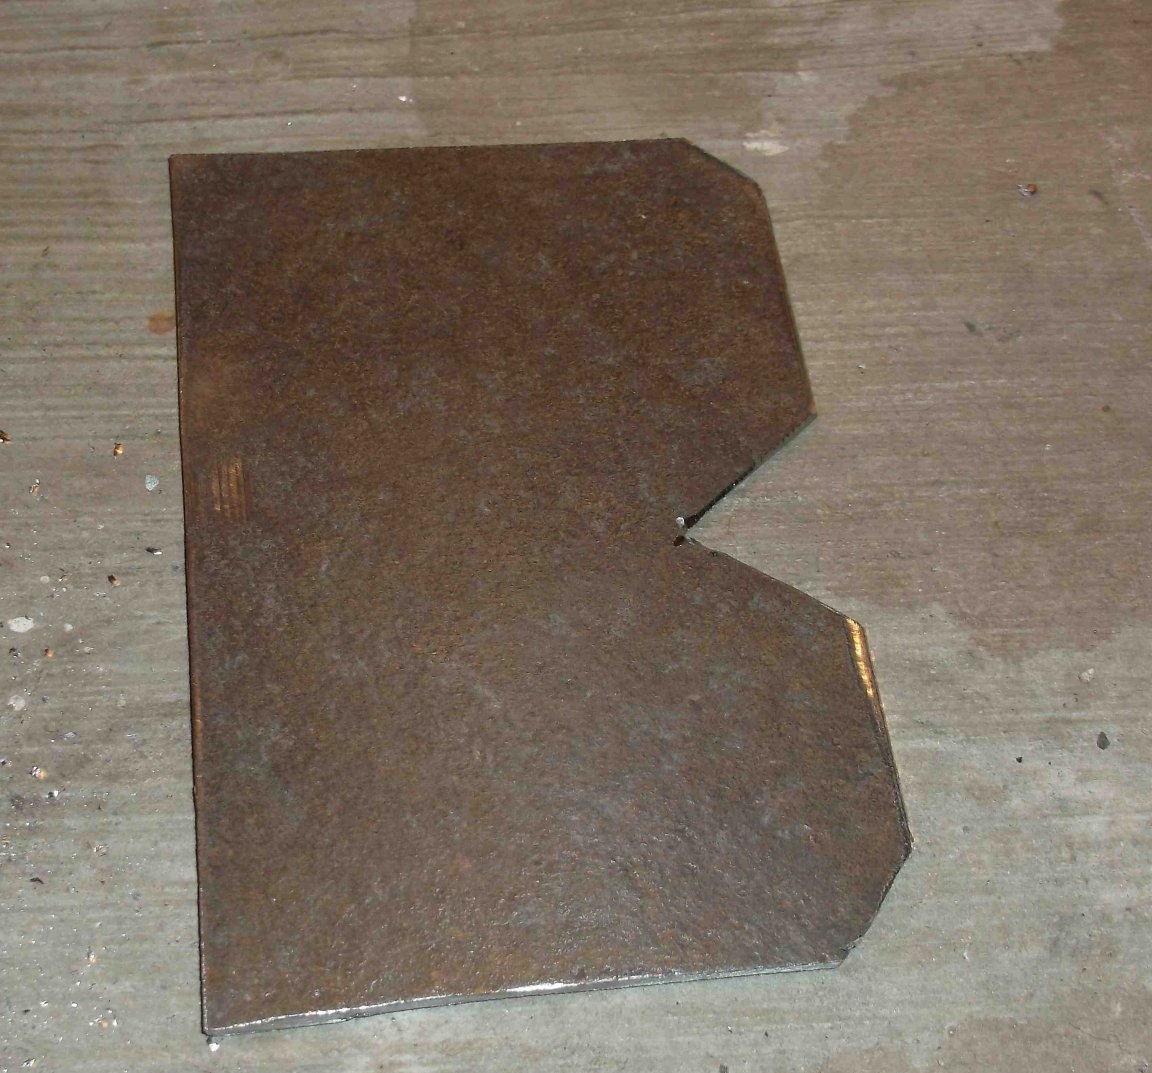
Next, I cut out a sheet of iron for mounting a lifting mechanism.The dimensions of the plate are approximately 11 by 8 cm and a thickness of at least 2 mm.
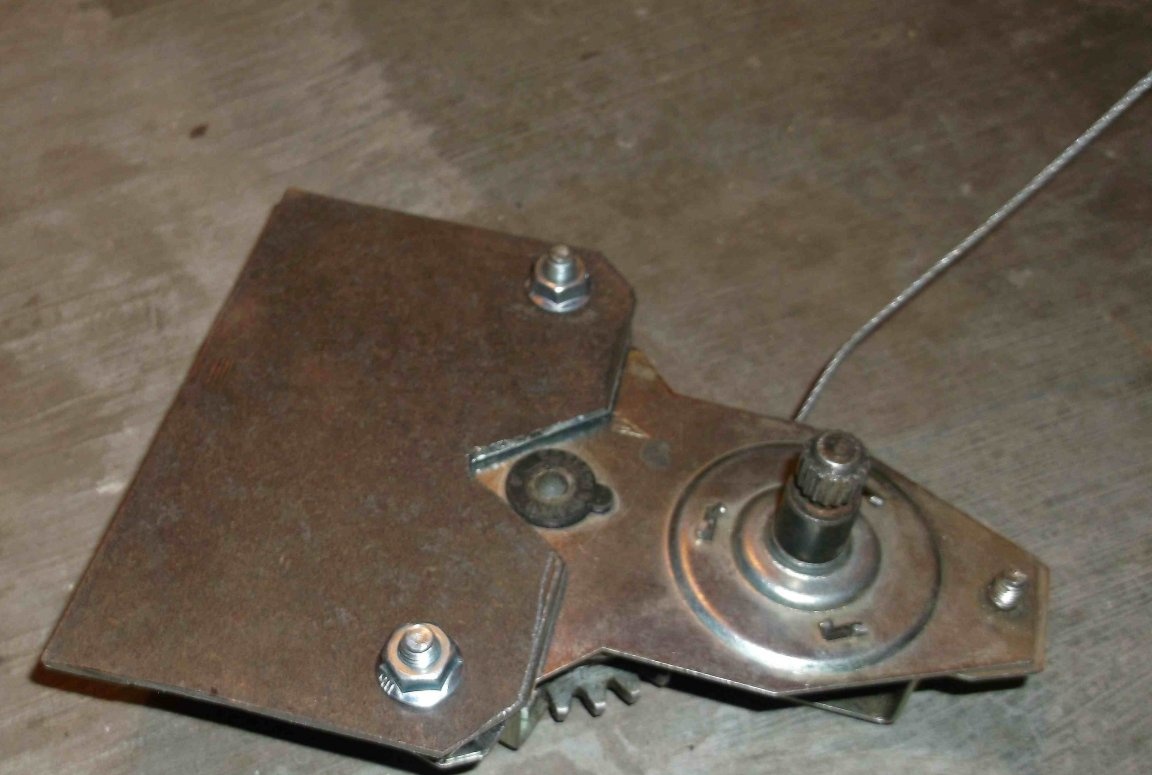
I drilled two holes for mounting and connected the plate to the gearbox using two nuts.
As can be seen in the photo, the cutout in the center serves to tighten the plate to the mechanism.
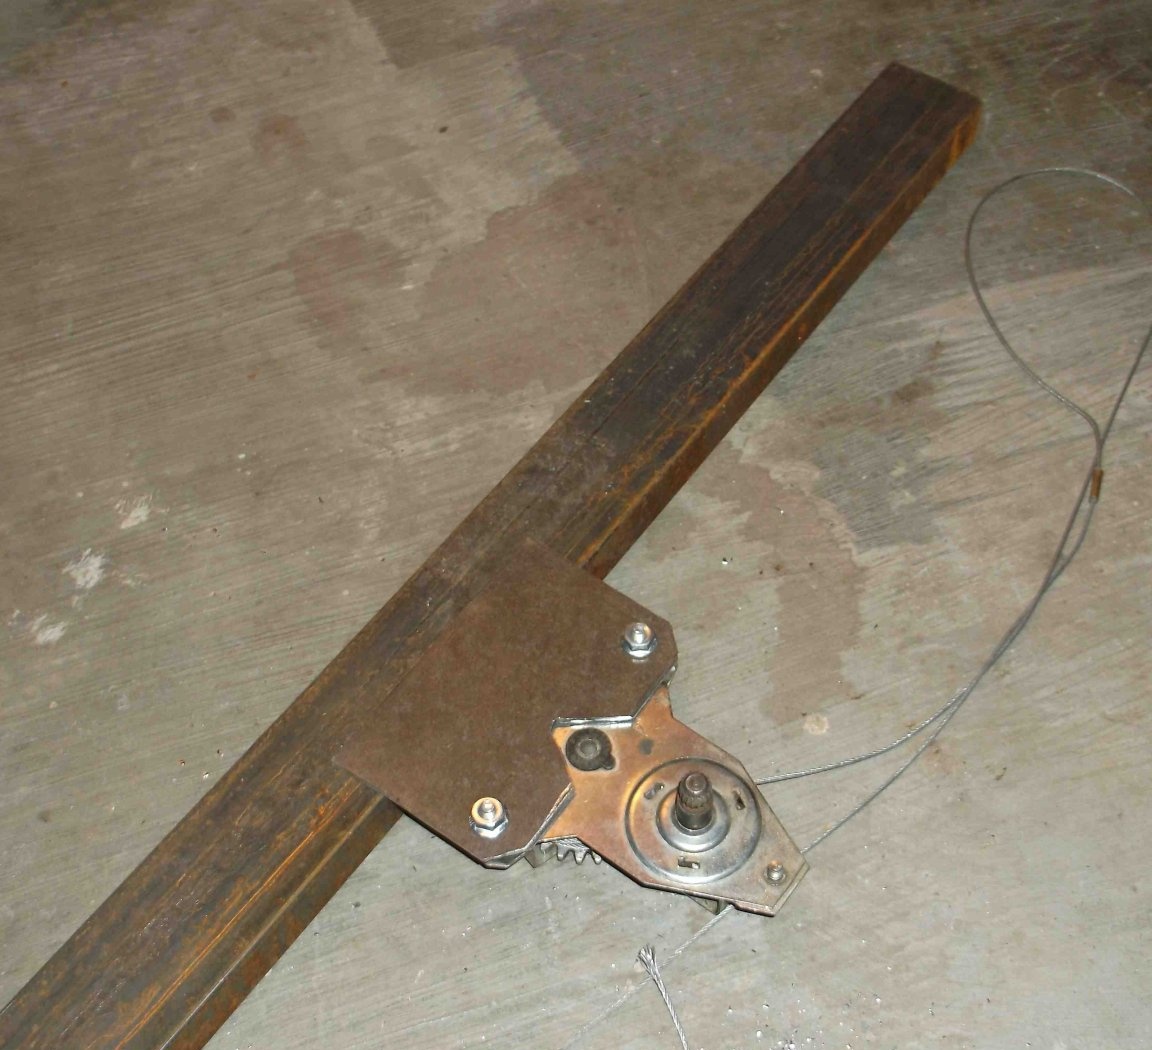
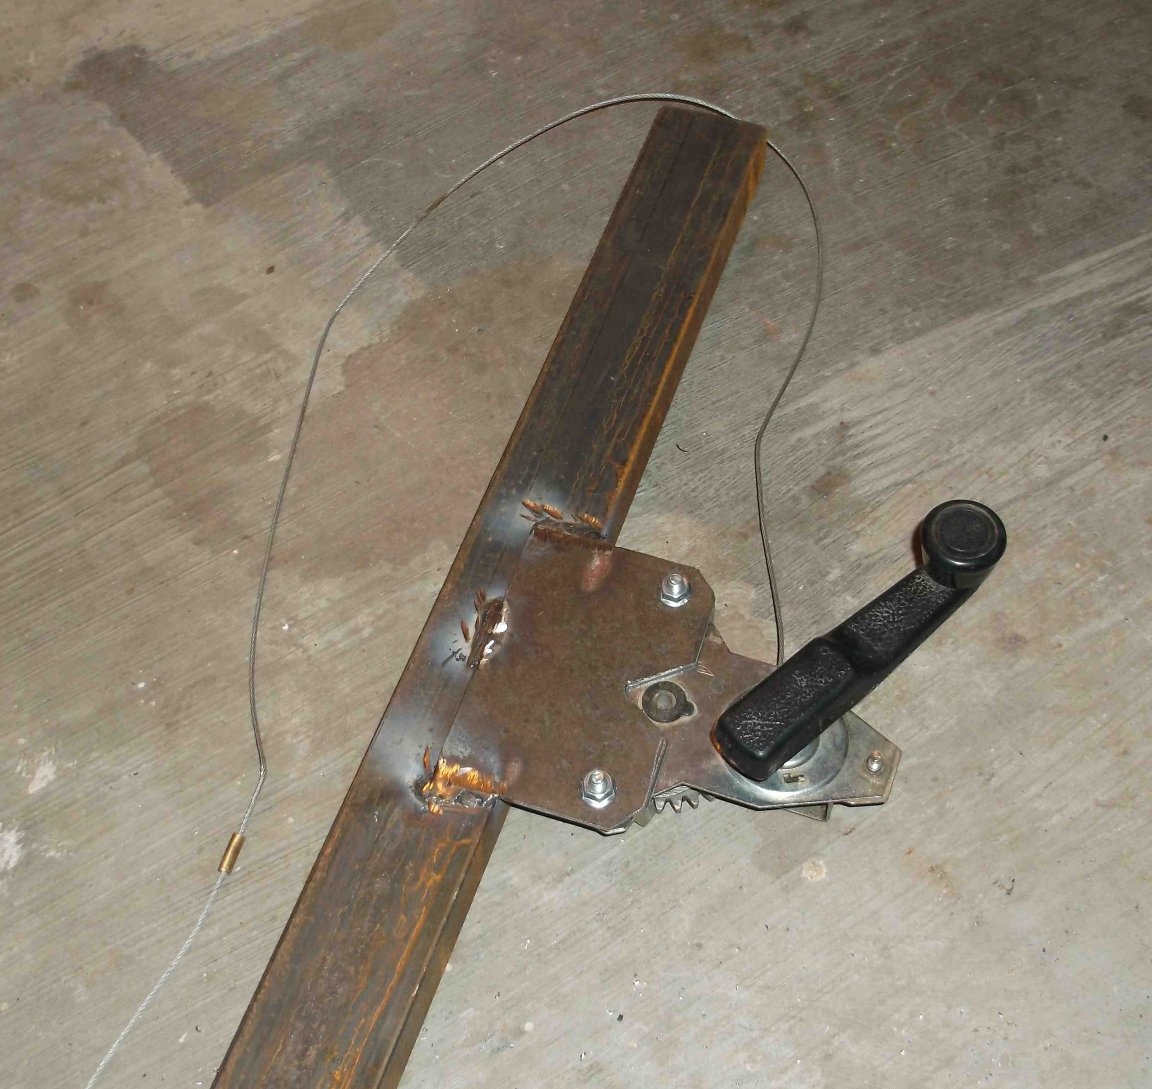
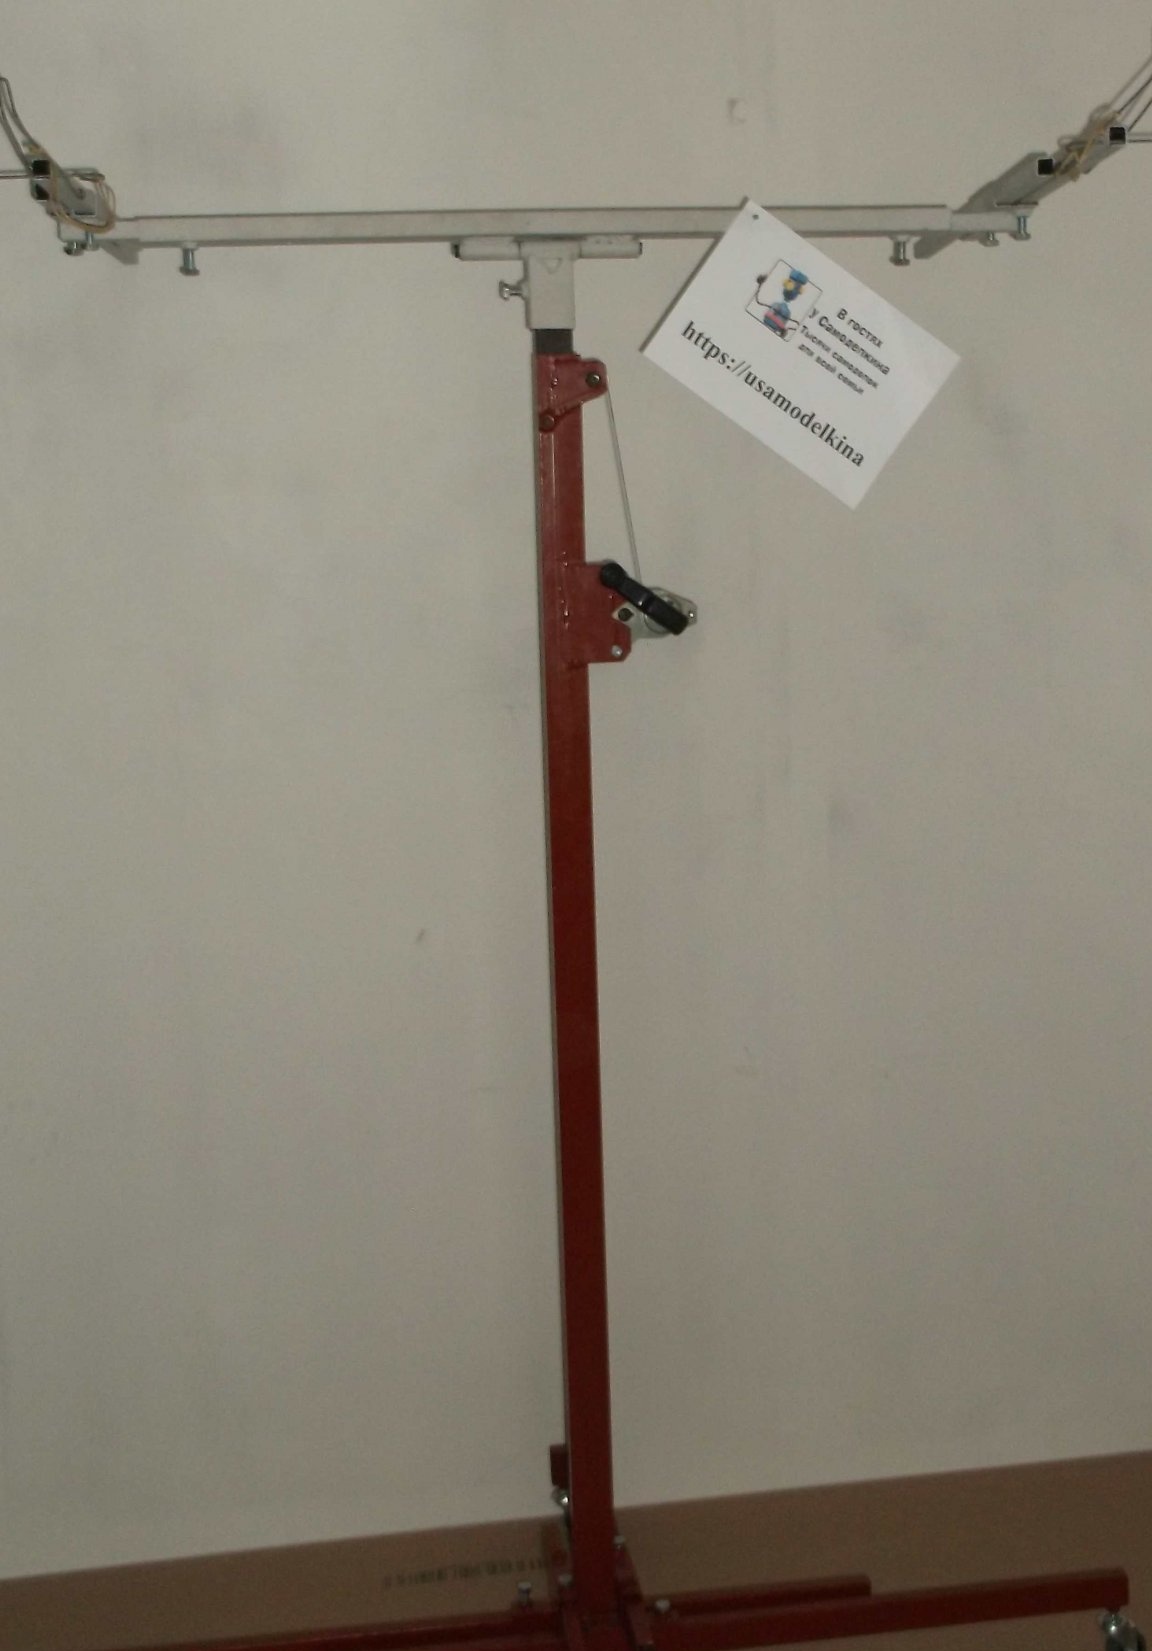
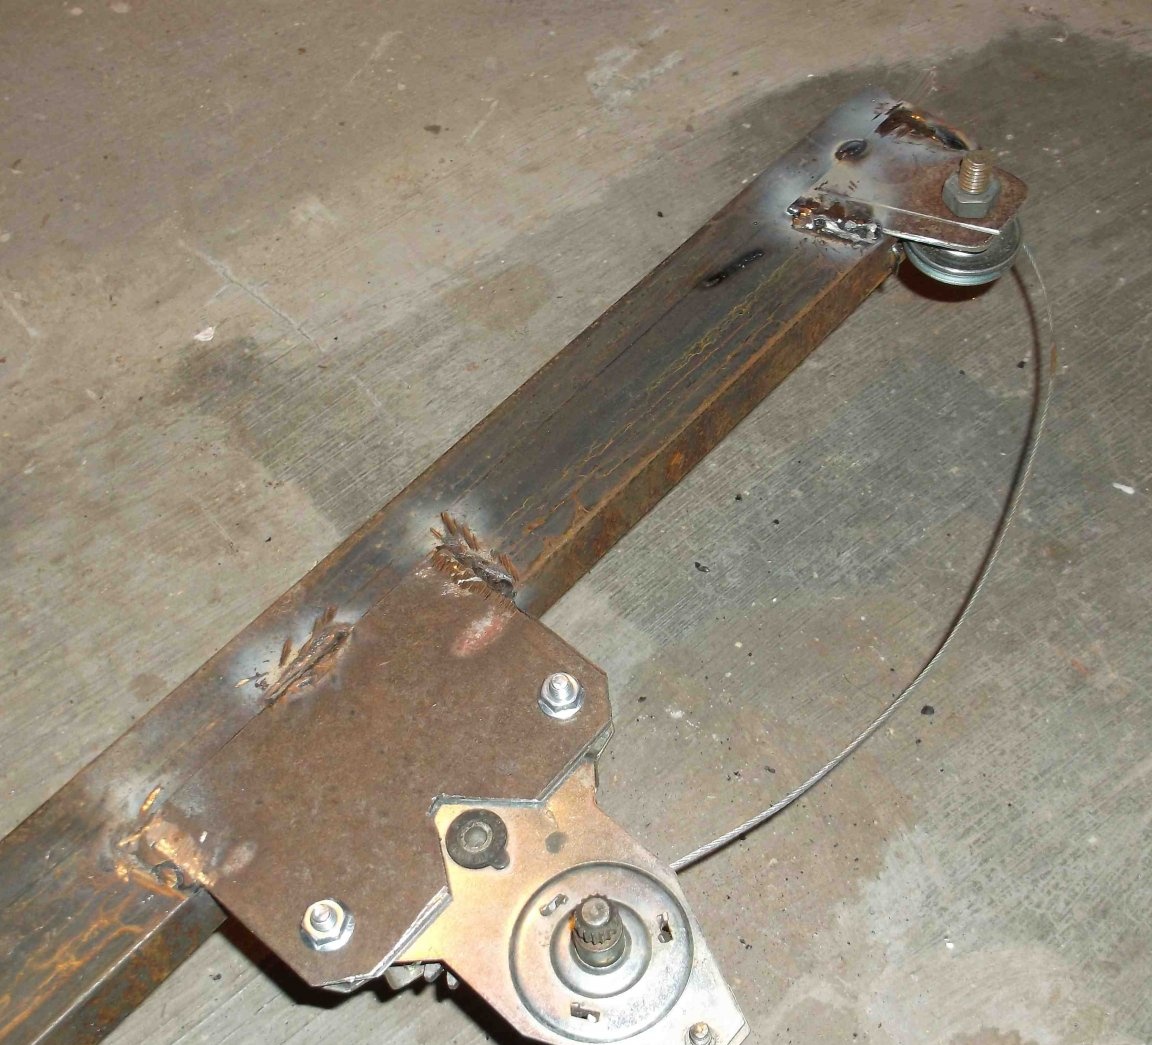
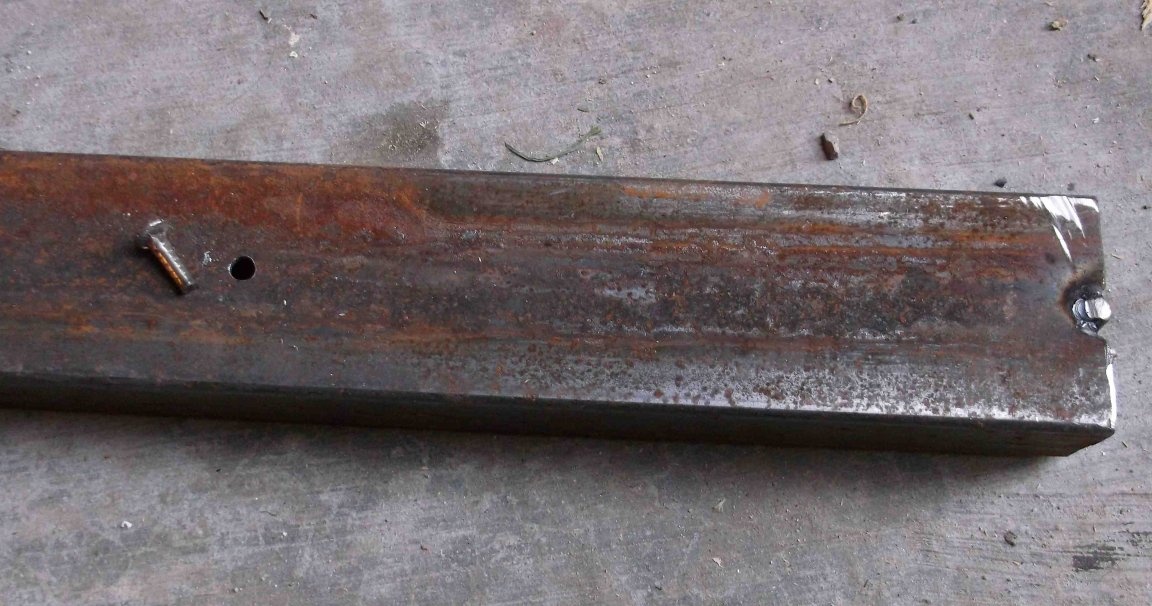
Then he took a profile pipe 50 * 25 * 1.5 mm long 155 cm, which will be the main rack of the lift. Stepping back from the edge of the rack 25 cm, fixed the lifting mechanism with the mounting plate by welding.
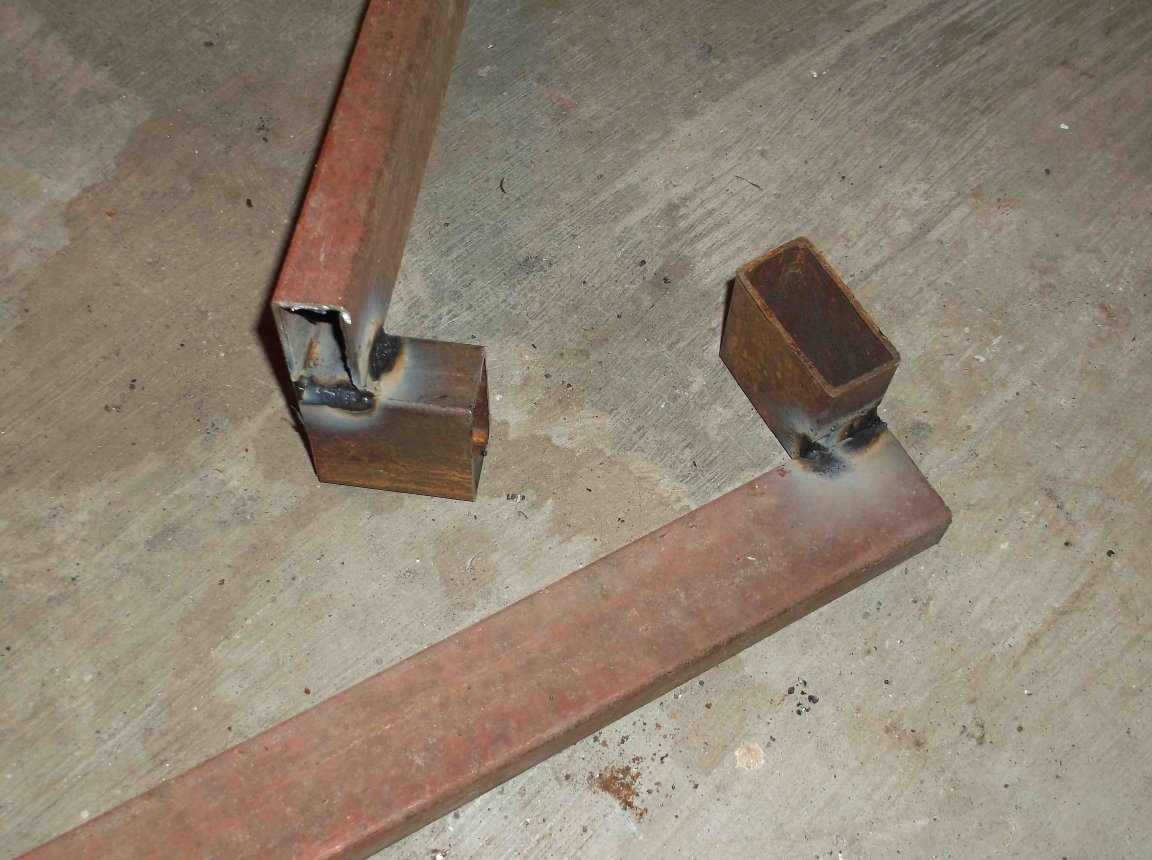
I decided to make a stand with removable and adjustable spacers. For this, I cut four sections 11 cm long from a profile pipe 50 * 25.
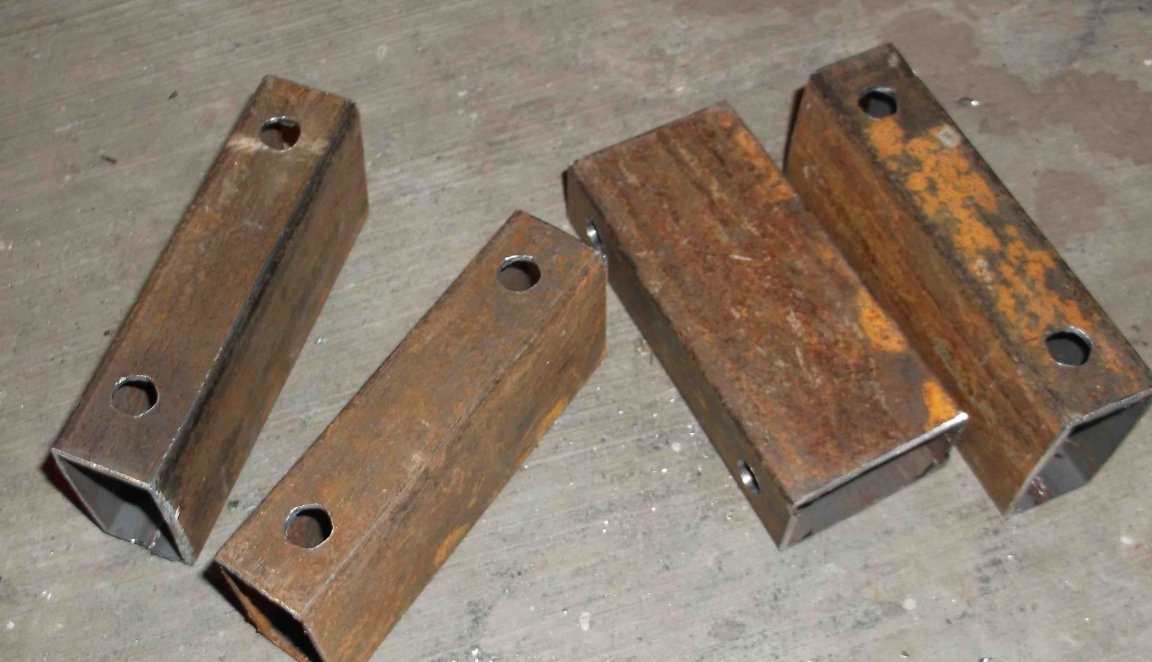
I drilled in each segment from one narrow side two holes with a diameter of 11 mm, deviating from the edges of about 2 cm.
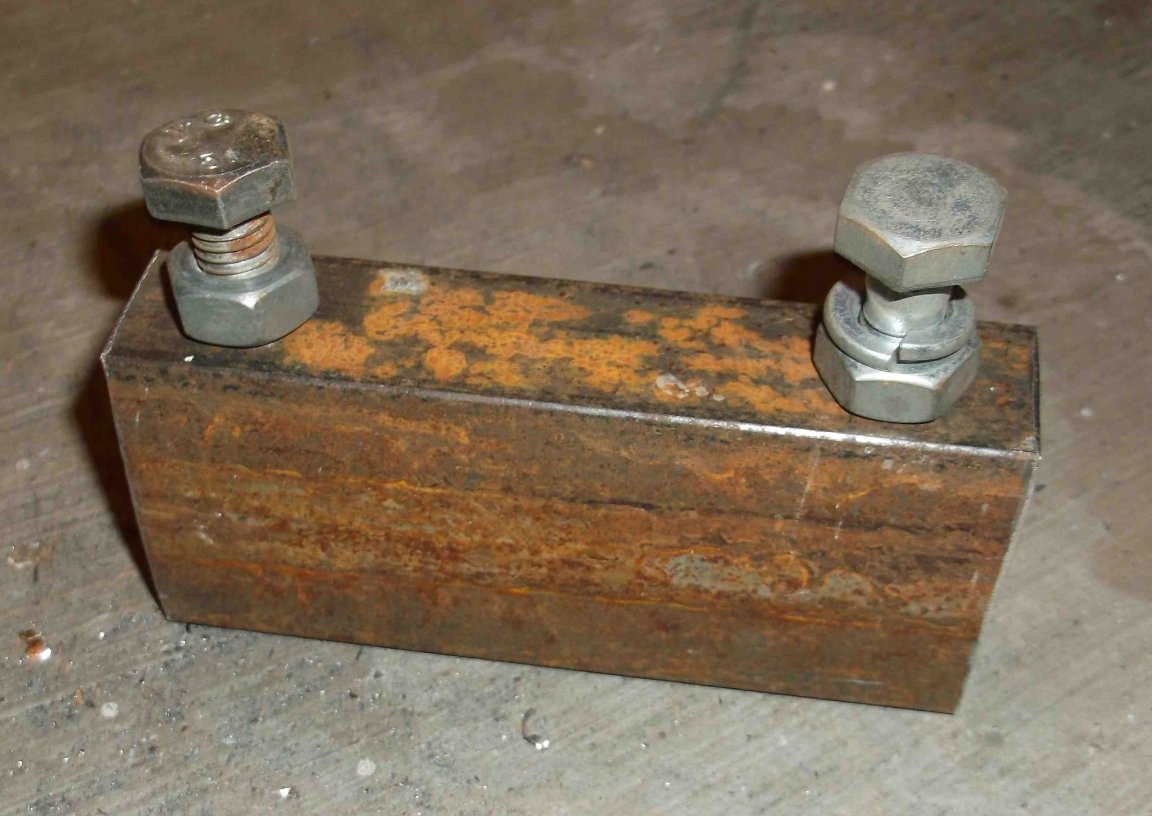
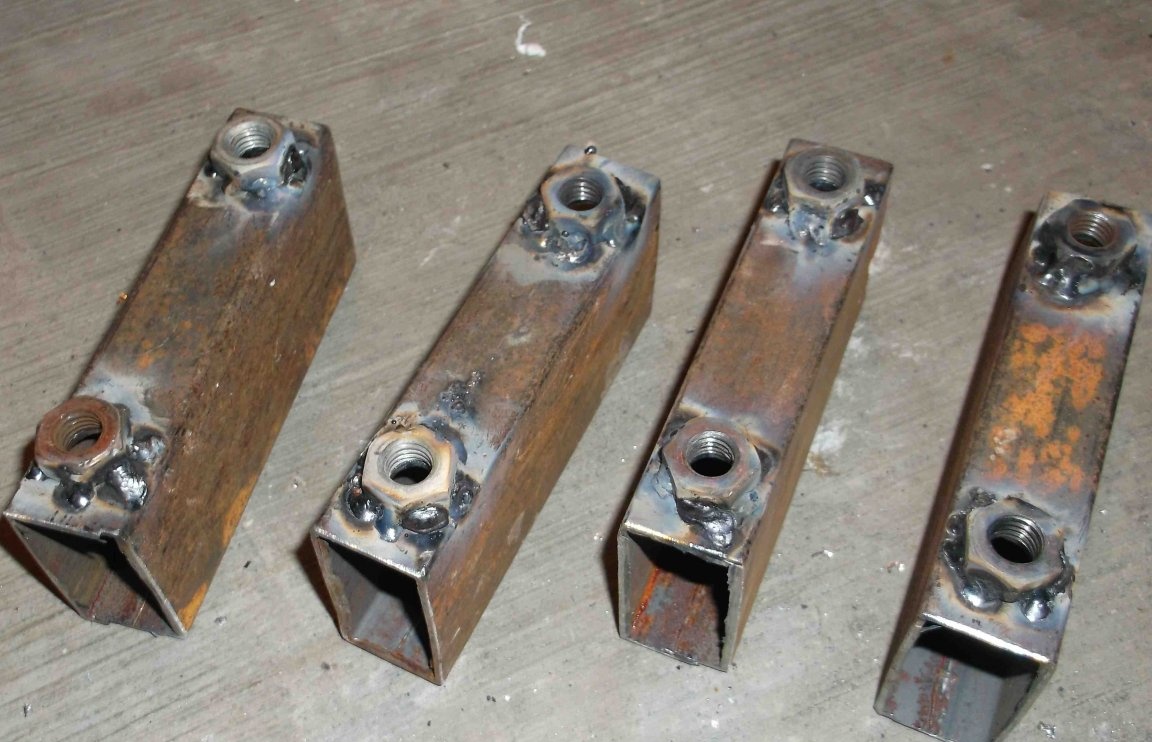
I installed 10 mm bolts with nuts in the drilled holes, for alignment and welded the nuts to the profile. At this stage I want to make an amendment - in this case, it will be enough to have one hole with a nut on each section of the profile. This was confirmed in practice after the complete assembly of the lift.
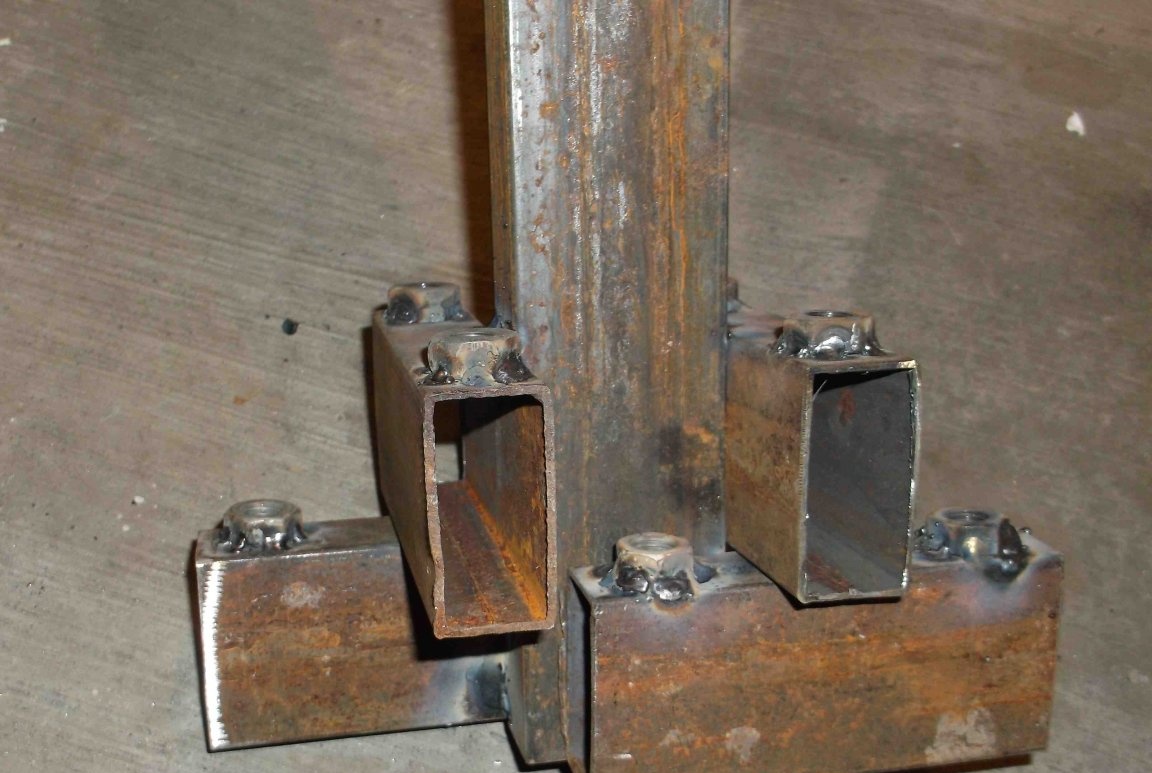
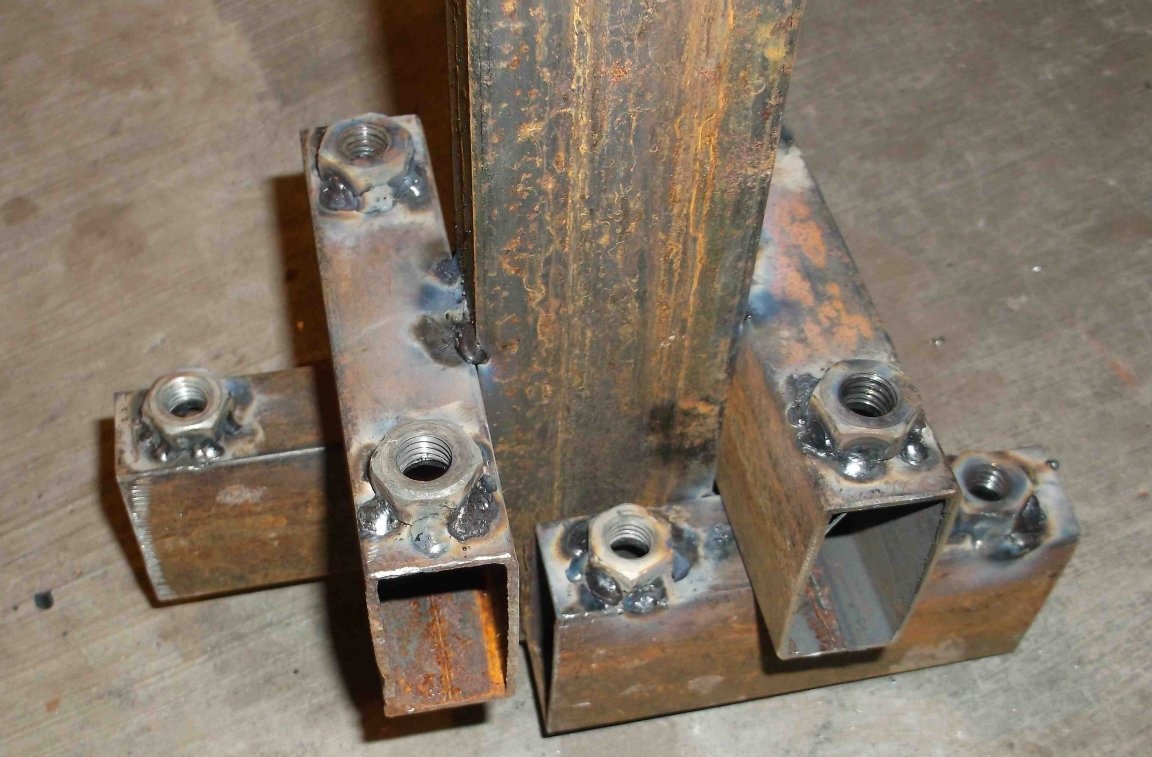
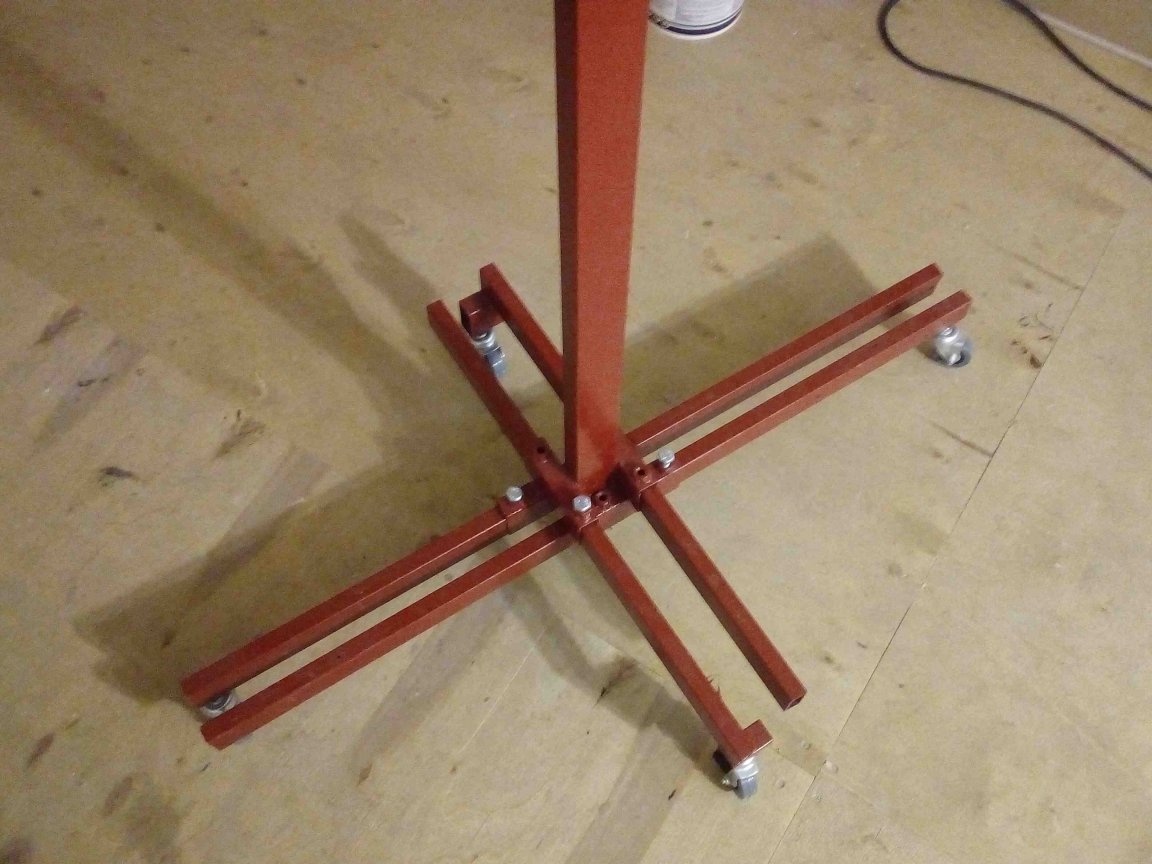
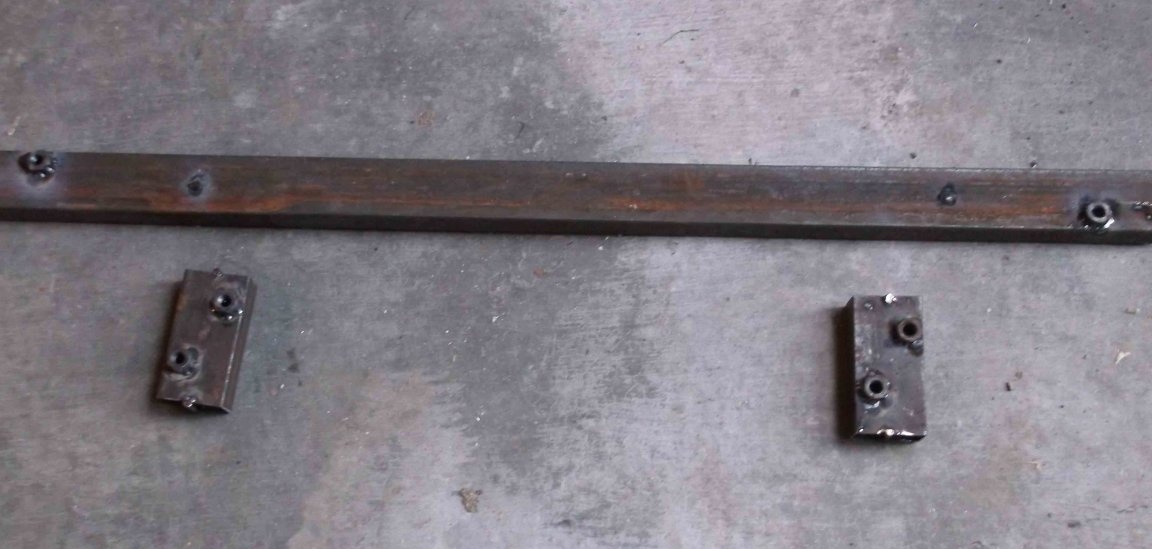
Two parallel guides for longer racks were welded to the bottom of the rack; above these guides, the remaining two pipe sections were perpendicularly welded. All this looks, to put it mildly, not aesthetically pleasing, but it makes it possible to regulate the overhang of the spacers of each separately.
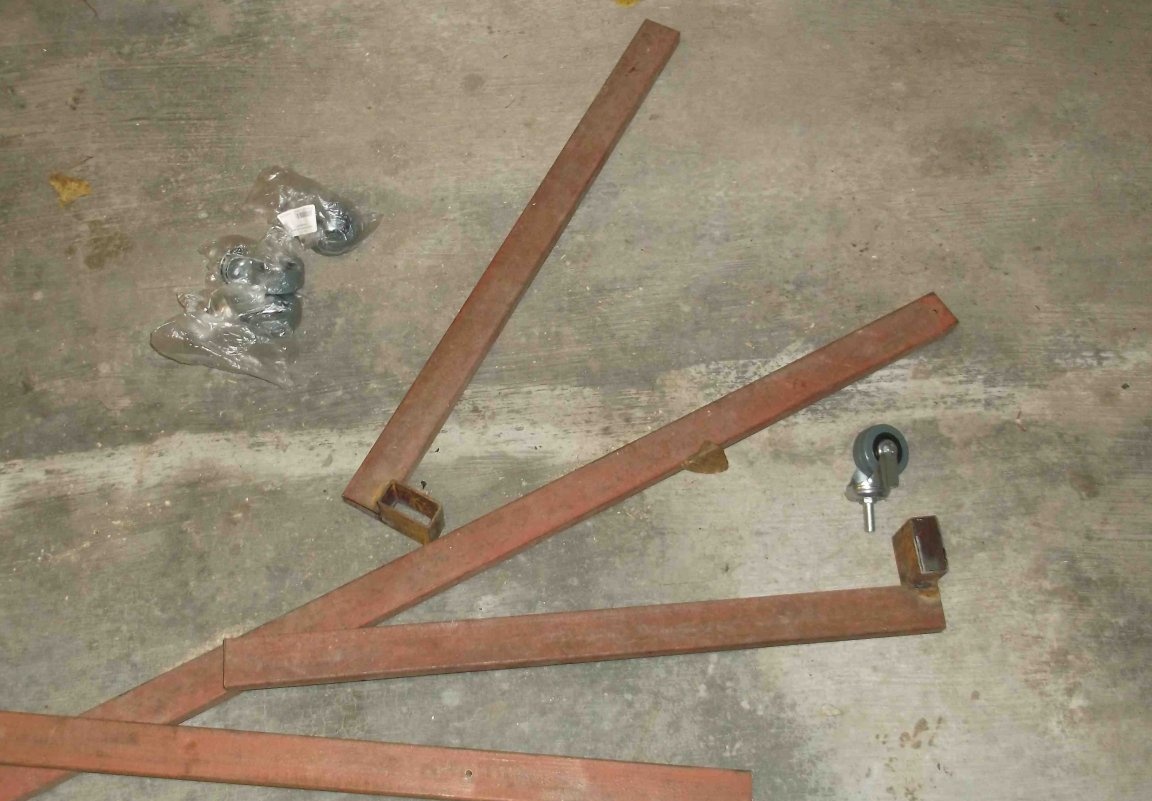
The spacers themselves were made from a profile pipe 20 * 40 * 1.5 mm. Spacers that will be located across the sheet width are enough sections of the profile pipe of 50 cm, in my case 60 cm. For struts along the sheet length, the pipe lengths of 70 cm are enough, I have 90 cm. Since the hoist was manufactured without any drawings and calculations and in this case, it is better to have more than less, and it is easier to make a short one from a long pipe than vice versa.
Since the guides for the struts are at different levels, to align to the struts of the upper level, I welded pipe segments of the corresponding height.
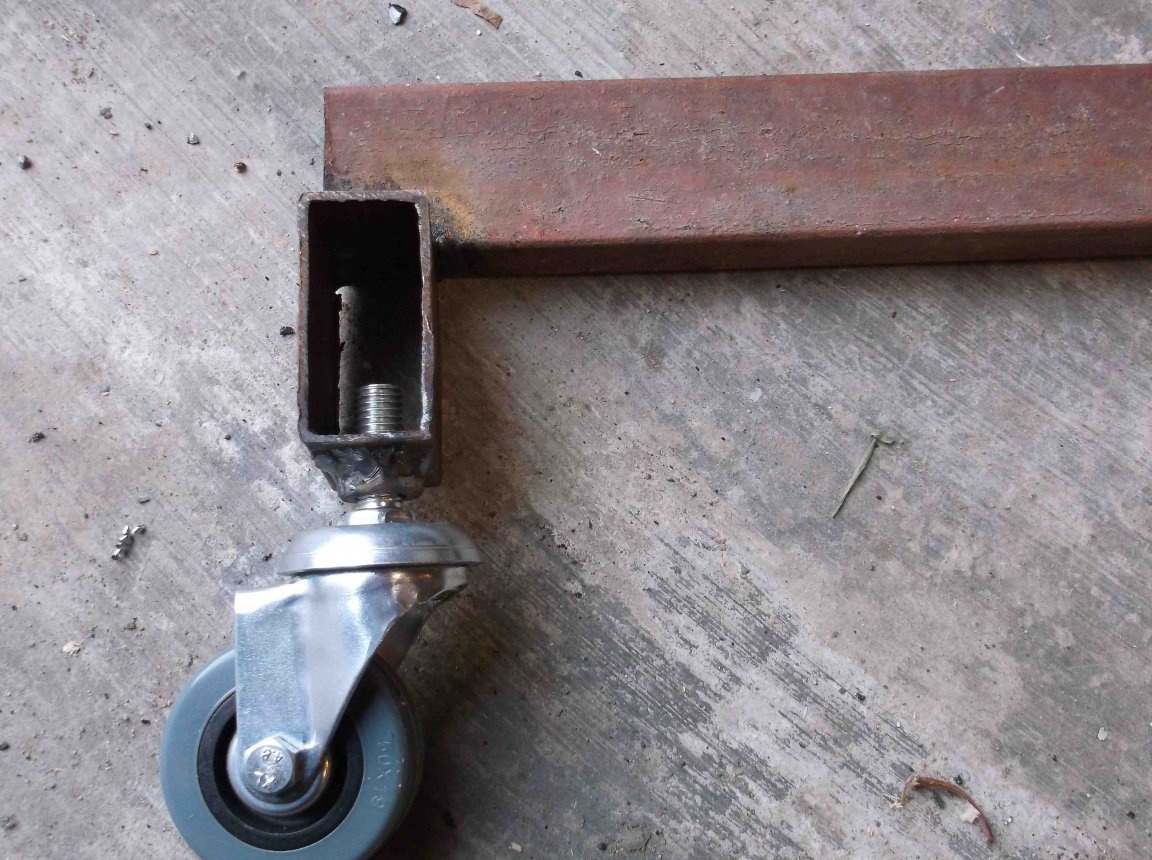
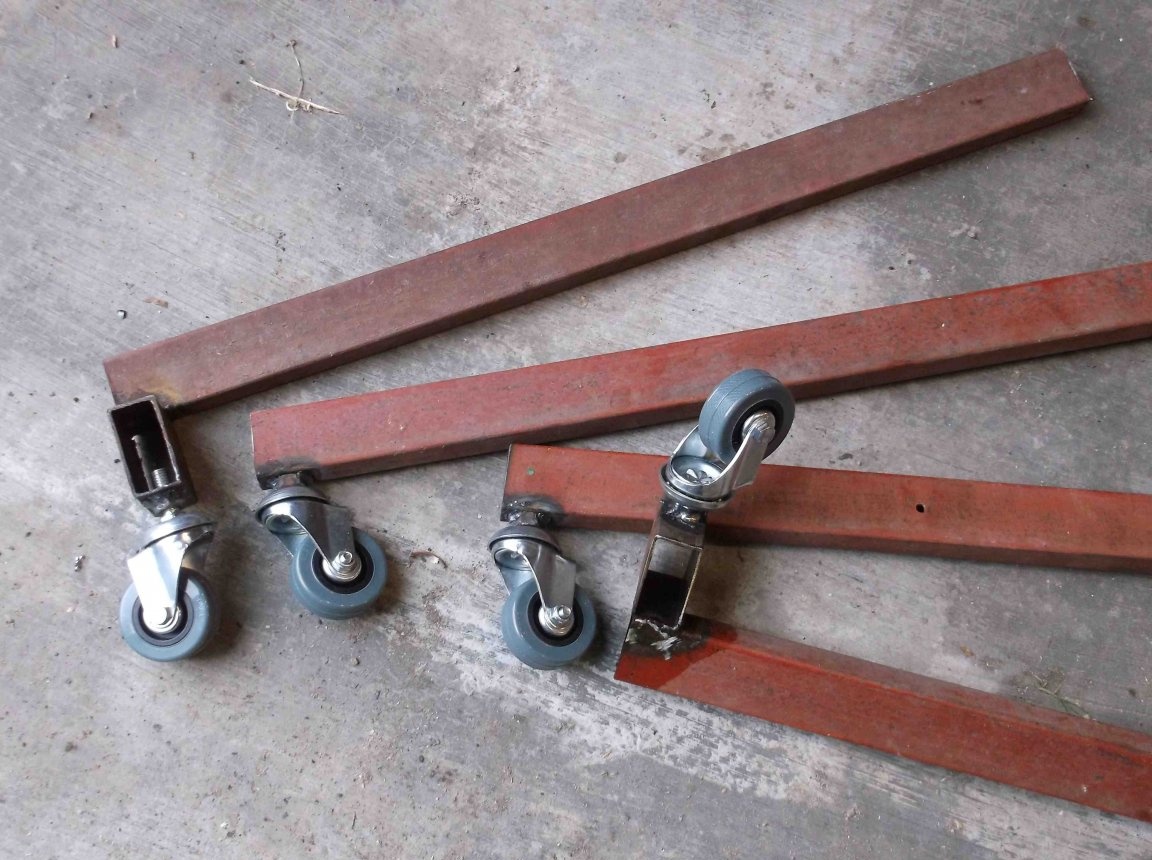
For the convenience of positioning plasterboard sheets, the lift was equipped with furniture wheels, which were screwed into the nuts welded at the ends of the spacers to pre-drilled holes.
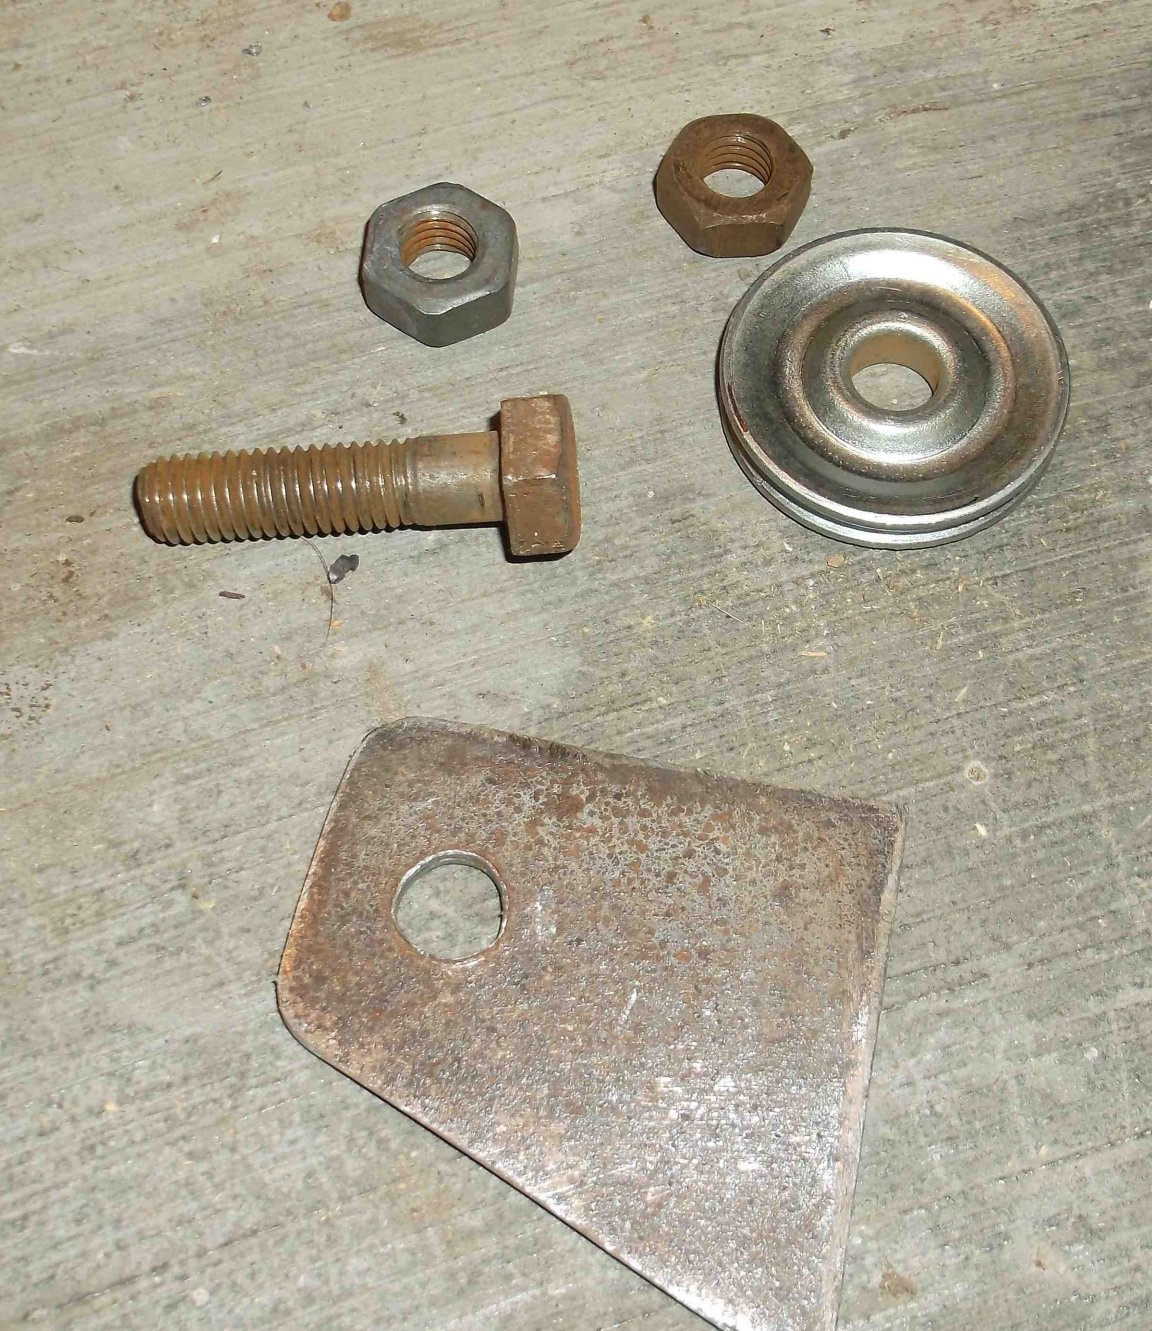
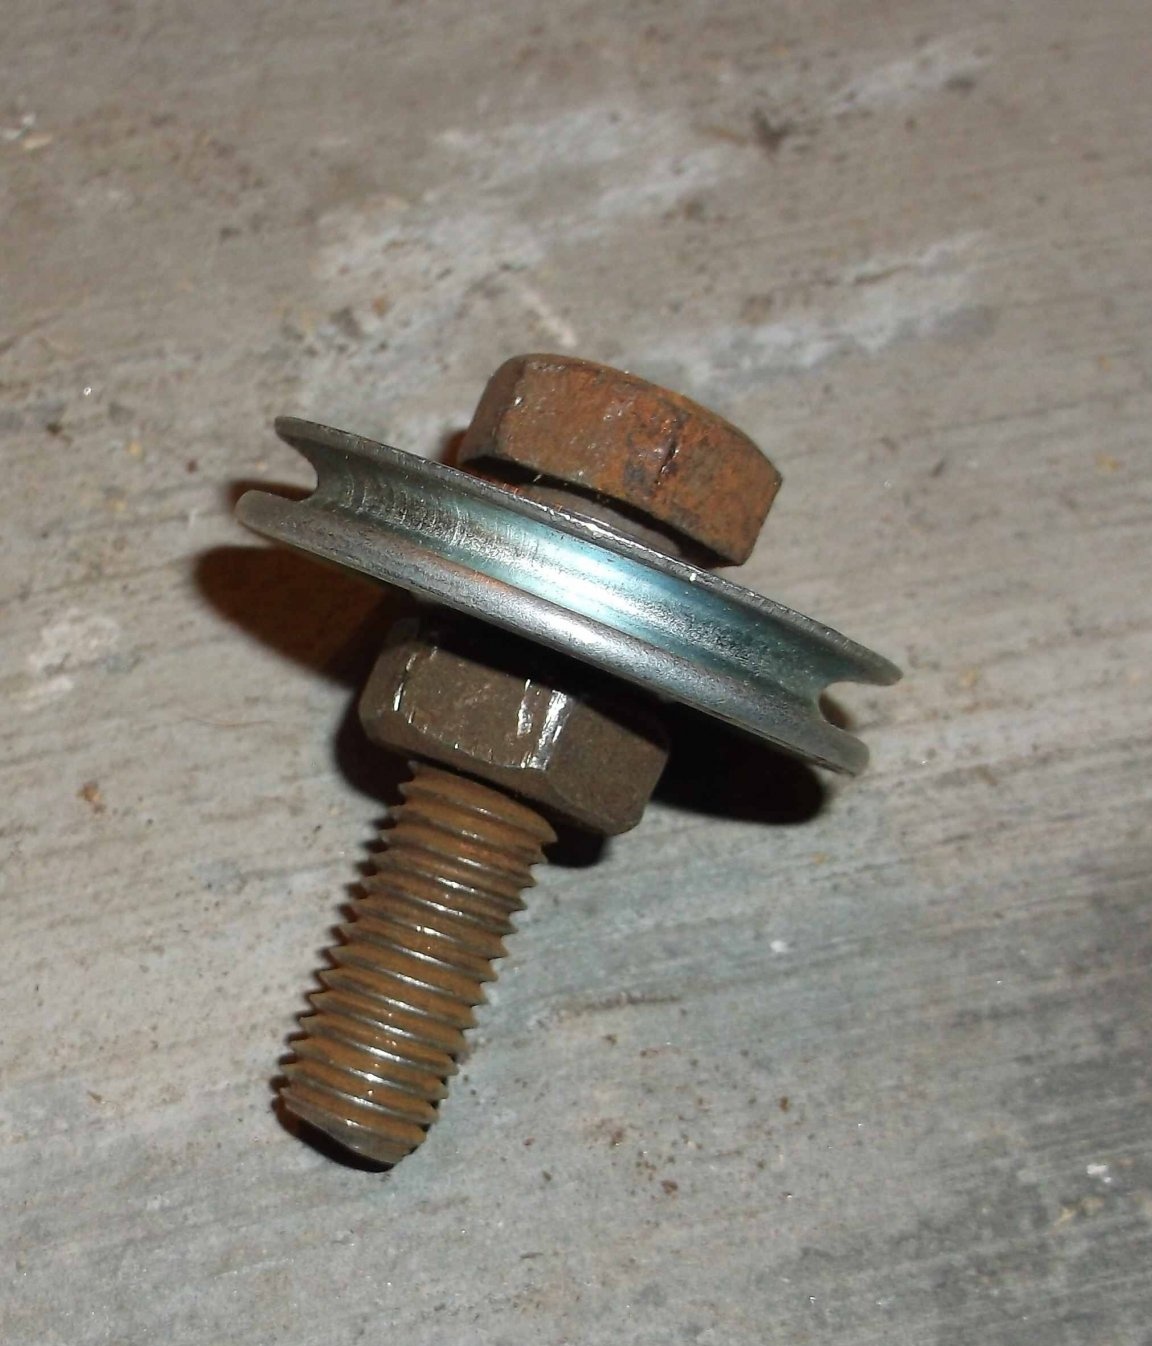
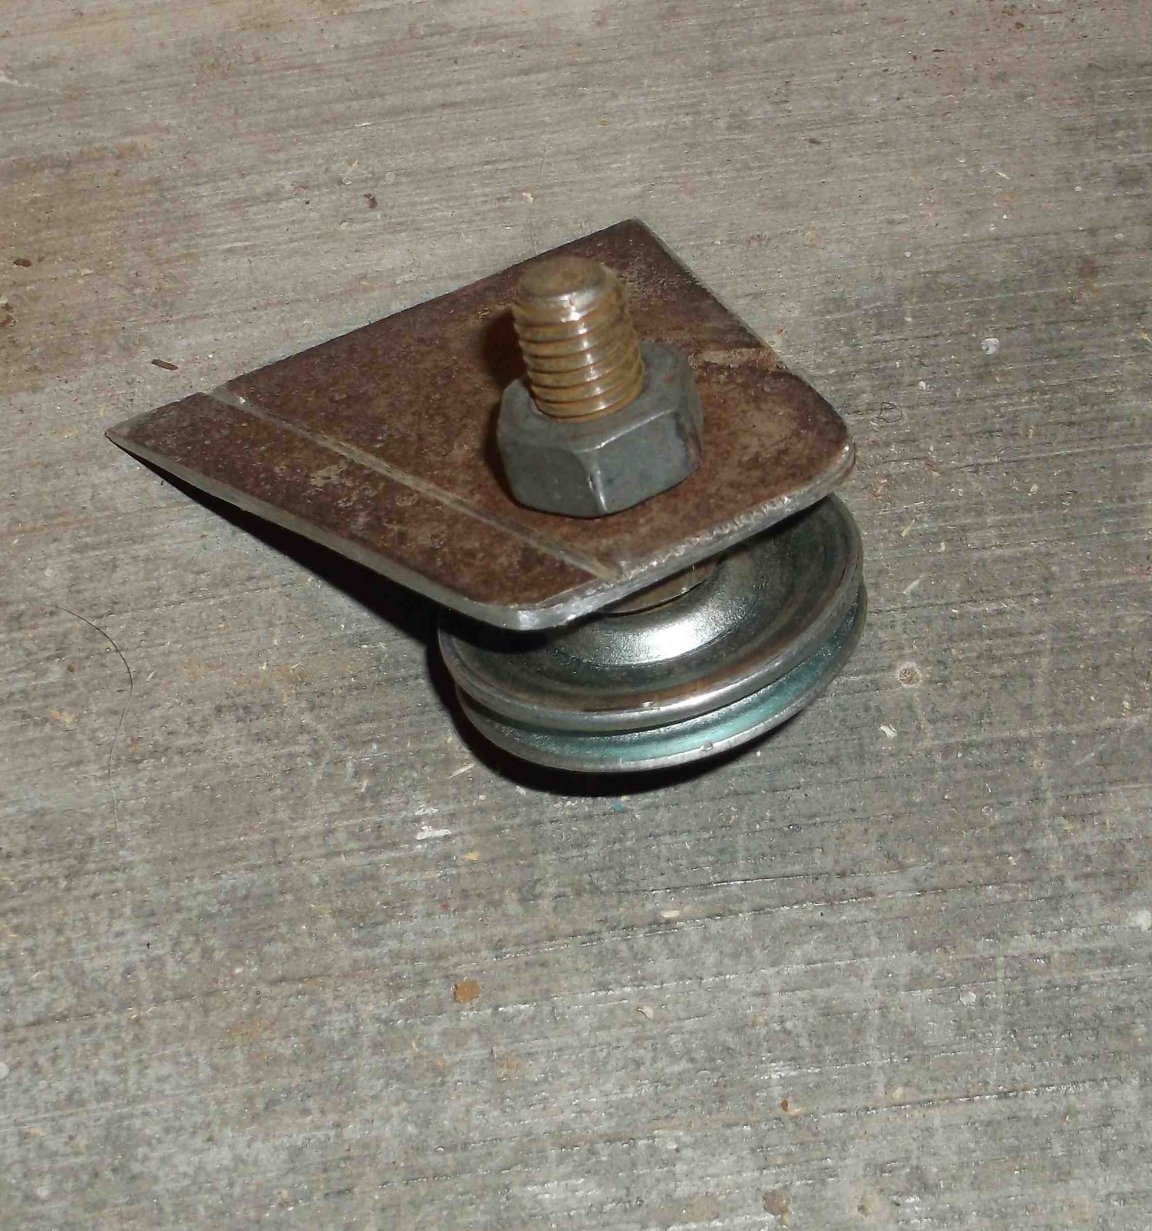
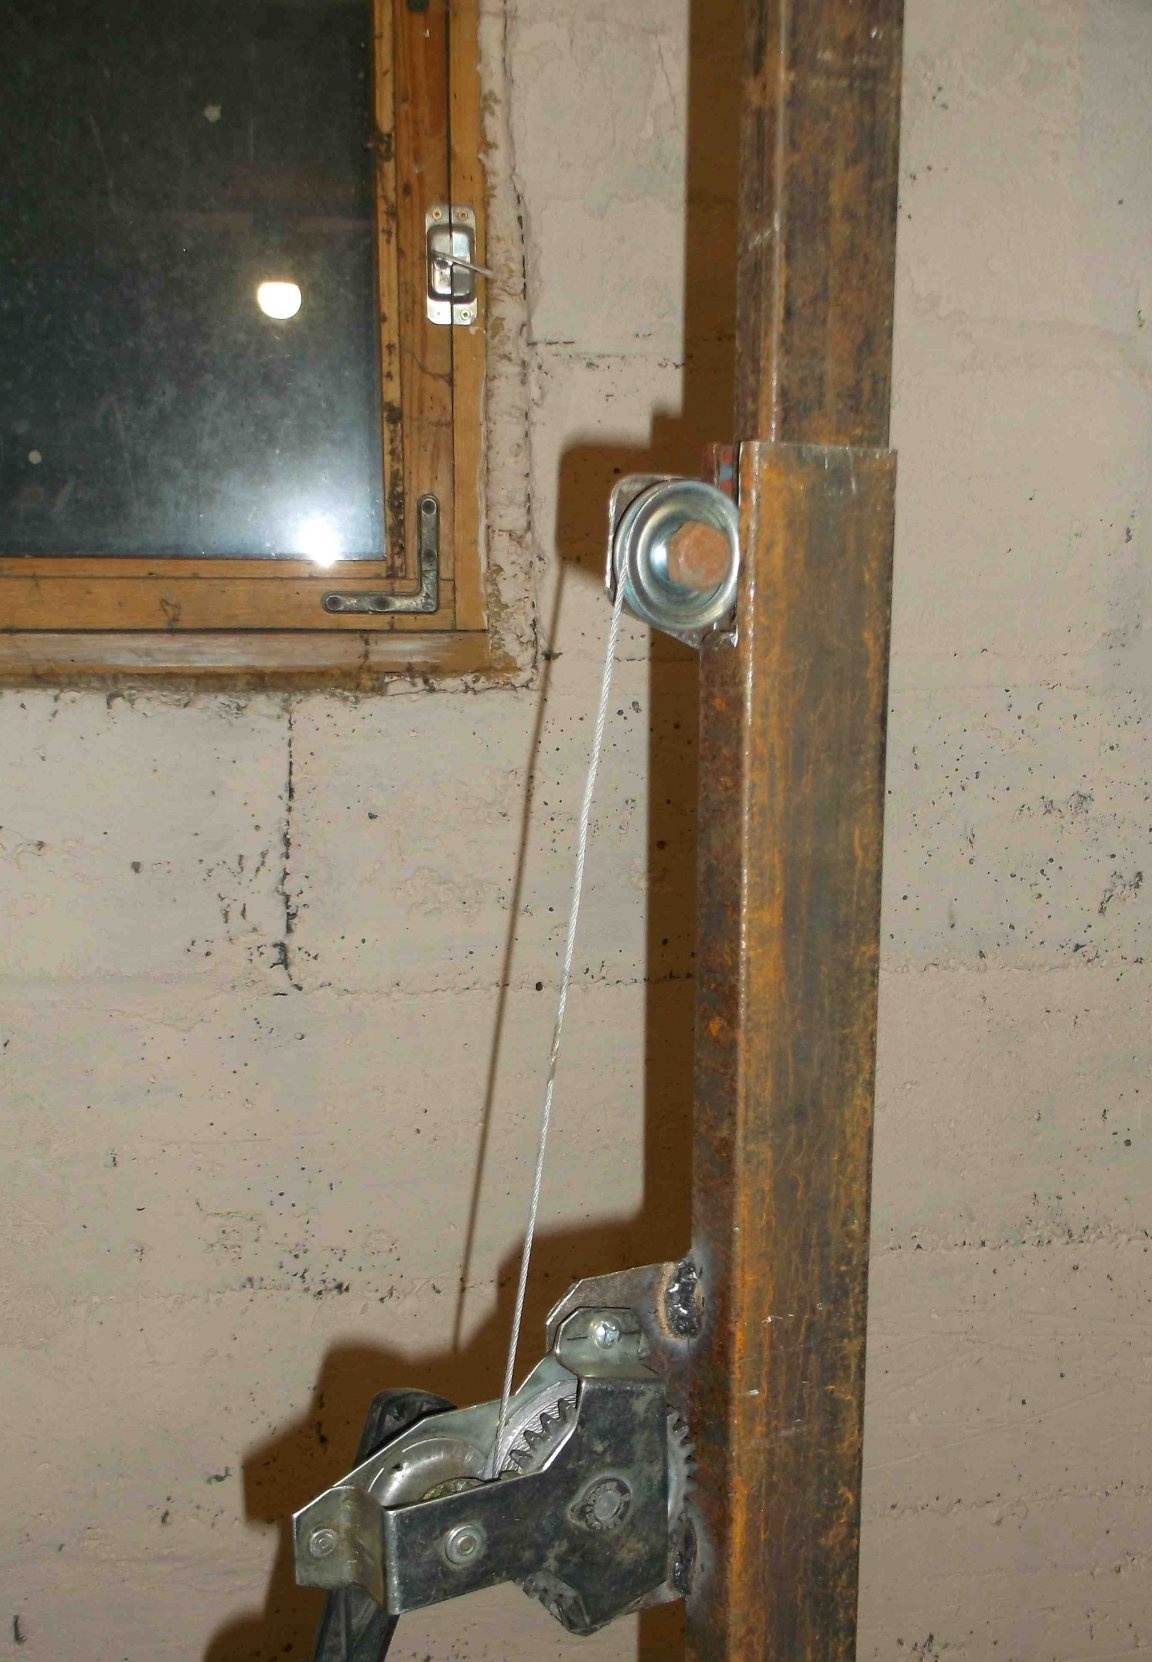
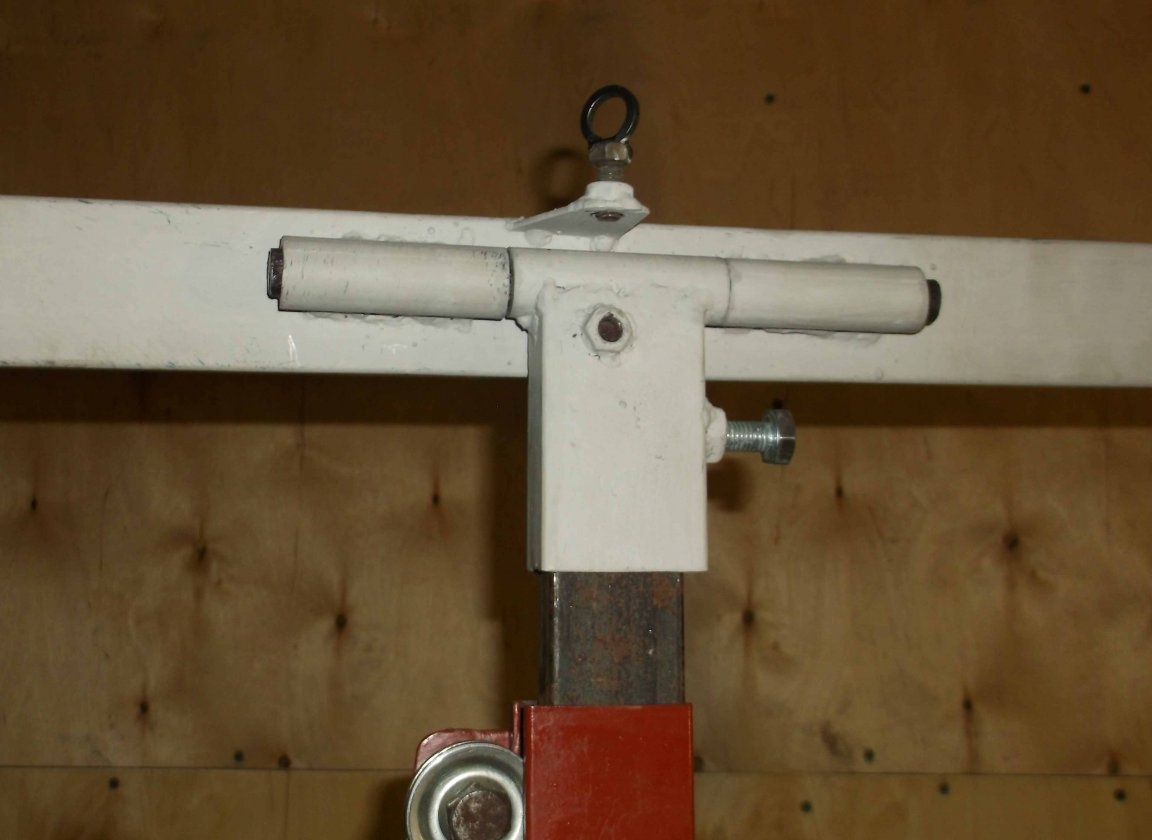
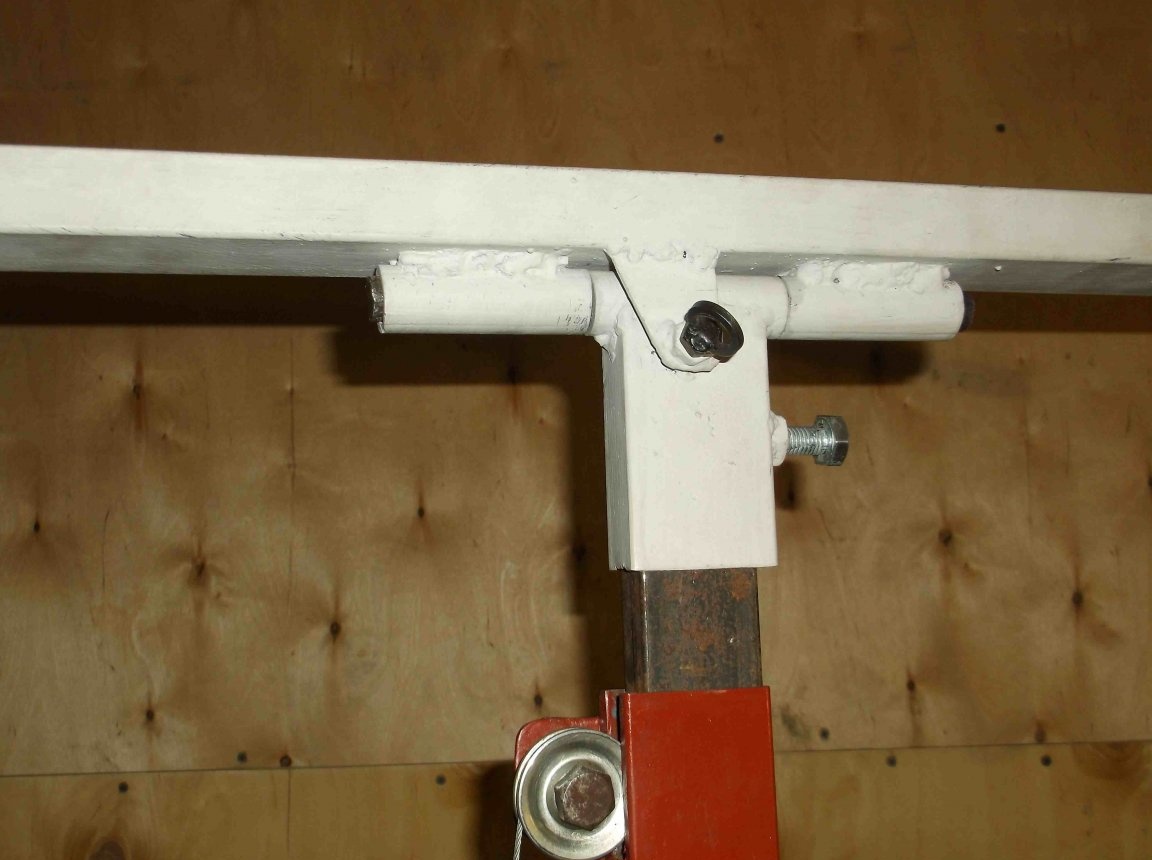
Further, for the operation of the retractable, telescopic mechanism, it also required a rotating fulcrum. This support consists of a roller for the cable from the window lifter mechanism, tens bolts with short threads with nuts and a mounting plate with a thickness of at least 2 mm. All this is assembled in one piece as in the photo. When assembling, greased the bolt and the inner hole of the roller with automotive grease (lithol).
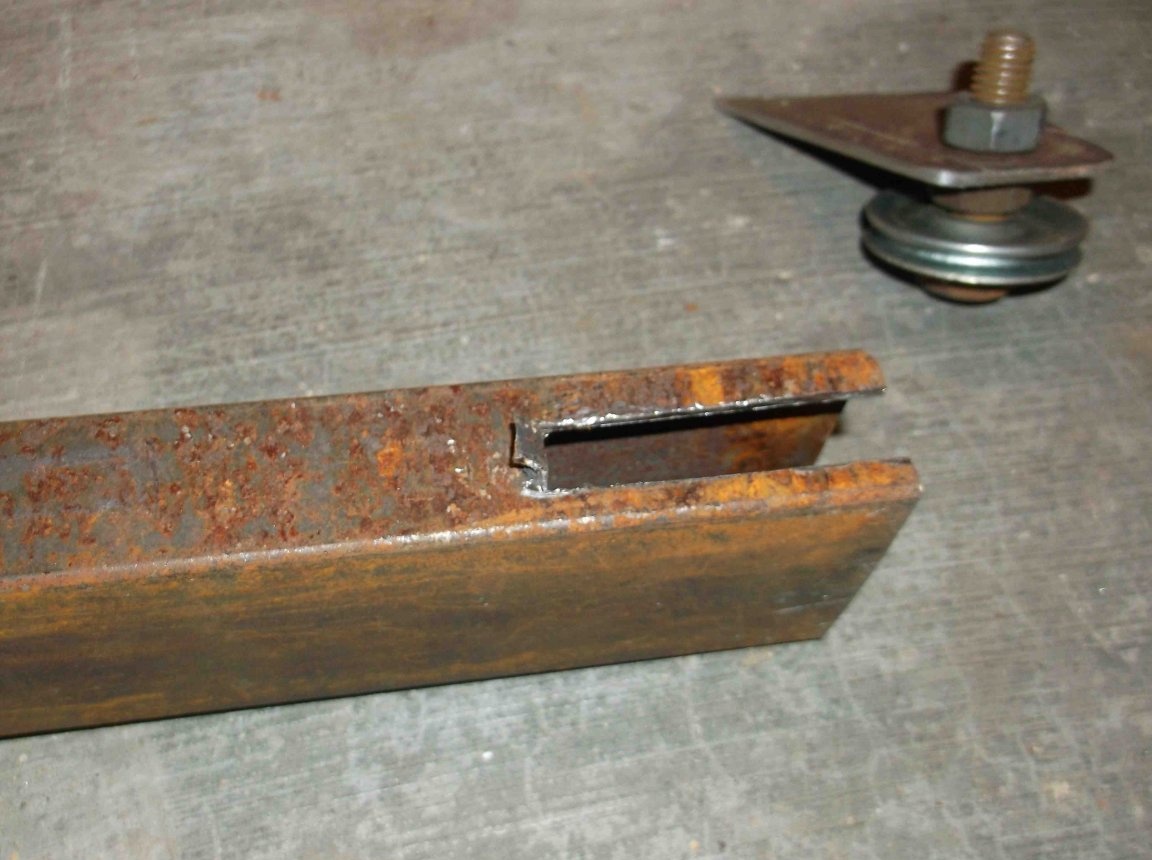
I sawed a small groove in the upper part of the rack, into which a roller with a cable should partially enter to lift the inner pipe. The inner tube 20 * 40 has a length of 170 cm.
Fixing the plate with the roller is carried out by welding, but first you must install the inner pipe, which should not be in contact with the roller, and the gap between them should be minimized. This will reduce the play between the pipes.

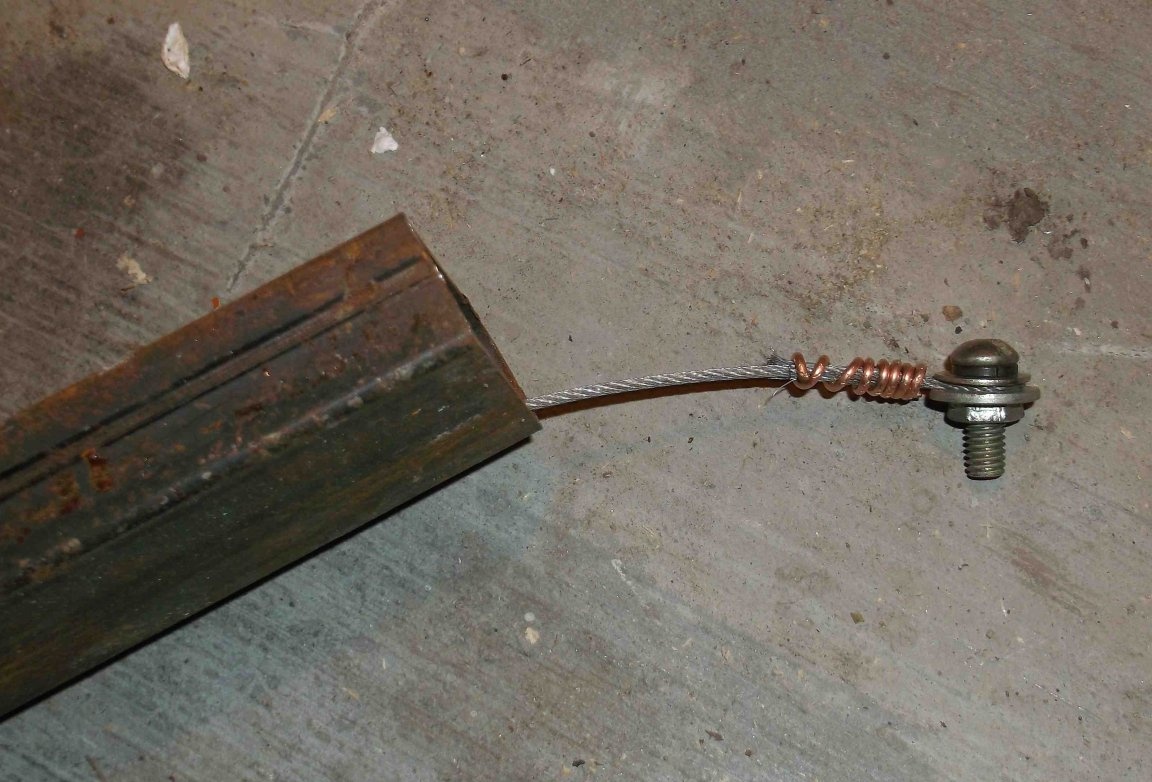
In the inner pipe, stepping back from the bottom edge of 35 cm (the indentation is used to prevent the inner tube from completely flying out when lifting), I drilled a hole with a diameter of 5 mm for the cable. He pulled the cable from the power window through the hole into the pipe, made a loop at the end of the cable and clamped it with a bolt, so that the cable could not be pulled back through the hole.
All drawer is ready.
Next, he began to manufacture a rotary mechanism.
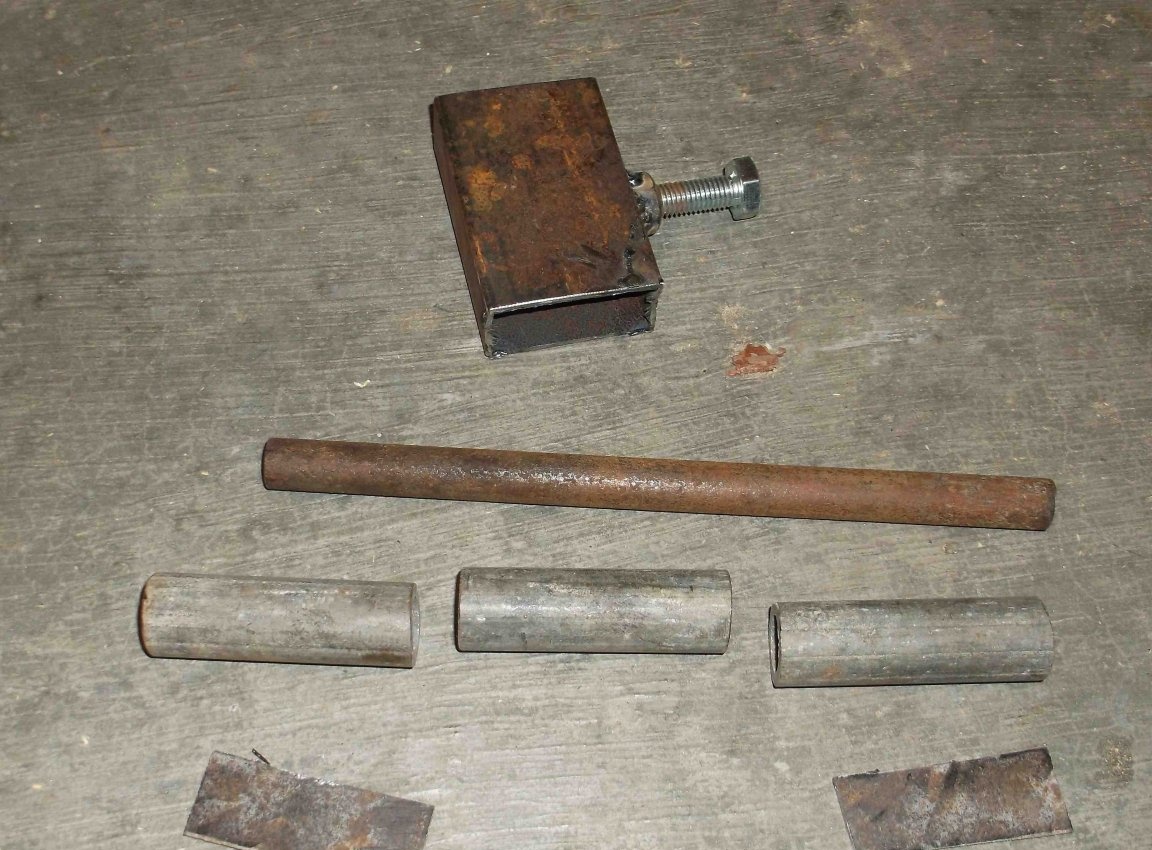
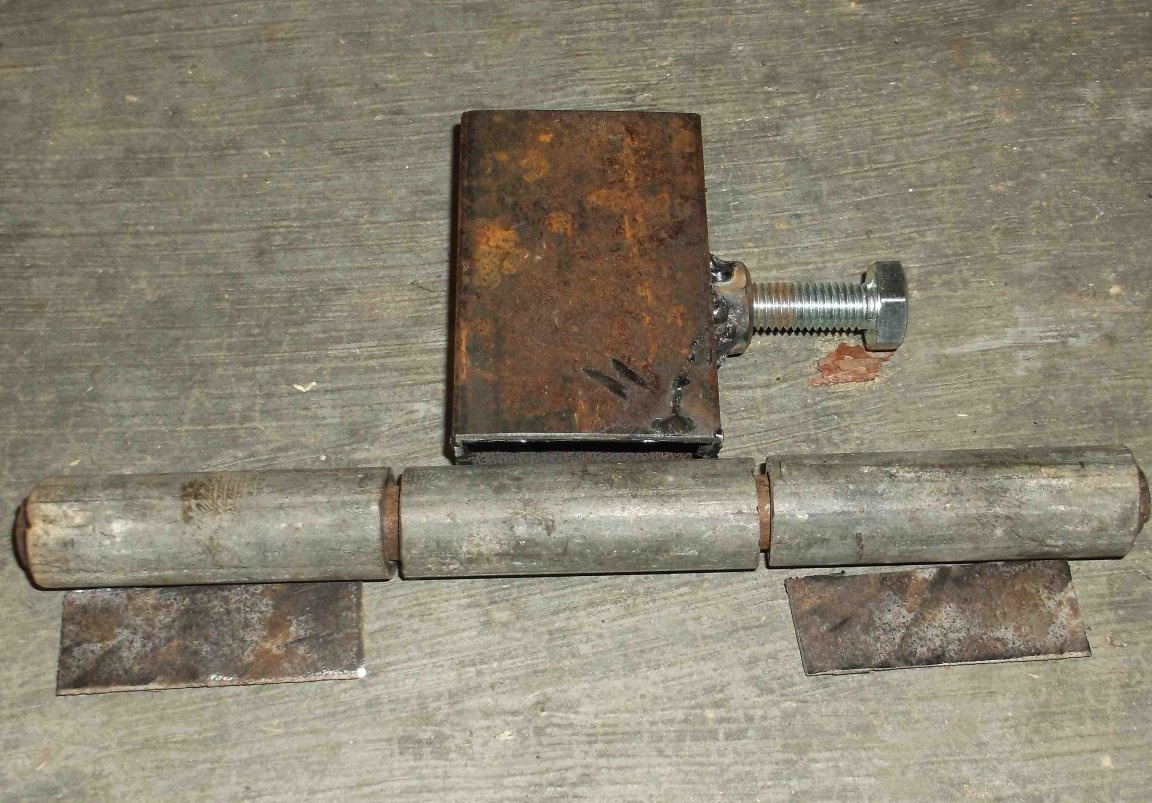
This required three pieces of half-inch pipes of 7 cm, a steel rod of 25 cm of suitable diameter, which fits tightly inside the pipe sections. Two plates for the gap between the parts, a section of the profile pipe 25 * 50 that will be worn on the extendable stand and the main profile pipe 25 * 50 with a length of 80 cm for the drywall sheet holder. The assembly process can be seen from the photo.
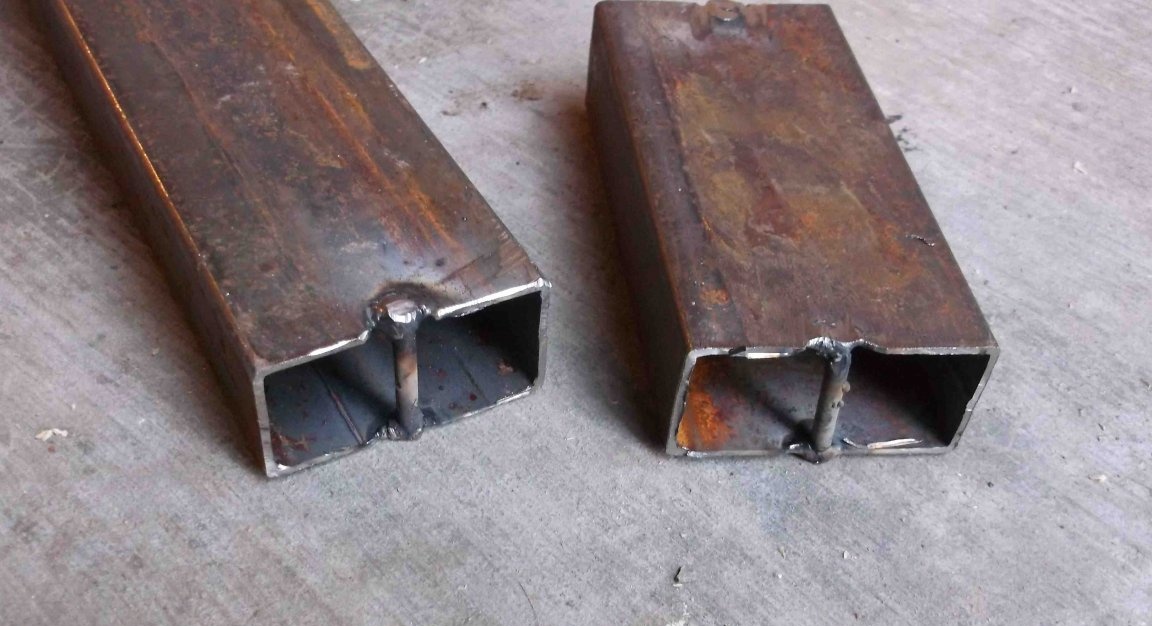
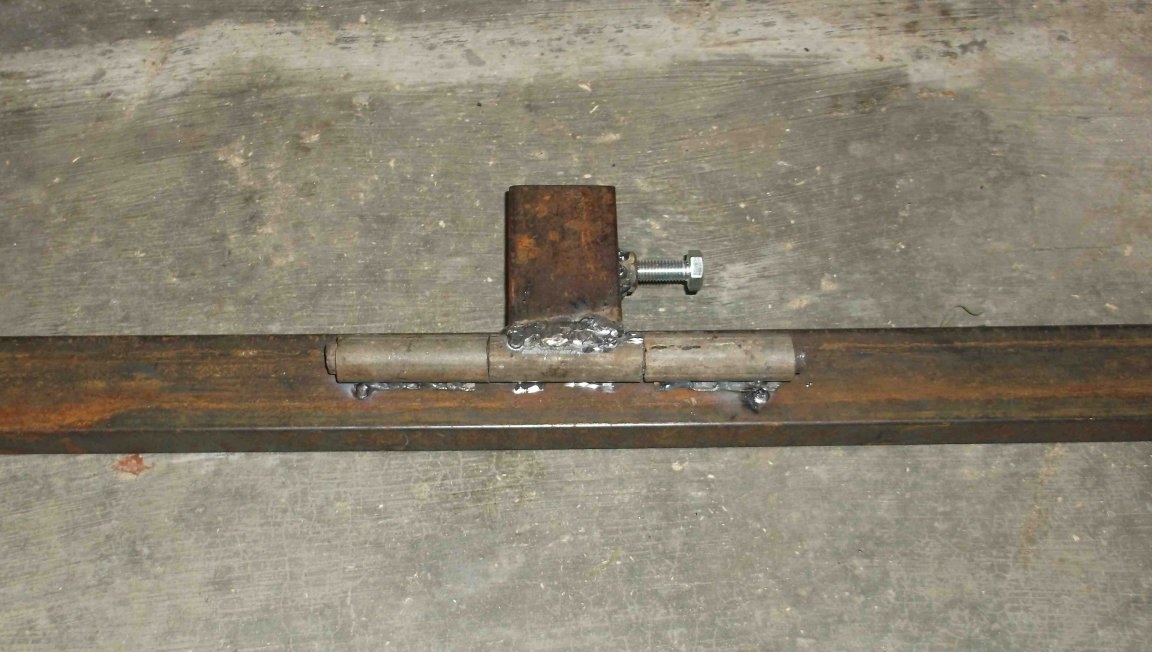
The main pipe was divided by jumpers at the ends and, having retreated from the pipe edges by 20 cm, drilled holes in the center, installed nails into the pipe and fixed them by welding. This is done to eliminate the backlash of two internal pipes 20 * 20 long 80cm, which will move inside. To fix the internal profiles on the outer pipe, nuts were welded at the edges to pre-drilled holes, as described previously. Similarly, I divided it with jumpers and welded the nuts to two pieces of a 10 cm long profile pipe 25 * 50. Inside these profiles, 20 * 20 pipes 55 cm long will be fixed, all connections have independent adjustment.
After the assembly, the profile pipes were cleaned with sandpaper and painted with a primer for metal.

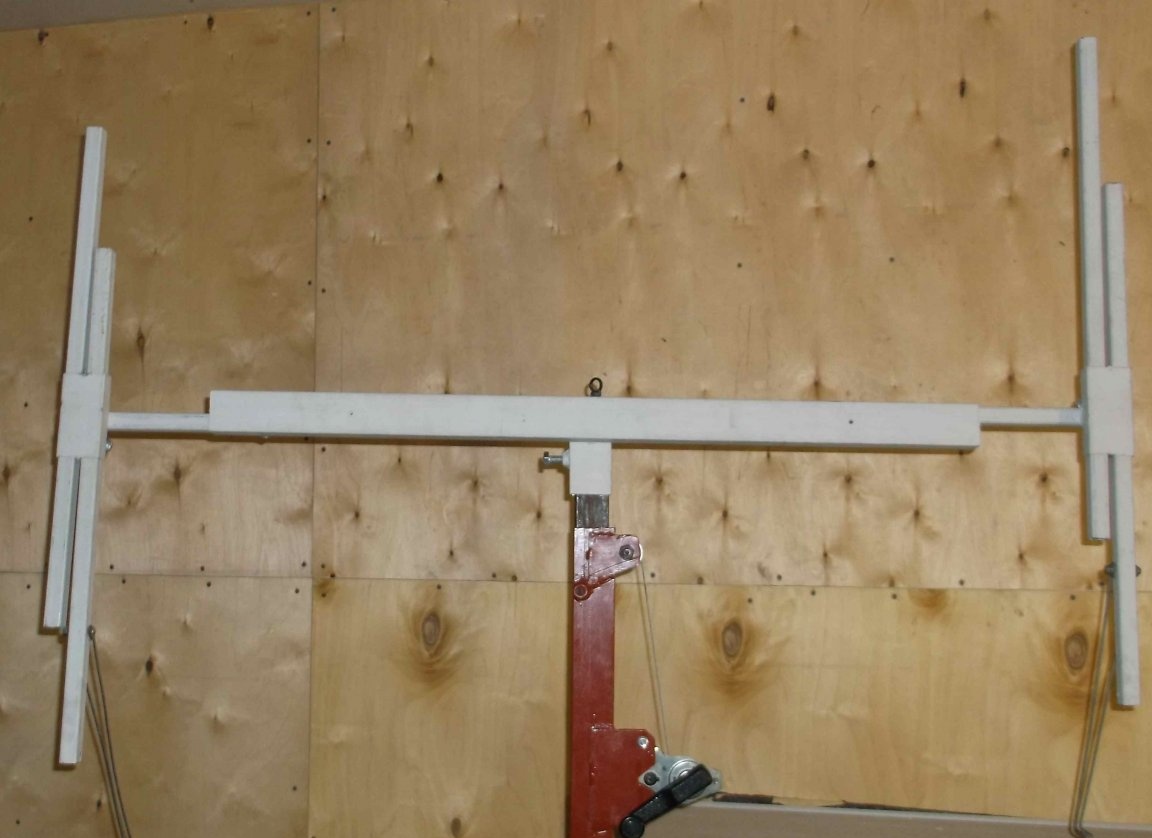
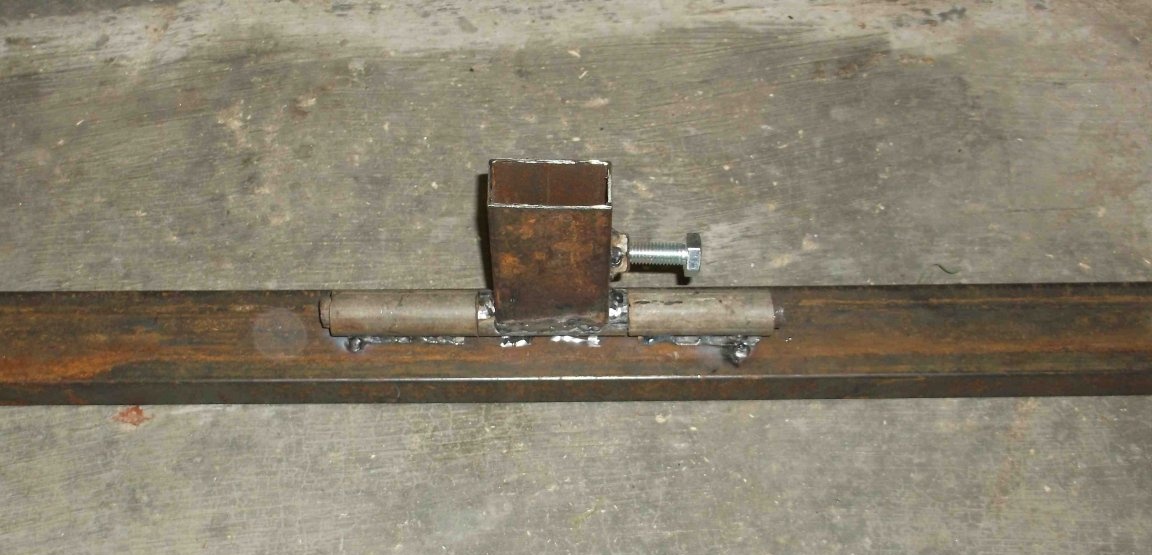
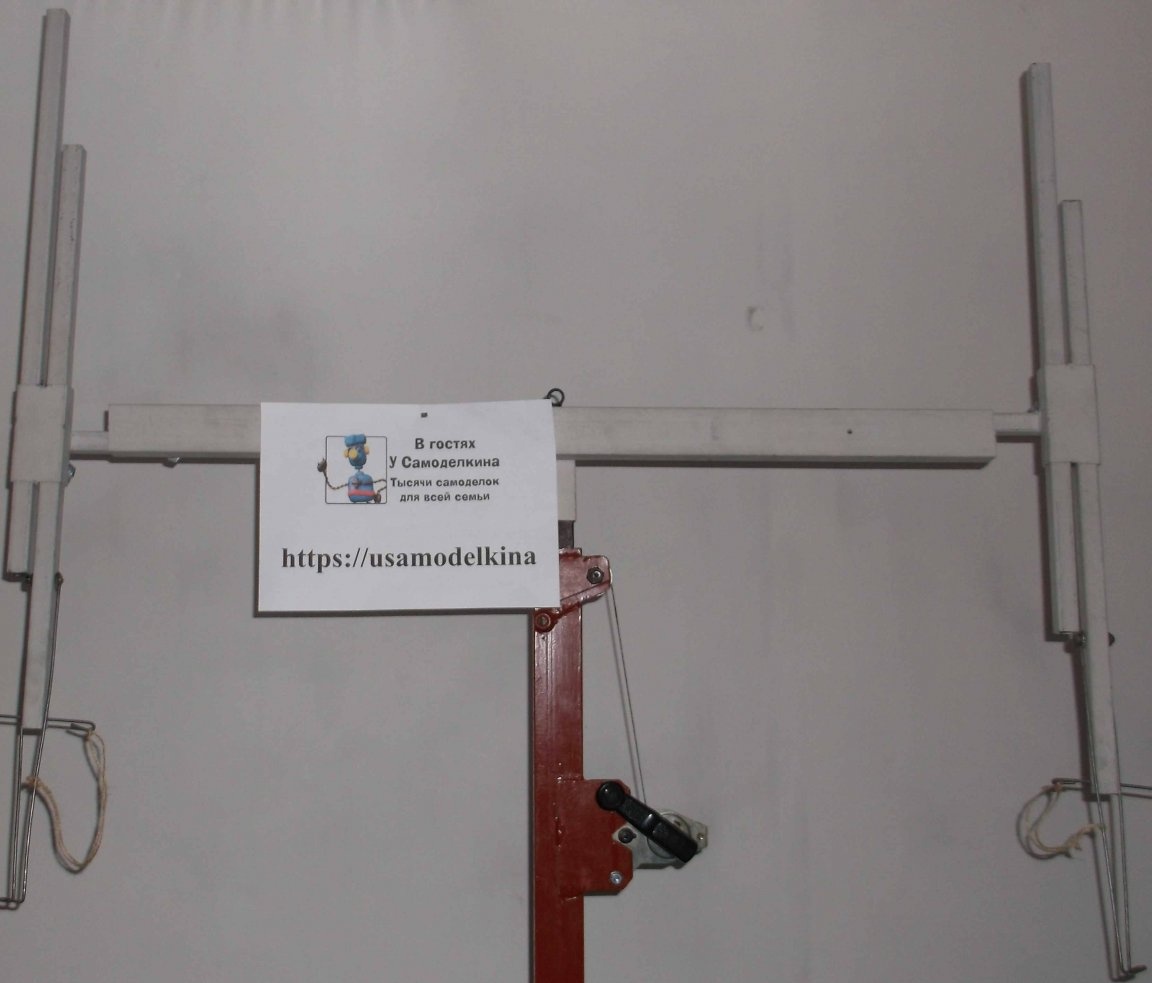
When assembled, it turned out as in the photo.
The rotation mechanism was assembled with a bolt of two nuts and a small plate 2 mm thick.
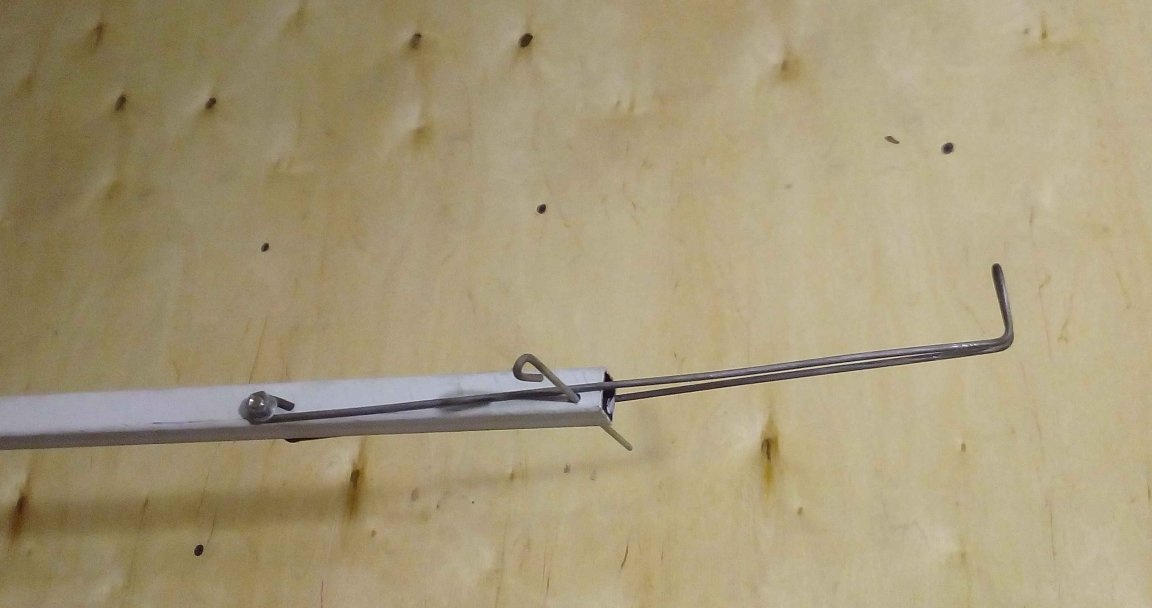

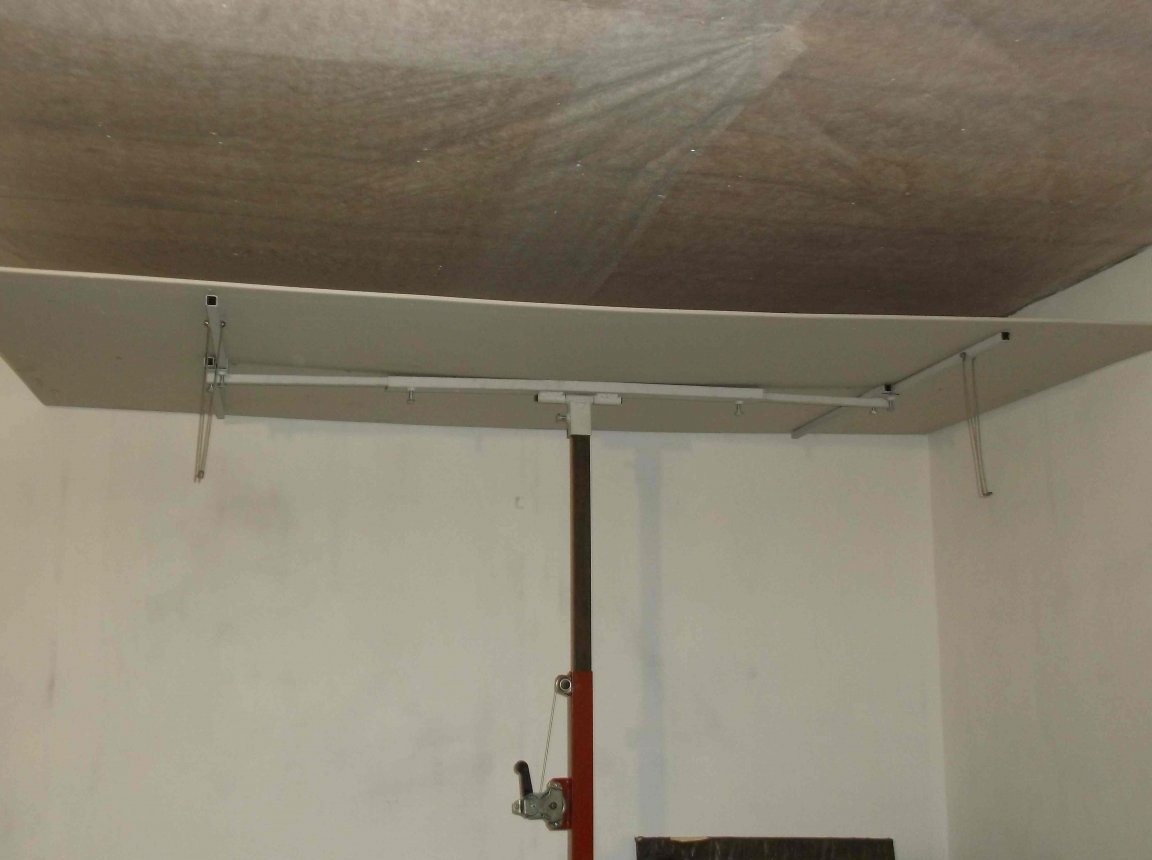
Drywall hooks arched from a 4 mm steel wire. A large departure of the hook over the edge of the profile was made so that when installing the sheet on the elevator it does not have to be raised high, and when the platform is installed in a horizontal position, the sheet can be easily shifted to the center of the platform.
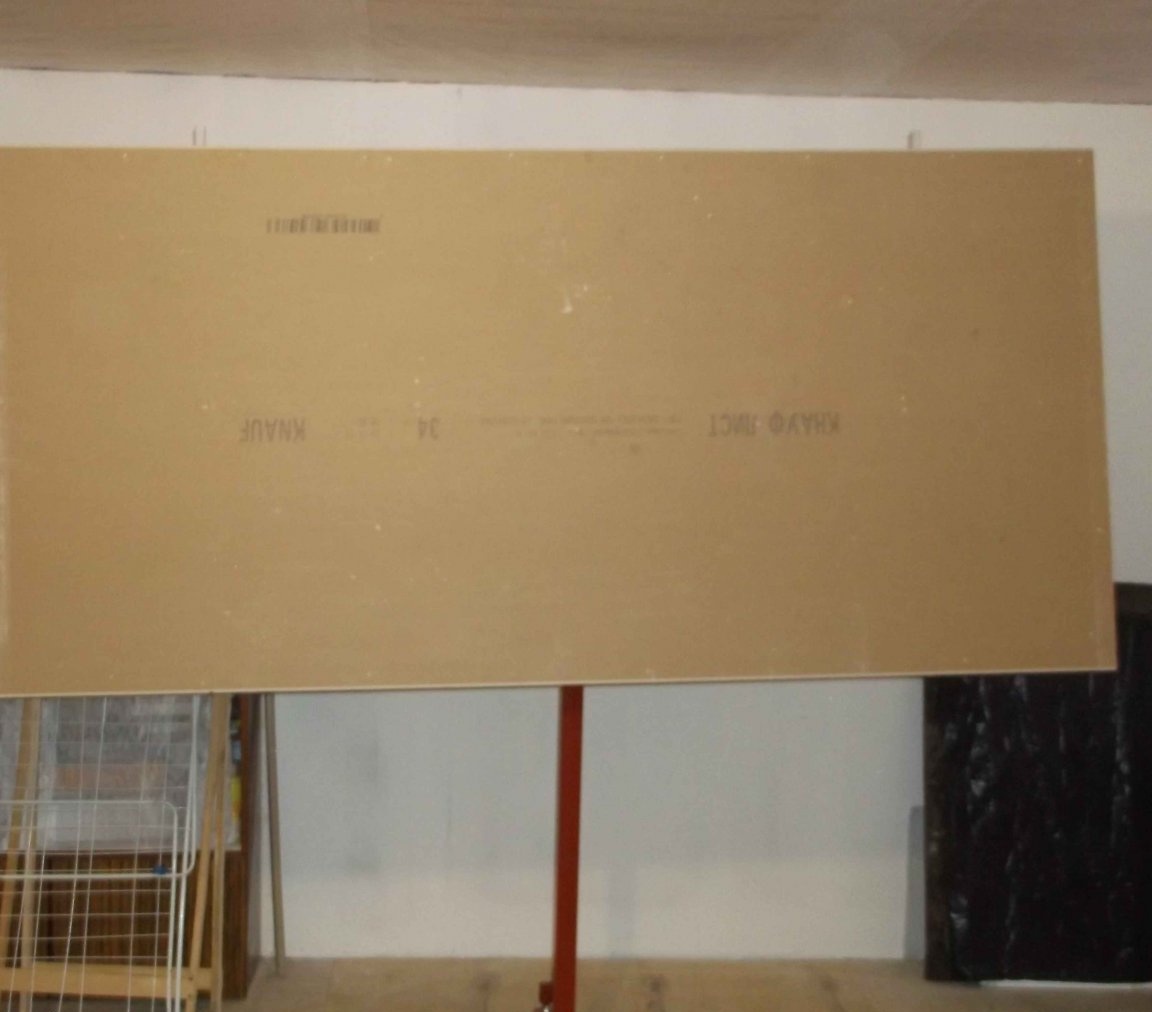
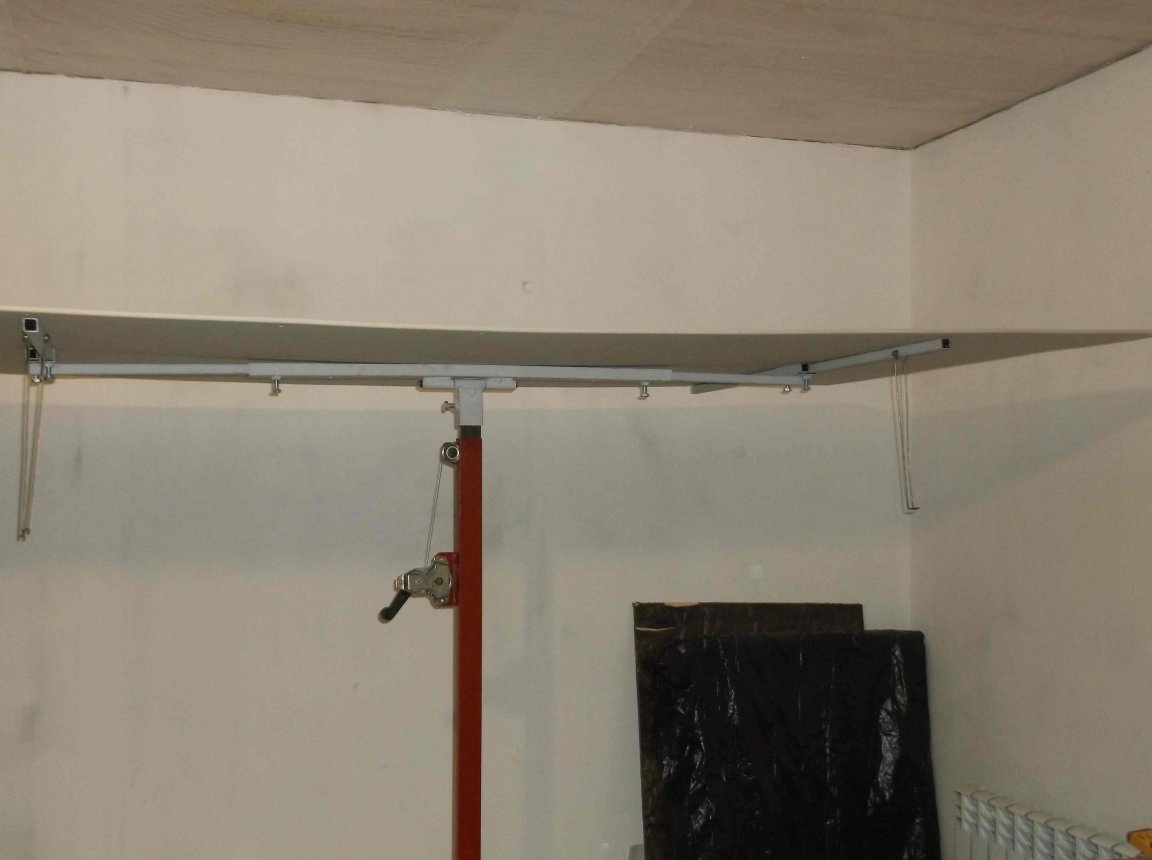
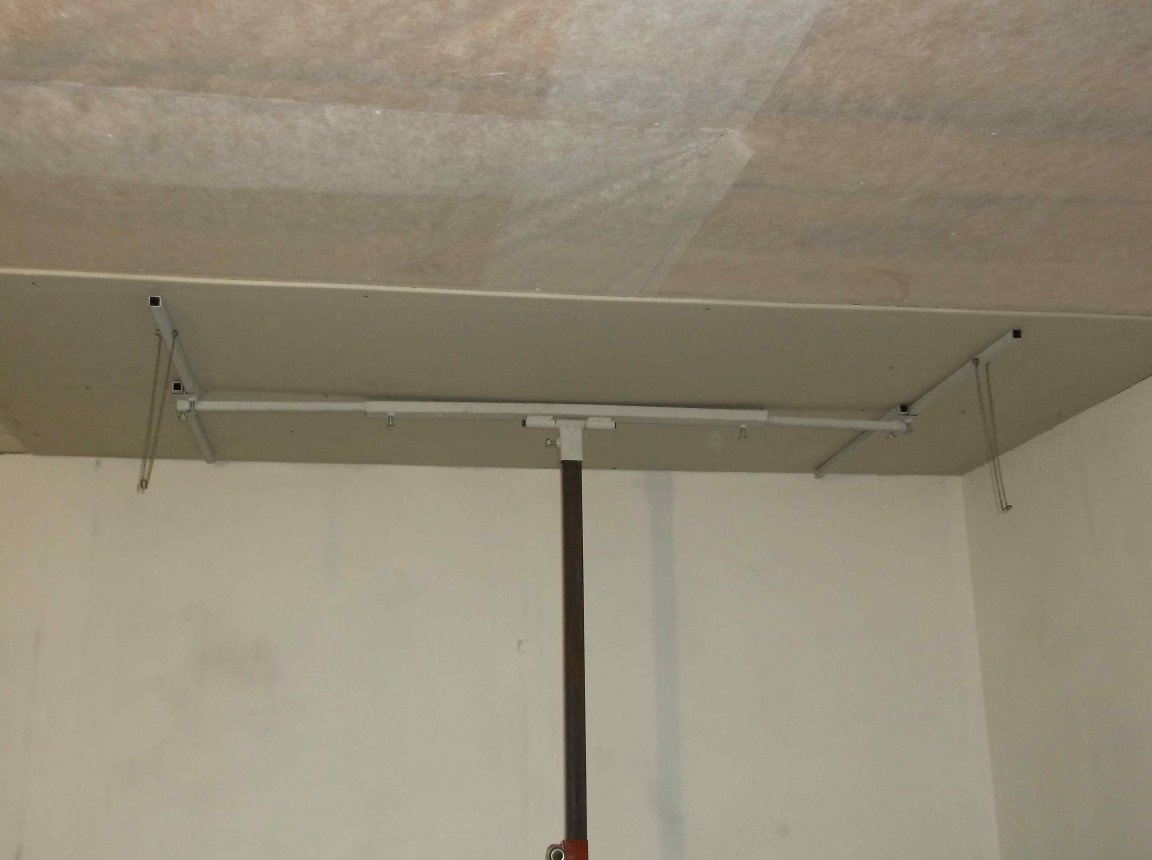
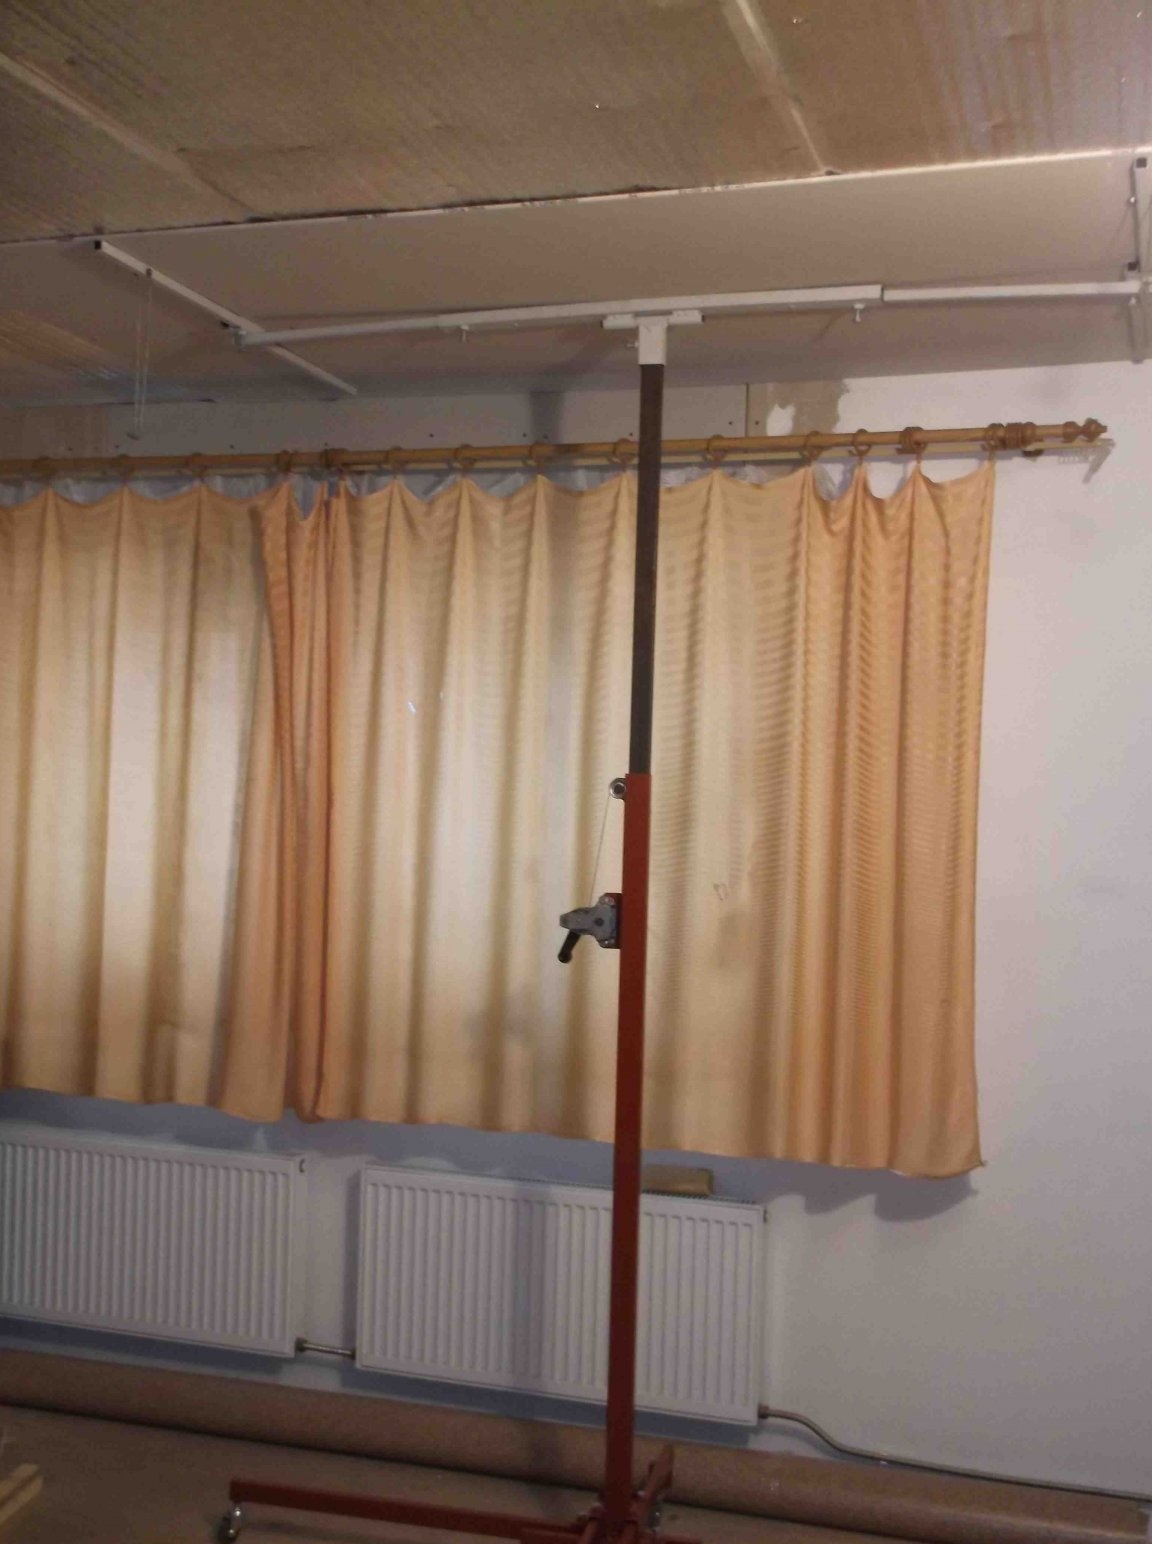
In conclusion, I want to say that when installing drywall sheets on the ceiling, this elevator was a very useful device. During repairs, the installation of drywall without effort and rush can be done alone! And if you have an assistant, you can not distract him from other work.
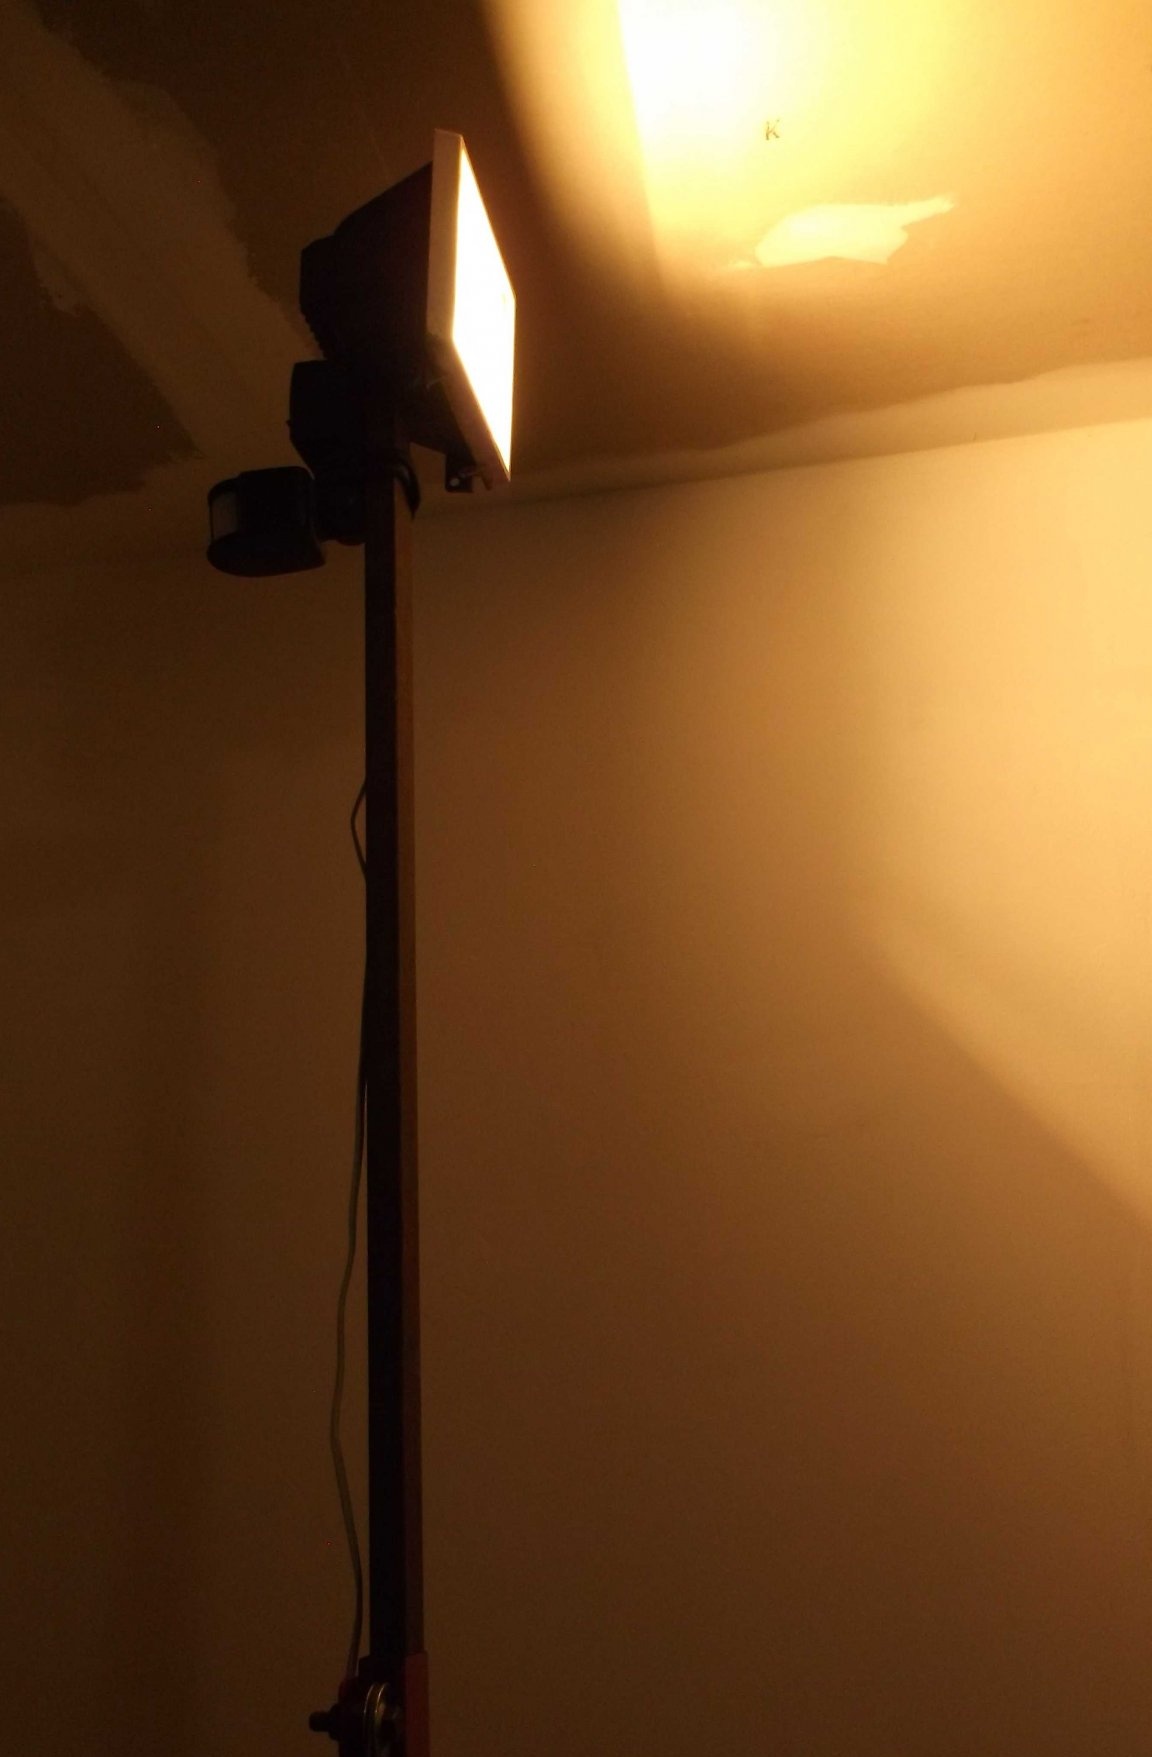
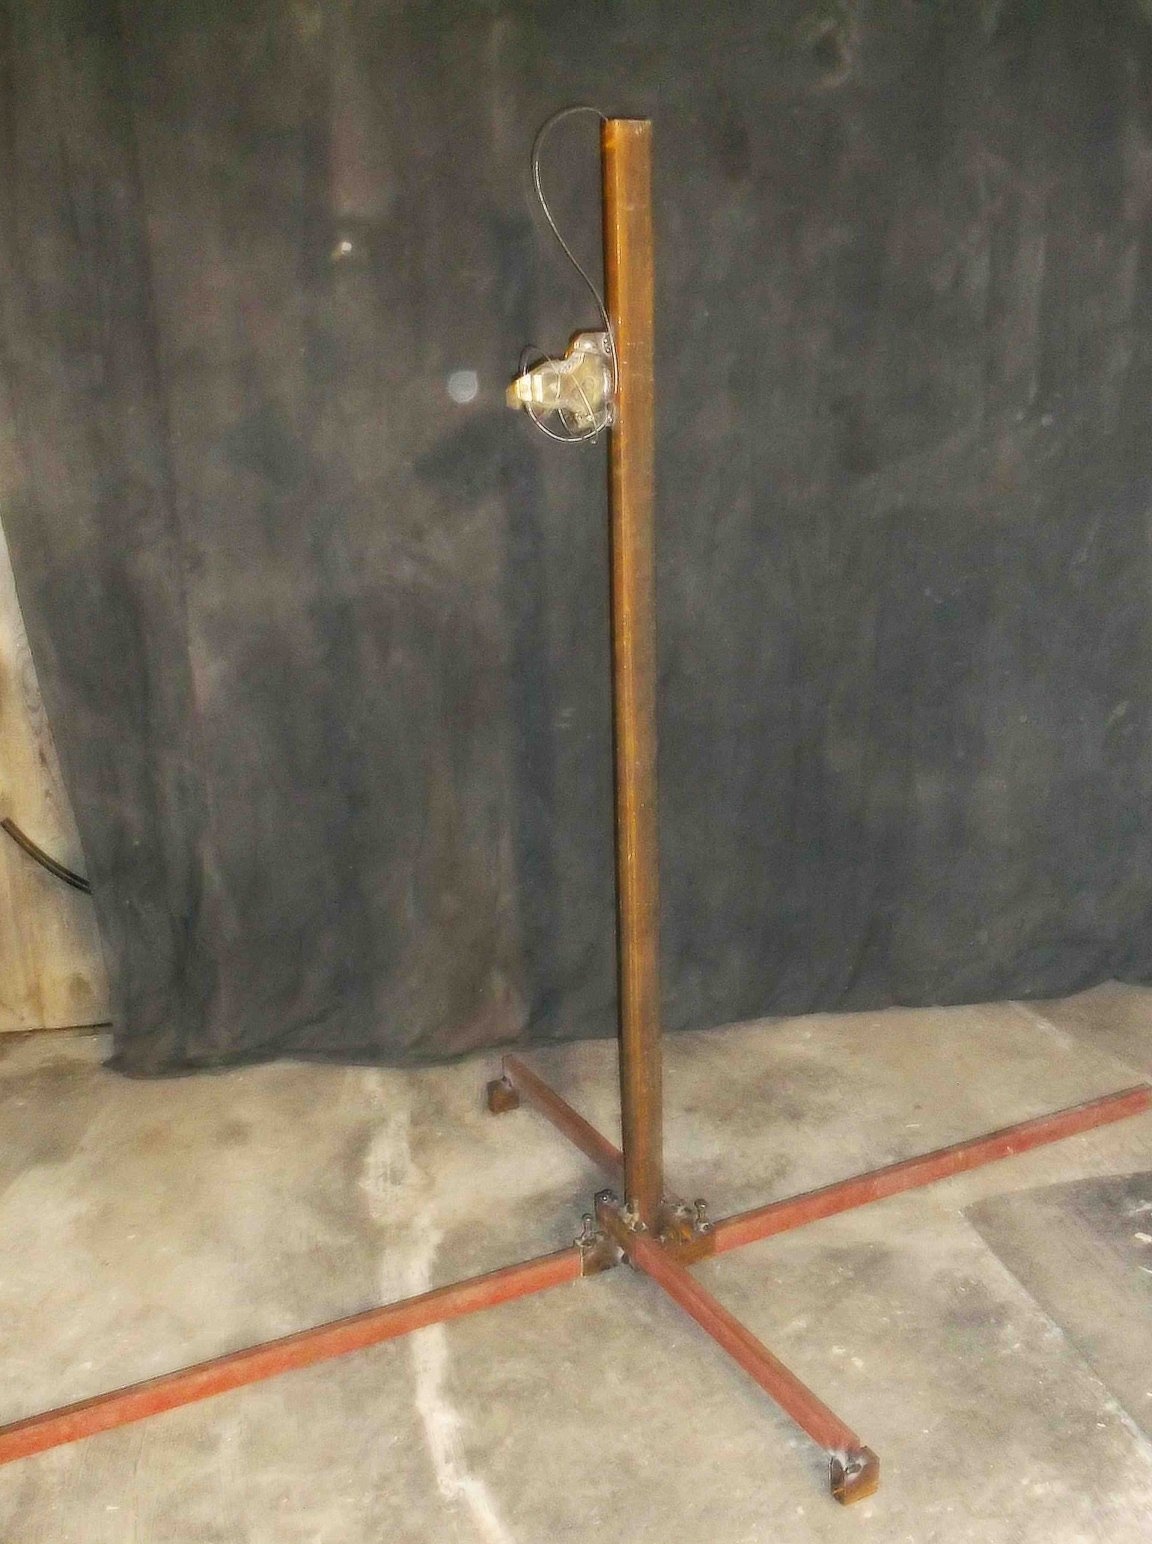
Also removing the upper part, you get a telescopic tripod. On a tripod, you can fix a lamp for finishing work on the ceiling or a laser level for marking. Personally, I did not regret how much I made this homemade product.
Questions, criticism, discussions are waiting in the comments!