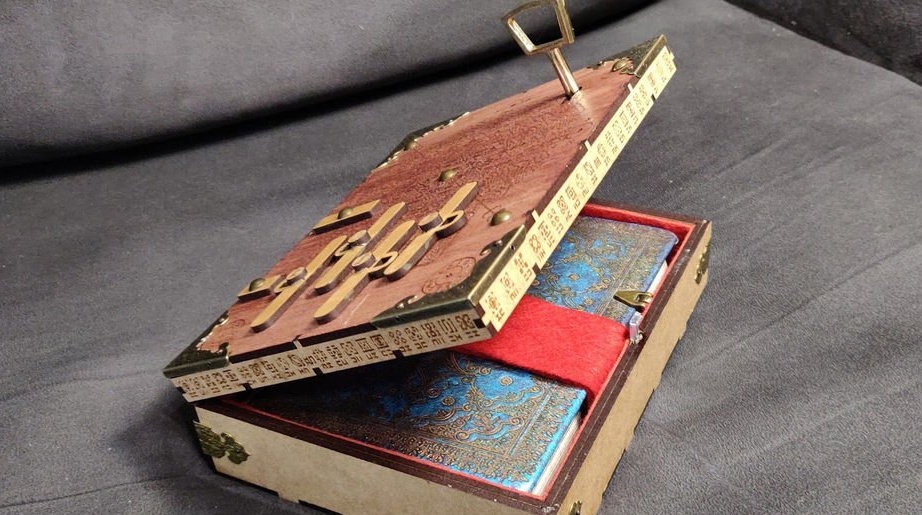
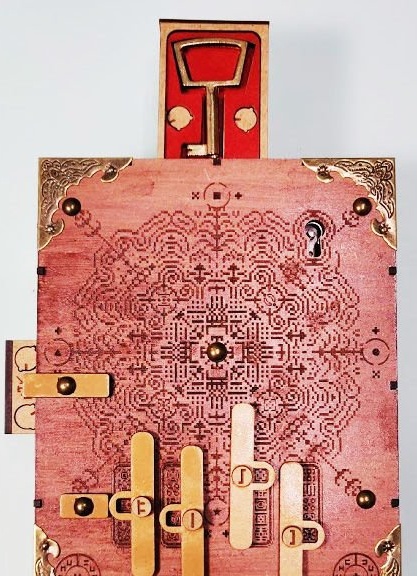
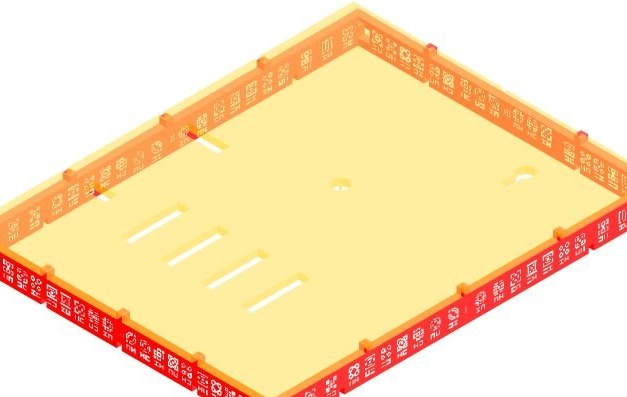
Want to make an unusual gift or surprise your friends? Then look what box, with an unusual locking mechanism, the Master made.
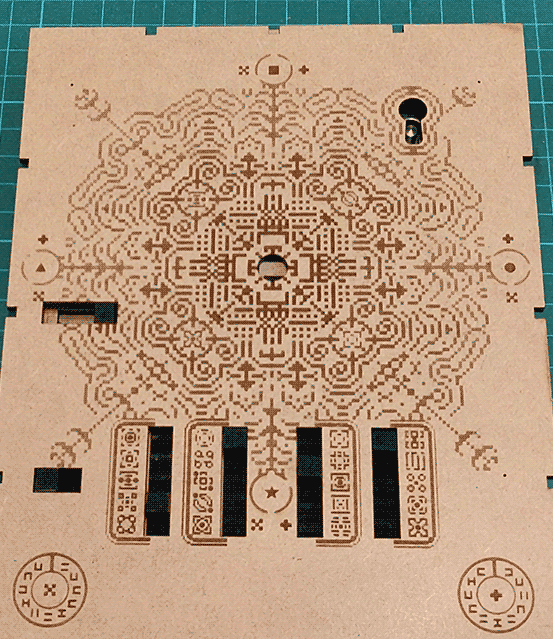
The secret of opening the castle is encrypted in a picture on the cover and, according to the author, it takes people at least 45 minutes to solve it. Now, let's look at how he did everything, and what were needed for this
Tools and materials:
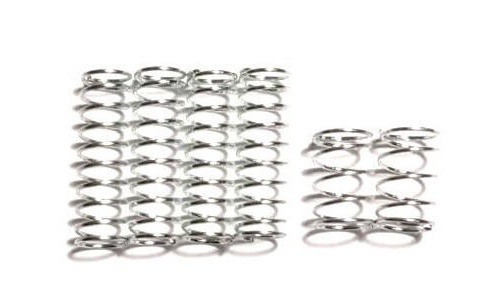
-4 springs Ø5.5 mm, length 17.5 mm;
-2 springs Ø6.5 mm, length 10 mm;
- MDF sheets 3mm thick;
- MDF sheet 6 mm thick;
- Joiner's glue;
-Sandpaper;
- adhesive tape;
-Varnish for wood;
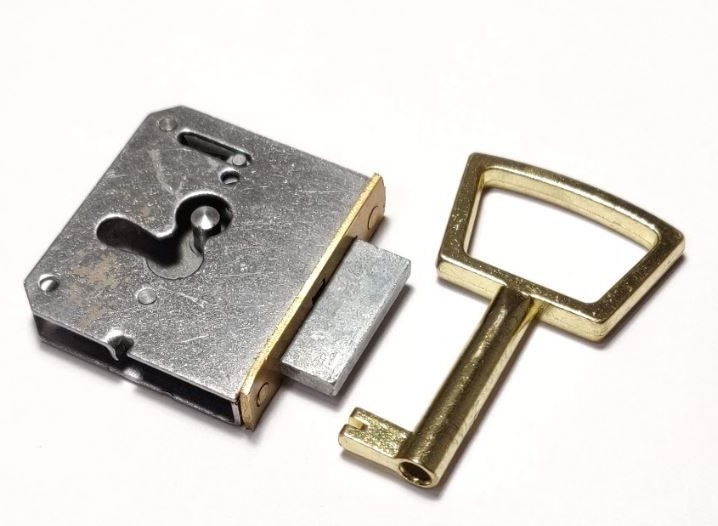
-Furniture lock 9x36x40 mm with a key;
-Laser cutter;
-Epoxy adhesive;
-The cloth;
-Chisel;
-Clips;
- Loops;
-Screwdriver;
-Fasteners;
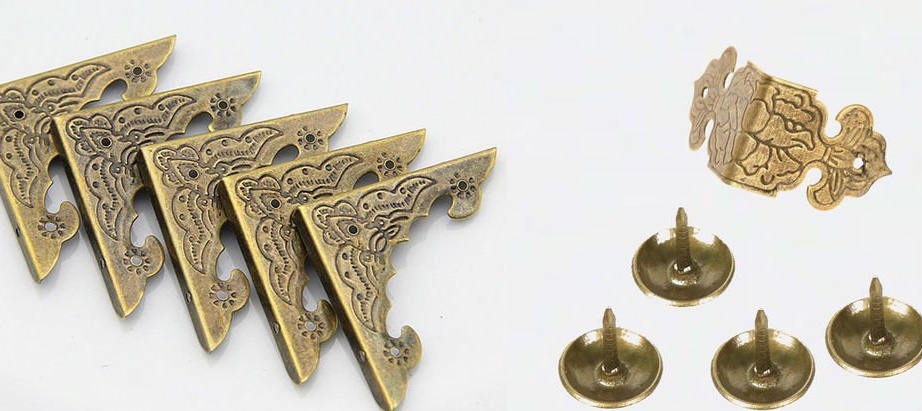
-Decorative fittings;

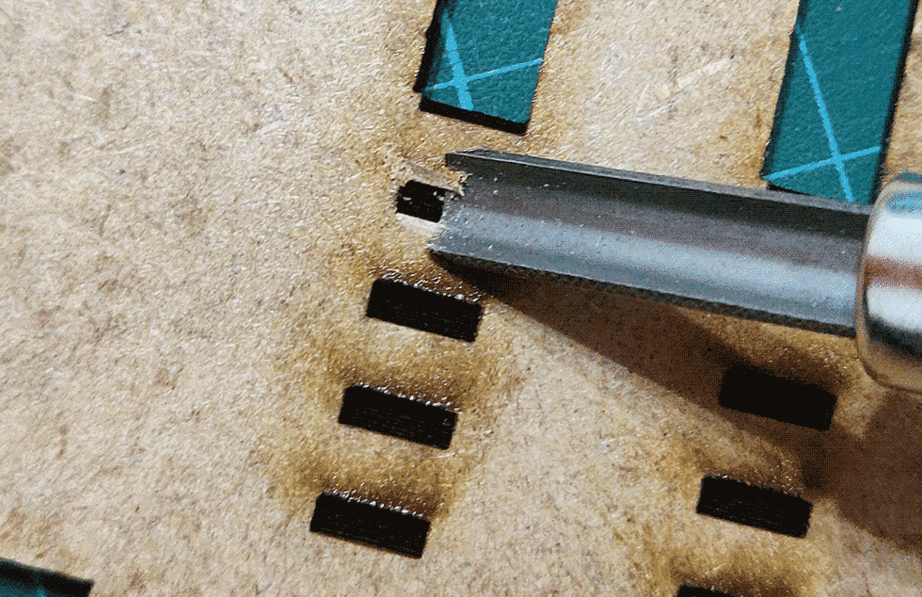
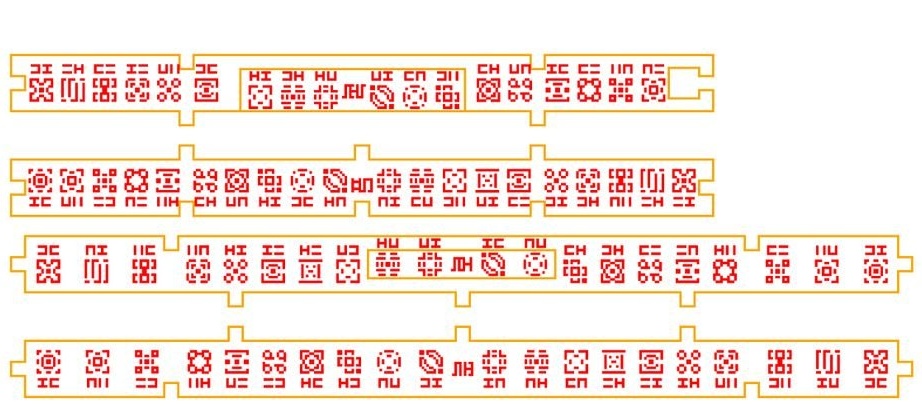
Step One: Laser Cutting the Top
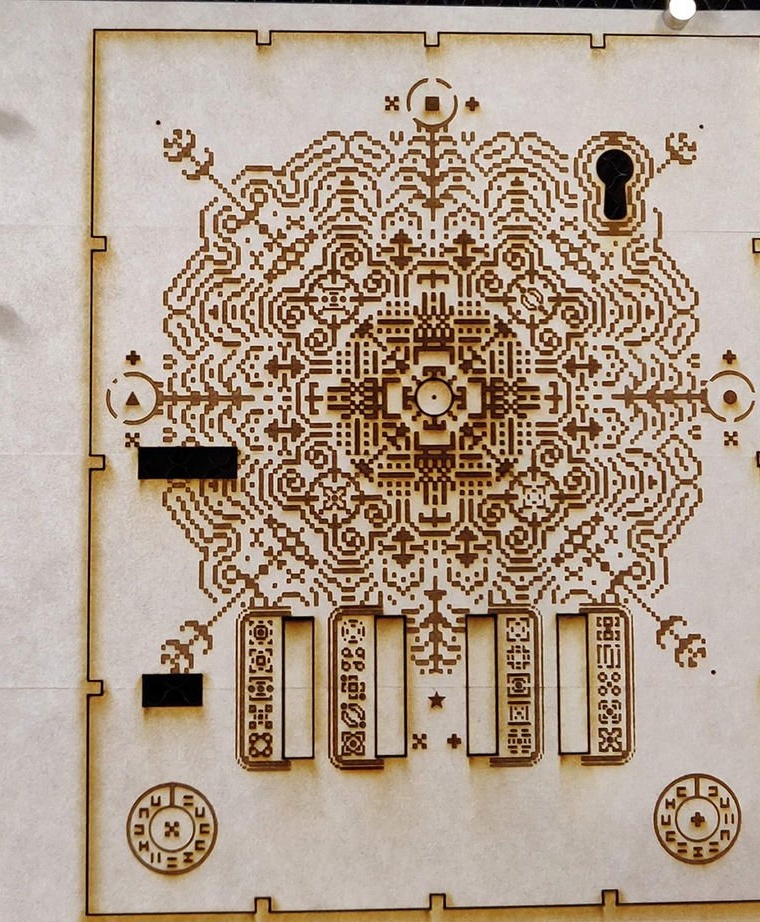
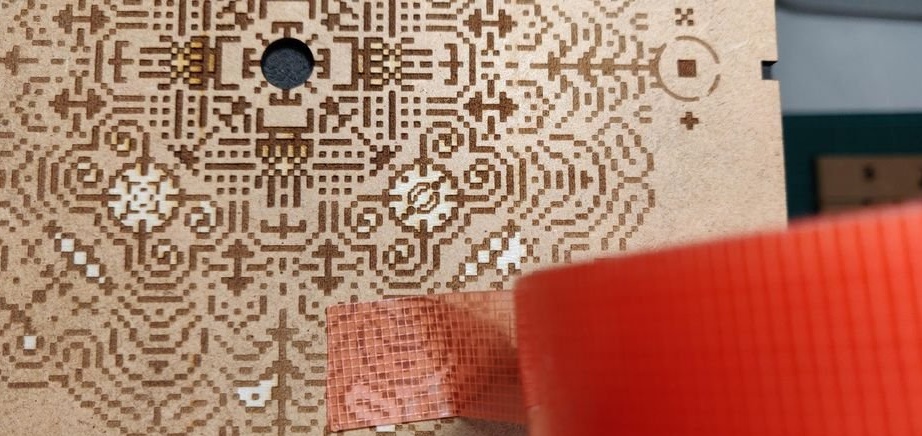
The lid of the box is multilayer, consists of five layers. First, we will analyze the engraving on the top. The master glues the MDF sheet with adhesive tape to avoid burning adjacent areas. Sends the workpiece for laser cutting.
The settings for the torch, in order to avoid confusion, are copied without changes:
Red: speed = 1000 - power = 60 - lines per cm = 180
Orange: speed = 1000 - power = 50 - lines per cm = 180
Light orange: speed = 1000 - power = 45 - lines per cm = 180
Yellow: speed = 1000 - power = 40 - lines per cm = 180
Key shape: speed = 500 - power = full - rows per cm = 90
Grooves: speed = 700 - power = full - rows per cm = 90
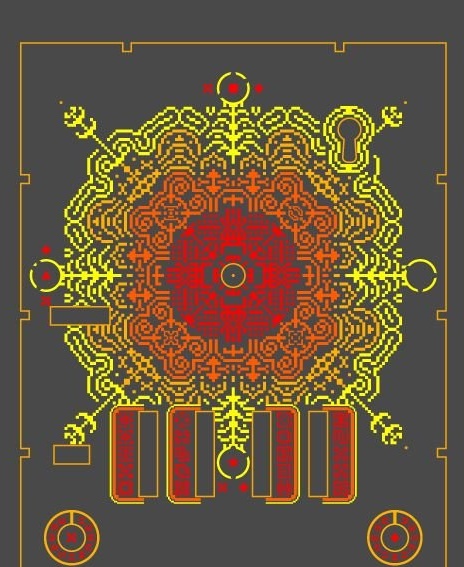
To trim the remaining parts, the master used the default settings for 6 mm and 3 mm boards.
For cutting 1 mm fabric, the following parameters:
Focus Height: 1mm
Speed: 500
Power: 65
File for the cutter below.
PaperBlanksBox.ai
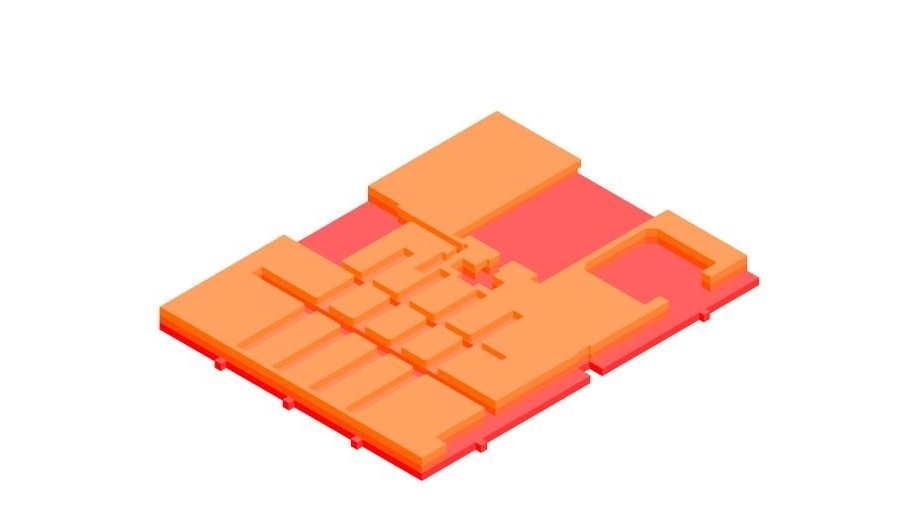
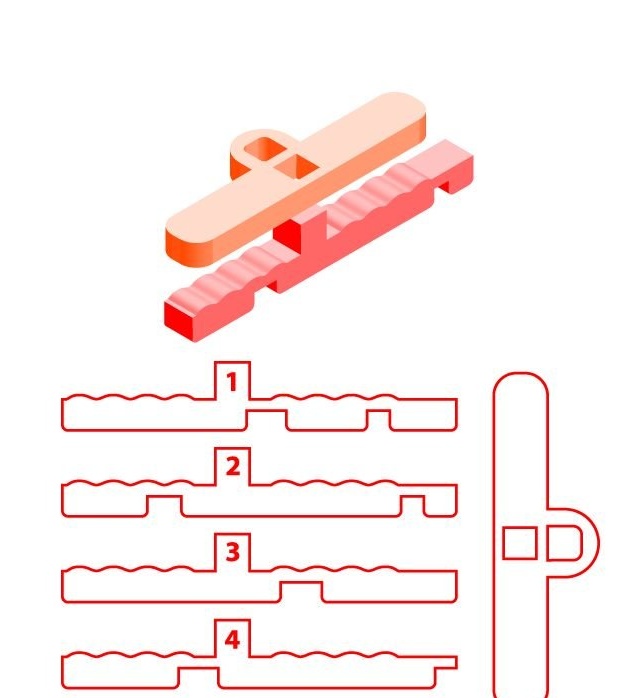
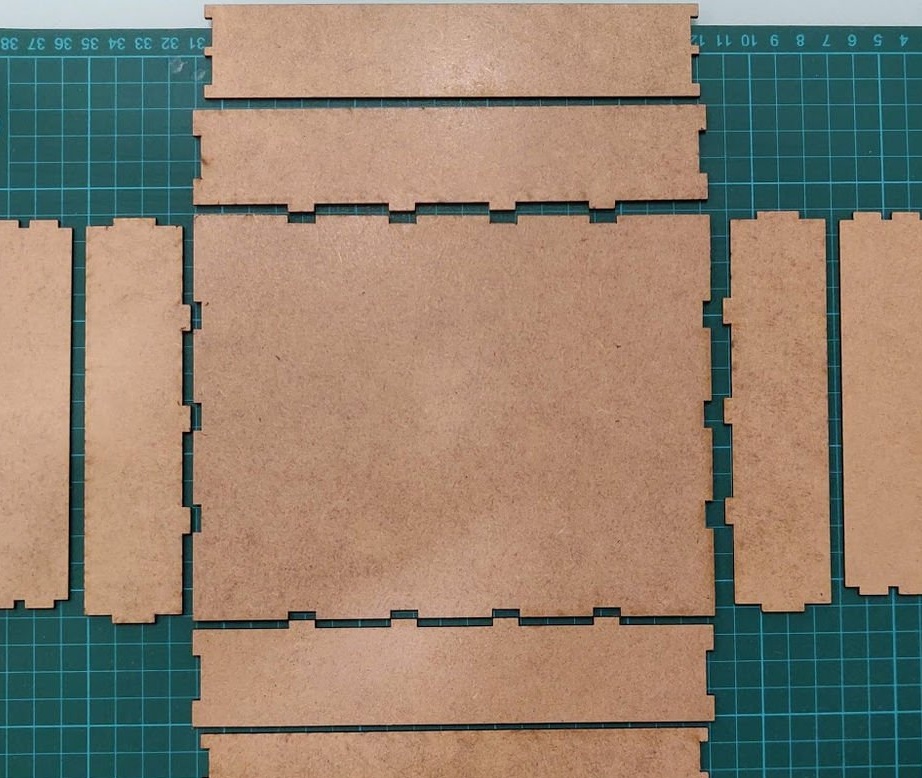
Step two: five parts of the cover
Then cuts out five layers of the lid. Each part is cut out on one side and only the top on two. For proper orientation, the master temporarily secured magnets in the corners.
Files for the cutter.
top_layer1.svg
top_layer2.svg
top_layer3.svg
top_layer4.svg
top_layer5.svg
After cutting, remove the adhesive tape. To facilitate the task, the master also uses adhesive tape.

Step Three: Three Layers
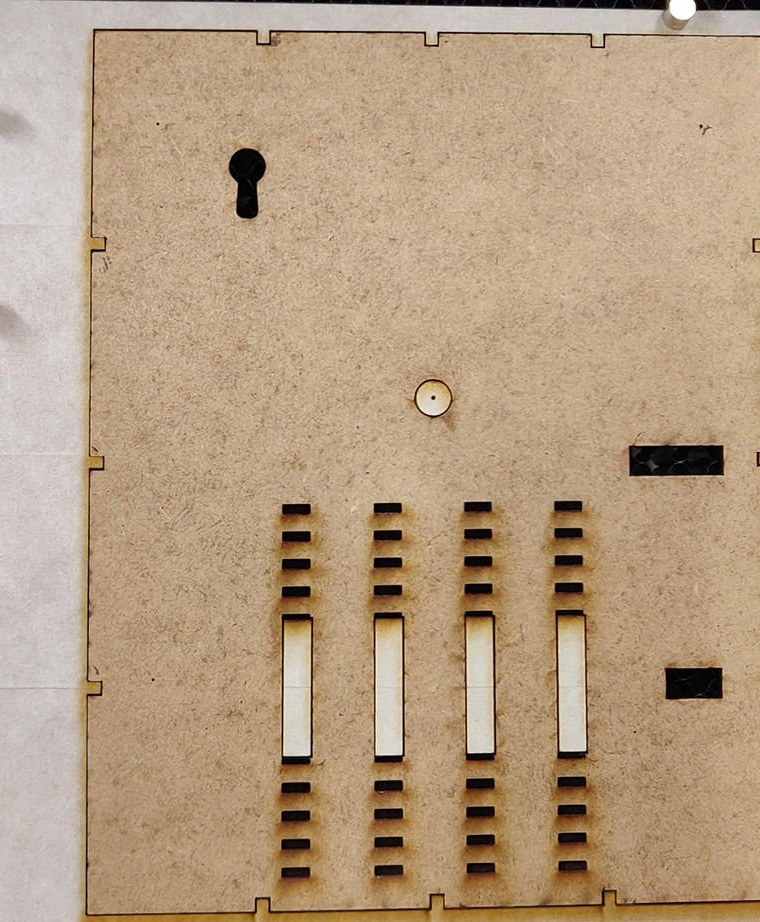
Glues the three lower layers of the lid.
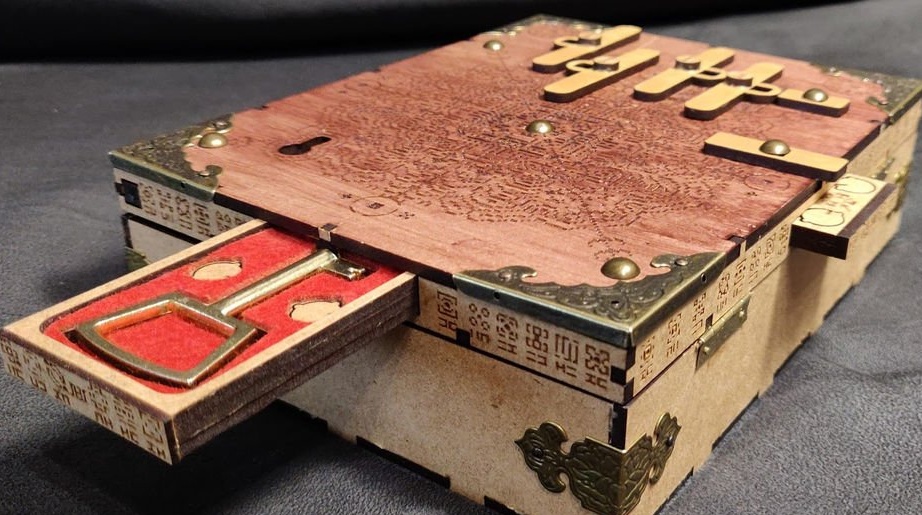
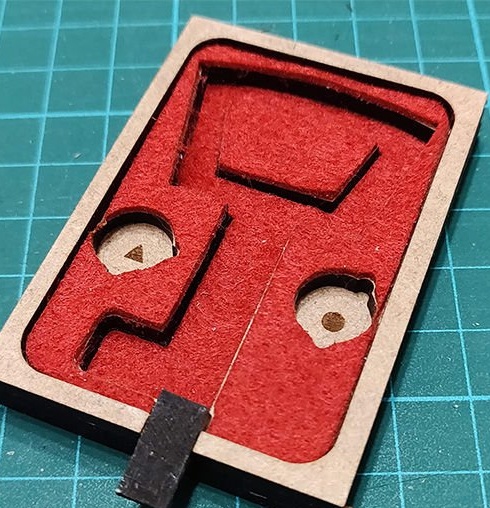
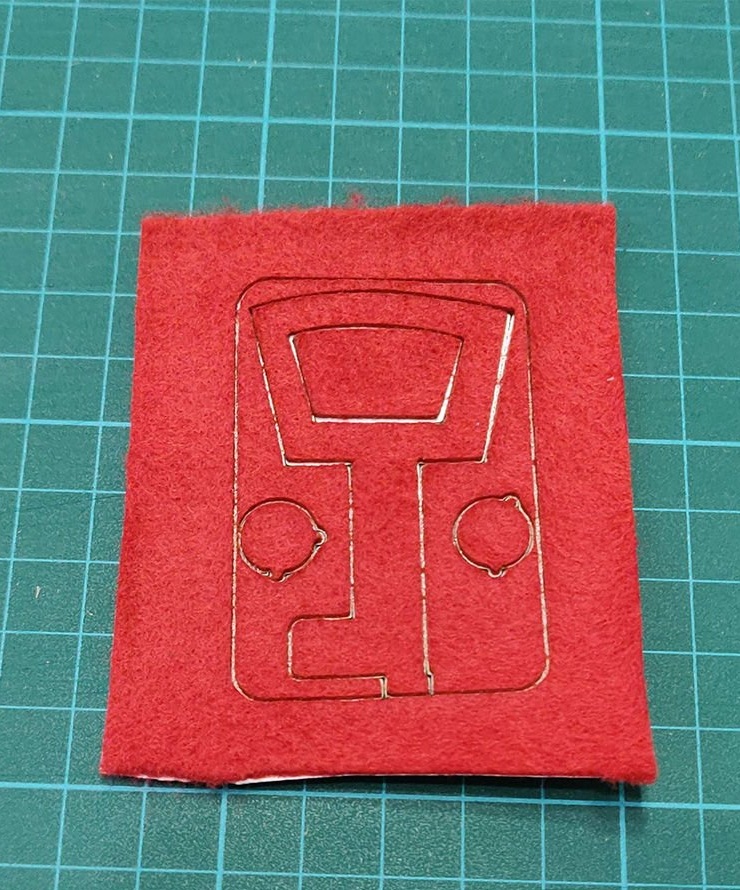
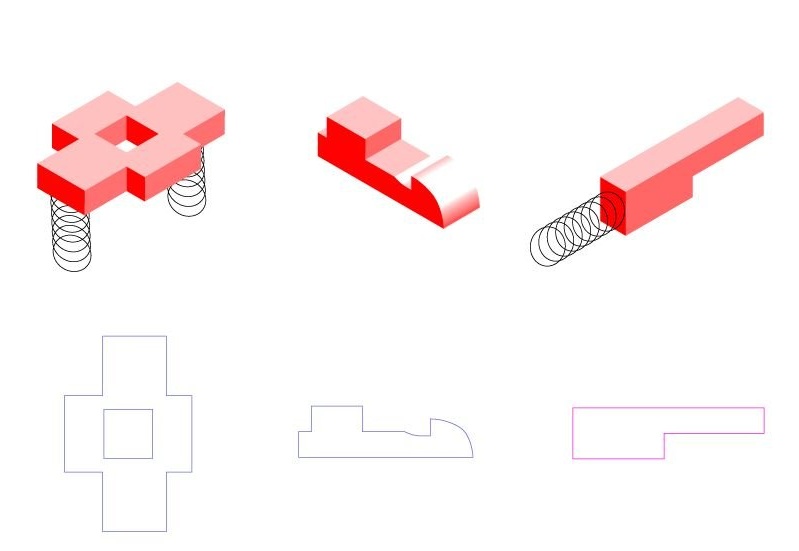
Step Four: Key Box
Cut and assemble a key box.
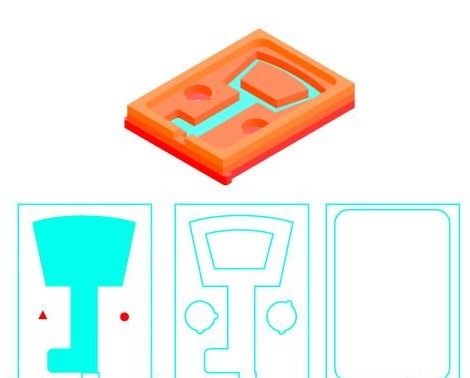

drawer.svg
drawer_locker.svg
drawer_felt.svg
Step Five: Side Part
Cuts an extra side part.
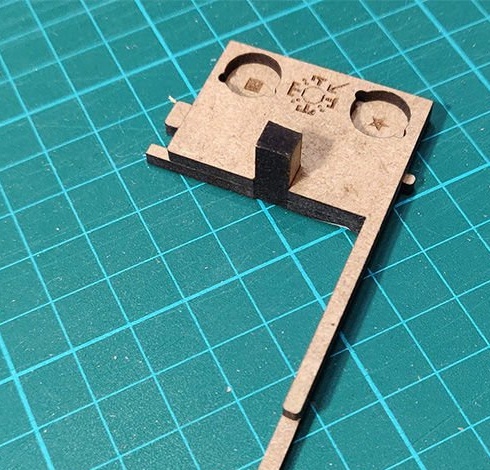
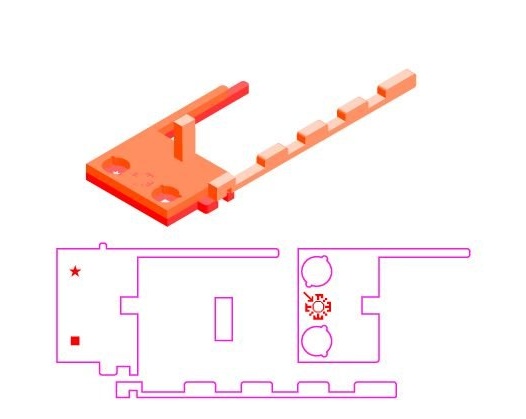
secondary_drawer.svg
secondary_drawer_handle.svg
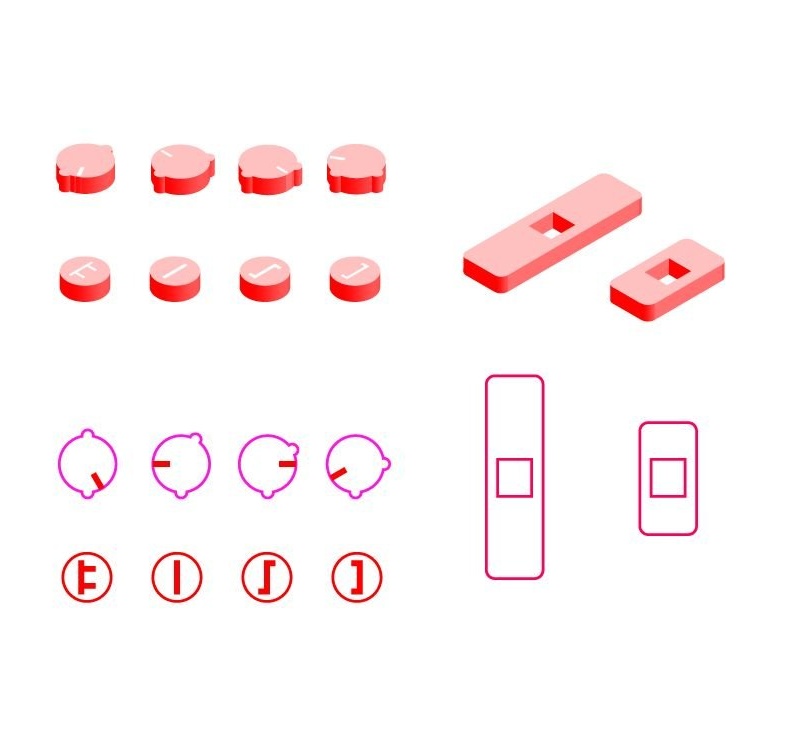
Step Six: Additional Details
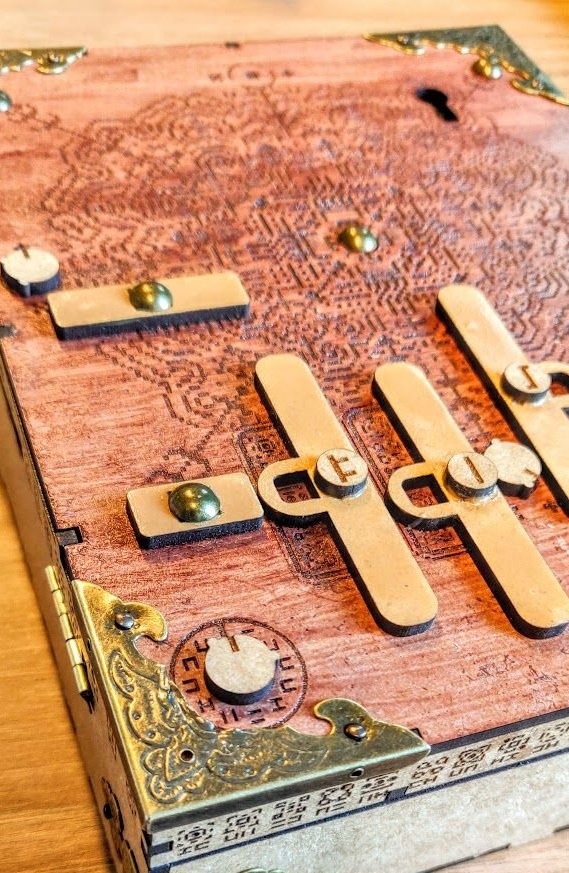
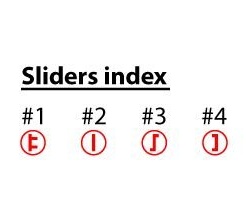
Cuts sliders.
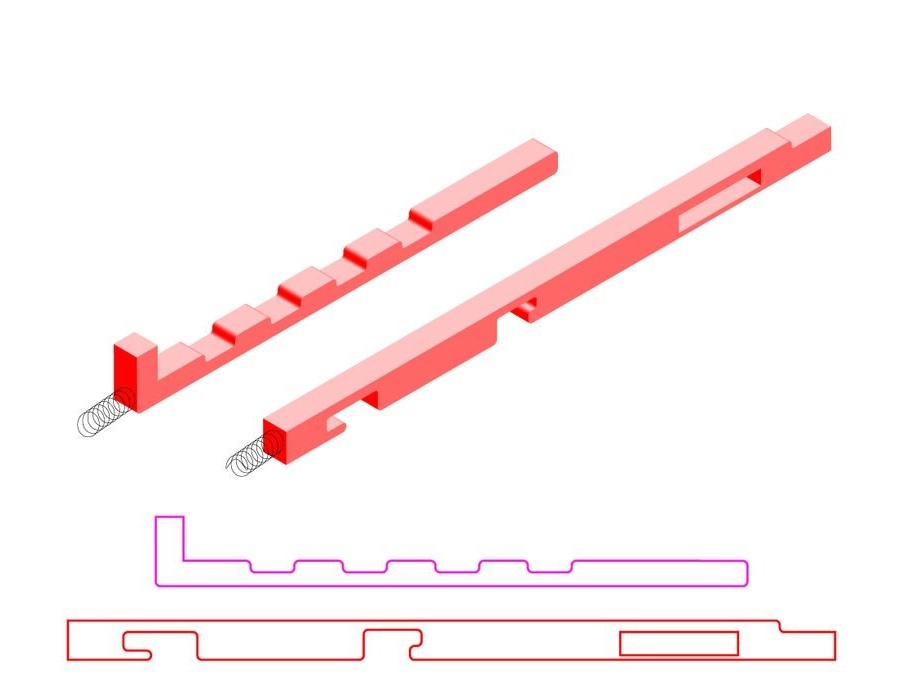
sliders_3mm.svg
siders_6mm.svg
Cut the details of the key box lock.
drawer_locker_6mm.svg
drawer_locker_3mm.svg
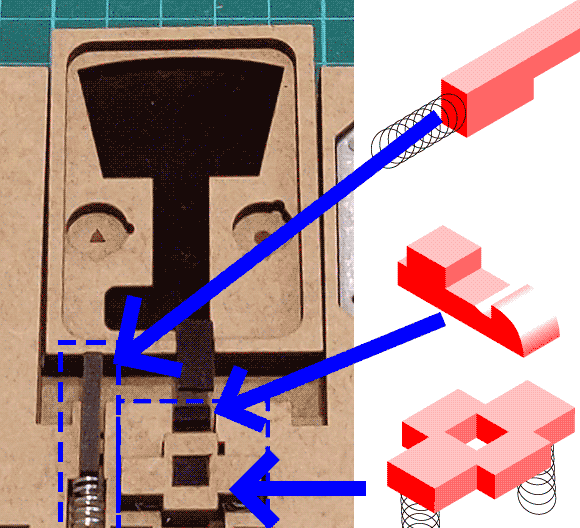
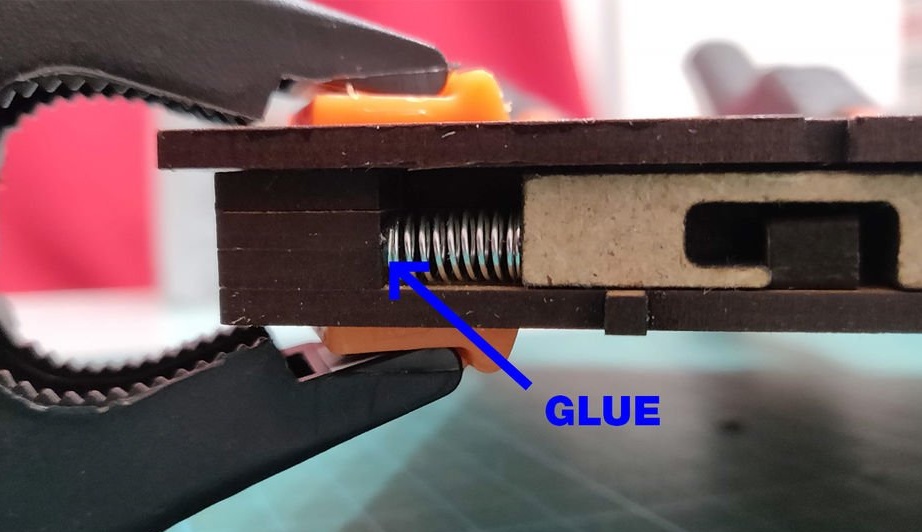
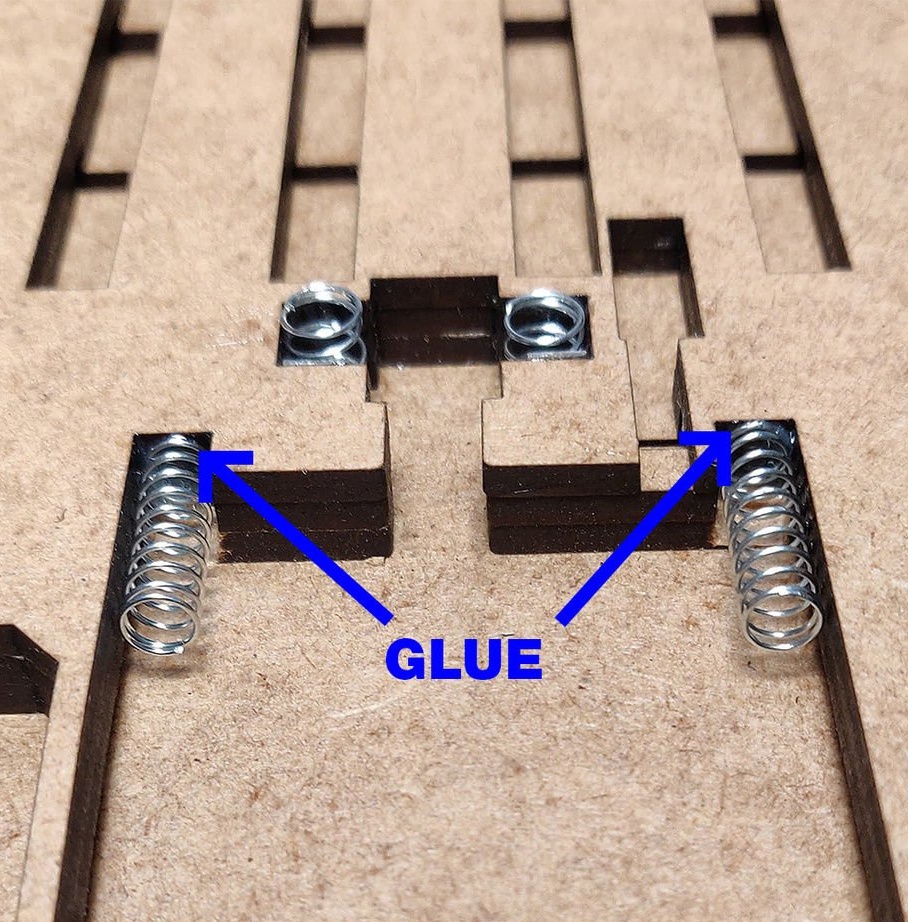
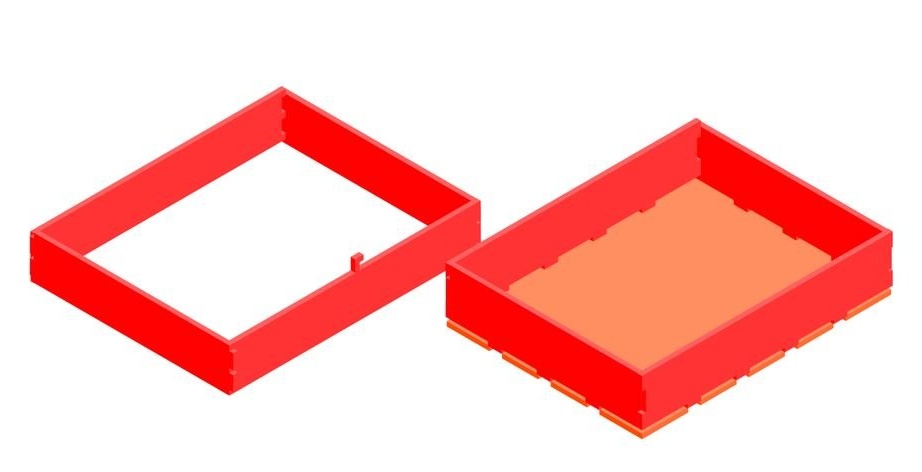
Seventh step: assembly
Then you need to collect everything as shown in the photographs.
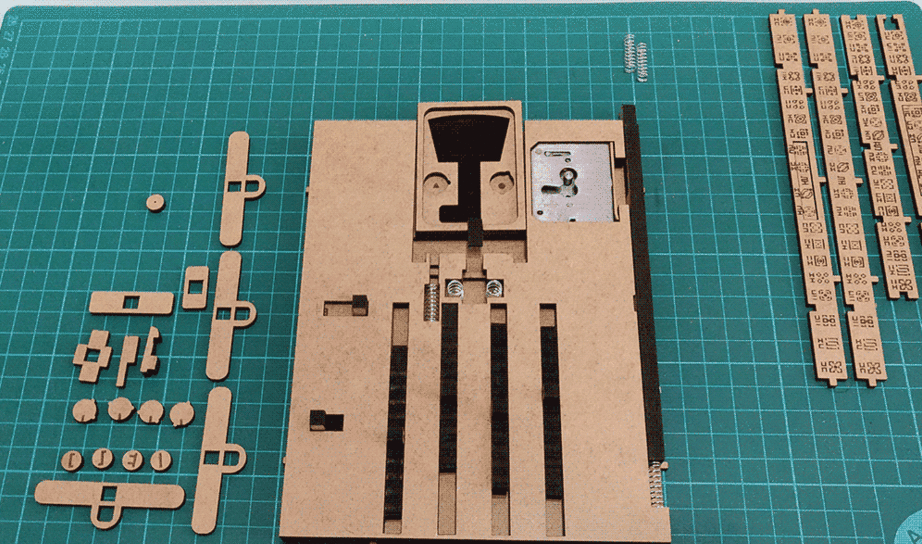
The end face is fixed with epoxy glue.
Glues the top cover.
Cuts and glues the side elements of the cover.
sides.svg
Cut and fix elements on the cover to orient the position of the lock mechanism. The main thing here is to place in this order and in the same position as in the photo.
elements.svg
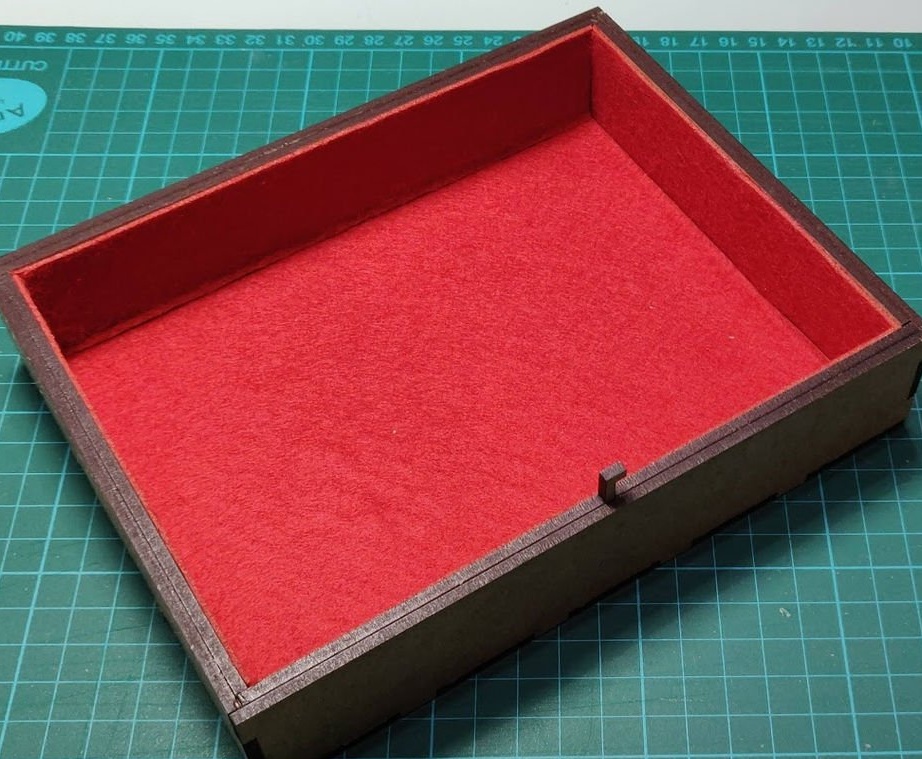
Step Eight: Bottom of the Box
Cuts and assembles the bottom. Fixes parts with glue. Then paste over the box inside with a cloth.
bottom.svg
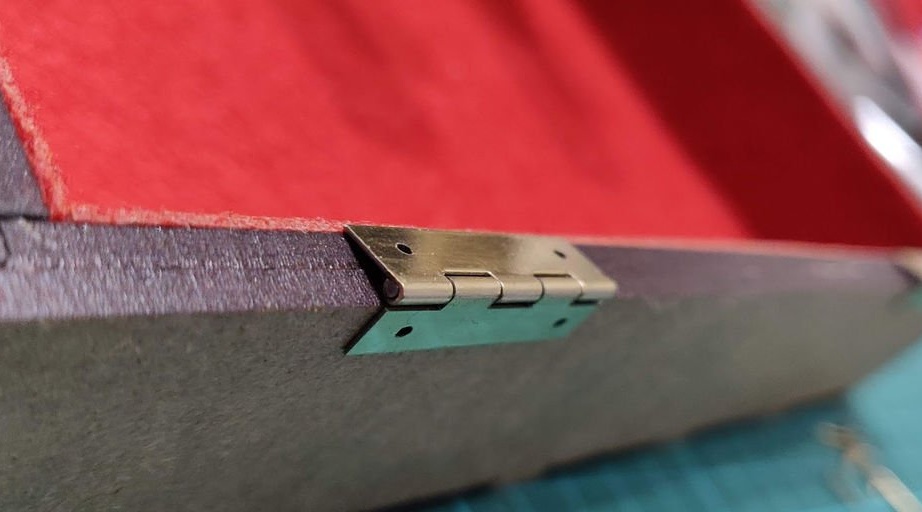
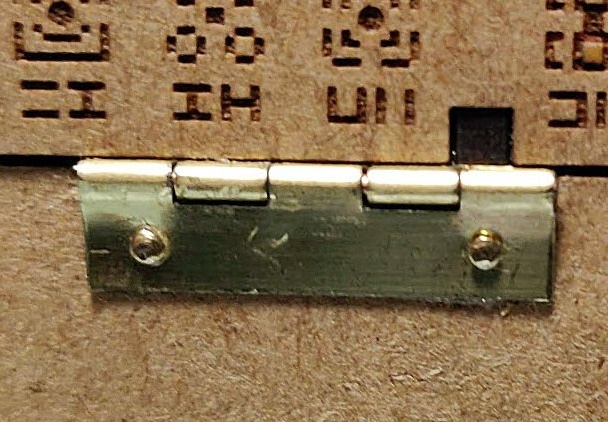
Tightens the hinges and connects the two parts of the box. Please note that the hinges are set so as not to cover the ornament on the side.
It remains to fix the decorative elements, corners, buttons, and you're done.