
This musical laser light show is a compact version using automotive motors.
Before you begin, you should know that lasers are harmful to your eyes. Avoid getting the laser beam from an uncontrolled reflected beam in your eyes.
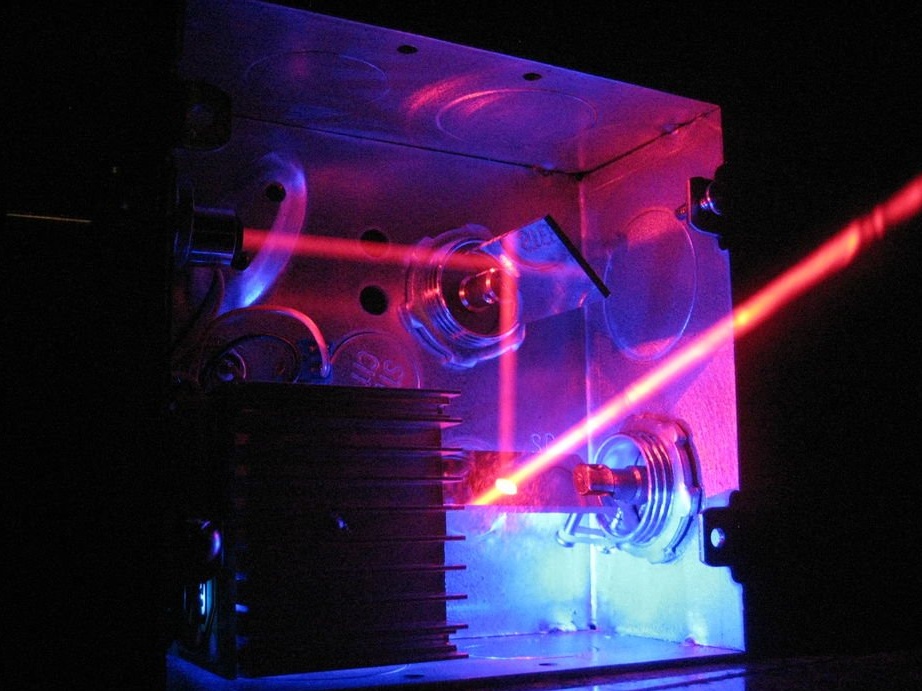
Step 1: An example of a laser show to music
Laser operation
Step 2: Association of music and laser with Pink Floyd;)
Step 3: Parts List
Steel electrical box (with 19 and 25 mm holes on each side)
Computer hard drives
Connectors with 19 mm set screw.
Cable clamps 9 mm
Adapter washers 25x19 mm.
Locknut PVC 19 mm.
Screws M3 x 12 mm
Uxcell DC motor shaft 6V 6300 rpm 2 mm
2.8 mm plug connectors
2mm shaft connectors
TDA7297 Dual Channel Amplifier Board Version 15W + 15W
Power Supply 12V 2A
5V Focusable Laser Module
12V-5V DC-DC Buck Converter
Rectifier Diode 1000V 3A
DC Power Connector
Safety on / off switch (there was a toggle switch on the prototype shown)
Step 4: Drilling holes in the housing
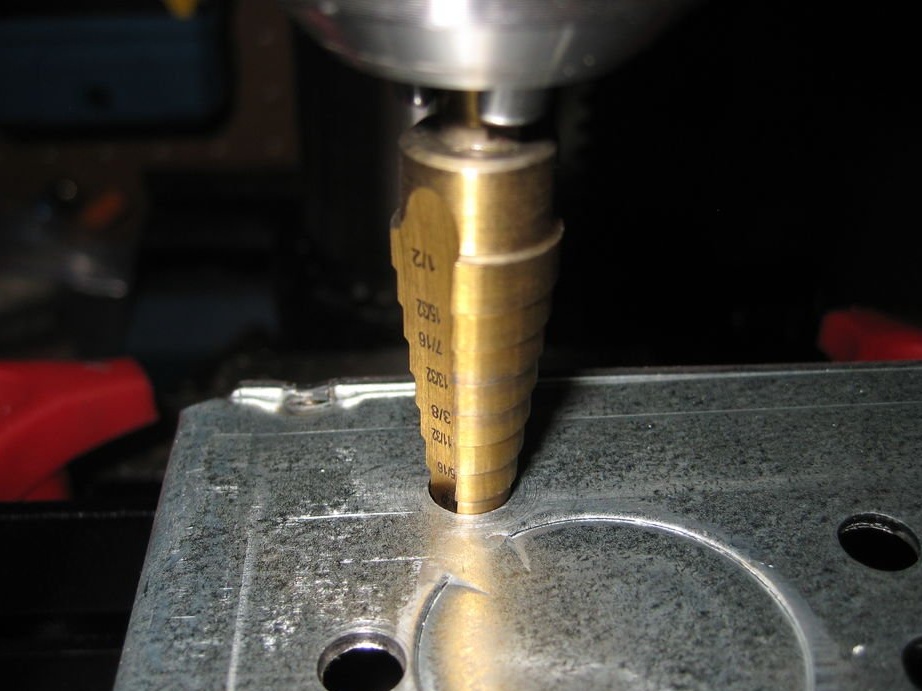
First of all, you need to drill holes in the back of the electrical unit for the on / off key, DC power connector and a 3.5-mm audio input of the amplifier and gain control.
Step 5: Drilling Fitting
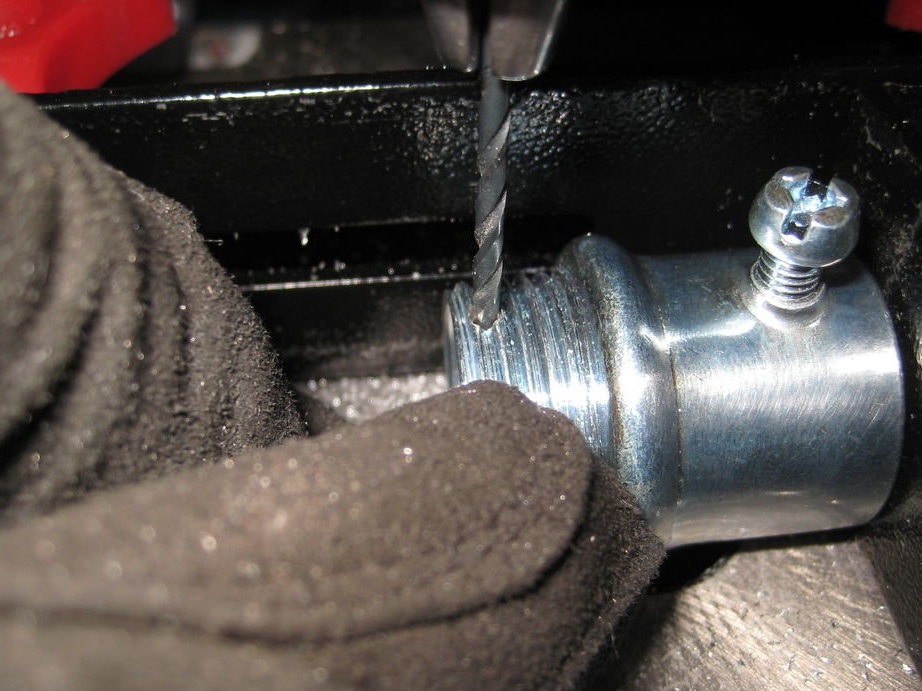
The next step is to drill a hole on the thread side of the conduit fitting for the screw, which will fix the rubber tape holding the mirrors in the center.
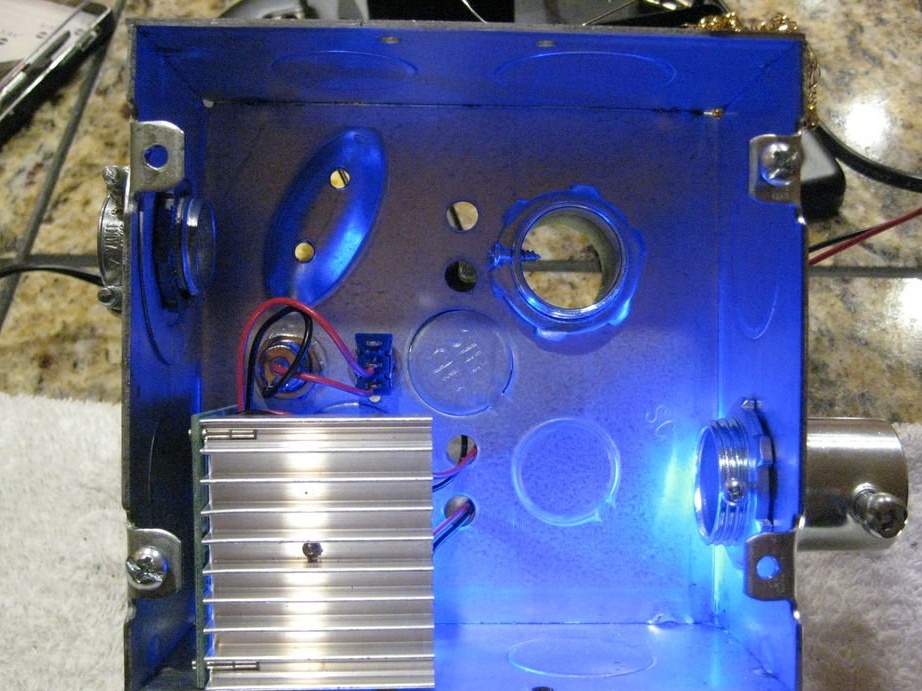
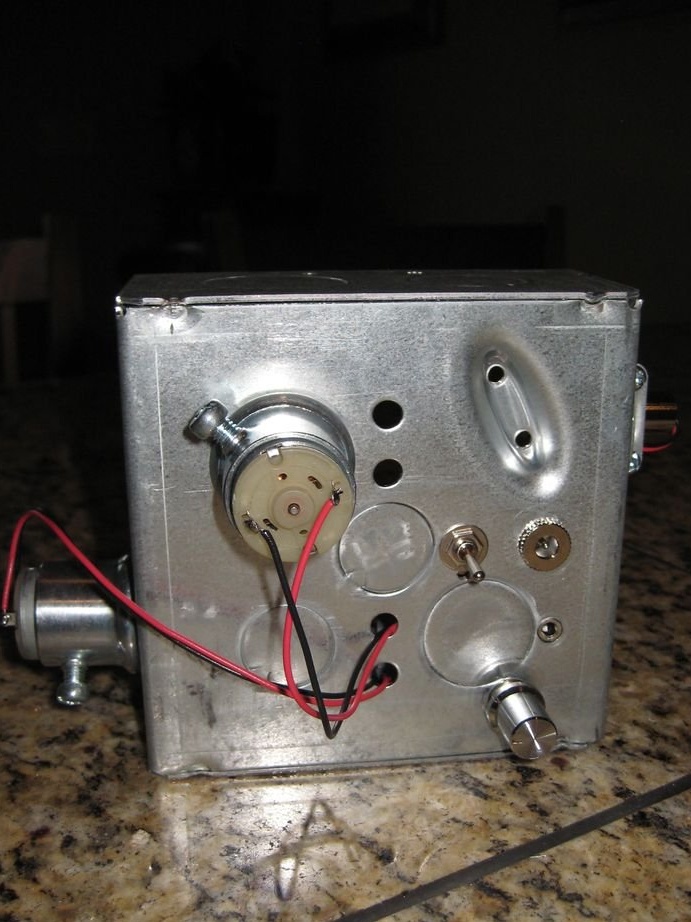
Step 6: Install Fittings
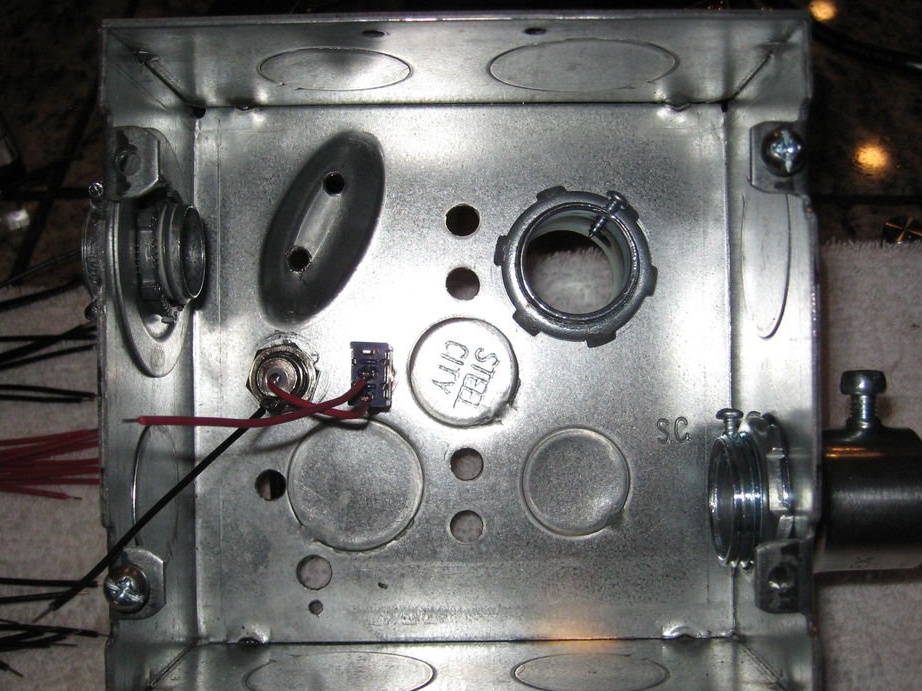
Next, install the power switch, DC power connector and conduit fittings in which the motors and the laser are located.
Step 7: soldering the wires
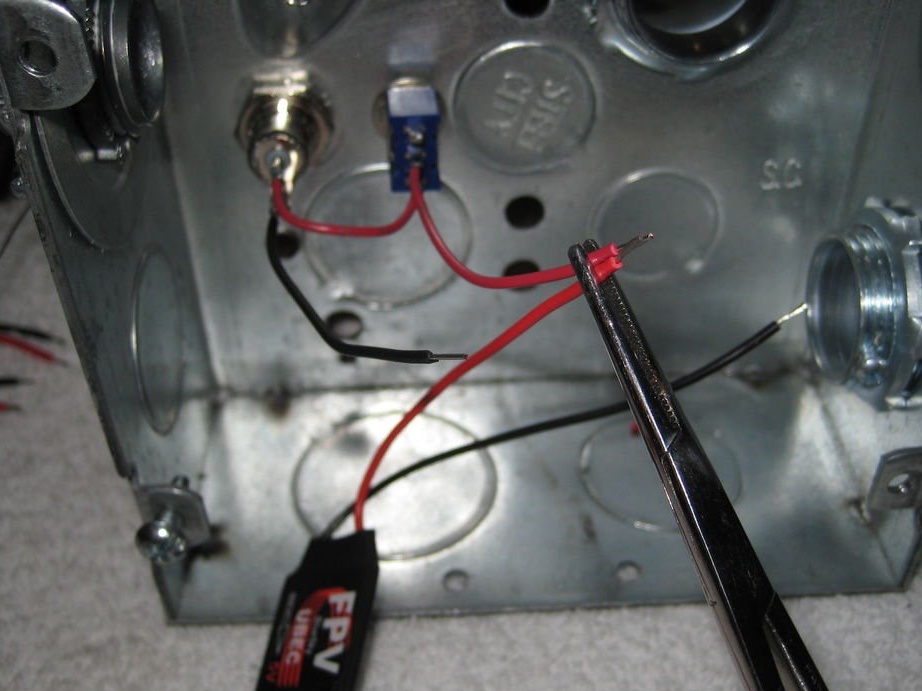
Then the wires in the 12 V and 5 V converter that feed the laser were soldered. The amplifier is powered by 12 V and the laser uses 5 V.
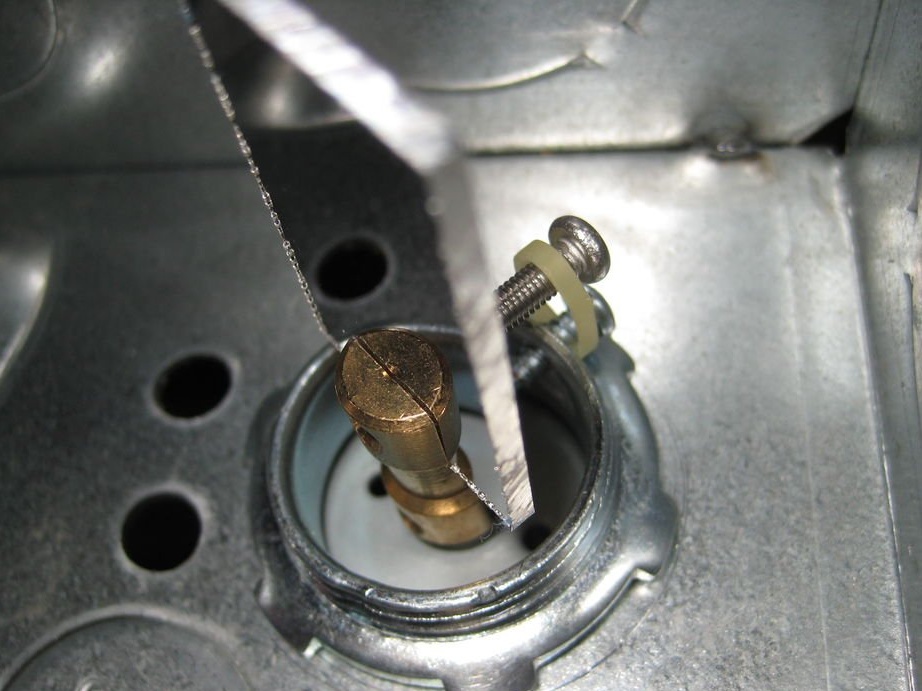
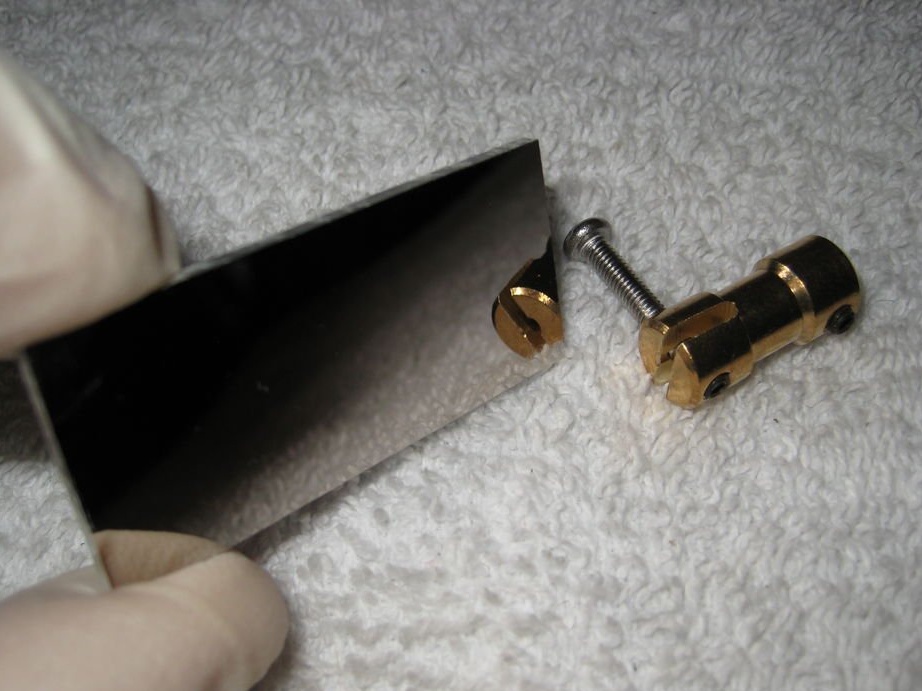
Step 8: Cutting the grooves for the mirrors
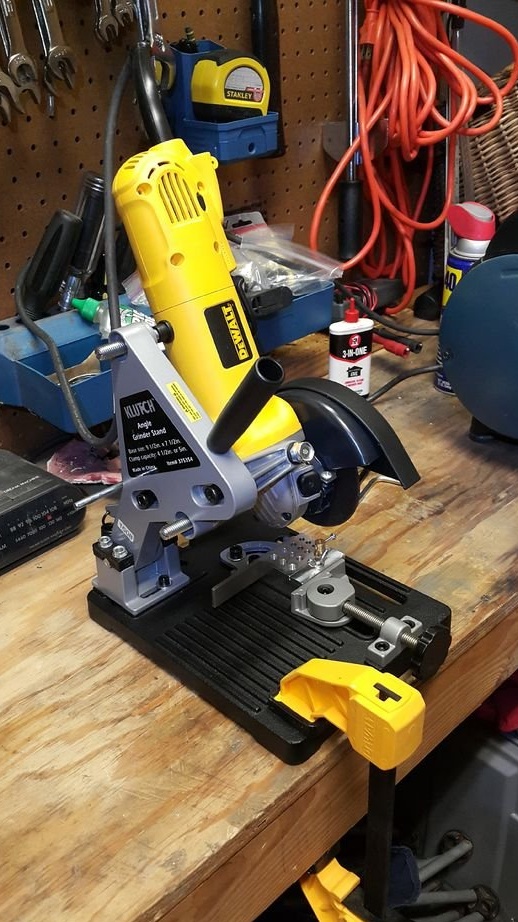
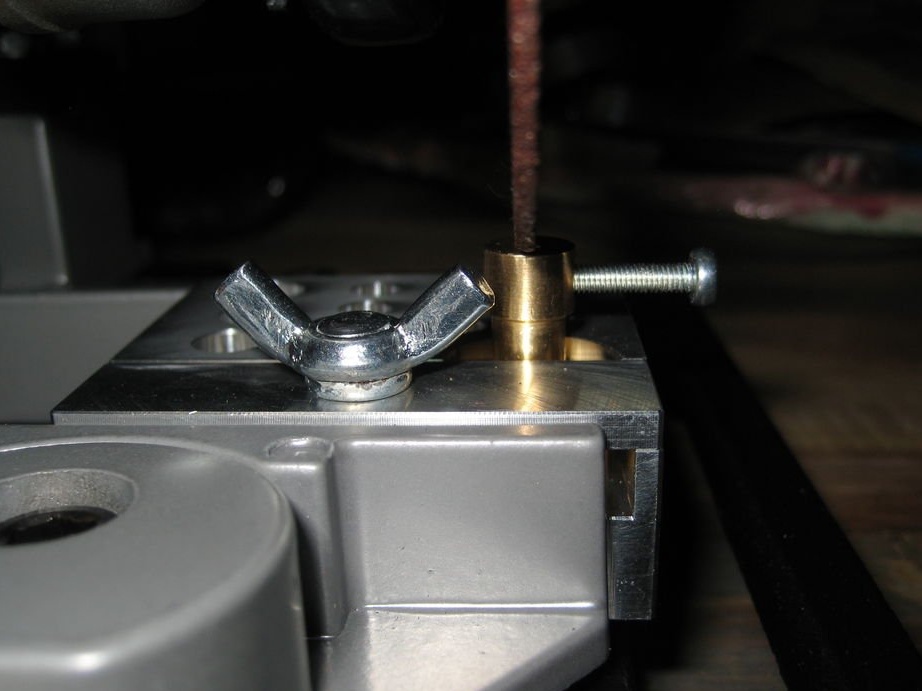
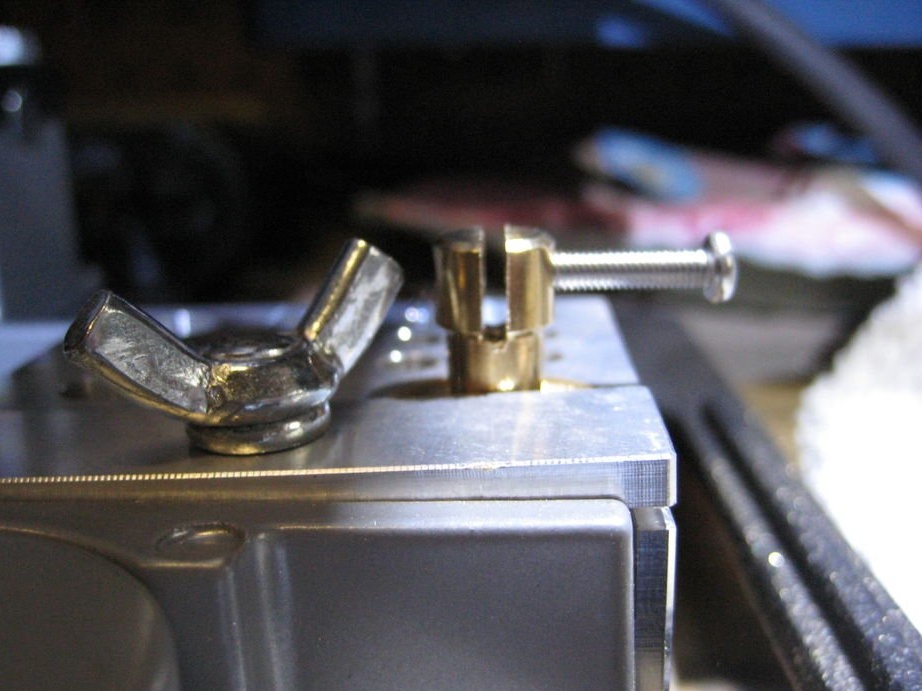
Then, using the angle grinder holder, it is necessary to cut out the grooves in the motor shaft connectors to hold the mirrors.
Step 9: disassembling the hard drive
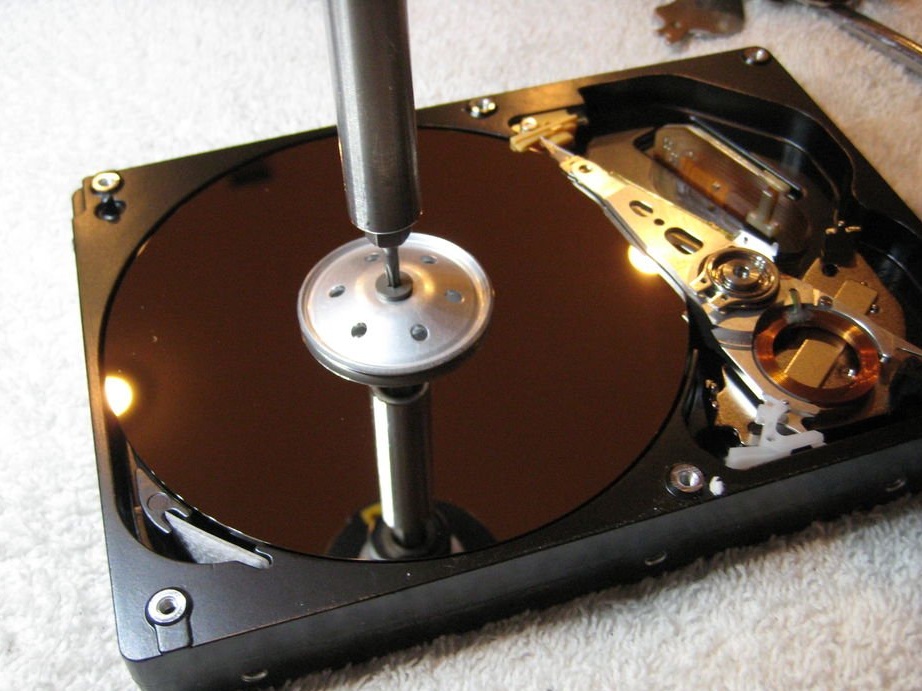
The hard drive was then disassembled to remove polished aluminum drives for future mirrors. If you use glass mirrors, the laser will be reflected both from the surface of the glass and from the silver substrate, so that you get two points.
Another advantage of using aluminum plates is that they can be tightly clamped inside screeds with notched shafts without breaking.
If you buy non-working hard drives on eBay or another trading platform, to remove the plates from them, be sure to visit the HDD capacity database to find out the model number of the hard drive you are purchasing. By the model number, you can find out how many disks this drive contains. Thus, you can get the maximum for your money.
An old 250 GB hard drive can contain 3 or 4 hard drives, while a newer model with 1 TB can only have one.
Step 10: Making Mirrors


Then table sleds were made for cutting aluminum plates. A table saw makes a clean and even cut. Experiments were conducted with a 100-tooth table saw blade specifically designed for cutting aluminum, but a conventional 60-tooth Dewalt saw blade actually worked better.
The trick is to set the saw blade to the maximum angle using clamps.
ATTENTION:
If you intend to cut metal with a table saw, you must take even greater precautions. SLOW DOWN.
Do not pinch both sides of the metal. A disk can pinch metal, which can fly out from under it and kill inadvertently.
Do not connect the vacuum cleaner to the dust outlet when cutting metal, as this may result in a fire in the dust collector.
Wear an apron or jumpsuit and face shield, not just safety glasses, because flying hot metal shavings can be harmful.
Step 11: Installing an Amplifier
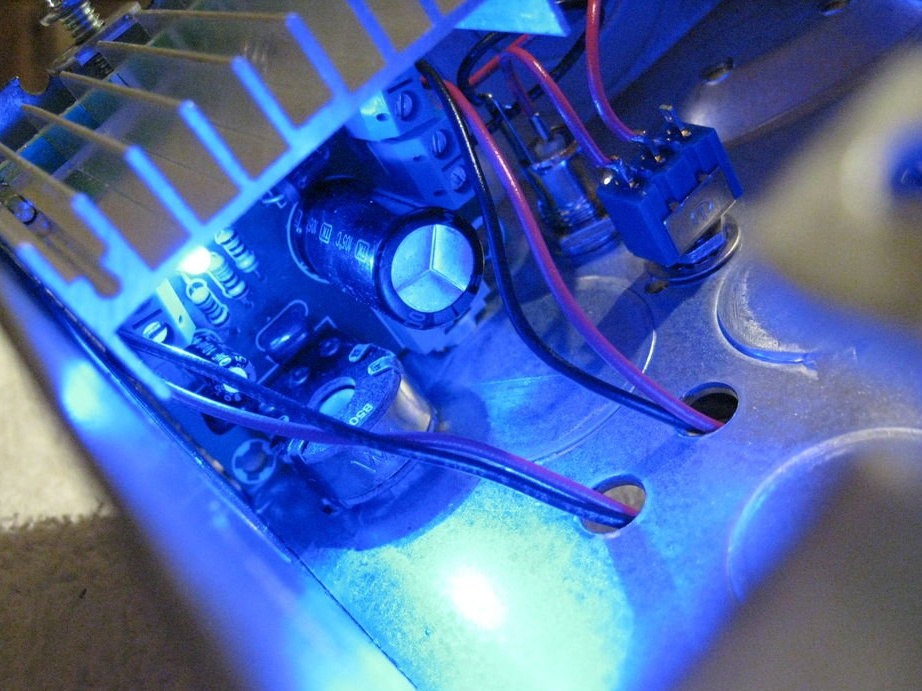
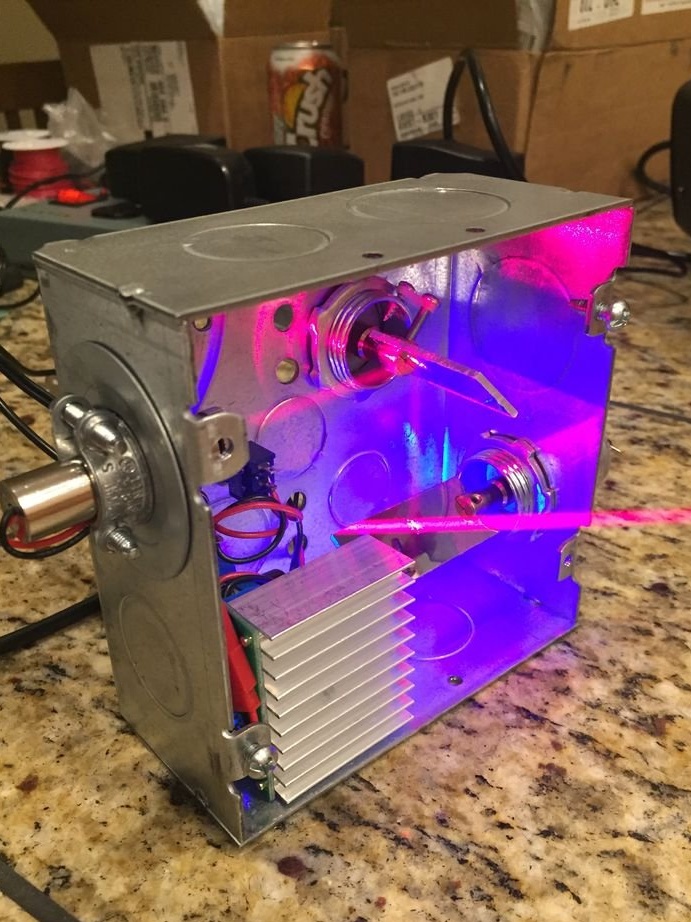
The amplifier had a very bright blue power LED that was turned off so that it would not compete with the laser in a dark room. Although with the desired orientation of the amplifier, the radiator blocks it from a direct view and makes it reflect the scattered blue color inside the electrical box, which gives it a really cool look.
Step 12: Installing Mirrors and Engines
The shaft connectors were installed on the motors, the mirrors were inserted into the grooves and the set screws were tightened. One of the set screws was replaced with a longer screw to hold the gum. After the motors were installed in the conduit fittings.
Step 13: Connecting the Motors
In the first prototype, the speaker wires were soldered to the motors, but later the connection was redone to 2.8 mm female blade connectors. This happened after one of the engines accidentally burned out.
The advantage of using paddle connectors is that you can detach the lower motor so that the laser moves only in the horizontal direction, creating the effect of a liquid sky. In this embodiment, the right channel is connected to the upper engine, and the left channel is connected to the lower engine, but this does not matter. It does not matter even to which motor terminals the negative and positive wires are connected, if both are connected.
Step 14: Laser Installation
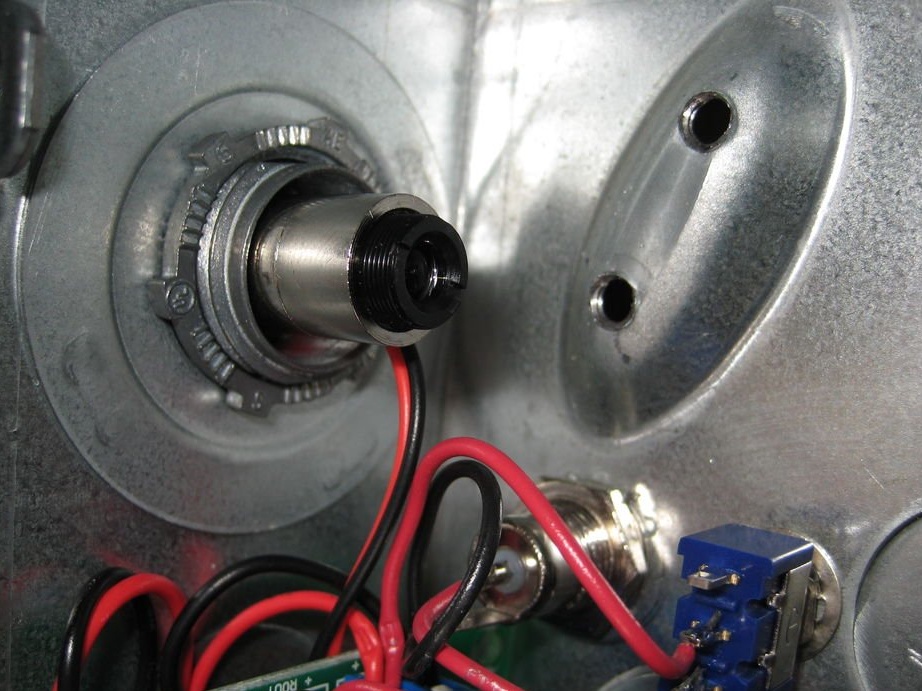
Then a laser module was installed. It simply clamps inside the adapter by 9 mm. A distinctive feature of the clamp is that you can easily remove the laser and replace it with a different color.
Step 15: electrical circuit
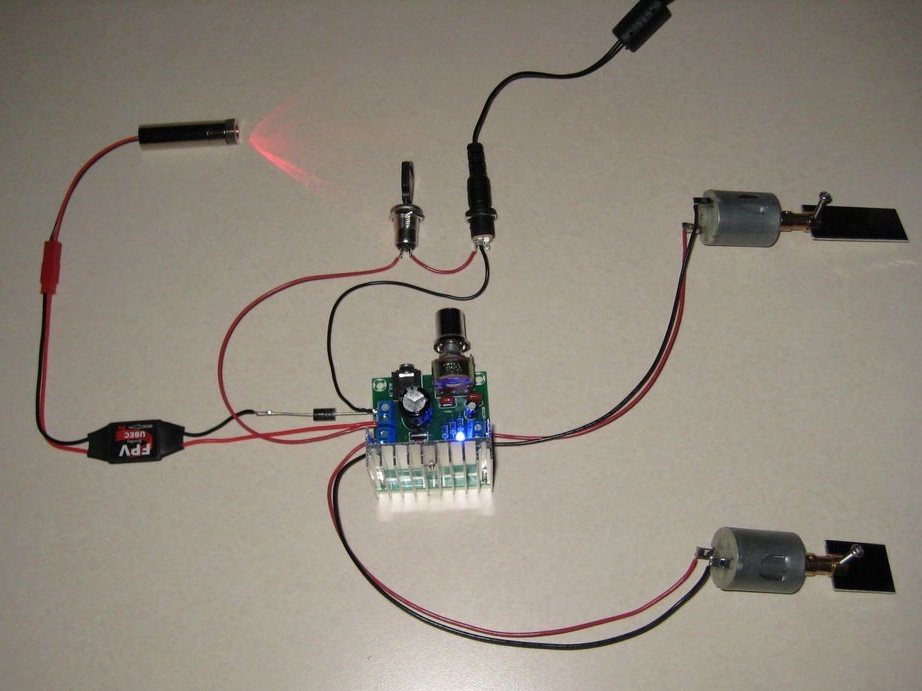
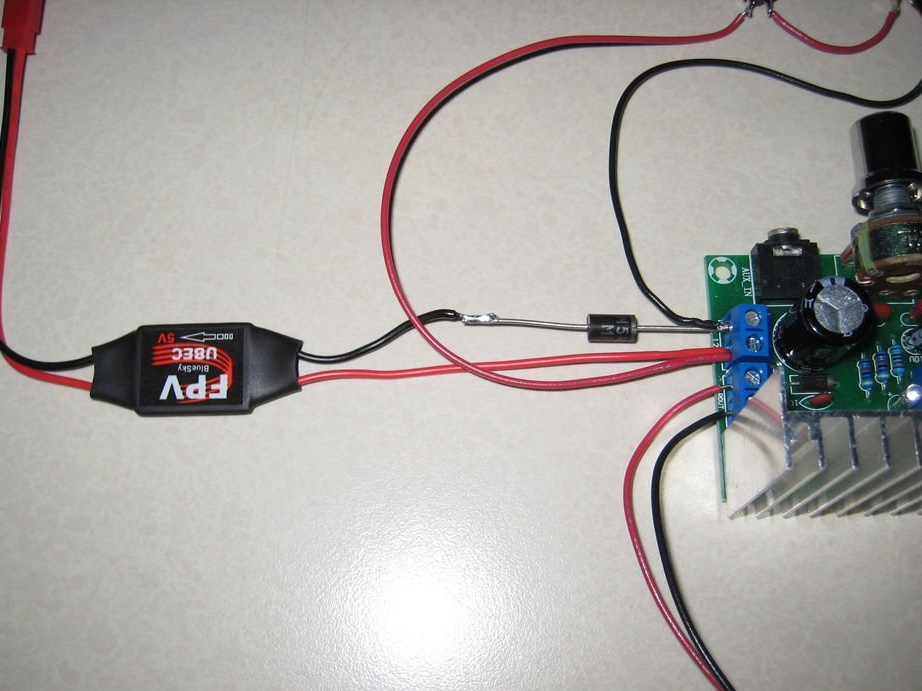
Here's how it works. A rectifier diode is only required for blue and green laser modules. They closed when their metal enclosures were grounded to an electrical box. Therefore, the grounding of the 12 V to 5 V dc buck converter was isolated using a 3 A rectifier diode to 1000 V. This helped.
Step 16: Mirror Adjustment
The laser was then launched to test it in action with artificial fog. Observing the laser pattern is cool in itself, but adding fog takes it to another level. With it, you can see a real laser beam when it cuts through the air. The best thing about using fittings for galvanometers is that everything is easily adjustable.
After the upper fitting is adjusted so that the laser beam is reflected from the center of the lower mirror, it can be tightened and left alone. Tighten the bottom fitting only by hand so that you can rotate it to move the laser pattern up and down the wall or even to the ceiling without physically tilting the box. The sharp teeth of the steel locknuts that came with the fittings cut into steel so hard that they could be tightened on their own to such an extent that they could not be loosened without tools, so I replaced them with 19 mm PVC locknuts.
The biggest advantage of using motors over hard drives, in addition to size, is that they provide a much greater mirror travel, so the pattern is much wider at closer distances.
Step 17: Laser Window

As a final touch, a corner was cut from a steel cover to make a laser window. With the window, you can throw out a slightly wider picture, and also project the picture onto the ceiling.
Step 18: Operation of the laser show on the video
Another video that shows how the laser processes various songs. This allows you to "see" the music.
The laser is easy to use:
• connect the audio source to the 3.5 mm audio jack
• connect the power source
• turn on the power
• start playing music
• Adjust the gain control to adjust the size of the laser pattern.