
Anyone having car sooner or later faced with the need to repair the wheels. We have enough nails on the roads ...
Of course, in the city for such a case there is vulcanization, or tire fitting, or whatever you have there ... And I have 40 km to the nearest tire fitting. And it is clear that nobody will turn my wheels there for free.
Having traveled here and there with the wheels a couple of times, having spent enough gasoline and money, I realized that I would do it myself further. I have nowhere to hurry, the strength in my hands so far.
In my household there are several cars and three trailers, where I just don’t drive them, so I repair my wheels quite often.
I especially note that I do not have tubeless tires, all of my tires are chamber. This is because my cars are mostly simple, working, their wheels are inexpensive, and accelerating above 100 km per hour on our roads is suicide.
I will tell and show two ways of wheel flanging, which I use.
For wheel repair work you will need the following tools and materials:
Mountings - 2 pieces.
A hammer or a small sledgehammer.
Piece of corner 50X50 or 75X75
Hydraulic jack
Compressor car or foot pump.
Set with patches and glue for tire repair
Skin, rag, some soap suds and a sponge.
So, the first way.
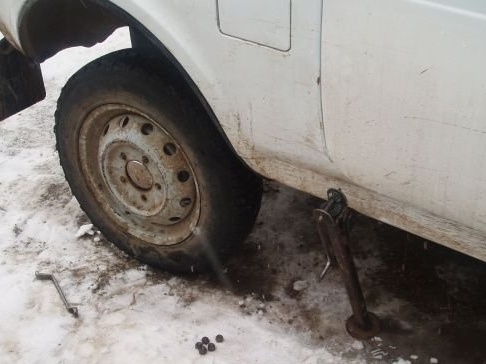
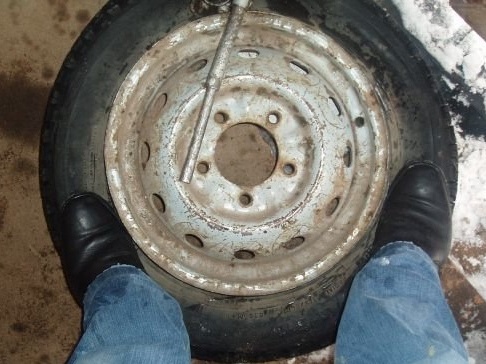
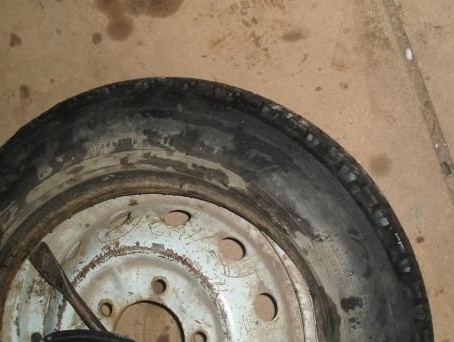
Remove the flat tire from the car and carry it to garage.
If the wheel was balanced by weights, then put a cross on the tire near the nipple with chalk in order to put the tire back on the same place during reverse installation without disturbing the overall balance of the wheel ..
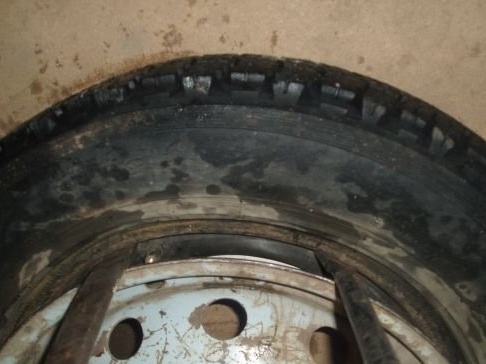
Wet with soapy water the junction of the tire to the disk.
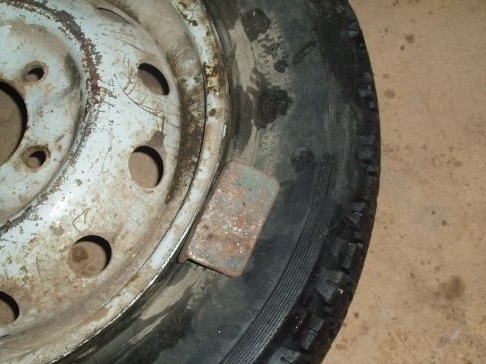
We put the corner on the wheel and with strong blows we drive the corner between the rim and the tire, gradually moving the corner in a circle. Do not forget to wet the resulting gap with soapy water.
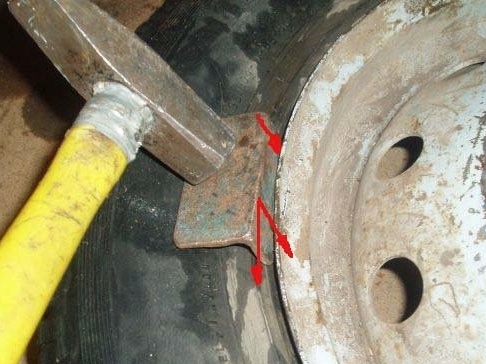
Under pressure from the corner, the tire will gradually “peel off” from the disk and at about half the diameter the tire can be pulled down by standing on it with your feet.
After the top of the tire slides off the disc, turn it over and repeat the same with the other side.
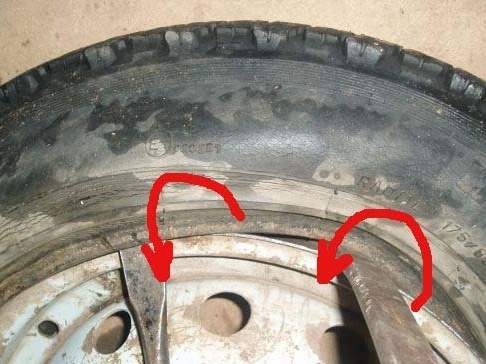
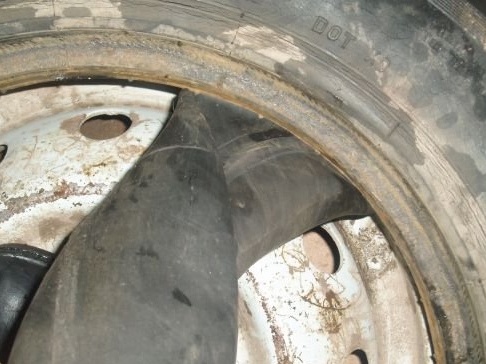
After the tire is freed from the disk, we take two mounts, insert them under the edge of the tire as shown in the figure below, and we stand with our feet on the opposite side of the tire so that it goes lower, deeper into the disk.
We immediately pull the tire edge towards us with two mounts so that it is above the disk. After that, we leave one mount in place, hold the edge of the tire from slipping, and palm off the second mount as deep as possible under the edge of the tire and pull it back to ourselves.
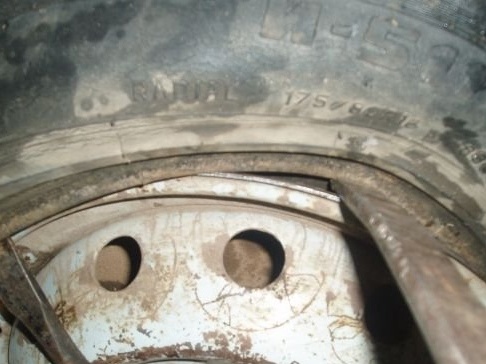
So, slowly, working as a second tire mount, we gradually pull up the entire tire until the dick is inside. More than 5 cm is not worth retreating, you will have to make too much effort, and you can bend the rim.
After that, we put our hand in and pull the camera out of the tire.
When the camera is pulled out, you can wipe it with a damp cloth and try to find a puncture.

If the eye is not visible, you should pump the camera and gradually wetting it with a sponge with soapy water, go over the entire surface. Even if you immediately found where the hole is.
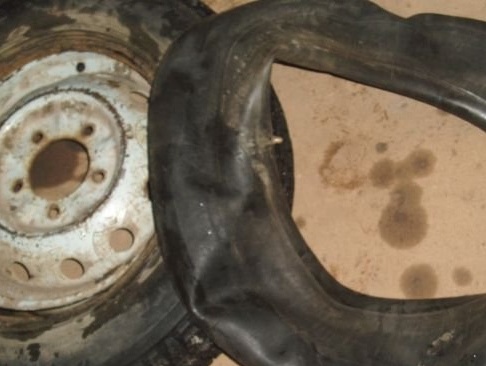
It happens that there is more than one puncture, so we check the entire chamber with water.
After the puncture is found, mark it with chalk, and lower the camera. Be sure to go back to the tire and, guided by the nipple of the camera, we check the puncture site for the presence of nails, screws or what pierced the camera.
During this time, the camera is already blown away, and it will be possible to do the actual repair.
Repair of the camera is simple - the puncture site should be cleaned with a fine sandpaper, smeared with special glue, put a patch from the repair kit and put it all under the load. Such kits are on sale in almost all auto shops, so I will not indicate the name and manufacturer. Once upon a time, in Soviet times, there weren’t such kits in stores, and I vulcanized punctures in tires with special crude rubber and a device called a “vulcanizer”. I do not think that you will be able to find such a thing somewhere on sale.
After the chamber is ready (after 10-15 minutes), you should pump it up a little again and use a soapy sponge to check if it is air-tight.

After checking, we return to the tire. We thoroughly wipe the tire inside with a damp cloth, remove dust and dirt so that particles of sand and debris do not get between it and the camera. We put the camera in place, and insert the nipple with the nipple into the disk. You should stick the camera as deep as possible, in the very middle of the disk, so as not to damage it by mounting it when reinstalling the tire. We make sure that the tire stands exactly at the place where the mark was made with chalk, so as not to disturb the wheel balancing.
Reinstallation is simple - trying to lower one edge of the tire as low as possible, into the inside of the disc, and holding it with your feet, wrap the other edge of the tire under the rim of the tire with a mount. The second mount also serves as a fuse so that the tire does not slip. So, quietly, retreating five centimeters, we put the tire on the whole disc with a tire mount.
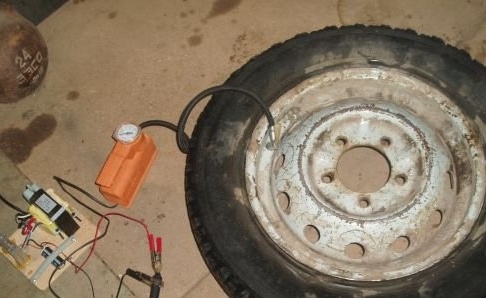
After installation, inflate the wheel to working pressure and install it in place.
By the way, so as not to land the battery again, I connect the car compressor to the charger. It is much simpler and faster.
Well, now about the second method. That is how I repair all my wheels now.
It differs from the previous one only in the way the tire is removed from the disk.
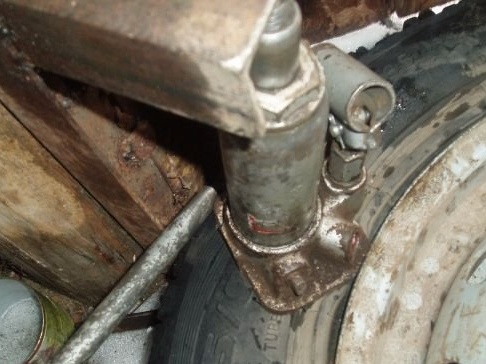
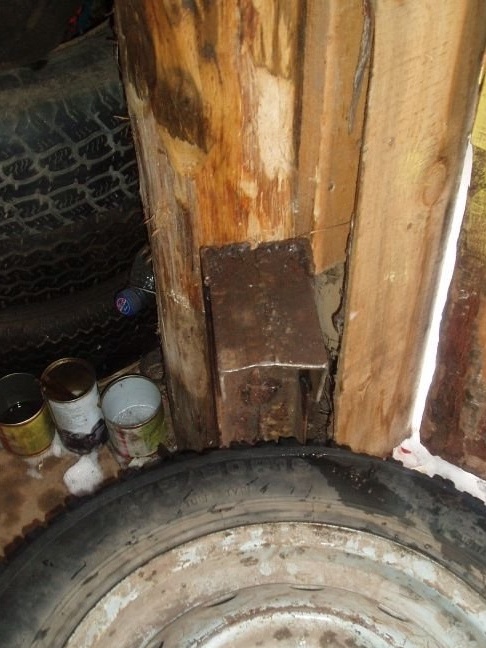
For this, I welded a special L-shaped device from scraps of iron corners and fastened it with nails to a vertical rack in the garage.

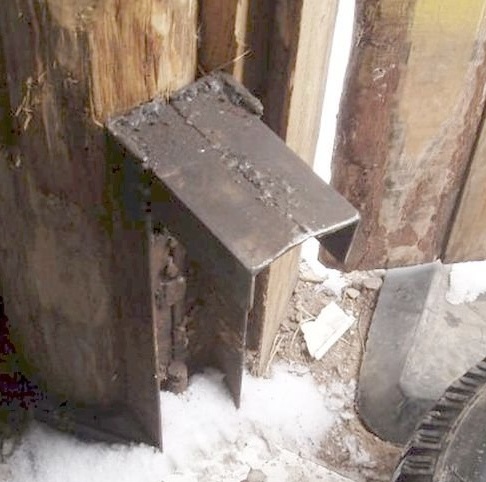
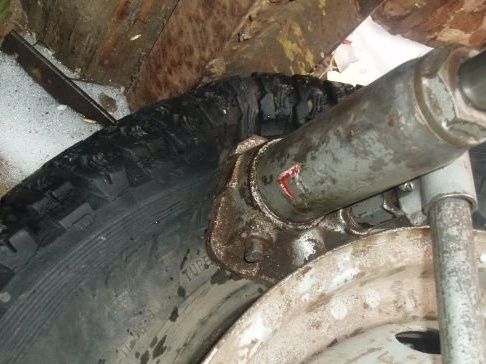
Now just put the wheel closer to the post, put a jack on it and slip the jack under the corner. Press the edge of the jack as close to the edge of the disk as possible.
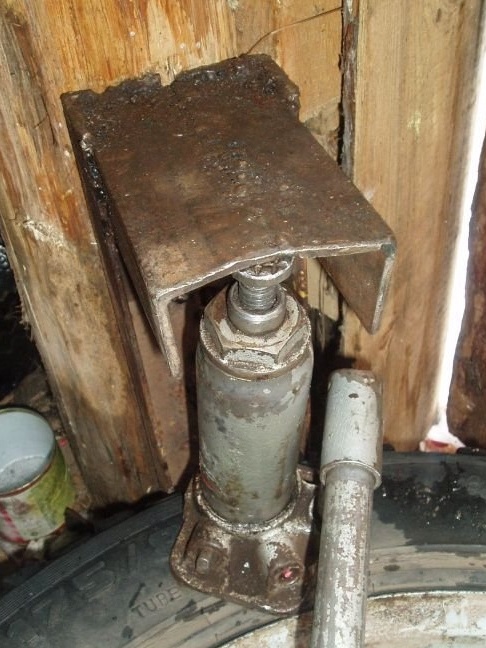
We start to pump the jack. At the same time, he leaves with his foot under the disk, removing the tire from it. Repeating this procedure two to three times, we get the wheel removed from the disk.
Further, all the operations of removing the tire from the disk, pulling out the camera, sticking a puncture and putting the tire back on are done in the same way as in the above method.
Once again, back to the topic of tubeless tires. In this second way, I made tubeless tires several times. In this case, you can carefully remove and put the wheel back on the disc without damaging its edge.
I also have another set, with glue, an awl and a special cord for repairing tubeless tires. But here the problem is different. When the tubeless tire is put back on the disk, it is very difficult to place it so that it immediately starts to inflate, almost always somewhere there is a gap through which the air comes out.
On vulcanization, air is supplied to the wheel quickly and under good pressure, so it immediately manages to pump up to that level to put on the disc tightly.
On the Internet, I saw videos in which a tubeless wheel is pumped up, setting fire to some gasoline poured inside, but I have not tried it myself.