
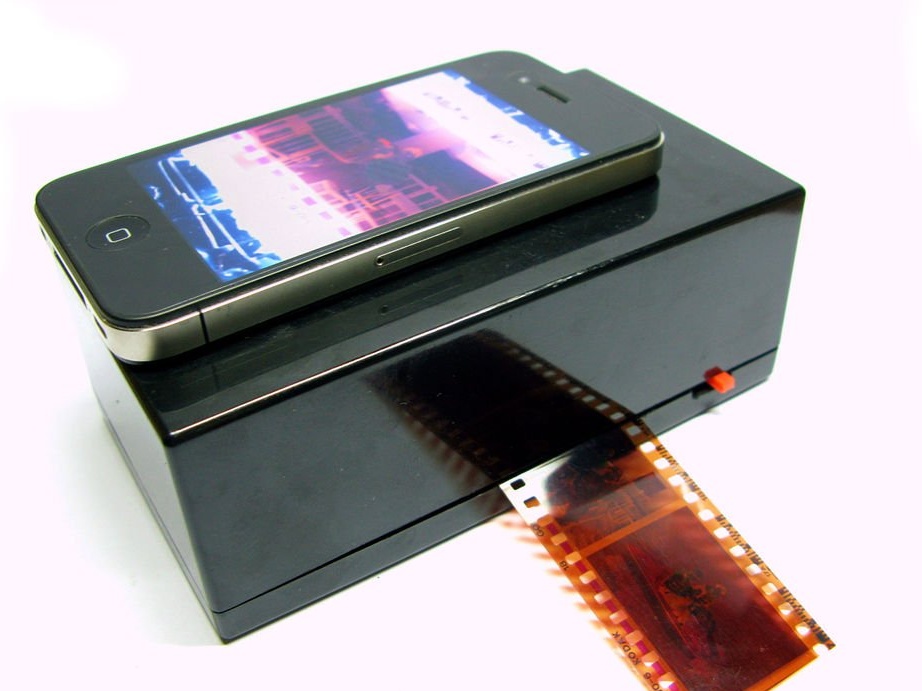


Read your favorite photo frames from the film with one click! To plunge into these old memories again! The project for the coming weekend will be the creation of a portable film projector for a mobile phone for less than 150 rubles. Our future device is perfectly compatible with iPhone, iTouch, Galaxy S4, HTC and other smartphone brands on the market.
This is a great way to read 35mm film frames on a mobile phone! It is as easy to use as its commercial counterparts.
New Year's gift for dad:
Preparing a gift for my father is always difficult, given that he has everything he needs. There is no better New Year present than the one made by the hands of his son: D He is an excellent photographer (amateur), and in his youth he took many beautiful photographs. Of course, even before switching to digital SLRs, my father used analog single-lens DSLRs. Unfortunately, most family photos were washed off by a flood in the 90s. But the father himself kept the films in a waterproof box. Now thousands of negatives are waiting for the projector to appear in the family: D I can’t wait to hand it to him!
This is just the perfect gift for old-school photographers! : D
How simple is the process?
Just insert a 35 mm film> Turn on the power> Activate the phone’s camera> Choose a convenient scale> In the settings, select the photo negative effect> Do it again. Everything is simple! : D
Attention: The quality of the photo depends on the camera of the phone. In my photo examples, I used a cheap 5MP smartphone, as well as an iPhone. I tested the projector on Samsung's Galaxy S4 and the quality of this smartphone was better than the rest! The more megapixels, the better: D
Step 1: Collecting Tools and Materials
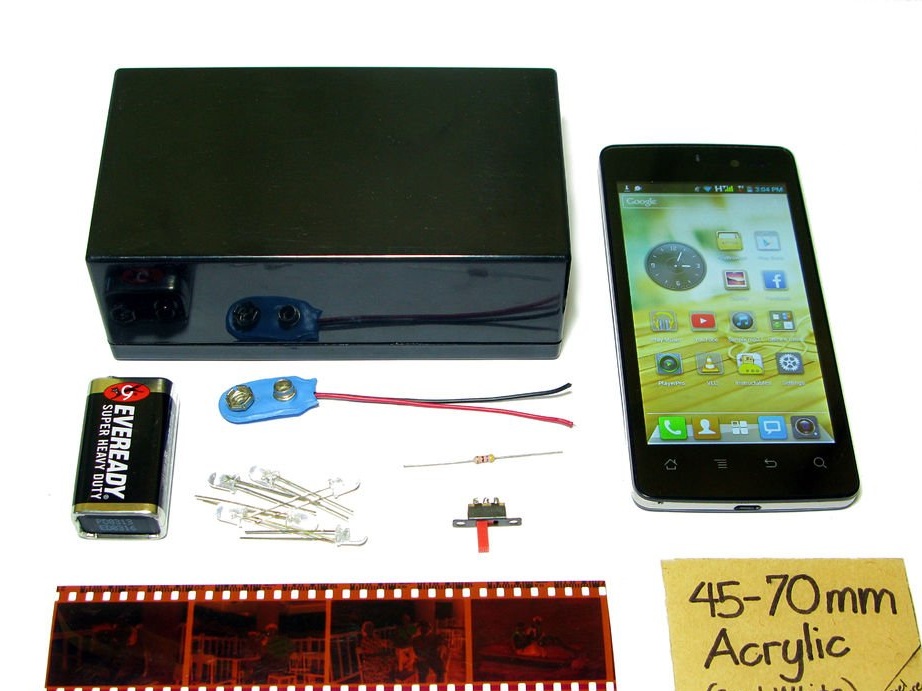
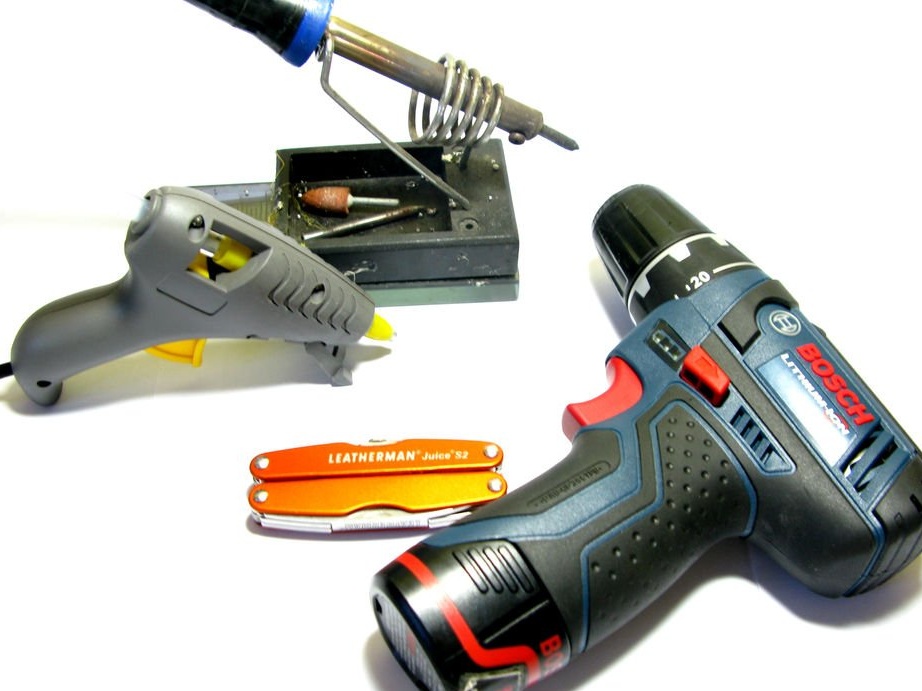
The spare parts I needed cost less than 150 rubles (not counting the smartphone)
What we need:
- your smartphone
- rectangular case
- 6 white ultra bright diodes
- 100 ohm resistor (1 / 4W)
- 9 volt battery with clip
- simple slide switch
- a piece of white acrylic 40x70 mm
- tube of superglue
Tools and equipment:
- multi-blade folding knife
- hand drill
- soldering iron
- hot glue gun
Step 2: Camera hole and film slot
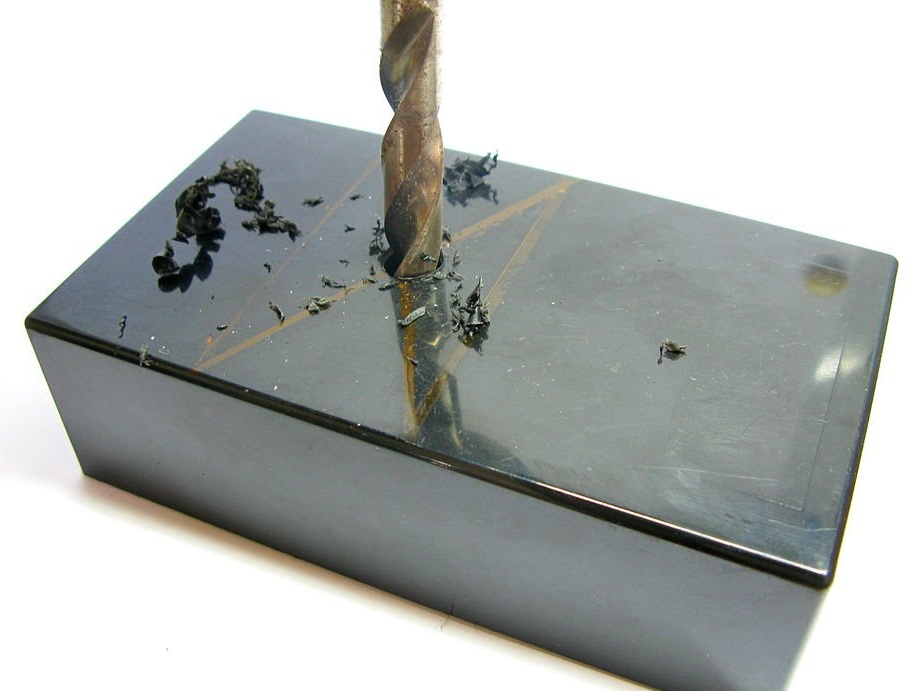
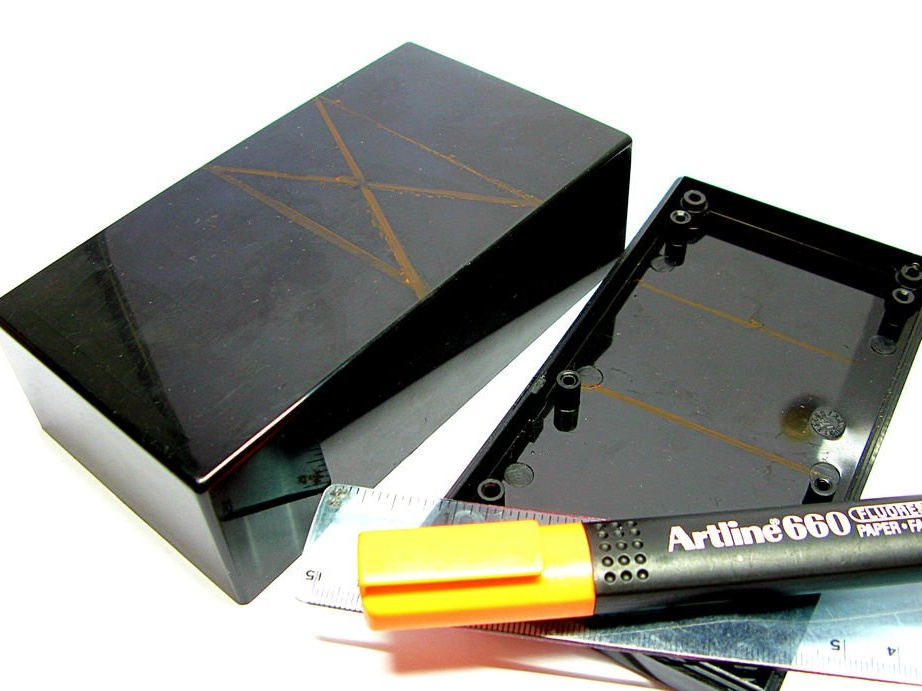
Use a light matte highlighter or highlighter to mark the measurements, and then drill a hole large enough for the phone’s camera.I used a 10 mm drill and cut the edges of the hole at an angle with my penknife.
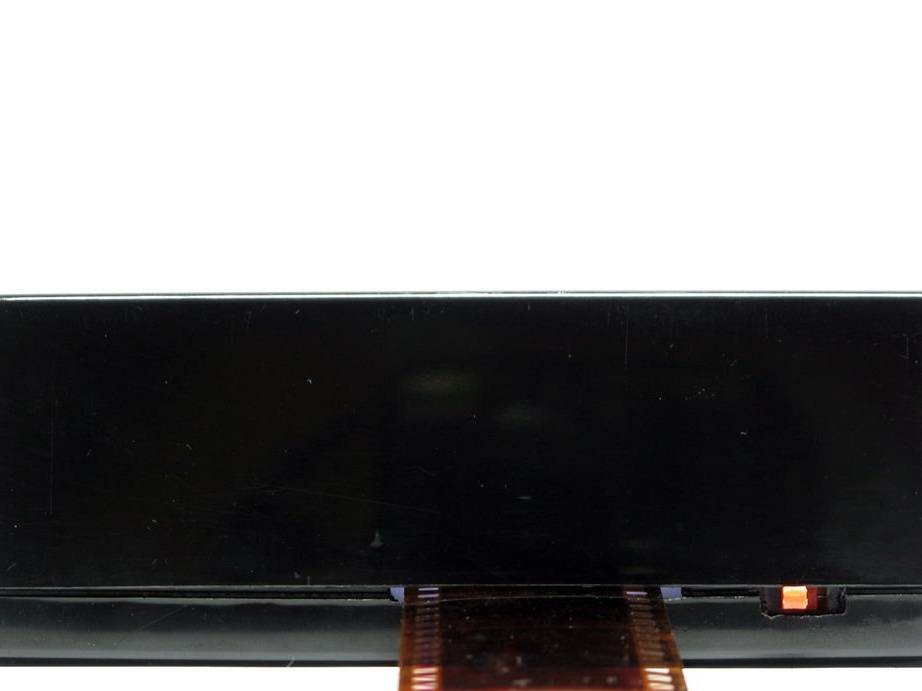
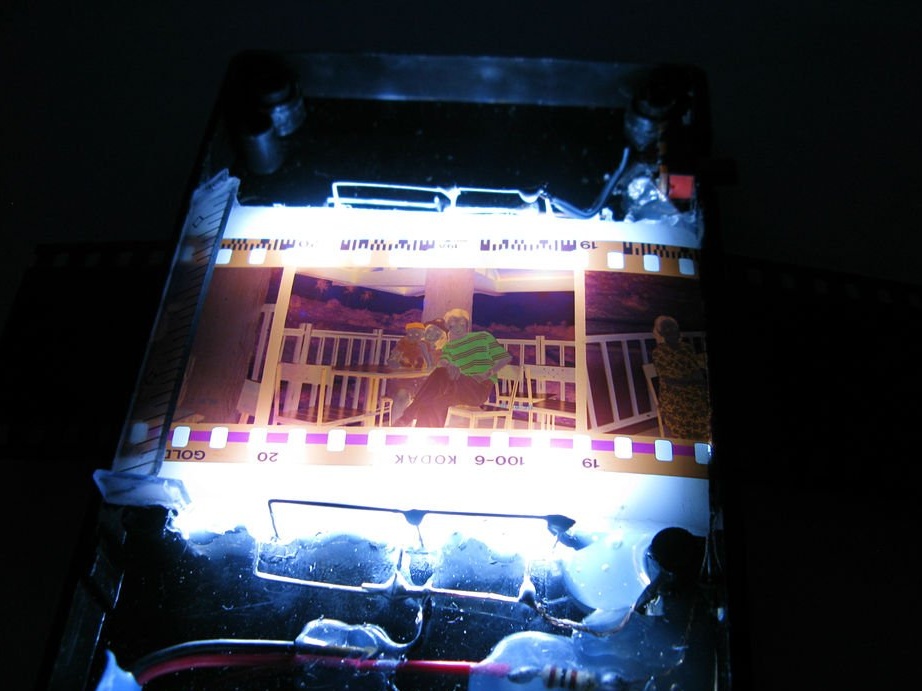
File the edge of the housing cover by making a slot for the film. I sharpened a 40 mm wide slot for my 35 mm films.
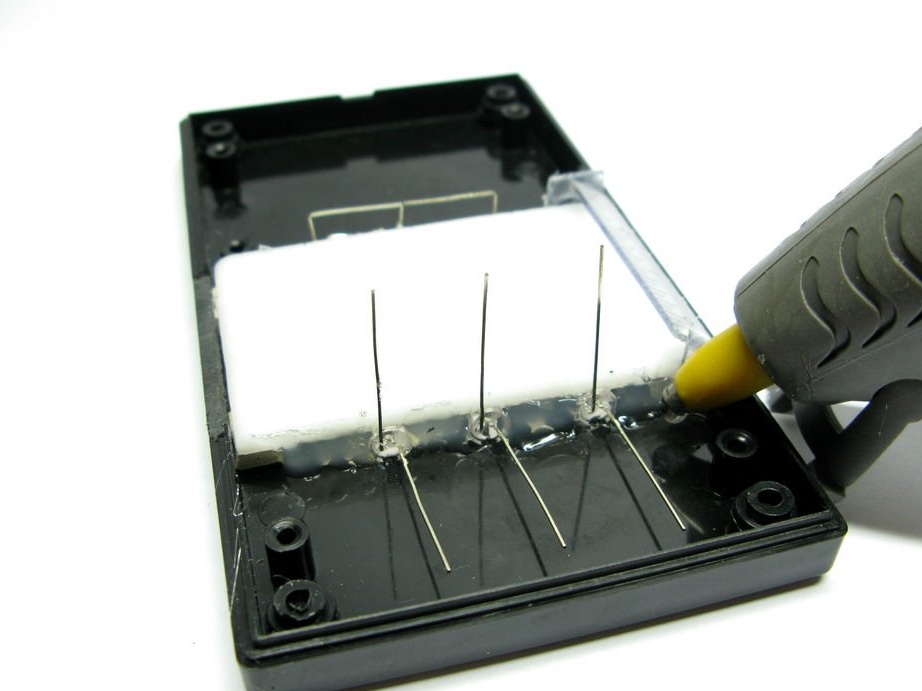
Step 3: Making an Acrylic Diffuse Screen

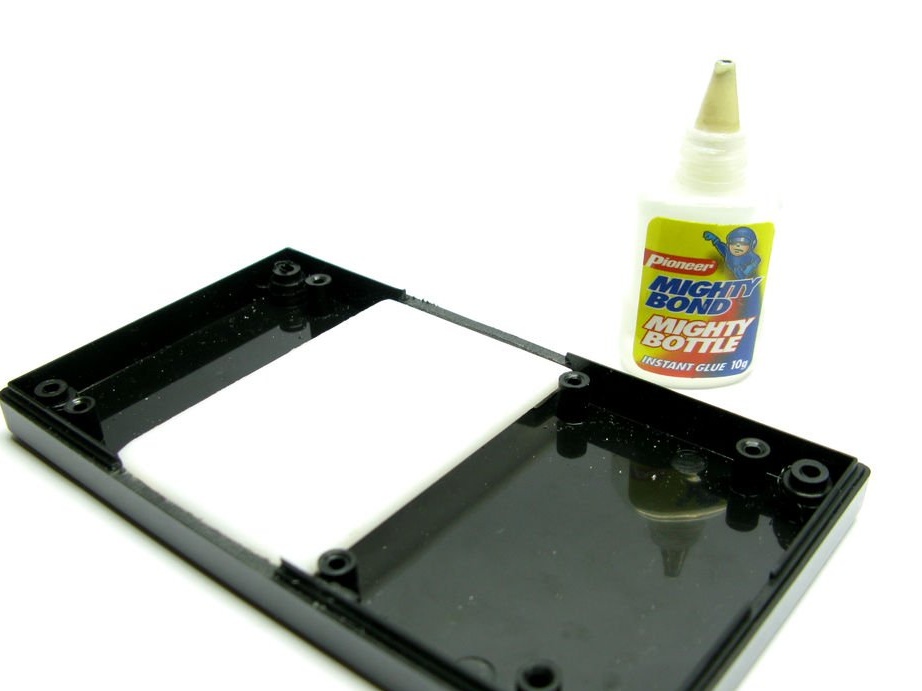
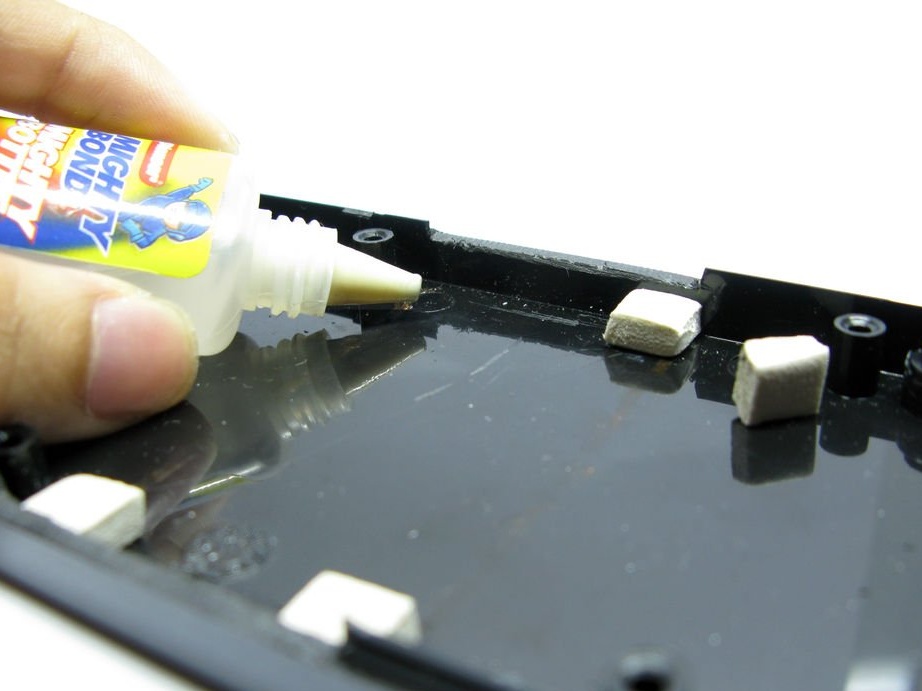
White diodes give out spot lighting, but for our purposes, the light must be diffused so that the picture is well balanced and illuminated.
1) Cut a rectangle of 40x70 mm from acrylic
2) Saw off the edges of this rectangle with a file, this will facilitate the flow of film.
3) Glue the acrylic plate into the body on the pre-glued 4 foam squares
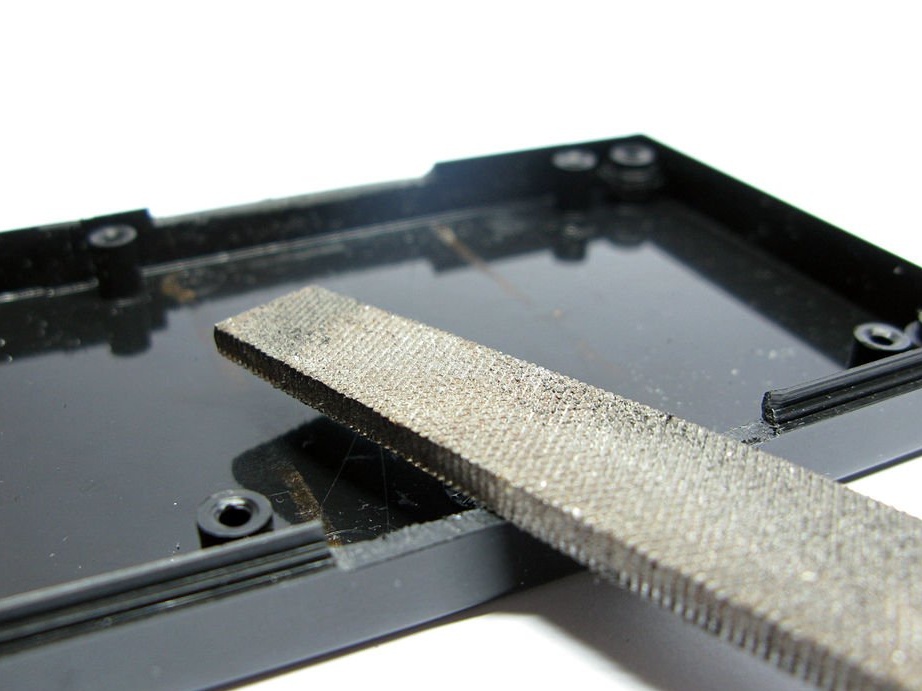
Step 4: Receiver
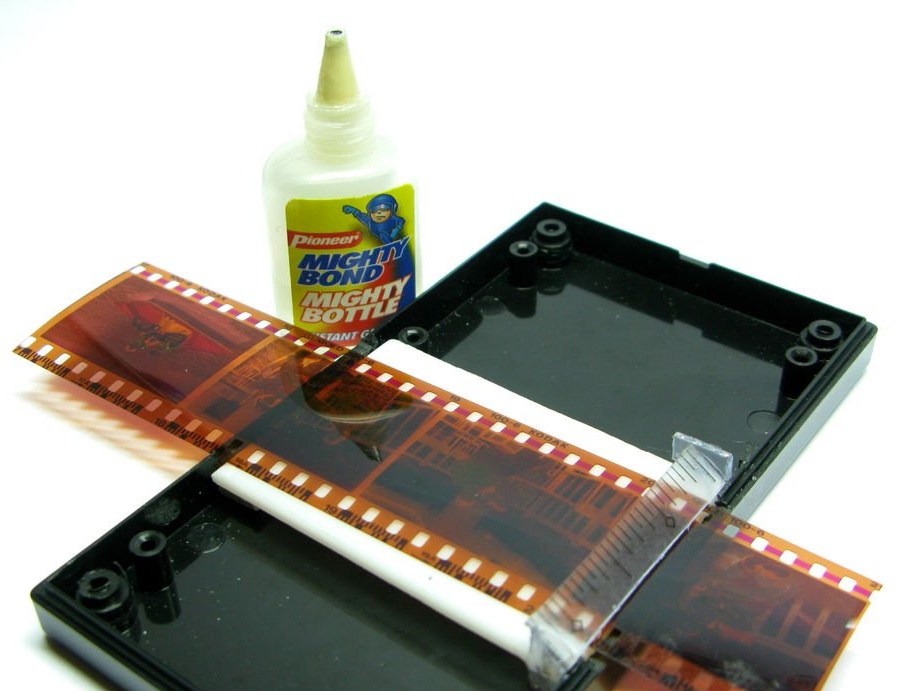
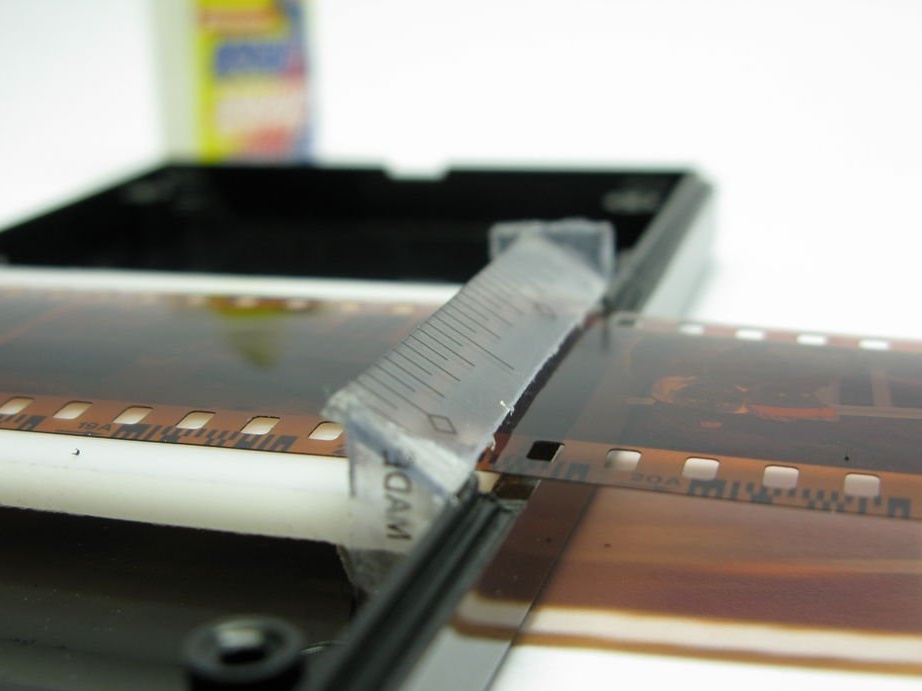

Sometimes the film is jammed, which makes it difficult to feed. I added a pickup mechanism that grabs the film on the other hand, which allows it to enter the projector.
To do this, I used a piece of the old ruler and super glue, building clamps in the case.
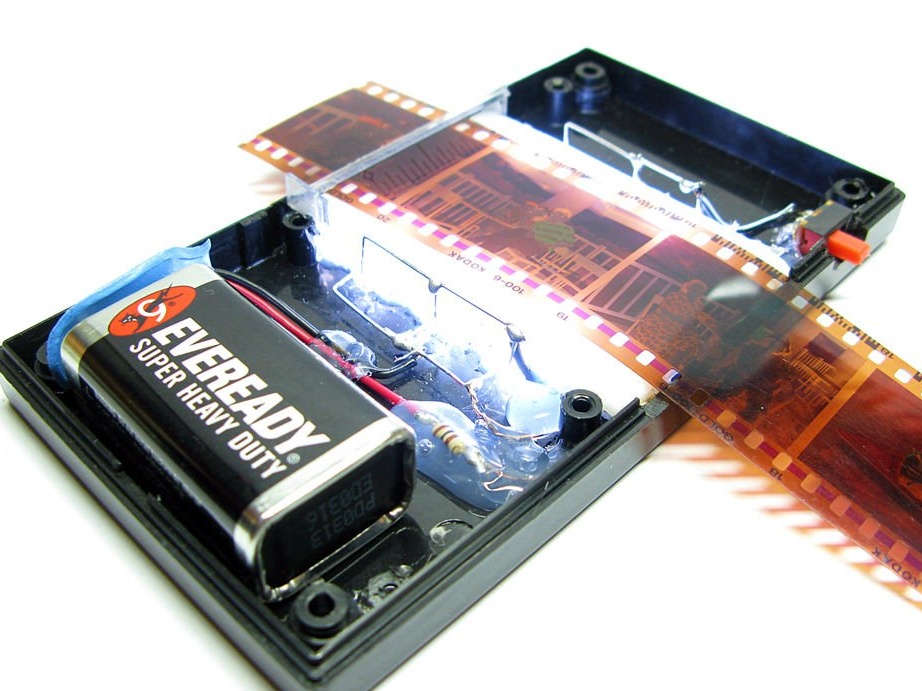
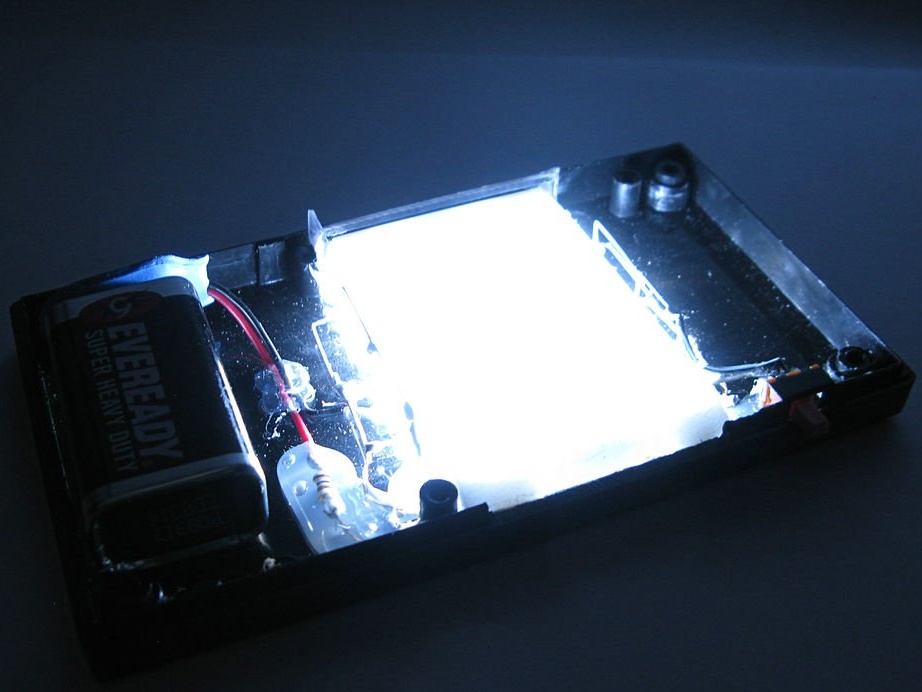
Step 5: Install the Diodes
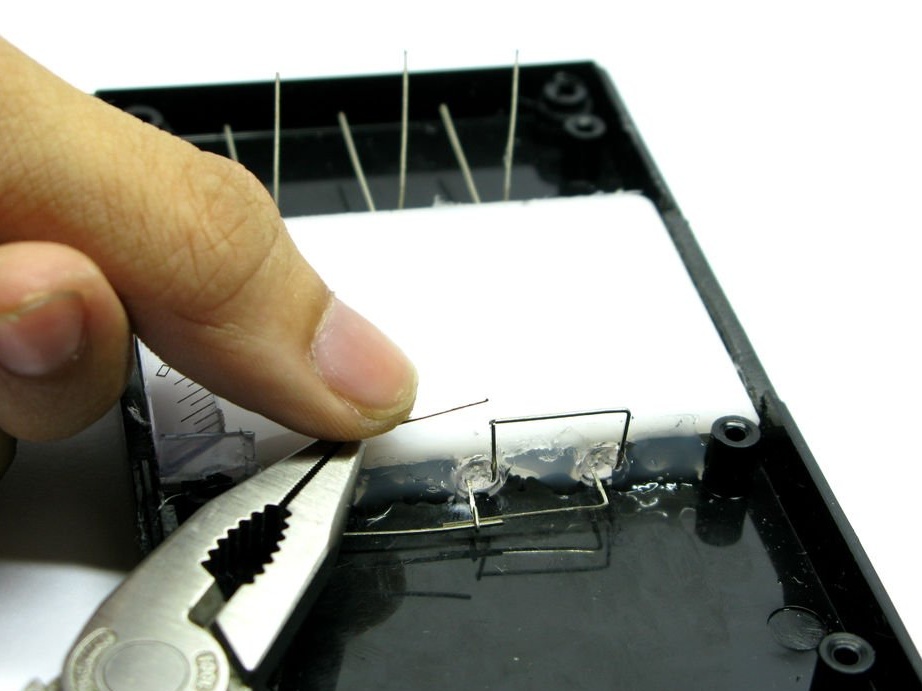
You need to install diodes on both sides of the acrylic screen. We divide the diodes by 3 for two sides, so the lighting will turn out better. Positive contacts go up, negative contacts go down.
Glue the diodes to the body with hot glue. Glue also works well as a reflector for light!
Step 6: solder the details
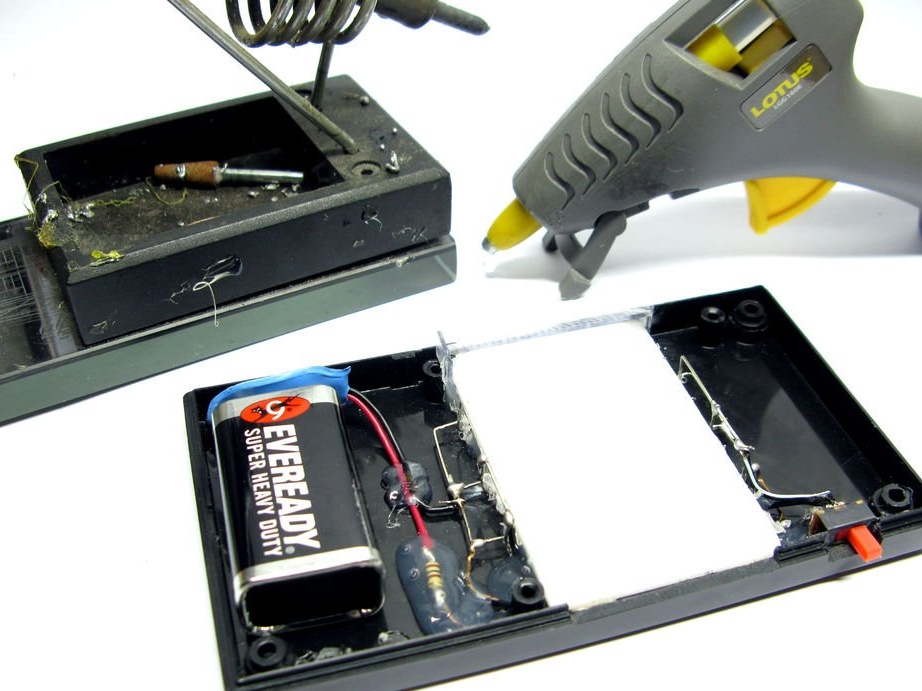
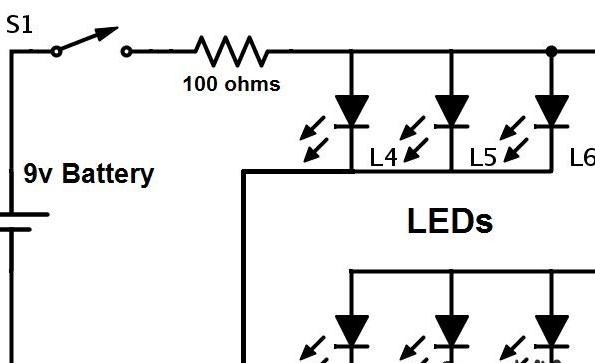
I brought the diagram in the photo above. Solder the battery, resistor, switch and diodes together.
Step 7: check the diodes

Connect the battery, turn on the switch, and your diodes should light up.
Step 8: Configure your phone’s camera settings!

1) Open the phone’s camera. I have the operating system Android 4.1 Jellybean.
2) Go to settings, color effects and select “Negative”
3) Use the zoom function so that photos are not cropped.
4) Take a couple of shots, you probably want to use the auto-correction function: D
Step 9: That's it! Refresh old memories!

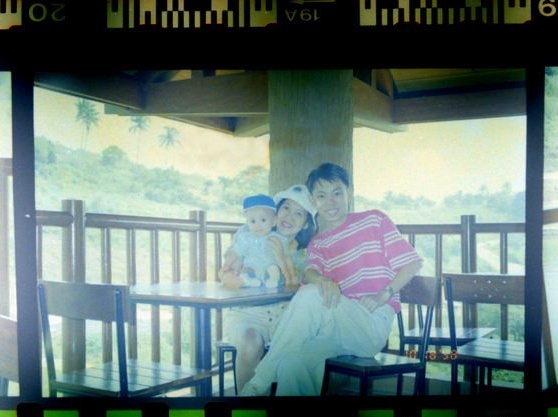
We have a lot of negatives that we never printed. It is so nice to delve into the past, bringing back pleasant memories: D I hope you enjoy your projector! My camera is not of very good quality, so some pictures are obscured.