
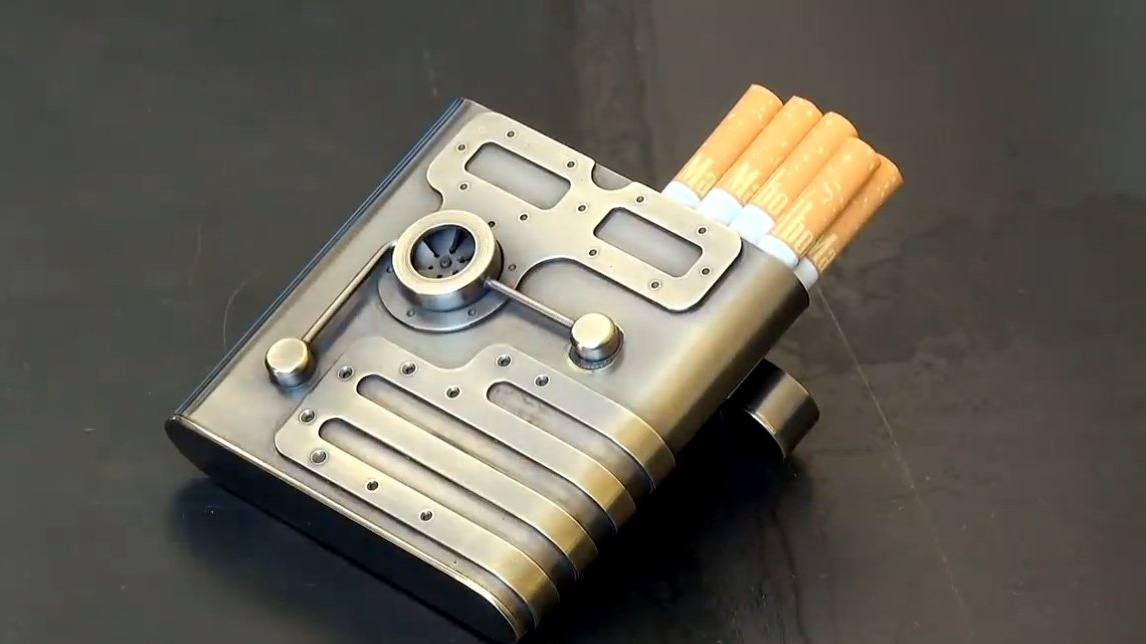
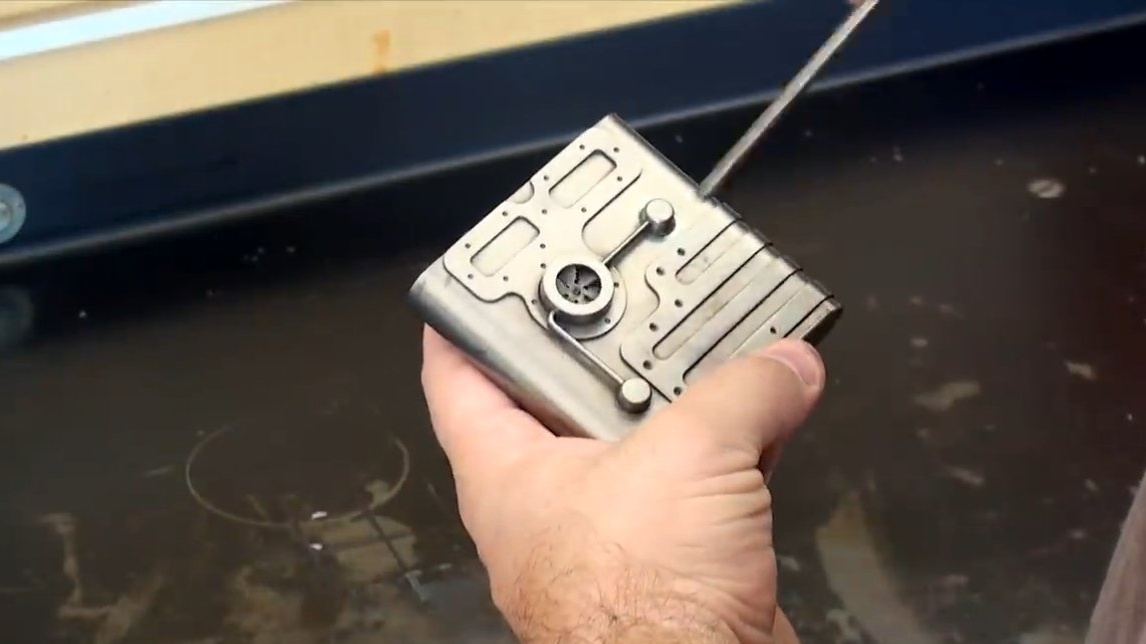
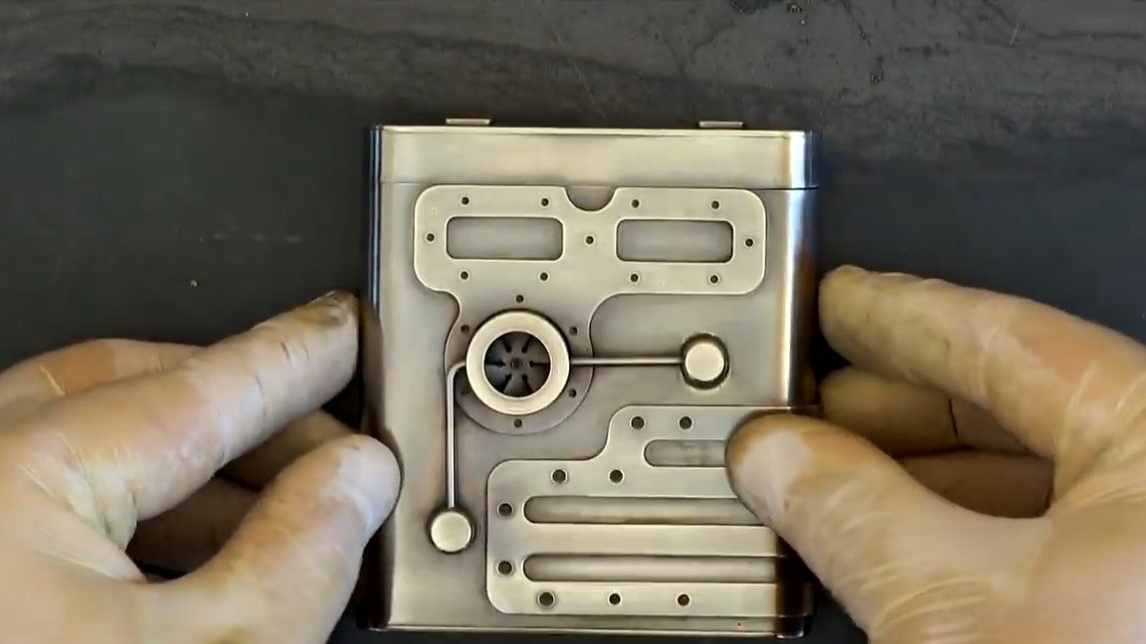
I welcome all fans to craft, I propose to consider instructions for making an interesting and reliable cigarette case do it yourself. Homemade the author made of brass and copper, as it should be in the genre "steampunk". The main material was sheet brass, but also tubes and other parts were needed. In general, making homemade products is not difficult, but the author turned some of the details on a lathe. The main highlight of the cigarette case can be considered a propeller, and it can even be rotated manually. If you are interested in the project, I propose to study it in more detail!
DANGEROUSLY!
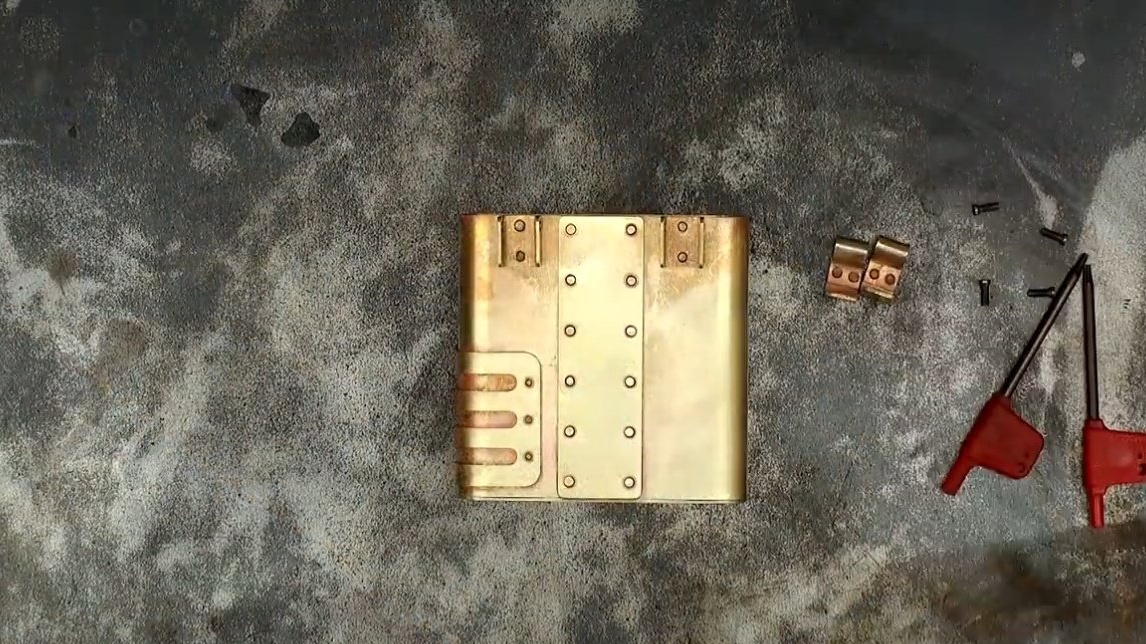
Materials and tools used by the author:
Material List:
- sheet brass;
- copper wire;
- cogs;
- small round neodymium magnets.
Tool List:
- lathe;
- a drilling machine or drill;
- vise;
- drill;
- a suitable tool for cutting sheet brass;
- various patterns and tools for bending;
- gas burner, flux, solder;
- black patina for brass;
- a spray bottle with water and more.
Homemade manufacturing process:
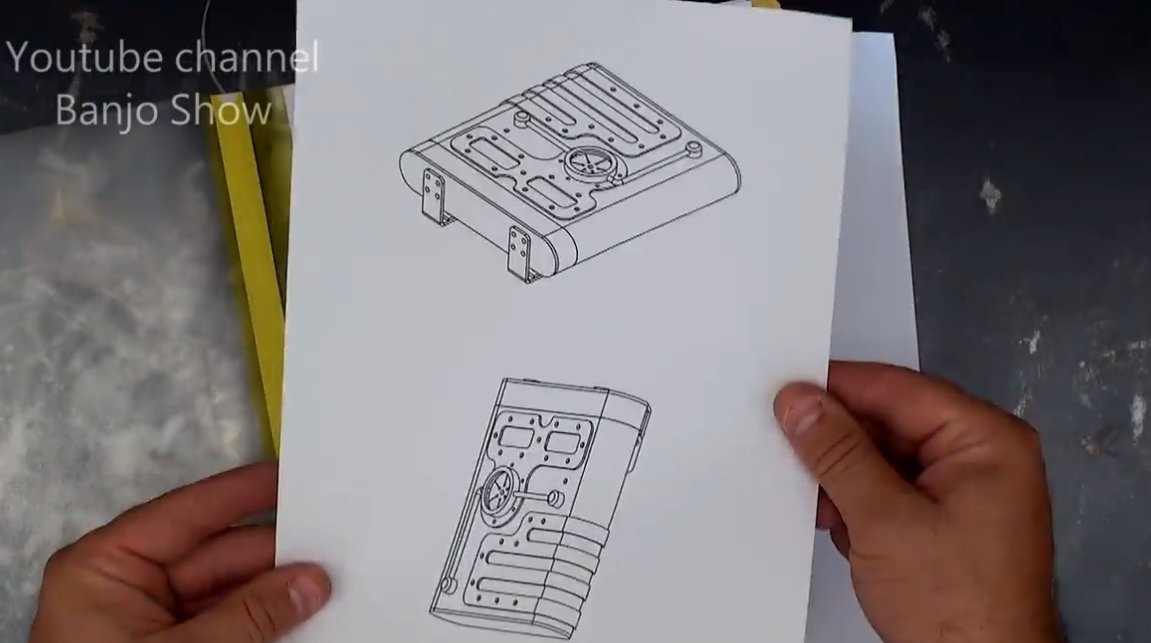
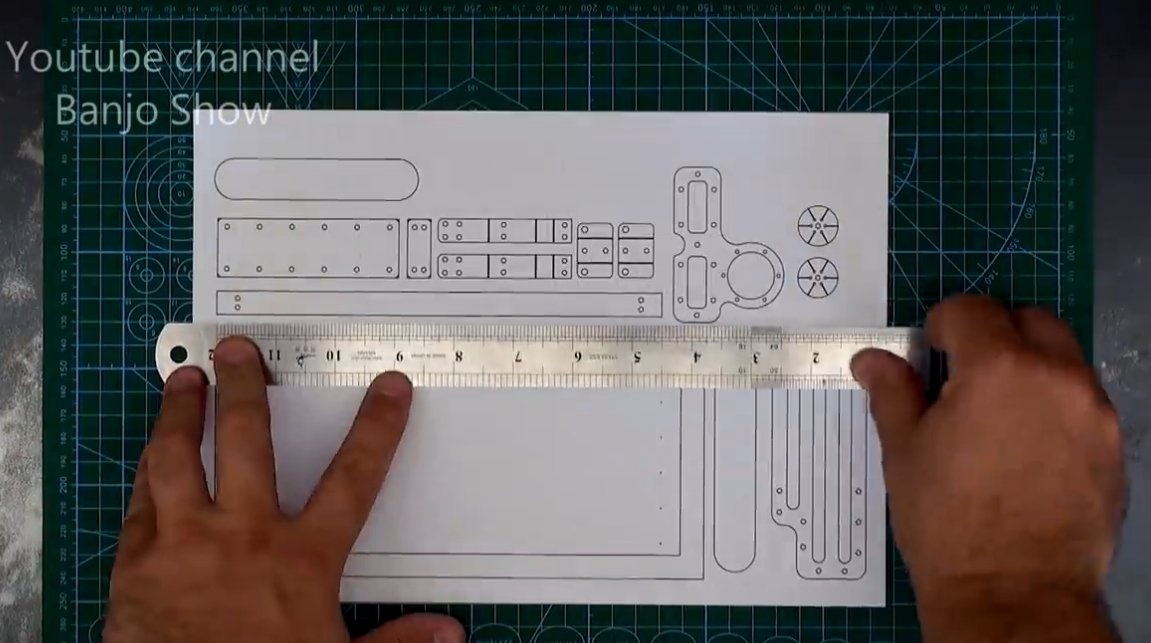
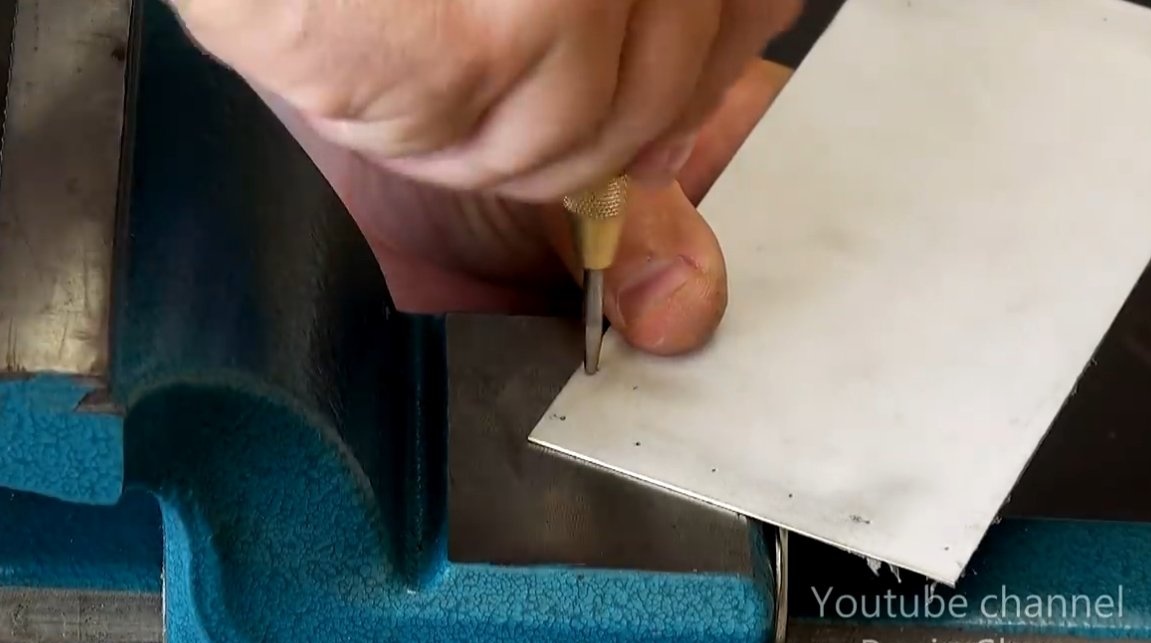
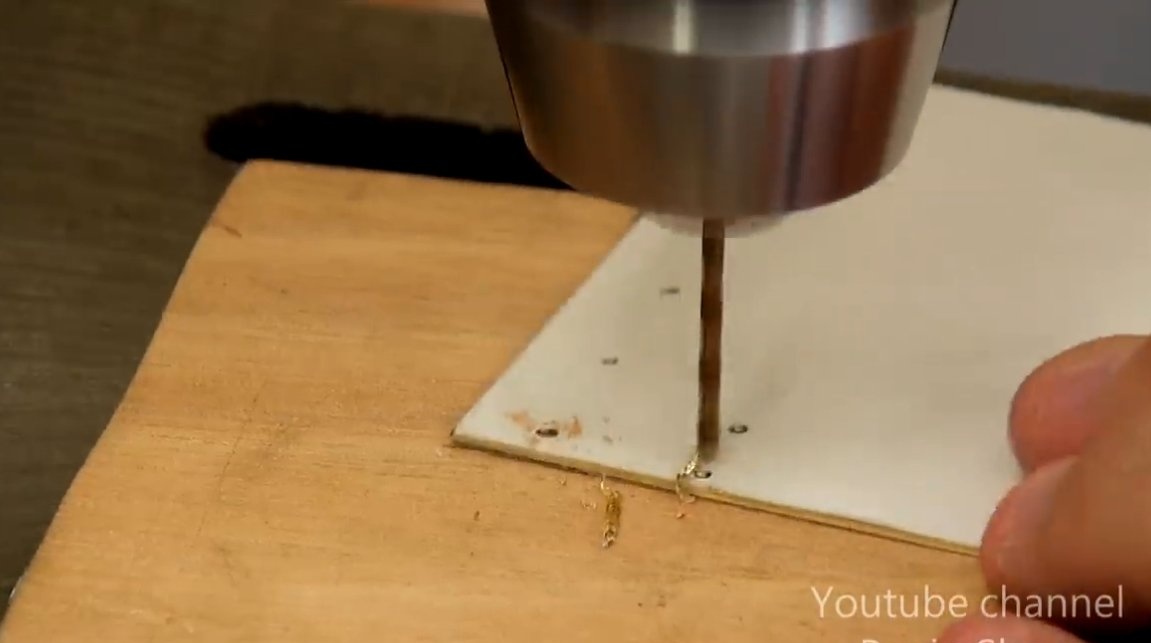
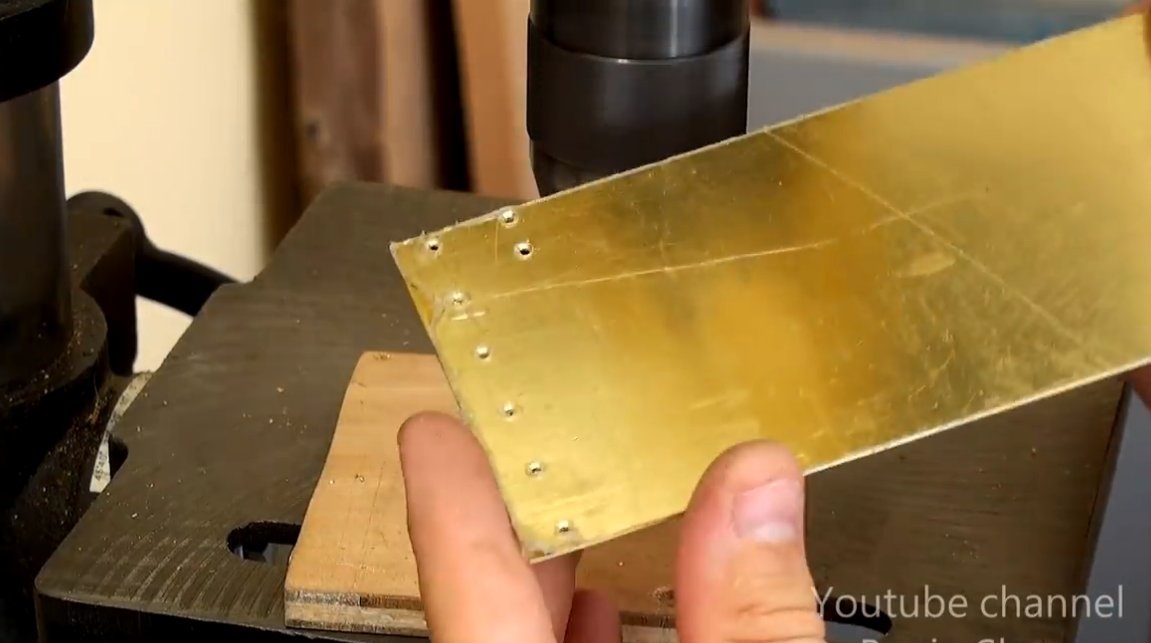
Step one. Cigarette Case Parts
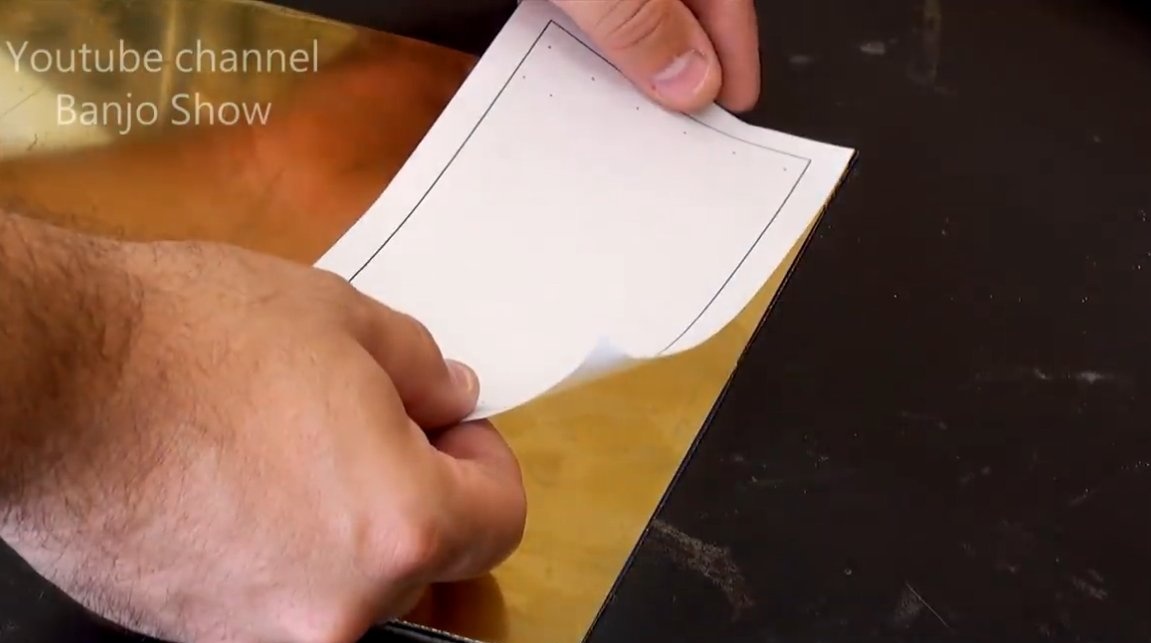
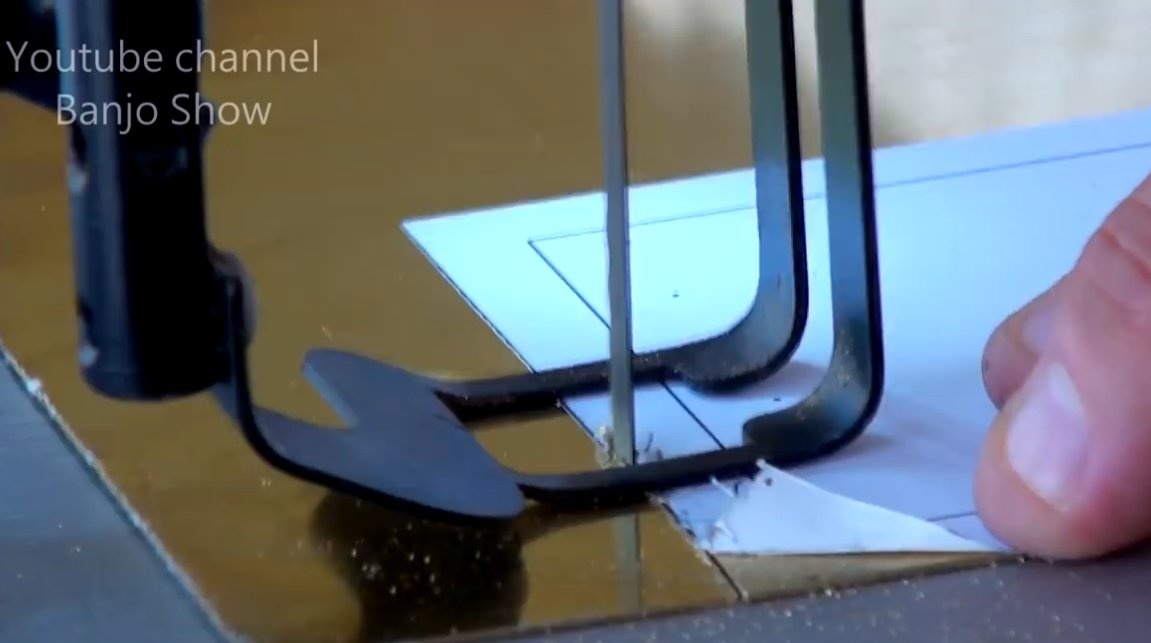
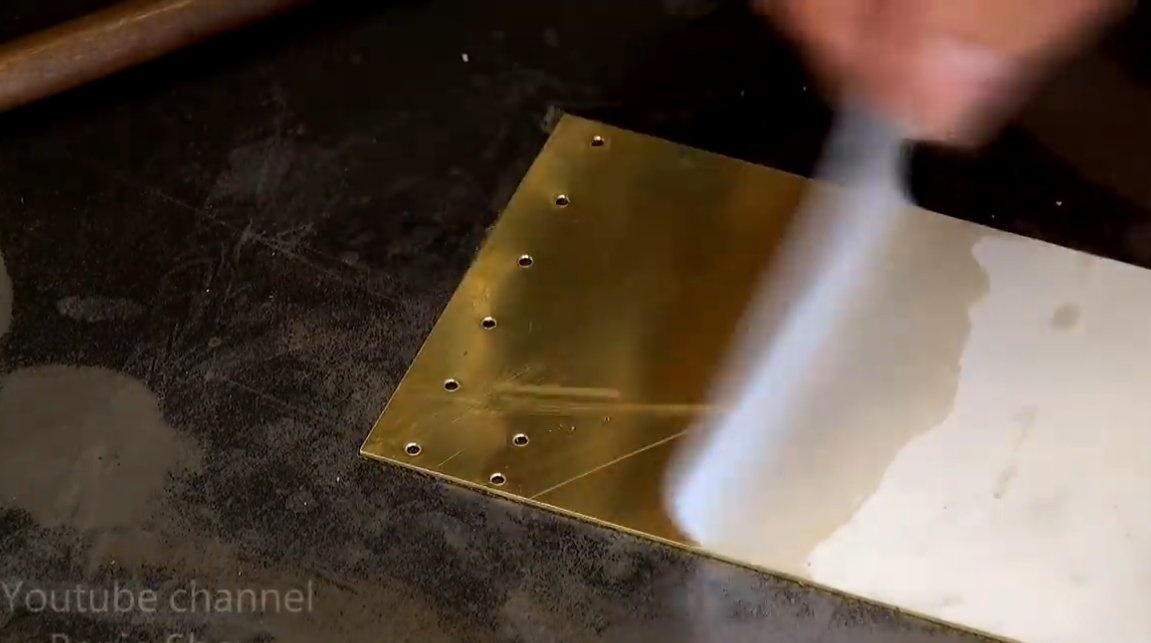
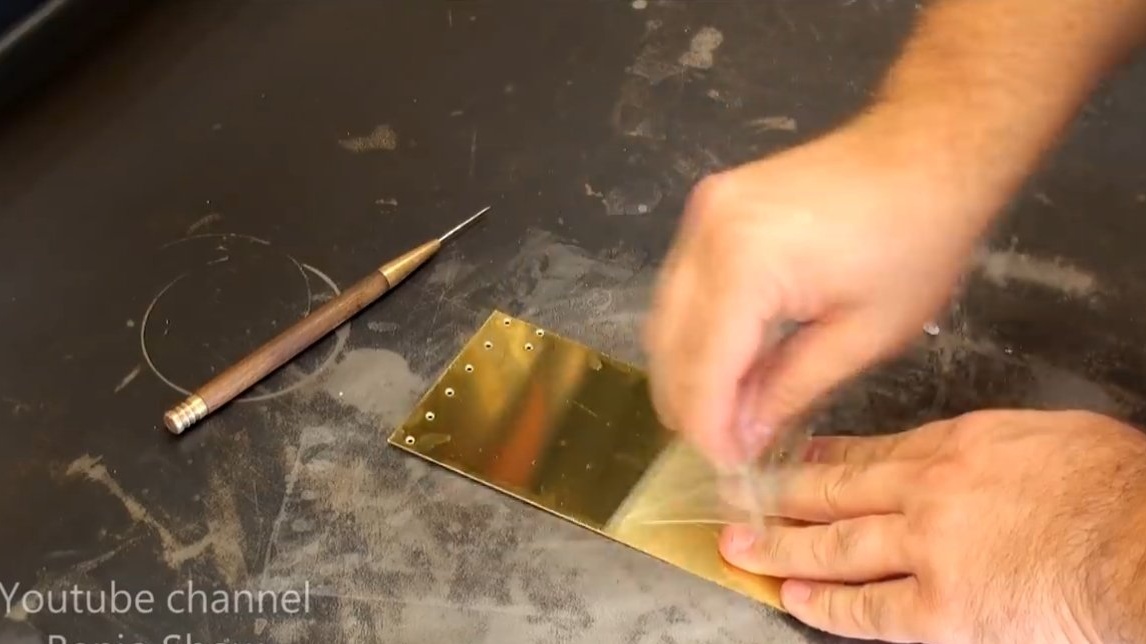
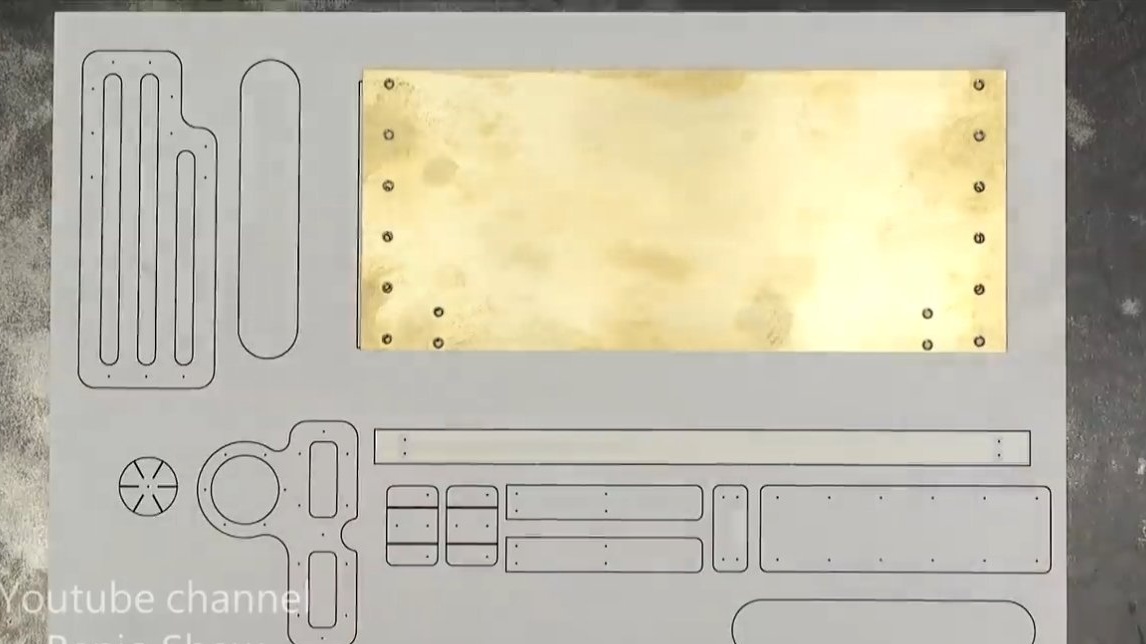
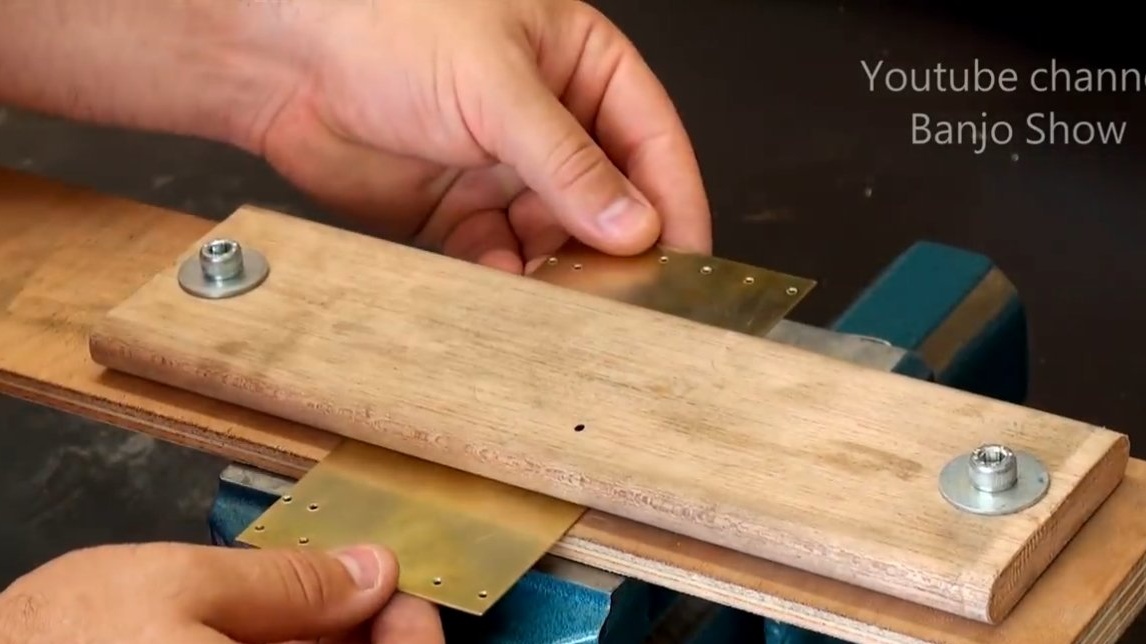
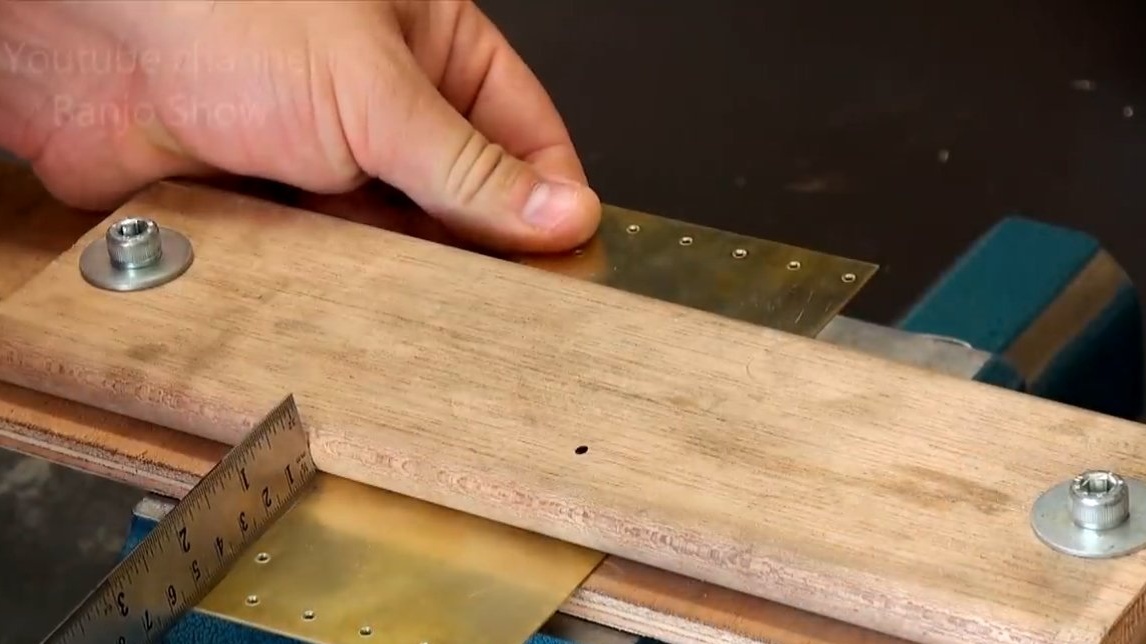
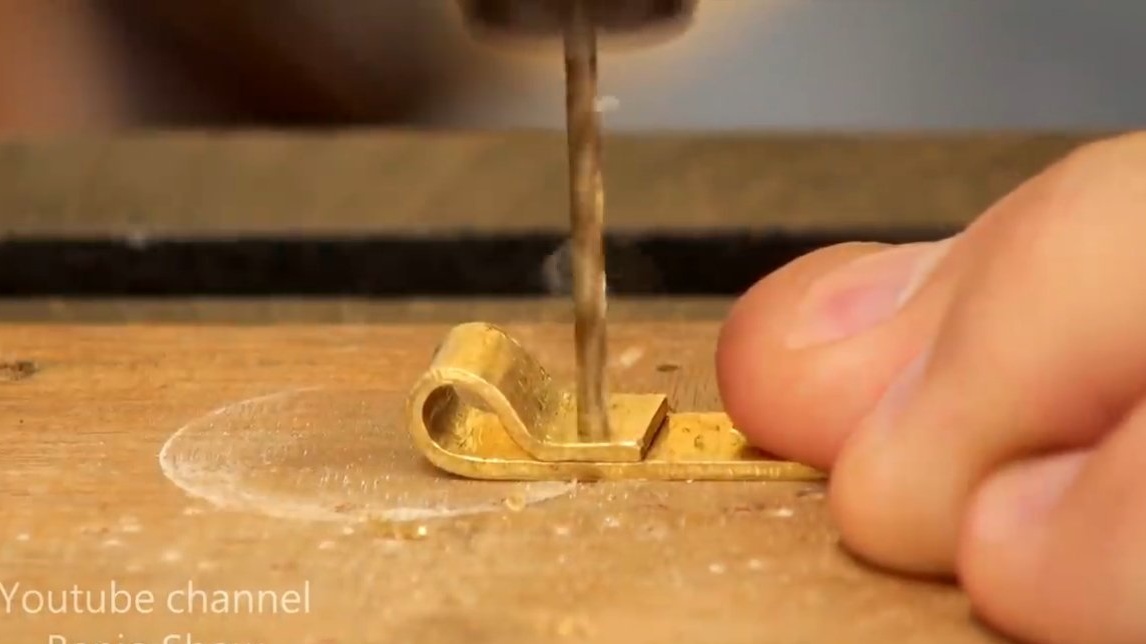
First of all, we cut out the necessary details for the manufacture of a cigarette case. The author made blueprints on paper, and brass parts are cut out on them. A manual jigsaw is suitable for cutting, but it is better to use a jigsaw machine, and a drill will also be useful, and you will need a drill.
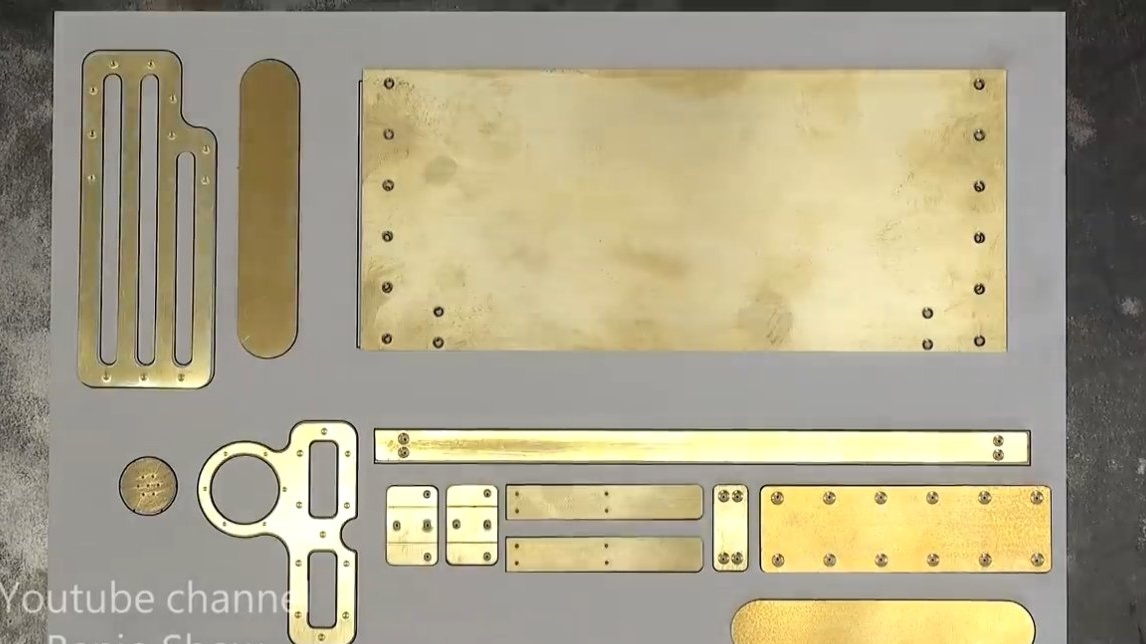
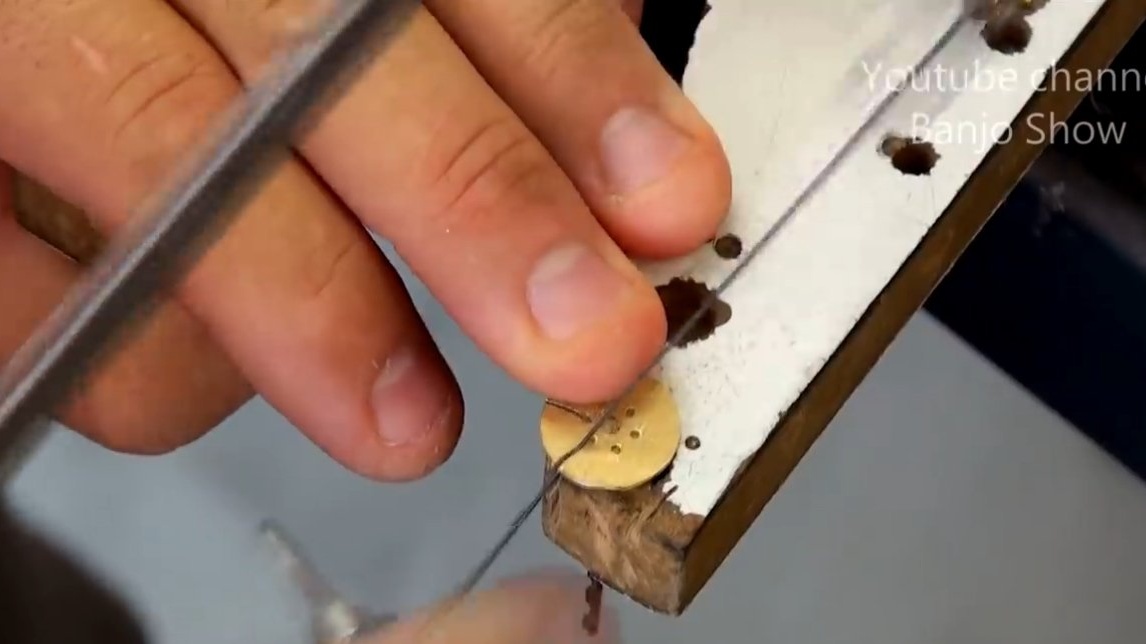
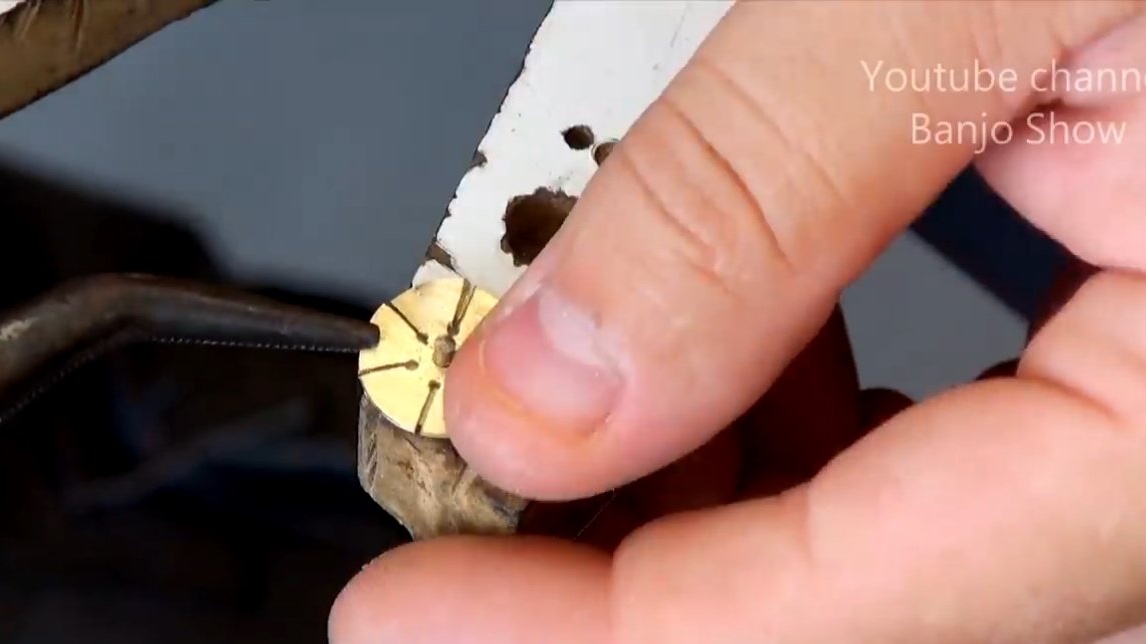
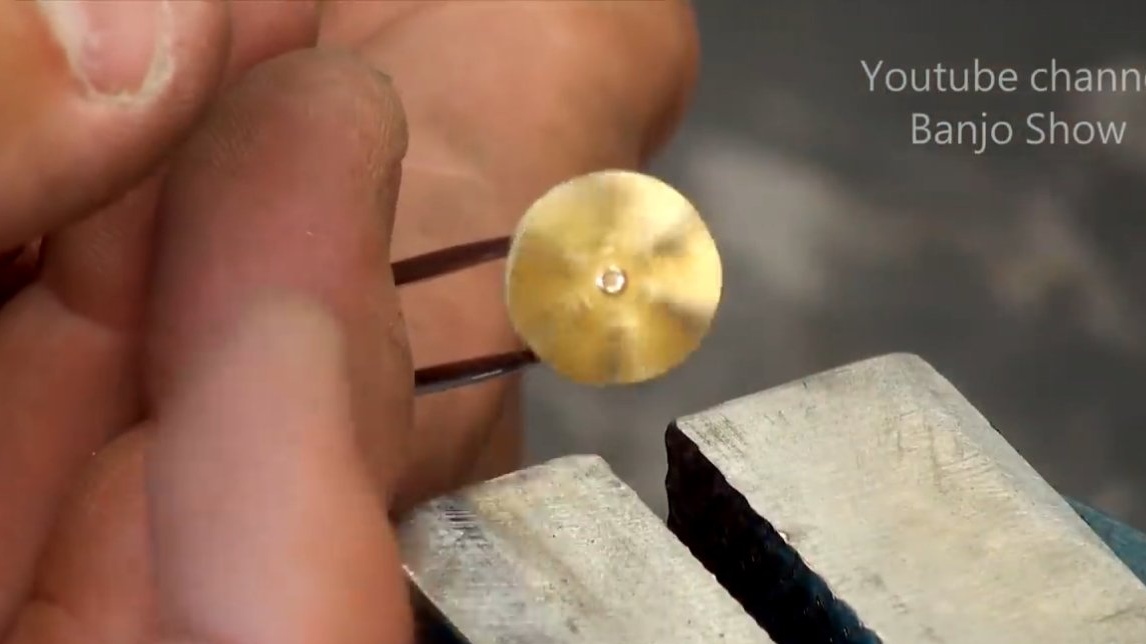
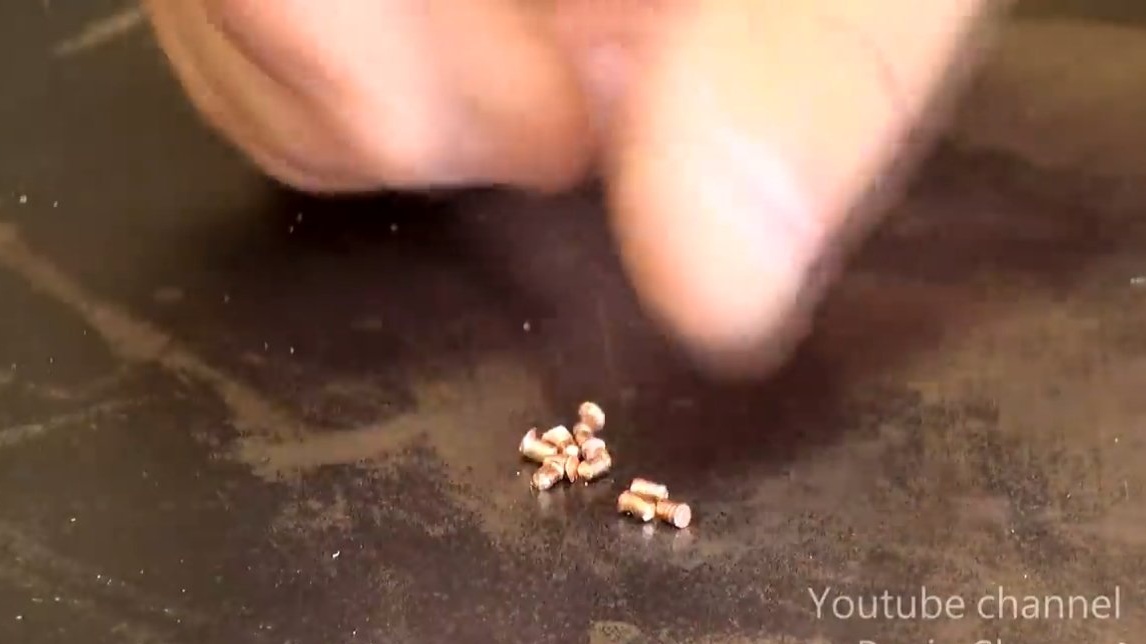
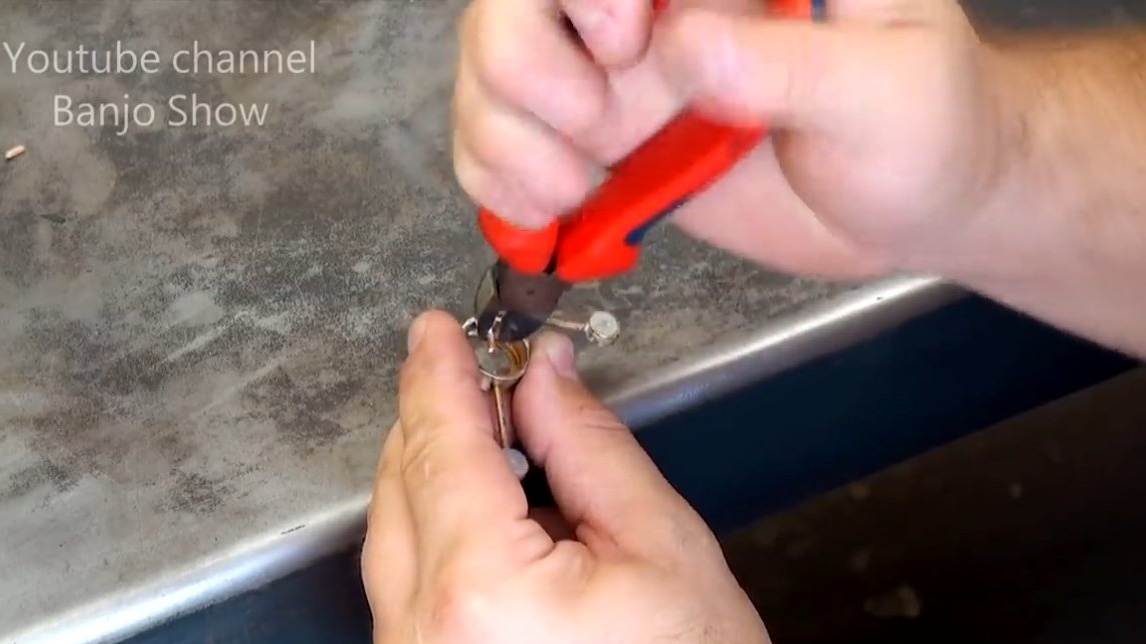
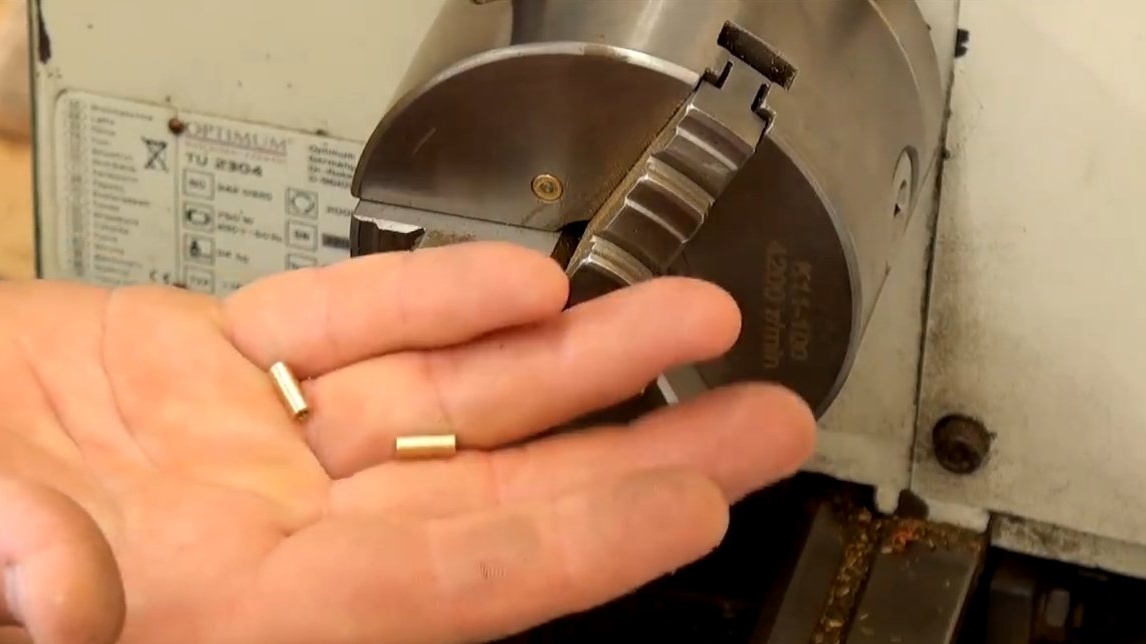
Do not forget to make a highlight of the cigarette case - propeller. The author cuts a circle from brass, drills holes, and then makes cuts with a jigsaw and bends the blades. The axis can be made from a piece of copper wire so that the propeller does not fly off, slightly flatten the wire from above.
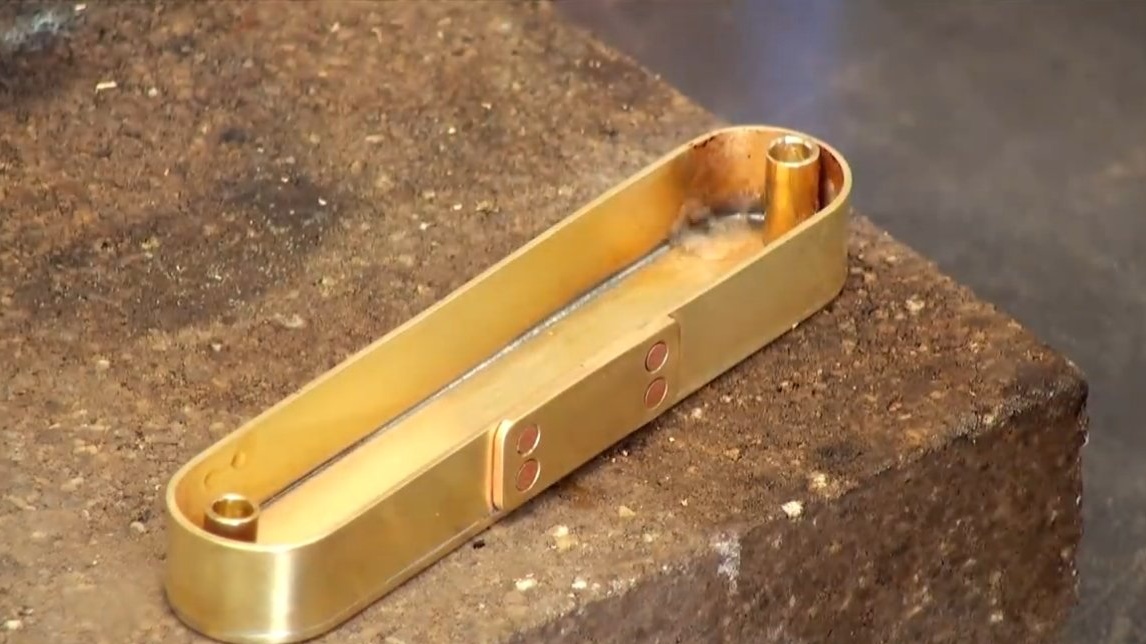
Step Two Body assembly
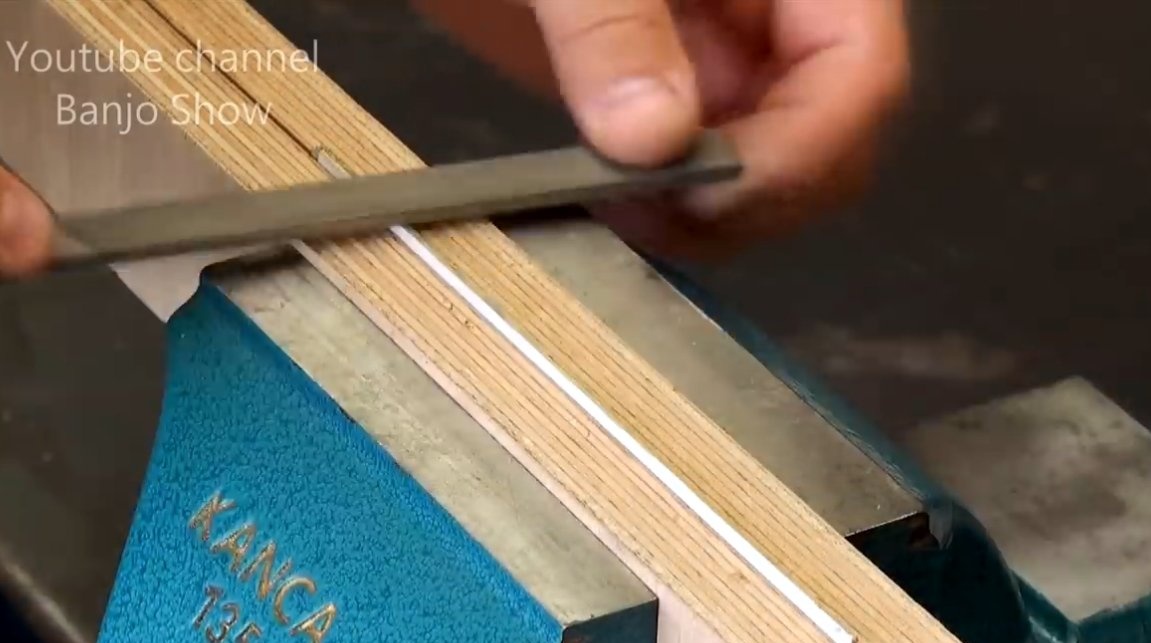
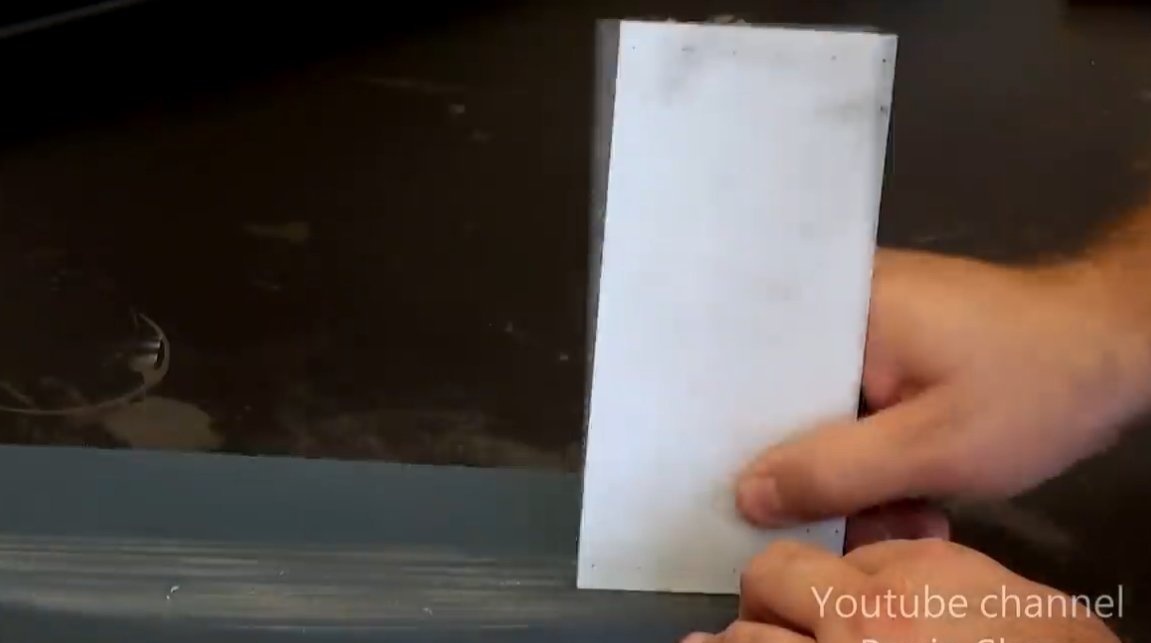
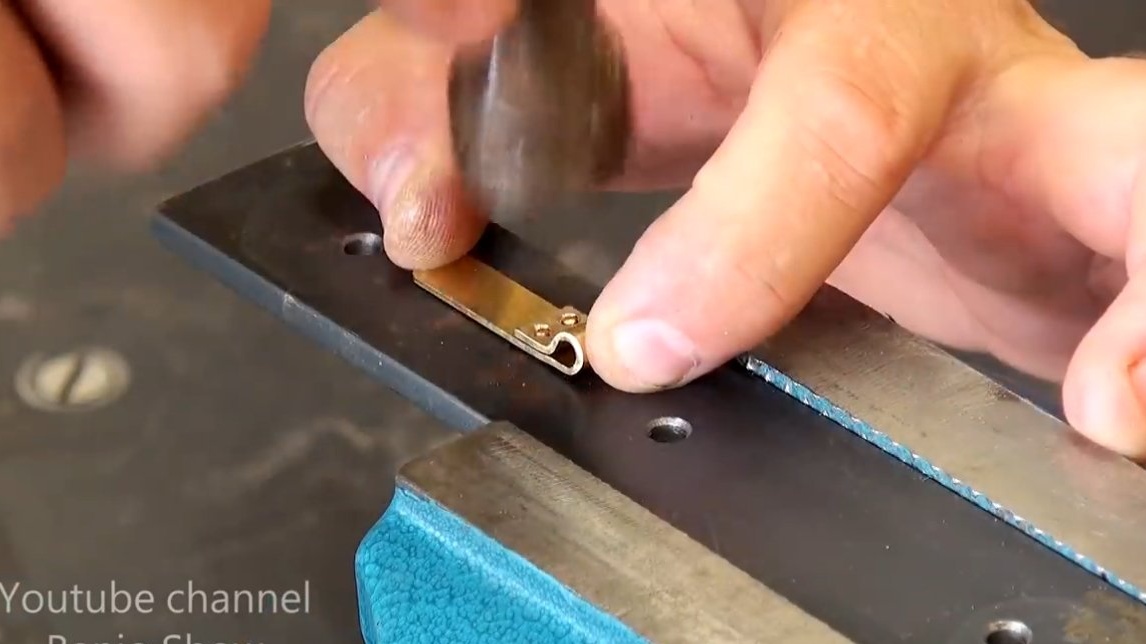
To assemble the housing, the parts must first be bent. The author has a special template for bending, which he made of wood. Brass is a fairly soft material and the author bends everything with his hands.
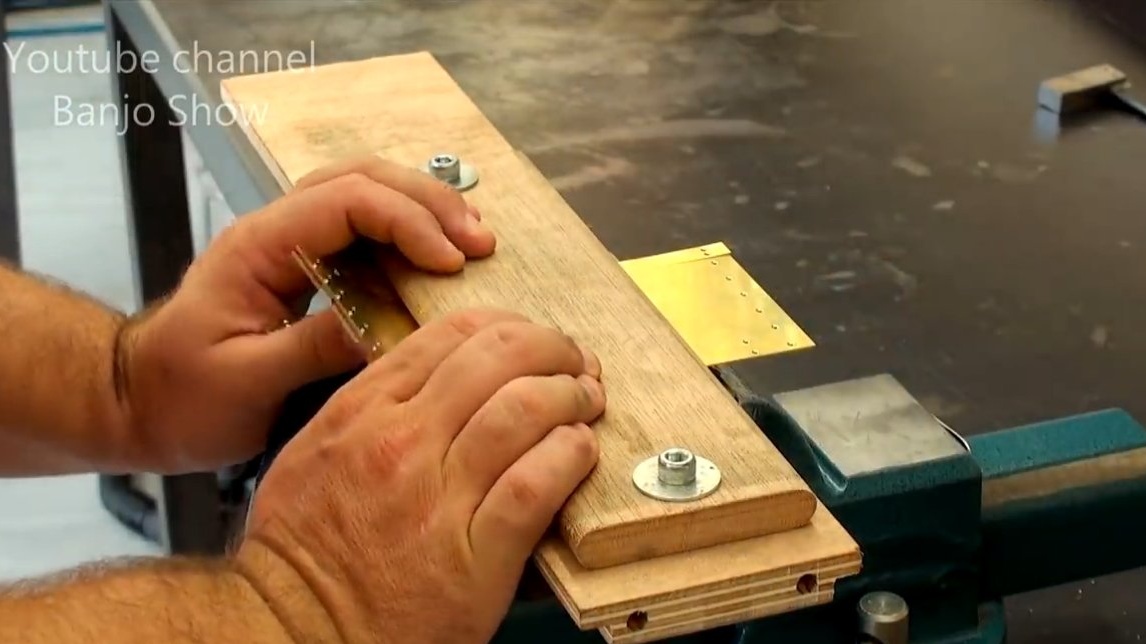

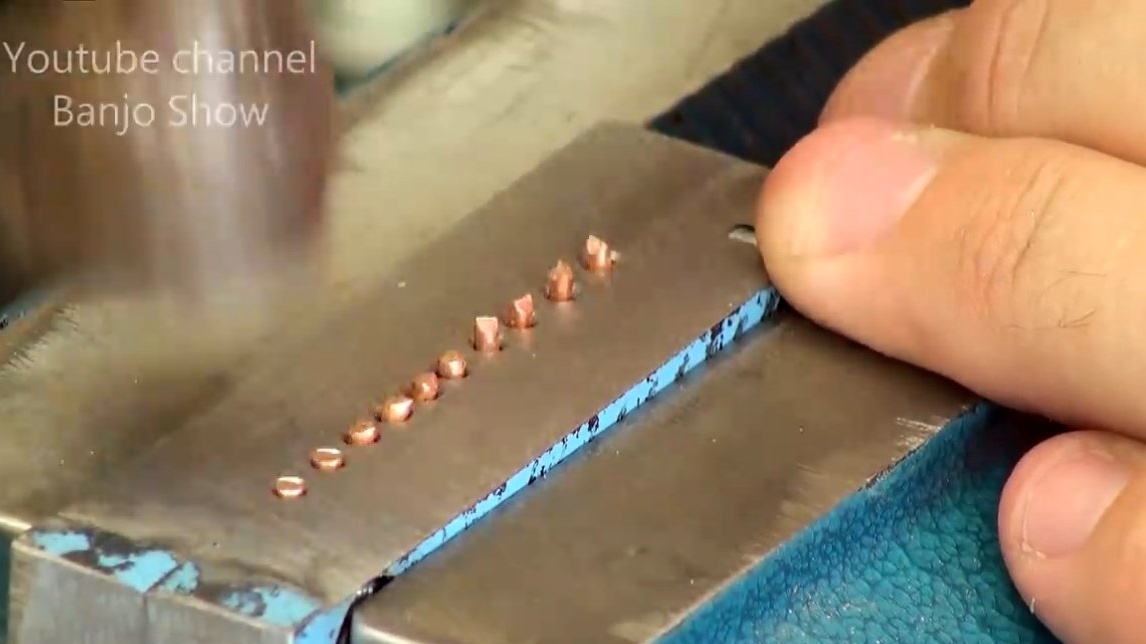

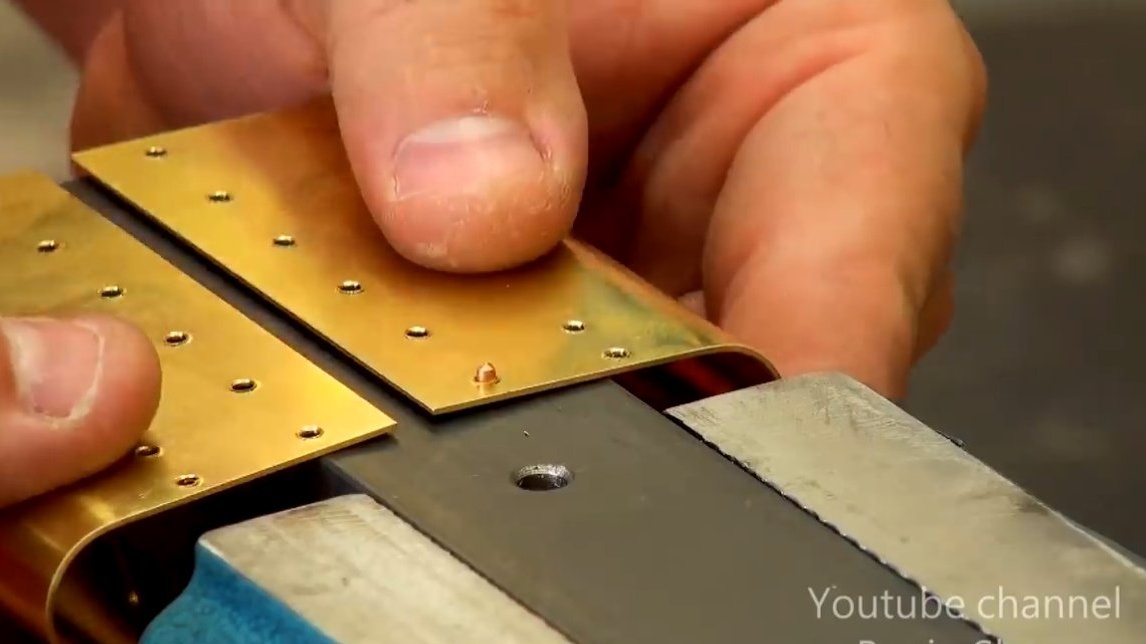
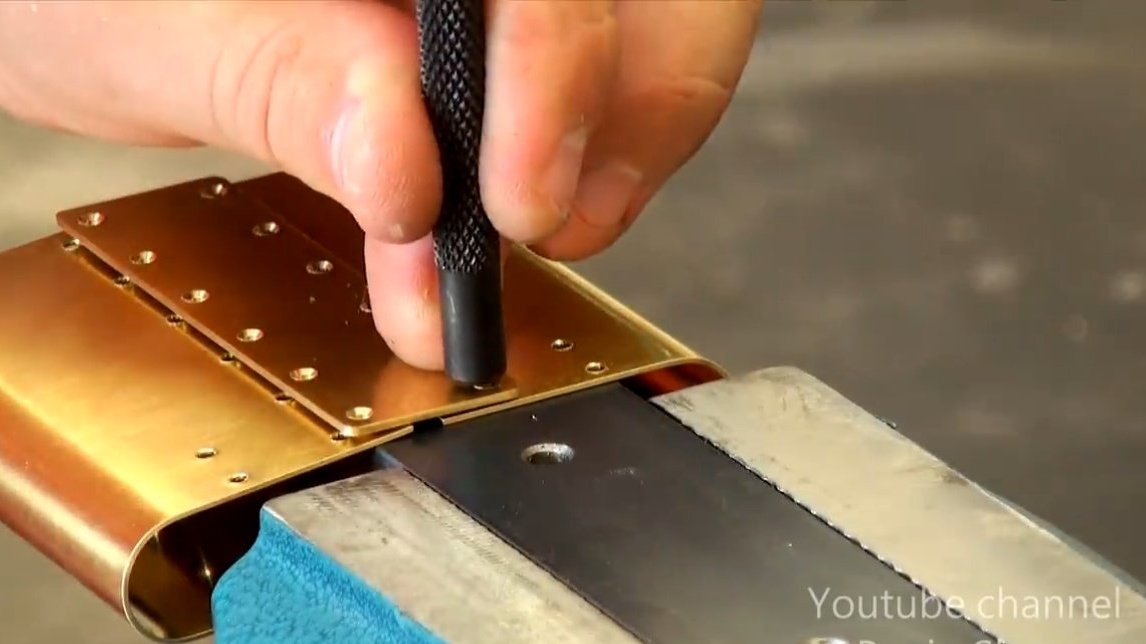
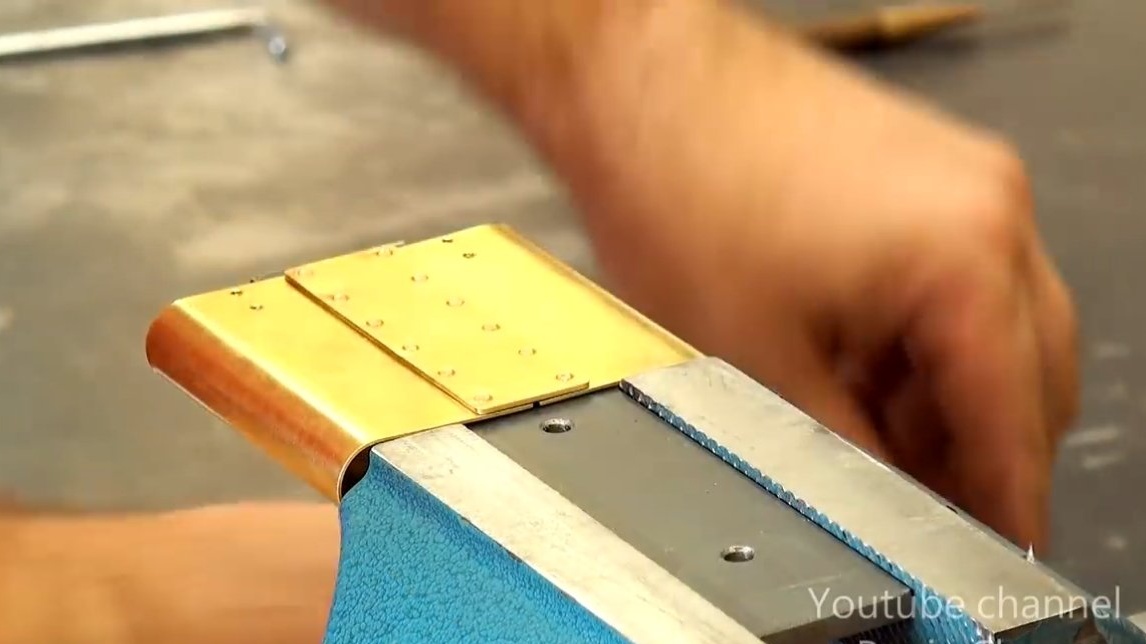
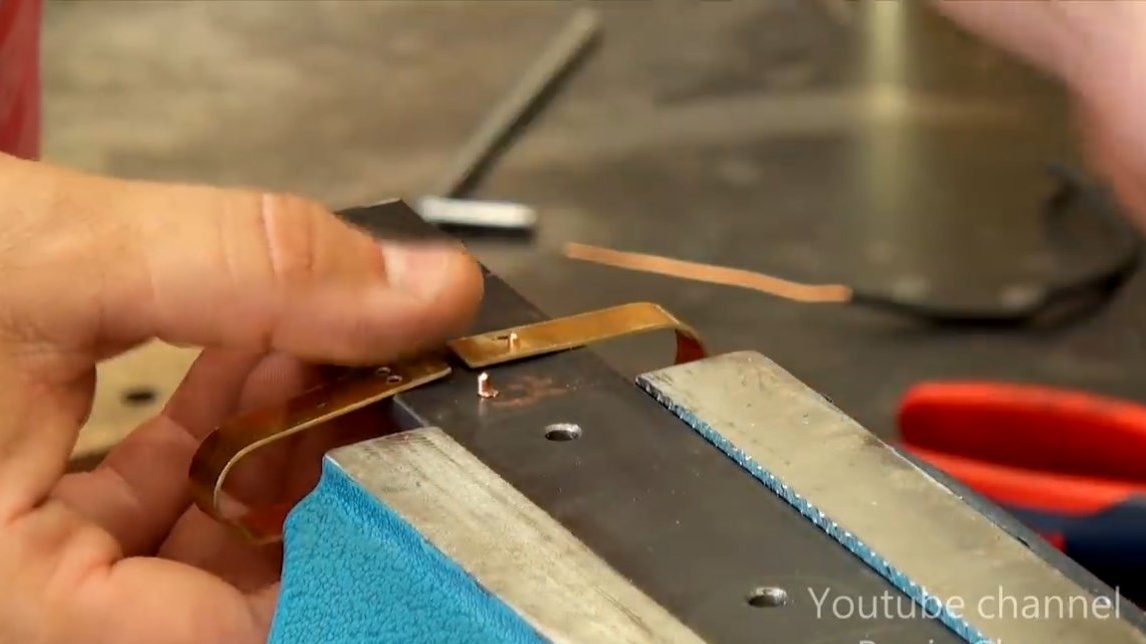

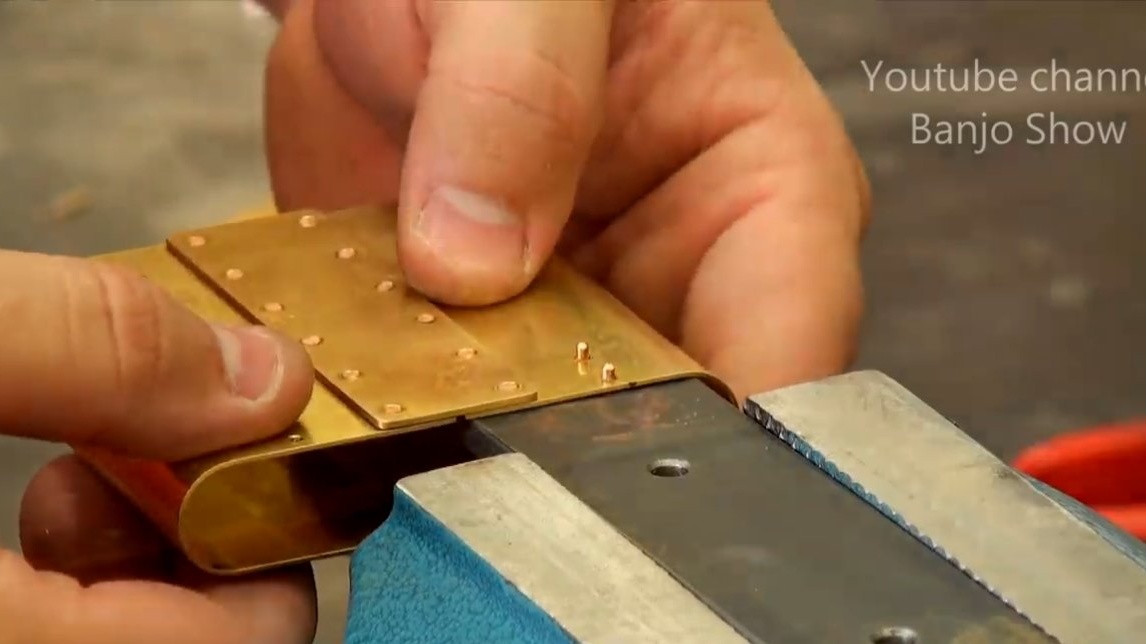
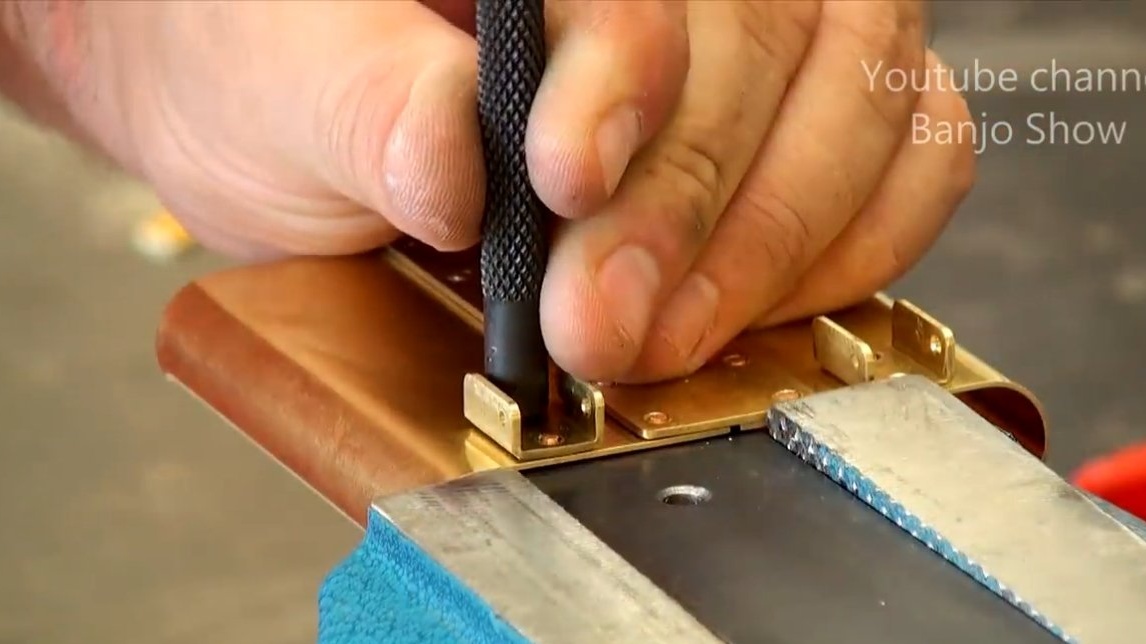
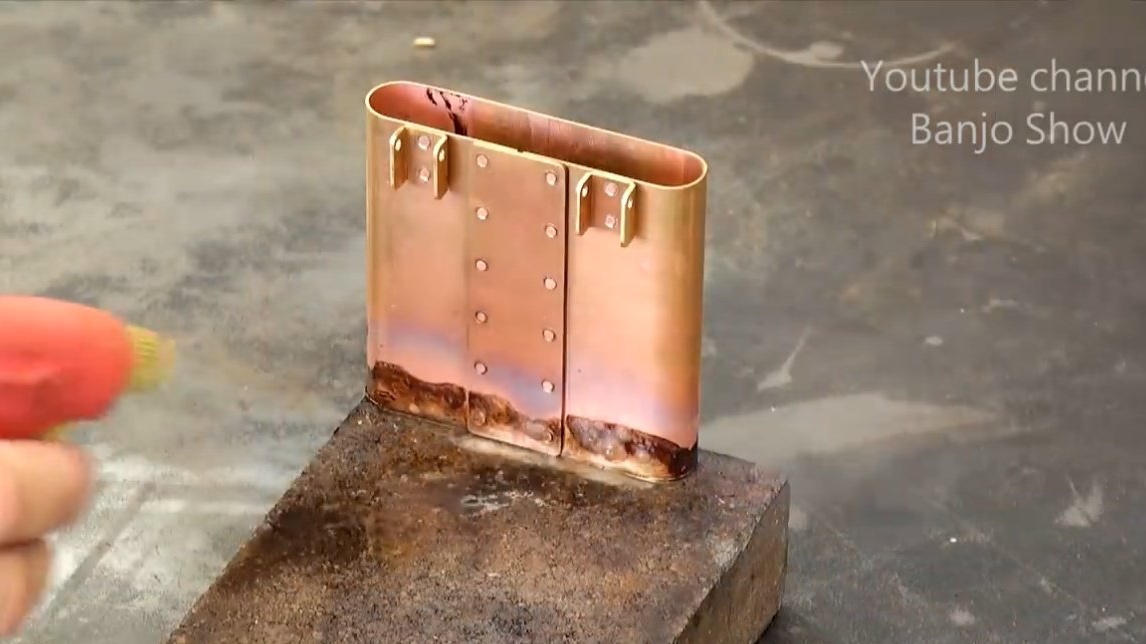
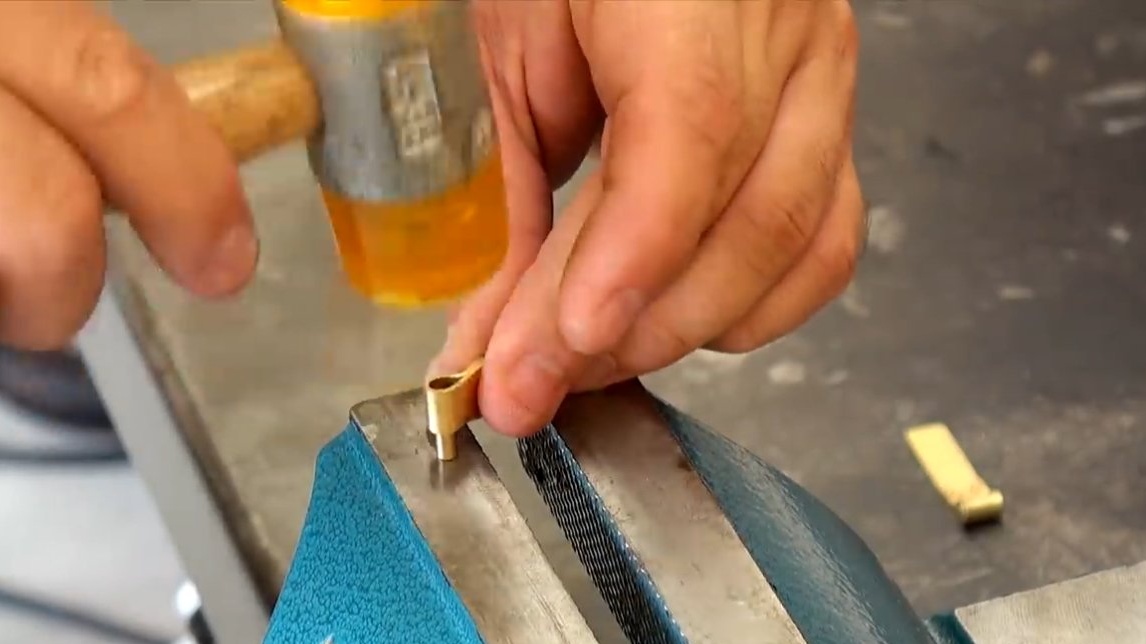
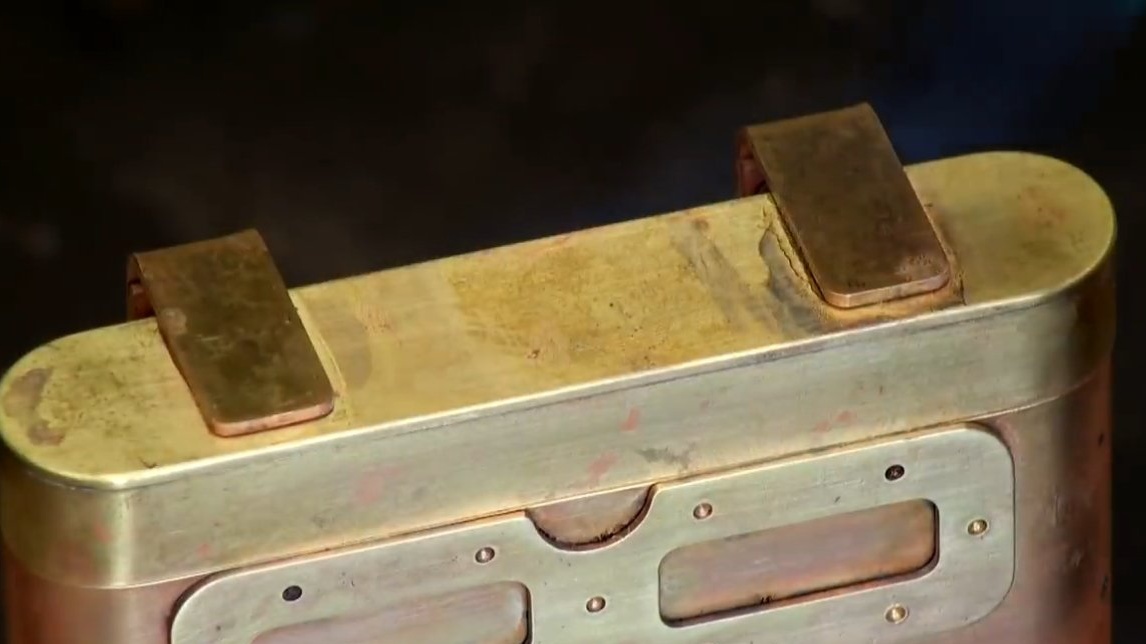
As a result, we get two edges that need to be connected to each other. Everything is connected on copper rivets, which the author himself makes of copper wire. When the ends are connected, you can install the bottom. The author solders the bottom using a gas burner, and after grinding with sandpaper, the product acquires a solid look. The lid is made in the same way, at the end the author installed hinges on the rivets, on which the lid will be hung.
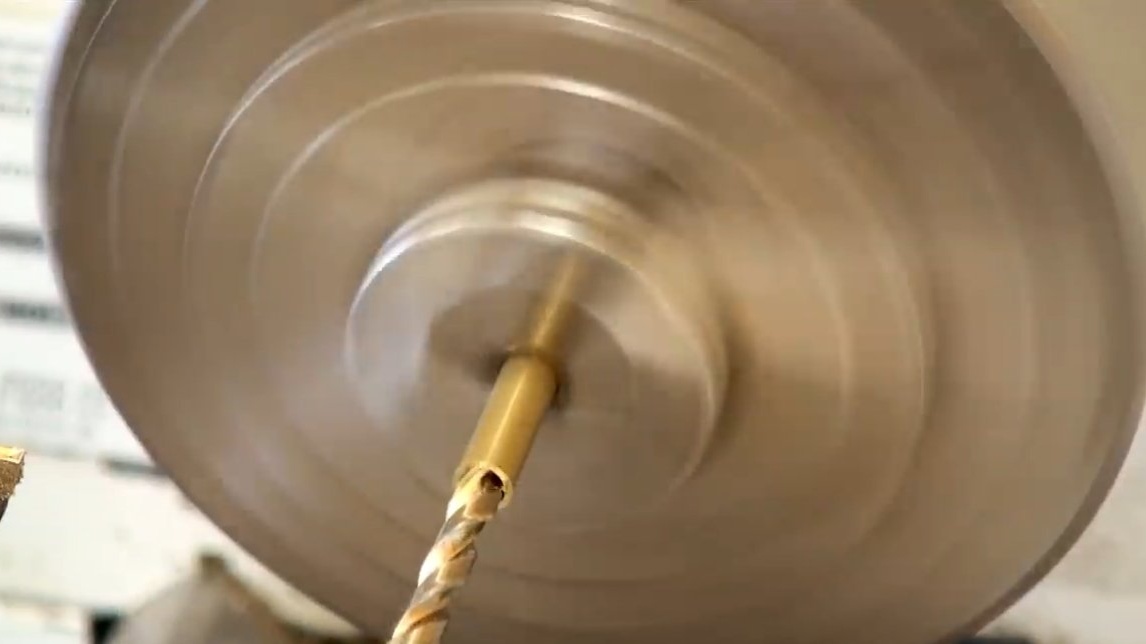
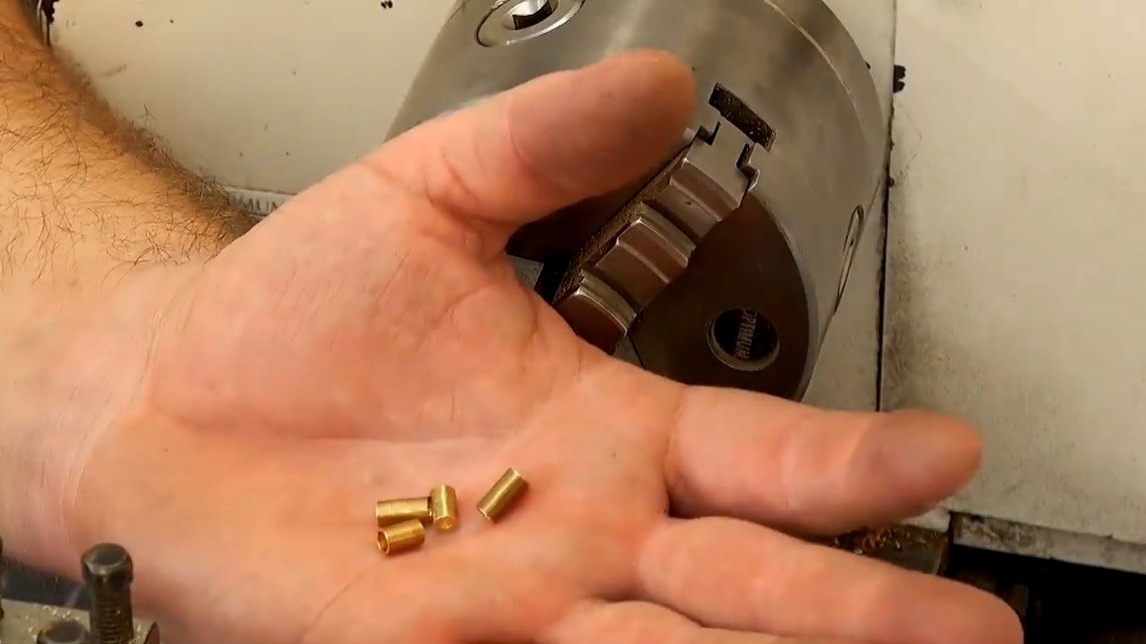
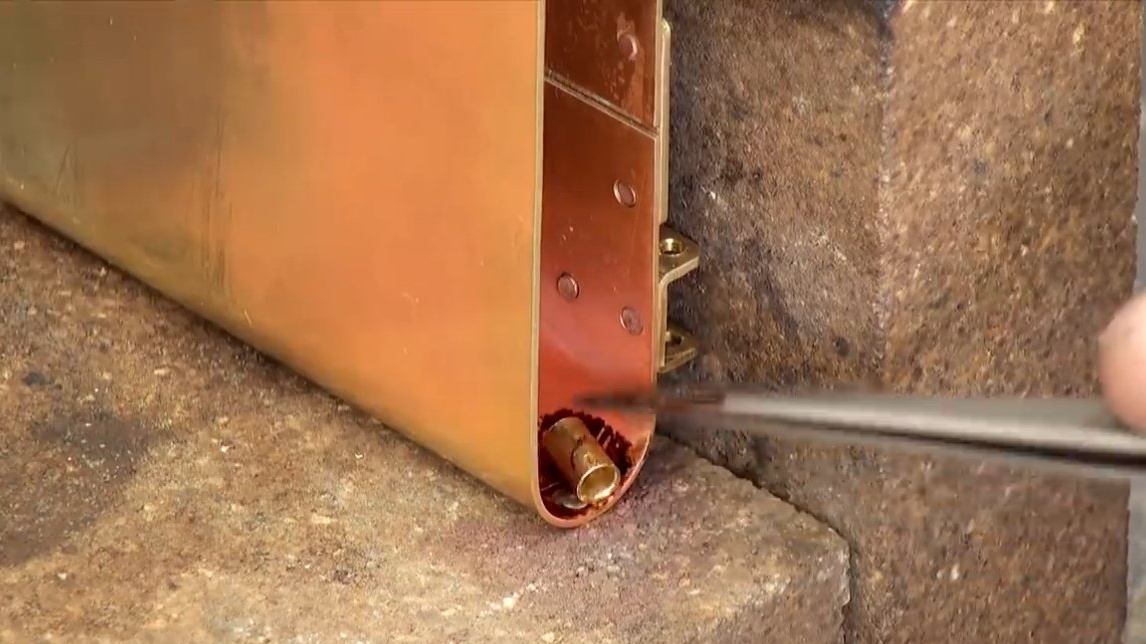
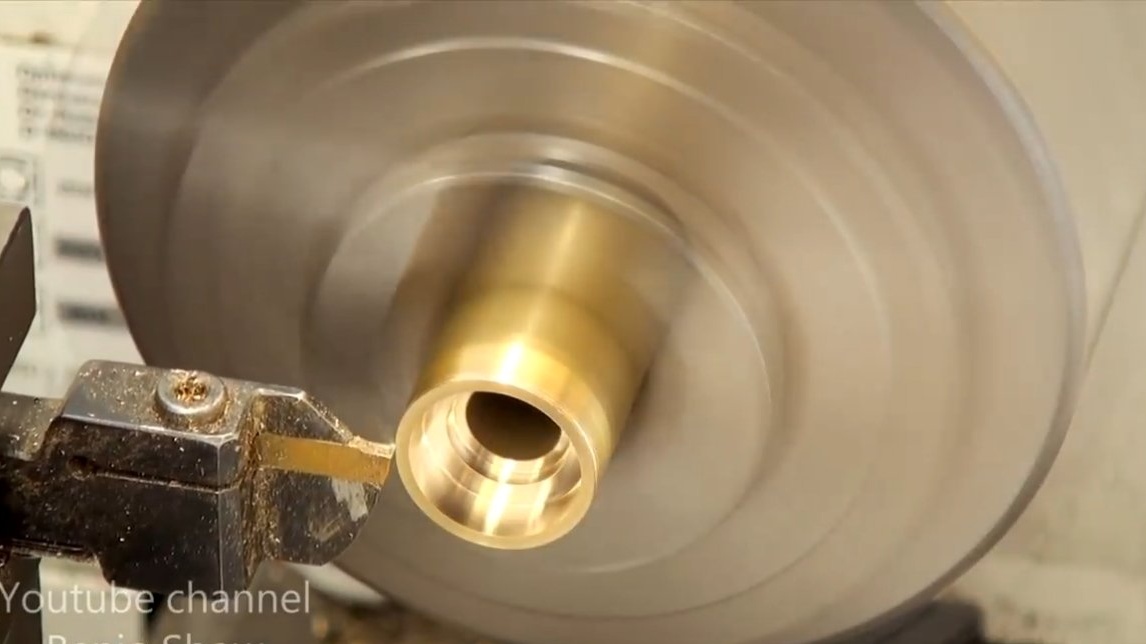
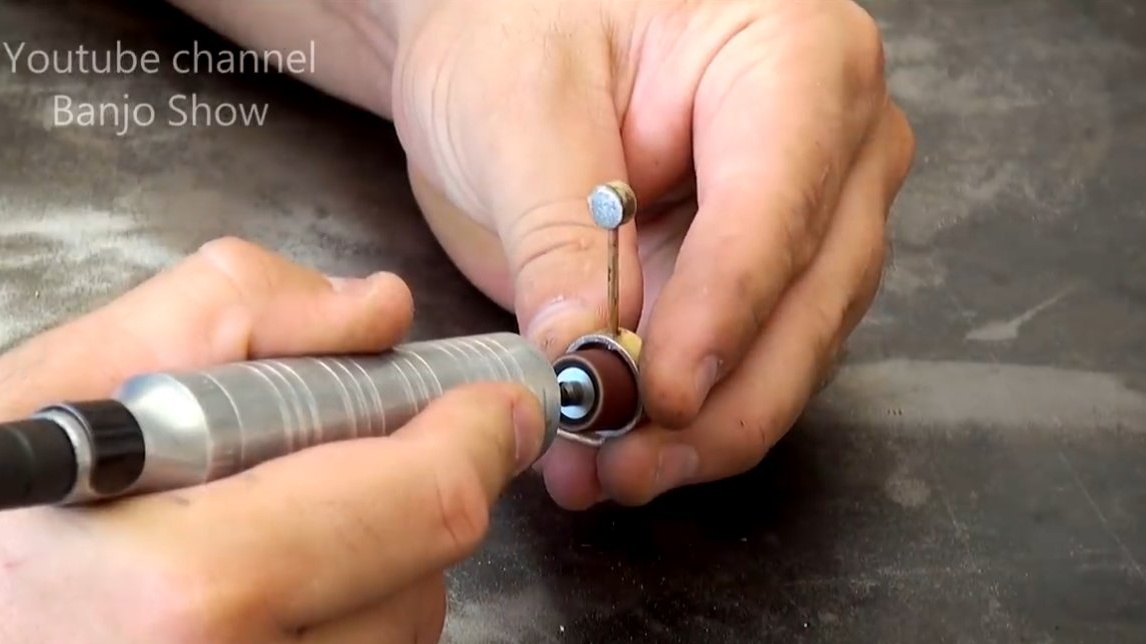
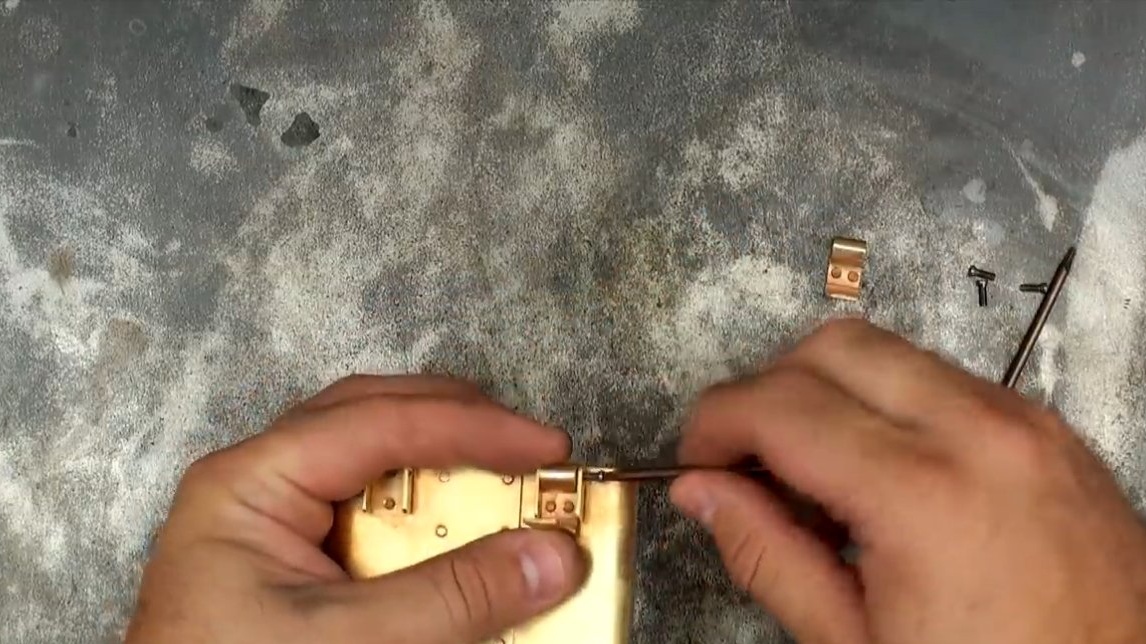
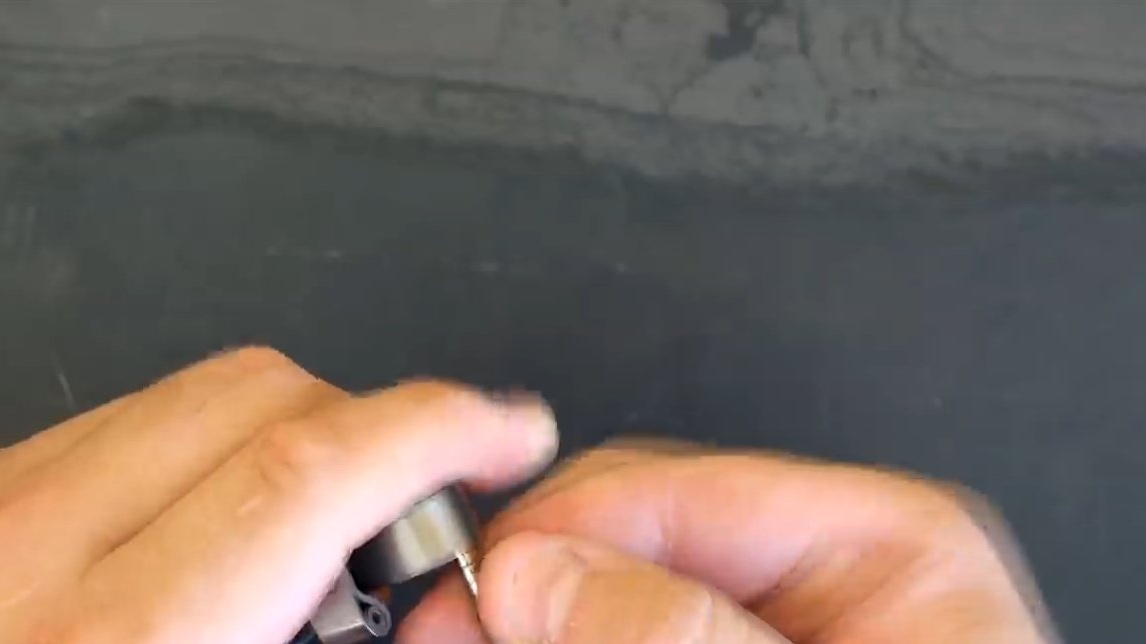
Step Three Tubes for magnets
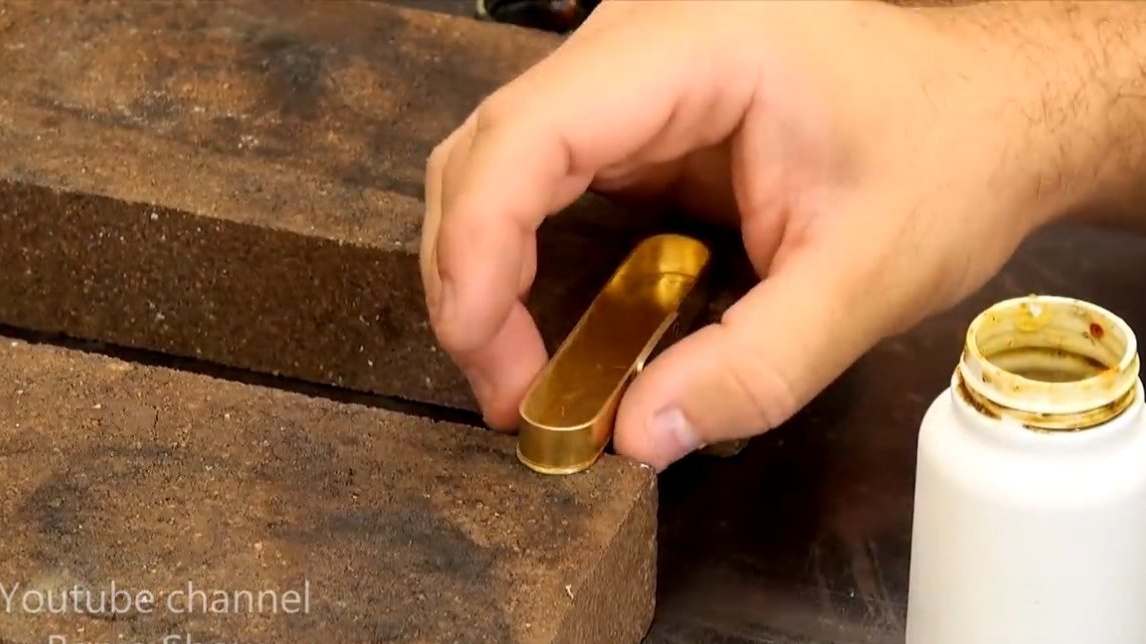
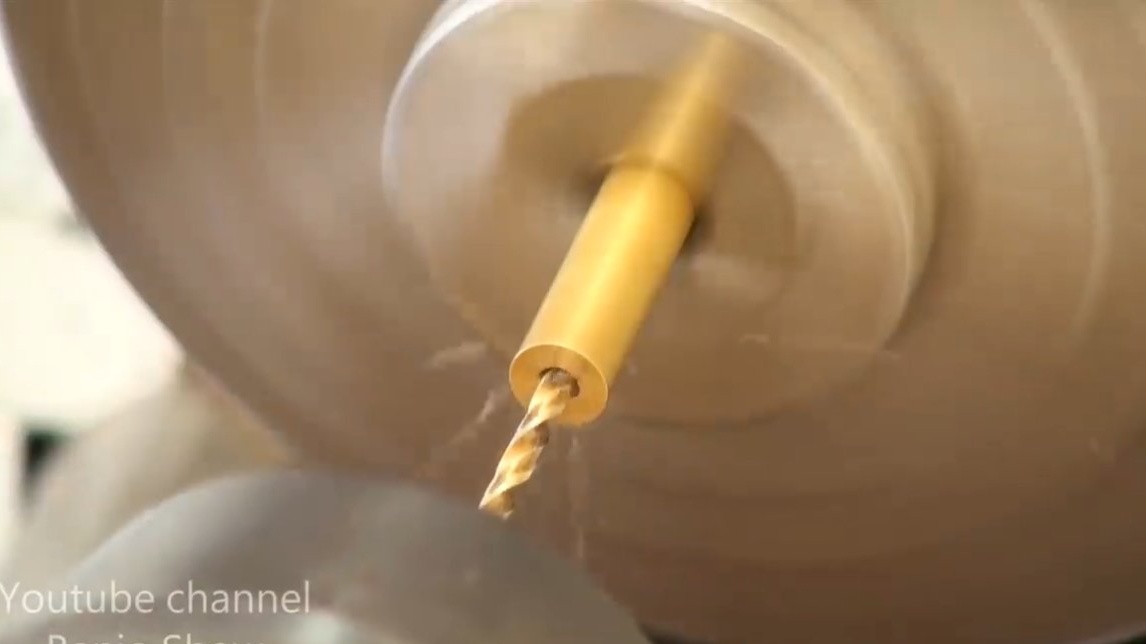
The author installed two tubes in the lid, similar ones are also built into the cigarette case itself, the tubes are located opposite one another.The author bored the inner diameter so that round neodymium magnets could be pressed into them.
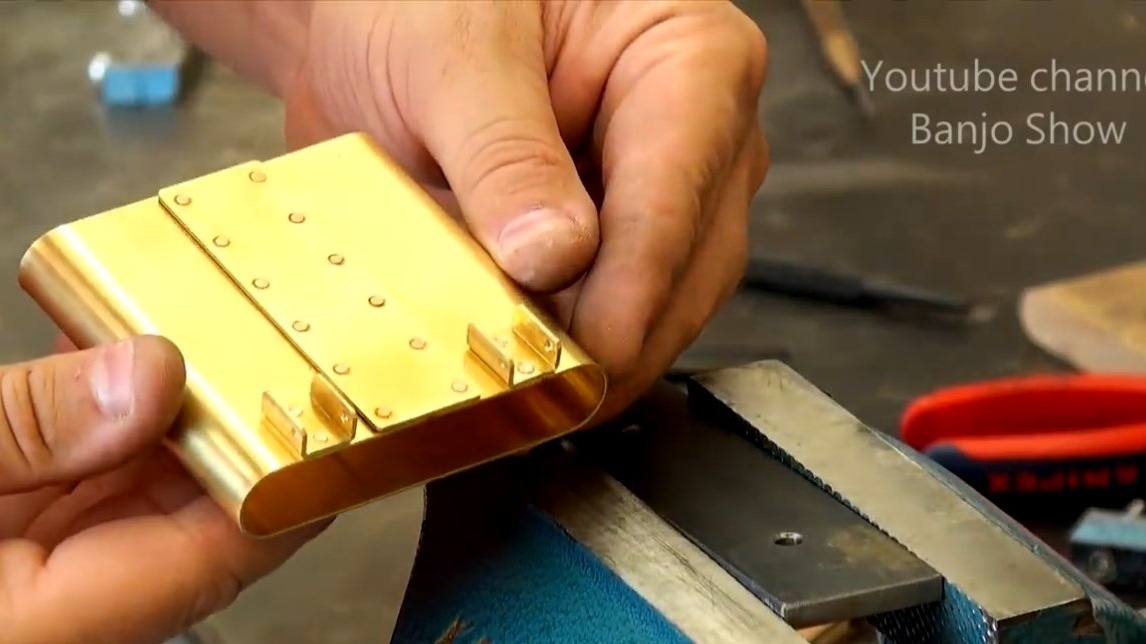
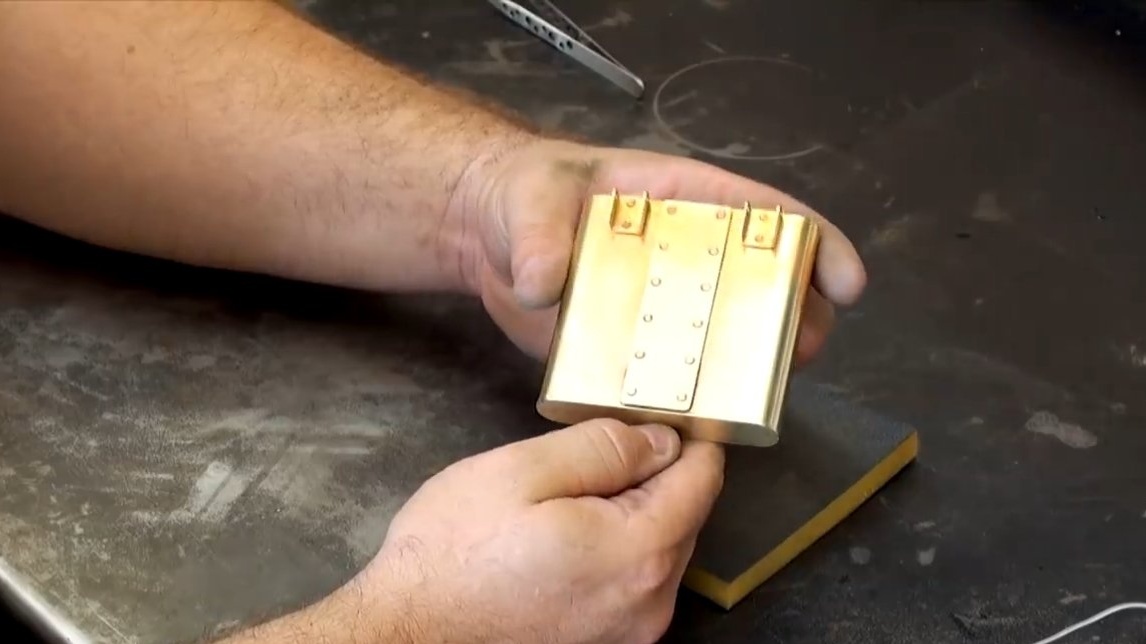
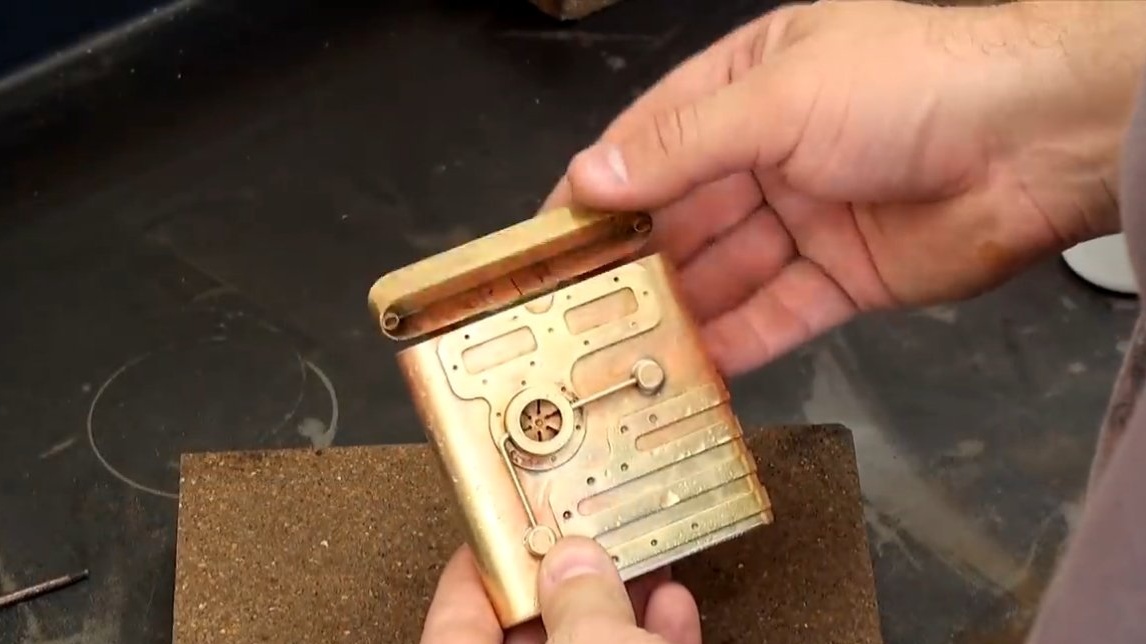
Step Four Cigarette case finish
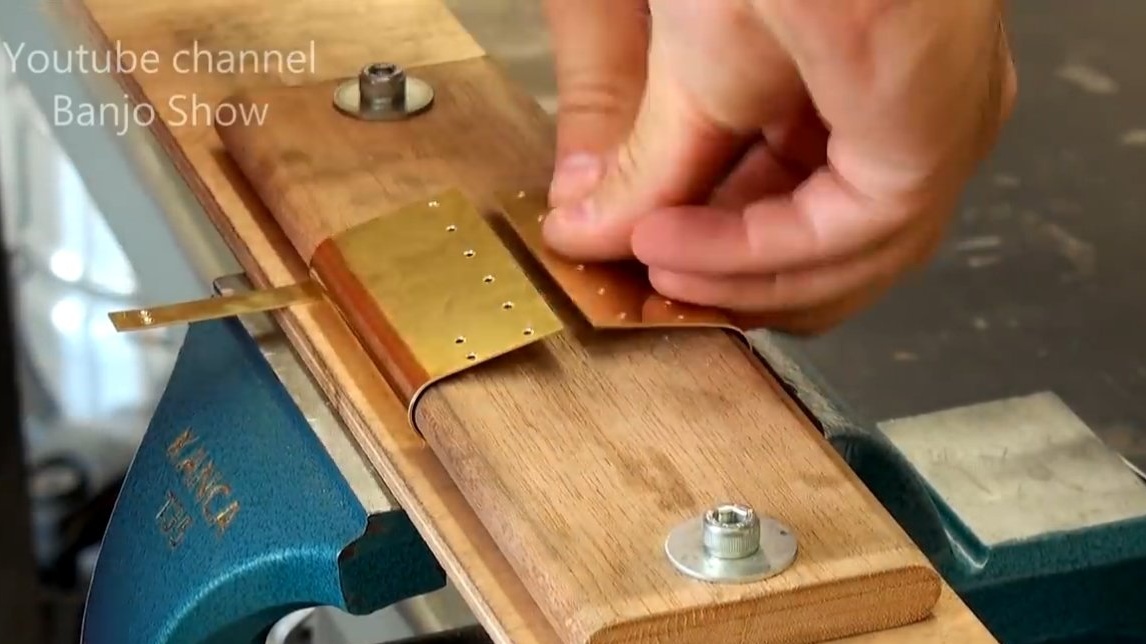
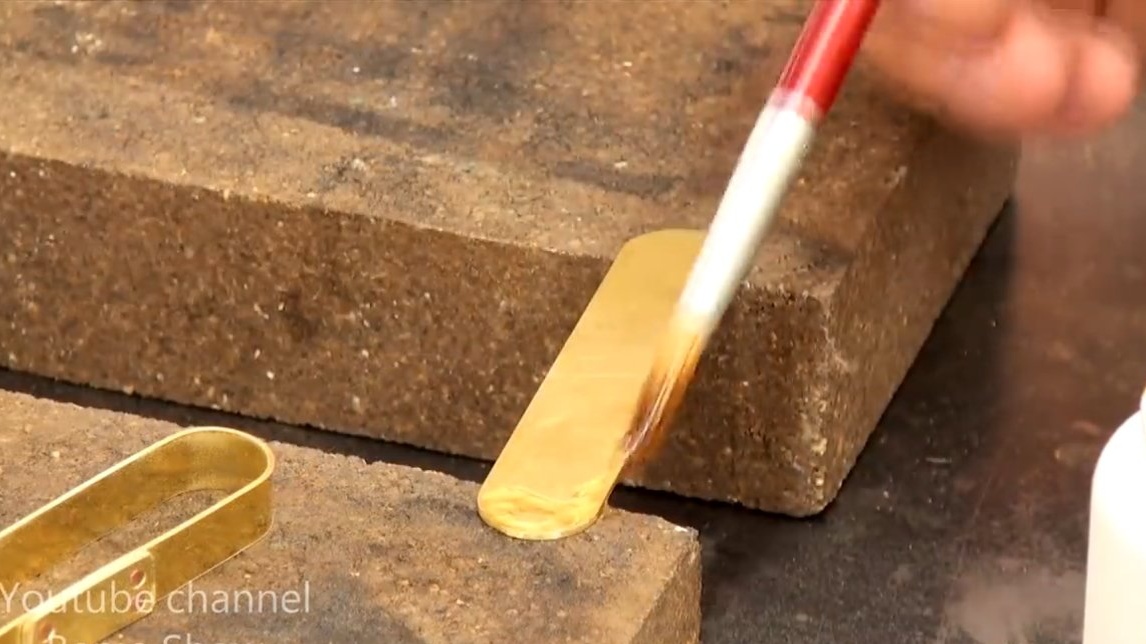
We bend the remaining details that will serve as the relief of the cigarette case. These parts need to be well flooded from the inside, they should have so much solder so that they can be soldered after warming up to the cigarette case.
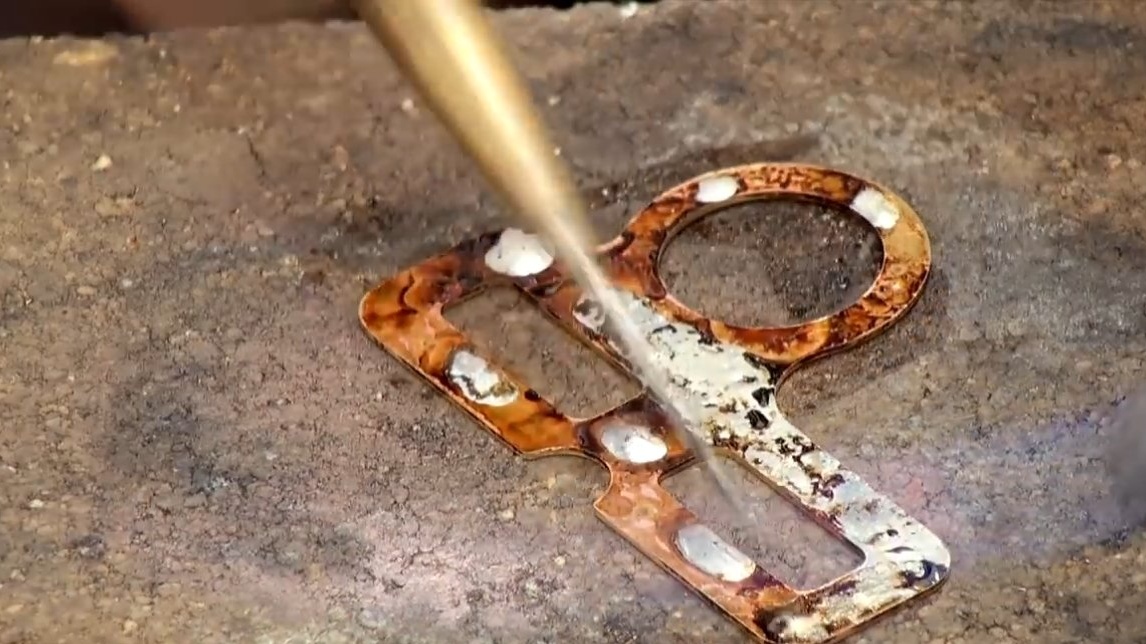
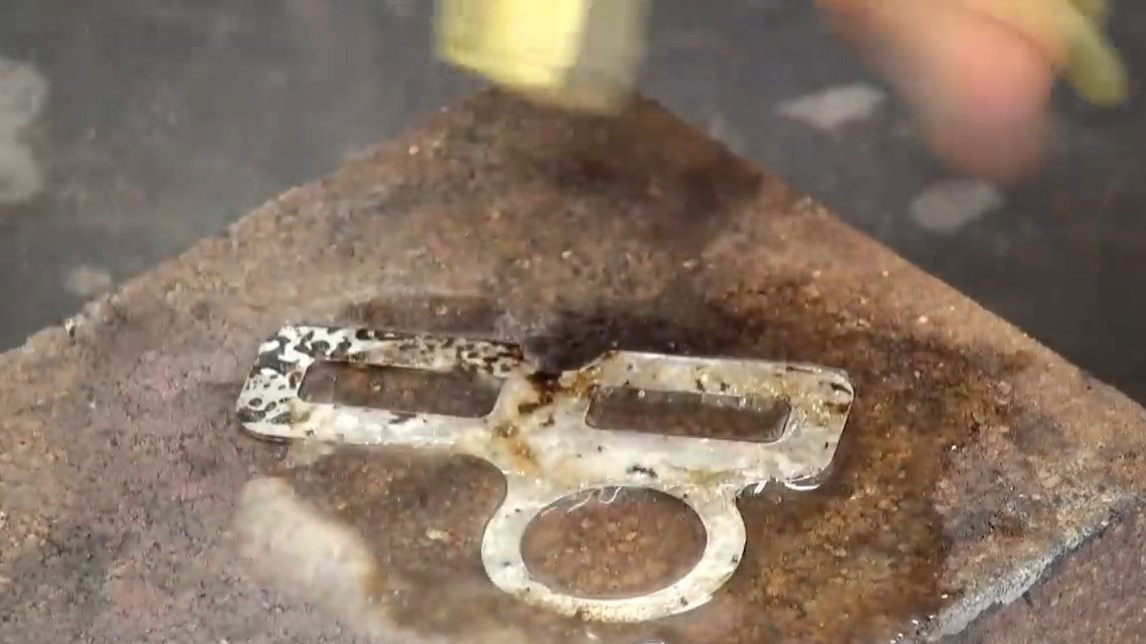
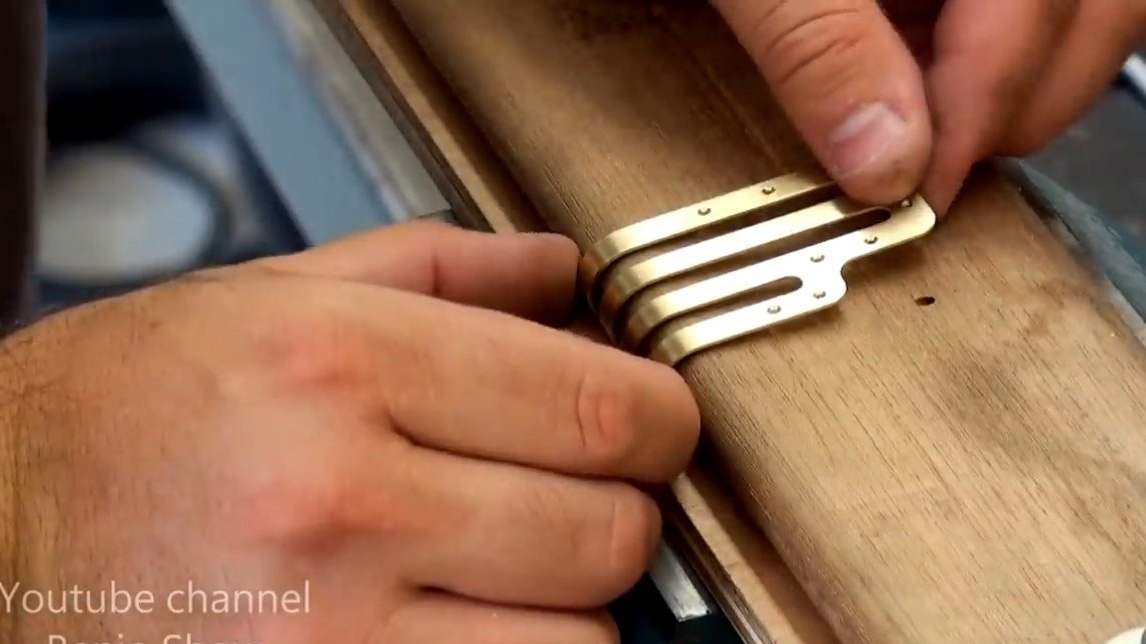
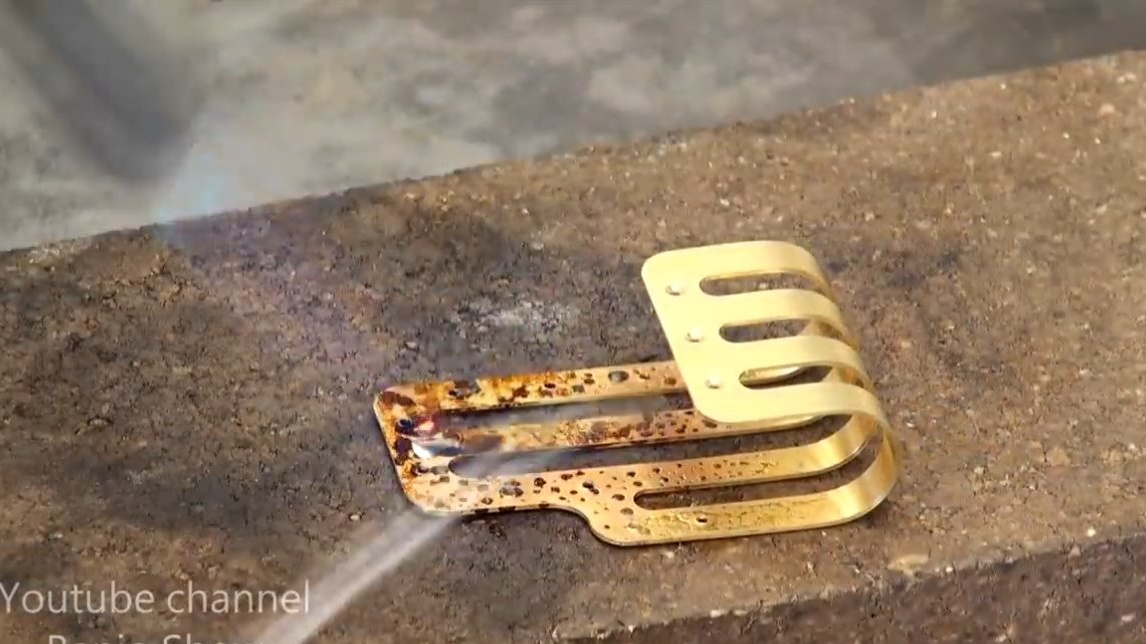

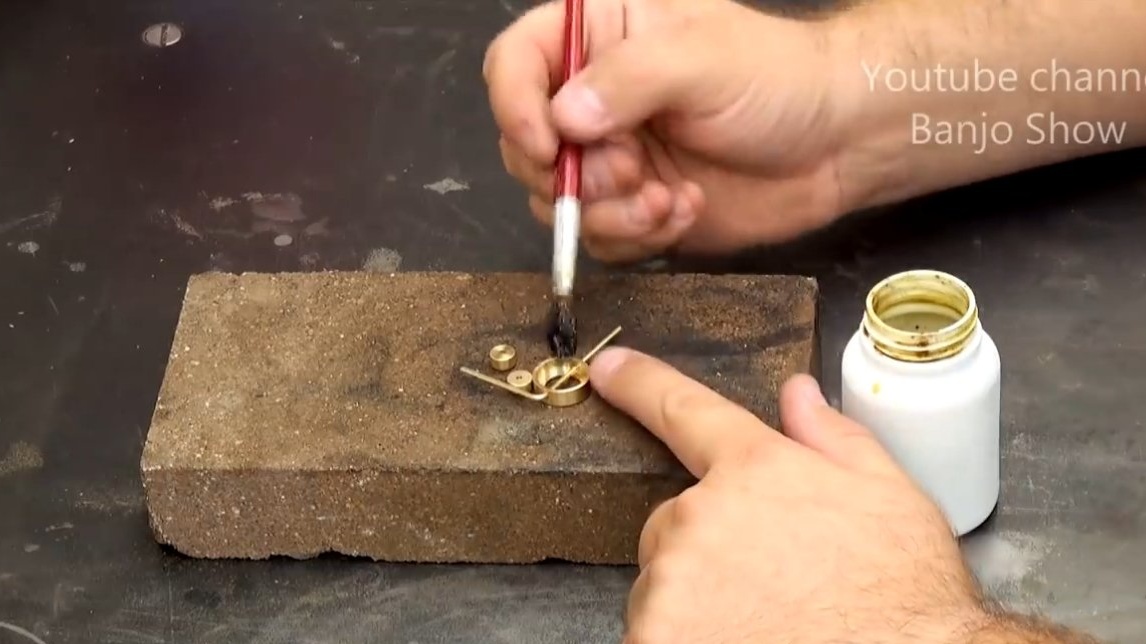
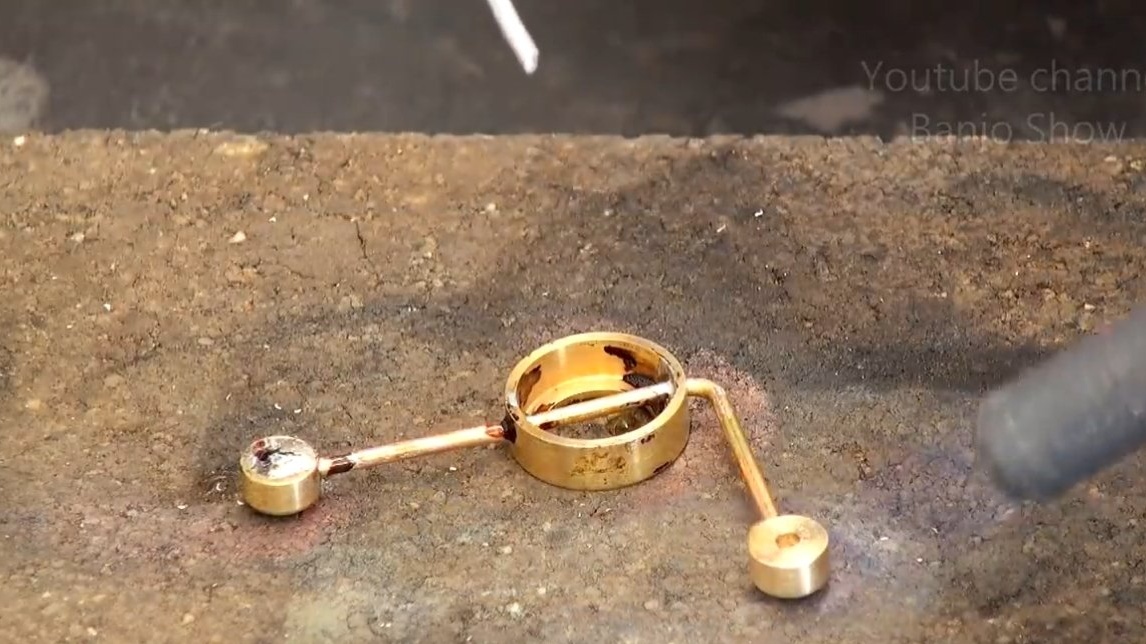
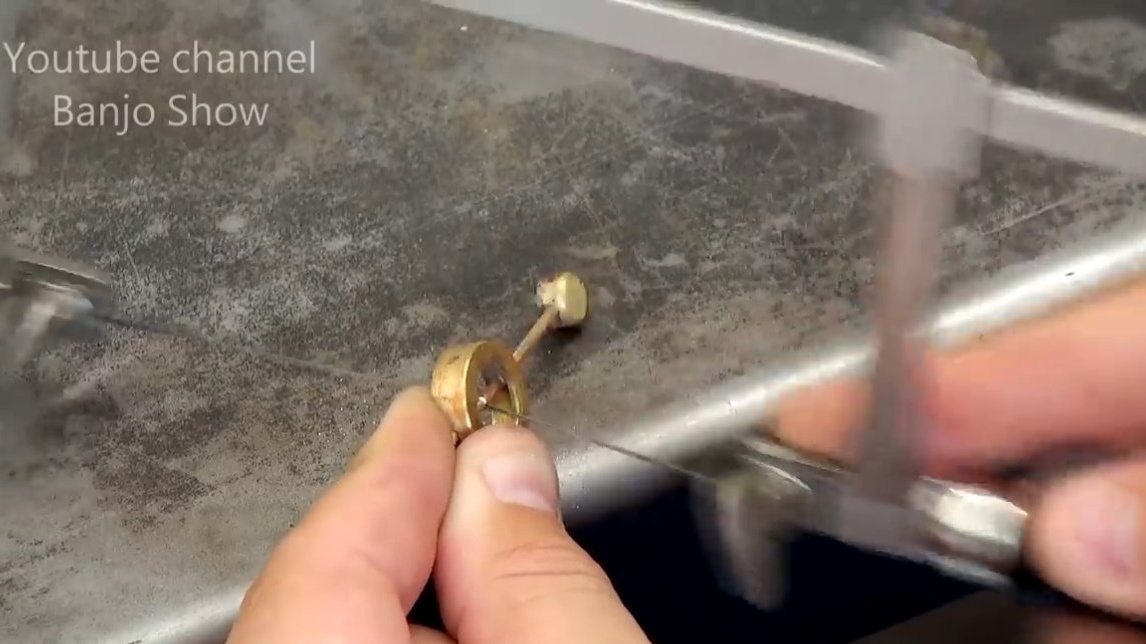
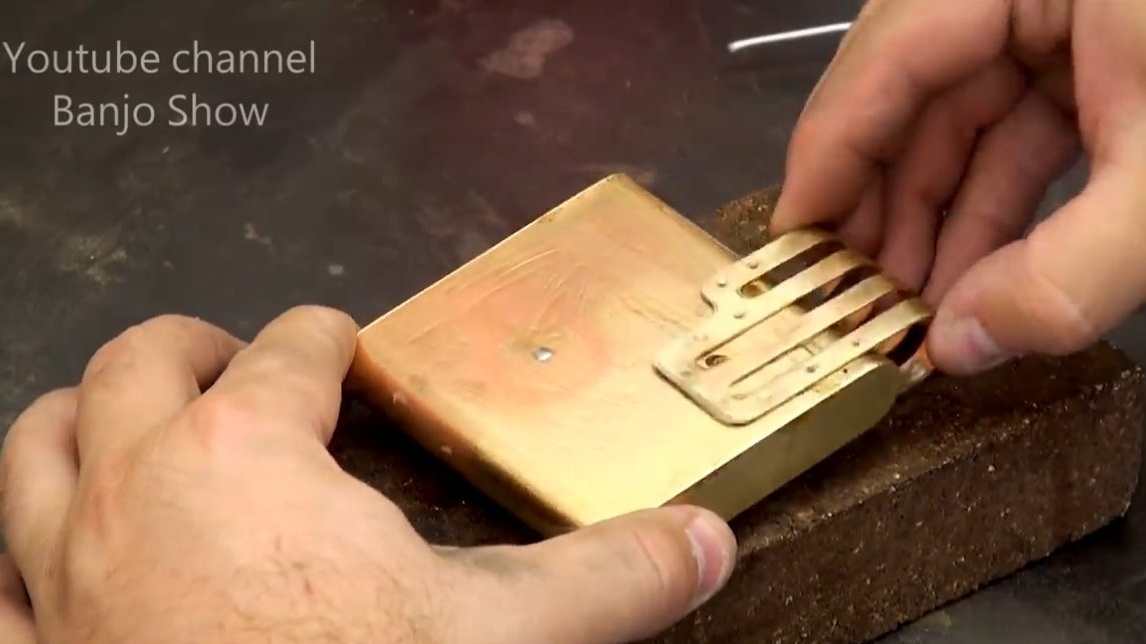
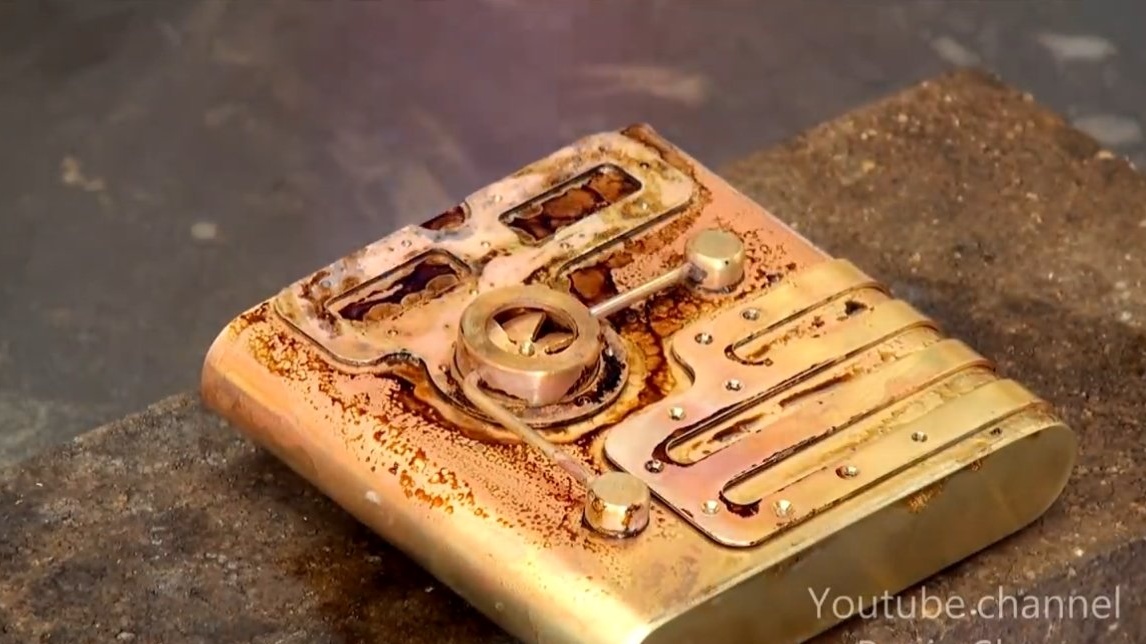
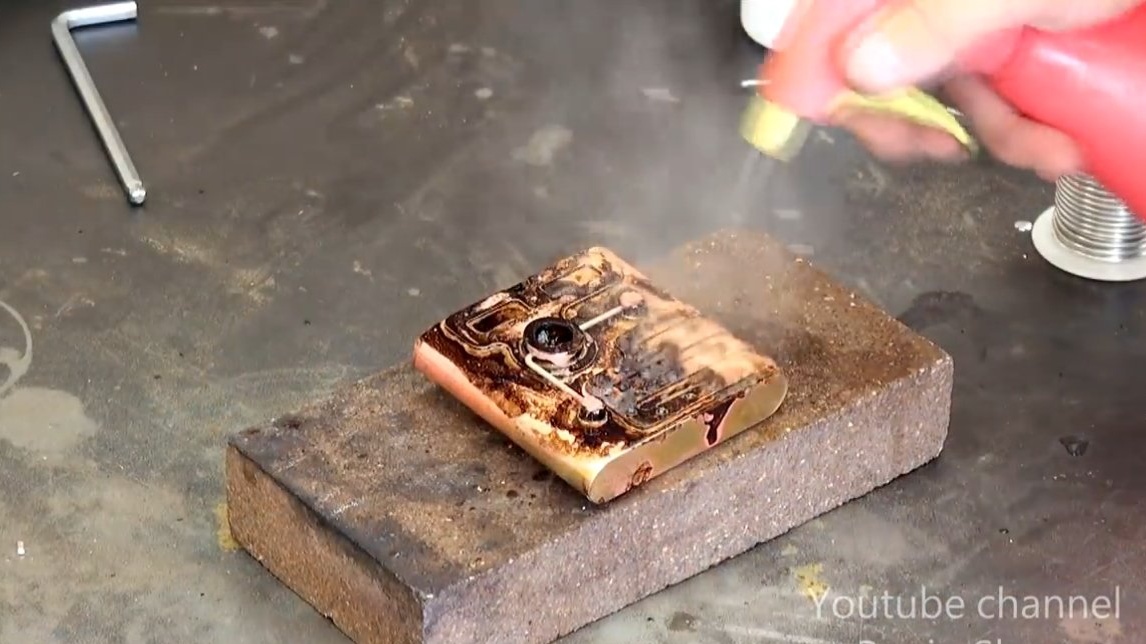
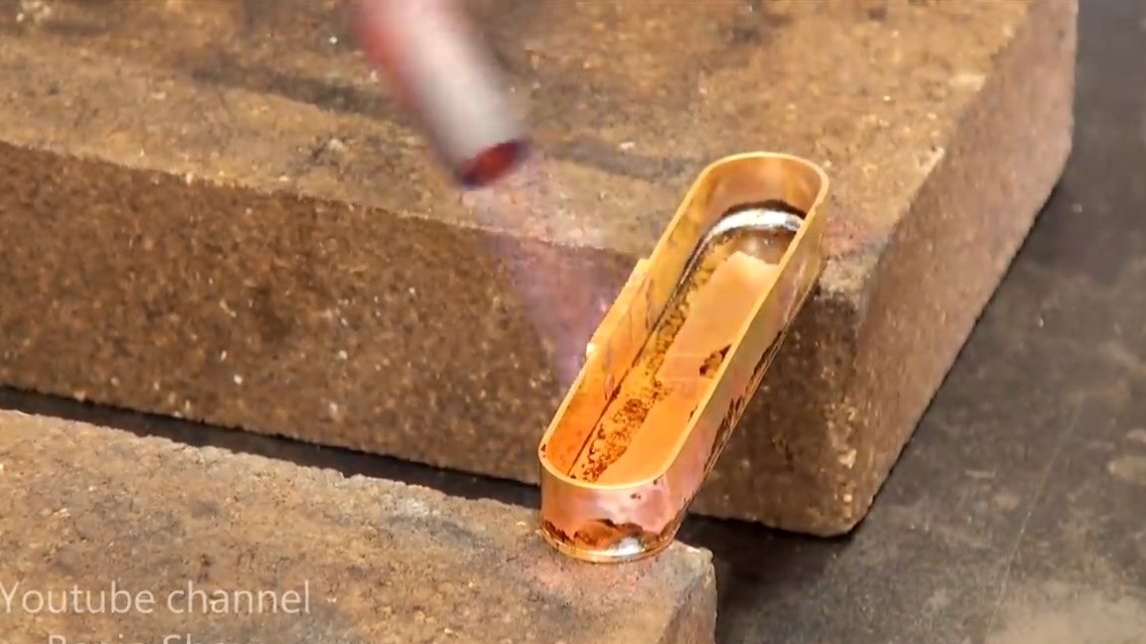
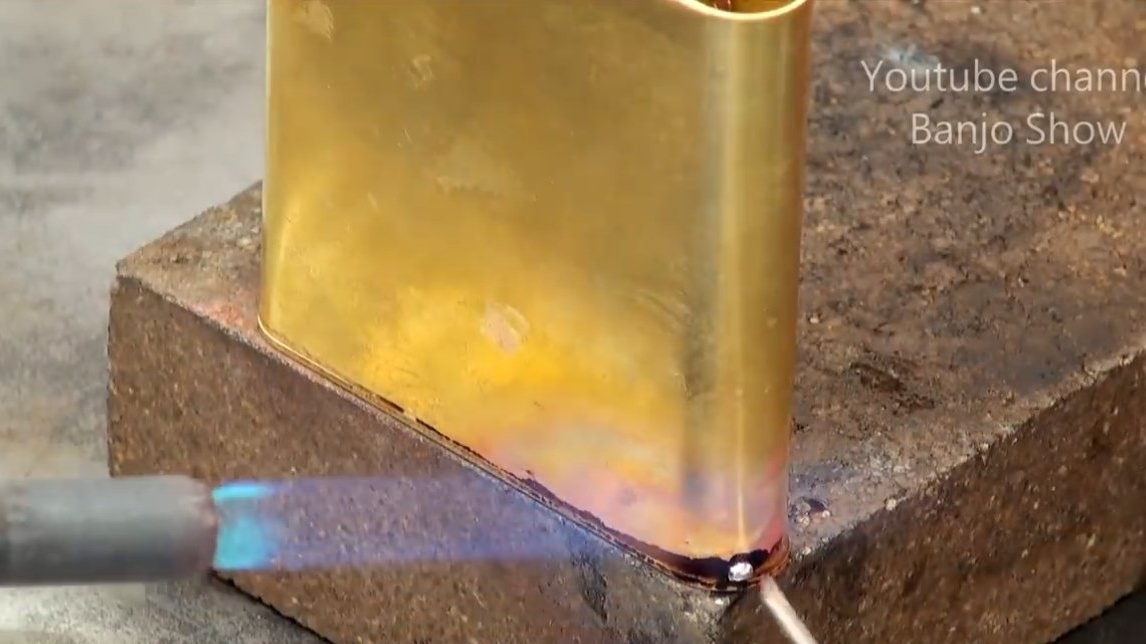
We make the rest of the part, in which the propeller will be located. Its author has machined on a lathe, and the copper wire will imitate the tubes. We are in contact with the cigarette case, and when everything is ready, we install the parts on the cigarette case. It is desirable that all the parts fit snugly on the cigarette case and can solder well. Gently warm the cigarette case with a burner and everything is welded to a high quality. At the end, the author sprayed water on a red-hot cigarette case, and almost all of it was cleaned of the burning that forms from the flux.
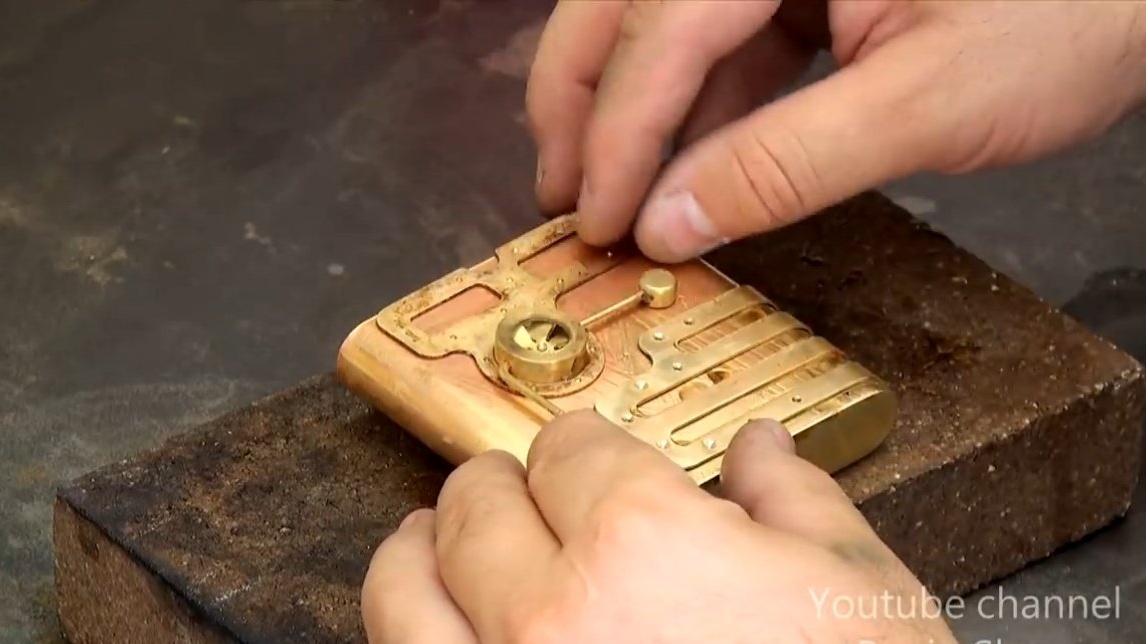
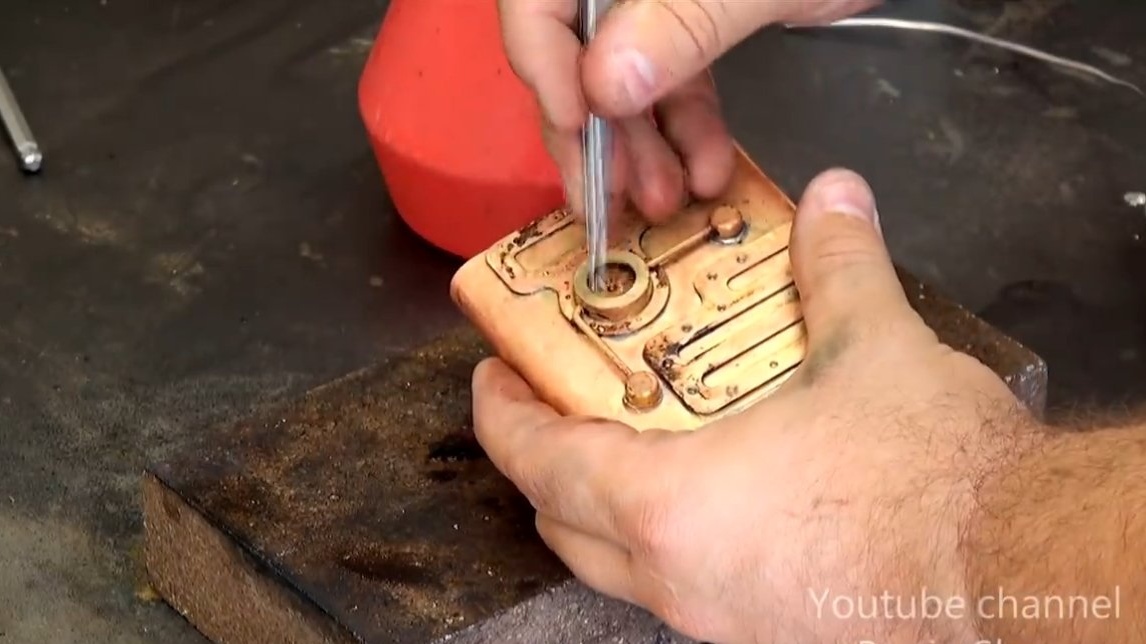
At the end, we pull all the details with tweezers and make sure that everything is soldered well.
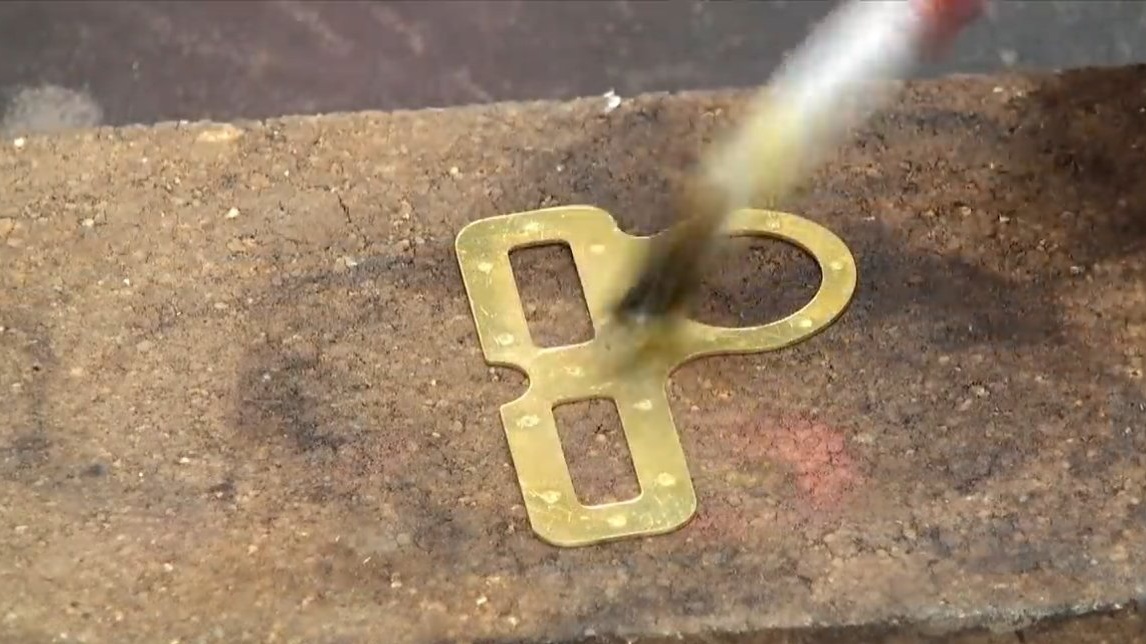
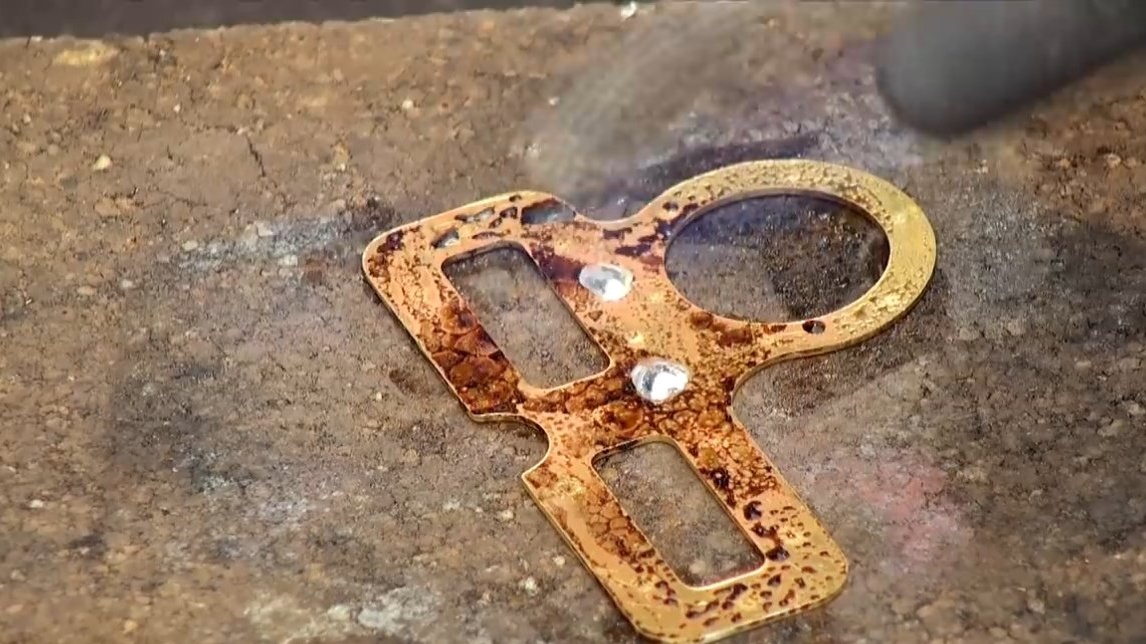
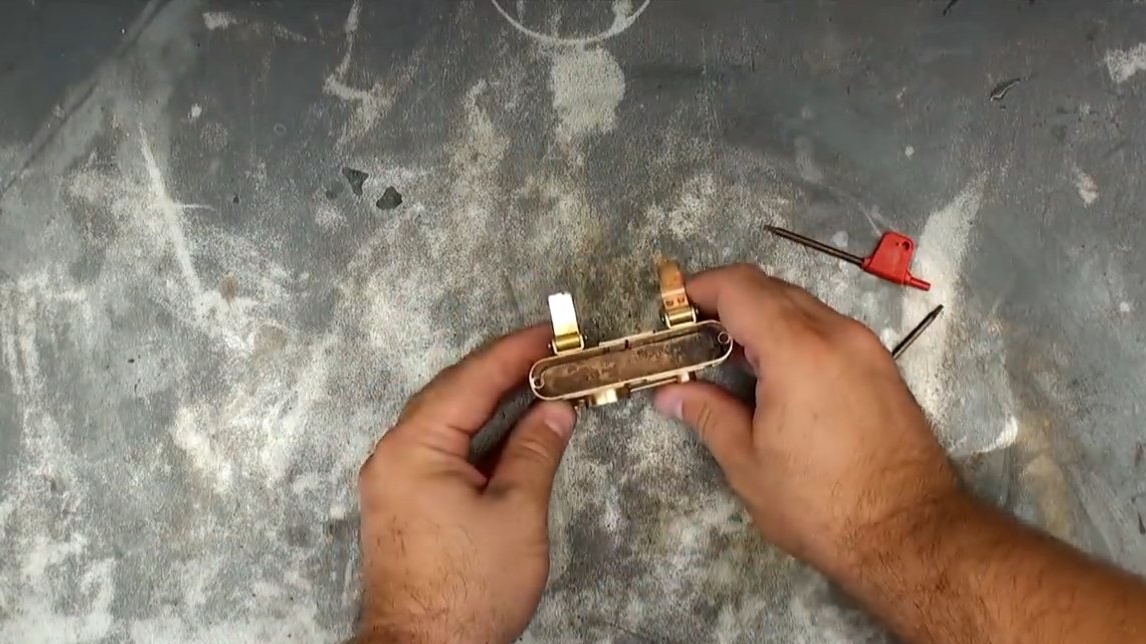
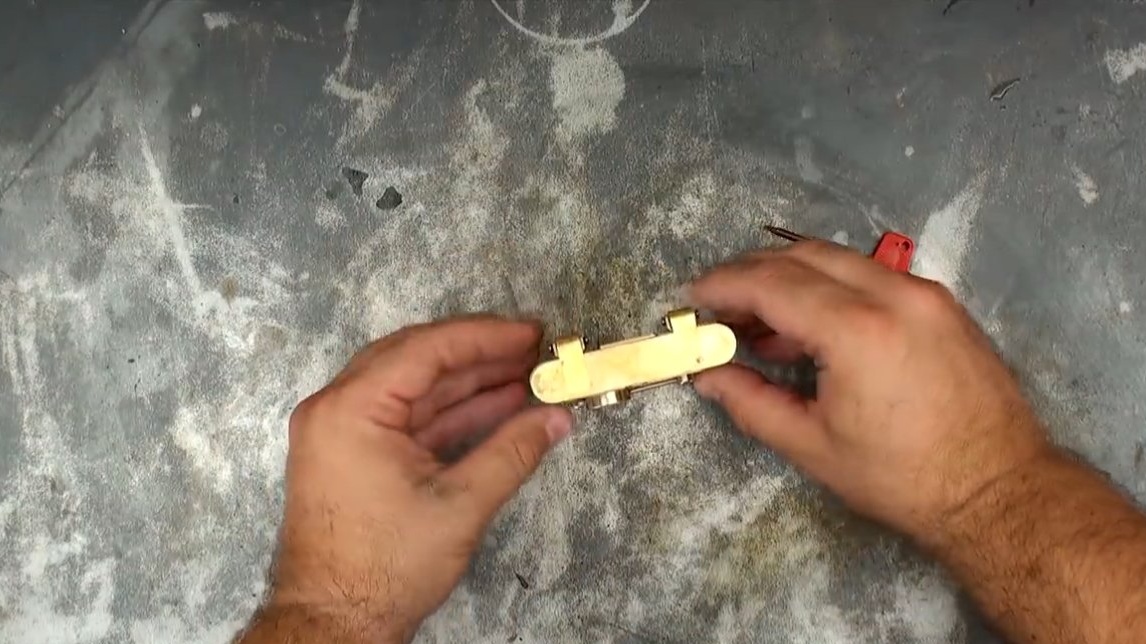
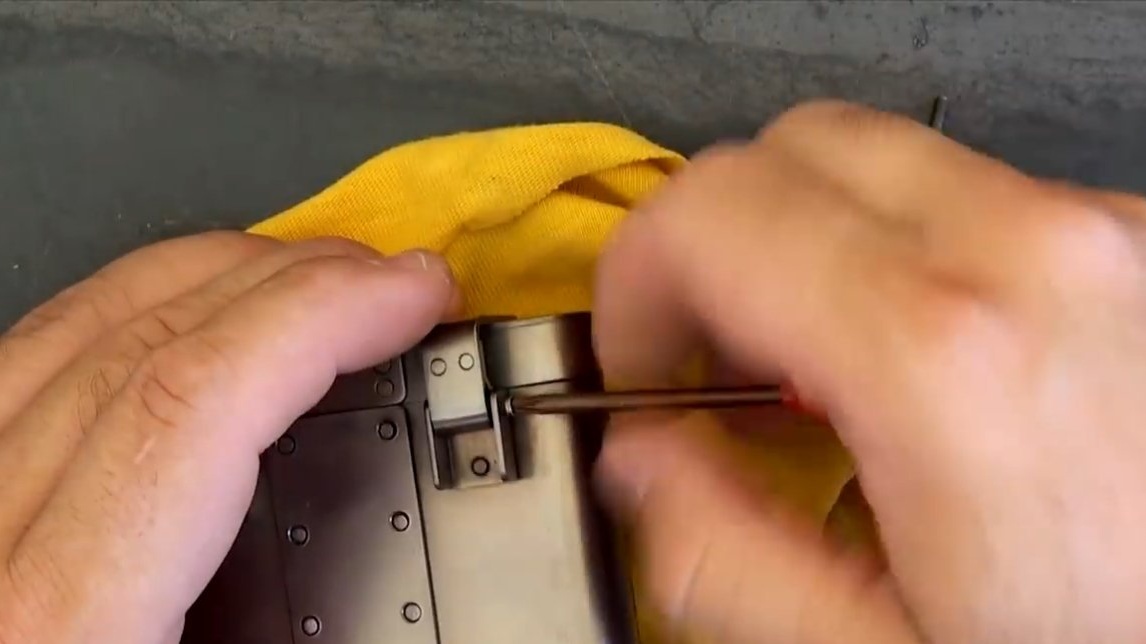
Step Five Hinges and cover installation
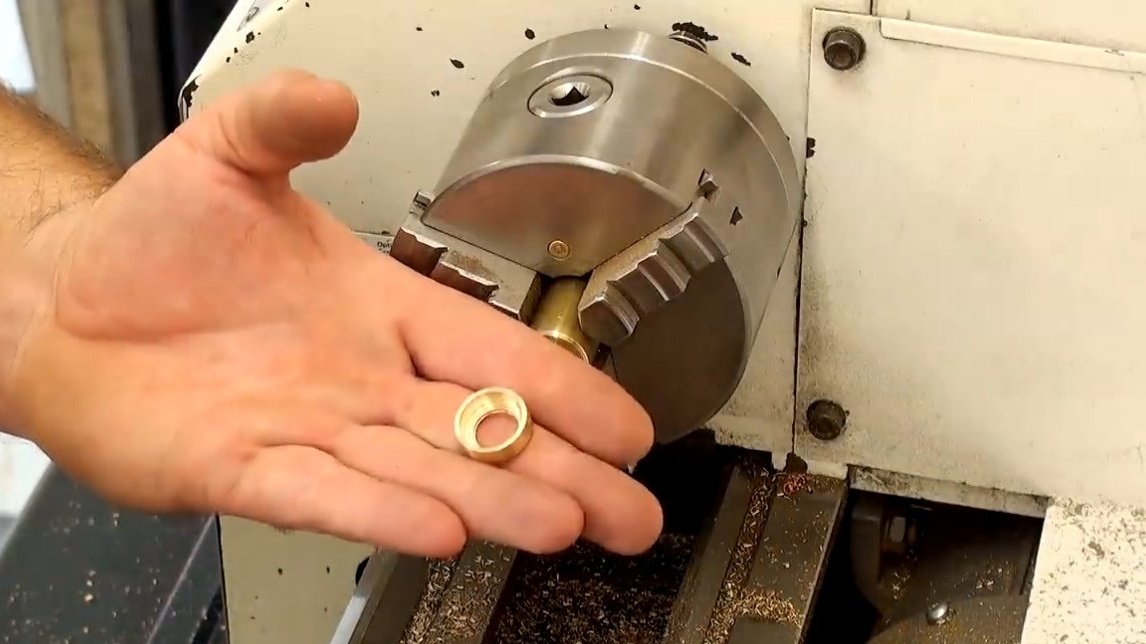
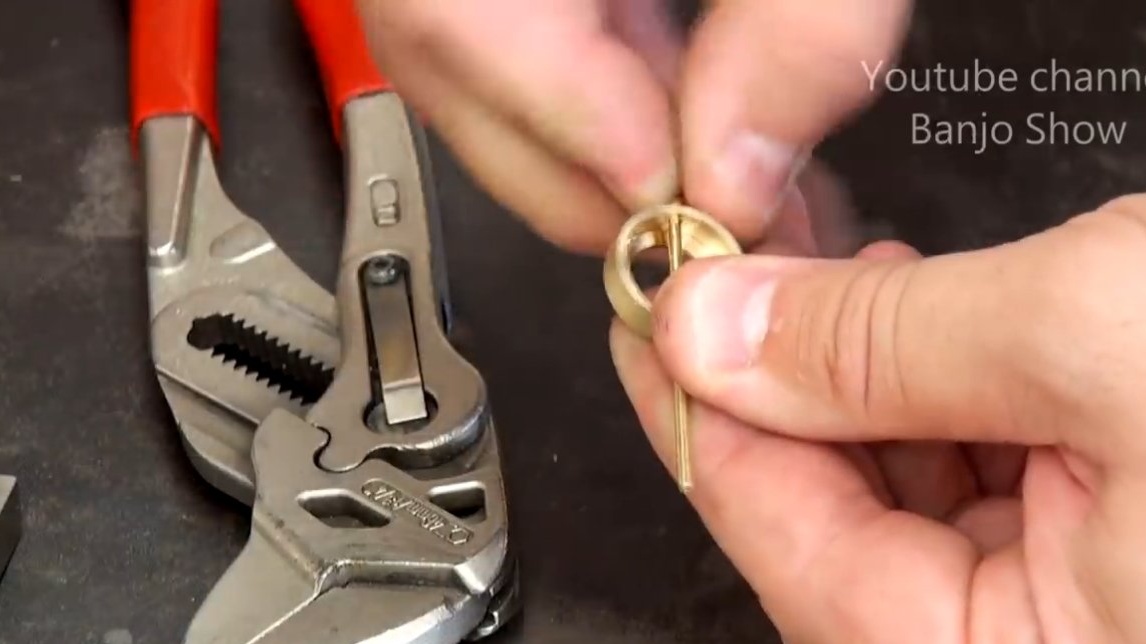
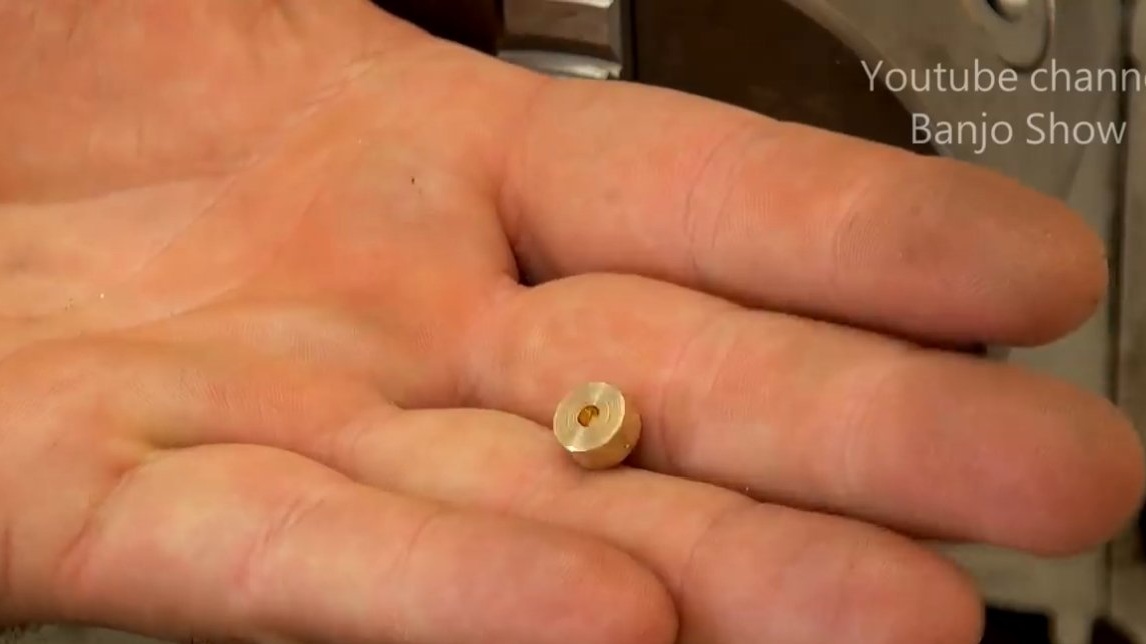
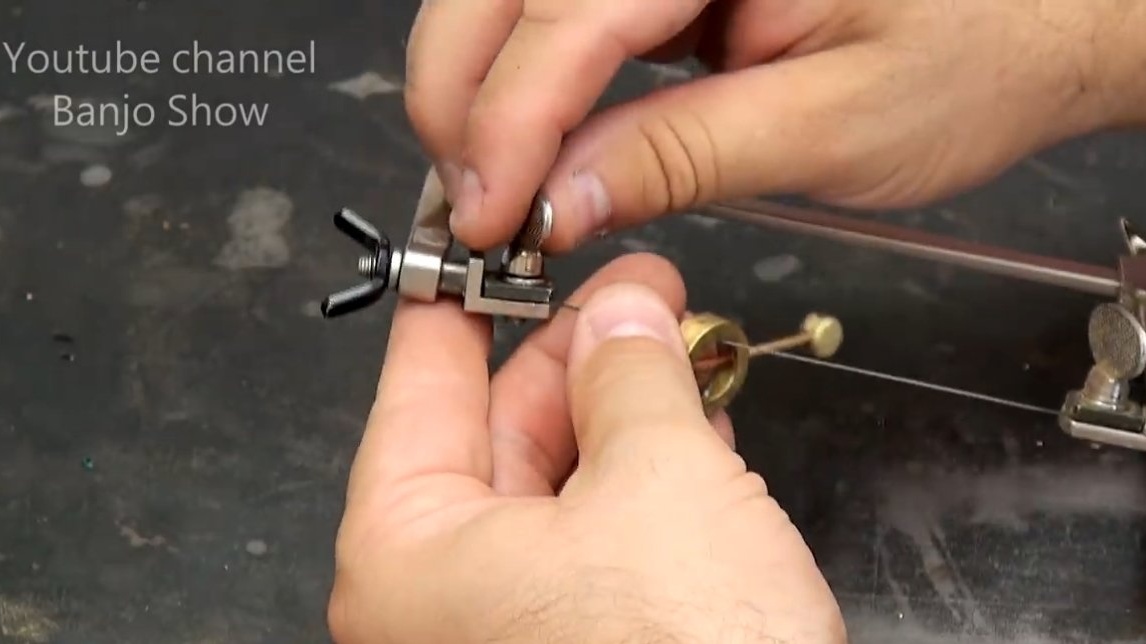
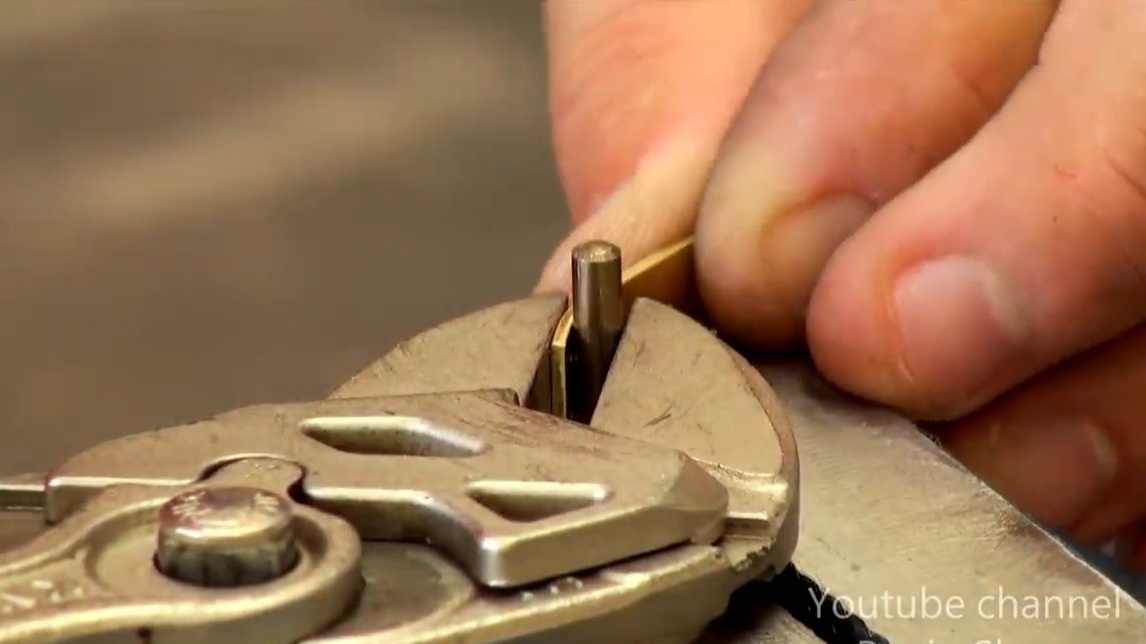
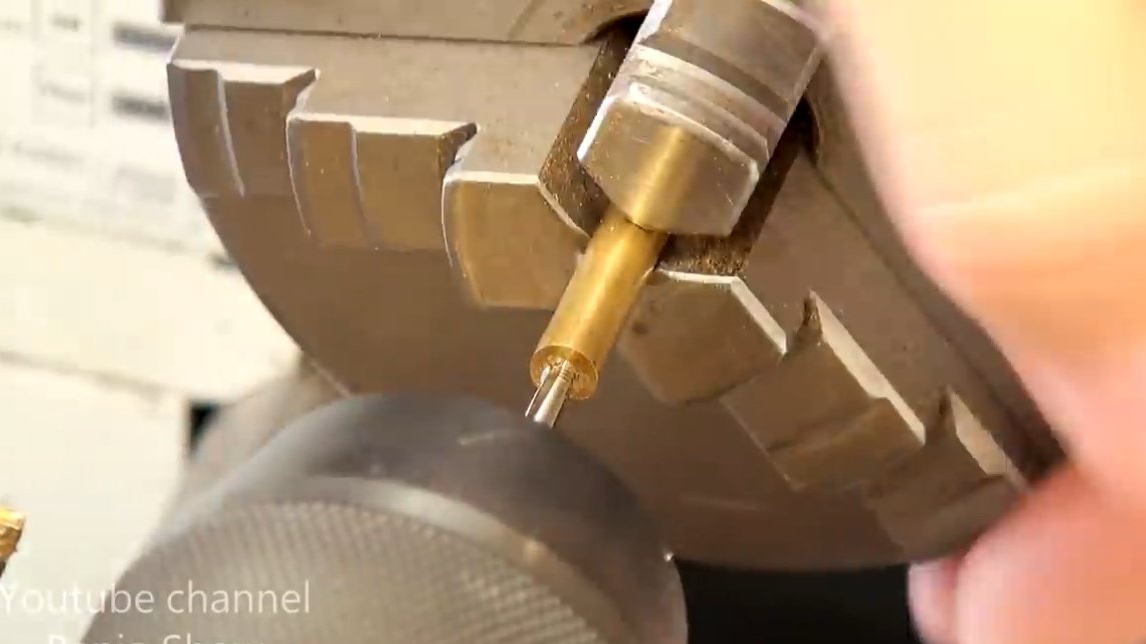
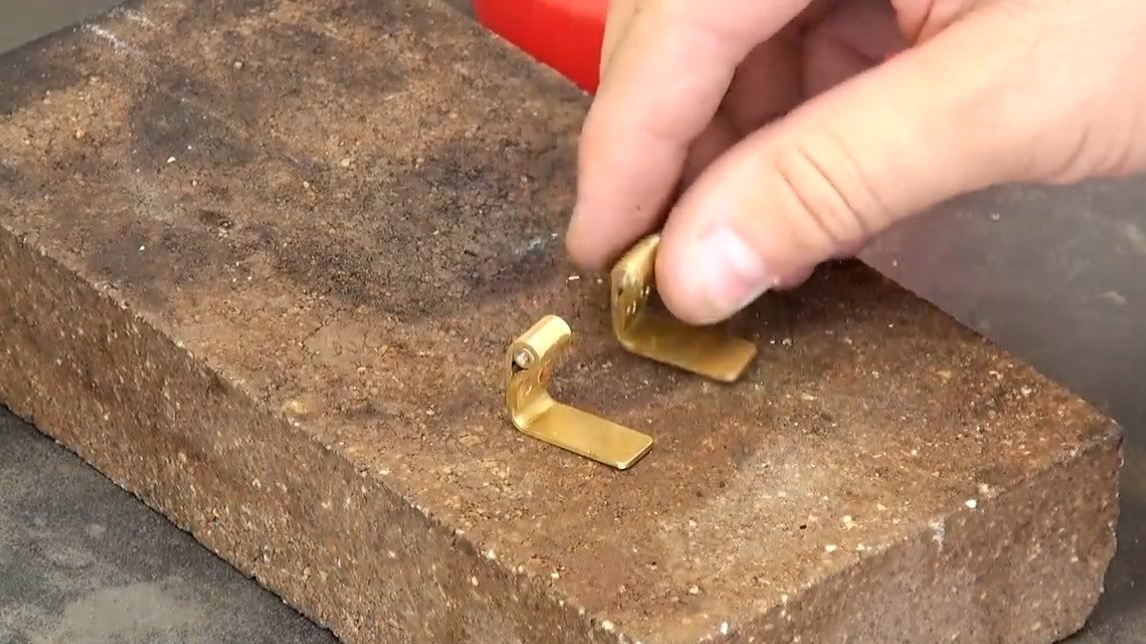
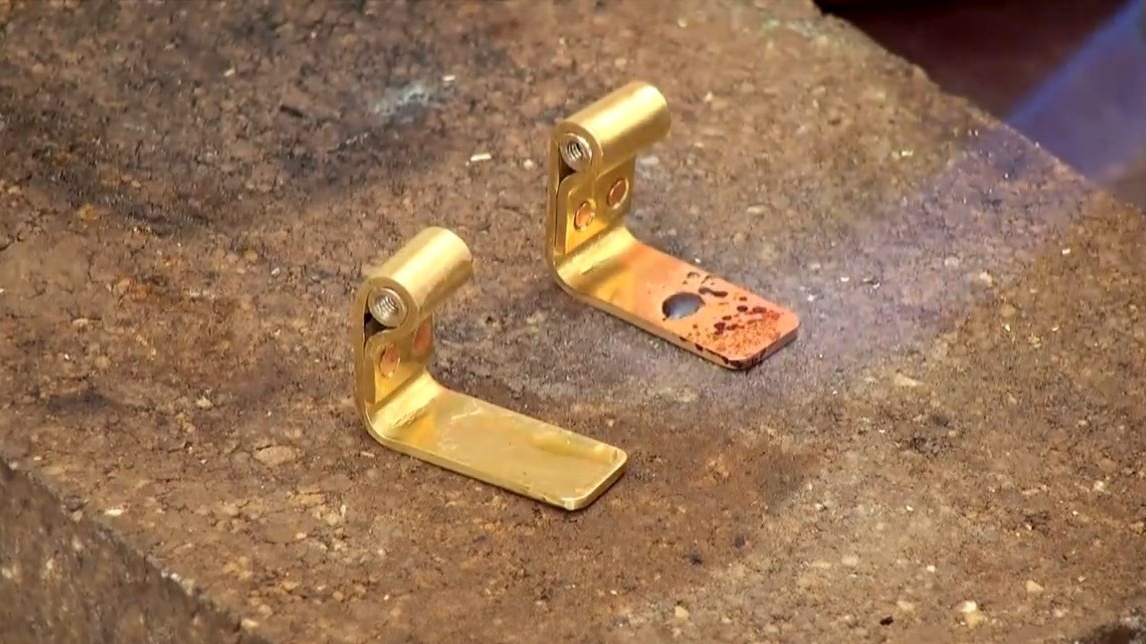
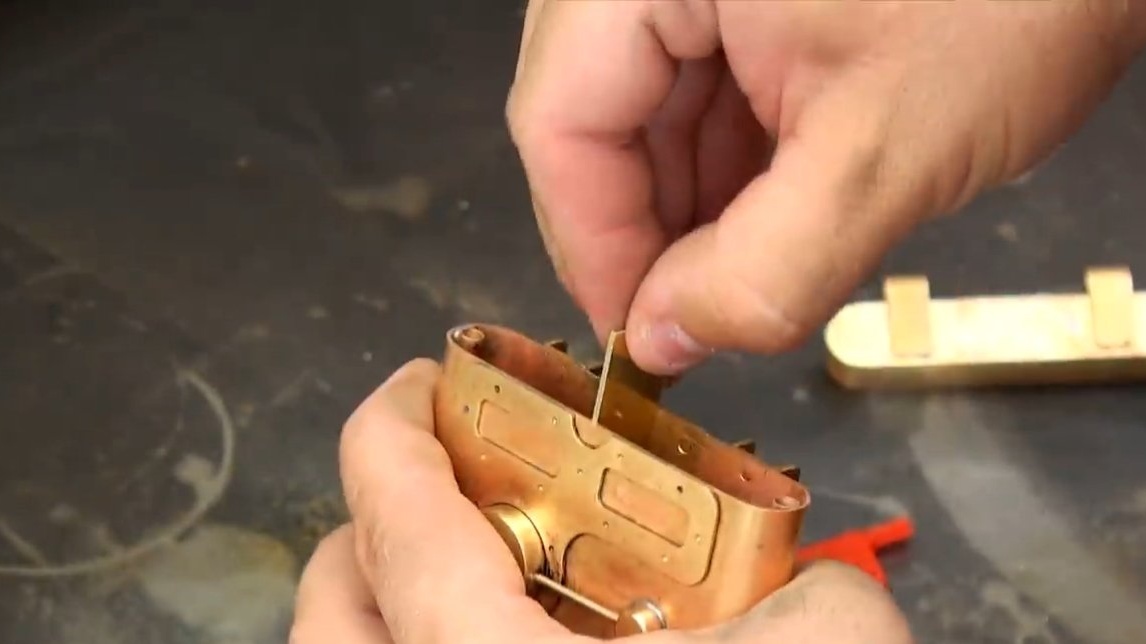
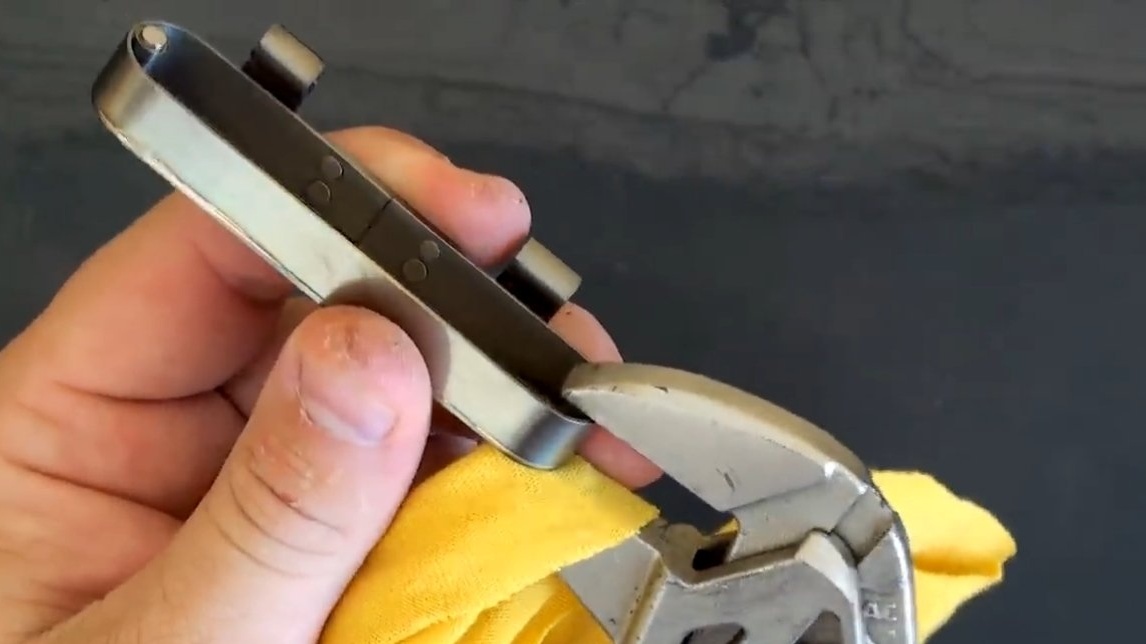
The author made the hinges in the form of the letter “G”, inside them there are nuts that the author has carved on a lathe. Screws are screwed into these nuts, which are the hinge axes. The length of the screws must be such that they do not clamp the hinge.
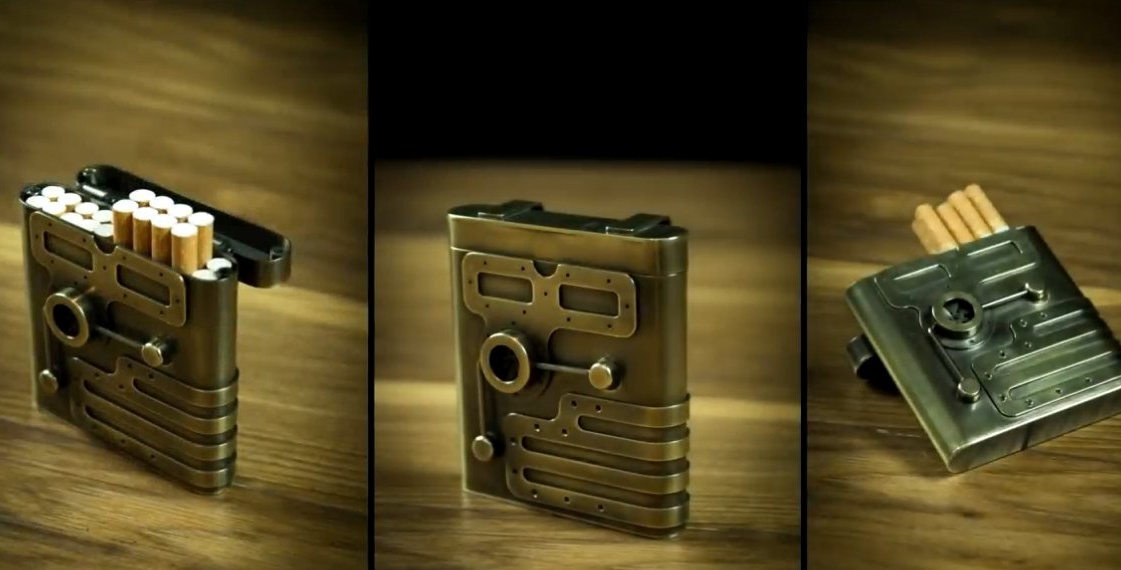
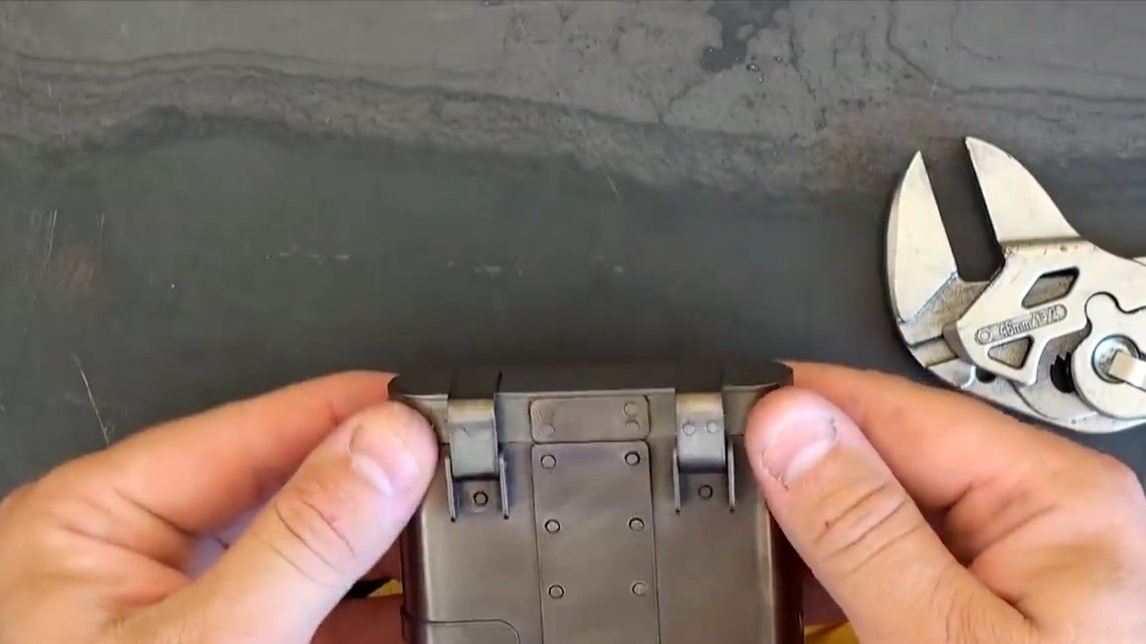
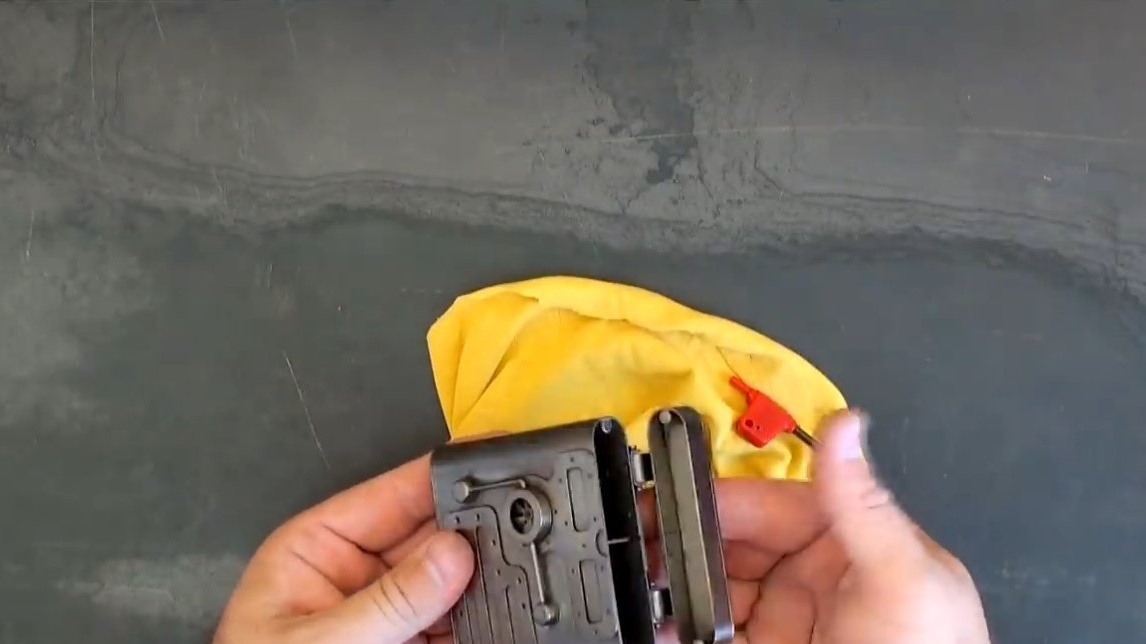
At the end, we center the lid and solder to it in place of the loop. Now we have a finished cigarette case with a lid, even now it looks interesting. At the end of the step, the author installed a partition inside.
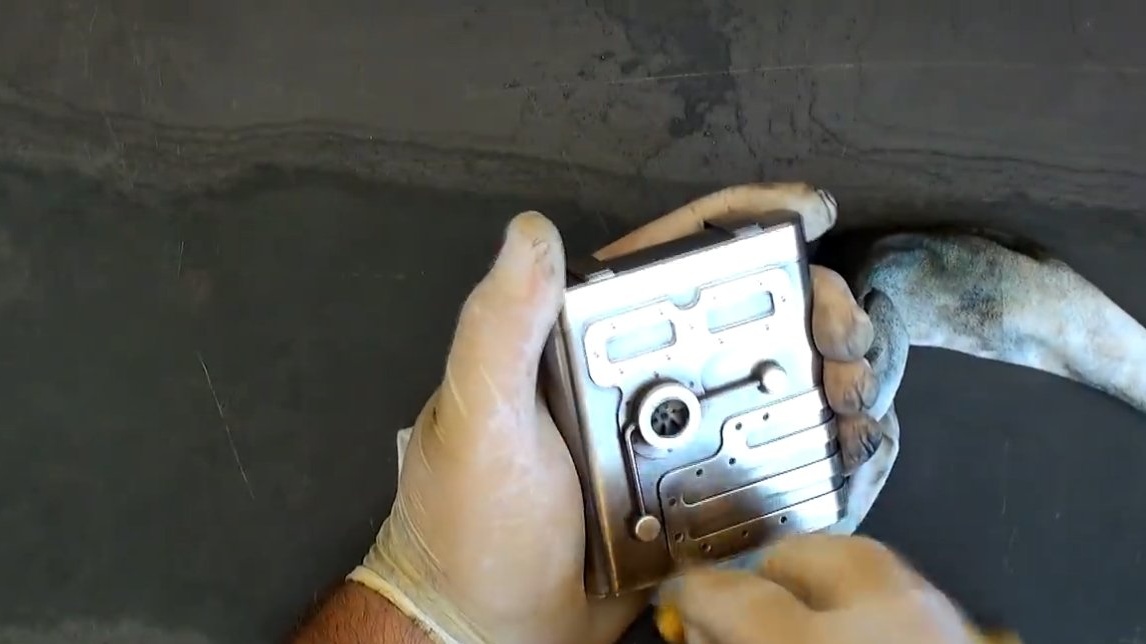
Step Six Cleaning and patination
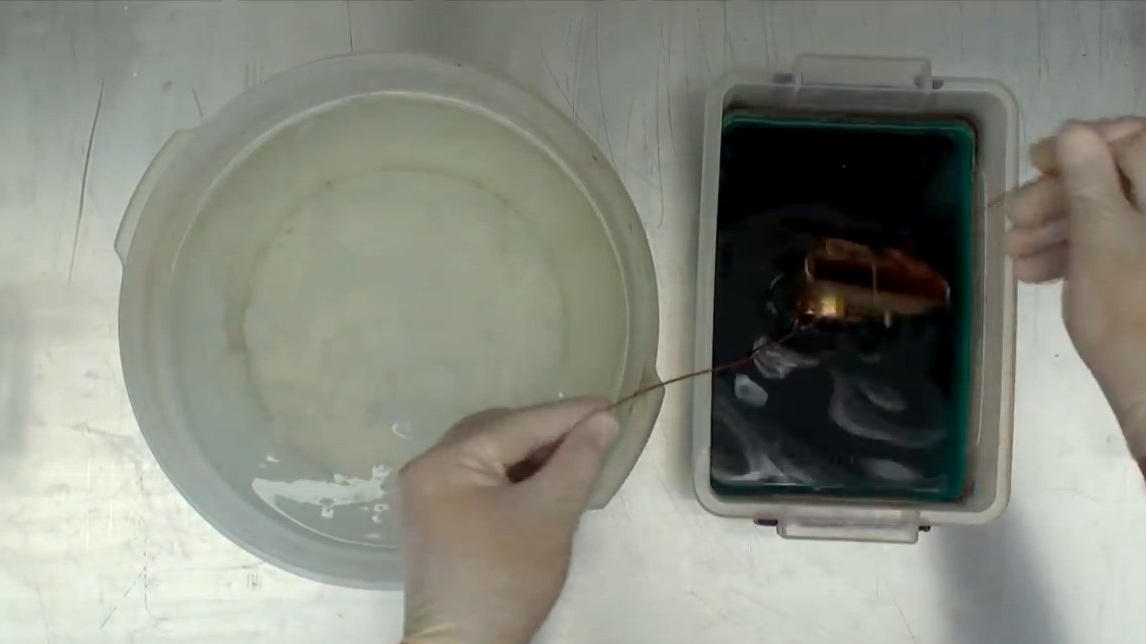
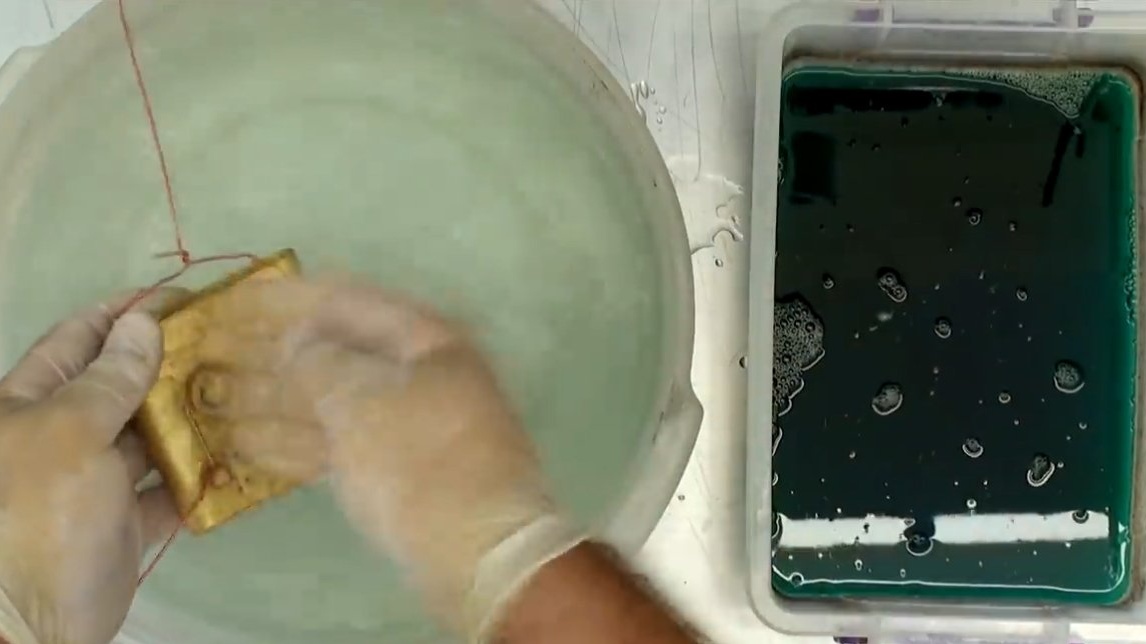
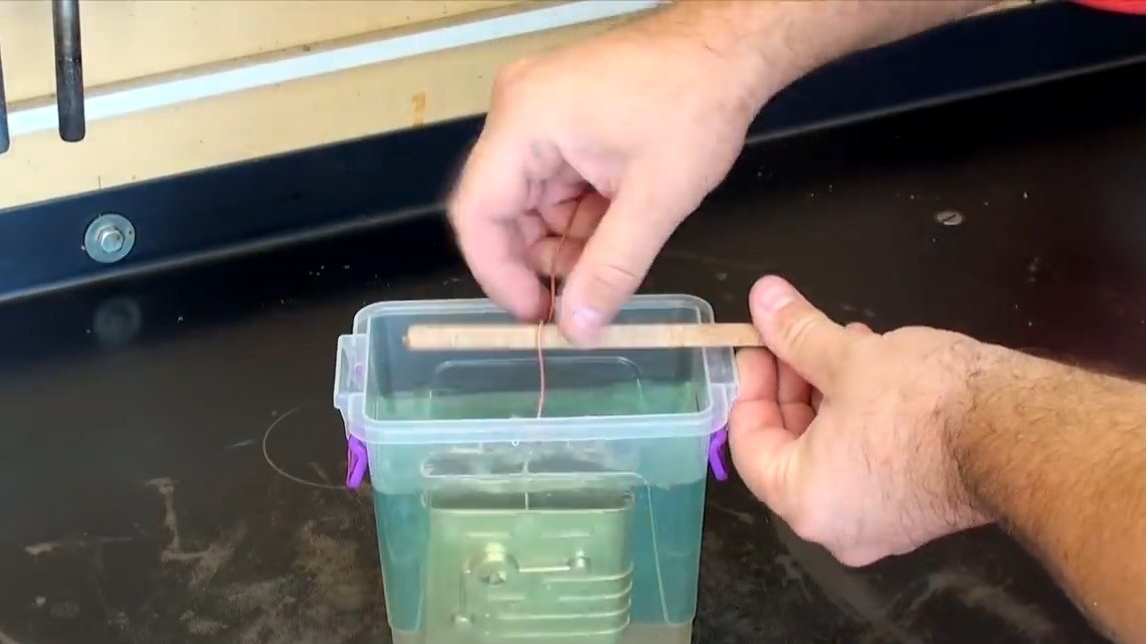
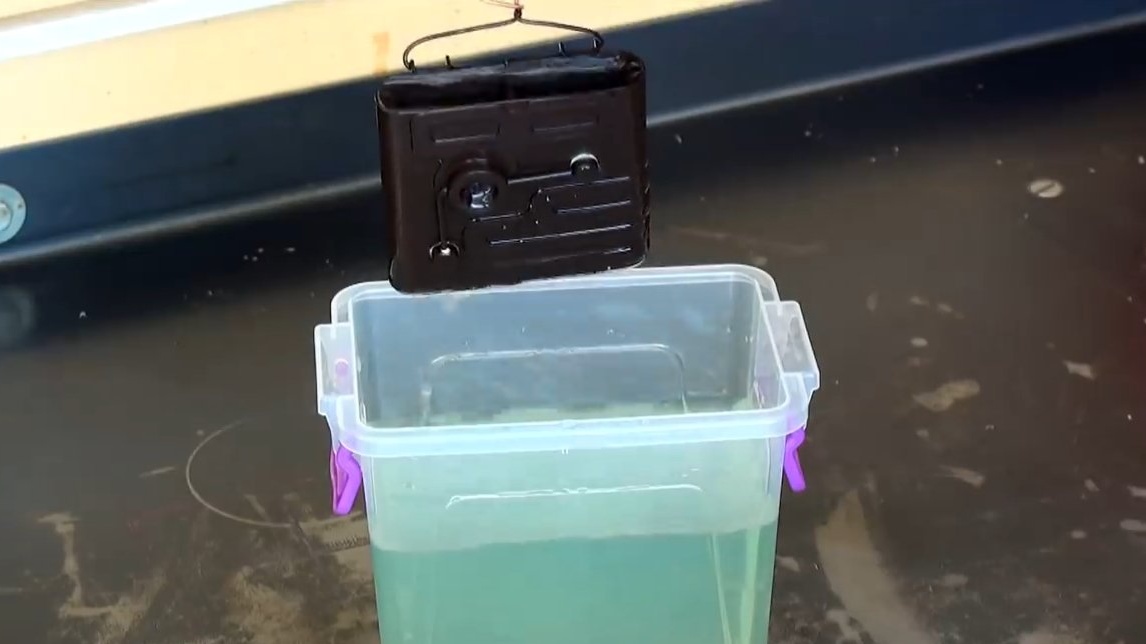
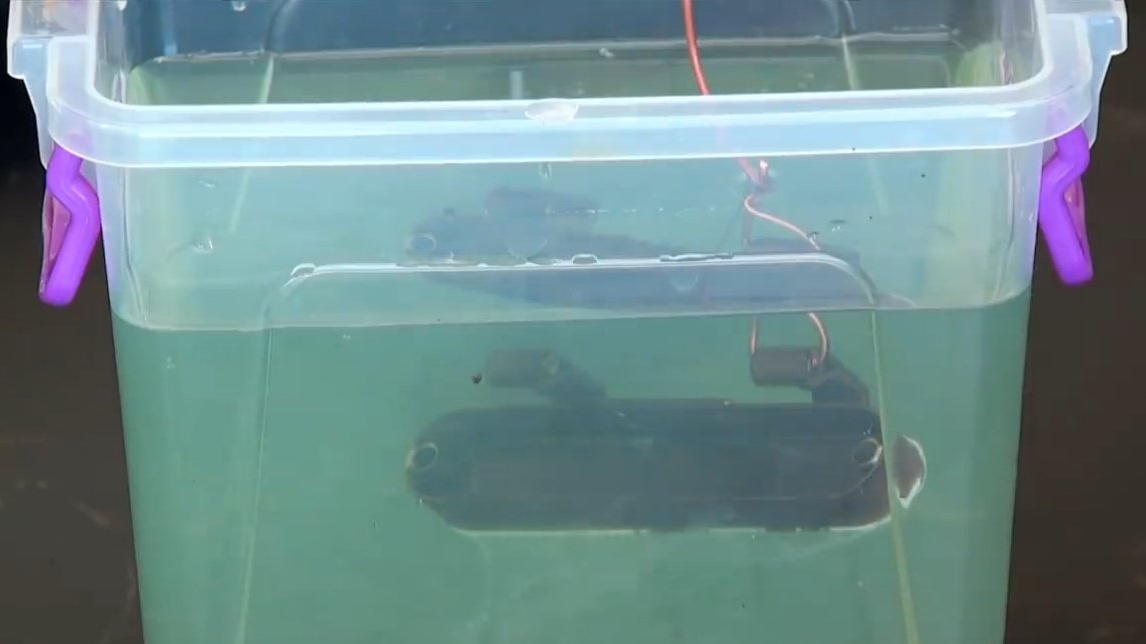
After soldering, immerse the cigarette case in a reagent that neutralizes the flux, and then clean the cigarette case well in water with soda and do the final rinse in clean water.
After drying, immerse the cigarette case in the patination fluid. The author chose black for patina, we hold the cigarette case in the reagent for a while and then wash it in accordance with the instructions for the patina.
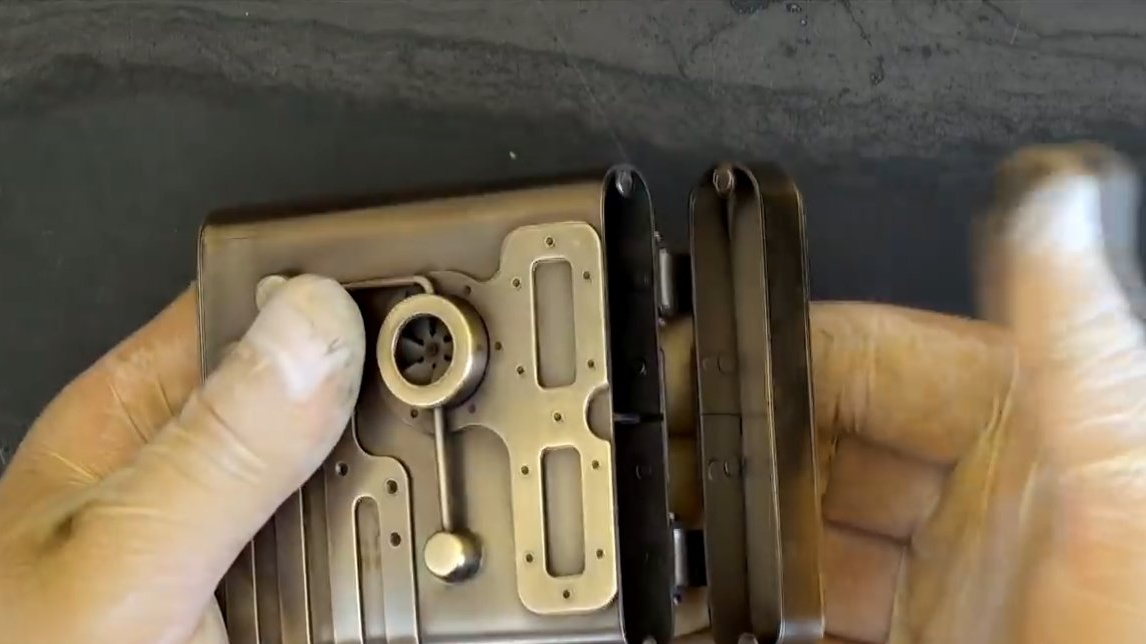
Seventh step. Final touches
At the end, the cigarette case will be polished, especially polishing the outer parts so that they become lighter. To protect the metal from further corrosion, you can coat it with oil. The author pressed small neodymium magnets into the lid; now it closes securely.
The cigarette case looks great, and it’s also reliable and you definitely won’t stop smoking.
The project is completed on this, I hope you liked the homemade work, and you found useful thoughts. Good luck and creative inspiration, if you decide to repeat this. Do not forget to share your ideas and homemade things with us!