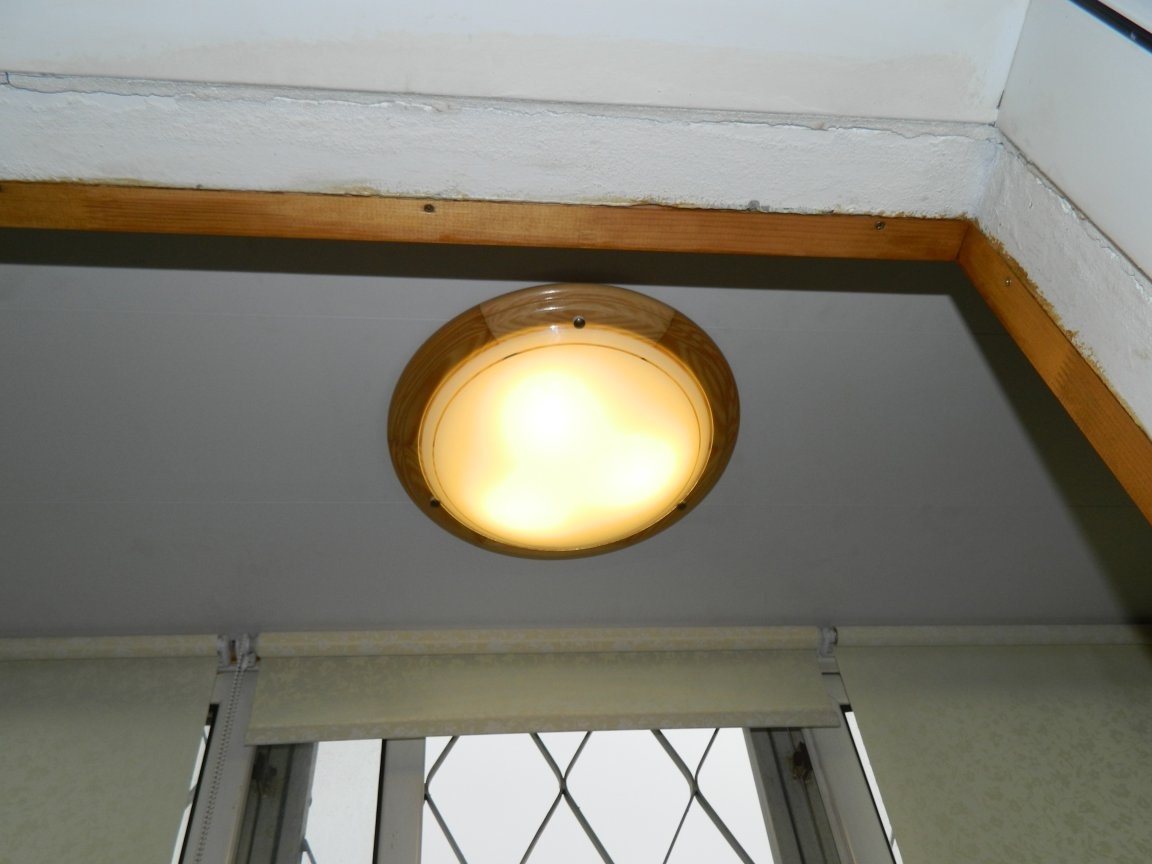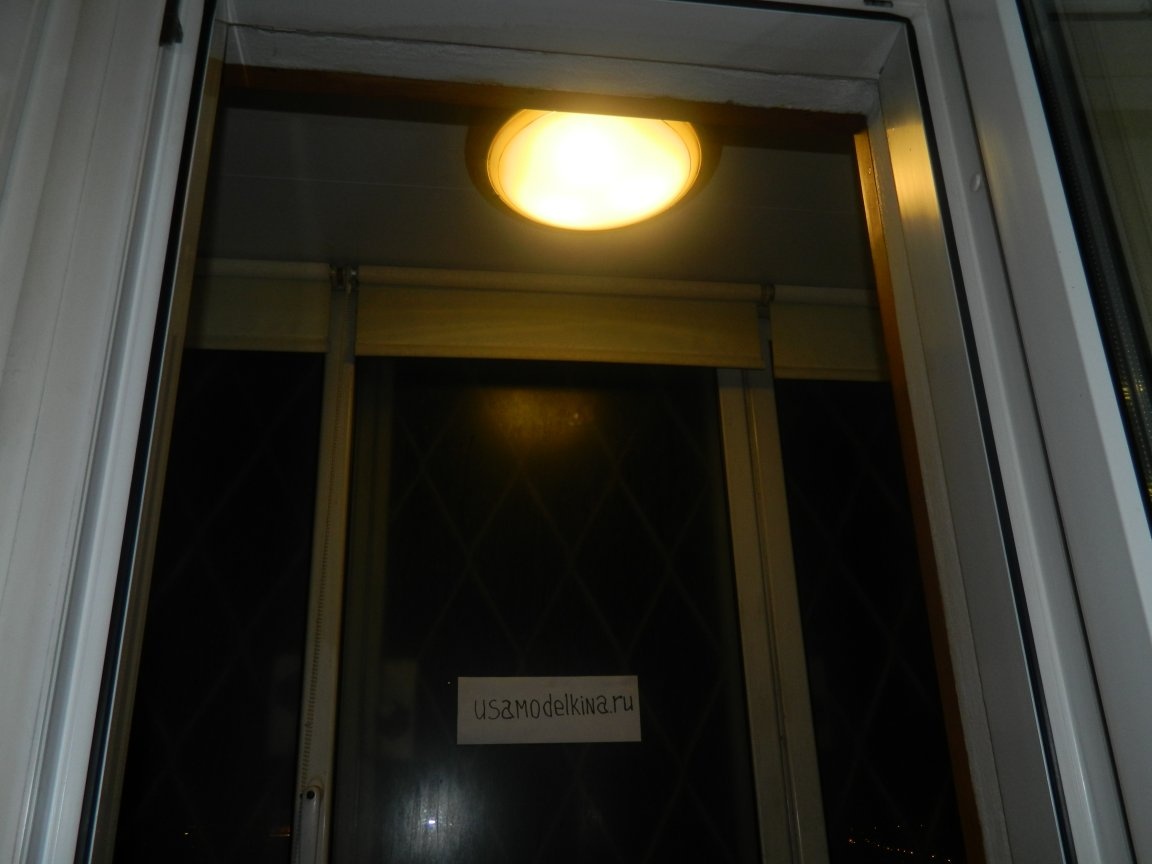
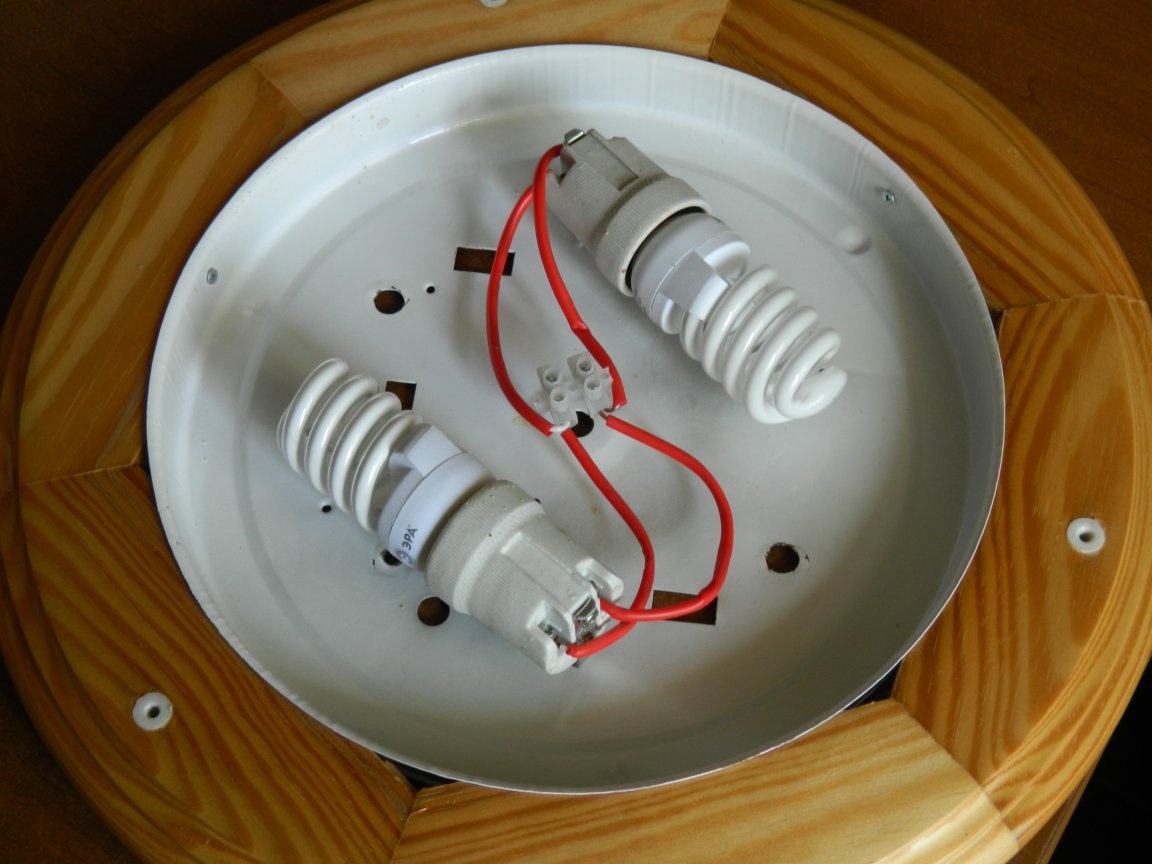
A lamp with two energy-saving lamps of 15 W each was installed on the ceiling of the balcony.
Everything seems to be nice if it were not for the heating of the lamps (especially in the cold season) for almost half an hour. And I decided to replace the energy-saving lamps with LEDs, and saving energy will not hurt.
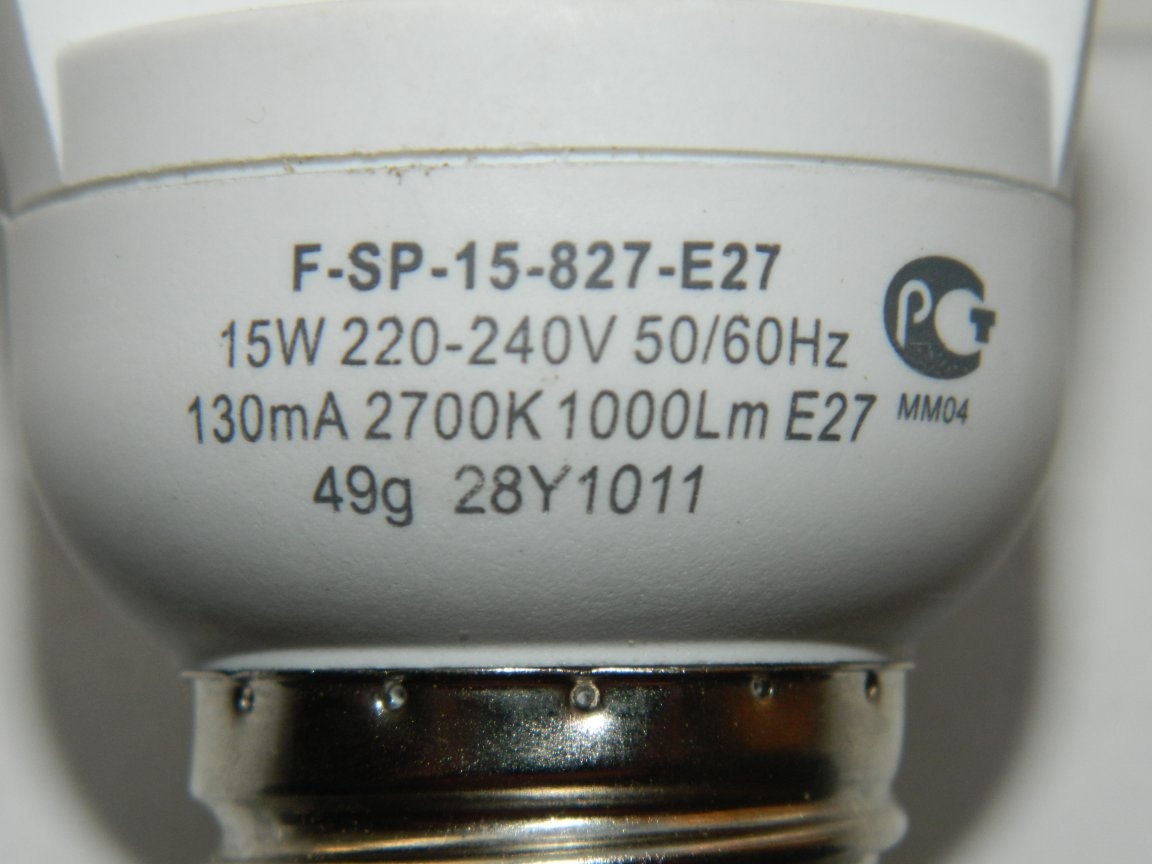
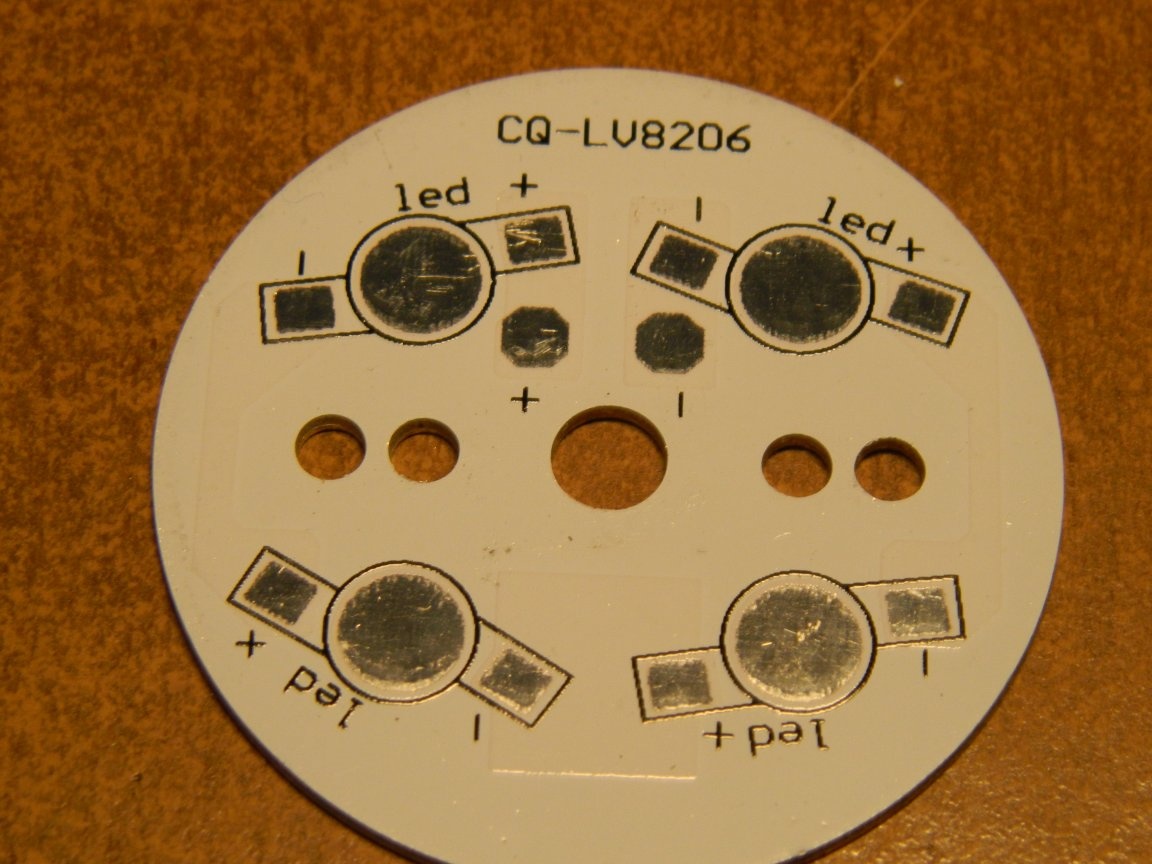
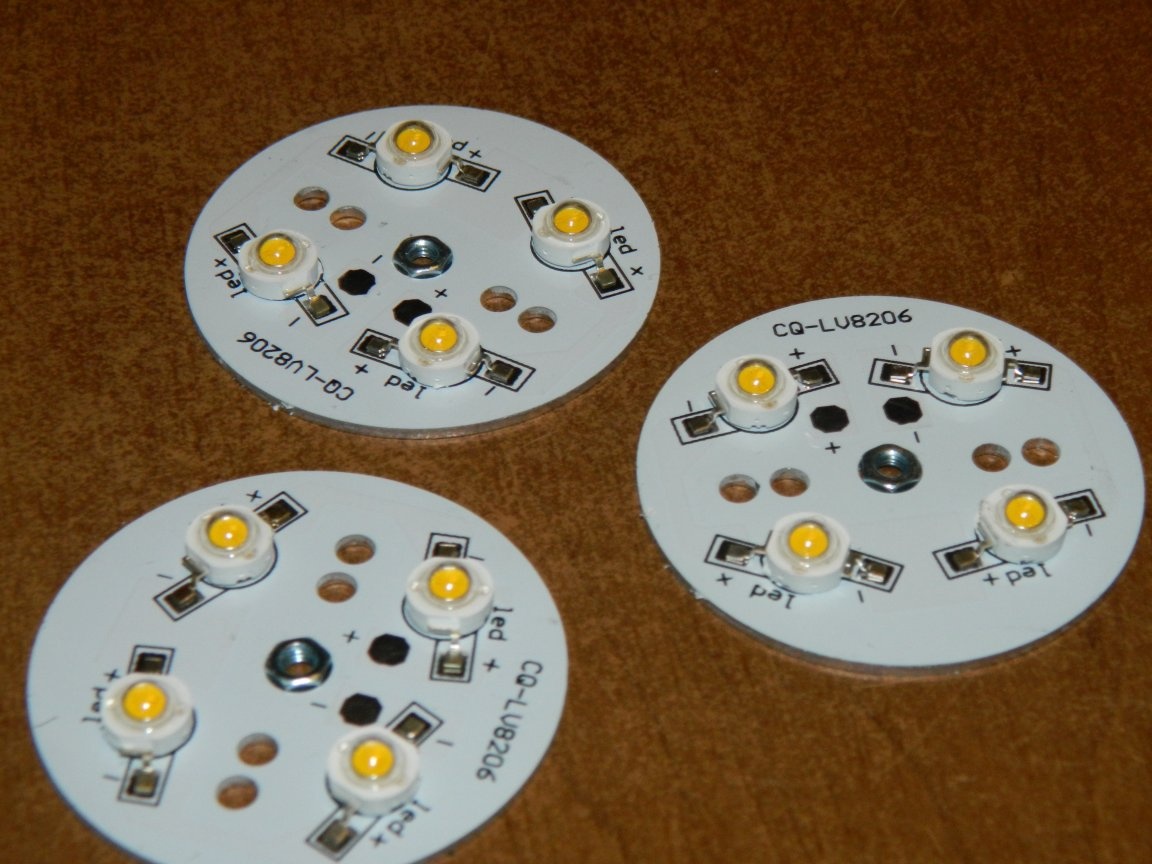
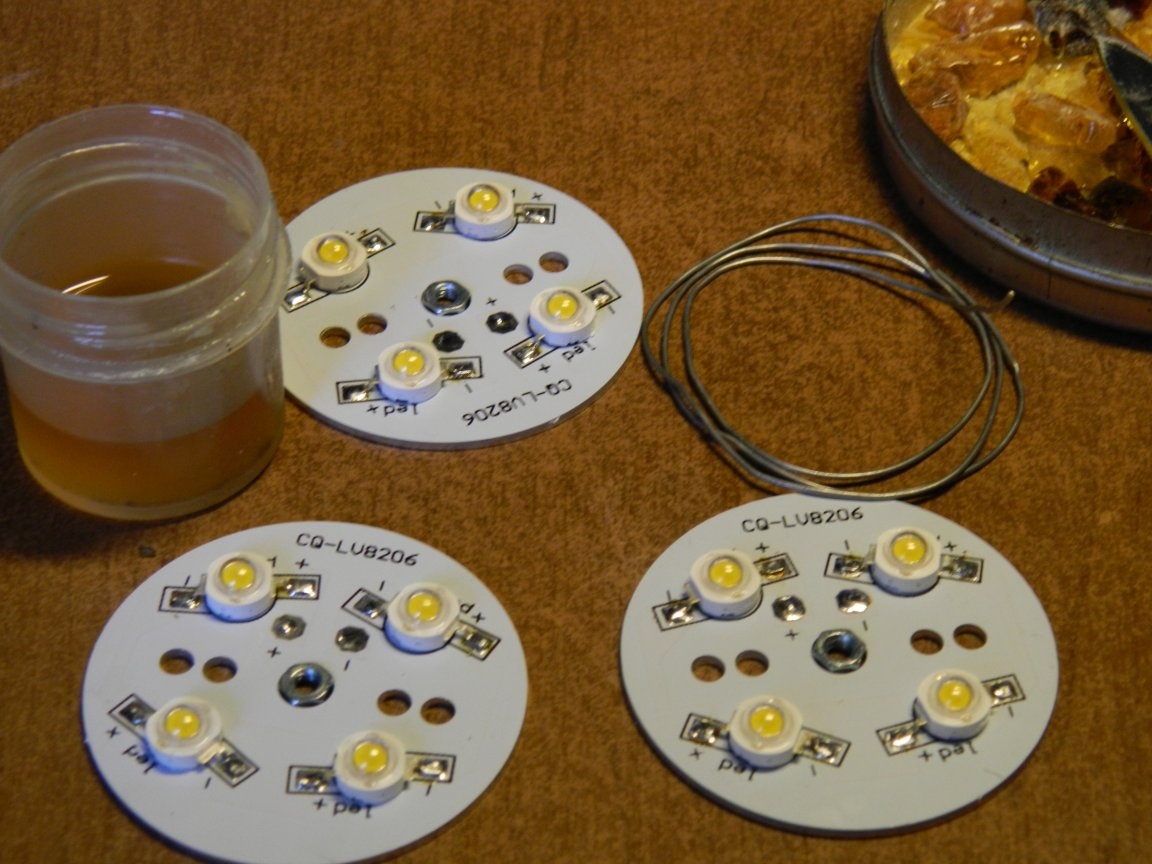
On energy-saving lamps there was a brand - 1000 lm! I doubt it, to put it mildly, but still decided to use 12 LEDs with a power of 1 W such as emitter 3HPD-1. For this type of LEDs, I had boards of Ø49 mm for four series-connected LEDs.
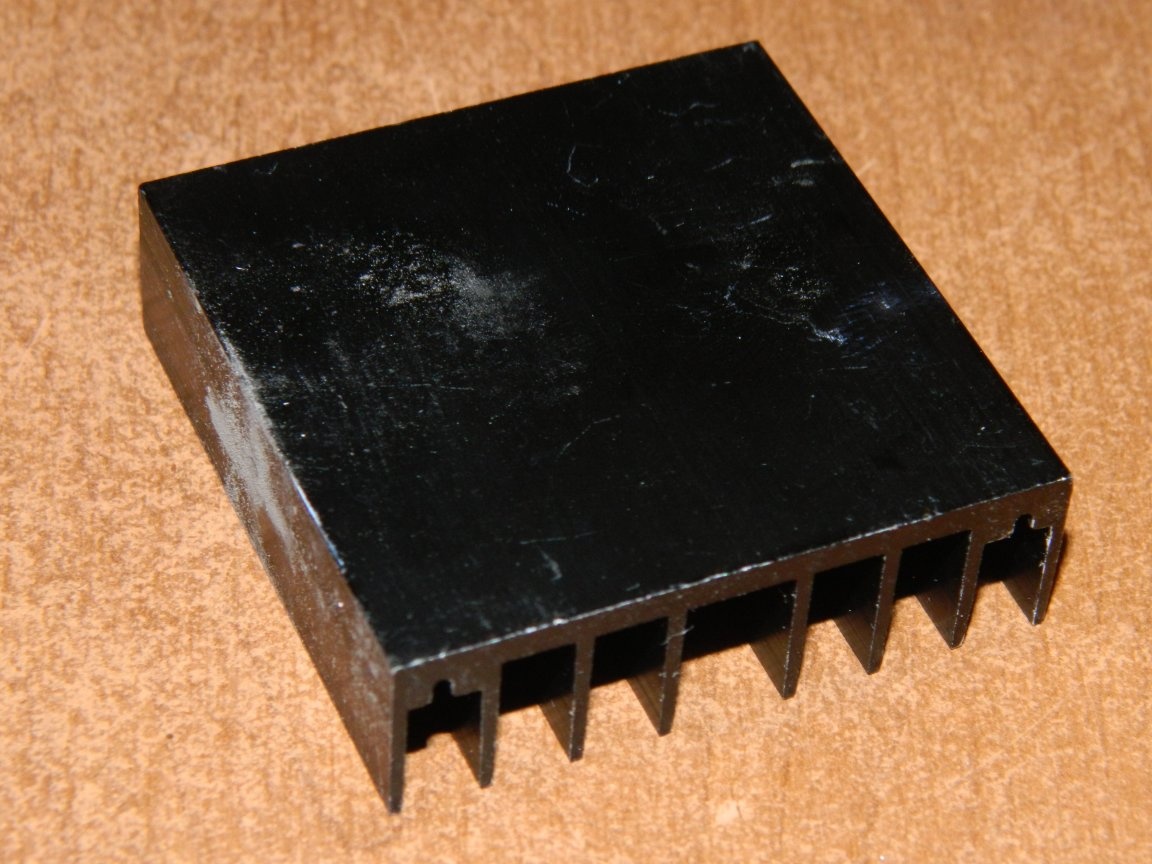
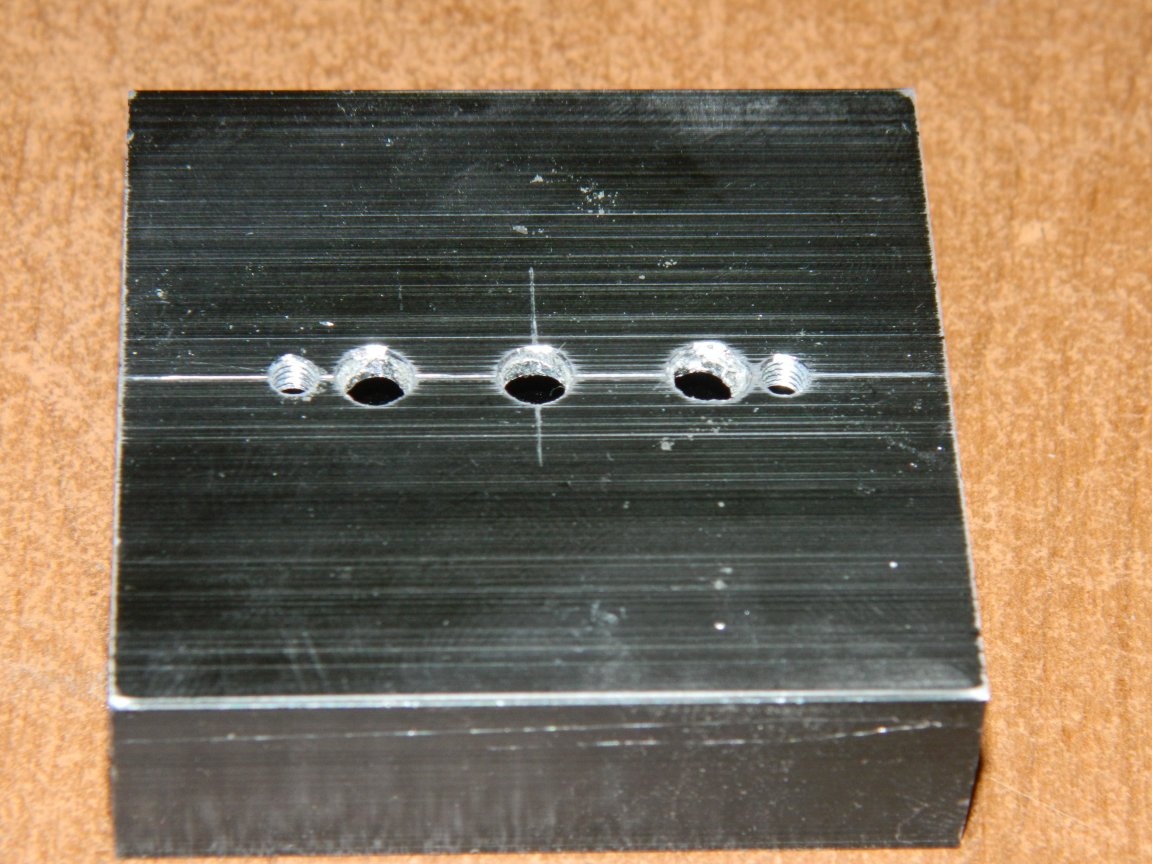
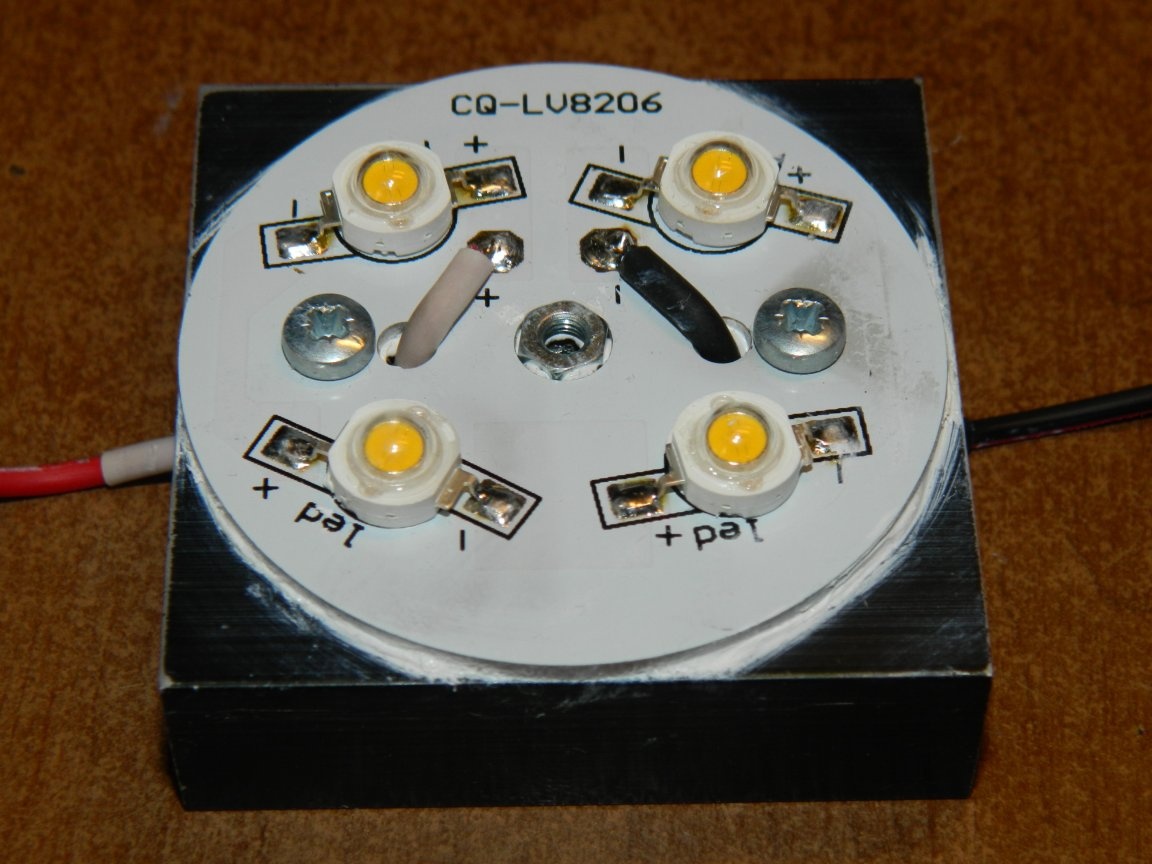
I bought radiators at a radio parts store in Nizhny Novgorod cheaply (when I was there) - BLA099-50. The dimensions of the radiator - 50x49x15 mm - are just for the board.
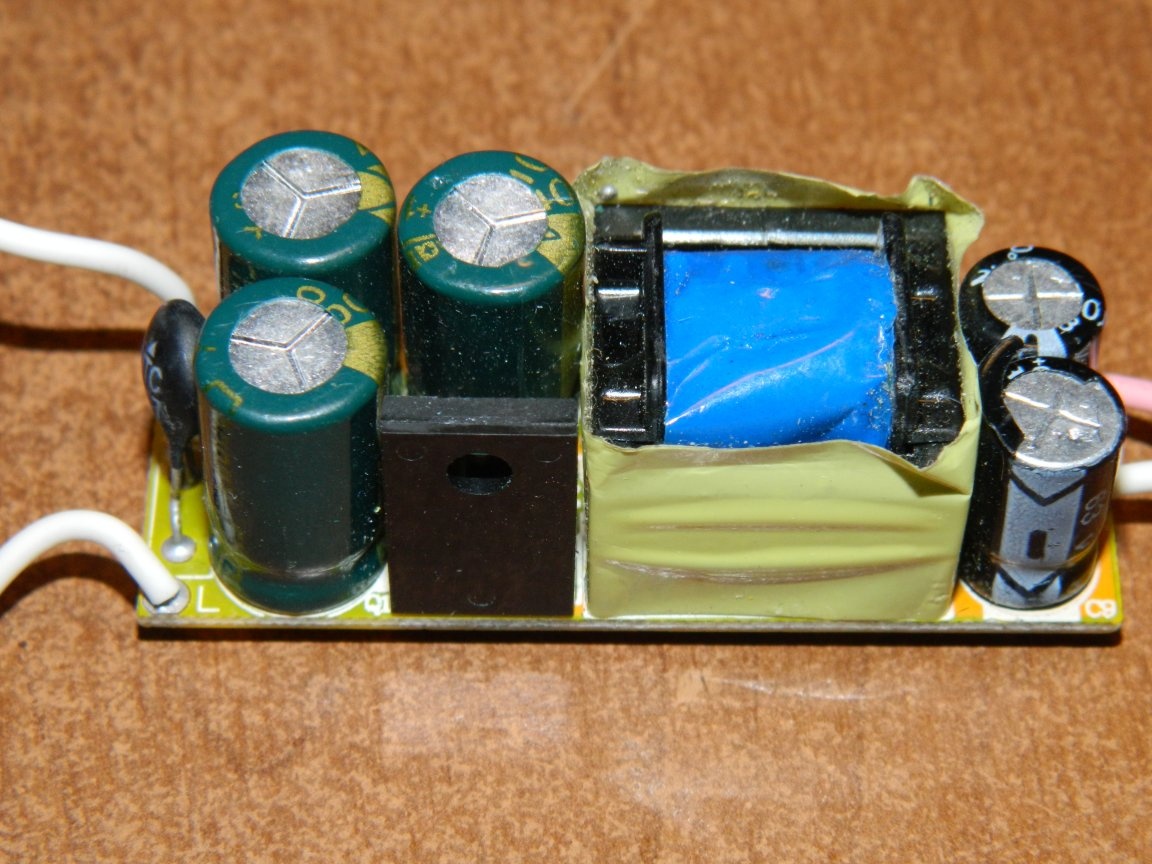
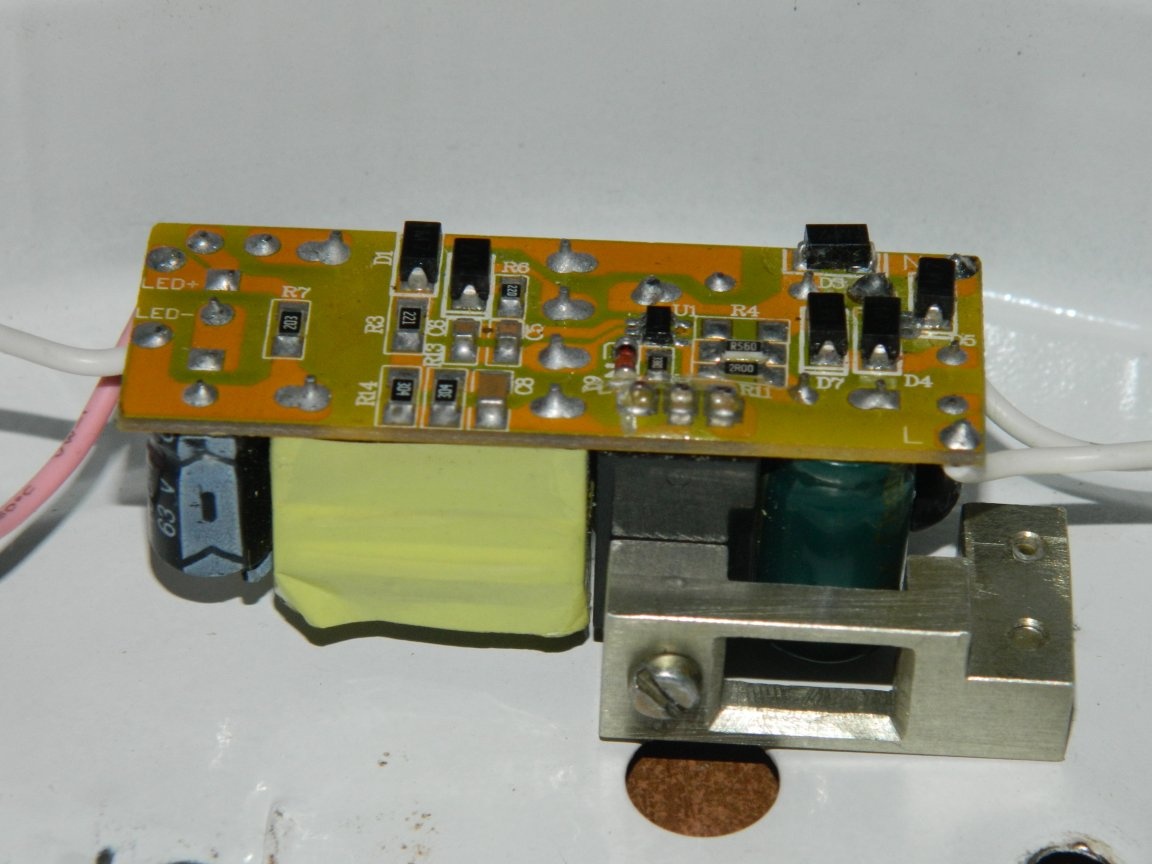
I had a PSM-330-20W driver, designed to connect 10–20 1 W LEDs connected in series.
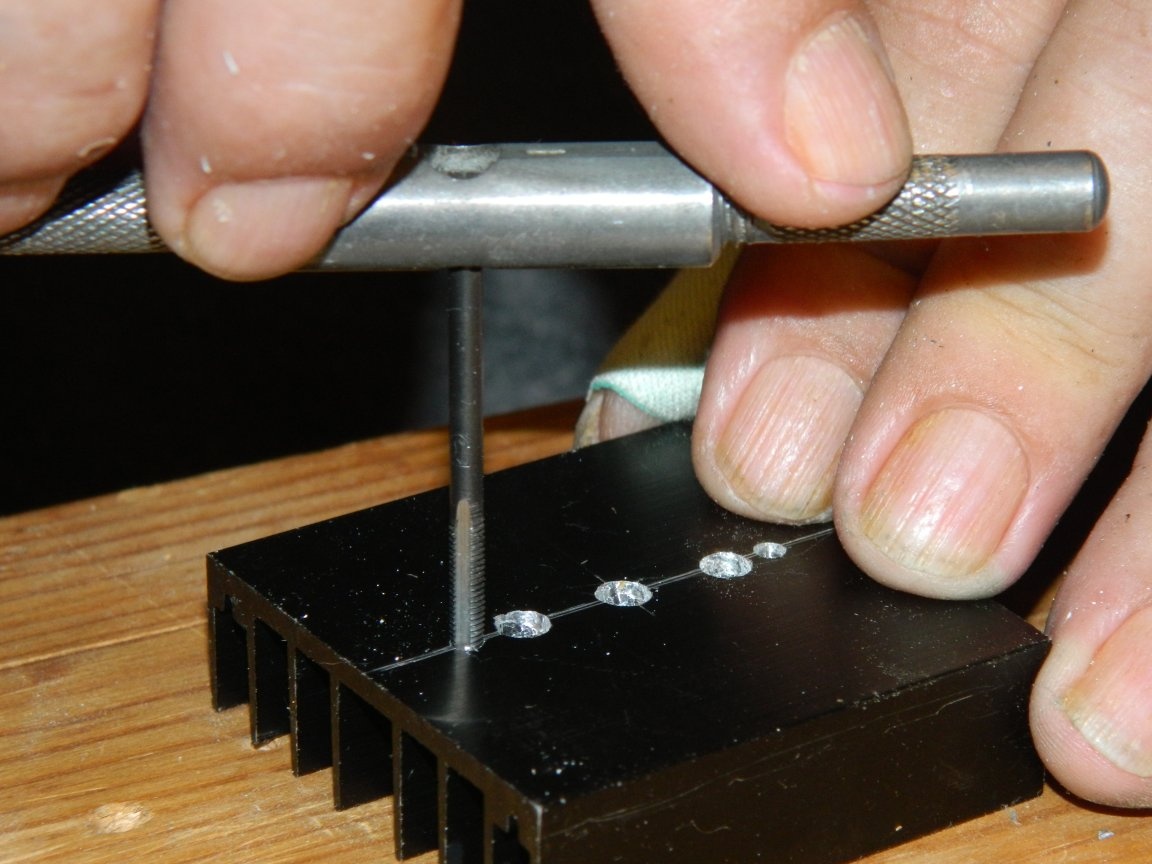
First, I drilled three Ø3.5 mm holes in the radiators to output the wires and fasten them to the base of the lamp. Then I drilled two Ø2.5 mm holes and cut M3 thread into them - they are designed to fasten the board to the radiator.
Then he glued the LEDs onto the boards with hot-melt adhesive and set them aside for drying.
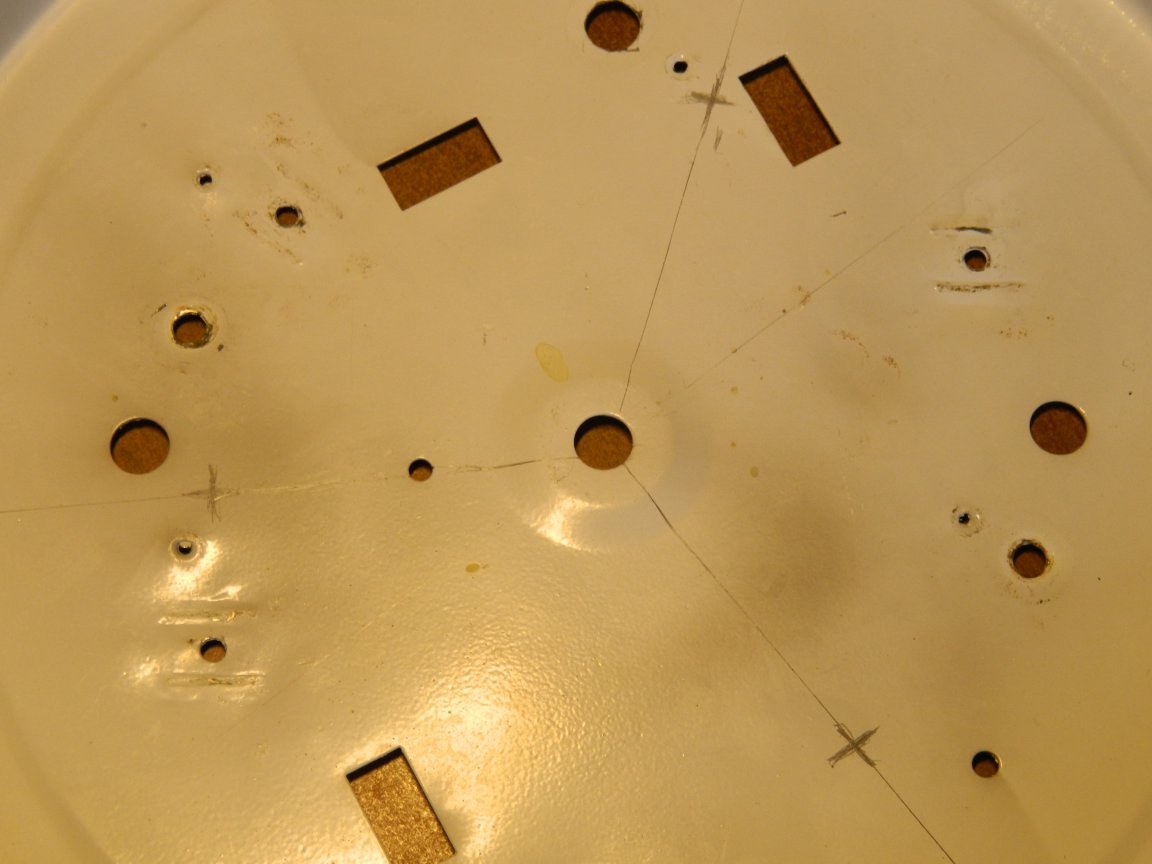
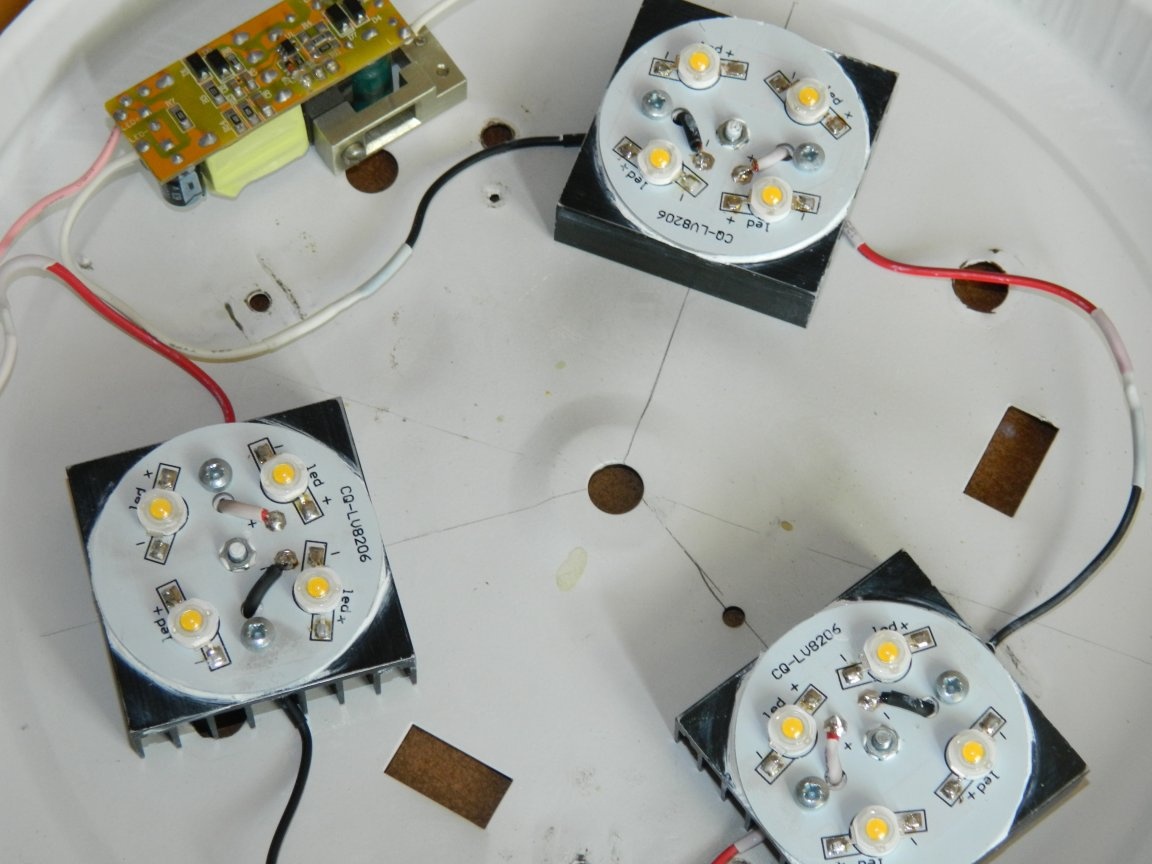
At the next stage, I took up the actual lamp. Based on it, with the help of a protractor, I marked three mounting points for future LED modules at 120 ° and drilled Ø3.5 mm holes at these points.
To fix the driver, I used a tricky aluminum corner (I found it suitable in the radio jam!). One end secured the corner to the base of the lamp with M2.5 screws, the other to the heatsink of the driver chip.
The next day, when the hot melt was dry, the LEDs were soldered to the boards.
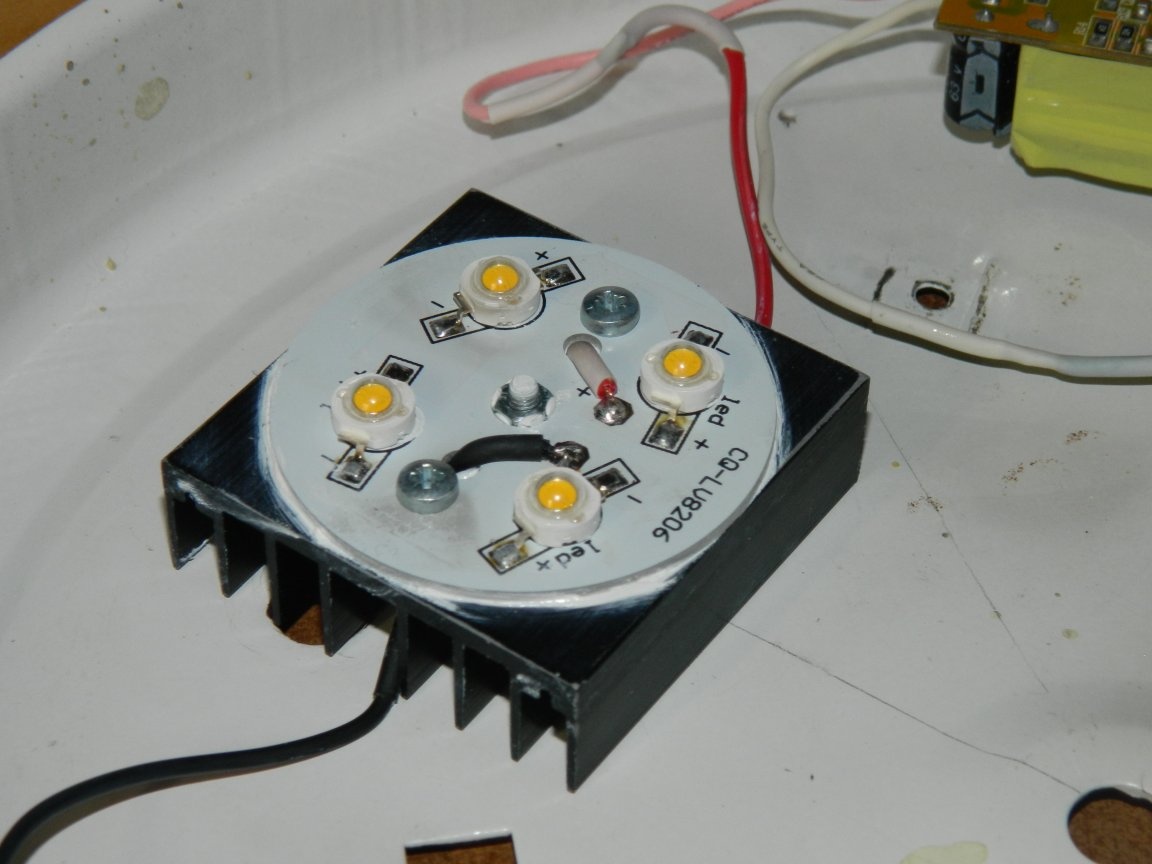
Then he began manufacturing light emitting modules. I soldered wires of 0.35 mm² to the circuit boards. Through thermal paste, KPT-8 attached the boards with M3 screws to the radiator and led the wires out using a heat shrink tube. The central hole in the circuit board turned out to be so large in diameter that the nut M3 entered into it “tightened”.
Screws M3 attached the light emitting modules to the base of the lamp and soldered them in series.
The thing is small - hang the lamp in place, connect 220 V, put on the ceiling and ... turn it on. The alteration took only a day and a half (if not for the glue, then it would have been possible to manage in half a day!). And I turned out to be right about 1000 lm on an energy-saving lamp - an LED lamp of 1300-1400 lm burns much brighter than the "2000" lm of energy-saving lamps!