
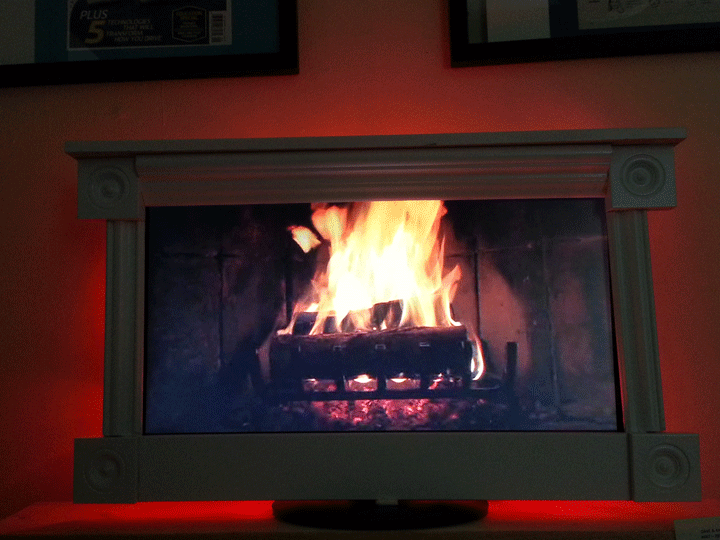
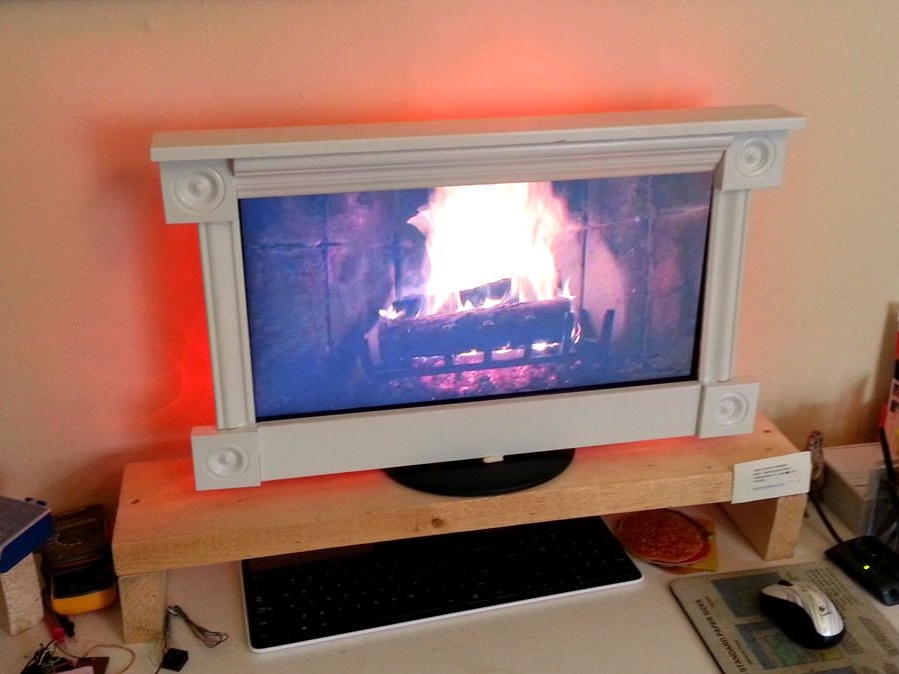
Putting a screensaver in the form of a burning fireplace on your desktop is a good idea, but somehow I somehow lacked authenticity, the feeling of a real fire. Although watching videos with burning fire made me feel nostalgia, I always returned to reality, looking at the side panels of the monitor. I understood that this was just a technological reproduction of a real fireplace.
I decided to frame my monitor so that it looked like a real fireplace, and also made smoothly pulsating lighting from behind, giving the effect of flickering of burning coals. The frame and lighting are mounted on the monitor, and they can be easily removed as soon as I need to turn my fireplace back into a working computer.
After several days of seeing my tabletop fireplace, I can say for sure that there is a certain psychological reaction to the fire. I feel warmth on my face and body. Of course, a monitor cannot warm like a fireplace. But still it’s a great feeling!
This is what I made my fireplace from:
instruments:
- saw wood
- wood glue
- gun for gluing
- sandpaper
materials:
- molded products / wooden layout
- a garland of 100 red diodes
- primer in spray
- white semi-gloss spray paint
Ready to create a comfortable fireplace from a computer monitor? Forward!
Step 1: Design + Measurement
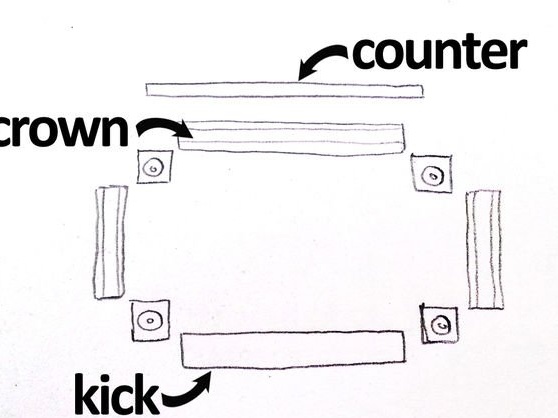
I designed my removable frame, it rests on the upper end of the monitor and covers completely the side, upper and lower panels around the matrix. At the back, a small bar holds this entire structure.
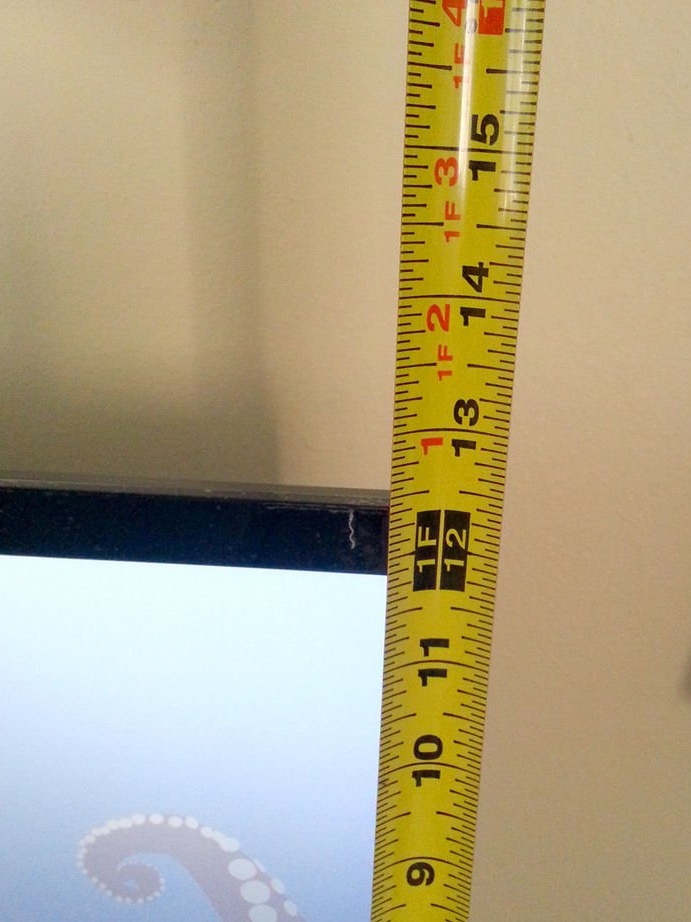
I measured all the dimensions of the monitor, including the thickness, as well as the distance between the bottom of the monitor and the bottom of the stand.
Step 2:
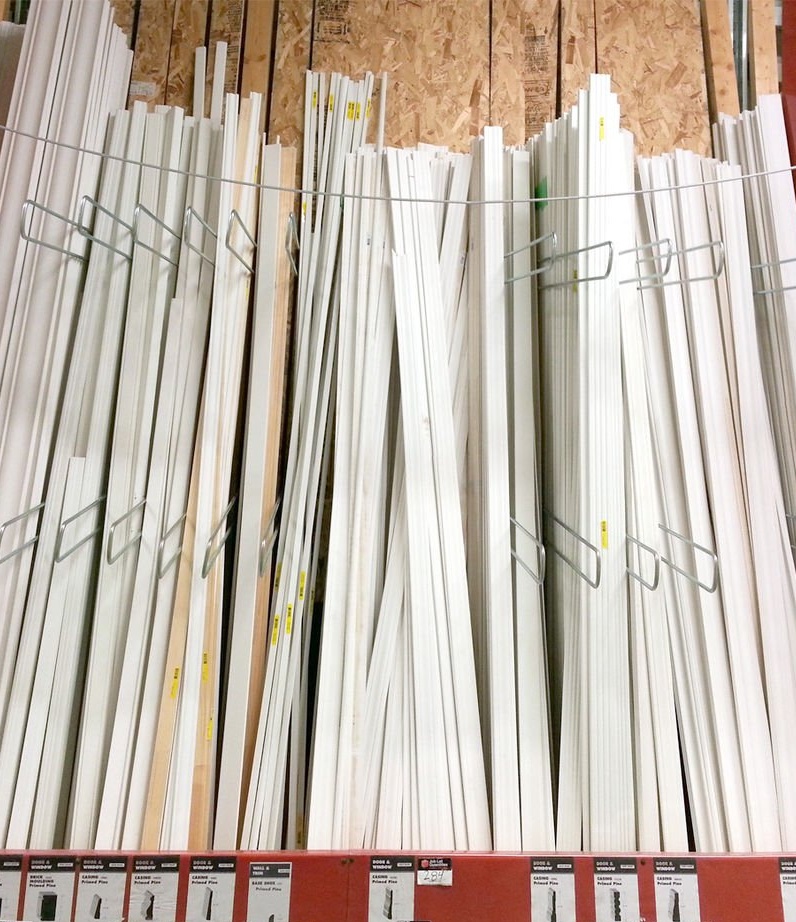
In my head, I imagined what the skin of my fireplace should look like, but I didn’t bathe about profiles - I decided to choose from those that will be available in the store. In the local construction store, all the available stucco frames were assembled on one stand, they were sold already primed, with a very different relief. Exactly what is needed!
For my design, I chose:
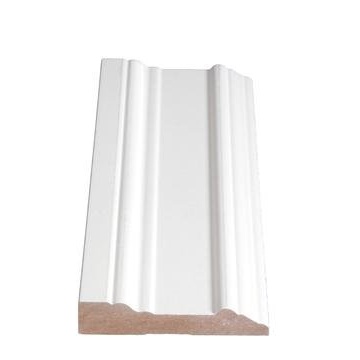
- corner blocks (3/4 "X 2-1 / 2" X 2-1 / 2 "), 4 pieces

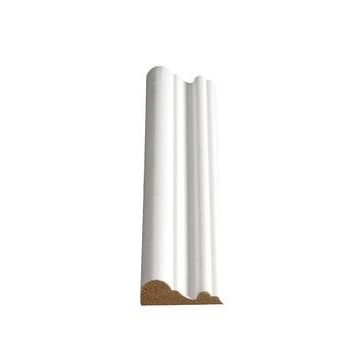
- Fiberboard profile for the top panel (5/8 "x 1 3/4"), 1 piece
- Fiberboard base (1/2 "X 3 1/2"), 1 for stand and 1 for bottom panel
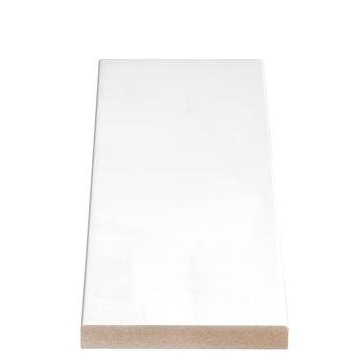
- Fibreboard (11/16 "X 3 1/2"), for 2 side panels
There was a container with rejection, and from there I took something like a window board, which I will use as a latch on the back of the frame so that it rests on the monitor. I cut the profiles into sections of approximately the desired length, and at home I already adjusted the sizes perfectly for the monitor.
Step 3: Join and glue the components
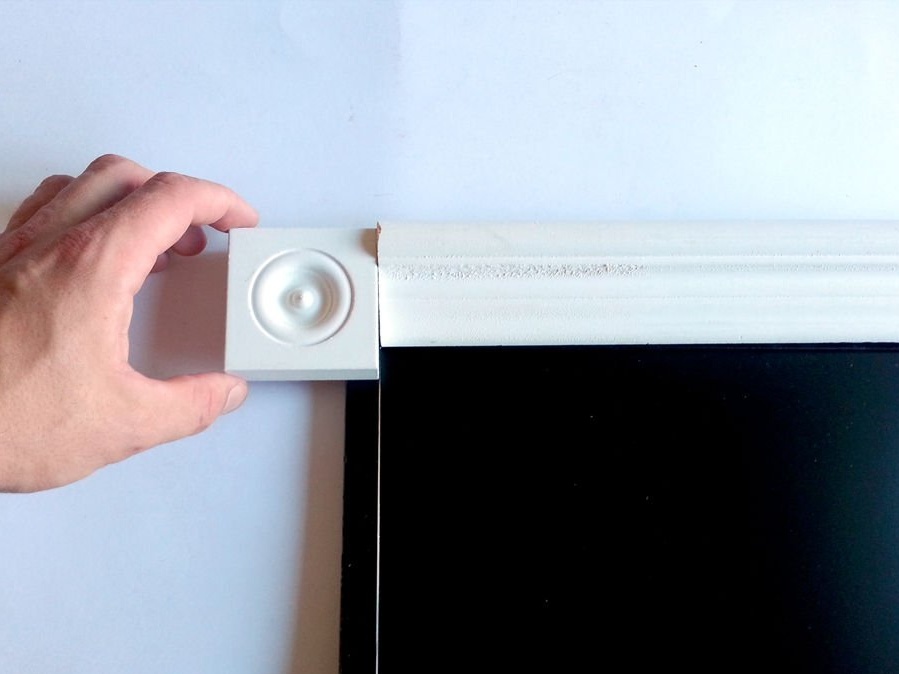

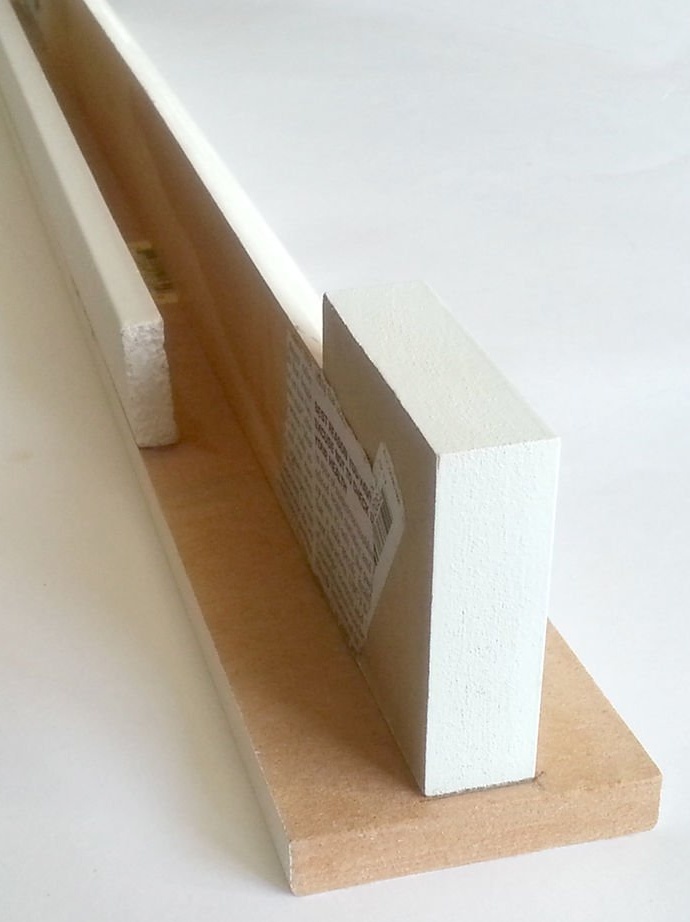

After the “fitting”, I cut each section exactly to the desired size. The frame was glued and reinforced with finishing nails. I started with two corner pieces, fastening them to the top panel, one on each side. Leaving enough clearance for the monitor, I glued the back plate to hold the frame on the monitor. For strength, I fastened all the parts together with clamps and set aside to dry.
Then I glued two corner pieces to the bottom panel and fastened them with clamps. Both parts glued together I left to dry overnight.
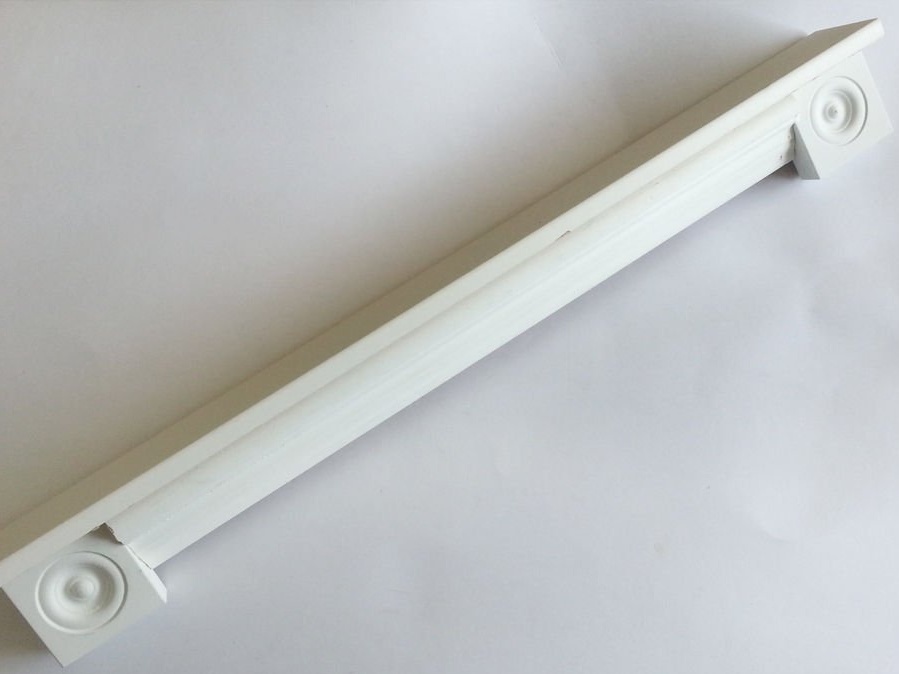
After that, I glued side panels to them, thus connecting the top and bottom of the frame. I strengthened the connection of the parts together by gluing small pieces of the rest of the tree to the seams.
Step 4: Primer + Painting
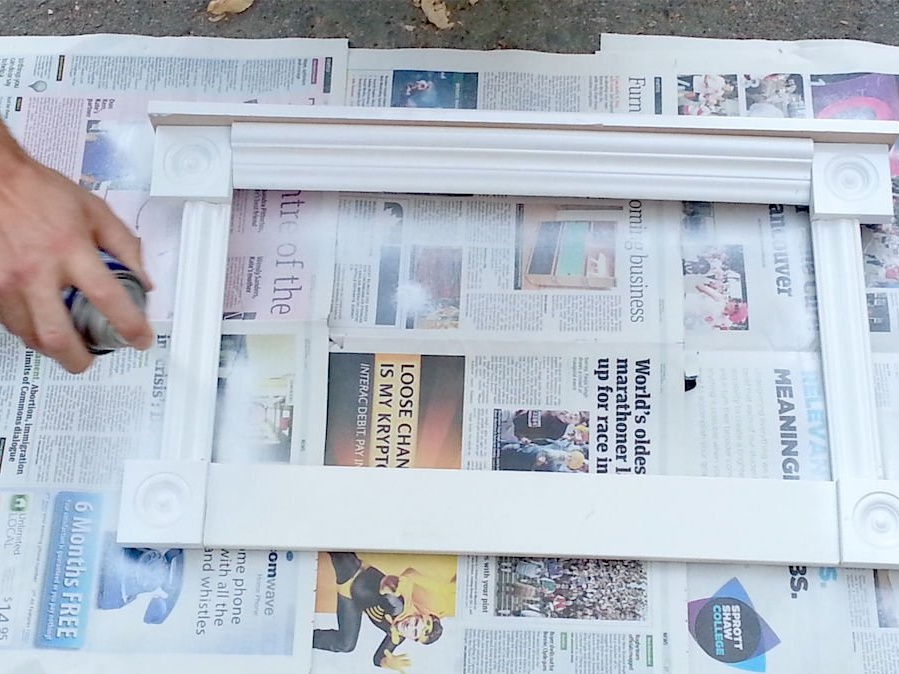
Although most of the items I bought were already primed, some areas like the back side needed processing. All the surfaces that will be visible, I lightly sanded with 300 grit sandpaper, and brushed it to remove all debris and dust.
Having covered the work surface with something, ground the frame in one layer and leave to dry for 20 minutes. If the final coating suits you, you can apply the paint. If you need to primer again - repeat one more coat and let dry before painting.
Then paint the entire frame with white paint. My paint dried for about 40 minutes, and then I applied another coat. In total, I applied 4 layers until I reached the finish I needed.
Step 5: Lighting
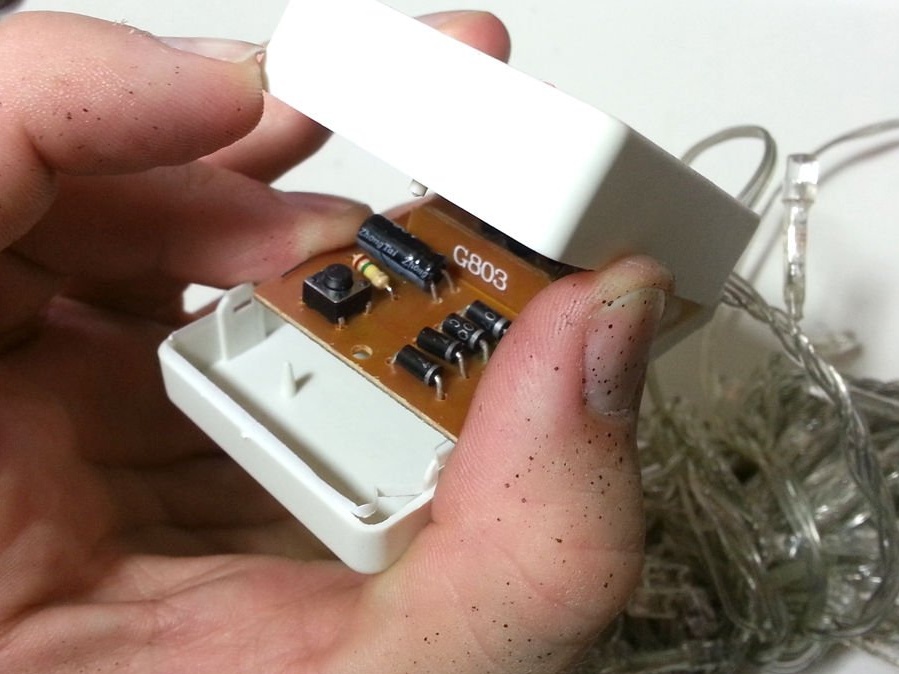
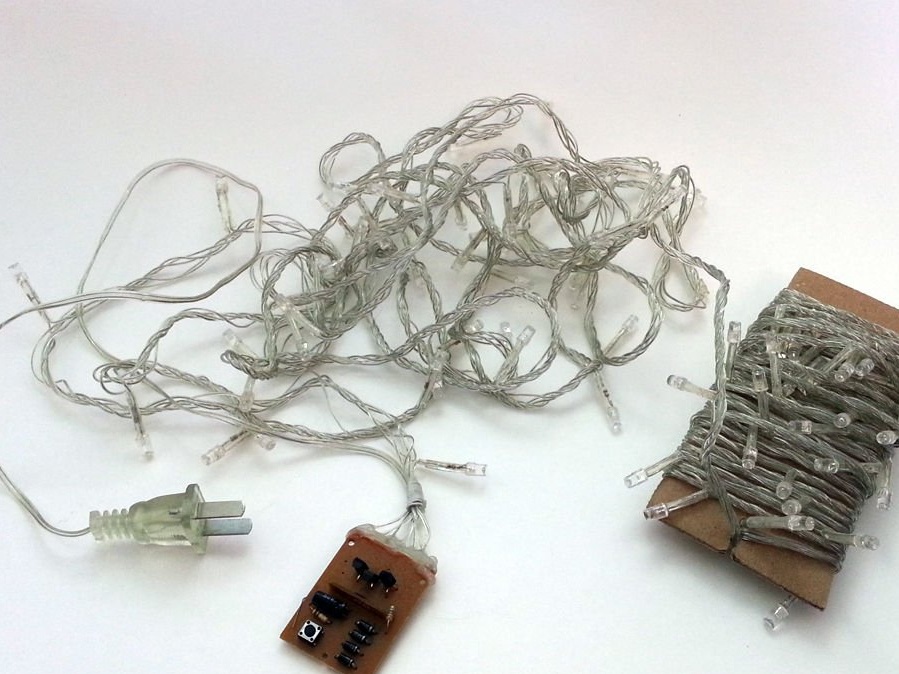

I bought a red diode garland with 100 bulbs. It was inexpensive, it could have different lighting effects, as I wanted. These modes were switched using a small control unit, which provided for as many as 8 lighting effects to choose from. One of them was a soft, smooth flicker - just what you need!
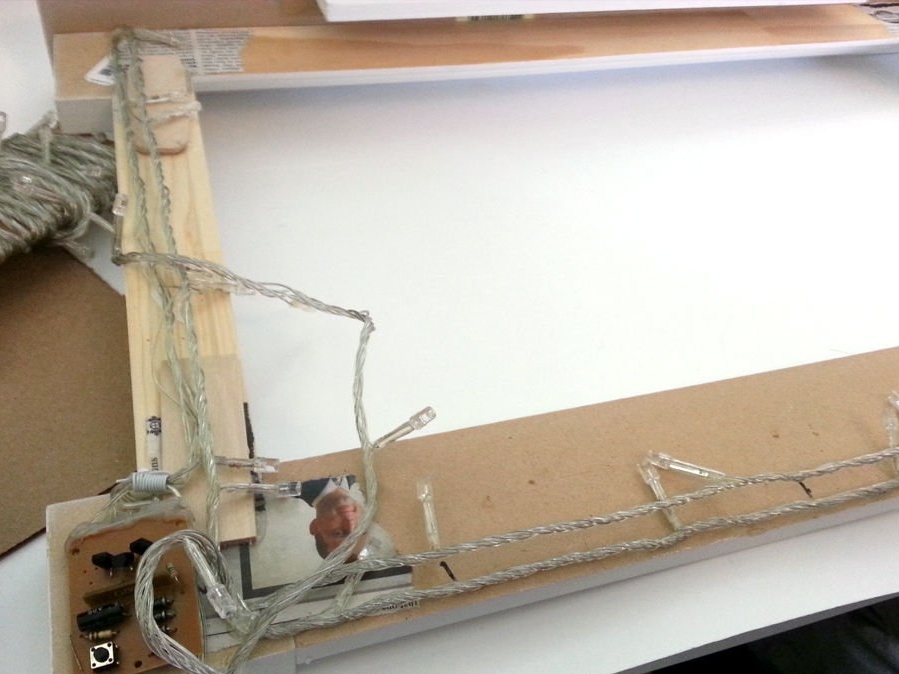
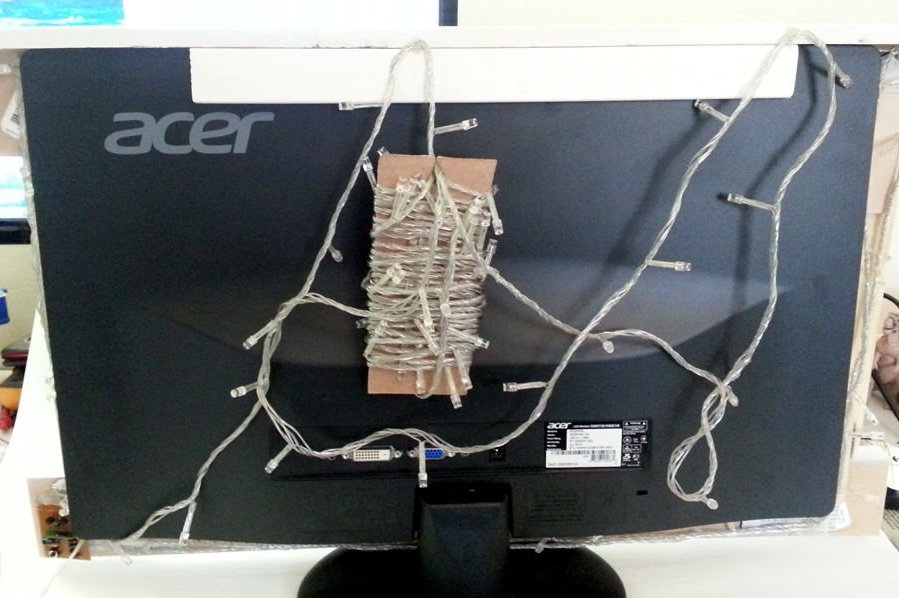
Although this remote was small, its body was slightly larger than I needed. Therefore, I removed the case from the circuit to reduce the volume. I fixed the remote control circuit on the back of the frame, glued the garland around the frame with hot glue. I wrapped the remaining length of the garland around a piece of cardboard and hid it behind the monitor after I hung the frame on it.
When the frame was on the monitor, I turned on the garland.
Step 6: Fireplace


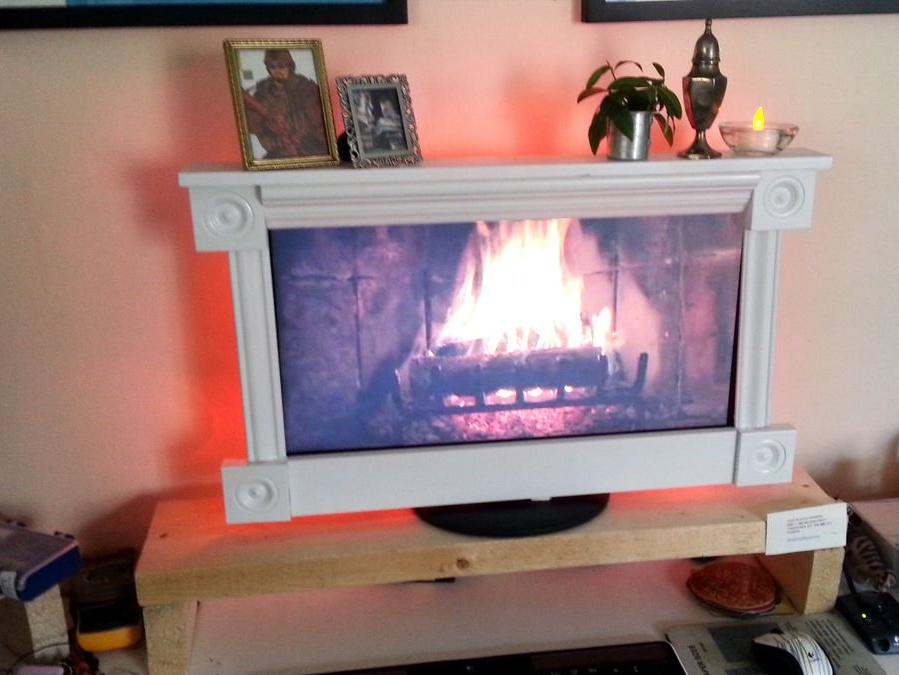
Of course, the fireplace frame and the video of burning firewood are already something, but for a more natural look, you need to decorate the fireplace with some photos, candles and plants - all that usually stands on fireplaces.
It remains only to turn off the light, lean back and enjoy the wonderful decay of coals in a table fireplace!