
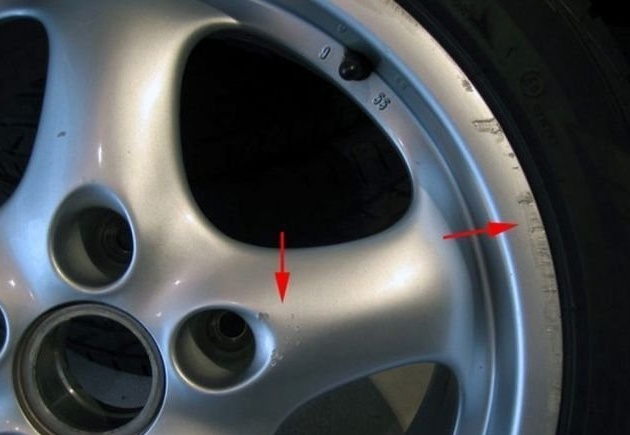
If you are worried that chips and scratches appeared on your car’s disks, which inappropriately spoil the appearance, and the weight of the wallet does not allow you to entrust cosmetic repairs to specialists - do not worry! You yourself can solve this problem.
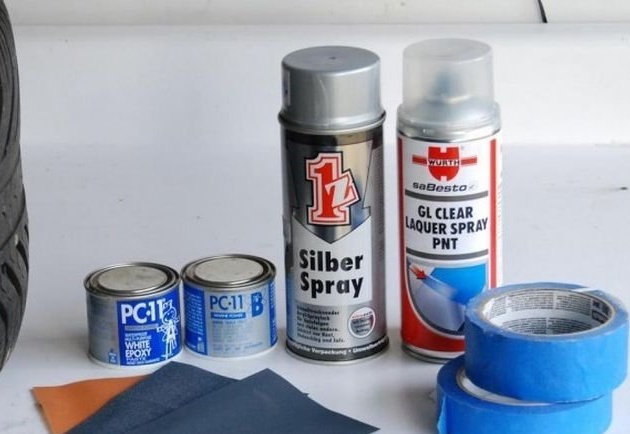
You will need the following:
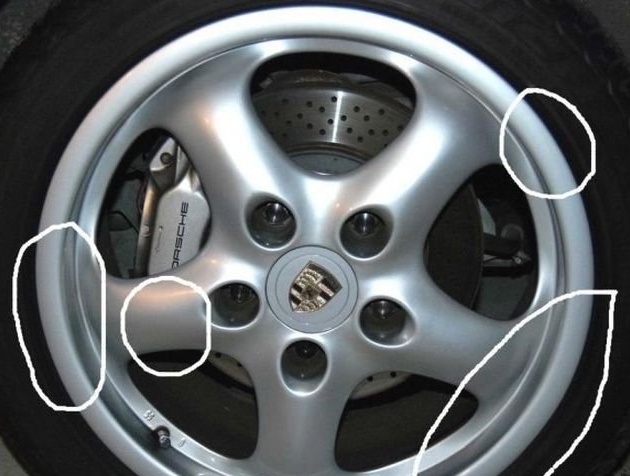
1) Our scratched discs
2) Two-component epoxy paste
Color does not really matter, as we will paint it. True, if it is too bright, it can also shine through, in which case it will have to be primed with a primer before painting. I used white paste, so I did not have to prime.
3) Sanding paper with a grain size of 300-400. And finer grit 600
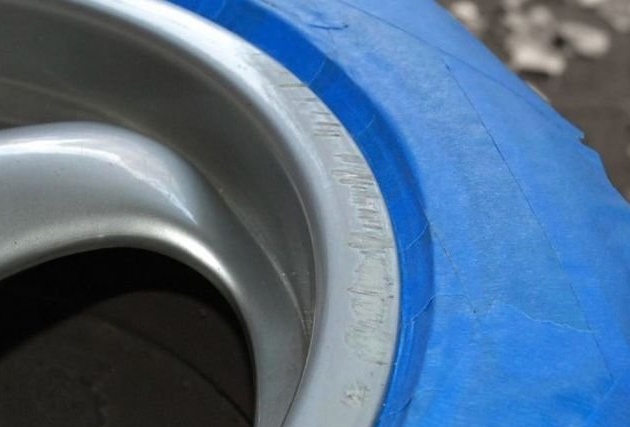
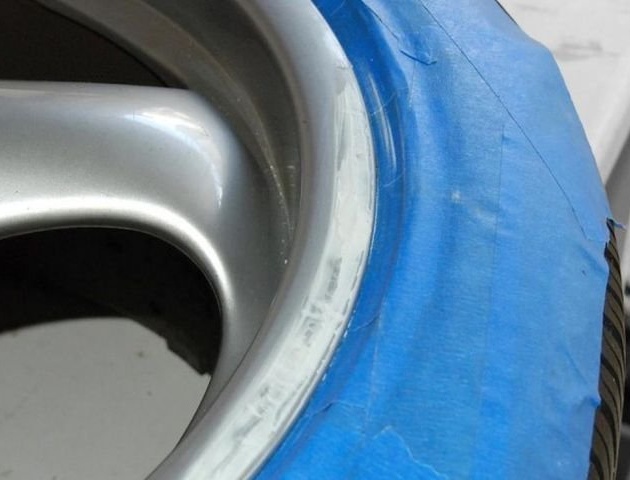
4) Adhesive tape if we are not going to remove rubber from the disc
5) Cylinder with paint and varnish. There are a lot of colors on sale that differ little from the old coating. Everything to your taste and wallet.
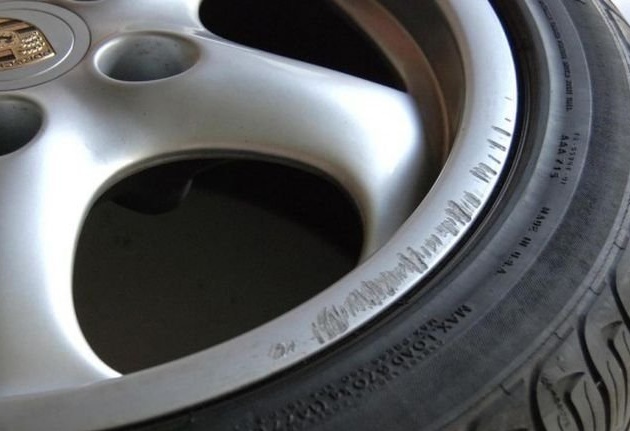
Using sanding paper 300-400 we clean the place of scratches so that the bumps would not be felt to the touch.
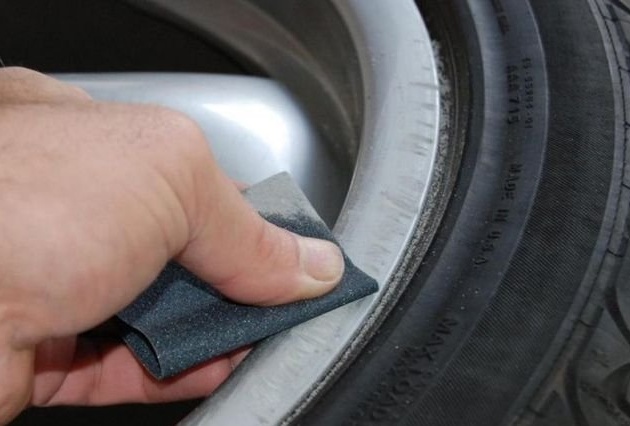
In order not to stain the rubber during painting, glue it with tape.
We mix the components A and B of the epoxy paste, with the calculation of one to one. We apply on the cleaned scratches so that it completely fills them from the inside, and on top there was only a thin layer.
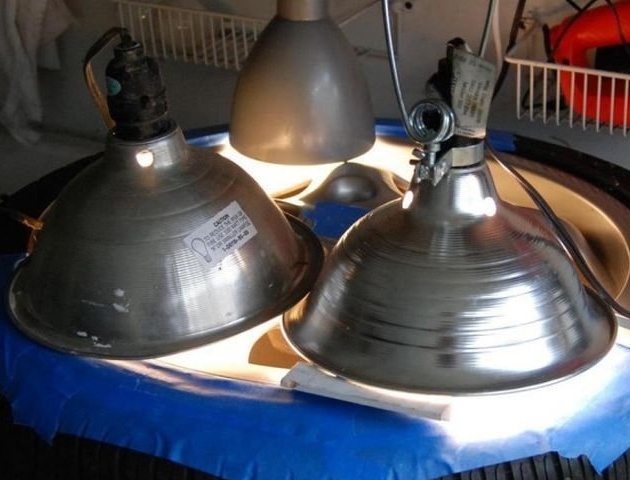
Sushim. The longer the better. If you want to speed up the process a bit, you can use heat (for example, place an ordinary incandescent lamp or electric fan closer).
After the epoxy has dried, we clean it with fine sanding paper for painting. Everything should be perfectly smooth, both in appearance and by touch.
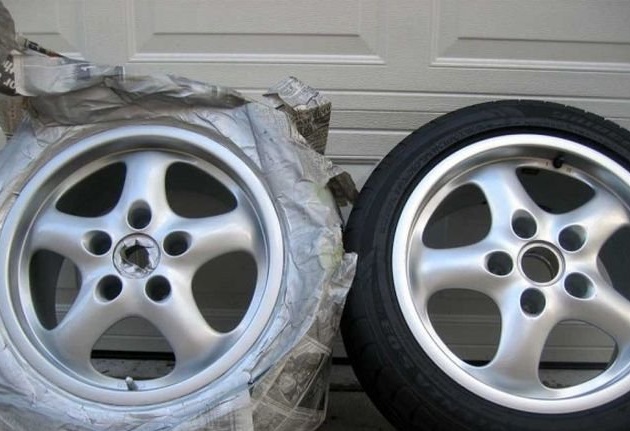
The next step is painting. Using a balloon, this is very easy to do - with a good shake, spray the paint with thin layers of 20-30 cm. We try to avoid noticeable transitions, for this we apply two or three layers, each drying for about half an hour. So that dust does not get on fresh paint, it is best to paint in a pre-moistened room.
After the paint dries, we apply the varnish in two layers, as in the case of the paint between the application of the layers, dry for about half an hour. After the top layer we dry for longer (you can reduce the time again by resorting to heat sources).
When everything is completely dry, wet the fine sanding paper with water and barely touch the smoothing of the varnished place.
The disc can be polished to create the perfect factory shine.