

Everything that is done with one's own hands was appreciated and appreciated now. Especially if this is some necessary attribute of an apartment or a house. Why spend large sums on what you can build yourself ?! No one can argue with the importance of talent and patience. But everyone knows that thanks to work you can achieve simply unrealistic results. The main thing is aspiration and you will succeed.
In the submitted homemadeIt’s important to know the basics of wiring in order to deal with electricity. You can do all the work in a day.
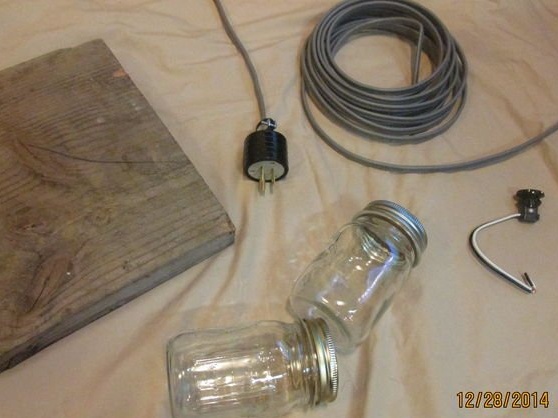
Materials necessary for the manufacture of chandeliers
• The first thing you need is a wire. He must be tough
• Mason banks
• Light sockets
• light bulbs
Instruments
• Wire strippers or box
• Knife
• Side milling cutters
• screwdriver
• Choose saw or jigsaw
• Router, desk router
• Drill or drilling machine
Making Chandelier Boxes
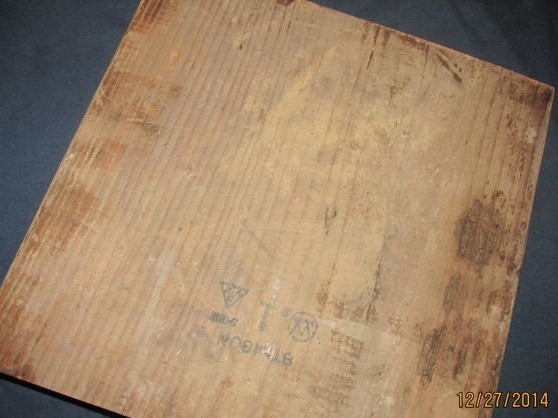
The box is simple and can be built with your needs and desires. The size of the box depends on the location and number of cans. You can create your box from everything that you have around, for example, pallets, scrap and so on.
Get rid of excess garbage
The selected base should be cleaned of garbage, if there are "burrs", then treat everything with sandpaper.
Now it’s worth moving on to the manufacture of our chandelier. To do this, draw on the basis of the proposed holes. You can choose their location as you like. After that, cut the holes.
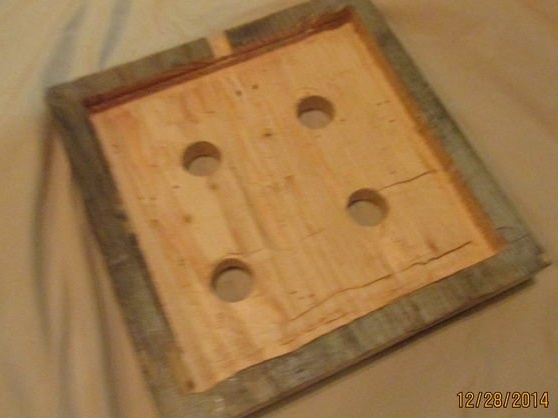
Holes need to be made as many as you cans are ready for installation. If there are four cans, then, respectively, four holes are needed, and so on.
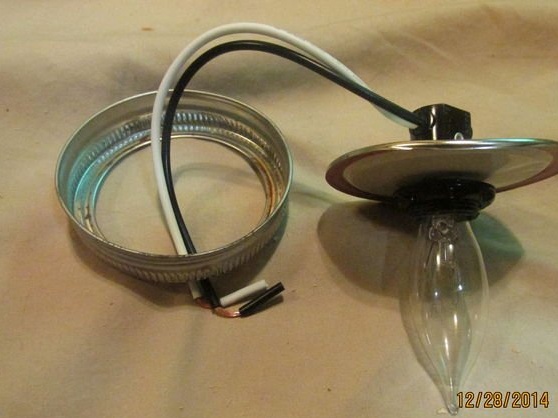
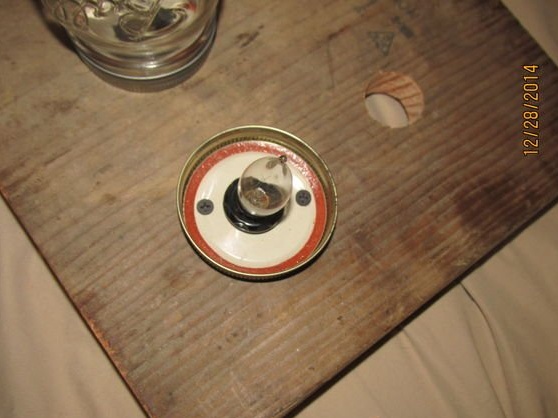
Now it’s worth preparing the lamp itself.
Take the can and carefully drill a hole in the lid.

After that, it is worth fixing a cartridge with a bulb in the drilled hole.
After you prepare all the bulbs, it is worth going to the moment of their fastening at the base of the chandelier.
Covers should be secured with screws.
Turn the chandelier upside down and carefully secure all the wires.

If desired, the base of the lamp can be painted.
That's all . Your chandelier light is ready to go.
In principle, the work is very laborious. But with maximum effort, you will succeed. It remains only to draw all the wiring through the finished holes and you're done. Your chandelier will decorate the whole room