
On the eve of the New Year, I suggest you assemble a Christmas tree programmable RGB garland with the ability to create various patterns.
What will be needed for a garland?
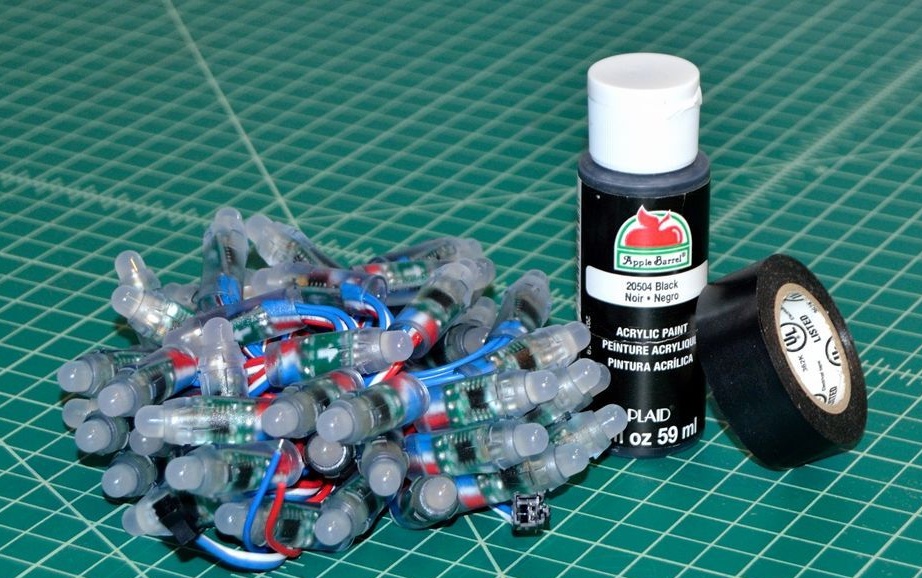
• WS2811 RGB Full Color 12mm LED String DC 5V can be purchased on Aliexpress for $ 20. The usual end of one such garland can be connected to the other to increase the length. This article is designed to build light patterns, so if you have at hand a programmable LED garland with a different protocol, you will need to rewrite the program and connect the garland in accordance with the datasheet.
• 5 volt current source rated for the current consumed by your garland. Typically, the seller indicates the current consumed by the garland.
• Arduino any version. The author used the standard Arduino Uno.
• Green acrylic paint
• Insulating tape
• The wire.
• It is advisable to have JST connectors so that it is easier to connect the daisy chain to the controller
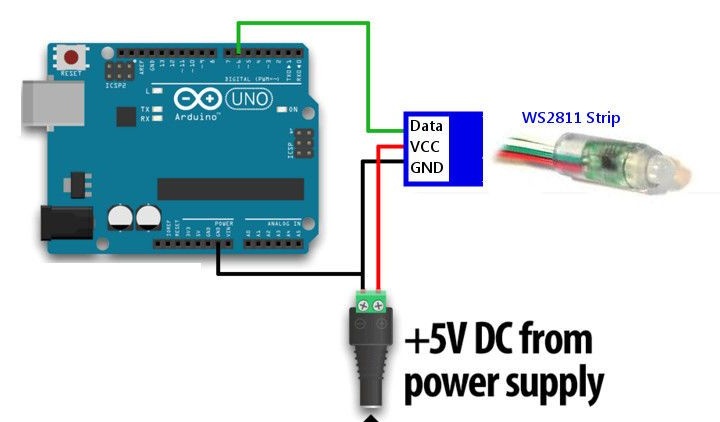
Before you start collecting Christmas tree garland, make sure that all the LEDs are working. On the Internet you can find how to connect WS2811 to Arduino.
Identify + 5V and GND pins on datasheet to your WS2811
• Red = + 5V
• Blue = GND
• White = Data
The connection is the same as in the picture.
Install the popular Adafruit WS2811 Arduino library. Download and read the installation instructions here:
Change the attached code according to the length of your garland in #define LED_COUNT. Download and run the program on Arduino. Note that the pixels change color from red to green, then to blue, then to white for 5 seconds. This ensures that all 3 LEDs inside the pixel are OK.
Assessment of voltage drop.
Each LED pixel and the subsequent connected LED garland will cause some kind of voltage drop. So after 50 LEDs in your LED garland, the voltage of the power source will drop by some noticeable amount. For example, from 5V to 4.7V. This means that the next garland that you connect to the first will be powered not from 5v, but from 4.7v and the voltage after it will drop even lower. As a result, each LED will be darker than the previous one. Ultimately, when the voltage drops to 3.3v, the chip serving the WS2811 protocol will simply stop working.
Since there are 3 LEDs in each pixel and a white color of the garland glow means that all 3 LEDs are lit equally, voltage will drop on it more than if, for example, only red LEDs were lit. When you started the testing program, did you notice strong blackouts at the ends of the garland? You can connect there additional 5v power. The author did this every 100 pixels.
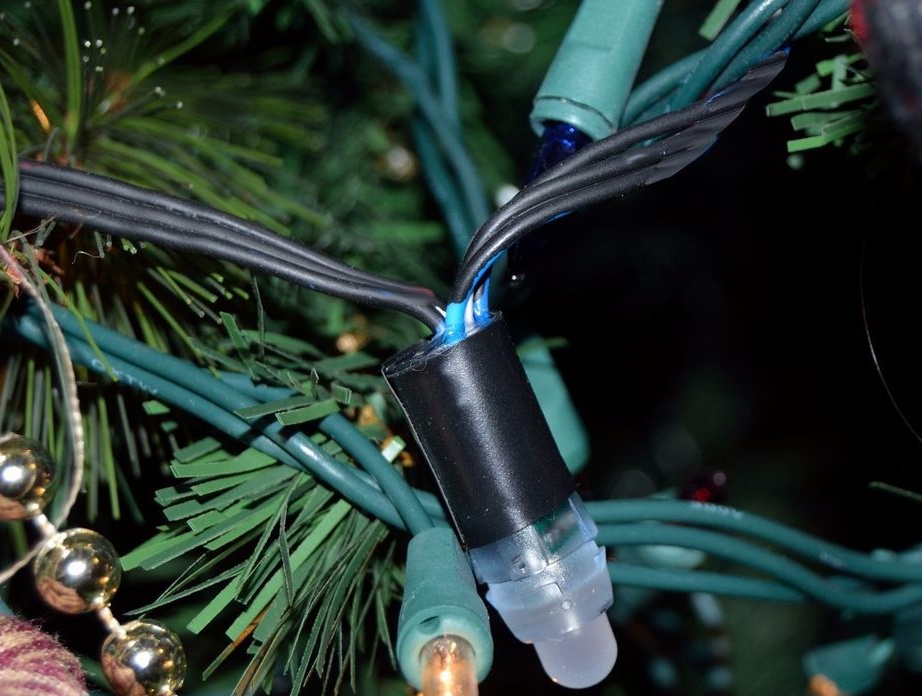
Garland painting.
Normal Christmas lights are green to merge with the tree. Your LED string lights have different colors. Hang the garland and paint the wires green with acrylic paint, this will take a little time. Wrap WS2811 in black electrical tape, it will be faster than painting them.
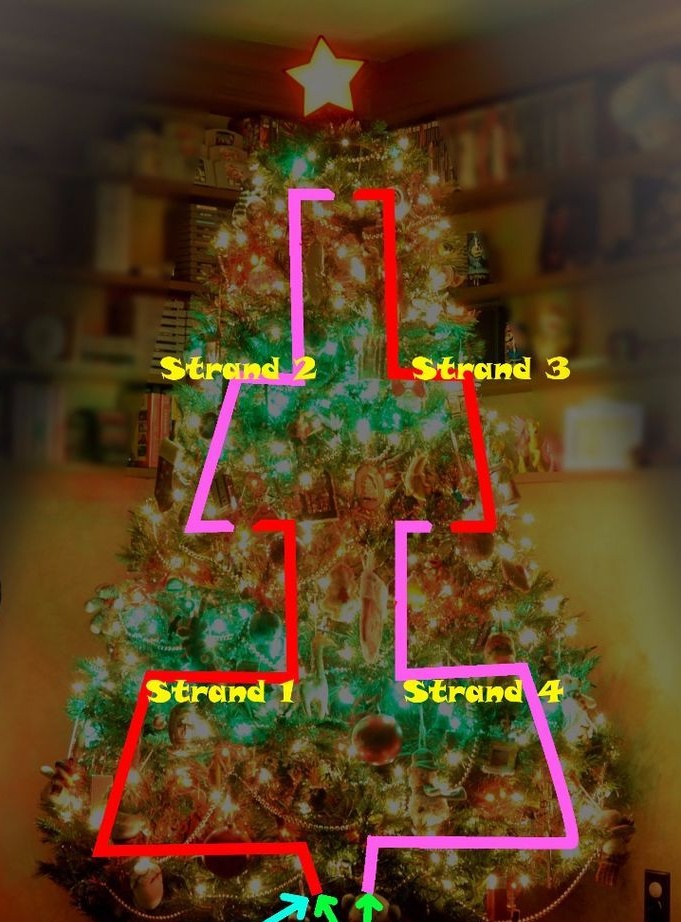
Determining the X and Y Positions of Each Pixel
Hang the assembled garland on the Christmas tree. After that, you can calculate the position of each pixel in X and Y and insert this data into the program code. To do this, use this file with the code. Uncomment the first function loop ()which lights up sections of 10 LEDs. If you have more than 50 LEDs, then you can extend this section with a simple copy, without forgetting to specify the desired number in #define LED_COUNT
In the video, the author superimposed a grid on the image in the video editor on a luminous Christmas tree, which allowed him to get 200 positions.

Try to overlay the grid so that the lowest left LED falls into cell 1.1. This is done so that the program can determine the middle of the tree in both X and Y directions. Entering X and Y coordinates is a manual process, you will receive each coordinate by looking at the video. 200 coordinates sounds, of course, terrifying, but it will take time within 20 minutes.
You can print the grid and attach it to the computer monitor or phone display, so as not to mess with video editors.
The attached file, like the previous file, is an example of code that goes through various patterns, like in a video.
From the video you can understand the logic of the program and write your own templates or change the code for yourself. Another attachment is a configuration file so that the Arduino can be controlled via a serial interface from another device. The author used the Raspberry Pi to control the Arduino.
Here's a New Year's garland using Arduino and the WS2811 kit.