
To make a speedometer you will need:
- skateboard;
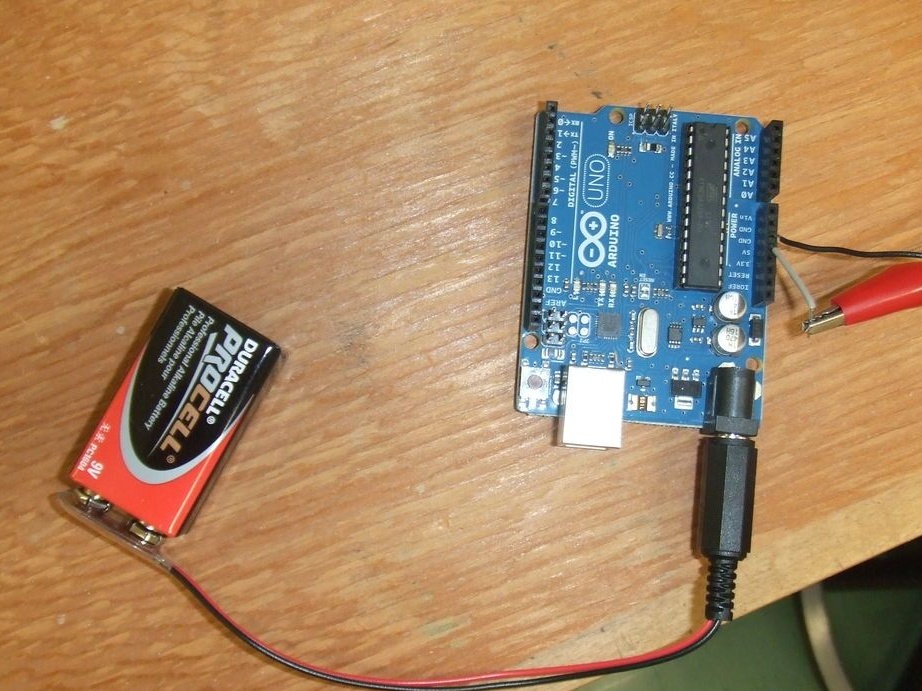
- Arduino controller;
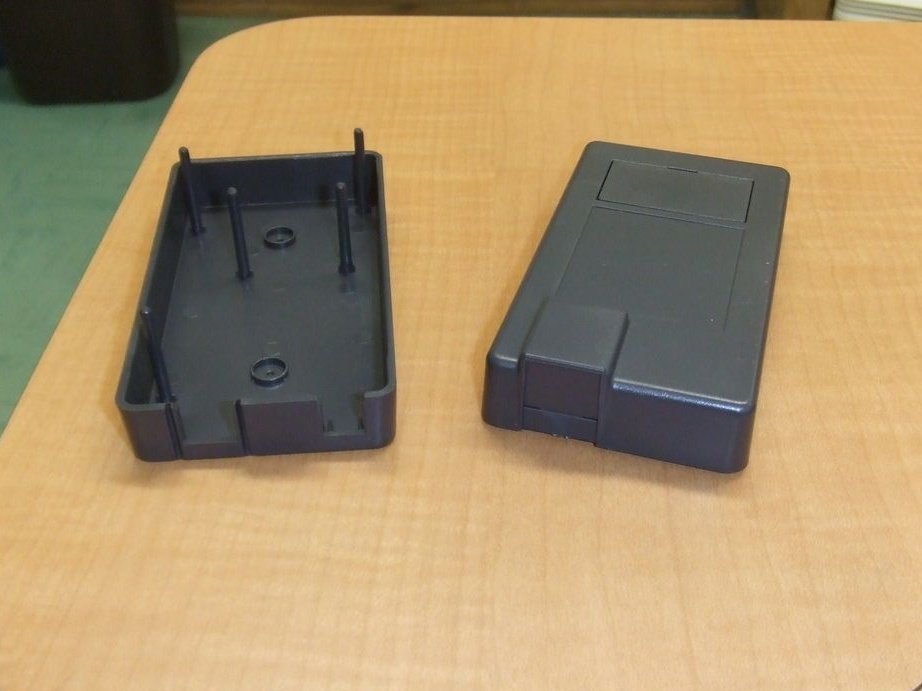
- a plastic box (the controller will be installed in it);
- A small magnet with a diameter of about 0.2 inches;
- magnetic switch (reed switch);
- 9V battery and a special connector with which the battery can be connected to the controller;
- small LCD screen (6 x 2 character display);
- resistors with characteristics 10K and 47 Ohm;
- wiring;
- soldering iron with solder;
- hot glue or the like;
- 10K potentiometer;
- drill.
Manufacturing process:
Step one. Install the magnet
First of all, you need to install a small magnet in the skateboard wheel. To do this, you need to drill a hole in the rubber, in diameter it should be such that the magnet fits tightly into the wheel. To fix the magnet, you need to thoroughly lubricate the hole with hot glue and then install the magnet. After that, a reed switch (magnetic switch) will be installed here, which, when the wheel is spinning, will generate signals for the Arduino controller.

Step Two Electronic device diagram
The device diagram is quite simple, everything can be seen in the picture. All contacts with + 5V power are marked in red. Green contacts are grounding, that is, minus. When connecting to the contacts, it is imperative to wear heat-shrink tubing so that the system does not short circuit. As for the method of fastening the contacts, it is best to solder them, since all other methods with vibration will not provide proper contact.
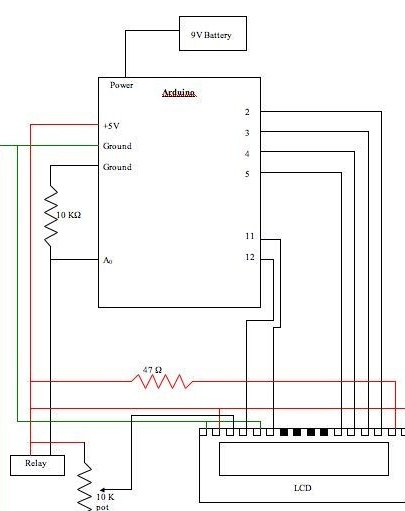
To mount the electronic part, it is best to use a separate piece of board or other material. In this case, the design will be more reliable. It is still important to determine in advance where the display will be. If placed directly above the electronics, this will reduce the number of wires and as a result make the system more reliable.
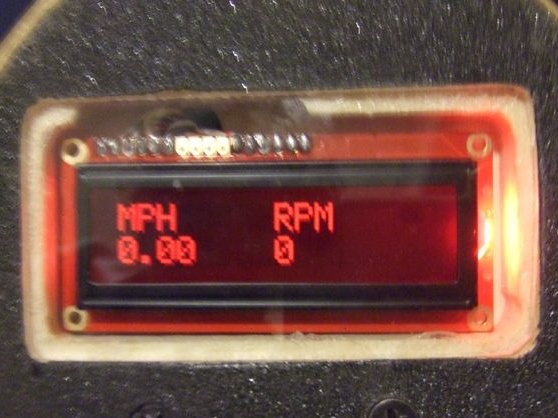
Step Three Speedometer Software
After the circuit is assembled, the controller will need to be programmed, this will allow it to do all the necessary calculations.The speed is calculated by a special formula, it will be necessary to substitute the value of the diameter of the wheel of a skateboard or other device, the speed of which must be measured. You also need to choose in which units to measure speed, in miles or kilometers. If the controller is programmed correctly, when the wheel rotates, the display should show the speed in miles or kilometers, as well as the RPM speed.
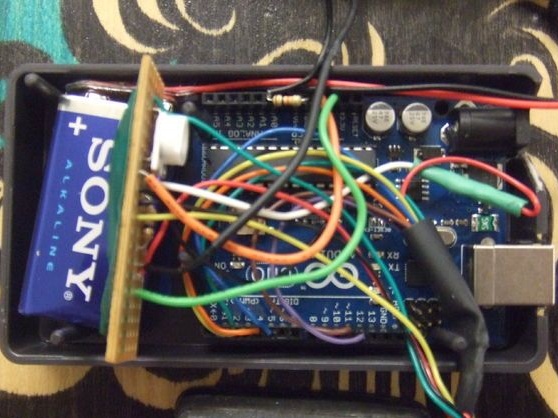
Step Four We protect the electronic part
When driving, dirt and water will get on the controller, and this can quickly put it out of action, and mechanical damage is also inevitable. To avoid this, the author placed the controller in a plastic case. Also, a power source is placed in the case - a 9 V battery. In the case, you need to make several holes for the output of wires from the sensor, as well as the display. The case is closed by a cover, and the whole structure is fixed with electrical tape. But it is best to seal all joints with hot glue or silicone for reliability.
You can use another case, the main thing is that it be airtight and reliably protect the electronics.
Step Five Installing components on a skate
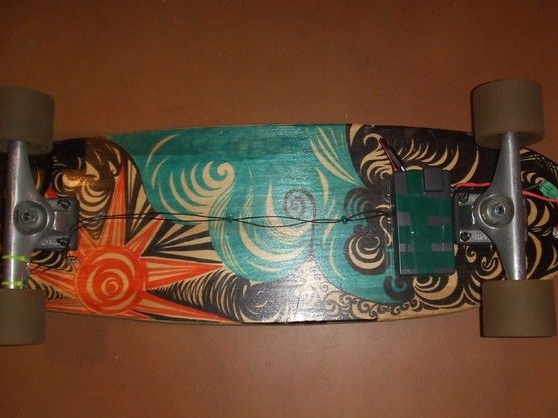
Installation of elements begins with the mounting of the reed switch. The author mounted it on the rear wheel, but this is not significant. The switch is fastened with two plastic ties. The reed switch must be a short distance from the sensor, otherwise the magnet will not be able to switch it. If you place it on the front wheel, you can reduce the number of wires.

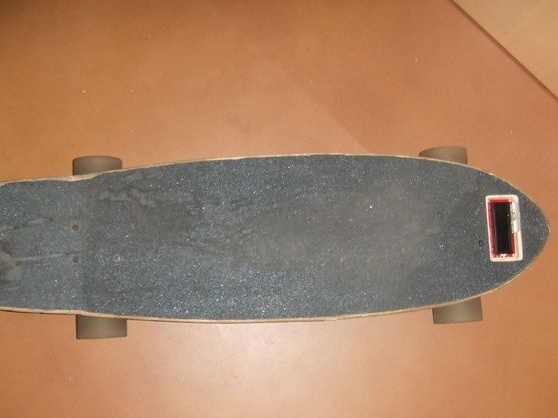
The author installed the electronic unit in the front of the skateboard, it can either be glued or fixed on small screws. The most difficult thing is to install the display, for it in the board you need to cut out a window of an appropriate size. The display can also be planted on hot glue.
If the board is too thin or there is no particular desire to cut a window in it, the display can be fixed in another way. For example, you can choose a plastic case for it and fix it directly on the surface of the board. After that, you will need to drill only a small hole in the board to stretch the wire.
It is very important that at the end of the assembly all the wires are securely fixed, they should not hang when driving. They can be glued or fixed with adhesive tape. Otherwise, broken contacts or wires can catch on some kind of obstacle.
That's all, now you can try the speedometer in practice. Such homemade will make this sport more interesting and arrange new types of competitions with friends.