What kind of bed did you dream about as a child? It’s clearly not about the masterpieces of furniture craftsmanship that enthusiasts are doing today. Only your own desire separates you from giving your child the crib of his dreams.
Often, everything comes down to producer prices of furniture. It is much more rational to buy a child new clothes or a set of books for the next school year. Moms and dads, ignore a little from the world of adults and plunge at least for a moment into the world of children.
Go into the nursery and try to look at it through the eyes of your child. Each kid perceives the surrounding space as a game and that is how he learns the world. In this he will need your help.
For example, there is no way in the world to more effectively wean a child to sleep in a parent's bed, how to prepare for him the best place in the world to sleep. Remember how you built houses in the childhood from improvised materials. What is not an idea for a bed?
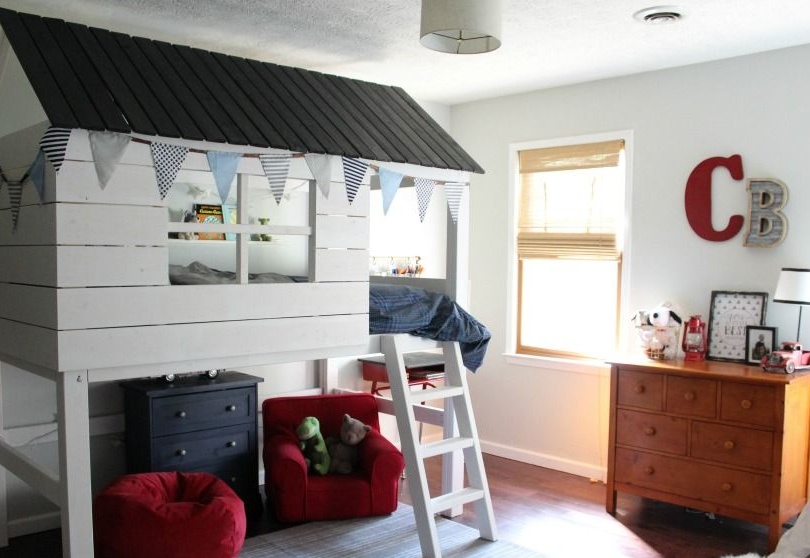
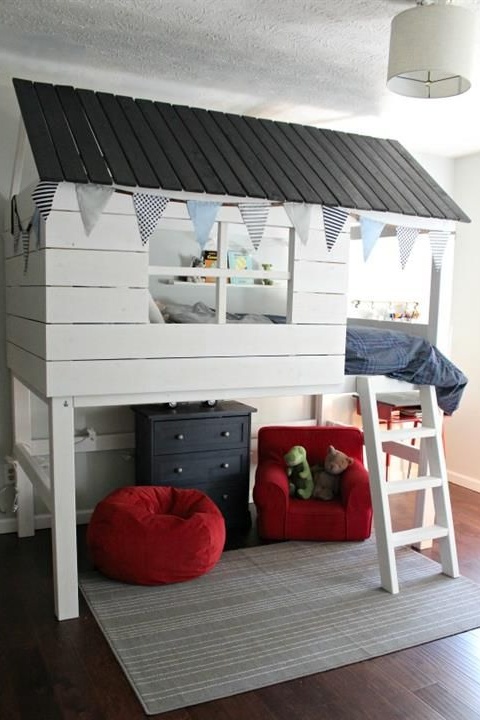
The author showed remarkable imagination, and so this project to create a crib in the form of an impromptu house was born. By the standards of U.S. residents, it took quite a bit of money to make it - just $ 200. In the furniture salon, such an original bed would cost its owner at least three to four times more expensive.
To make a crib in the shape of a house you will need:
Materials:
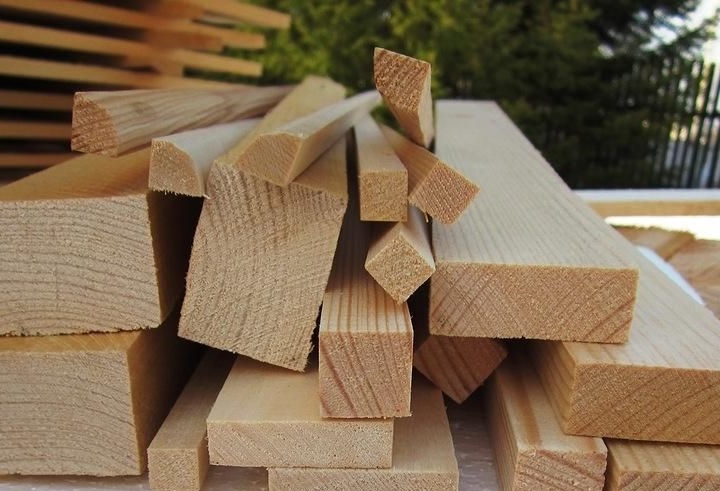
- pine boards, bars and slats;
- glue for woodwork;
- resistant oil paint of at least two shades;
- resistant furniture varnish;
- furniture screws or wood screws;
- bolts and nuts for assembling the frame;
- nails.
Instruments:
- a miter saw or any other suitable tool for sawing lumber;
- electric drill;
- grinder;
- screwdriver;
- joiner's hammer;
- fine sandpaper;
- building tape measure and square;
- paint brushes and roller with a tray for paint.
Step One: Choosing Materials
Let's say you have two main tasks. Firstly, since you undertook to make the bed yourself, most likely you are trying to save some money from the family budget. Secondly, given that the furniture is intended for use by her child, all materials should be as safe as possible.
In order to cope with the first task, approach wisely to the choice of the main material.Do not rush to buy lumber of the first grade in a supermarket. The bed has to be painted, so no one will have the opportunity to assess the degree of your generosity - the paint will hide all the details.
Of course, the most economical option is the independent processing of wood and the manufacture of bed parts. But for this you will need a thickness gauge. Processing and fitting of material on the thicknesser can also be ordered in the workshop.
Finally, another affordable option is to purchase second-grade materials or use used wood. Supermarkets often put up for sale short sections of boards that are perfect for furniture production in home conditions.
But how to choose paint for products that are designed for children? The advice will seem trivial, but pay attention to the quality compositions of well-known manufacturers. What type of paint would not belong, even if it would be made on the basis of solvents; in the hardened state, high-quality paints and varnishes are not dangerous.
Step Two: Bed Detailing
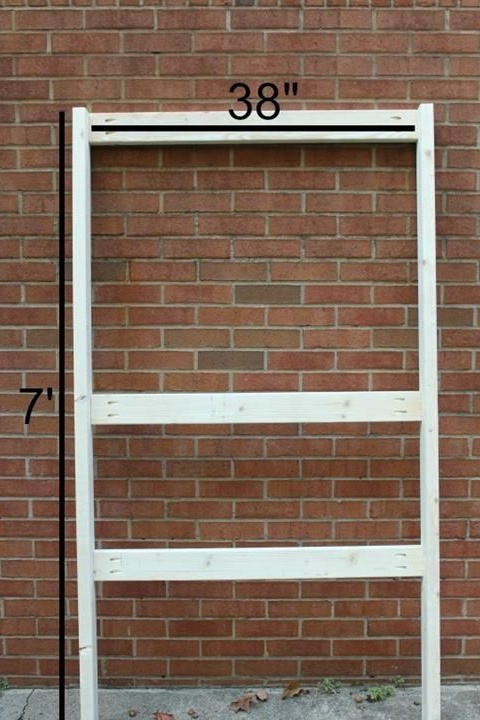
Collect all the photos from the master class and on a piece of paper list all the details that you will need to make the bed. In photographs and diagrams, dimensions are in inches. When converted to centimeters, multiply the value by a factor of 2.5.
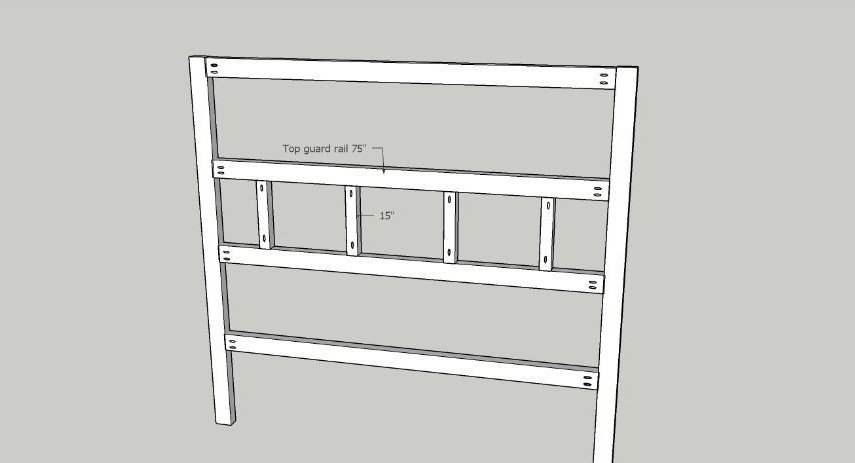
Please note that the bed frame is assembled from the rear, front and two side panels, so you will not need four racks, but eight.
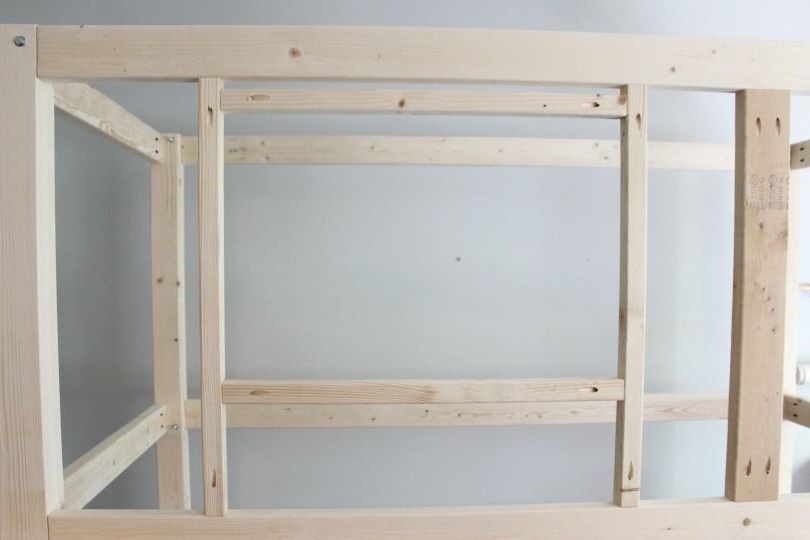
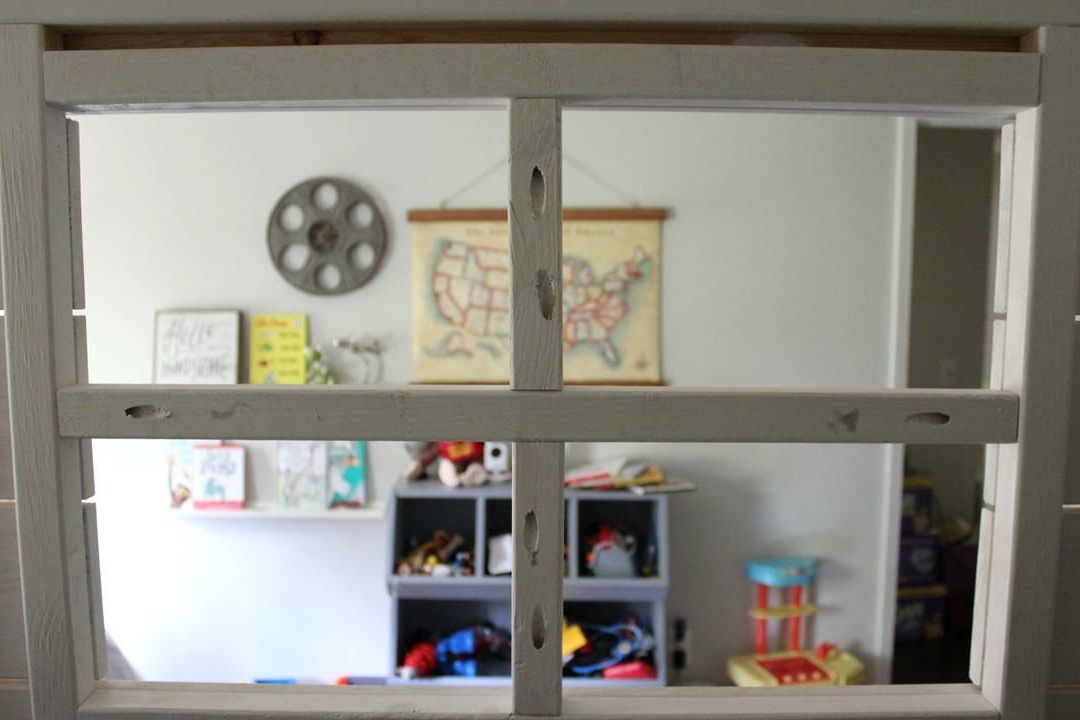
The front panel has openings for entry and windows and you will need four additional transverse partitions.
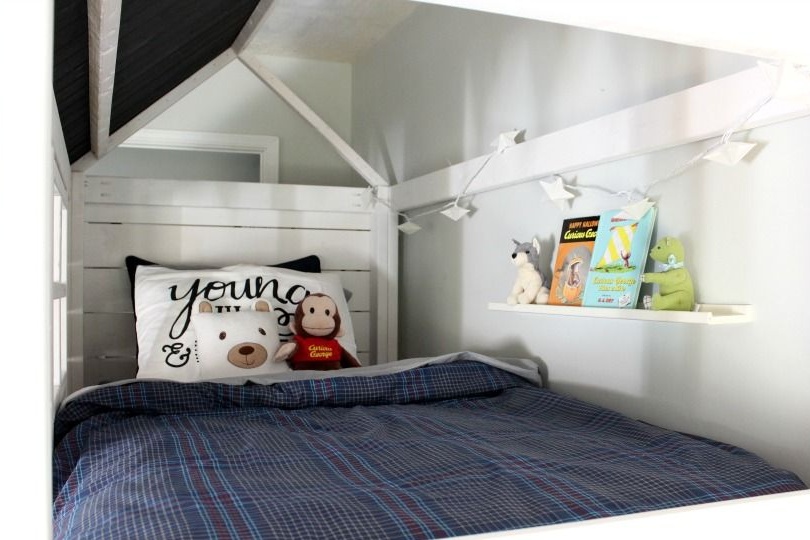
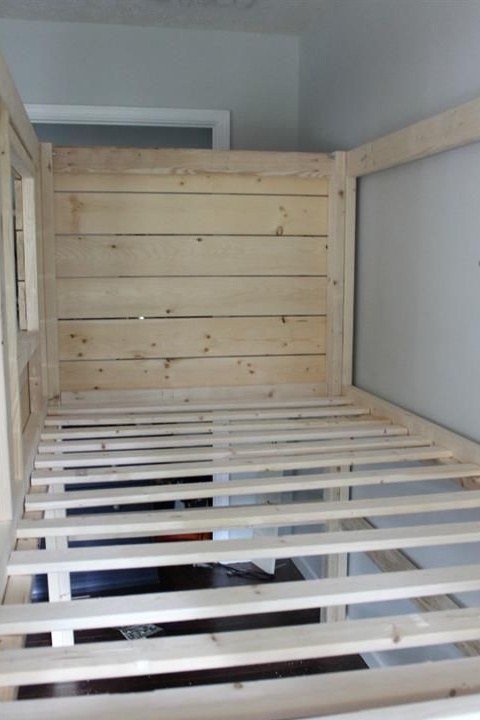
One of the sidewalls is completely sewn up by the boards, while the second is almost open and concurrently acts as a second window, turned to the sun.
The base of the bed is sewn up with boards with a small gap. Instead of boards, you can use slats or a solid sheet of plywood - depending on the task.
The back wall, turned to the wall of the room, remains as it is, and the front one is also sewn up with trims. In addition, you will need slats for the roof frame and parts for the roof.
Prepare also the elements of the stairs. It will be stationary fixed at the entrance.
Calculate and indicate the exact dimensions of each detail of the bed. You will need a lot of them, and getting lost in a heap of good is simple. A clear plan will help you coordinate your work and work smoothly.
Step three: manufacturing of parts and their grinding
Mark the frame and skin parts. Do not forget about the stairs. Saw boards, bars and slats into pieces of the required length using a miter saw or any available tool.
If you use a belt sander for sanding, it's time to do woodworking. After assembly, you can use the orbital sander, and the tape one will be out of work here.
Pay particular attention to the edges along which you saw. Any surface in preparation for painting should be even and smooth.

Step Four: Assembling the Crib
The author has compiled detailed photo instructions so that you can easily navigate the details in the process.
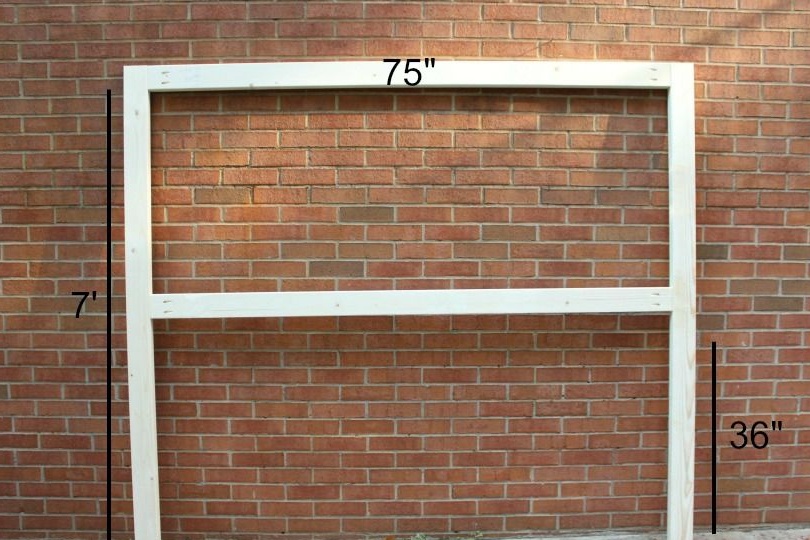
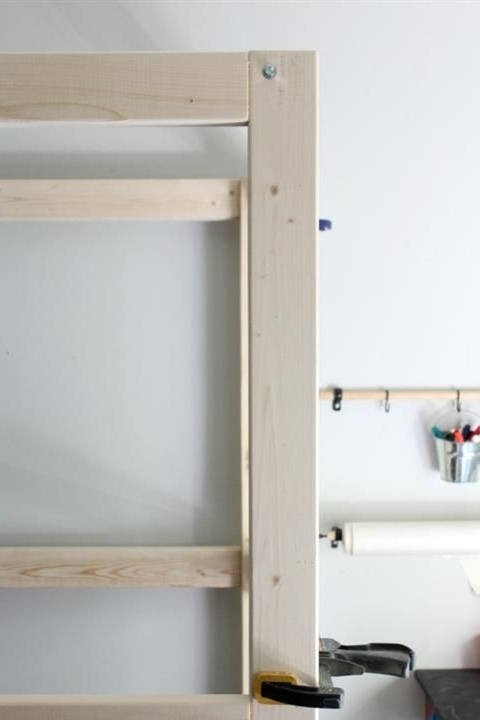
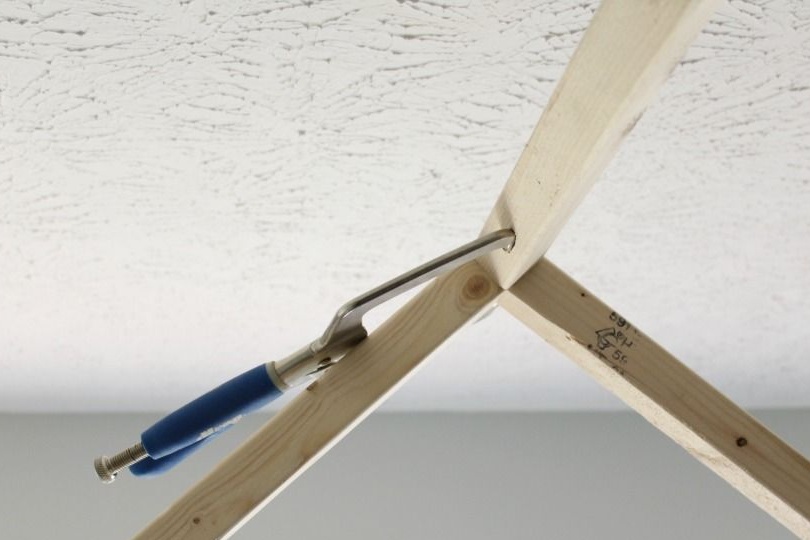
Assemble each of the four panels of the frame using diagonal pocket holes and solid wood glue. By the way, this time you can not do without glue. Such a large-scale and heavy construction must be assembled using glue, otherwise it will regularly require repair.
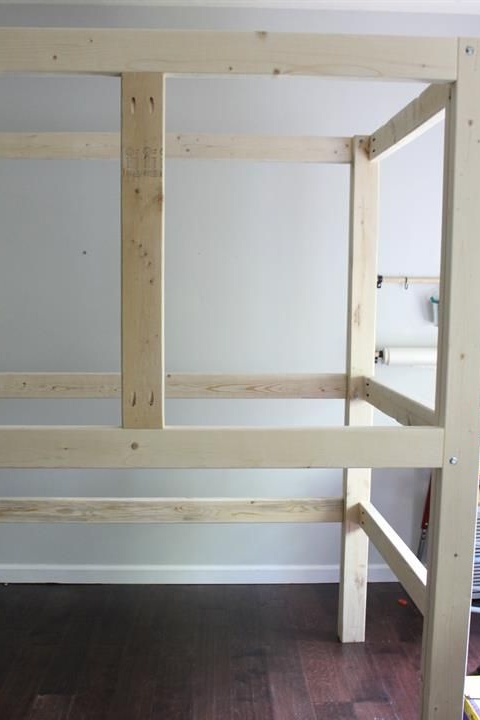
The panels are ready and you have to connect them with each other. Use either furniture screws or bolts with nuts for your choice. In the places where the side posts adjoin the front struts, apply glue to the connection surface. Drill holes for the screws or bolts by docking both parts together as shown in the photo.
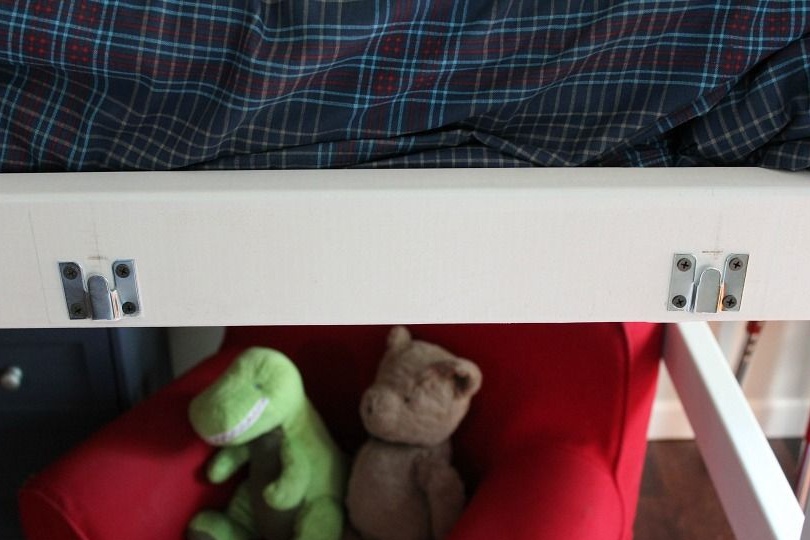
You can also use metal fasteners. Extra strength has not prevented a single bed.
Fasten the transverse partitions for entry and window. Screw the slats onto the longitudinal parts of the bed frame, onto which the base trim will later lie. Sew board the front and side panels of the bed, as well as the base under the mattress.
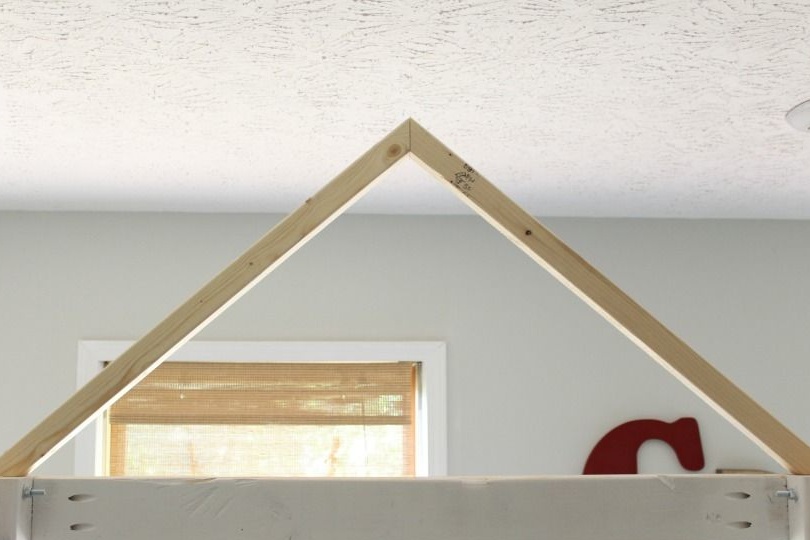
Proceed to the construction of the roof. A special load on the roof structure is not expected, so for the manufacture you most likely used slats or bars of a small cross section. Sheathe the roof from the front side with buckles, imitating the roof. Install a cross-shaped partition on the window.
Securely lock the ladder at an angle so that it is easier for the child to climb the second tier. Use special metal fittings or bolts with nuts for this.

Step Five: Painting
The author used white as the main color. For the roof, he picked up a dark gray shade. The cot turned out to be universal and in such a color scheme could equally well be used for both the girl and the boy.
Choose resistant paints and no less reliable varnish. It is better if it is a specialized furniture varnish - nitro-varnish or alcohol varnish.
Apply two three coats of paint and at least two coats of varnish. You can apply inter-sanding in the process of varnishing in order to get the most durable coating.
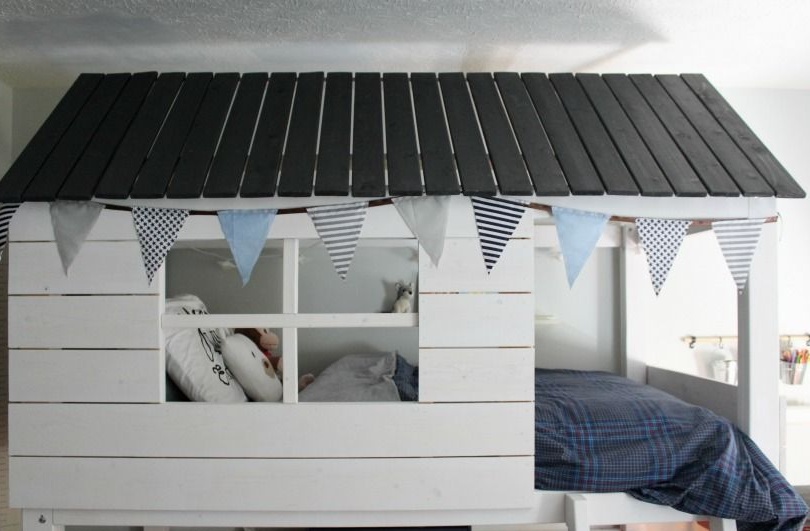
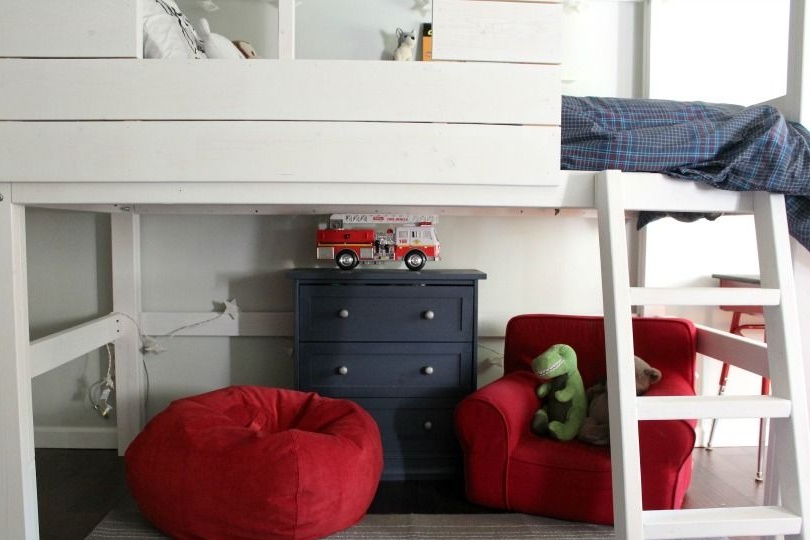
A wonderful crib in the form of a house is ready and waiting for its new owner! Do not forget that the space under the bed can be effectively used if you arrange a mini-living room or just a corner for relaxation. Do not forget to regularly please your children!